
크립토 거래노트
17 Публикации

크립토 거래노트
Отправить жалобу
Заблокировать пользователя
바이낸스 가입·인증·보안·입출금을 공식 자료로 설명하는 독립 가이드. 공식 고객지원이 아닙니다. Independent guides on signup, verification and security.
0 подписок(и/а)
0 подписчиков(а)
0 понравилось
Посты
·
--
См. перевод
가격이 내려도 단순이동평균이 올라갈 수 있다마지막 가격이 하락해도 3기간 단순이동평균(SMA)은 오를 수 있습니다. 평균에 새로 들어오는 값과 빠지는 값이 있기 때문입니다.
가상의 확정 종가가 차례로 80, 100, 110이라면 3기간 SMA는 96.67입니다. 다음 종가가 105로 끝났다고 해봅시다. 가격은 직전 110보다 내렸지만 새 표본은 100, 110, 105가 됩니다. 오래된 80이 빠지므로 평균은 105로 높아집니다. 105가 110보다 작다는 비교와 105가 빠져나간 80보다 크다는 비교가 동시에 성립합니다.
평균이 바뀐 폭도 확인할 수 있습니다. 새 평균에서 옛 평균을 빼면, 남아 있는 두 종가 100과 110은 서로 상쇄됩니다. 따라서 평균 변화는 (새로 들어온 105 − 빠진 80) ÷ 3 = 약 8.33입니다. 직전 종가 110에서 105로 내린 폭과 평균이 변한 폭은 서로 다른 비교입니다.
따라서 ‘평균선 상승=방금 가격 상승’이라고 읽으면 구간이 섞입니다. 평균은 여러 과거 값을 요약하고, 마지막 가격 변화는 두 시점만 비교합니다. 가격이 평균 위에 있다는 말도 평균이 계속 오를 것이라는 약속은 아닙니다. 차트의 평균선이 낯설게 움직일 때는 기간, 사용 가격, 새 값과 빠지는 값을 따로 적어보세요.
공식 개념 참고
Binance Academy — Moving Averages Explained
https://www.binance.com/en/academy/articles/moving-averages-explained
가격이 내려도 단순이동평균이 올라갈 수 있다
마지막 가격이 하락해도 3기간 단순이동평균(SMA)은 오를 수 있습니다. 평균에 새로 들어오는 값과 빠지는 값이 있기 때문입니다.
가상의 확정 종가가 차례로 80, 100, 110이라면 3기간 SMA는 96.67입니다. 다음 종가가 105로 끝났다고 해봅시다. 가격은 직전 110보다 내렸지만 새 표본은 100, 110, 105가 됩니다. 오래된 80이 빠지므로 평균은 105로 높아집니다. 105가 110보다 작다는 비교와 105가 빠져나간 80보다 크다는 비교가 동시에 성립합니다.
평균이 바뀐 폭도 확인할 수 있습니다. 새 평균에서 옛 평균을 빼면, 남아 있는 두 종가 100과 110은 서로 상쇄됩니다. 따라서 평균 변화는 (새로 들어온 105 − 빠진 80) ÷ 3 = 약 8.33입니다. 직전 종가 110에서 105로 내린 폭과 평균이 변한 폭은 서로 다른 비교입니다.
따라서 ‘평균선 상승=방금 가격 상승’이라고 읽으면 구간이 섞입니다. 평균은 여러 과거 값을 요약하고, 마지막 가격 변화는 두 시점만 비교합니다. 가격이 평균 위에 있다는 말도 평균이 계속 오를 것이라는 약속은 아닙니다. 차트의 평균선이 낯설게 움직일 때는 기간, 사용 가격, 새 값과 빠지는 값을 따로 적어보세요.
공식 개념 참고
Binance Academy — Moving Averages Explained
https://www.binance.com/en/academy/articles/moving-averages-explained
가상의 확정 종가가 차례로 80, 100, 110이라면 3기간 SMA는 96.67입니다. 다음 종가가 105로 끝났다고 해봅시다. 가격은 직전 110보다 내렸지만 새 표본은 100, 110, 105가 됩니다. 오래된 80이 빠지므로 평균은 105로 높아집니다. 105가 110보다 작다는 비교와 105가 빠져나간 80보다 크다는 비교가 동시에 성립합니다.
평균이 바뀐 폭도 확인할 수 있습니다. 새 평균에서 옛 평균을 빼면, 남아 있는 두 종가 100과 110은 서로 상쇄됩니다. 따라서 평균 변화는 (새로 들어온 105 − 빠진 80) ÷ 3 = 약 8.33입니다. 직전 종가 110에서 105로 내린 폭과 평균이 변한 폭은 서로 다른 비교입니다.
따라서 ‘평균선 상승=방금 가격 상승’이라고 읽으면 구간이 섞입니다. 평균은 여러 과거 값을 요약하고, 마지막 가격 변화는 두 시점만 비교합니다. 가격이 평균 위에 있다는 말도 평균이 계속 오를 것이라는 약속은 아닙니다. 차트의 평균선이 낯설게 움직일 때는 기간, 사용 가격, 새 값과 빠지는 값을 따로 적어보세요.
공식 개념 참고
Binance Academy — Moving Averages Explained
https://www.binance.com/en/academy/articles/moving-averages-explained
74
·
--
См. перевод
A $1 Stablecoin Peg Is Not the Same as a $1 SaleA dollar peg describes the value a stablecoin is designed to track. To assess a sale or redemption, check the execution price and whether you can redeem directly through the issuer.
Target price and sale proceeds
For a fictional example, take a token that targets $1. Assume a sale of 1,000 tokens actually executes at $0.997 per token. The gross proceeds would be $997, before any applicable costs. The number of tokens multiplied by the peg would be $1,000, but that is not the price used in this example’s sale.
If this fictional sale also carries a 0.1% fee deducted from the dollar proceeds, the fee is $997 × 0.001 = $0.997. That leaves $996.003, or about $996.00, before any separate withdrawal or currency-conversion costs.
The $3 difference from the $1 peg is a price difference, separate from the trading fee. The token, price and 0.1% fee are invented for this example. For a real receipt, check each fill, the fee asset and the platform’s rounding rules.
For a worked order-book example, see how market-order execution prices are calculated. It separates price differences from trading fees.
[https://www.binance.com/en-AE/square/post/385974115205396](https://www.binance.com/en-AE/square/post/385974115205396)
Returning to the peg is not the same as breaking even
In a separate fictional example, assume you buy 1,000 tokens at $1.01 and later sell all 1,000 at exactly $1.00. The purchase cost is $1,010 and the sale proceeds are $1,000. The price-only loss is $10, about 0.99% of the purchase cost, before fees. The sale price matches the token’s target, but it is still below the price paid.
A return to the peg and a return to your break-even price are different outcomes. Include the actual purchase price and costs on both trades when checking the result. This example assumes both trades execute at the stated prices; it does not predict a recovery or recommend buying a deviation.
Backing and access to cash are different checks
Stablecoins use different designs. Some rely on reserve assets, some on crypto collateral, and some on algorithmic mechanisms. A label such as “dollar-backed” should lead to a closer look at what backs the token and how the mechanism works.
If an issuer offers direct redemption, read the current process: who can use it, what verification is required, whether minimums or charges apply, and how payment is delivered. Selling through a market and redeeming with an issuer are different routes. Do not assume every stablecoin or every holder has the same route.
A statement about reserve value also does not answer how quickly those assets can be converted into cash when many people want to exit. Binance Academy’s depegging explainer discusses how a shortage of liquid reserves can matter even when other backing assets remain.
A small deviation does not tell the whole story
An observed price below the target is a reason to investigate the mechanism and current information. It does not, by itself, establish why the deviation happened, how long it will last, or whether the token will return to its target. Buying solely because “it must go back to $1” assumes an outcome that has not been established.
When reading a stablecoin screen, check the reference value it aims to track, the market price you can actually transact at, and the redemption conditions that apply to you separately.
This note explains terms and a fictional calculation. It does not recommend buying, selling or holding a stablecoin.
Background on peg mechanisms and liquidity risk: Binance Academy — Why Do Stablecoins Depeg?
https://www.binance.com/en/academy/articles/why-do-stablecoins-depeg
A $1 Stablecoin Peg Is Not the Same as a $1 Sale
A dollar peg describes the value a stablecoin is designed to track. To assess a sale or redemption, check the execution price and whether you can redeem directly through the issuer.
Target price and sale proceeds
For a fictional example, take a token that targets $1. Assume a sale of 1,000 tokens actually executes at $0.997 per token. The gross proceeds would be $997, before any applicable costs. The number of tokens multiplied by the peg would be $1,000, but that is not the price used in this example’s sale.
If this fictional sale also carries a 0.1% fee deducted from the dollar proceeds, the fee is $997 × 0.001 = $0.997. That leaves $996.003, or about $996.00, before any separate withdrawal or currency-conversion costs.
The $3 difference from the $1 peg is a price difference, separate from the trading fee. The token, price and 0.1% fee are invented for this example. For a real receipt, check each fill, the fee asset and the platform’s rounding rules.
For a worked order-book example, see how market-order execution prices are calculated. It separates price differences from trading fees.
https://www.binance.com/en-AE/square/post/385974115205396
Returning to the peg is not the same as breaking even
In a separate fictional example, assume you buy 1,000 tokens at $1.01 and later sell all 1,000 at exactly $1.00. The purchase cost is $1,010 and the sale proceeds are $1,000. The price-only loss is $10, about 0.99% of the purchase cost, before fees. The sale price matches the token’s target, but it is still below the price paid.
A return to the peg and a return to your break-even price are different outcomes. Include the actual purchase price and costs on both trades when checking the result. This example assumes both trades execute at the stated prices; it does not predict a recovery or recommend buying a deviation.
Backing and access to cash are different checks
Stablecoins use different designs. Some rely on reserve assets, some on crypto collateral, and some on algorithmic mechanisms. A label such as “dollar-backed” should lead to a closer look at what backs the token and how the mechanism works.
If an issuer offers direct redemption, read the current process: who can use it, what verification is required, whether minimums or charges apply, and how payment is delivered. Selling through a market and redeeming with an issuer are different routes. Do not assume every stablecoin or every holder has the same route.
A statement about reserve value also does not answer how quickly those assets can be converted into cash when many people want to exit. Binance Academy’s depegging explainer discusses how a shortage of liquid reserves can matter even when other backing assets remain.
A small deviation does not tell the whole story
An observed price below the target is a reason to investigate the mechanism and current information. It does not, by itself, establish why the deviation happened, how long it will last, or whether the token will return to its target. Buying solely because “it must go back to $1” assumes an outcome that has not been established.
When reading a stablecoin screen, check the reference value it aims to track, the market price you can actually transact at, and the redemption conditions that apply to you separately.
This note explains terms and a fictional calculation. It does not recommend buying, selling or holding a stablecoin.
Background on peg mechanisms and liquidity risk: Binance Academy — Why Do Stablecoins Depeg?
https://www.binance.com/en/academy/articles/why-do-stablecoins-depeg
Target price and sale proceeds
For a fictional example, take a token that targets $1. Assume a sale of 1,000 tokens actually executes at $0.997 per token. The gross proceeds would be $997, before any applicable costs. The number of tokens multiplied by the peg would be $1,000, but that is not the price used in this example’s sale.
If this fictional sale also carries a 0.1% fee deducted from the dollar proceeds, the fee is $997 × 0.001 = $0.997. That leaves $996.003, or about $996.00, before any separate withdrawal or currency-conversion costs.
The $3 difference from the $1 peg is a price difference, separate from the trading fee. The token, price and 0.1% fee are invented for this example. For a real receipt, check each fill, the fee asset and the platform’s rounding rules.
For a worked order-book example, see how market-order execution prices are calculated. It separates price differences from trading fees.
https://www.binance.com/en-AE/square/post/385974115205396
Returning to the peg is not the same as breaking even
In a separate fictional example, assume you buy 1,000 tokens at $1.01 and later sell all 1,000 at exactly $1.00. The purchase cost is $1,010 and the sale proceeds are $1,000. The price-only loss is $10, about 0.99% of the purchase cost, before fees. The sale price matches the token’s target, but it is still below the price paid.
A return to the peg and a return to your break-even price are different outcomes. Include the actual purchase price and costs on both trades when checking the result. This example assumes both trades execute at the stated prices; it does not predict a recovery or recommend buying a deviation.
Backing and access to cash are different checks
Stablecoins use different designs. Some rely on reserve assets, some on crypto collateral, and some on algorithmic mechanisms. A label such as “dollar-backed” should lead to a closer look at what backs the token and how the mechanism works.
If an issuer offers direct redemption, read the current process: who can use it, what verification is required, whether minimums or charges apply, and how payment is delivered. Selling through a market and redeeming with an issuer are different routes. Do not assume every stablecoin or every holder has the same route.
A statement about reserve value also does not answer how quickly those assets can be converted into cash when many people want to exit. Binance Academy’s depegging explainer discusses how a shortage of liquid reserves can matter even when other backing assets remain.
A small deviation does not tell the whole story
An observed price below the target is a reason to investigate the mechanism and current information. It does not, by itself, establish why the deviation happened, how long it will last, or whether the token will return to its target. Buying solely because “it must go back to $1” assumes an outcome that has not been established.
When reading a stablecoin screen, check the reference value it aims to track, the market price you can actually transact at, and the redemption conditions that apply to you separately.
This note explains terms and a fictional calculation. It does not recommend buying, selling or holding a stablecoin.
Background on peg mechanisms and liquidity risk: Binance Academy — Why Do Stablecoins Depeg?
https://www.binance.com/en/academy/articles/why-do-stablecoins-depeg
55
·
--
См. перевод
휴대전화를 잃었을 때: 거래소 계정과 개인 지갑은 복구가 다릅니다거래소 계정과 개인 지갑은 같은 휴대전화에서 쓰더라도 복구 방식이 다를 수 있습니다. 앱에 다시 로그인하는 절차와 블록체인 자산을 움직일 권한을 되찾는 절차를 구분해 확인하세요.
거래소 계정: 서비스의 인증 절차부터
일반적인 수탁형 거래소 계정에서는 서비스 제공자가 개인키를 관리합니다. 사용자는 비밀번호·패스키·추가 인증 등으로 계정에 접근합니다. 이때 비밀번호를 잊거나 인증 기기를 잃었다면 해당 서비스가 제공하는 공식 계정 복구 절차가 출발점입니다.
신원 확인을 거쳐 접근을 되찾을 수 있는 경우가 있지만, 처리 기간이나 결과를 미리 단정할 수는 없습니다. 로그인 복구가 끝났다는 사실과 자산 출금이 즉시 가능한지도 따로 확인해야 합니다. 수탁형 서비스에는 운영사의 보안 사고나 계정 제한 같은 위험도 남습니다.
개인 지갑: 무엇으로 거래를 승인하는지 확인
비수탁형 지갑은 사용자가 개인키에 대한 통제권을 갖는 구조입니다. 복구 문구를 사용하는 지갑이라면, 그 문구는 단순히 앱 비밀번호를 바꾸는 데 쓰는 힌트가 아닙니다. 지갑 접근을 복원하는 핵심 정보이므로 거래소 로그인 비밀번호와 섞어 생각하면 안 됩니다.
예를 들어 기존 기기는 없어졌지만 올바른 복구 수단이 남아 있는 상황과, 복구 수단에도 접근할 수 없는 상황은 다릅니다. 일반적인 개인키 기반 지갑에서는 고객지원에 로그인 비밀번호 재설정을 요청하는 것만으로 잃어버린 개인키가 다시 생기지 않습니다.
다만 모든 지갑이 같은 복구 문구 방식을 쓰지는 않습니다. MPC나 스마트컨트랙트 지갑처럼 복구 설계가 다른 경우도 있습니다. 지갑 이름과 실제 설정을 확인한 뒤 그 지갑의 공식 복구 설명을 기준으로 판단하세요.
MPC 방식의 예를 보면, 거래 승인에는 설계상 정해진 수의 키 조각이 필요하고 그 조각을 보관하는 기기·참여자 구성도 지갑마다 다릅니다. 복구 문구를 직접 적지 않는다는 설명을 “복구 준비가 필요 없다”는 뜻으로 받아들이지는 마세요. 본인 지갑이 요구하는 기기·계정 접근과 백업 조건을 공식 안내에서 따로 확인해야 합니다.
기기 초기화 전에 복구 방법부터 확인
어떤 서비스의 계정인지, 어떤 지갑인지, 필요한 복구 수단을 어디서 확인할 수 있는지부터 정리합니다. 아직 기존 기기를 사용할 수 있다면 초기화나 앱 삭제 전에 공식 안내에서 필요한 준비를 확인하세요. 화면 잠금 비밀번호, 거래소 비밀번호, 지갑 복구 문구는 서로 대신할 수 있는 정보가 아닙니다. 복구 문구를 쓰는 지갑이라면 해당 지갑이 안내하는 안전한 백업 방법도 함께 확인하세요.
바이낸스 계정의 패스키를 쓰고 있다면, [패스키 저장 방식과 기기 변경 점검](https://www.binance.com/en-AE/square/post/386246417946758)도 함께 확인하세요. 지갑 복구와 별도로 준비할 계정 인증 항목을 다룹니다.
상담을 받더라도 비밀번호·일회용 인증 코드·개인키·복구 문구를 댓글이나 메시지로 보내지 마세요. 지갑 복구 과정에서 입력이 필요하다면, 직접 확인한 공식 앱의 복구 절차인지 먼저 살펴야 합니다. 이 글은 특정 지갑의 복구 성공을 약속하거나 보관 방식을 추천하는 안내가 아닙니다.
관리 주체와 복구 방식의 기본 차이: Binance Academy — Custodial vs. Non-Custodial Wallets.
https://www.binance.com/en/academy/articles/custodial-vs-non-custodial-wallets-what-s-the-difference
MPC의 키 조각·복구 설계 설명: Binance Academy — What Are Multi-Party Computation (MPC) Wallets?
https://www.binance.com/en/academy/articles/what-are-multi-party-computation-mpc-wallets
휴대전화를 잃었을 때: 거래소 계정과 개인 지갑은 복구가 다릅니다
거래소 계정과 개인 지갑은 같은 휴대전화에서 쓰더라도 복구 방식이 다를 수 있습니다. 앱에 다시 로그인하는 절차와 블록체인 자산을 움직일 권한을 되찾는 절차를 구분해 확인하세요.
거래소 계정: 서비스의 인증 절차부터
일반적인 수탁형 거래소 계정에서는 서비스 제공자가 개인키를 관리합니다. 사용자는 비밀번호·패스키·추가 인증 등으로 계정에 접근합니다. 이때 비밀번호를 잊거나 인증 기기를 잃었다면 해당 서비스가 제공하는 공식 계정 복구 절차가 출발점입니다.
신원 확인을 거쳐 접근을 되찾을 수 있는 경우가 있지만, 처리 기간이나 결과를 미리 단정할 수는 없습니다. 로그인 복구가 끝났다는 사실과 자산 출금이 즉시 가능한지도 따로 확인해야 합니다. 수탁형 서비스에는 운영사의 보안 사고나 계정 제한 같은 위험도 남습니다.
개인 지갑: 무엇으로 거래를 승인하는지 확인
비수탁형 지갑은 사용자가 개인키에 대한 통제권을 갖는 구조입니다. 복구 문구를 사용하는 지갑이라면, 그 문구는 단순히 앱 비밀번호를 바꾸는 데 쓰는 힌트가 아닙니다. 지갑 접근을 복원하는 핵심 정보이므로 거래소 로그인 비밀번호와 섞어 생각하면 안 됩니다.
예를 들어 기존 기기는 없어졌지만 올바른 복구 수단이 남아 있는 상황과, 복구 수단에도 접근할 수 없는 상황은 다릅니다. 일반적인 개인키 기반 지갑에서는 고객지원에 로그인 비밀번호 재설정을 요청하는 것만으로 잃어버린 개인키가 다시 생기지 않습니다.
다만 모든 지갑이 같은 복구 문구 방식을 쓰지는 않습니다. MPC나 스마트컨트랙트 지갑처럼 복구 설계가 다른 경우도 있습니다. 지갑 이름과 실제 설정을 확인한 뒤 그 지갑의 공식 복구 설명을 기준으로 판단하세요.
MPC 방식의 예를 보면, 거래 승인에는 설계상 정해진 수의 키 조각이 필요하고 그 조각을 보관하는 기기·참여자 구성도 지갑마다 다릅니다. 복구 문구를 직접 적지 않는다는 설명을 “복구 준비가 필요 없다”는 뜻으로 받아들이지는 마세요. 본인 지갑이 요구하는 기기·계정 접근과 백업 조건을 공식 안내에서 따로 확인해야 합니다.
기기 초기화 전에 복구 방법부터 확인
어떤 서비스의 계정인지, 어떤 지갑인지, 필요한 복구 수단을 어디서 확인할 수 있는지부터 정리합니다. 아직 기존 기기를 사용할 수 있다면 초기화나 앱 삭제 전에 공식 안내에서 필요한 준비를 확인하세요. 화면 잠금 비밀번호, 거래소 비밀번호, 지갑 복구 문구는 서로 대신할 수 있는 정보가 아닙니다. 복구 문구를 쓰는 지갑이라면 해당 지갑이 안내하는 안전한 백업 방법도 함께 확인하세요.
바이낸스 계정의 패스키를 쓰고 있다면, 패스키 저장 방식과 기기 변경 점검도 함께 확인하세요. 지갑 복구와 별도로 준비할 계정 인증 항목을 다룹니다.
상담을 받더라도 비밀번호·일회용 인증 코드·개인키·복구 문구를 댓글이나 메시지로 보내지 마세요. 지갑 복구 과정에서 입력이 필요하다면, 직접 확인한 공식 앱의 복구 절차인지 먼저 살펴야 합니다. 이 글은 특정 지갑의 복구 성공을 약속하거나 보관 방식을 추천하는 안내가 아닙니다.
관리 주체와 복구 방식의 기본 차이: Binance Academy — Custodial vs. Non-Custodial Wallets.
https://www.binance.com/en/academy/articles/custodial-vs-non-custodial-wallets-what-s-the-difference
MPC의 키 조각·복구 설계 설명: Binance Academy — What Are Multi-Party Computation (MPC) Wallets?
https://www.binance.com/en/academy/articles/what-are-multi-party-computation-mpc-wallets
거래소 계정: 서비스의 인증 절차부터
일반적인 수탁형 거래소 계정에서는 서비스 제공자가 개인키를 관리합니다. 사용자는 비밀번호·패스키·추가 인증 등으로 계정에 접근합니다. 이때 비밀번호를 잊거나 인증 기기를 잃었다면 해당 서비스가 제공하는 공식 계정 복구 절차가 출발점입니다.
신원 확인을 거쳐 접근을 되찾을 수 있는 경우가 있지만, 처리 기간이나 결과를 미리 단정할 수는 없습니다. 로그인 복구가 끝났다는 사실과 자산 출금이 즉시 가능한지도 따로 확인해야 합니다. 수탁형 서비스에는 운영사의 보안 사고나 계정 제한 같은 위험도 남습니다.
개인 지갑: 무엇으로 거래를 승인하는지 확인
비수탁형 지갑은 사용자가 개인키에 대한 통제권을 갖는 구조입니다. 복구 문구를 사용하는 지갑이라면, 그 문구는 단순히 앱 비밀번호를 바꾸는 데 쓰는 힌트가 아닙니다. 지갑 접근을 복원하는 핵심 정보이므로 거래소 로그인 비밀번호와 섞어 생각하면 안 됩니다.
예를 들어 기존 기기는 없어졌지만 올바른 복구 수단이 남아 있는 상황과, 복구 수단에도 접근할 수 없는 상황은 다릅니다. 일반적인 개인키 기반 지갑에서는 고객지원에 로그인 비밀번호 재설정을 요청하는 것만으로 잃어버린 개인키가 다시 생기지 않습니다.
다만 모든 지갑이 같은 복구 문구 방식을 쓰지는 않습니다. MPC나 스마트컨트랙트 지갑처럼 복구 설계가 다른 경우도 있습니다. 지갑 이름과 실제 설정을 확인한 뒤 그 지갑의 공식 복구 설명을 기준으로 판단하세요.
MPC 방식의 예를 보면, 거래 승인에는 설계상 정해진 수의 키 조각이 필요하고 그 조각을 보관하는 기기·참여자 구성도 지갑마다 다릅니다. 복구 문구를 직접 적지 않는다는 설명을 “복구 준비가 필요 없다”는 뜻으로 받아들이지는 마세요. 본인 지갑이 요구하는 기기·계정 접근과 백업 조건을 공식 안내에서 따로 확인해야 합니다.
기기 초기화 전에 복구 방법부터 확인
어떤 서비스의 계정인지, 어떤 지갑인지, 필요한 복구 수단을 어디서 확인할 수 있는지부터 정리합니다. 아직 기존 기기를 사용할 수 있다면 초기화나 앱 삭제 전에 공식 안내에서 필요한 준비를 확인하세요. 화면 잠금 비밀번호, 거래소 비밀번호, 지갑 복구 문구는 서로 대신할 수 있는 정보가 아닙니다. 복구 문구를 쓰는 지갑이라면 해당 지갑이 안내하는 안전한 백업 방법도 함께 확인하세요.
바이낸스 계정의 패스키를 쓰고 있다면, 패스키 저장 방식과 기기 변경 점검도 함께 확인하세요. 지갑 복구와 별도로 준비할 계정 인증 항목을 다룹니다.
상담을 받더라도 비밀번호·일회용 인증 코드·개인키·복구 문구를 댓글이나 메시지로 보내지 마세요. 지갑 복구 과정에서 입력이 필요하다면, 직접 확인한 공식 앱의 복구 절차인지 먼저 살펴야 합니다. 이 글은 특정 지갑의 복구 성공을 약속하거나 보관 방식을 추천하는 안내가 아닙니다.
관리 주체와 복구 방식의 기본 차이: Binance Academy — Custodial vs. Non-Custodial Wallets.
https://www.binance.com/en/academy/articles/custodial-vs-non-custodial-wallets-what-s-the-difference
MPC의 키 조각·복구 설계 설명: Binance Academy — What Are Multi-Party Computation (MPC) Wallets?
https://www.binance.com/en/academy/articles/what-are-multi-party-computation-mpc-wallets
58
·
--
См. перевод
거래량 15계약, 미결제약정 7계약: 같은 시장에서 가능한 이유거래량이 늘어도 미결제약정은 줄어들 수 있습니다. 거래량은 일정 기간에 체결된 계약을 세고, 미결제약정(OI)은 특정 시점에 아직 닫히거나 결제되지 않은 계약을 세기 때문입니다.
처음부터 끝까지 같은 계약만 세어 보겠습니다
미결제약정이 0인 가상의 선물 시장에서 시작하겠습니다. 아래 세 거래만 같은 집계 기간에 일어났다고 가정합니다. 단위는 모두 계약 수이며, 실제 바이낸스 시장 수치나 매매 기록이 아닙니다.
첫 거래: A가 신규 롱 10계약을 열고, B가 그 상대편에서 신규 숏 10계약을 엽니다. 체결량은 10계약이고 OI도 10계약입니다. 매수자와 매도자가 있다고 20계약으로 두 번 세지 않습니다.
두 번째 거래: A가 롱 3계약을 매도해 닫고, B가 그 3계약을 매수해 기존 숏을 닫습니다. 이번에도 3계약이 체결됐으므로 누적 거래량은 13계약입니다. 반면 남아 있는 계약은 7개가 되어 OI는 7계약으로 줄어듭니다.
세 번째 거래: A가 남은 롱 중 2계약을 매도해 닫고, 새 참여자 C가 그 2계약을 매수해 신규 롱을 엽니다. B의 숏 7계약은 그대로입니다. 누적 거래량은 15계약이 됐지만 OI는 여전히 7계약입니다. 롱을 보유한 쪽이 A 7계약에서 A 5계약과 C 2계약으로 나뉘었을 뿐입니다.
15와 7은 서로 모순되지 않습니다
이 기간에 체결된 계약은 10 + 3 + 2 = 15계약입니다. 마지막에 남은 계약은 10 − 3 = 7계약입니다. 거래량에는 포지션을 여는 거래뿐 아니라 닫거나 넘겨받는 거래도 들어갑니다. 그래서 거래가 활발했다고 OI가 반드시 증가하지는 않습니다.
같은 수량의 체결이라도 양쪽 모두 신규 포지션이면 OI가 늘고, 양쪽 모두 기존 포지션을 닫으면 줄어듭니다. 한쪽은 닫고 다른 쪽은 새로 여는 경우에는 유지됩니다. 미결제약정의 “미결제”를 아직 체결되지 않은 지정가 주문으로 읽으면 안 됩니다.
OI가 늘었다고 알 수 없는 것
새 계약에는 롱과 숏 양쪽이 있습니다. OI가 증가했다는 사실만으로 매수가 우세하다거나 가격이 오를 것이라고 결론 내릴 수 없습니다. 반대로 OI가 줄었다고 모든 감소분을 강제청산으로 볼 수도 없습니다. 앞의 예제에서는 두 참여자가 기존 포지션을 닫았을 뿐, 강제청산을 가정하지 않았습니다.
OI는 참여자 수나 새로 입금된 현금, 증거금 총액을 그대로 보여 주는 숫자도 아닙니다. 한 사람이 여러 계약을 보유할 수 있고, 같은 계약 수라도 증거금과 레버리지 조건은 다를 수 있습니다. 거래량과 OI 두 숫자만으로 그 사정을 알아낼 수는 없습니다.
계약 수는 그대로인데 금액만 늘어날 수도 있습니다
바이낸스의 공개 BTCUSDT 거래 데이터 차트는 Open Interest (BTC)와 Notional Value of Open Interest (USDT)를 구분해 표시합니다. 코인 수량으로 본 OI와 금액으로 환산한 OI는 같은 단위가 아닙니다.
앞의 7계약이 그대로 남아 있고, 계약 하나가 가상의 코인 1개를 나타낸다고 덧붙여 가정해 보겠습니다. 코인 수량은 7개입니다. 이 수량에 곱하는 환산 가격이 10 USDT에서 12 USDT로 오르면 명목가치는 70 USDT에서 84 USDT로 20% 늘어납니다. 새 계약이 한 개도 생기지 않아도 금액 표시가 커지는 예입니다.
이 계산은 수량에 가격을 곱하는 선형 계약의 가정입니다. 실제 상품의 계약 단위와 환산 가격 기준까지 같다는 뜻은 아닙니다. 금액 기준 OI가 증가했다는 화면만 보고 계약 수나 신규 유입 자금도 같은 비율로 늘었다고 단정하지 마세요. 먼저 수량 기준과 금액 기준 중 무엇을 보고 있는지 확인하면 됩니다.
화면을 비교하기 전에 적어 둘 다섯 가지
거래소, 계약 이름, 표시 단위, 거래량의 집계 기간, OI의 기준 시점을 함께 확인하세요. 현물 거래량과 선물 OI를 같은 계약의 두 지표처럼 비교하거나, 계약 수와 코인 수량·금액 표시를 그대로 합산하지 않습니다.
거래량 증가와 OI 감소가 함께 보여도 곧바로 화면 오류나 매매 신호로 판단하지 말고, 각 지표의 집계 기간과 기준 시점을 확인하세요.
공식 개념 참고: Binance Academy — What Is Open Interest?
https://www.binance.com/en/academy/articles/what-is-open-interest
표시 단위 참고: Binance Futures — Trading Data의 미결제약정 차트
https://www.binance.com/en/futures/funding-history/perpetual/trading-data
거래량 15계약, 미결제약정 7계약: 같은 시장에서 가능한 이유
거래량이 늘어도 미결제약정은 줄어들 수 있습니다. 거래량은 일정 기간에 체결된 계약을 세고, 미결제약정(OI)은 특정 시점에 아직 닫히거나 결제되지 않은 계약을 세기 때문입니다.
처음부터 끝까지 같은 계약만 세어 보겠습니다
미결제약정이 0인 가상의 선물 시장에서 시작하겠습니다. 아래 세 거래만 같은 집계 기간에 일어났다고 가정합니다. 단위는 모두 계약 수이며, 실제 바이낸스 시장 수치나 매매 기록이 아닙니다.
첫 거래: A가 신규 롱 10계약을 열고, B가 그 상대편에서 신규 숏 10계약을 엽니다. 체결량은 10계약이고 OI도 10계약입니다. 매수자와 매도자가 있다고 20계약으로 두 번 세지 않습니다.
두 번째 거래: A가 롱 3계약을 매도해 닫고, B가 그 3계약을 매수해 기존 숏을 닫습니다. 이번에도 3계약이 체결됐으므로 누적 거래량은 13계약입니다. 반면 남아 있는 계약은 7개가 되어 OI는 7계약으로 줄어듭니다.
세 번째 거래: A가 남은 롱 중 2계약을 매도해 닫고, 새 참여자 C가 그 2계약을 매수해 신규 롱을 엽니다. B의 숏 7계약은 그대로입니다. 누적 거래량은 15계약이 됐지만 OI는 여전히 7계약입니다. 롱을 보유한 쪽이 A 7계약에서 A 5계약과 C 2계약으로 나뉘었을 뿐입니다.
15와 7은 서로 모순되지 않습니다
이 기간에 체결된 계약은 10 + 3 + 2 = 15계약입니다. 마지막에 남은 계약은 10 − 3 = 7계약입니다. 거래량에는 포지션을 여는 거래뿐 아니라 닫거나 넘겨받는 거래도 들어갑니다. 그래서 거래가 활발했다고 OI가 반드시 증가하지는 않습니다.
같은 수량의 체결이라도 양쪽 모두 신규 포지션이면 OI가 늘고, 양쪽 모두 기존 포지션을 닫으면 줄어듭니다. 한쪽은 닫고 다른 쪽은 새로 여는 경우에는 유지됩니다. 미결제약정의 “미결제”를 아직 체결되지 않은 지정가 주문으로 읽으면 안 됩니다.
OI가 늘었다고 알 수 없는 것
새 계약에는 롱과 숏 양쪽이 있습니다. OI가 증가했다는 사실만으로 매수가 우세하다거나 가격이 오를 것이라고 결론 내릴 수 없습니다. 반대로 OI가 줄었다고 모든 감소분을 강제청산으로 볼 수도 없습니다. 앞의 예제에서는 두 참여자가 기존 포지션을 닫았을 뿐, 강제청산을 가정하지 않았습니다.
OI는 참여자 수나 새로 입금된 현금, 증거금 총액을 그대로 보여 주는 숫자도 아닙니다. 한 사람이 여러 계약을 보유할 수 있고, 같은 계약 수라도 증거금과 레버리지 조건은 다를 수 있습니다. 거래량과 OI 두 숫자만으로 그 사정을 알아낼 수는 없습니다.
계약 수는 그대로인데 금액만 늘어날 수도 있습니다
바이낸스의 공개 BTCUSDT 거래 데이터 차트는 Open Interest (BTC)와 Notional Value of Open Interest (USDT)를 구분해 표시합니다. 코인 수량으로 본 OI와 금액으로 환산한 OI는 같은 단위가 아닙니다.
앞의 7계약이 그대로 남아 있고, 계약 하나가 가상의 코인 1개를 나타낸다고 덧붙여 가정해 보겠습니다. 코인 수량은 7개입니다. 이 수량에 곱하는 환산 가격이 10 USDT에서 12 USDT로 오르면 명목가치는 70 USDT에서 84 USDT로 20% 늘어납니다. 새 계약이 한 개도 생기지 않아도 금액 표시가 커지는 예입니다.
이 계산은 수량에 가격을 곱하는 선형 계약의 가정입니다. 실제 상품의 계약 단위와 환산 가격 기준까지 같다는 뜻은 아닙니다. 금액 기준 OI가 증가했다는 화면만 보고 계약 수나 신규 유입 자금도 같은 비율로 늘었다고 단정하지 마세요. 먼저 수량 기준과 금액 기준 중 무엇을 보고 있는지 확인하면 됩니다.
화면을 비교하기 전에 적어 둘 다섯 가지
거래소, 계약 이름, 표시 단위, 거래량의 집계 기간, OI의 기준 시점을 함께 확인하세요. 현물 거래량과 선물 OI를 같은 계약의 두 지표처럼 비교하거나, 계약 수와 코인 수량·금액 표시를 그대로 합산하지 않습니다.
거래량 증가와 OI 감소가 함께 보여도 곧바로 화면 오류나 매매 신호로 판단하지 말고, 각 지표의 집계 기간과 기준 시점을 확인하세요.
공식 개념 참고: Binance Academy — What Is Open Interest?
https://www.binance.com/en/academy/articles/what-is-open-interest
표시 단위 참고: Binance Futures — Trading Data의 미결제약정 차트
https://www.binance.com/en/futures/funding-history/perpetual/trading-data
처음부터 끝까지 같은 계약만 세어 보겠습니다
미결제약정이 0인 가상의 선물 시장에서 시작하겠습니다. 아래 세 거래만 같은 집계 기간에 일어났다고 가정합니다. 단위는 모두 계약 수이며, 실제 바이낸스 시장 수치나 매매 기록이 아닙니다.
첫 거래: A가 신규 롱 10계약을 열고, B가 그 상대편에서 신규 숏 10계약을 엽니다. 체결량은 10계약이고 OI도 10계약입니다. 매수자와 매도자가 있다고 20계약으로 두 번 세지 않습니다.
두 번째 거래: A가 롱 3계약을 매도해 닫고, B가 그 3계약을 매수해 기존 숏을 닫습니다. 이번에도 3계약이 체결됐으므로 누적 거래량은 13계약입니다. 반면 남아 있는 계약은 7개가 되어 OI는 7계약으로 줄어듭니다.
세 번째 거래: A가 남은 롱 중 2계약을 매도해 닫고, 새 참여자 C가 그 2계약을 매수해 신규 롱을 엽니다. B의 숏 7계약은 그대로입니다. 누적 거래량은 15계약이 됐지만 OI는 여전히 7계약입니다. 롱을 보유한 쪽이 A 7계약에서 A 5계약과 C 2계약으로 나뉘었을 뿐입니다.
15와 7은 서로 모순되지 않습니다
이 기간에 체결된 계약은 10 + 3 + 2 = 15계약입니다. 마지막에 남은 계약은 10 − 3 = 7계약입니다. 거래량에는 포지션을 여는 거래뿐 아니라 닫거나 넘겨받는 거래도 들어갑니다. 그래서 거래가 활발했다고 OI가 반드시 증가하지는 않습니다.
같은 수량의 체결이라도 양쪽 모두 신규 포지션이면 OI가 늘고, 양쪽 모두 기존 포지션을 닫으면 줄어듭니다. 한쪽은 닫고 다른 쪽은 새로 여는 경우에는 유지됩니다. 미결제약정의 “미결제”를 아직 체결되지 않은 지정가 주문으로 읽으면 안 됩니다.
OI가 늘었다고 알 수 없는 것
새 계약에는 롱과 숏 양쪽이 있습니다. OI가 증가했다는 사실만으로 매수가 우세하다거나 가격이 오를 것이라고 결론 내릴 수 없습니다. 반대로 OI가 줄었다고 모든 감소분을 강제청산으로 볼 수도 없습니다. 앞의 예제에서는 두 참여자가 기존 포지션을 닫았을 뿐, 강제청산을 가정하지 않았습니다.
OI는 참여자 수나 새로 입금된 현금, 증거금 총액을 그대로 보여 주는 숫자도 아닙니다. 한 사람이 여러 계약을 보유할 수 있고, 같은 계약 수라도 증거금과 레버리지 조건은 다를 수 있습니다. 거래량과 OI 두 숫자만으로 그 사정을 알아낼 수는 없습니다.
계약 수는 그대로인데 금액만 늘어날 수도 있습니다
바이낸스의 공개 BTCUSDT 거래 데이터 차트는 Open Interest (BTC)와 Notional Value of Open Interest (USDT)를 구분해 표시합니다. 코인 수량으로 본 OI와 금액으로 환산한 OI는 같은 단위가 아닙니다.
앞의 7계약이 그대로 남아 있고, 계약 하나가 가상의 코인 1개를 나타낸다고 덧붙여 가정해 보겠습니다. 코인 수량은 7개입니다. 이 수량에 곱하는 환산 가격이 10 USDT에서 12 USDT로 오르면 명목가치는 70 USDT에서 84 USDT로 20% 늘어납니다. 새 계약이 한 개도 생기지 않아도 금액 표시가 커지는 예입니다.
이 계산은 수량에 가격을 곱하는 선형 계약의 가정입니다. 실제 상품의 계약 단위와 환산 가격 기준까지 같다는 뜻은 아닙니다. 금액 기준 OI가 증가했다는 화면만 보고 계약 수나 신규 유입 자금도 같은 비율로 늘었다고 단정하지 마세요. 먼저 수량 기준과 금액 기준 중 무엇을 보고 있는지 확인하면 됩니다.
화면을 비교하기 전에 적어 둘 다섯 가지
거래소, 계약 이름, 표시 단위, 거래량의 집계 기간, OI의 기준 시점을 함께 확인하세요. 현물 거래량과 선물 OI를 같은 계약의 두 지표처럼 비교하거나, 계약 수와 코인 수량·금액 표시를 그대로 합산하지 않습니다.
거래량 증가와 OI 감소가 함께 보여도 곧바로 화면 오류나 매매 신호로 판단하지 말고, 각 지표의 집계 기간과 기준 시점을 확인하세요.
공식 개념 참고: Binance Academy — What Is Open Interest?
https://www.binance.com/en/academy/articles/what-is-open-interest
표시 단위 참고: Binance Futures — Trading Data의 미결제약정 차트
https://www.binance.com/en/futures/funding-history/perpetual/trading-data
64
·
--
См. перевод
Crypto Market Cap vs. Price: Is a $1 Token Really Cheaper?When comparing a token priced at $1 with one priced at $100, check how many units exist as well as the unit price. A lower unit price does not, by itself, mean the asset is undervalued.
Put supply next to the price
Consider two fictional tokens, using prices and circulating supplies measured at the same time.
Token A: $1 per token × 1 billion circulating tokens = $1 billion market capitalization.
Token B: $100 per token × 5 million circulating tokens = $500 million market capitalization.
A has the lower unit price, yet its circulating market value is twice as large. Neither calculation tells us which project deserves that valuation.
A larger market cap is not a larger cash account
Market capitalization applies the current quoted price to the circulating supply. It does not measure how much cash investors have put in, and it is not a pool of money waiting to pay sellers.
Keep A’s supply unchanged and let its quoted price move from $1 to $1.10. Its calculated market cap increases from $1 billion to $1.1 billion. That arithmetic does not prove that buyers deposited another $100 million. The price can move as trades meet the orders available in the market.
For the same reason, multiplying all tokens by today’s quote does not mean all holders could sell at that price. The size and prices of available buy orders matter.
Market cap vs. FDV: check the supply not yet circulating
Suppose fictional token A has a maximum supply of 10 billion tokens. At the same $1 quote, a calculation using that maximum supply gives a fully diluted valuation, or FDV, of $10 billion. That is a scenario using today’s price, not a forecast of a future market cap.
Check the data provider’s definition: FDV may use total supply or maximum supply. Also check what supply is still locked, when it may become transferable and whether future issuance can change the figures. An unlock schedule is information about supply; it is not a guarantee that the price will fall on a particular date.
A useful comparison starts with three questions
Are the price and supply figures from the same point in time? Which supply definition is being used? Is there enough market liquidity for the size of transaction being considered?
These checks make the numbers more meaningful. They do not establish fair value or turn a low-priced token into a bargain. The two tokens and all dollar figures above are invented solely to explain the calculation; no purchase is being recommended.
Next in this series: APR versus APY, and how a token balance can grow while its dollar value falls.
Definition and supply distinctions: Binance Academy — Market Capitalization.
https://www.binance.com/en/academy/glossary/market-capitalization
Crypto Market Cap vs. Price: Is a $1 Token Really Cheaper?
When comparing a token priced at $1 with one priced at $100, check how many units exist as well as the unit price. A lower unit price does not, by itself, mean the asset is undervalued.
Put supply next to the price
Consider two fictional tokens, using prices and circulating supplies measured at the same time.
Token A: $1 per token × 1 billion circulating tokens = $1 billion market capitalization.
Token B: $100 per token × 5 million circulating tokens = $500 million market capitalization.
A has the lower unit price, yet its circulating market value is twice as large. Neither calculation tells us which project deserves that valuation.
A larger market cap is not a larger cash account
Market capitalization applies the current quoted price to the circulating supply. It does not measure how much cash investors have put in, and it is not a pool of money waiting to pay sellers.
Keep A’s supply unchanged and let its quoted price move from $1 to $1.10. Its calculated market cap increases from $1 billion to $1.1 billion. That arithmetic does not prove that buyers deposited another $100 million. The price can move as trades meet the orders available in the market.
For the same reason, multiplying all tokens by today’s quote does not mean all holders could sell at that price. The size and prices of available buy orders matter.
Market cap vs. FDV: check the supply not yet circulating
Suppose fictional token A has a maximum supply of 10 billion tokens. At the same $1 quote, a calculation using that maximum supply gives a fully diluted valuation, or FDV, of $10 billion. That is a scenario using today’s price, not a forecast of a future market cap.
Check the data provider’s definition: FDV may use total supply or maximum supply. Also check what supply is still locked, when it may become transferable and whether future issuance can change the figures. An unlock schedule is information about supply; it is not a guarantee that the price will fall on a particular date.
A useful comparison starts with three questions
Are the price and supply figures from the same point in time? Which supply definition is being used? Is there enough market liquidity for the size of transaction being considered?
These checks make the numbers more meaningful. They do not establish fair value or turn a low-priced token into a bargain. The two tokens and all dollar figures above are invented solely to explain the calculation; no purchase is being recommended.
Next in this series: APR versus APY, and how a token balance can grow while its dollar value falls.
Definition and supply distinctions: Binance Academy — Market Capitalization.
https://www.binance.com/en/academy/glossary/market-capitalization
Put supply next to the price
Consider two fictional tokens, using prices and circulating supplies measured at the same time.
Token A: $1 per token × 1 billion circulating tokens = $1 billion market capitalization.
Token B: $100 per token × 5 million circulating tokens = $500 million market capitalization.
A has the lower unit price, yet its circulating market value is twice as large. Neither calculation tells us which project deserves that valuation.
A larger market cap is not a larger cash account
Market capitalization applies the current quoted price to the circulating supply. It does not measure how much cash investors have put in, and it is not a pool of money waiting to pay sellers.
Keep A’s supply unchanged and let its quoted price move from $1 to $1.10. Its calculated market cap increases from $1 billion to $1.1 billion. That arithmetic does not prove that buyers deposited another $100 million. The price can move as trades meet the orders available in the market.
For the same reason, multiplying all tokens by today’s quote does not mean all holders could sell at that price. The size and prices of available buy orders matter.
Market cap vs. FDV: check the supply not yet circulating
Suppose fictional token A has a maximum supply of 10 billion tokens. At the same $1 quote, a calculation using that maximum supply gives a fully diluted valuation, or FDV, of $10 billion. That is a scenario using today’s price, not a forecast of a future market cap.
Check the data provider’s definition: FDV may use total supply or maximum supply. Also check what supply is still locked, when it may become transferable and whether future issuance can change the figures. An unlock schedule is information about supply; it is not a guarantee that the price will fall on a particular date.
A useful comparison starts with three questions
Are the price and supply figures from the same point in time? Which supply definition is being used? Is there enough market liquidity for the size of transaction being considered?
These checks make the numbers more meaningful. They do not establish fair value or turn a low-priced token into a bargain. The two tokens and all dollar figures above are invented solely to explain the calculation; no purchase is being recommended.
Next in this series: APR versus APY, and how a token balance can grow while its dollar value falls.
Definition and supply distinctions: Binance Academy — Market Capitalization.
https://www.binance.com/en/academy/glossary/market-capitalization
65
·
--
См. перевод
바이낸스 보안 설정: 패스키·안티피싱 코드와 기기 변경바이낸스 보안 메뉴의 패스키·인증 앱은 계정에 들어가거나 중요한 작업을 승인할 때 사용합니다. 안티피싱 코드는 받은 메시지를 살펴볼 때 쓰는 식별 코드입니다. 설정 전에 각 기능이 쓰이는 상황을 구분하세요.
기기를 바꾼 뒤에도 사용할 수 있도록 패스키의 저장 위치와 다시 접근하는 방법을 확인해 두세요.
지금 상황에 맞는 순서부터 고르기
처음 보안을 설정한다면 패스키를 추가하면서 저장 위치를 확인하고, 안티피싱 코드를 설정한 뒤 연결된 이메일과 계정 활동을 점검하세요.
휴대전화를 바꿀 예정이라면 등록 방법보다 현재 패스키를 어디서 쓸 수 있는지와 필수 인증 설정부터 확인하세요. 아직 기존 기기를 사용할 수 있을 때 아래의 기기 변경 항목을 읽는 편이 좋습니다.
이미 패스키를 사용할 수 없다면 새로 등록하는 설명을 따라가기보다 아래의 복구 항목으로 이동하세요. 로그인 가능한 상태에서의 설정과, 로그인이 막힌 상태에서의 복구는 출발점이 다릅니다.
패스키와 안티피싱 코드는 언제 쓰나
패스키는 지원되는 로그인·보안 인증 과정에서 사용합니다. 휴대전화의 화면 잠금이나 생체 인증으로 패스키 사용을 승인하는 방식이 대표적입니다. 안티피싱 코드는 자신이 정한 문자열이 바이낸스 안내 메시지에 표시되는지 살펴보는 기능입니다. 로그인 창에 넣는 일회용 인증 코드와도 용도가 다릅니다.
예를 들어 출금 안내 메일에 익숙한 안티피싱 코드가 보이더라도, 그 메일을 보낸 사람에게 인증 앱의 숫자를 알려주는 단계가 생기는 것은 아닙니다. 메시지 확인과 계정 작업 승인을 따로 생각하면 이런 요구를 판단하기 쉽습니다.
패스키 메뉴가 보이지 않을 때
등록 버튼부터 찾다가 막혔다면 앱·운영체제·브라우저의 지원 조건을 먼저 확인하세요. 바이낸스 공식 등록 안내는 모바일 앱과 iOS·Android의 지원 버전을 따로 제시하고, 웹에서는 최신 Chrome 같은 지원 브라우저를 안내합니다. 다른 사람의 화면에 버튼이 있다고 해서 내 환경에도 같은 선택지가 표시되는 것은 아닙니다.
메뉴를 찾으려고 앱부터 삭제하지는 마세요. 이미 패스키 필수 인증을 켰다면 앱 재설치도 사전에 설정을 확인해야 하는 경우에 포함됩니다. 아래의 패스키 필수 인증 항목을 먼저 읽고, 본인이 계속 접근할 수 있는 인증 수단을 확인한 뒤 공식 안내 순서로 진행하세요.
패스키를 추가할 때는 저장 위치까지 확인
바이낸스 패스키 등록 안내 (https://www.binance.com/en-IN/support/faq/detail/2aec8fe0437242f2a5fbef9cdb71d4c2)에서는 계정의 Security에서 Passkeys 항목으로 들어가 Add Passkey를 선택하도록 설명합니다. 기존 인증 수단으로 확인한 뒤, 표시된 계정 이메일이 맞는지 보고 저장 방식을 선택합니다. 앱·브라우저·기기에 따라 실제 선택지는 달라질 수 있으니 화면에 없는 방식을 억지로 따라 할 필요는 없습니다.
설정을 마치면 등록 목록을 확인하고 나중에 알아볼 수 있는 이름을 붙여 두세요. 기기를 바꿀 때 다시 찾을 수 있도록 저장 위치도 확인해 둡니다. 어느 비밀번호 관리자와 계정에 저장했는지, 특정 기기나 물리 보안 키에 저장했는지 구분하면 됩니다. PIN이나 복구 정보를 공개 메모에 적는 방식은 피하세요.
동기화되는 패스키와 기기에 남는 패스키
Google 비밀번호 관리자에 저장한 패스키는 같은 Google 계정으로 로그인한 지원 기기에서 사용할 수 있으며, 잠금 해제에 관리자 PIN이나 기기 화면 잠금 정보가 필요할 수 있습니다. 반면 Windows Hello나 물리 보안 키에만 저장한 패스키를 모두 같은 방식으로 복구할 수 있다고 생각하면 안 됩니다. 저장 방식별 차이는 Google Chrome 도움말의 「Manage passkeys in Chrome」(문서 13168025)에서 확인할 수 있습니다.
바이낸스의 iCloud 키체인 등록 안내도 같은 Apple 계정을 사용하는 기기 간 동기화를 설명합니다. 새 휴대전화로 바꿨는데 패스키가 안 보인다면, 먼저 예전과 같은 저장 서비스·계정을 쓰고 있는지 확인하세요. “휴대전화에 저장했다”는 기억만으로는 어떤 경로를 확인해야 할지 알기 어렵습니다.
패스키 필수 인증을 켰다면 기기 변경 전에 따로 확인
패스키 등록과 Must verify using passkey 설정은 구분해야 합니다. 패스키 필수 인증 공식 안내 (https://www.binance.com/en/support/faq/detail/c0596072150d4e7b8a824ae111f9856a)에 따르면 이 기능을 켜면 로그인과 출금에 패스키 인증이 요구됩니다. 모든 패스키 접근 수단을 잃으면 로그인할 수 없으므로, 다른 인증 수단도 등록했으니 괜찮겠다고 넘길 부분이 아닙니다.
공식 문서는 휴대전화 교체, 다른 iCloud 계정으로 변경, 시스템 패스키 설정 변경, 바이낸스 앱 재설치 전에 이 기능의 해제 절차를 확인하도록 안내합니다. 해제에도 패스키 확인이 필요합니다. 기기를 초기화한 뒤 해결하려 하지 말고, 아직 접근 가능한 상태에서 현재 설정과 공식 변경 순서를 먼저 확인하세요.
패스키를 이미 사용할 수 없다면
우선 저장 계정이나 기기를 잘못 선택한 것인지, 실제로 인증 수단을 잃은 것인지 나눠 봅니다. 정말 접근할 수 없다면 직접 연 공식 로그인 화면에서 My Passkeys Are Not Available 또는 보안 인증 수단을 사용할 수 없다는 항목을 찾으세요. 표시되는 절차는 로그인할 수 없을 때의 2FA 재설정 안내 (https://www.binance.com/en-TR/support/faq/detail/2de25ddf8c5b4f59adaebe9452f7b64b)와 대조하면 됩니다.
재설정을 진행하면 남아 있는 인증 수단으로 확인하거나 추가 심사를 거칠 수 있습니다. 공식 문서는 재설정 후 출금·P2P 판매·내부 전송·결제 기능이 최대 48시간 제한될 수 있다고 안내합니다. 이는 복구가 반드시 48시간 안에 끝난다는 약속과 다릅니다. 신청 결과와 제한 기간은 본인 화면에서 각각 확인하세요.
안티피싱 코드 설정과 실제 메시지 확인
안티피싱 코드 공식 안내 (https://www.binance.com/en-IN/support/faq/detail/311927d6c4b4478ba094fc6a611d5201)는 Security의 Anti-Phishing Code에서 코드를 만들고 2FA 또는 패스키로 확인하는 흐름을 설명합니다. 본인이 알아볼 수 있는 문자열을 정하되, 실제 입력란의 길이·문자 조건을 따르세요. 비밀번호나 일회용 인증 코드를 그대로 넣지 마세요.
현재 안내에서는 설정한 코드가 바이낸스의 이메일과 SMS에 포함된다고 설명합니다. 설정 후 받은 메시지에서 확인하고, 코드가 다르거나 없다면 링크를 누르기 전에 직접 연 앱이나 공식 지원 경로에서 확인하세요. 코드가 노출됐다고 의심되면 보안 설정에서 변경할 수 있습니다.
코드가 맞는다는 이유만으로 송금 요구나 원격제어 요청까지 신뢰할 필요는 없습니다. 중요한 계정 알림은 메시지에 달린 버튼을 따라가기보다 직접 연 앱에서 확인하는 습관을 들이는 편이 좋습니다.
마지막 점검은 이메일과 복구 경로
설정을 마쳤다면 연결된 이메일도 별도 비밀번호와 추가 인증으로 보호하고, 계정 활동에 모르는 로그인이나 변경이 없는지 확인하세요. 바이낸스 계정 보안 안내 (https://www.binance.com/en-IN/support/faq/detail/360000106932)도 이메일 보호와 계정 활동 확인을 함께 다룹니다. 본인이 하지 않은 변경이 확인되면 공식 앱·사이트의 계정 보호 및 지원 절차로 이어가세요.
메일 자체가 도착하지 않는 문제는 바이낸스 인증메일 점검 글 (https://www.binance.com/en-AE/square/post/385597773935567)에서 수신 경로와 코드 요청을 나눠 설명했습니다.
도움을 요청할 때는 “어느 화면에서 어떤 인증 수단을 사용할 수 없는지”를 설명하면 됩니다. 비밀번호·일회용 코드·복구 문구를 댓글이나 메시지로 보내지 마세요. 사칭 연락이나 의심스러운 요구가 있었다면 공식 신고 안내 (https://www.binance.com/en-IN/support/faq/detail/49b6dbdd87ed4c60b527375918ab5683)에 따라 증거를 제출하고, 공개 댓글에는 계정 정보가 담긴 화면을 올리지 않는 편이 좋습니다.
바이낸스 보안 설정: 패스키·안티피싱 코드와 기기 변경
바이낸스 보안 메뉴의 패스키·인증 앱은 계정에 들어가거나 중요한 작업을 승인할 때 사용합니다. 안티피싱 코드는 받은 메시지를 살펴볼 때 쓰는 식별 코드입니다. 설정 전에 각 기능이 쓰이는 상황을 구분하세요.
기기를 바꾼 뒤에도 사용할 수 있도록 패스키의 저장 위치와 다시 접근하는 방법을 확인해 두세요.
지금 상황에 맞는 순서부터 고르기
처음 보안을 설정한다면 패스키를 추가하면서 저장 위치를 확인하고, 안티피싱 코드를 설정한 뒤 연결된 이메일과 계정 활동을 점검하세요.
휴대전화를 바꿀 예정이라면 등록 방법보다 현재 패스키를 어디서 쓸 수 있는지와 필수 인증 설정부터 확인하세요. 아직 기존 기기를 사용할 수 있을 때 아래의 기기 변경 항목을 읽는 편이 좋습니다.
이미 패스키를 사용할 수 없다면 새로 등록하는 설명을 따라가기보다 아래의 복구 항목으로 이동하세요. 로그인 가능한 상태에서의 설정과, 로그인이 막힌 상태에서의 복구는 출발점이 다릅니다.
패스키와 안티피싱 코드는 언제 쓰나
패스키는 지원되는 로그인·보안 인증 과정에서 사용합니다. 휴대전화의 화면 잠금이나 생체 인증으로 패스키 사용을 승인하는 방식이 대표적입니다. 안티피싱 코드는 자신이 정한 문자열이 바이낸스 안내 메시지에 표시되는지 살펴보는 기능입니다. 로그인 창에 넣는 일회용 인증 코드와도 용도가 다릅니다.
예를 들어 출금 안내 메일에 익숙한 안티피싱 코드가 보이더라도, 그 메일을 보낸 사람에게 인증 앱의 숫자를 알려주는 단계가 생기는 것은 아닙니다. 메시지 확인과 계정 작업 승인을 따로 생각하면 이런 요구를 판단하기 쉽습니다.
패스키 메뉴가 보이지 않을 때
등록 버튼부터 찾다가 막혔다면 앱·운영체제·브라우저의 지원 조건을 먼저 확인하세요. 바이낸스 공식 등록 안내는 모바일 앱과 iOS·Android의 지원 버전을 따로 제시하고, 웹에서는 최신 Chrome 같은 지원 브라우저를 안내합니다. 다른 사람의 화면에 버튼이 있다고 해서 내 환경에도 같은 선택지가 표시되는 것은 아닙니다.
메뉴를 찾으려고 앱부터 삭제하지는 마세요. 이미 패스키 필수 인증을 켰다면 앱 재설치도 사전에 설정을 확인해야 하는 경우에 포함됩니다. 아래의 패스키 필수 인증 항목을 먼저 읽고, 본인이 계속 접근할 수 있는 인증 수단을 확인한 뒤 공식 안내 순서로 진행하세요.
패스키를 추가할 때는 저장 위치까지 확인
바이낸스 패스키 등록 안내 (https://www.binance.com/en-IN/support/faq/detail/2aec8fe0437242f2a5fbef9cdb71d4c2)에서는 계정의 Security에서 Passkeys 항목으로 들어가 Add Passkey를 선택하도록 설명합니다. 기존 인증 수단으로 확인한 뒤, 표시된 계정 이메일이 맞는지 보고 저장 방식을 선택합니다. 앱·브라우저·기기에 따라 실제 선택지는 달라질 수 있으니 화면에 없는 방식을 억지로 따라 할 필요는 없습니다.
설정을 마치면 등록 목록을 확인하고 나중에 알아볼 수 있는 이름을 붙여 두세요. 기기를 바꿀 때 다시 찾을 수 있도록 저장 위치도 확인해 둡니다. 어느 비밀번호 관리자와 계정에 저장했는지, 특정 기기나 물리 보안 키에 저장했는지 구분하면 됩니다. PIN이나 복구 정보를 공개 메모에 적는 방식은 피하세요.
동기화되는 패스키와 기기에 남는 패스키
Google 비밀번호 관리자에 저장한 패스키는 같은 Google 계정으로 로그인한 지원 기기에서 사용할 수 있으며, 잠금 해제에 관리자 PIN이나 기기 화면 잠금 정보가 필요할 수 있습니다. 반면 Windows Hello나 물리 보안 키에만 저장한 패스키를 모두 같은 방식으로 복구할 수 있다고 생각하면 안 됩니다. 저장 방식별 차이는 Google Chrome 도움말의 「Manage passkeys in Chrome」(문서 13168025)에서 확인할 수 있습니다.
바이낸스의 iCloud 키체인 등록 안내도 같은 Apple 계정을 사용하는 기기 간 동기화를 설명합니다. 새 휴대전화로 바꿨는데 패스키가 안 보인다면, 먼저 예전과 같은 저장 서비스·계정을 쓰고 있는지 확인하세요. “휴대전화에 저장했다”는 기억만으로는 어떤 경로를 확인해야 할지 알기 어렵습니다.
패스키 필수 인증을 켰다면 기기 변경 전에 따로 확인
패스키 등록과 Must verify using passkey 설정은 구분해야 합니다. 패스키 필수 인증 공식 안내 (https://www.binance.com/en/support/faq/detail/c0596072150d4e7b8a824ae111f9856a)에 따르면 이 기능을 켜면 로그인과 출금에 패스키 인증이 요구됩니다. 모든 패스키 접근 수단을 잃으면 로그인할 수 없으므로, 다른 인증 수단도 등록했으니 괜찮겠다고 넘길 부분이 아닙니다.
공식 문서는 휴대전화 교체, 다른 iCloud 계정으로 변경, 시스템 패스키 설정 변경, 바이낸스 앱 재설치 전에 이 기능의 해제 절차를 확인하도록 안내합니다. 해제에도 패스키 확인이 필요합니다. 기기를 초기화한 뒤 해결하려 하지 말고, 아직 접근 가능한 상태에서 현재 설정과 공식 변경 순서를 먼저 확인하세요.
패스키를 이미 사용할 수 없다면
우선 저장 계정이나 기기를 잘못 선택한 것인지, 실제로 인증 수단을 잃은 것인지 나눠 봅니다. 정말 접근할 수 없다면 직접 연 공식 로그인 화면에서 My Passkeys Are Not Available 또는 보안 인증 수단을 사용할 수 없다는 항목을 찾으세요. 표시되는 절차는 로그인할 수 없을 때의 2FA 재설정 안내 (https://www.binance.com/en-TR/support/faq/detail/2de25ddf8c5b4f59adaebe9452f7b64b)와 대조하면 됩니다.
재설정을 진행하면 남아 있는 인증 수단으로 확인하거나 추가 심사를 거칠 수 있습니다. 공식 문서는 재설정 후 출금·P2P 판매·내부 전송·결제 기능이 최대 48시간 제한될 수 있다고 안내합니다. 이는 복구가 반드시 48시간 안에 끝난다는 약속과 다릅니다. 신청 결과와 제한 기간은 본인 화면에서 각각 확인하세요.
안티피싱 코드 설정과 실제 메시지 확인
안티피싱 코드 공식 안내 (https://www.binance.com/en-IN/support/faq/detail/311927d6c4b4478ba094fc6a611d5201)는 Security의 Anti-Phishing Code에서 코드를 만들고 2FA 또는 패스키로 확인하는 흐름을 설명합니다. 본인이 알아볼 수 있는 문자열을 정하되, 실제 입력란의 길이·문자 조건을 따르세요. 비밀번호나 일회용 인증 코드를 그대로 넣지 마세요.
현재 안내에서는 설정한 코드가 바이낸스의 이메일과 SMS에 포함된다고 설명합니다. 설정 후 받은 메시지에서 확인하고, 코드가 다르거나 없다면 링크를 누르기 전에 직접 연 앱이나 공식 지원 경로에서 확인하세요. 코드가 노출됐다고 의심되면 보안 설정에서 변경할 수 있습니다.
코드가 맞는다는 이유만으로 송금 요구나 원격제어 요청까지 신뢰할 필요는 없습니다. 중요한 계정 알림은 메시지에 달린 버튼을 따라가기보다 직접 연 앱에서 확인하는 습관을 들이는 편이 좋습니다.
마지막 점검은 이메일과 복구 경로
설정을 마쳤다면 연결된 이메일도 별도 비밀번호와 추가 인증으로 보호하고, 계정 활동에 모르는 로그인이나 변경이 없는지 확인하세요. 바이낸스 계정 보안 안내 (https://www.binance.com/en-IN/support/faq/detail/360000106932)도 이메일 보호와 계정 활동 확인을 함께 다룹니다. 본인이 하지 않은 변경이 확인되면 공식 앱·사이트의 계정 보호 및 지원 절차로 이어가세요.
메일 자체가 도착하지 않는 문제는 바이낸스 인증메일 점검 글 (https://www.binance.com/en-AE/square/post/385597773935567)에서 수신 경로와 코드 요청을 나눠 설명했습니다.
도움을 요청할 때는 “어느 화면에서 어떤 인증 수단을 사용할 수 없는지”를 설명하면 됩니다. 비밀번호·일회용 코드·복구 문구를 댓글이나 메시지로 보내지 마세요. 사칭 연락이나 의심스러운 요구가 있었다면 공식 신고 안내 (https://www.binance.com/en-IN/support/faq/detail/49b6dbdd87ed4c60b527375918ab5683)에 따라 증거를 제출하고, 공개 댓글에는 계정 정보가 담긴 화면을 올리지 않는 편이 좋습니다.
기기를 바꾼 뒤에도 사용할 수 있도록 패스키의 저장 위치와 다시 접근하는 방법을 확인해 두세요.
지금 상황에 맞는 순서부터 고르기
처음 보안을 설정한다면 패스키를 추가하면서 저장 위치를 확인하고, 안티피싱 코드를 설정한 뒤 연결된 이메일과 계정 활동을 점검하세요.
휴대전화를 바꿀 예정이라면 등록 방법보다 현재 패스키를 어디서 쓸 수 있는지와 필수 인증 설정부터 확인하세요. 아직 기존 기기를 사용할 수 있을 때 아래의 기기 변경 항목을 읽는 편이 좋습니다.
이미 패스키를 사용할 수 없다면 새로 등록하는 설명을 따라가기보다 아래의 복구 항목으로 이동하세요. 로그인 가능한 상태에서의 설정과, 로그인이 막힌 상태에서의 복구는 출발점이 다릅니다.
패스키와 안티피싱 코드는 언제 쓰나
패스키는 지원되는 로그인·보안 인증 과정에서 사용합니다. 휴대전화의 화면 잠금이나 생체 인증으로 패스키 사용을 승인하는 방식이 대표적입니다. 안티피싱 코드는 자신이 정한 문자열이 바이낸스 안내 메시지에 표시되는지 살펴보는 기능입니다. 로그인 창에 넣는 일회용 인증 코드와도 용도가 다릅니다.
예를 들어 출금 안내 메일에 익숙한 안티피싱 코드가 보이더라도, 그 메일을 보낸 사람에게 인증 앱의 숫자를 알려주는 단계가 생기는 것은 아닙니다. 메시지 확인과 계정 작업 승인을 따로 생각하면 이런 요구를 판단하기 쉽습니다.
패스키 메뉴가 보이지 않을 때
등록 버튼부터 찾다가 막혔다면 앱·운영체제·브라우저의 지원 조건을 먼저 확인하세요. 바이낸스 공식 등록 안내는 모바일 앱과 iOS·Android의 지원 버전을 따로 제시하고, 웹에서는 최신 Chrome 같은 지원 브라우저를 안내합니다. 다른 사람의 화면에 버튼이 있다고 해서 내 환경에도 같은 선택지가 표시되는 것은 아닙니다.
메뉴를 찾으려고 앱부터 삭제하지는 마세요. 이미 패스키 필수 인증을 켰다면 앱 재설치도 사전에 설정을 확인해야 하는 경우에 포함됩니다. 아래의 패스키 필수 인증 항목을 먼저 읽고, 본인이 계속 접근할 수 있는 인증 수단을 확인한 뒤 공식 안내 순서로 진행하세요.
패스키를 추가할 때는 저장 위치까지 확인
바이낸스 패스키 등록 안내 (https://www.binance.com/en-IN/support/faq/detail/2aec8fe0437242f2a5fbef9cdb71d4c2)에서는 계정의 Security에서 Passkeys 항목으로 들어가 Add Passkey를 선택하도록 설명합니다. 기존 인증 수단으로 확인한 뒤, 표시된 계정 이메일이 맞는지 보고 저장 방식을 선택합니다. 앱·브라우저·기기에 따라 실제 선택지는 달라질 수 있으니 화면에 없는 방식을 억지로 따라 할 필요는 없습니다.
설정을 마치면 등록 목록을 확인하고 나중에 알아볼 수 있는 이름을 붙여 두세요. 기기를 바꿀 때 다시 찾을 수 있도록 저장 위치도 확인해 둡니다. 어느 비밀번호 관리자와 계정에 저장했는지, 특정 기기나 물리 보안 키에 저장했는지 구분하면 됩니다. PIN이나 복구 정보를 공개 메모에 적는 방식은 피하세요.
동기화되는 패스키와 기기에 남는 패스키
Google 비밀번호 관리자에 저장한 패스키는 같은 Google 계정으로 로그인한 지원 기기에서 사용할 수 있으며, 잠금 해제에 관리자 PIN이나 기기 화면 잠금 정보가 필요할 수 있습니다. 반면 Windows Hello나 물리 보안 키에만 저장한 패스키를 모두 같은 방식으로 복구할 수 있다고 생각하면 안 됩니다. 저장 방식별 차이는 Google Chrome 도움말의 「Manage passkeys in Chrome」(문서 13168025)에서 확인할 수 있습니다.
바이낸스의 iCloud 키체인 등록 안내도 같은 Apple 계정을 사용하는 기기 간 동기화를 설명합니다. 새 휴대전화로 바꿨는데 패스키가 안 보인다면, 먼저 예전과 같은 저장 서비스·계정을 쓰고 있는지 확인하세요. “휴대전화에 저장했다”는 기억만으로는 어떤 경로를 확인해야 할지 알기 어렵습니다.
패스키 필수 인증을 켰다면 기기 변경 전에 따로 확인
패스키 등록과 Must verify using passkey 설정은 구분해야 합니다. 패스키 필수 인증 공식 안내 (https://www.binance.com/en/support/faq/detail/c0596072150d4e7b8a824ae111f9856a)에 따르면 이 기능을 켜면 로그인과 출금에 패스키 인증이 요구됩니다. 모든 패스키 접근 수단을 잃으면 로그인할 수 없으므로, 다른 인증 수단도 등록했으니 괜찮겠다고 넘길 부분이 아닙니다.
공식 문서는 휴대전화 교체, 다른 iCloud 계정으로 변경, 시스템 패스키 설정 변경, 바이낸스 앱 재설치 전에 이 기능의 해제 절차를 확인하도록 안내합니다. 해제에도 패스키 확인이 필요합니다. 기기를 초기화한 뒤 해결하려 하지 말고, 아직 접근 가능한 상태에서 현재 설정과 공식 변경 순서를 먼저 확인하세요.
패스키를 이미 사용할 수 없다면
우선 저장 계정이나 기기를 잘못 선택한 것인지, 실제로 인증 수단을 잃은 것인지 나눠 봅니다. 정말 접근할 수 없다면 직접 연 공식 로그인 화면에서 My Passkeys Are Not Available 또는 보안 인증 수단을 사용할 수 없다는 항목을 찾으세요. 표시되는 절차는 로그인할 수 없을 때의 2FA 재설정 안내 (https://www.binance.com/en-TR/support/faq/detail/2de25ddf8c5b4f59adaebe9452f7b64b)와 대조하면 됩니다.
재설정을 진행하면 남아 있는 인증 수단으로 확인하거나 추가 심사를 거칠 수 있습니다. 공식 문서는 재설정 후 출금·P2P 판매·내부 전송·결제 기능이 최대 48시간 제한될 수 있다고 안내합니다. 이는 복구가 반드시 48시간 안에 끝난다는 약속과 다릅니다. 신청 결과와 제한 기간은 본인 화면에서 각각 확인하세요.
안티피싱 코드 설정과 실제 메시지 확인
안티피싱 코드 공식 안내 (https://www.binance.com/en-IN/support/faq/detail/311927d6c4b4478ba094fc6a611d5201)는 Security의 Anti-Phishing Code에서 코드를 만들고 2FA 또는 패스키로 확인하는 흐름을 설명합니다. 본인이 알아볼 수 있는 문자열을 정하되, 실제 입력란의 길이·문자 조건을 따르세요. 비밀번호나 일회용 인증 코드를 그대로 넣지 마세요.
현재 안내에서는 설정한 코드가 바이낸스의 이메일과 SMS에 포함된다고 설명합니다. 설정 후 받은 메시지에서 확인하고, 코드가 다르거나 없다면 링크를 누르기 전에 직접 연 앱이나 공식 지원 경로에서 확인하세요. 코드가 노출됐다고 의심되면 보안 설정에서 변경할 수 있습니다.
코드가 맞는다는 이유만으로 송금 요구나 원격제어 요청까지 신뢰할 필요는 없습니다. 중요한 계정 알림은 메시지에 달린 버튼을 따라가기보다 직접 연 앱에서 확인하는 습관을 들이는 편이 좋습니다.
마지막 점검은 이메일과 복구 경로
설정을 마쳤다면 연결된 이메일도 별도 비밀번호와 추가 인증으로 보호하고, 계정 활동에 모르는 로그인이나 변경이 없는지 확인하세요. 바이낸스 계정 보안 안내 (https://www.binance.com/en-IN/support/faq/detail/360000106932)도 이메일 보호와 계정 활동 확인을 함께 다룹니다. 본인이 하지 않은 변경이 확인되면 공식 앱·사이트의 계정 보호 및 지원 절차로 이어가세요.
메일 자체가 도착하지 않는 문제는 바이낸스 인증메일 점검 글 (https://www.binance.com/en-AE/square/post/385597773935567)에서 수신 경로와 코드 요청을 나눠 설명했습니다.
도움을 요청할 때는 “어느 화면에서 어떤 인증 수단을 사용할 수 없는지”를 설명하면 됩니다. 비밀번호·일회용 코드·복구 문구를 댓글이나 메시지로 보내지 마세요. 사칭 연락이나 의심스러운 요구가 있었다면 공식 신고 안내 (https://www.binance.com/en-IN/support/faq/detail/49b6dbdd87ed4c60b527375918ab5683)에 따라 증거를 제출하고, 공개 댓글에는 계정 정보가 담긴 화면을 올리지 않는 편이 좋습니다.
74
·
--
См. перевод
토큰 이름이 같다고 같은 코인은 아닙니다: 입금 전 확인할 세 가지지갑에 익숙한 이름의 토큰이 보이거나 누군가 같은 이름의 코인을 보내겠다고 해도, 이름과 로고만으로 같은 자산이라고 판단하기는 어렵습니다. 바이낸스 공식 FAQ도 여러 프로젝트가 같은 티커를 사용할 수 있다고 설명합니다.
입금 전에 세 항목을 묶어서 확인하세요. 자산의 공식 정보, 블록체인 네트워크, 그리고 스마트컨트랙트 기반 토큰이라면 해당 네트워크의 컨트랙트 주소입니다.
① 공식 정보의 출처: 메시지에 붙은 로고나 검색 결과 제목만 보지 말고, 해당 프로젝트의 공식 정보와 신뢰할 수 있는 블록 탐색기에서 같은 자산을 가리키는지 확인합니다.
② 네트워크: 이름이 같아도 서로 다른 네트워크의 자산일 수 있습니다. 보내는 쪽의 네트워크와 받는 플랫폼이 지원하는 네트워크를 함께 확인해야 합니다. 주소 문자열이 같거나 비슷하다는 것만으로 네트워크까지 같다고 판단하지 마세요.
③ 컨트랙트 주소와 지원 여부: 받는 플랫폼이 그 네트워크의 해당 토큰을 지원하는지 확인합니다. 바이낸스 FAQ는 앱 입출금 화면에서 네트워크를 고른 뒤 Contract Information 항목을 확인하는 방법을 안내합니다. 화면이 다르거나 정보가 분명하지 않다면 전송을 진행하기 전에 공식 지원 경로에서 확인하세요.
가상의 ABC 토큰을 예로 들어보겠습니다. 두 화면에 모두 ABC가 표시돼도 지갑은 네트워크 A, 거래소 입금 화면은 네트워크 B라면 이름만 맞춘 상태입니다. 스마트컨트랙트 기반 토큰이라면 같은 네트워크를 기준으로 컨트랙트 정보까지 대조해야 합니다. 해당 조합의 지원 여부가 불분명하면 여기서 멈추고 확인하세요.
토큰 컨트랙트 주소는 자산을 식별할 때, 내 계정의 입금 주소는 받을 곳을 지정할 때 사용합니다. 토큰을 구별하려고 확인한 컨트랙트 주소를 개인 입금 주소 대신 입력하지 마세요.
컨트랙트 정보가 일치한다는 사실도 가격이나 투자 안전성을 보장하지 않습니다. 이 점검은 보내려는 자산과 받는 곳의 지원 조건을 맞추기 위한 것입니다.
공식 확인 방법: How to Identify the Correct Token/Ticker Symbol?
https://www.binance.com/en/support/faq/how-to-identify-the-correct-token-ticker-symbol-b5dcf3f29baa48cea3ee6eb4d6326257
토큰 이름이 같다고 같은 코인은 아닙니다: 입금 전 확인할 세 가지
지갑에 익숙한 이름의 토큰이 보이거나 누군가 같은 이름의 코인을 보내겠다고 해도, 이름과 로고만으로 같은 자산이라고 판단하기는 어렵습니다. 바이낸스 공식 FAQ도 여러 프로젝트가 같은 티커를 사용할 수 있다고 설명합니다.
입금 전에 세 항목을 묶어서 확인하세요. 자산의 공식 정보, 블록체인 네트워크, 그리고 스마트컨트랙트 기반 토큰이라면 해당 네트워크의 컨트랙트 주소입니다.
① 공식 정보의 출처: 메시지에 붙은 로고나 검색 결과 제목만 보지 말고, 해당 프로젝트의 공식 정보와 신뢰할 수 있는 블록 탐색기에서 같은 자산을 가리키는지 확인합니다.
② 네트워크: 이름이 같아도 서로 다른 네트워크의 자산일 수 있습니다. 보내는 쪽의 네트워크와 받는 플랫폼이 지원하는 네트워크를 함께 확인해야 합니다. 주소 문자열이 같거나 비슷하다는 것만으로 네트워크까지 같다고 판단하지 마세요.
③ 컨트랙트 주소와 지원 여부: 받는 플랫폼이 그 네트워크의 해당 토큰을 지원하는지 확인합니다. 바이낸스 FAQ는 앱 입출금 화면에서 네트워크를 고른 뒤 Contract Information 항목을 확인하는 방법을 안내합니다. 화면이 다르거나 정보가 분명하지 않다면 전송을 진행하기 전에 공식 지원 경로에서 확인하세요.
가상의 ABC 토큰을 예로 들어보겠습니다. 두 화면에 모두 ABC가 표시돼도 지갑은 네트워크 A, 거래소 입금 화면은 네트워크 B라면 이름만 맞춘 상태입니다. 스마트컨트랙트 기반 토큰이라면 같은 네트워크를 기준으로 컨트랙트 정보까지 대조해야 합니다. 해당 조합의 지원 여부가 불분명하면 여기서 멈추고 확인하세요.
토큰 컨트랙트 주소는 자산을 식별할 때, 내 계정의 입금 주소는 받을 곳을 지정할 때 사용합니다. 토큰을 구별하려고 확인한 컨트랙트 주소를 개인 입금 주소 대신 입력하지 마세요.
컨트랙트 정보가 일치한다는 사실도 가격이나 투자 안전성을 보장하지 않습니다. 이 점검은 보내려는 자산과 받는 곳의 지원 조건을 맞추기 위한 것입니다.
공식 확인 방법: How to Identify the Correct Token/Ticker Symbol?
https://www.binance.com/en/support/faq/how-to-identify-the-correct-token-ticker-symbol-b5dcf3f29baa48cea3ee6eb4d6326257
입금 전에 세 항목을 묶어서 확인하세요. 자산의 공식 정보, 블록체인 네트워크, 그리고 스마트컨트랙트 기반 토큰이라면 해당 네트워크의 컨트랙트 주소입니다.
① 공식 정보의 출처: 메시지에 붙은 로고나 검색 결과 제목만 보지 말고, 해당 프로젝트의 공식 정보와 신뢰할 수 있는 블록 탐색기에서 같은 자산을 가리키는지 확인합니다.
② 네트워크: 이름이 같아도 서로 다른 네트워크의 자산일 수 있습니다. 보내는 쪽의 네트워크와 받는 플랫폼이 지원하는 네트워크를 함께 확인해야 합니다. 주소 문자열이 같거나 비슷하다는 것만으로 네트워크까지 같다고 판단하지 마세요.
③ 컨트랙트 주소와 지원 여부: 받는 플랫폼이 그 네트워크의 해당 토큰을 지원하는지 확인합니다. 바이낸스 FAQ는 앱 입출금 화면에서 네트워크를 고른 뒤 Contract Information 항목을 확인하는 방법을 안내합니다. 화면이 다르거나 정보가 분명하지 않다면 전송을 진행하기 전에 공식 지원 경로에서 확인하세요.
가상의 ABC 토큰을 예로 들어보겠습니다. 두 화면에 모두 ABC가 표시돼도 지갑은 네트워크 A, 거래소 입금 화면은 네트워크 B라면 이름만 맞춘 상태입니다. 스마트컨트랙트 기반 토큰이라면 같은 네트워크를 기준으로 컨트랙트 정보까지 대조해야 합니다. 해당 조합의 지원 여부가 불분명하면 여기서 멈추고 확인하세요.
토큰 컨트랙트 주소는 자산을 식별할 때, 내 계정의 입금 주소는 받을 곳을 지정할 때 사용합니다. 토큰을 구별하려고 확인한 컨트랙트 주소를 개인 입금 주소 대신 입력하지 마세요.
컨트랙트 정보가 일치한다는 사실도 가격이나 투자 안전성을 보장하지 않습니다. 이 점검은 보내려는 자산과 받는 곳의 지원 조건을 맞추기 위한 것입니다.
공식 확인 방법: How to Identify the Correct Token/Ticker Symbol?
https://www.binance.com/en/support/faq/how-to-identify-the-correct-token-ticker-symbol-b5dcf3f29baa48cea3ee6eb4d6326257
63
·
--
См. перевод
시장가 주문은 왜 본 가격과 다르게 체결될까? 호가 3줄로 계산하기100 USDT를 보고 주문했는데 평균 체결가가 101.8 USDT라면, 주문 당시의 호가와 실제 체결 내역부터 확인하세요. 가격 차이와 거래 수수료는 따로 계산해야 합니다.
스프레드는 지금 있는 두 가격의 간격
가상의 호가창에서 가장 높은 매수 호가가 99 USDT, 가장 낮은 매도 호가가 100 USDT라면 매수·매도 호가 차이인 스프레드는 1 USDT입니다. 즉시 사려는 주문과 즉시 팔려는 주문이 마주하는 가격부터 다릅니다. 화면에서 본 최근 체결가와 지금 거래할 수 있는 호가도 구별해야 합니다.
100 USDT에 원하는 수량이 전부 있는 것은 아닙니다
이번에는 가상의 매도 호가가 다음과 같다고 해 보겠습니다. 단위는 코인 1개당 USDT이고, 계산 중 다른 주문이나 가격 변화는 없다고 가정합니다.
100 USDT에 2개 / 101 USDT에 3개 / 103 USDT에 5개
이 상태에서 10개를 시장가로 매수해 세 가격에 모두 체결된다면, 체결 대금은 (100 × 2) + (101 × 3) + (103 × 5) = 1,018 USDT입니다. 평균 체결가는 1,018 ÷ 10 = 101.8 USDT가 됩니다.
처음 본 최우선 매도 호가 100 USDT를 비교 기준으로 잡으면 평균 체결가는 1.8% 높습니다. 10개를 모두 100 USDT에 살 것으로 생각했던 1,000 USDT와 비교하면 차이는 18 USDT입니다. 이 예에서는 원하는 수량보다 첫 가격의 매도 물량이 적어 다음 가격대까지 체결된 것입니다.
슬리피지와 수수료를 한 칸에 적지 않기
슬리피지는 기대한 가격과 실제 체결 가격의 차이입니다. 위 예제에서는 100 USDT를 기대 가격으로 정했습니다. 비교 기준을 최근 체결가나 다른 시점의 가격으로 바꾸면 계산 결과도 달라집니다.
스프레드 1 USDT와 체결 대금 차이 18 USDT는 같은 단위의 항목이 아닙니다. 앞의 값은 1개당 호가 간격이고 뒤의 값은 10개 전체의 대금 차이입니다. 이 둘을 무조건 더해 추가 수수료라고 부르면 안 됩니다. 거래소가 실제로 차감한 수수료 금액과 자산은 별도 내역에서 확인하세요.
슬리피지는 유동성과 가격 변동의 영향을 받으며 항상 불리한 방향만 있는 것은 아닙니다. 유리한 가격에 체결되는 경우도 있습니다. 이 글의 호가는 작동 방식을 보기 위한 숫자이며 실제 시장 상황이나 체결 결과가 아닙니다.
주문 전에 볼 것, 체결 뒤에 볼 것
주문 전에는 현재 스프레드, 내가 거래하려는 수량에 비해 호가가 얼마나 쌓여 있는지, 주문 방식의 조건을 봅니다. 지정가 주문은 정한 가격 또는 더 유리한 가격으로만 체결되지만, 기다리거나 일부만 체결되거나 전혀 체결되지 않을 수 있습니다. 원하는 가격과 즉시 체결은 별개의 조건입니다.
체결 뒤에는 각 체결의 가격·수량으로 평균가를 계산하고, 별도로 수수료를 확인합니다. 숫자가 예상과 다르다면 실제 차감 수수료와 가격 차이를 각각 확인하세요.
공식 개념 설명: [Binance Academy — Bid-Ask Spread and Slippage Explained](https://www.binance.com/en/academy/articles/bid-ask-spread-and-slippage-explained)
시장가 주문은 왜 본 가격과 다르게 체결될까? 호가 3줄로 계산하기
100 USDT를 보고 주문했는데 평균 체결가가 101.8 USDT라면, 주문 당시의 호가와 실제 체결 내역부터 확인하세요. 가격 차이와 거래 수수료는 따로 계산해야 합니다.
스프레드는 지금 있는 두 가격의 간격
가상의 호가창에서 가장 높은 매수 호가가 99 USDT, 가장 낮은 매도 호가가 100 USDT라면 매수·매도 호가 차이인 스프레드는 1 USDT입니다. 즉시 사려는 주문과 즉시 팔려는 주문이 마주하는 가격부터 다릅니다. 화면에서 본 최근 체결가와 지금 거래할 수 있는 호가도 구별해야 합니다.
100 USDT에 원하는 수량이 전부 있는 것은 아닙니다
이번에는 가상의 매도 호가가 다음과 같다고 해 보겠습니다. 단위는 코인 1개당 USDT이고, 계산 중 다른 주문이나 가격 변화는 없다고 가정합니다.
100 USDT에 2개 / 101 USDT에 3개 / 103 USDT에 5개
이 상태에서 10개를 시장가로 매수해 세 가격에 모두 체결된다면, 체결 대금은 (100 × 2) + (101 × 3) + (103 × 5) = 1,018 USDT입니다. 평균 체결가는 1,018 ÷ 10 = 101.8 USDT가 됩니다.
처음 본 최우선 매도 호가 100 USDT를 비교 기준으로 잡으면 평균 체결가는 1.8% 높습니다. 10개를 모두 100 USDT에 살 것으로 생각했던 1,000 USDT와 비교하면 차이는 18 USDT입니다. 이 예에서는 원하는 수량보다 첫 가격의 매도 물량이 적어 다음 가격대까지 체결된 것입니다.
슬리피지와 수수료를 한 칸에 적지 않기
슬리피지는 기대한 가격과 실제 체결 가격의 차이입니다. 위 예제에서는 100 USDT를 기대 가격으로 정했습니다. 비교 기준을 최근 체결가나 다른 시점의 가격으로 바꾸면 계산 결과도 달라집니다.
스프레드 1 USDT와 체결 대금 차이 18 USDT는 같은 단위의 항목이 아닙니다. 앞의 값은 1개당 호가 간격이고 뒤의 값은 10개 전체의 대금 차이입니다. 이 둘을 무조건 더해 추가 수수료라고 부르면 안 됩니다. 거래소가 실제로 차감한 수수료 금액과 자산은 별도 내역에서 확인하세요.
슬리피지는 유동성과 가격 변동의 영향을 받으며 항상 불리한 방향만 있는 것은 아닙니다. 유리한 가격에 체결되는 경우도 있습니다. 이 글의 호가는 작동 방식을 보기 위한 숫자이며 실제 시장 상황이나 체결 결과가 아닙니다.
주문 전에 볼 것, 체결 뒤에 볼 것
주문 전에는 현재 스프레드, 내가 거래하려는 수량에 비해 호가가 얼마나 쌓여 있는지, 주문 방식의 조건을 봅니다. 지정가 주문은 정한 가격 또는 더 유리한 가격으로만 체결되지만, 기다리거나 일부만 체결되거나 전혀 체결되지 않을 수 있습니다. 원하는 가격과 즉시 체결은 별개의 조건입니다.
체결 뒤에는 각 체결의 가격·수량으로 평균가를 계산하고, 별도로 수수료를 확인합니다. 숫자가 예상과 다르다면 실제 차감 수수료와 가격 차이를 각각 확인하세요.
공식 개념 설명: Binance Academy — Bid-Ask Spread and Slippage Explained
스프레드는 지금 있는 두 가격의 간격
가상의 호가창에서 가장 높은 매수 호가가 99 USDT, 가장 낮은 매도 호가가 100 USDT라면 매수·매도 호가 차이인 스프레드는 1 USDT입니다. 즉시 사려는 주문과 즉시 팔려는 주문이 마주하는 가격부터 다릅니다. 화면에서 본 최근 체결가와 지금 거래할 수 있는 호가도 구별해야 합니다.
100 USDT에 원하는 수량이 전부 있는 것은 아닙니다
이번에는 가상의 매도 호가가 다음과 같다고 해 보겠습니다. 단위는 코인 1개당 USDT이고, 계산 중 다른 주문이나 가격 변화는 없다고 가정합니다.
100 USDT에 2개 / 101 USDT에 3개 / 103 USDT에 5개
이 상태에서 10개를 시장가로 매수해 세 가격에 모두 체결된다면, 체결 대금은 (100 × 2) + (101 × 3) + (103 × 5) = 1,018 USDT입니다. 평균 체결가는 1,018 ÷ 10 = 101.8 USDT가 됩니다.
처음 본 최우선 매도 호가 100 USDT를 비교 기준으로 잡으면 평균 체결가는 1.8% 높습니다. 10개를 모두 100 USDT에 살 것으로 생각했던 1,000 USDT와 비교하면 차이는 18 USDT입니다. 이 예에서는 원하는 수량보다 첫 가격의 매도 물량이 적어 다음 가격대까지 체결된 것입니다.
슬리피지와 수수료를 한 칸에 적지 않기
슬리피지는 기대한 가격과 실제 체결 가격의 차이입니다. 위 예제에서는 100 USDT를 기대 가격으로 정했습니다. 비교 기준을 최근 체결가나 다른 시점의 가격으로 바꾸면 계산 결과도 달라집니다.
스프레드 1 USDT와 체결 대금 차이 18 USDT는 같은 단위의 항목이 아닙니다. 앞의 값은 1개당 호가 간격이고 뒤의 값은 10개 전체의 대금 차이입니다. 이 둘을 무조건 더해 추가 수수료라고 부르면 안 됩니다. 거래소가 실제로 차감한 수수료 금액과 자산은 별도 내역에서 확인하세요.
슬리피지는 유동성과 가격 변동의 영향을 받으며 항상 불리한 방향만 있는 것은 아닙니다. 유리한 가격에 체결되는 경우도 있습니다. 이 글의 호가는 작동 방식을 보기 위한 숫자이며 실제 시장 상황이나 체결 결과가 아닙니다.
주문 전에 볼 것, 체결 뒤에 볼 것
주문 전에는 현재 스프레드, 내가 거래하려는 수량에 비해 호가가 얼마나 쌓여 있는지, 주문 방식의 조건을 봅니다. 지정가 주문은 정한 가격 또는 더 유리한 가격으로만 체결되지만, 기다리거나 일부만 체결되거나 전혀 체결되지 않을 수 있습니다. 원하는 가격과 즉시 체결은 별개의 조건입니다.
체결 뒤에는 각 체결의 가격·수량으로 평균가를 계산하고, 별도로 수수료를 확인합니다. 숫자가 예상과 다르다면 실제 차감 수수료와 가격 차이를 각각 확인하세요.
공식 개념 설명: Binance Academy — Bid-Ask Spread and Slippage Explained
85
·
--
См. перевод
20% 손실 뒤 20% 반등하면 원금일까요?20% 하락 뒤 20% 반등을 계산하면 출발 금액으로 돌아오지 못합니다. 하락 전과 반등 전의 기준 금액이 달라지기 때문입니다.
추가 입출금·수수료·세금이 없는 가상의 평가액 100을 놓고 보겠습니다. 20% 하락하면 80입니다. 여기서 20% 상승하면 늘어나는 금액은 80의 20%인 16이므로, 평가액은 96이 됩니다. 처음의 100보다 아직 4가 적습니다.
80에서 다시 100이 되려면 20이 늘어야 합니다. 현재 금액을 기준으로 나누면 20 ÷ 80 = 0.25, 즉 25% 상승이 필요합니다. 하락할 때의 기준은 100, 반등할 때의 기준은 80이기 때문에 같은 20%가 서로 상쇄되지 않는 겁니다.
같은 가정으로 계산하면 10% 손실 뒤에는 약 11.11%, 20% 손실 뒤에는 25%, 50% 손실 뒤에는 100% 상승이 있어야 출발 금액으로 돌아옵니다.
직접 계산하려면 손실률을 소수로 바꿔 L이라고 두고, L ÷ (1 − L)을 구한 다음 100을 곱하세요. L은 0 이상 1 미만인 경우에 적용합니다. 20% 손실이라면 0.2 ÷ 0.8 × 100 = 25%입니다.
이 숫자는 만회할 목표 수익률이나 추가 매매 신호가 아닙니다. 같은 퍼센트라도 기준 금액이 달라진다는 계산일 뿐입니다. 실제 성과에는 비용과 입출금도 따로 반영해야 합니다. 거래 기록을 볼 때 수익률 옆에 시작 금액과 끝 금액을 함께 적으면 이런 착각을 줄일 수 있습니다.
계산의 기준: [Binance Academy의 ROI 설명](https://www.binance.com/en/academy/articles/how-to-calculate-return-on-investment-roi). 위 100→80→96 예제와 회복률은 별도로 구성하고 계산한 가상 사례입니다.
20% 손실 뒤 20% 반등하면 원금일까요?
20% 하락 뒤 20% 반등을 계산하면 출발 금액으로 돌아오지 못합니다. 하락 전과 반등 전의 기준 금액이 달라지기 때문입니다.
추가 입출금·수수료·세금이 없는 가상의 평가액 100을 놓고 보겠습니다. 20% 하락하면 80입니다. 여기서 20% 상승하면 늘어나는 금액은 80의 20%인 16이므로, 평가액은 96이 됩니다. 처음의 100보다 아직 4가 적습니다.
80에서 다시 100이 되려면 20이 늘어야 합니다. 현재 금액을 기준으로 나누면 20 ÷ 80 = 0.25, 즉 25% 상승이 필요합니다. 하락할 때의 기준은 100, 반등할 때의 기준은 80이기 때문에 같은 20%가 서로 상쇄되지 않는 겁니다.
같은 가정으로 계산하면 10% 손실 뒤에는 약 11.11%, 20% 손실 뒤에는 25%, 50% 손실 뒤에는 100% 상승이 있어야 출발 금액으로 돌아옵니다.
직접 계산하려면 손실률을 소수로 바꿔 L이라고 두고, L ÷ (1 − L)을 구한 다음 100을 곱하세요. L은 0 이상 1 미만인 경우에 적용합니다. 20% 손실이라면 0.2 ÷ 0.8 × 100 = 25%입니다.
이 숫자는 만회할 목표 수익률이나 추가 매매 신호가 아닙니다. 같은 퍼센트라도 기준 금액이 달라진다는 계산일 뿐입니다. 실제 성과에는 비용과 입출금도 따로 반영해야 합니다. 거래 기록을 볼 때 수익률 옆에 시작 금액과 끝 금액을 함께 적으면 이런 착각을 줄일 수 있습니다.
계산의 기준: Binance Academy의 ROI 설명. 위 100→80→96 예제와 회복률은 별도로 구성하고 계산한 가상 사례입니다.
추가 입출금·수수료·세금이 없는 가상의 평가액 100을 놓고 보겠습니다. 20% 하락하면 80입니다. 여기서 20% 상승하면 늘어나는 금액은 80의 20%인 16이므로, 평가액은 96이 됩니다. 처음의 100보다 아직 4가 적습니다.
80에서 다시 100이 되려면 20이 늘어야 합니다. 현재 금액을 기준으로 나누면 20 ÷ 80 = 0.25, 즉 25% 상승이 필요합니다. 하락할 때의 기준은 100, 반등할 때의 기준은 80이기 때문에 같은 20%가 서로 상쇄되지 않는 겁니다.
같은 가정으로 계산하면 10% 손실 뒤에는 약 11.11%, 20% 손실 뒤에는 25%, 50% 손실 뒤에는 100% 상승이 있어야 출발 금액으로 돌아옵니다.
직접 계산하려면 손실률을 소수로 바꿔 L이라고 두고, L ÷ (1 − L)을 구한 다음 100을 곱하세요. L은 0 이상 1 미만인 경우에 적용합니다. 20% 손실이라면 0.2 ÷ 0.8 × 100 = 25%입니다.
이 숫자는 만회할 목표 수익률이나 추가 매매 신호가 아닙니다. 같은 퍼센트라도 기준 금액이 달라진다는 계산일 뿐입니다. 실제 성과에는 비용과 입출금도 따로 반영해야 합니다. 거래 기록을 볼 때 수익률 옆에 시작 금액과 끝 금액을 함께 적으면 이런 착각을 줄일 수 있습니다.
계산의 기준: Binance Academy의 ROI 설명. 위 100→80→96 예제와 회복률은 별도로 구성하고 계산한 가상 사례입니다.
96
·
--
См. перевод
송금 주소의 앞뒤만 확인했다면: 주소 포이즈닝 예방 3단계송금 주소를 붙여 넣은 뒤 앞뒤 몇 글자만 확인하면 주소 포이즈닝을 놓칠 수 있습니다. 최근 거래 내역에 나타났더라도 내가 보내려던 상대의 주소인지 확인해야 합니다.
주소 포이즈닝은 공격자가 익숙한 거래 상대의 주소와 비슷하게 만든 주소에서 소액이나 가치 없는 토큰 등을 보내, 이용자의 거래 내역에 그 주소가 남도록 하는 수법입니다. 다음 송금 때 그 내역에서 주소를 복사하도록 유도하는 것이 핵심입니다. 바이낸스 공식 보안 글도 앞부분과 끝부분만 확인하지 말고 전체 주소를 대조하라고 안내합니다.
보내기 전에는 세 단계를 확인해 보세요.
① 주소를 어디서 가져왔나요?
최근 거래 내역에 나타난 낯선 주소를 그대로 재사용하지 말고, 받는 곳에서 직접 확인한 주소를 기준으로 삼으세요.
② 가운데 글자까지 같은가요?
화면에 축약된 주소만 비교하면 서로 다른 주소를 놓칠 수 있습니다. 복사한 원본과 입력된 전체 주소를 대조하세요.
③ 붙여 넣은 다음에도 확인했나요?
공식 안내는 클립보드 내용을 바꿔치기하는 악성 프로그램도 경고합니다. 복사 직전에 맞았다는 사실만으로 입력 결과까지 같다고 생각하면 안 됩니다.
자주 쓰는 주소는 검증한 뒤 지갑의 주소 저장 기능을 활용할 수 있습니다. 저장된 이름과 실제 목적지를 대조하고, 주소의 출처와 붙여 넣은 결과를 순서대로 확인하세요.
참고: [Binance 공식 보안 글 — The Binance Antidote: Protecting Users From Address Poisoning Attacks](https://www.binance.com/en/blog/security/1195692545296235775)
송금 주소의 앞뒤만 확인했다면: 주소 포이즈닝 예방 3단계
송금 주소를 붙여 넣은 뒤 앞뒤 몇 글자만 확인하면 주소 포이즈닝을 놓칠 수 있습니다. 최근 거래 내역에 나타났더라도 내가 보내려던 상대의 주소인지 확인해야 합니다.
주소 포이즈닝은 공격자가 익숙한 거래 상대의 주소와 비슷하게 만든 주소에서 소액이나 가치 없는 토큰 등을 보내, 이용자의 거래 내역에 그 주소가 남도록 하는 수법입니다. 다음 송금 때 그 내역에서 주소를 복사하도록 유도하는 것이 핵심입니다. 바이낸스 공식 보안 글도 앞부분과 끝부분만 확인하지 말고 전체 주소를 대조하라고 안내합니다.
보내기 전에는 세 단계를 확인해 보세요.
① 주소를 어디서 가져왔나요?
최근 거래 내역에 나타난 낯선 주소를 그대로 재사용하지 말고, 받는 곳에서 직접 확인한 주소를 기준으로 삼으세요.
② 가운데 글자까지 같은가요?
화면에 축약된 주소만 비교하면 서로 다른 주소를 놓칠 수 있습니다. 복사한 원본과 입력된 전체 주소를 대조하세요.
③ 붙여 넣은 다음에도 확인했나요?
공식 안내는 클립보드 내용을 바꿔치기하는 악성 프로그램도 경고합니다. 복사 직전에 맞았다는 사실만으로 입력 결과까지 같다고 생각하면 안 됩니다.
자주 쓰는 주소는 검증한 뒤 지갑의 주소 저장 기능을 활용할 수 있습니다. 저장된 이름과 실제 목적지를 대조하고, 주소의 출처와 붙여 넣은 결과를 순서대로 확인하세요.
참고: Binance 공식 보안 글 — The Binance Antidote: Protecting Users From Address Poisoning Attacks
주소 포이즈닝은 공격자가 익숙한 거래 상대의 주소와 비슷하게 만든 주소에서 소액이나 가치 없는 토큰 등을 보내, 이용자의 거래 내역에 그 주소가 남도록 하는 수법입니다. 다음 송금 때 그 내역에서 주소를 복사하도록 유도하는 것이 핵심입니다. 바이낸스 공식 보안 글도 앞부분과 끝부분만 확인하지 말고 전체 주소를 대조하라고 안내합니다.
보내기 전에는 세 단계를 확인해 보세요.
① 주소를 어디서 가져왔나요?
최근 거래 내역에 나타난 낯선 주소를 그대로 재사용하지 말고, 받는 곳에서 직접 확인한 주소를 기준으로 삼으세요.
② 가운데 글자까지 같은가요?
화면에 축약된 주소만 비교하면 서로 다른 주소를 놓칠 수 있습니다. 복사한 원본과 입력된 전체 주소를 대조하세요.
③ 붙여 넣은 다음에도 확인했나요?
공식 안내는 클립보드 내용을 바꿔치기하는 악성 프로그램도 경고합니다. 복사 직전에 맞았다는 사실만으로 입력 결과까지 같다고 생각하면 안 됩니다.
자주 쓰는 주소는 검증한 뒤 지갑의 주소 저장 기능을 활용할 수 있습니다. 저장된 이름과 실제 목적지를 대조하고, 주소의 출처와 붙여 넣은 결과를 순서대로 확인하세요.
참고: Binance 공식 보안 글 — The Binance Antidote: Protecting Users From Address Poisoning Attacks
77
·
--
См. перевод
바이낸스 인증메일 안 올 때: 미수신·코드 오류 확인 순서바이낸스 인증메일이 전혀 도착하지 않는 경우와, 받은 숫자를 넣었는데 오류가 나는 경우는 확인할 곳이 다릅니다. 먼저 화면의 오류 문구를 기준으로 어느 쪽인지 구분하세요.
가입 중이라면 입력한 주소를, 로그인 중이라면 기존 계정에 연결된 주소를 기준으로 확인하세요. 아래 순서는 메일 수신 경로와 인증 요청을 차례로 좁혀 가는 방법입니다.
지금 막힌 곳부터 구분하기
메일이 한 통도 없다: 코드 요청 여부, 수신 주소, 메일함을 확인합니다. 메일은 왔는데 Wrong code가 나온다: 입력 중인 인증 방식과 요청을 확인합니다. Send code failed가 나온다: 코드 전송 요청 자체가 실패한 상태이므로 메일함 검색만 반복해서는 원인을 좁히기 어렵습니다.
예를 들어 로그인 화면은 이메일 인증을 요구하는데 휴대전화의 인증 앱 숫자를 입력하고 있다면, 숫자를 정확히 옮겨도 필요한 인증 수단이 다릅니다. 화면에 표시된 Email, SMS, Authenticator 같은 이름부터 읽어보세요. 모두 숫자 코드처럼 보여도 같은 칸에 넣는 정보가 아닙니다.
인증메일이 없을 때는 주소와 메일함을 함께 확인
먼저 인증 화면에서 Get Code를 눌러 전송을 요청했는지 봅니다. 그다음 현재 열어 둔 메일 계정과 바이낸스에 입력하거나 연결한 주소가 같은지 확인하세요. 업무용·개인용 메일을 함께 쓰는 경우에는 익숙한 받은편지함을 보고 있으면서 다른 주소로 코드를 요청했을 수도 있습니다.
스팸함과 휴지통을 확인하고, 메일 서비스의 자동 분류·차단 규칙과 저장 공간도 살펴봅니다. 바이낸스 공식 미수신 안내에는 받은편지함 용량이 가득 찼는지 확인하는 항목이 있습니다. 앱에 새 메일이 보이지 않는다면 메일 서비스 웹사이트에서도 수신 여부를 확인해볼 수 있습니다. 어느 쪽에서 보이는지 알아야 수신 문제와 표시 문제를 구분하기 쉽습니다.
수신 허용 목록이 필요하면 아래 공식 도움말에 연결된 최신 안내를 이용하세요. 다른 사람이 댓글에 적은 발신 주소 목록을 그대로 믿거나 메일 보안을 통째로 해제할 필요는 없습니다.
바이낸스의 2FA 오류 도움말은 전송 지연 시 10분 뒤 다시 시도하도록 안내합니다. 이는 재시도 안내이지, 모든 인증메일이 반드시 10분 안에 도착한다는 약속은 아닙니다. 화면에 별도의 대기 시간이나 제한이 표시되면 그 안내를 먼저 따르세요.
Apple로 가입했다면 ‘나의 이메일 가리기’ 확인
Apple로 로그인하면서 이메일을 가렸다면, 바이낸스에 보이는 주소와 실제로 메일을 읽는 주소가 다를 수 있습니다. Apple이 만든 중계 주소로 전송된 메일을 개인 받은편지함으로 전달하는 구조입니다. 중계 주소를 별도의 메일함처럼 열려고 하기보다 어디로 전달되는지 확인하는 편이 맞습니다.
Apple의 현재 안내에서는 iPhone·iPad의 설정에서 본인 이름을 누른 뒤 ‘Apple로 로그인’에 들어가 연결된 앱·웹사이트를 확인하도록 설명합니다. 해당 서비스의 가리기 주소와 전달 설정을 살펴보세요. 기기 버전에 따라 항목 이름은 다를 수 있으며, iCloud+의 일반적인 가리기 주소 관리와 Apple로 로그인한 서비스의 연결 관리는 구분해야 합니다.
수신 경로를 확인하려는 단계에서 Apple 연결부터 해제하지는 마세요. 계정에 접근하는 방법까지 바뀔 수 있으므로, 주소 변경이나 인증 수단 재설정이 필요한지는 기존 설정을 파악한 다음 판단하는 편이 좋습니다.
메일은 도착했는데 인증번호가 틀리다고 나온다면
어떤 화면에서 무엇을 요청했는지 다시 맞춰봅니다. 가입 탭, 로그인 탭, 보안 설정 탭이 함께 열려 있다면 각각의 요청을 혼동하기 쉽습니다. 작업 중인 화면 하나를 기준으로 정리하고, 그 요청에 대응하는 메일을 확인하세요. 메일에 표시된 시간과 작업 종류가 구분에 도움이 됩니다.
공식 안내는 새 코드를 요청하는 방법을 제시하면서 짧은 시간에 너무 자주 시도하면 계정이 잠길 수 있다고 설명합니다. 이미 제공되는 다른 인증 수단이 있다면 화면에서 사용할 수 있는지도 확인할 수 있습니다. 오류가 지속될 때는 지원되는 다른 기기나 브라우저로 시도하는 방법도 안내되어 있지만, 화면의 제한을 무시하고 반복 요청하는 방식으로 해결하려 해서는 안 됩니다.
오류 문구가 전송 실패인지 코드 불일치인지도 함께 기록하세요. 같은 ‘인증이 안 된다’는 설명이라도 지원 담당자가 확인할 단계가 달라집니다. 새로 요청한 코드의 유효 시간이나 재전송 제한을 블로그의 고정 숫자로 판단하지 말고 현재 인증 화면의 안내를 읽으세요.
공식 지원에 문의할 때는 이 정도만 정리
공식 지원에 문의할 때는 발생 시각과 시간대, 앱 또는 브라우저, 진행 중인 작업, 화면의 오류 문구, 이미 확인한 항목을 적어두세요. 다음은 문의 예시입니다.
“오후 9시경 한국 시간에 PC 브라우저에서 기존 계정 로그인을 시도했습니다. 이메일 코드를 요청했지만 받은편지함·스팸함·휴지통에서 찾지 못했습니다. 수신 주소와 저장 공간을 확인했고, 화면에는 전송 실패 문구가 표시됩니다.”
이것은 문의 작성 예시입니다. 실제로 확인하지 않은 항목까지 했다고 적을 필요는 없습니다. 인증번호, 비밀번호, 복구 키는 문의 예시나 공개 댓글에 넣지 마세요. 계정 정보를 보여줘야 하는 상황이라면 공식 지원 절차에서 요구하는 범위를 확인하고 제출하세요.
자주 헷갈리는 두 가지
계정을 다시 만들면 해결될까요? 기존 계정의 수신 문제라면 그 계정의 인증·복구 절차부터 확인하는 편이 맞습니다. 이메일 오류를 해결하려고 계정을 늘리면 로그인 주소와 계정 연결을 더 헷갈릴 수 있습니다.
가입 인증을 끝내면 KYC도 완료되나요? 이메일 확인과 본인인증은 다른 단계입니다. 메일 문제를 해결한 뒤에는 [바이낸스 가입·KYC·보안 설정 가이드](https://www.binance.com/en-AE/square/post/361929963714169)에서 다음 순서를 이어서 확인할 수 있습니다.
2026년 11월 7일 공식 자료 확인. 메뉴 이름과 인증 수단은 기기·계정에 따라 달라질 수 있습니다.
참고한 공식 안내: [바이낸스 이메일 미수신 점검](https://www.binance.com/en/support/faq/detail/115003783731) · [바이낸스 2FA 코드 오류](https://www.binance.com/en-AU/support/faq/detail/93959f1614744ef7a32c9a0759928103) · Apple 지원 — Manage your apps with Sign in with Apple (문서 102571)
바이낸스 인증메일 안 올 때: 미수신·코드 오류 확인 순서
바이낸스 인증메일이 전혀 도착하지 않는 경우와, 받은 숫자를 넣었는데 오류가 나는 경우는 확인할 곳이 다릅니다. 먼저 화면의 오류 문구를 기준으로 어느 쪽인지 구분하세요.
가입 중이라면 입력한 주소를, 로그인 중이라면 기존 계정에 연결된 주소를 기준으로 확인하세요. 아래 순서는 메일 수신 경로와 인증 요청을 차례로 좁혀 가는 방법입니다.
지금 막힌 곳부터 구분하기
메일이 한 통도 없다: 코드 요청 여부, 수신 주소, 메일함을 확인합니다. 메일은 왔는데 Wrong code가 나온다: 입력 중인 인증 방식과 요청을 확인합니다. Send code failed가 나온다: 코드 전송 요청 자체가 실패한 상태이므로 메일함 검색만 반복해서는 원인을 좁히기 어렵습니다.
예를 들어 로그인 화면은 이메일 인증을 요구하는데 휴대전화의 인증 앱 숫자를 입력하고 있다면, 숫자를 정확히 옮겨도 필요한 인증 수단이 다릅니다. 화면에 표시된 Email, SMS, Authenticator 같은 이름부터 읽어보세요. 모두 숫자 코드처럼 보여도 같은 칸에 넣는 정보가 아닙니다.
인증메일이 없을 때는 주소와 메일함을 함께 확인
먼저 인증 화면에서 Get Code를 눌러 전송을 요청했는지 봅니다. 그다음 현재 열어 둔 메일 계정과 바이낸스에 입력하거나 연결한 주소가 같은지 확인하세요. 업무용·개인용 메일을 함께 쓰는 경우에는 익숙한 받은편지함을 보고 있으면서 다른 주소로 코드를 요청했을 수도 있습니다.
스팸함과 휴지통을 확인하고, 메일 서비스의 자동 분류·차단 규칙과 저장 공간도 살펴봅니다. 바이낸스 공식 미수신 안내에는 받은편지함 용량이 가득 찼는지 확인하는 항목이 있습니다. 앱에 새 메일이 보이지 않는다면 메일 서비스 웹사이트에서도 수신 여부를 확인해볼 수 있습니다. 어느 쪽에서 보이는지 알아야 수신 문제와 표시 문제를 구분하기 쉽습니다.
수신 허용 목록이 필요하면 아래 공식 도움말에 연결된 최신 안내를 이용하세요. 다른 사람이 댓글에 적은 발신 주소 목록을 그대로 믿거나 메일 보안을 통째로 해제할 필요는 없습니다.
바이낸스의 2FA 오류 도움말은 전송 지연 시 10분 뒤 다시 시도하도록 안내합니다. 이는 재시도 안내이지, 모든 인증메일이 반드시 10분 안에 도착한다는 약속은 아닙니다. 화면에 별도의 대기 시간이나 제한이 표시되면 그 안내를 먼저 따르세요.
Apple로 가입했다면 ‘나의 이메일 가리기’ 확인
Apple로 로그인하면서 이메일을 가렸다면, 바이낸스에 보이는 주소와 실제로 메일을 읽는 주소가 다를 수 있습니다. Apple이 만든 중계 주소로 전송된 메일을 개인 받은편지함으로 전달하는 구조입니다. 중계 주소를 별도의 메일함처럼 열려고 하기보다 어디로 전달되는지 확인하는 편이 맞습니다.
Apple의 현재 안내에서는 iPhone·iPad의 설정에서 본인 이름을 누른 뒤 ‘Apple로 로그인’에 들어가 연결된 앱·웹사이트를 확인하도록 설명합니다. 해당 서비스의 가리기 주소와 전달 설정을 살펴보세요. 기기 버전에 따라 항목 이름은 다를 수 있으며, iCloud+의 일반적인 가리기 주소 관리와 Apple로 로그인한 서비스의 연결 관리는 구분해야 합니다.
수신 경로를 확인하려는 단계에서 Apple 연결부터 해제하지는 마세요. 계정에 접근하는 방법까지 바뀔 수 있으므로, 주소 변경이나 인증 수단 재설정이 필요한지는 기존 설정을 파악한 다음 판단하는 편이 좋습니다.
메일은 도착했는데 인증번호가 틀리다고 나온다면
어떤 화면에서 무엇을 요청했는지 다시 맞춰봅니다. 가입 탭, 로그인 탭, 보안 설정 탭이 함께 열려 있다면 각각의 요청을 혼동하기 쉽습니다. 작업 중인 화면 하나를 기준으로 정리하고, 그 요청에 대응하는 메일을 확인하세요. 메일에 표시된 시간과 작업 종류가 구분에 도움이 됩니다.
공식 안내는 새 코드를 요청하는 방법을 제시하면서 짧은 시간에 너무 자주 시도하면 계정이 잠길 수 있다고 설명합니다. 이미 제공되는 다른 인증 수단이 있다면 화면에서 사용할 수 있는지도 확인할 수 있습니다. 오류가 지속될 때는 지원되는 다른 기기나 브라우저로 시도하는 방법도 안내되어 있지만, 화면의 제한을 무시하고 반복 요청하는 방식으로 해결하려 해서는 안 됩니다.
오류 문구가 전송 실패인지 코드 불일치인지도 함께 기록하세요. 같은 ‘인증이 안 된다’는 설명이라도 지원 담당자가 확인할 단계가 달라집니다. 새로 요청한 코드의 유효 시간이나 재전송 제한을 블로그의 고정 숫자로 판단하지 말고 현재 인증 화면의 안내를 읽으세요.
공식 지원에 문의할 때는 이 정도만 정리
공식 지원에 문의할 때는 발생 시각과 시간대, 앱 또는 브라우저, 진행 중인 작업, 화면의 오류 문구, 이미 확인한 항목을 적어두세요. 다음은 문의 예시입니다.
“오후 9시경 한국 시간에 PC 브라우저에서 기존 계정 로그인을 시도했습니다. 이메일 코드를 요청했지만 받은편지함·스팸함·휴지통에서 찾지 못했습니다. 수신 주소와 저장 공간을 확인했고, 화면에는 전송 실패 문구가 표시됩니다.”
이것은 문의 작성 예시입니다. 실제로 확인하지 않은 항목까지 했다고 적을 필요는 없습니다. 인증번호, 비밀번호, 복구 키는 문의 예시나 공개 댓글에 넣지 마세요. 계정 정보를 보여줘야 하는 상황이라면 공식 지원 절차에서 요구하는 범위를 확인하고 제출하세요.
자주 헷갈리는 두 가지
계정을 다시 만들면 해결될까요? 기존 계정의 수신 문제라면 그 계정의 인증·복구 절차부터 확인하는 편이 맞습니다. 이메일 오류를 해결하려고 계정을 늘리면 로그인 주소와 계정 연결을 더 헷갈릴 수 있습니다.
가입 인증을 끝내면 KYC도 완료되나요? 이메일 확인과 본인인증은 다른 단계입니다. 메일 문제를 해결한 뒤에는 바이낸스 가입·KYC·보안 설정 가이드에서 다음 순서를 이어서 확인할 수 있습니다.
2026년 11월 7일 공식 자료 확인. 메뉴 이름과 인증 수단은 기기·계정에 따라 달라질 수 있습니다.
참고한 공식 안내: 바이낸스 이메일 미수신 점검 · 바이낸스 2FA 코드 오류 · Apple 지원 — Manage your apps with Sign in with Apple (문서 102571)
가입 중이라면 입력한 주소를, 로그인 중이라면 기존 계정에 연결된 주소를 기준으로 확인하세요. 아래 순서는 메일 수신 경로와 인증 요청을 차례로 좁혀 가는 방법입니다.
지금 막힌 곳부터 구분하기
메일이 한 통도 없다: 코드 요청 여부, 수신 주소, 메일함을 확인합니다. 메일은 왔는데 Wrong code가 나온다: 입력 중인 인증 방식과 요청을 확인합니다. Send code failed가 나온다: 코드 전송 요청 자체가 실패한 상태이므로 메일함 검색만 반복해서는 원인을 좁히기 어렵습니다.
예를 들어 로그인 화면은 이메일 인증을 요구하는데 휴대전화의 인증 앱 숫자를 입력하고 있다면, 숫자를 정확히 옮겨도 필요한 인증 수단이 다릅니다. 화면에 표시된 Email, SMS, Authenticator 같은 이름부터 읽어보세요. 모두 숫자 코드처럼 보여도 같은 칸에 넣는 정보가 아닙니다.
인증메일이 없을 때는 주소와 메일함을 함께 확인
먼저 인증 화면에서 Get Code를 눌러 전송을 요청했는지 봅니다. 그다음 현재 열어 둔 메일 계정과 바이낸스에 입력하거나 연결한 주소가 같은지 확인하세요. 업무용·개인용 메일을 함께 쓰는 경우에는 익숙한 받은편지함을 보고 있으면서 다른 주소로 코드를 요청했을 수도 있습니다.
스팸함과 휴지통을 확인하고, 메일 서비스의 자동 분류·차단 규칙과 저장 공간도 살펴봅니다. 바이낸스 공식 미수신 안내에는 받은편지함 용량이 가득 찼는지 확인하는 항목이 있습니다. 앱에 새 메일이 보이지 않는다면 메일 서비스 웹사이트에서도 수신 여부를 확인해볼 수 있습니다. 어느 쪽에서 보이는지 알아야 수신 문제와 표시 문제를 구분하기 쉽습니다.
수신 허용 목록이 필요하면 아래 공식 도움말에 연결된 최신 안내를 이용하세요. 다른 사람이 댓글에 적은 발신 주소 목록을 그대로 믿거나 메일 보안을 통째로 해제할 필요는 없습니다.
바이낸스의 2FA 오류 도움말은 전송 지연 시 10분 뒤 다시 시도하도록 안내합니다. 이는 재시도 안내이지, 모든 인증메일이 반드시 10분 안에 도착한다는 약속은 아닙니다. 화면에 별도의 대기 시간이나 제한이 표시되면 그 안내를 먼저 따르세요.
Apple로 가입했다면 ‘나의 이메일 가리기’ 확인
Apple로 로그인하면서 이메일을 가렸다면, 바이낸스에 보이는 주소와 실제로 메일을 읽는 주소가 다를 수 있습니다. Apple이 만든 중계 주소로 전송된 메일을 개인 받은편지함으로 전달하는 구조입니다. 중계 주소를 별도의 메일함처럼 열려고 하기보다 어디로 전달되는지 확인하는 편이 맞습니다.
Apple의 현재 안내에서는 iPhone·iPad의 설정에서 본인 이름을 누른 뒤 ‘Apple로 로그인’에 들어가 연결된 앱·웹사이트를 확인하도록 설명합니다. 해당 서비스의 가리기 주소와 전달 설정을 살펴보세요. 기기 버전에 따라 항목 이름은 다를 수 있으며, iCloud+의 일반적인 가리기 주소 관리와 Apple로 로그인한 서비스의 연결 관리는 구분해야 합니다.
수신 경로를 확인하려는 단계에서 Apple 연결부터 해제하지는 마세요. 계정에 접근하는 방법까지 바뀔 수 있으므로, 주소 변경이나 인증 수단 재설정이 필요한지는 기존 설정을 파악한 다음 판단하는 편이 좋습니다.
메일은 도착했는데 인증번호가 틀리다고 나온다면
어떤 화면에서 무엇을 요청했는지 다시 맞춰봅니다. 가입 탭, 로그인 탭, 보안 설정 탭이 함께 열려 있다면 각각의 요청을 혼동하기 쉽습니다. 작업 중인 화면 하나를 기준으로 정리하고, 그 요청에 대응하는 메일을 확인하세요. 메일에 표시된 시간과 작업 종류가 구분에 도움이 됩니다.
공식 안내는 새 코드를 요청하는 방법을 제시하면서 짧은 시간에 너무 자주 시도하면 계정이 잠길 수 있다고 설명합니다. 이미 제공되는 다른 인증 수단이 있다면 화면에서 사용할 수 있는지도 확인할 수 있습니다. 오류가 지속될 때는 지원되는 다른 기기나 브라우저로 시도하는 방법도 안내되어 있지만, 화면의 제한을 무시하고 반복 요청하는 방식으로 해결하려 해서는 안 됩니다.
오류 문구가 전송 실패인지 코드 불일치인지도 함께 기록하세요. 같은 ‘인증이 안 된다’는 설명이라도 지원 담당자가 확인할 단계가 달라집니다. 새로 요청한 코드의 유효 시간이나 재전송 제한을 블로그의 고정 숫자로 판단하지 말고 현재 인증 화면의 안내를 읽으세요.
공식 지원에 문의할 때는 이 정도만 정리
공식 지원에 문의할 때는 발생 시각과 시간대, 앱 또는 브라우저, 진행 중인 작업, 화면의 오류 문구, 이미 확인한 항목을 적어두세요. 다음은 문의 예시입니다.
“오후 9시경 한국 시간에 PC 브라우저에서 기존 계정 로그인을 시도했습니다. 이메일 코드를 요청했지만 받은편지함·스팸함·휴지통에서 찾지 못했습니다. 수신 주소와 저장 공간을 확인했고, 화면에는 전송 실패 문구가 표시됩니다.”
이것은 문의 작성 예시입니다. 실제로 확인하지 않은 항목까지 했다고 적을 필요는 없습니다. 인증번호, 비밀번호, 복구 키는 문의 예시나 공개 댓글에 넣지 마세요. 계정 정보를 보여줘야 하는 상황이라면 공식 지원 절차에서 요구하는 범위를 확인하고 제출하세요.
자주 헷갈리는 두 가지
계정을 다시 만들면 해결될까요? 기존 계정의 수신 문제라면 그 계정의 인증·복구 절차부터 확인하는 편이 맞습니다. 이메일 오류를 해결하려고 계정을 늘리면 로그인 주소와 계정 연결을 더 헷갈릴 수 있습니다.
가입 인증을 끝내면 KYC도 완료되나요? 이메일 확인과 본인인증은 다른 단계입니다. 메일 문제를 해결한 뒤에는 바이낸스 가입·KYC·보안 설정 가이드에서 다음 순서를 이어서 확인할 수 있습니다.
2026년 11월 7일 공식 자료 확인. 메뉴 이름과 인증 수단은 기기·계정에 따라 달라질 수 있습니다.
참고한 공식 안내: 바이낸스 이메일 미수신 점검 · 바이낸스 2FA 코드 오류 · Apple 지원 — Manage your apps with Sign in with Apple (문서 102571)
77
·
--
См. перевод
Binance Referral Code: Sign-Up and Welcome Rewards ExplainedMarketing material for Binance; not investment advice.
This content is not intended for users in countries restricted under the Binance Affiliate Program. Check the current [restricted-countries guide](https://www.binance.com/en/support/faq/detail/4e65bc209c08424f85fec35accb0c8b0) for its scope.
During registration, check the signup route, the referral connection and any reward assigned to your account separately. A code can be linked successfully while a reward task is still unfinished.
If you are creating your first account, open the signup page below and keep the guide beside it. If you already use Binance, start with your existing account and the troubleshooting section further down.
[Create a Binance account](https://www.binance.com/register?ref=DE20OFFVIP)
Affiliate disclosure: This account may receive a commission when you sign up through this link under the applicable program. The referral code is DE20OFFVIP. Check the benefits and conditions displayed for your account.
Official information reviewed on 7 November 2026. Screens, regional availability and campaign terms can change.
What a Binance referral code does
A referral code records an invitation relationship. It helps distinguish who referred an account from which product or promotion the account can actually use. That distinction becomes useful when a signup page, a fee page and a rewards page show different information.
For example, a confirmation beside a referral field tells you about the connection. A trading-fee entry tells you what was charged for an execution. A voucher in the Rewards Hub has its own conditions. Reading each record for what it represents makes it much easier to understand the result.
Before you open the signup page
Check that the service you want is available where you actually live. An English article or a country code in a page address does not settle your eligibility. Use your real residence information and the requirements presented in the official account flow.
Have an email address or phone number you can continue to access. You may need it again for login and recovery. If you are unsure whether you already have an account, resolve that first rather than creating another one while comparing offers.
Decide whether you need a personal or entity account before proceeding. Binance's website registration guide says the account type cannot be changed after registration. A business account deserves its own setup process; it is not simply a personal account with a different display name.
How to use the referral link during signup
Choose your registration method. Follow the email, phone or supported social-signup option shown on the page. Read the terms before accepting them.Complete the contact and account steps. Check the email address carefully and follow the current password requirements.Confirm the referral connection. Binance's web guide describes an automatically filled code, a green tick and a Linked label when a referral link is connected. Read that status before finishing.Continue with identity verification and security. Creating an account does not complete KYC. Follow the verification requirements for your residence and enable the available account security controls.
Before continuing, confirm that the expected referral information appears in the official signup flow. Opening a different creator's link after a relationship is established is not a way to replace that relationship.
Welcome rewards: understanding the maximum 19,800 USD value
Binance's Affiliate-Boosted Welcome Bonus announcement describes rewards worth up to 19,800 USD: up to 100 USD in initial tasks and up to 19,700 USD in additional tasks after KYC. These are conditional rewards, not an automatic cash payment for registering.
Eligible newcomers must register through an affiliate admitted to the program, complete KYC within 30 days and finish their assigned tasks within the stated deadlines. Rewards can include trading-fee rebate vouchers and Earn trial funds. The announcement limits allocation to the first 1,000 eligible new referrals per affiliate in each 30-day cycle.
Task values, voucher types, allocation and regional eligibility can change. Read your actual Rewards Hub assignment before deciding whether to participate; the headline maximum is not the amount every account receives. The [official welcome-bonus announcement](https://www.binance.com/es-LA/support/announcement/detail/854ba3fda59648799882ff19b5296645) provides the program conditions.
How to read a reward without confusing it with cash
Start with the unit and the reward type. A number followed by USD can describe the stated value of a voucher, while a trial fund can provide temporary use under separate rules. The first practical question is what the reward lets you do.
Here is a hypothetical example, not a Binance offer: suppose a fee voucher has a face value of 50 USD and can reimburse eligible fees until it expires. If the qualifying fees you actually incur are 3 USD, the face value alone does not turn those 3 USD of fees into a 50 USD cash gift. You must read the reimbursement rules, cap and expiry together.
For a task-based offer, write down the required action, deadline and reward type on the same line. That small habit keeps the headline amount attached to its conditions. Do not add deposits or trades solely to chase a reward that would otherwise be irrelevant to your plans.
Comparing fees without mixing different costs
A useful comparison begins with the same product and the same transaction size. Spot execution fees, Futures execution fees and withdrawal costs describe different events. Comparing one against another will not tell you which account setup costs less.
For illustration, a 1,000 USDT execution at an assumed 0.1% fee rate produces a 1 USDT fee. This is arithmetic, not a statement of your current rate. Replace the assumed rate with the one displayed for your account and product. Then check how any separately applicable rebate or voucher is recorded.
Keep three figures separate: the amount charged when an order executes, any qualifying adjustment later recorded, and the cost you finally bear. A headline percentage cannot answer all three questions. This also helps you avoid treating an inviter's commission table as the discount available to a new user.
Already registered? Check which situation applies
A referral is already connected. Binance's Referral Pro FAQ says an established relationship cannot be changed or removed. Another signup link will not overwrite it.
No referral is connected. The FAQ describes limited post-registration binding: a parent account within 30 days of registration, no deposits or trades, no existing referral, no reuse of the KYC information on another account during the previous 180 days, and no wash-trader flag. All conditions must be met. Check the [current Referral Pro FAQ](https://www.binance.com/en-AE/support/faq/detail/6233094e540b4ea4ac50387d1518911b) before assuming the option applies.
You are considering starting over. Closing and recreating an account to change a referral can invalidate commissions and rebates. Use the normal login, recovery and support routes for an existing account.
If the expected reward is missing
First identify what is missing. Is the referral connection absent, is a task still incomplete, or has a completed reward not appeared? These are different questions and need different evidence.
Read the specific task text, completion status and deadline. If those do not explain the outcome, contact Binance support with the relevant private record. Do not publish identity documents, balances, verification codes or contact details in Square comments. A general question about a screen label is enough for a public discussion.
There is no need to place a trade to test a guide. You can review account status, conditions and security before making a separate decision about deposits or trading. Crypto prices can move sharply and trading can result in losses.
Useful references for the next screen
The [official website registration guide](https://www.binance.com/en/support/faq/detail/08f314ad219e45fc9b7a27b67801a5c4) illustrates the signup flow and Linked status. For Korean explanations of account setup, KYC and security, use [the Korean Binance signup guide](https://www.binance.com/en-AE/square/post/361929963714169). If your question is about leverage or margin rather than registration, the separate [Binance Futures guide](https://www.binance.com/en-AE/square/post/363972337065799) explains those mechanics.
Binance Referral Code: Sign-Up and Welcome Rewards Explained
Marketing material for Binance; not investment advice.
This content is not intended for users in countries restricted under the Binance Affiliate Program. Check the current restricted-countries guide for its scope.
During registration, check the signup route, the referral connection and any reward assigned to your account separately. A code can be linked successfully while a reward task is still unfinished.
If you are creating your first account, open the signup page below and keep the guide beside it. If you already use Binance, start with your existing account and the troubleshooting section further down.
Create a Binance account
Affiliate disclosure: This account may receive a commission when you sign up through this link under the applicable program. The referral code is DE20OFFVIP. Check the benefits and conditions displayed for your account.
Official information reviewed on 7 November 2026. Screens, regional availability and campaign terms can change.
What a Binance referral code does
A referral code records an invitation relationship. It helps distinguish who referred an account from which product or promotion the account can actually use. That distinction becomes useful when a signup page, a fee page and a rewards page show different information.
For example, a confirmation beside a referral field tells you about the connection. A trading-fee entry tells you what was charged for an execution. A voucher in the Rewards Hub has its own conditions. Reading each record for what it represents makes it much easier to understand the result.
Before you open the signup page
Check that the service you want is available where you actually live. An English article or a country code in a page address does not settle your eligibility. Use your real residence information and the requirements presented in the official account flow.
Have an email address or phone number you can continue to access. You may need it again for login and recovery. If you are unsure whether you already have an account, resolve that first rather than creating another one while comparing offers.
Decide whether you need a personal or entity account before proceeding. Binance's website registration guide says the account type cannot be changed after registration. A business account deserves its own setup process; it is not simply a personal account with a different display name.
How to use the referral link during signup
Choose your registration method. Follow the email, phone or supported social-signup option shown on the page. Read the terms before accepting them.Complete the contact and account steps. Check the email address carefully and follow the current password requirements.Confirm the referral connection. Binance's web guide describes an automatically filled code, a green tick and a Linked label when a referral link is connected. Read that status before finishing.Continue with identity verification and security. Creating an account does not complete KYC. Follow the verification requirements for your residence and enable the available account security controls.
Before continuing, confirm that the expected referral information appears in the official signup flow. Opening a different creator's link after a relationship is established is not a way to replace that relationship.
Welcome rewards: understanding the maximum 19,800 USD value
Binance's Affiliate-Boosted Welcome Bonus announcement describes rewards worth up to 19,800 USD: up to 100 USD in initial tasks and up to 19,700 USD in additional tasks after KYC. These are conditional rewards, not an automatic cash payment for registering.
Eligible newcomers must register through an affiliate admitted to the program, complete KYC within 30 days and finish their assigned tasks within the stated deadlines. Rewards can include trading-fee rebate vouchers and Earn trial funds. The announcement limits allocation to the first 1,000 eligible new referrals per affiliate in each 30-day cycle.
Task values, voucher types, allocation and regional eligibility can change. Read your actual Rewards Hub assignment before deciding whether to participate; the headline maximum is not the amount every account receives. The official welcome-bonus announcement provides the program conditions.
How to read a reward without confusing it with cash
Start with the unit and the reward type. A number followed by USD can describe the stated value of a voucher, while a trial fund can provide temporary use under separate rules. The first practical question is what the reward lets you do.
Here is a hypothetical example, not a Binance offer: suppose a fee voucher has a face value of 50 USD and can reimburse eligible fees until it expires. If the qualifying fees you actually incur are 3 USD, the face value alone does not turn those 3 USD of fees into a 50 USD cash gift. You must read the reimbursement rules, cap and expiry together.
For a task-based offer, write down the required action, deadline and reward type on the same line. That small habit keeps the headline amount attached to its conditions. Do not add deposits or trades solely to chase a reward that would otherwise be irrelevant to your plans.
Comparing fees without mixing different costs
A useful comparison begins with the same product and the same transaction size. Spot execution fees, Futures execution fees and withdrawal costs describe different events. Comparing one against another will not tell you which account setup costs less.
For illustration, a 1,000 USDT execution at an assumed 0.1% fee rate produces a 1 USDT fee. This is arithmetic, not a statement of your current rate. Replace the assumed rate with the one displayed for your account and product. Then check how any separately applicable rebate or voucher is recorded.
Keep three figures separate: the amount charged when an order executes, any qualifying adjustment later recorded, and the cost you finally bear. A headline percentage cannot answer all three questions. This also helps you avoid treating an inviter's commission table as the discount available to a new user.
Already registered? Check which situation applies
A referral is already connected. Binance's Referral Pro FAQ says an established relationship cannot be changed or removed. Another signup link will not overwrite it.
No referral is connected. The FAQ describes limited post-registration binding: a parent account within 30 days of registration, no deposits or trades, no existing referral, no reuse of the KYC information on another account during the previous 180 days, and no wash-trader flag. All conditions must be met. Check the current Referral Pro FAQ before assuming the option applies.
You are considering starting over. Closing and recreating an account to change a referral can invalidate commissions and rebates. Use the normal login, recovery and support routes for an existing account.
If the expected reward is missing
First identify what is missing. Is the referral connection absent, is a task still incomplete, or has a completed reward not appeared? These are different questions and need different evidence.
Read the specific task text, completion status and deadline. If those do not explain the outcome, contact Binance support with the relevant private record. Do not publish identity documents, balances, verification codes or contact details in Square comments. A general question about a screen label is enough for a public discussion.
There is no need to place a trade to test a guide. You can review account status, conditions and security before making a separate decision about deposits or trading. Crypto prices can move sharply and trading can result in losses.
Useful references for the next screen
The official website registration guide illustrates the signup flow and Linked status. For Korean explanations of account setup, KYC and security, use the Korean Binance signup guide. If your question is about leverage or margin rather than registration, the separate Binance Futures guide explains those mechanics.
This content is not intended for users in countries restricted under the Binance Affiliate Program. Check the current restricted-countries guide for its scope.
During registration, check the signup route, the referral connection and any reward assigned to your account separately. A code can be linked successfully while a reward task is still unfinished.
If you are creating your first account, open the signup page below and keep the guide beside it. If you already use Binance, start with your existing account and the troubleshooting section further down.
Create a Binance account
Affiliate disclosure: This account may receive a commission when you sign up through this link under the applicable program. The referral code is DE20OFFVIP. Check the benefits and conditions displayed for your account.
Official information reviewed on 7 November 2026. Screens, regional availability and campaign terms can change.
What a Binance referral code does
A referral code records an invitation relationship. It helps distinguish who referred an account from which product or promotion the account can actually use. That distinction becomes useful when a signup page, a fee page and a rewards page show different information.
For example, a confirmation beside a referral field tells you about the connection. A trading-fee entry tells you what was charged for an execution. A voucher in the Rewards Hub has its own conditions. Reading each record for what it represents makes it much easier to understand the result.
Before you open the signup page
Check that the service you want is available where you actually live. An English article or a country code in a page address does not settle your eligibility. Use your real residence information and the requirements presented in the official account flow.
Have an email address or phone number you can continue to access. You may need it again for login and recovery. If you are unsure whether you already have an account, resolve that first rather than creating another one while comparing offers.
Decide whether you need a personal or entity account before proceeding. Binance's website registration guide says the account type cannot be changed after registration. A business account deserves its own setup process; it is not simply a personal account with a different display name.
How to use the referral link during signup
Choose your registration method. Follow the email, phone or supported social-signup option shown on the page. Read the terms before accepting them.Complete the contact and account steps. Check the email address carefully and follow the current password requirements.Confirm the referral connection. Binance's web guide describes an automatically filled code, a green tick and a Linked label when a referral link is connected. Read that status before finishing.Continue with identity verification and security. Creating an account does not complete KYC. Follow the verification requirements for your residence and enable the available account security controls.
Before continuing, confirm that the expected referral information appears in the official signup flow. Opening a different creator's link after a relationship is established is not a way to replace that relationship.
Welcome rewards: understanding the maximum 19,800 USD value
Binance's Affiliate-Boosted Welcome Bonus announcement describes rewards worth up to 19,800 USD: up to 100 USD in initial tasks and up to 19,700 USD in additional tasks after KYC. These are conditional rewards, not an automatic cash payment for registering.
Eligible newcomers must register through an affiliate admitted to the program, complete KYC within 30 days and finish their assigned tasks within the stated deadlines. Rewards can include trading-fee rebate vouchers and Earn trial funds. The announcement limits allocation to the first 1,000 eligible new referrals per affiliate in each 30-day cycle.
Task values, voucher types, allocation and regional eligibility can change. Read your actual Rewards Hub assignment before deciding whether to participate; the headline maximum is not the amount every account receives. The official welcome-bonus announcement provides the program conditions.
How to read a reward without confusing it with cash
Start with the unit and the reward type. A number followed by USD can describe the stated value of a voucher, while a trial fund can provide temporary use under separate rules. The first practical question is what the reward lets you do.
Here is a hypothetical example, not a Binance offer: suppose a fee voucher has a face value of 50 USD and can reimburse eligible fees until it expires. If the qualifying fees you actually incur are 3 USD, the face value alone does not turn those 3 USD of fees into a 50 USD cash gift. You must read the reimbursement rules, cap and expiry together.
For a task-based offer, write down the required action, deadline and reward type on the same line. That small habit keeps the headline amount attached to its conditions. Do not add deposits or trades solely to chase a reward that would otherwise be irrelevant to your plans.
Comparing fees without mixing different costs
A useful comparison begins with the same product and the same transaction size. Spot execution fees, Futures execution fees and withdrawal costs describe different events. Comparing one against another will not tell you which account setup costs less.
For illustration, a 1,000 USDT execution at an assumed 0.1% fee rate produces a 1 USDT fee. This is arithmetic, not a statement of your current rate. Replace the assumed rate with the one displayed for your account and product. Then check how any separately applicable rebate or voucher is recorded.
Keep three figures separate: the amount charged when an order executes, any qualifying adjustment later recorded, and the cost you finally bear. A headline percentage cannot answer all three questions. This also helps you avoid treating an inviter's commission table as the discount available to a new user.
Already registered? Check which situation applies
A referral is already connected. Binance's Referral Pro FAQ says an established relationship cannot be changed or removed. Another signup link will not overwrite it.
No referral is connected. The FAQ describes limited post-registration binding: a parent account within 30 days of registration, no deposits or trades, no existing referral, no reuse of the KYC information on another account during the previous 180 days, and no wash-trader flag. All conditions must be met. Check the current Referral Pro FAQ before assuming the option applies.
You are considering starting over. Closing and recreating an account to change a referral can invalidate commissions and rebates. Use the normal login, recovery and support routes for an existing account.
If the expected reward is missing
First identify what is missing. Is the referral connection absent, is a task still incomplete, or has a completed reward not appeared? These are different questions and need different evidence.
Read the specific task text, completion status and deadline. If those do not explain the outcome, contact Binance support with the relevant private record. Do not publish identity documents, balances, verification codes or contact details in Square comments. A general question about a screen label is enough for a public discussion.
There is no need to place a trade to test a guide. You can review account status, conditions and security before making a separate decision about deposits or trading. Crypto prices can move sharply and trading can result in losses.
Useful references for the next screen
The official website registration guide illustrates the signup flow and Linked status. For Korean explanations of account setup, KYC and security, use the Korean Binance signup guide. If your question is about leverage or margin rather than registration, the separate Binance Futures guide explains those mechanics.
32
·
--

Статья
См. перевод
Binance Futures Guide: Account Setup, Margin and Trading CostsMarketing material for Binance; not investment advice.
This content is not intended for users in countries restricted under the Binance Affiliate Program. Check the current [restricted-countries guide](https://www.binance.com/en/support/faq/detail/4e65bc209c08424f85fec35accb0c8b0) for its scope.
The number beside “leverage” is easy to notice. The more useful number is the size of the position it creates. Put 100 USDT behind a hypothetical 500 USDT position, and a small price move is already being measured against five times the initial margin.
That is where this Binance Futures guide starts: with the amounts you are exposed to, then the account requirements, contract types and costs that can change the result. If you arrived while looking for a Binance signup guide, the account section below separates registration from access to derivatives.
Start with the contract, not just the coin name
Buying BTC on Spot and opening a BTC futures position are different transactions. A futures position gives exposure through a contract; it is not the same as owning BTC that you can withdraw. A long position benefits from a rise in the relevant price, while a short benefits from a fall, before costs. Either can lose money.
Read the full contract name. USDⓈ-M contracts commonly use a stablecoin such as USDT or USDC for margin and settlement, while COIN-M contracts use cryptocurrency. The collateral matters: when collateral is itself a volatile coin, its value in your preferred reporting currency can change too. Comparing two positions by the ticker alone misses that distinction.
Then establish whether you are looking at a perpetual contract or a dated contract. Funding is part of the perpetual-contract discussion; it should not be pasted indiscriminately onto every product called “futures.” Use the current specification for the actual contract.
Account setup: what registration does and does not complete
For a new personal account, choose a supported signup method on Binance, complete the requested contact verification and finish the account-creation steps. The website guide describes checking the referral field and its “Linked” confirmation when a referral is used. Check the recorded result before moving on; an article showing a code cannot prove what was saved on your account.
[Create a Binance account — signup page](https://www.binance.com/register?ref=DE20OFFVIP)
Affiliate link: this account may earn a commission if you register through it under the applicable program. Referral code: DE20OFFVIP. Using it is optional; check any benefit and eligibility in your own signup screen.
This is a general Binance registration link. It is not a promise that the code works in a separate Futures-referral field or that derivatives are available where you live. If you already have a Binance account, use that account and its recovery options.
Binance’s Futures opening guide describes a separate account-opening step, identity verification before trading, and a service agreement with risk acknowledgment. Use your real residence and experience information. A translated page or an accessible menu does not establish eligibility. Once logged in, read the terms and restrictions that apply to the account before deciding whether the product suits you.
Margin and leverage: a small example makes the difference clear
Imagine a linear contract with 500 USDT of exposure and 100 USDT of initial margin. That is a simplified 5x relationship. If the price moves 1% against the position, the price effect is approximately 5 USDT: 500 × 0.01. Relative to the initial margin, that is 5%, not 1%.
For clarity, this example leaves out fees, funding, additional margin and changing account conditions. It shows price sensitivity; it does not calculate a liquidation price.
A leverage setting describes one part of the setup. Maintenance margin is another: a position must continue to meet the applicable requirement. The permitted leverage and margin tier depend on the contract and position size, and Binance can revise those tiers. This is why “the platform offers X leverage” is a poor substitute for reading the selected contract’s current parameters.
A useful paper exercise is to write down three separate figures: position notional, initial margin and the loss from a small adverse move. If the third figure surprises you, the exposure is not yet clear enough. There is no need to fund a position to do this exercise.
Cross or isolated: follow the collateral
Cross margin draws on eligible collateral within the relevant cross-margin system. Isolated margin allocates collateral to a particular position. The practical question is where additional losses can draw their support from, not which label sounds safer.
When reviewing a position, note the margin mode alongside the collateral amount. Check whether extra margin has been added. If the selected product offers automatic margin additions, check that setting too. A description based only on the original amount can become misleading once the setup changes. Other positions and the selected account mode also matter when assessing shared collateral.
Neither choice removes liquidation risk. Binance distinguishes Mark Price from Last Price, and uses Mark Price for liquidation calculations. A chart displaying the latest trade therefore does not explain every liquidation event. Compare like with like: contract, price type, margin mode and time.
Read the fee by the event that created it
Execution: trading commission is associated with a filled trade. Look at maker/taker treatment, the product and the actual fee asset.
Funding: a perpetual position can pay or receive funding at settlement. Check that contract’s rate and timetable instead of assuming every contract uses the same interval.
Liquidation: a forced liquidation can produce a separate clearance charge. It belongs to a different event from an ordinary entry or exit.
BNB fee payment is another setting with its own conditions. The Futures fee FAQ describes sufficient BNB in the relevant Futures wallet and fallback to USDT when it is insufficient. That does not establish a referral benefit. Compare the current program, product and actual debit asset before combining any percentages.
For a simple reconciliation, group a position’s records by time and event. “What was this charge for?” comes before “Was the amount correct?” A funding debit beside a trading commission is not automatically a duplicate trading charge. Keep private account records private if you need support to explain a discrepancy.
A limit order is a price instruction, not a fee promise
A market order seeks available liquidity; a limit order sets a price condition. A limit order that immediately matches an existing order can be a taker. The word “limit” on its own does not prove that a maker fee will apply.
For example, suppose the lowest available sell price is 100. A buy limit at 101 may match that existing liquidity immediately. It need not sit on the order book waiting for a later seller. This is a hypothetical order-book example, not a quote or a suggestion to enter an order.
The same habit helps with stop-related orders: read the trigger condition separately from what is submitted after the trigger. A trigger price and the eventual fill price answer different questions. Check the selected order’s terms rather than treating a stop label as a guaranteed exit price.
Referral terms: read the benefit from the right side
A referral program can describe both what the inviter earns and what the invited user receives. Those are not interchangeable. If a headline points to an affiliate commission table, that table alone does not tell you your trading discount.
When comparing an offer, keep its product, qualifying account conditions and expiry together. A fee voucher is also different from cash available to withdraw. The reliable comparison is between the terms shown for your account, not two large numbers taken from unrelated promotions. Our [referral-code guide](https://www.binance.com/en-AE/square/post/385302178768265) explains the checks before and after signup.
Questions that come up before the first position
Can I use Futures as soon as I create an account? Registration is only one stage. Read the identity, regional and product requirements in your account and the Futures opening process.
Can I calculate liquidation by dividing 100% by leverage? That shortcut leaves out maintenance margin and other conditions. The simplified exposure example above explains price sensitivity, not a liquidation threshold.
Why does the balance change when I have not opened another trade? Start with the transaction record and the open position. A funding entry, a fee or a margin change needs its own explanation. Do not infer the cause from the balance total alone.
What should I finish before depositing? Understand the account’s security and recovery options, confirm the service you can use, and learn the asset and network requirements for any transfer you independently choose to make. A signup decision does not require an immediate deposit.
Futures can produce substantial losses. The most useful preparation is being able to explain your exposure, collateral and costs in ordinary numbers before deciding whether to take any risk.
Sources and revision note
Reviewed 7 November 2026. This revision replaces older promotional rate examples and a dated fee screenshot with worked examples of exposure and trading costs. Examples are hypothetical, not personal trade records.
[Website registration](https://www.binance.com/en/support/faq/detail/08f314ad219e45fc9b7a27b67801a5c4) · [Futures account requirements](https://www.binance.com/en/support/faq/detail/360033772992) · [Leverage and margin tiers](https://www.binance.com/en/support/faq/detail/360033162192) · [Futures fees](https://www.binance.com/en-NG/support/faq/detail/98488a516eb84e3eb34605683dffd554) · [Liquidation and Mark Price](https://www.binance.com/en-NG/support/faq/detail/360033525271) · [Futures margin modes](https://www.binance.com/en/support/faq/detail/360038075852) · [Contract parameters](https://www.binance.com/en/futures/trading-parameters/perpetual) · [Referral Pro terms](https://www.binance.com/en-AE/support/faq/detail/6233094e540b4ea4ac50387d1518911b)
Binance Futures Guide: Account Setup, Margin and Trading Costs
Marketing material for Binance; not investment advice.
This content is not intended for users in countries restricted under the Binance Affiliate Program. Check the current restricted-countries guide for its scope.
The number beside “leverage” is easy to notice. The more useful number is the size of the position it creates. Put 100 USDT behind a hypothetical 500 USDT position, and a small price move is already being measured against five times the initial margin.
That is where this Binance Futures guide starts: with the amounts you are exposed to, then the account requirements, contract types and costs that can change the result. If you arrived while looking for a Binance signup guide, the account section below separates registration from access to derivatives.
Start with the contract, not just the coin name
Buying BTC on Spot and opening a BTC futures position are different transactions. A futures position gives exposure through a contract; it is not the same as owning BTC that you can withdraw. A long position benefits from a rise in the relevant price, while a short benefits from a fall, before costs. Either can lose money.
Read the full contract name. USDⓈ-M contracts commonly use a stablecoin such as USDT or USDC for margin and settlement, while COIN-M contracts use cryptocurrency. The collateral matters: when collateral is itself a volatile coin, its value in your preferred reporting currency can change too. Comparing two positions by the ticker alone misses that distinction.
Then establish whether you are looking at a perpetual contract or a dated contract. Funding is part of the perpetual-contract discussion; it should not be pasted indiscriminately onto every product called “futures.” Use the current specification for the actual contract.
Account setup: what registration does and does not complete
For a new personal account, choose a supported signup method on Binance, complete the requested contact verification and finish the account-creation steps. The website guide describes checking the referral field and its “Linked” confirmation when a referral is used. Check the recorded result before moving on; an article showing a code cannot prove what was saved on your account.
Create a Binance account — signup page
Affiliate link: this account may earn a commission if you register through it under the applicable program. Referral code: DE20OFFVIP. Using it is optional; check any benefit and eligibility in your own signup screen.
This is a general Binance registration link. It is not a promise that the code works in a separate Futures-referral field or that derivatives are available where you live. If you already have a Binance account, use that account and its recovery options.
Binance’s Futures opening guide describes a separate account-opening step, identity verification before trading, and a service agreement with risk acknowledgment. Use your real residence and experience information. A translated page or an accessible menu does not establish eligibility. Once logged in, read the terms and restrictions that apply to the account before deciding whether the product suits you.
Margin and leverage: a small example makes the difference clear
Imagine a linear contract with 500 USDT of exposure and 100 USDT of initial margin. That is a simplified 5x relationship. If the price moves 1% against the position, the price effect is approximately 5 USDT: 500 × 0.01. Relative to the initial margin, that is 5%, not 1%.
For clarity, this example leaves out fees, funding, additional margin and changing account conditions. It shows price sensitivity; it does not calculate a liquidation price.
A leverage setting describes one part of the setup. Maintenance margin is another: a position must continue to meet the applicable requirement. The permitted leverage and margin tier depend on the contract and position size, and Binance can revise those tiers. This is why “the platform offers X leverage” is a poor substitute for reading the selected contract’s current parameters.
A useful paper exercise is to write down three separate figures: position notional, initial margin and the loss from a small adverse move. If the third figure surprises you, the exposure is not yet clear enough. There is no need to fund a position to do this exercise.
Cross or isolated: follow the collateral
Cross margin draws on eligible collateral within the relevant cross-margin system. Isolated margin allocates collateral to a particular position. The practical question is where additional losses can draw their support from, not which label sounds safer.
When reviewing a position, note the margin mode alongside the collateral amount. Check whether extra margin has been added. If the selected product offers automatic margin additions, check that setting too. A description based only on the original amount can become misleading once the setup changes. Other positions and the selected account mode also matter when assessing shared collateral.
Neither choice removes liquidation risk. Binance distinguishes Mark Price from Last Price, and uses Mark Price for liquidation calculations. A chart displaying the latest trade therefore does not explain every liquidation event. Compare like with like: contract, price type, margin mode and time.
Read the fee by the event that created it
Execution: trading commission is associated with a filled trade. Look at maker/taker treatment, the product and the actual fee asset.
Funding: a perpetual position can pay or receive funding at settlement. Check that contract’s rate and timetable instead of assuming every contract uses the same interval.
Liquidation: a forced liquidation can produce a separate clearance charge. It belongs to a different event from an ordinary entry or exit.
BNB fee payment is another setting with its own conditions. The Futures fee FAQ describes sufficient BNB in the relevant Futures wallet and fallback to USDT when it is insufficient. That does not establish a referral benefit. Compare the current program, product and actual debit asset before combining any percentages.
For a simple reconciliation, group a position’s records by time and event. “What was this charge for?” comes before “Was the amount correct?” A funding debit beside a trading commission is not automatically a duplicate trading charge. Keep private account records private if you need support to explain a discrepancy.
A limit order is a price instruction, not a fee promise
A market order seeks available liquidity; a limit order sets a price condition. A limit order that immediately matches an existing order can be a taker. The word “limit” on its own does not prove that a maker fee will apply.
For example, suppose the lowest available sell price is 100. A buy limit at 101 may match that existing liquidity immediately. It need not sit on the order book waiting for a later seller. This is a hypothetical order-book example, not a quote or a suggestion to enter an order.
The same habit helps with stop-related orders: read the trigger condition separately from what is submitted after the trigger. A trigger price and the eventual fill price answer different questions. Check the selected order’s terms rather than treating a stop label as a guaranteed exit price.
Referral terms: read the benefit from the right side
A referral program can describe both what the inviter earns and what the invited user receives. Those are not interchangeable. If a headline points to an affiliate commission table, that table alone does not tell you your trading discount.
When comparing an offer, keep its product, qualifying account conditions and expiry together. A fee voucher is also different from cash available to withdraw. The reliable comparison is between the terms shown for your account, not two large numbers taken from unrelated promotions. Our referral-code guide explains the checks before and after signup.
Questions that come up before the first position
Can I use Futures as soon as I create an account? Registration is only one stage. Read the identity, regional and product requirements in your account and the Futures opening process.
Can I calculate liquidation by dividing 100% by leverage? That shortcut leaves out maintenance margin and other conditions. The simplified exposure example above explains price sensitivity, not a liquidation threshold.
Why does the balance change when I have not opened another trade? Start with the transaction record and the open position. A funding entry, a fee or a margin change needs its own explanation. Do not infer the cause from the balance total alone.
What should I finish before depositing? Understand the account’s security and recovery options, confirm the service you can use, and learn the asset and network requirements for any transfer you independently choose to make. A signup decision does not require an immediate deposit.
Futures can produce substantial losses. The most useful preparation is being able to explain your exposure, collateral and costs in ordinary numbers before deciding whether to take any risk.
Sources and revision note
Reviewed 7 November 2026. This revision replaces older promotional rate examples and a dated fee screenshot with worked examples of exposure and trading costs. Examples are hypothetical, not personal trade records.
Website registration · Futures account requirements · Leverage and margin tiers · Futures fees · Liquidation and Mark Price · Futures margin modes · Contract parameters · Referral Pro terms
This content is not intended for users in countries restricted under the Binance Affiliate Program. Check the current restricted-countries guide for its scope.
The number beside “leverage” is easy to notice. The more useful number is the size of the position it creates. Put 100 USDT behind a hypothetical 500 USDT position, and a small price move is already being measured against five times the initial margin.
That is where this Binance Futures guide starts: with the amounts you are exposed to, then the account requirements, contract types and costs that can change the result. If you arrived while looking for a Binance signup guide, the account section below separates registration from access to derivatives.
Start with the contract, not just the coin name
Buying BTC on Spot and opening a BTC futures position are different transactions. A futures position gives exposure through a contract; it is not the same as owning BTC that you can withdraw. A long position benefits from a rise in the relevant price, while a short benefits from a fall, before costs. Either can lose money.
Read the full contract name. USDⓈ-M contracts commonly use a stablecoin such as USDT or USDC for margin and settlement, while COIN-M contracts use cryptocurrency. The collateral matters: when collateral is itself a volatile coin, its value in your preferred reporting currency can change too. Comparing two positions by the ticker alone misses that distinction.
Then establish whether you are looking at a perpetual contract or a dated contract. Funding is part of the perpetual-contract discussion; it should not be pasted indiscriminately onto every product called “futures.” Use the current specification for the actual contract.
Account setup: what registration does and does not complete
For a new personal account, choose a supported signup method on Binance, complete the requested contact verification and finish the account-creation steps. The website guide describes checking the referral field and its “Linked” confirmation when a referral is used. Check the recorded result before moving on; an article showing a code cannot prove what was saved on your account.
Create a Binance account — signup page
Affiliate link: this account may earn a commission if you register through it under the applicable program. Referral code: DE20OFFVIP. Using it is optional; check any benefit and eligibility in your own signup screen.
This is a general Binance registration link. It is not a promise that the code works in a separate Futures-referral field or that derivatives are available where you live. If you already have a Binance account, use that account and its recovery options.
Binance’s Futures opening guide describes a separate account-opening step, identity verification before trading, and a service agreement with risk acknowledgment. Use your real residence and experience information. A translated page or an accessible menu does not establish eligibility. Once logged in, read the terms and restrictions that apply to the account before deciding whether the product suits you.
Margin and leverage: a small example makes the difference clear
Imagine a linear contract with 500 USDT of exposure and 100 USDT of initial margin. That is a simplified 5x relationship. If the price moves 1% against the position, the price effect is approximately 5 USDT: 500 × 0.01. Relative to the initial margin, that is 5%, not 1%.
For clarity, this example leaves out fees, funding, additional margin and changing account conditions. It shows price sensitivity; it does not calculate a liquidation price.
A leverage setting describes one part of the setup. Maintenance margin is another: a position must continue to meet the applicable requirement. The permitted leverage and margin tier depend on the contract and position size, and Binance can revise those tiers. This is why “the platform offers X leverage” is a poor substitute for reading the selected contract’s current parameters.
A useful paper exercise is to write down three separate figures: position notional, initial margin and the loss from a small adverse move. If the third figure surprises you, the exposure is not yet clear enough. There is no need to fund a position to do this exercise.
Cross or isolated: follow the collateral
Cross margin draws on eligible collateral within the relevant cross-margin system. Isolated margin allocates collateral to a particular position. The practical question is where additional losses can draw their support from, not which label sounds safer.
When reviewing a position, note the margin mode alongside the collateral amount. Check whether extra margin has been added. If the selected product offers automatic margin additions, check that setting too. A description based only on the original amount can become misleading once the setup changes. Other positions and the selected account mode also matter when assessing shared collateral.
Neither choice removes liquidation risk. Binance distinguishes Mark Price from Last Price, and uses Mark Price for liquidation calculations. A chart displaying the latest trade therefore does not explain every liquidation event. Compare like with like: contract, price type, margin mode and time.
Read the fee by the event that created it
Execution: trading commission is associated with a filled trade. Look at maker/taker treatment, the product and the actual fee asset.
Funding: a perpetual position can pay or receive funding at settlement. Check that contract’s rate and timetable instead of assuming every contract uses the same interval.
Liquidation: a forced liquidation can produce a separate clearance charge. It belongs to a different event from an ordinary entry or exit.
BNB fee payment is another setting with its own conditions. The Futures fee FAQ describes sufficient BNB in the relevant Futures wallet and fallback to USDT when it is insufficient. That does not establish a referral benefit. Compare the current program, product and actual debit asset before combining any percentages.
For a simple reconciliation, group a position’s records by time and event. “What was this charge for?” comes before “Was the amount correct?” A funding debit beside a trading commission is not automatically a duplicate trading charge. Keep private account records private if you need support to explain a discrepancy.
A limit order is a price instruction, not a fee promise
A market order seeks available liquidity; a limit order sets a price condition. A limit order that immediately matches an existing order can be a taker. The word “limit” on its own does not prove that a maker fee will apply.
For example, suppose the lowest available sell price is 100. A buy limit at 101 may match that existing liquidity immediately. It need not sit on the order book waiting for a later seller. This is a hypothetical order-book example, not a quote or a suggestion to enter an order.
The same habit helps with stop-related orders: read the trigger condition separately from what is submitted after the trigger. A trigger price and the eventual fill price answer different questions. Check the selected order’s terms rather than treating a stop label as a guaranteed exit price.
Referral terms: read the benefit from the right side
A referral program can describe both what the inviter earns and what the invited user receives. Those are not interchangeable. If a headline points to an affiliate commission table, that table alone does not tell you your trading discount.
When comparing an offer, keep its product, qualifying account conditions and expiry together. A fee voucher is also different from cash available to withdraw. The reliable comparison is between the terms shown for your account, not two large numbers taken from unrelated promotions. Our referral-code guide explains the checks before and after signup.
Questions that come up before the first position
Can I use Futures as soon as I create an account? Registration is only one stage. Read the identity, regional and product requirements in your account and the Futures opening process.
Can I calculate liquidation by dividing 100% by leverage? That shortcut leaves out maintenance margin and other conditions. The simplified exposure example above explains price sensitivity, not a liquidation threshold.
Why does the balance change when I have not opened another trade? Start with the transaction record and the open position. A funding entry, a fee or a margin change needs its own explanation. Do not infer the cause from the balance total alone.
What should I finish before depositing? Understand the account’s security and recovery options, confirm the service you can use, and learn the asset and network requirements for any transfer you independently choose to make. A signup decision does not require an immediate deposit.
Futures can produce substantial losses. The most useful preparation is being able to explain your exposure, collateral and costs in ordinary numbers before deciding whether to take any risk.
Sources and revision note
Reviewed 7 November 2026. This revision replaces older promotional rate examples and a dated fee screenshot with worked examples of exposure and trading costs. Examples are hypothetical, not personal trade records.
Website registration · Futures account requirements · Leverage and margin tiers · Futures fees · Liquidation and Mark Price · Futures margin modes · Contract parameters · Referral Pro terms
127
·
--
$ETH
ETH сейчас торгуется около $2,460, демонстрируя краткосрочное восстановление после внутридневного снижения.
Если ETH успешно пробьёт основные уровни сопротивления:
$2,500 → $2,600 → $2,800 → $3,000
это подтвердит более сильный бычий импульс и может открыть путь к $3,200–$3,500 на следующем этапе рыночного цикла. 🚀📈
С другой стороны, $2,400–$2,430 — важная зона поддержки. Удержание этой области сохранит бычью структуру восстановления.
Ключевой уровень пробоя: $2,600
Основная психологическая цель: $3,000 🔥
#Ethereum #ETH $ETH
$ETH
ETH сейчас торгуется около $2,460, демонстрируя краткосрочное восстановление после внутридневного снижения.
Если ETH успешно пробьёт основные уровни сопротивления:
$2,500 → $2,600 → $2,800 → $3,000
это подтвердит более сильный бычий импульс и может открыть путь к $3,200–$3,500 на следующем этапе рыночного цикла. 🚀📈
С другой стороны, $2,400–$2,430 — важная зона поддержки. Удержание этой области сохранит бычью структуру восстановления.
Ключевой уровень пробоя: $2,600
Основная психологическая цель: $3,000 🔥
#Ethereum #ETH $ETH
ETH сейчас торгуется около $2,460, демонстрируя краткосрочное восстановление после внутридневного снижения.
Если ETH успешно пробьёт основные уровни сопротивления:
$2,500 → $2,600 → $2,800 → $3,000
это подтвердит более сильный бычий импульс и может открыть путь к $3,200–$3,500 на следующем этапе рыночного цикла. 🚀📈
С другой стороны, $2,400–$2,430 — важная зона поддержки. Удержание этой области сохранит бычью структуру восстановления.
Ключевой уровень пробоя: $2,600
Основная психологическая цель: $3,000 🔥
#Ethereum #ETH $ETH
279
·
--
Анализ SOL/USDT на 1D:
Общий тренд: Сильный восходящий тренд, в настоящее время происходит краткосрочная коррекция/консолидация
Поддержка: $97.0 – $98.0 (ключевая поддержка на ближайшее время)
Сопротивление: $103.0 – $105.0, затем $109.0 – $110.0 MA
Сигналы: Цена остается выше основных скользящих средних, сохраняя среднесрочную структуру бычьей; краткосрочно
MA слегка разворачивается в сторону медвежьего движения
Объем: Высокий во время пробоя, но снижается во время отката — импульс остывает
Итог: В целом бычий, пока SOL удерживается выше $97. Пробой ниже $97 может спровоцировать более глубокую коррекцию в сторону $93–95.
Следите за пробоем выше $105 — возможен повторный тест уровня $110+ и продолжение бычьего движения.
#solana $SOL
Анализ SOL/USDT на 1D:
Общий тренд: Сильный восходящий тренд, в настоящее время происходит краткосрочная коррекция/консолидация
Поддержка: $97.0 – $98.0 (ключевая поддержка на ближайшее время)
Сопротивление: $103.0 – $105.0, затем $109.0 – $110.0 MA
Сигналы: Цена остается выше основных скользящих средних, сохраняя среднесрочную структуру бычьей; краткосрочно
MA слегка разворачивается в сторону медвежьего движения
Объем: Высокий во время пробоя, но снижается во время отката — импульс остывает
Итог: В целом бычий, пока SOL удерживается выше $97. Пробой ниже $97 может спровоцировать более глубокую коррекцию в сторону $93–95.
Следите за пробоем выше $105 — возможен повторный тест уровня $110+ и продолжение бычьего движения.
#solana $SOL
Общий тренд: Сильный восходящий тренд, в настоящее время происходит краткосрочная коррекция/консолидация
Поддержка: $97.0 – $98.0 (ключевая поддержка на ближайшее время)
Сопротивление: $103.0 – $105.0, затем $109.0 – $110.0 MA
Сигналы: Цена остается выше основных скользящих средних, сохраняя среднесрочную структуру бычьей; краткосрочно
MA слегка разворачивается в сторону медвежьего движения
Объем: Высокий во время пробоя, но снижается во время отката — импульс остывает
Итог: В целом бычий, пока SOL удерживается выше $97. Пробой ниже $97 может спровоцировать более глубокую коррекцию в сторону $93–95.
Следите за пробоем выше $105 — возможен повторный тест уровня $110+ и продолжение бычьего движения.
#solana $SOL
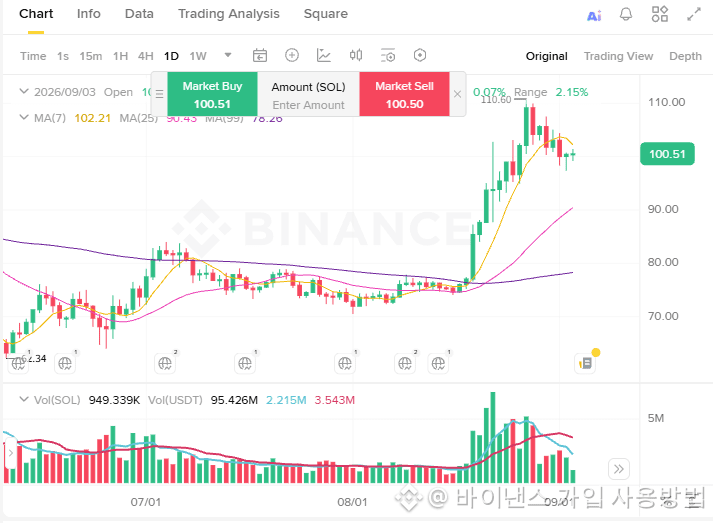
170
Войдите, чтобы посмотреть больше материала
Присоединяйтесь к пользователям криптовалют по всему миру на Binance Square
⚡️ Получайте новейшую и полезную информацию о криптоактивах.
💬 Нам доверяет крупнейшая в мире криптобиржа.
👍 Получите достоверные аналитические данные от верифицированных создателей контента.
Эл. почта/номер телефона
В тренде
fomcотслеживание
Просмотров: 120,196
588 обсуждают
Сейчас всё внимание приковано к решениям ФРС 🇺🇸
Рынок внимательно следит за сигналами от FOMC, ведь даже одно изменение в риторике представителей ФРС может повлиять на настроение инвесторов.
Особенно интересно наблюдать за реакцией BTC и ETH. Иногда рынок начинает двигаться ещё до официальных заявлений, а после публикации протокола волатильность может заметно вырасти.
$BTC
$ETH
Я бы сейчас не торопился с выводами. Лучше следить за новостями, объёмами и реакцией цены, чем пытаться угадать направление заранее.
А вы как думаете, чего сейчас больше ждёт рынок — снижения ставки или сохранения текущей политики?
#fomcотслеживание #ПротоколFOMC
Saymontop20
·Лайков: 0
·Просмотров: 46
ПротоколFOMC
Просмотров: 144,995
328 обсуждают
USPPIMissMayEaseBTCPressure
Просмотров: 103,956
1,296 обсуждают