

CryptoBellaN
4.6k منشورات

CryptoBellaN
إبلاغ
حظر المُستخدم
📊 Crypto Trader | Technical Analysis
📉 Short-Term Setups & Market Momentum
🎯 Entries • Targets • Risk Management
DYOR | No Financial Advice
مُتداول مُتكرر
9.3 أشهر
44 تتابع
16.4K+ المتابعون
13.5K+ إعجاب
منشورات
الكل
اقتباسات
مقاطع فيديو
Live
PINNED
·
--
⚡ إشعارات مجانية — احصل عليها قبل الزحمة[join fast guys](https://app.binance.com/uni-qr/JKnBG4ki)
🚨 تنبيهات فورية. بدون انتظار.
📲 الإشارات تصل إلى غرفة الدردشة أولاً — بما في ذلك Entry • TP • SL • إدارة الصفقة.
🔥 انضم مجاناً وابقَ متقدماً على كل تحديث.
🎯 تاجر بذكاء. تحلَّ بالانضباط. تحكّم في المخاطر.
$BANK , $DEXE and $LIGHT
{future}(LIGHTUSDT)
{future}(DEXEUSDT)
{future}(BANKUSDT)
⚡ إشعارات مجانية — احصل عليها قبل الزحمةjoin fast guys
🚨 تنبيهات فورية. بدون انتظار.
📲 الإشارات تصل إلى غرفة الدردشة أولاً — بما في ذلك Entry • TP • SL • إدارة الصفقة.
🔥 انضم مجاناً وابقَ متقدماً على كل تحديث.
🎯 تاجر بذكاء. تحلَّ بالانضباط. تحكّم في المخاطر.
$BANK , $DEXE and $LIGHT
🚨 تنبيهات فورية. بدون انتظار.
📲 الإشارات تصل إلى غرفة الدردشة أولاً — بما في ذلك Entry • TP • SL • إدارة الصفقة.
🔥 انضم مجاناً وابقَ متقدماً على كل تحديث.
🎯 تاجر بذكاء. تحلَّ بالانضباط. تحكّم في المخاطر.
$BANK , $DEXE and $LIGHT
4
1
4
44
PINNED
·
--
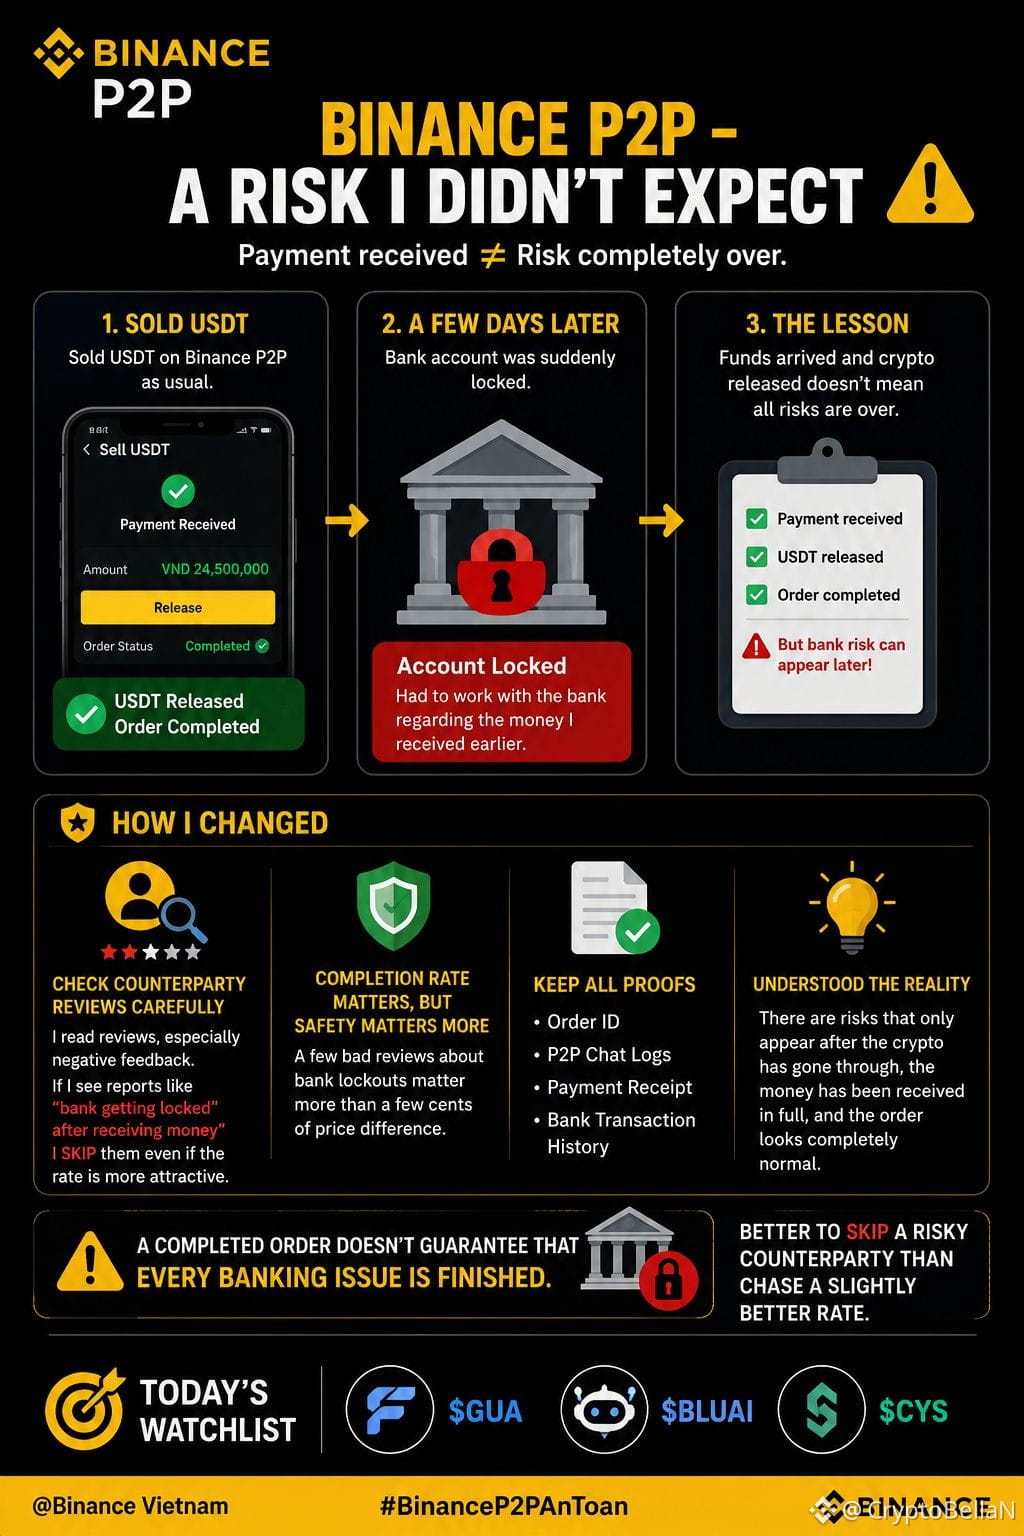
⚠️ بينانس P2P — مخاطرة لم أتوقعها
قمت ببيع USDT، وتحققت من اكتمال الدفع، ثم قمت بتحرير العملات المشفرة، وتم تعليم الطلب على أنه مكتمل.
بعد بضعة أيام، تم قفل حسابي البنكي بشكل غير متوقع. 🏦
علّمتني هذه التجربة شيئًا واحدًا:
✅ استلام الدفع ≠ زوال المخاطر بالكامل.
الآن أتحقق من تقييمات الطرف الآخر قبل التداول، خصوصًا الملاحظات السلبية المتعلقة بتجميد البنك أو المدفوعات المتنازع عليها.
📌 كما أنني أحتفظ بـ:
• رقم الطلب
• محادثة P2P
• إيصال الدفع
• سجل معاملات البنك
إن الطلب المكتمل لا يضمن أن كل مشكلة بنكية قد انتهت.
🎯 من الأفضل أن تتجنب طرفًا خطِرًا بدلًا من مطاردة سعر أفضل قليلًا.
👀 شاهد: $GUA • $BLUAI • $CYS
{future}(CYSUSDT)
#BinanceP2PAnToan
⚠️ بينانس P2P — مخاطرة لم أتوقعها
قمت ببيع USDT، وتحققت من اكتمال الدفع، ثم قمت بتحرير العملات المشفرة، وتم تعليم الطلب على أنه مكتمل.
بعد بضعة أيام، تم قفل حسابي البنكي بشكل غير متوقع. 🏦
علّمتني هذه التجربة شيئًا واحدًا:
✅ استلام الدفع ≠ زوال المخاطر بالكامل.
الآن أتحقق من تقييمات الطرف الآخر قبل التداول، خصوصًا الملاحظات السلبية المتعلقة بتجميد البنك أو المدفوعات المتنازع عليها.
📌 كما أنني أحتفظ بـ:
• رقم الطلب
• محادثة P2P
• إيصال الدفع
• سجل معاملات البنك
إن الطلب المكتمل لا يضمن أن كل مشكلة بنكية قد انتهت.
🎯 من الأفضل أن تتجنب طرفًا خطِرًا بدلًا من مطاردة سعر أفضل قليلًا.
👀 شاهد: $GUA • $BLUAI • $CYS
#BinanceP2PAnToan
قمت ببيع USDT، وتحققت من اكتمال الدفع، ثم قمت بتحرير العملات المشفرة، وتم تعليم الطلب على أنه مكتمل.
بعد بضعة أيام، تم قفل حسابي البنكي بشكل غير متوقع. 🏦
علّمتني هذه التجربة شيئًا واحدًا:
✅ استلام الدفع ≠ زوال المخاطر بالكامل.
الآن أتحقق من تقييمات الطرف الآخر قبل التداول، خصوصًا الملاحظات السلبية المتعلقة بتجميد البنك أو المدفوعات المتنازع عليها.
📌 كما أنني أحتفظ بـ:
• رقم الطلب
• محادثة P2P
• إيصال الدفع
• سجل معاملات البنك
إن الطلب المكتمل لا يضمن أن كل مشكلة بنكية قد انتهت.
🎯 من الأفضل أن تتجنب طرفًا خطِرًا بدلًا من مطاردة سعر أفضل قليلًا.
👀 شاهد: $GUA • $BLUAI • $CYS
#BinanceP2PAnToan
1
2
238
·
--
صاعد
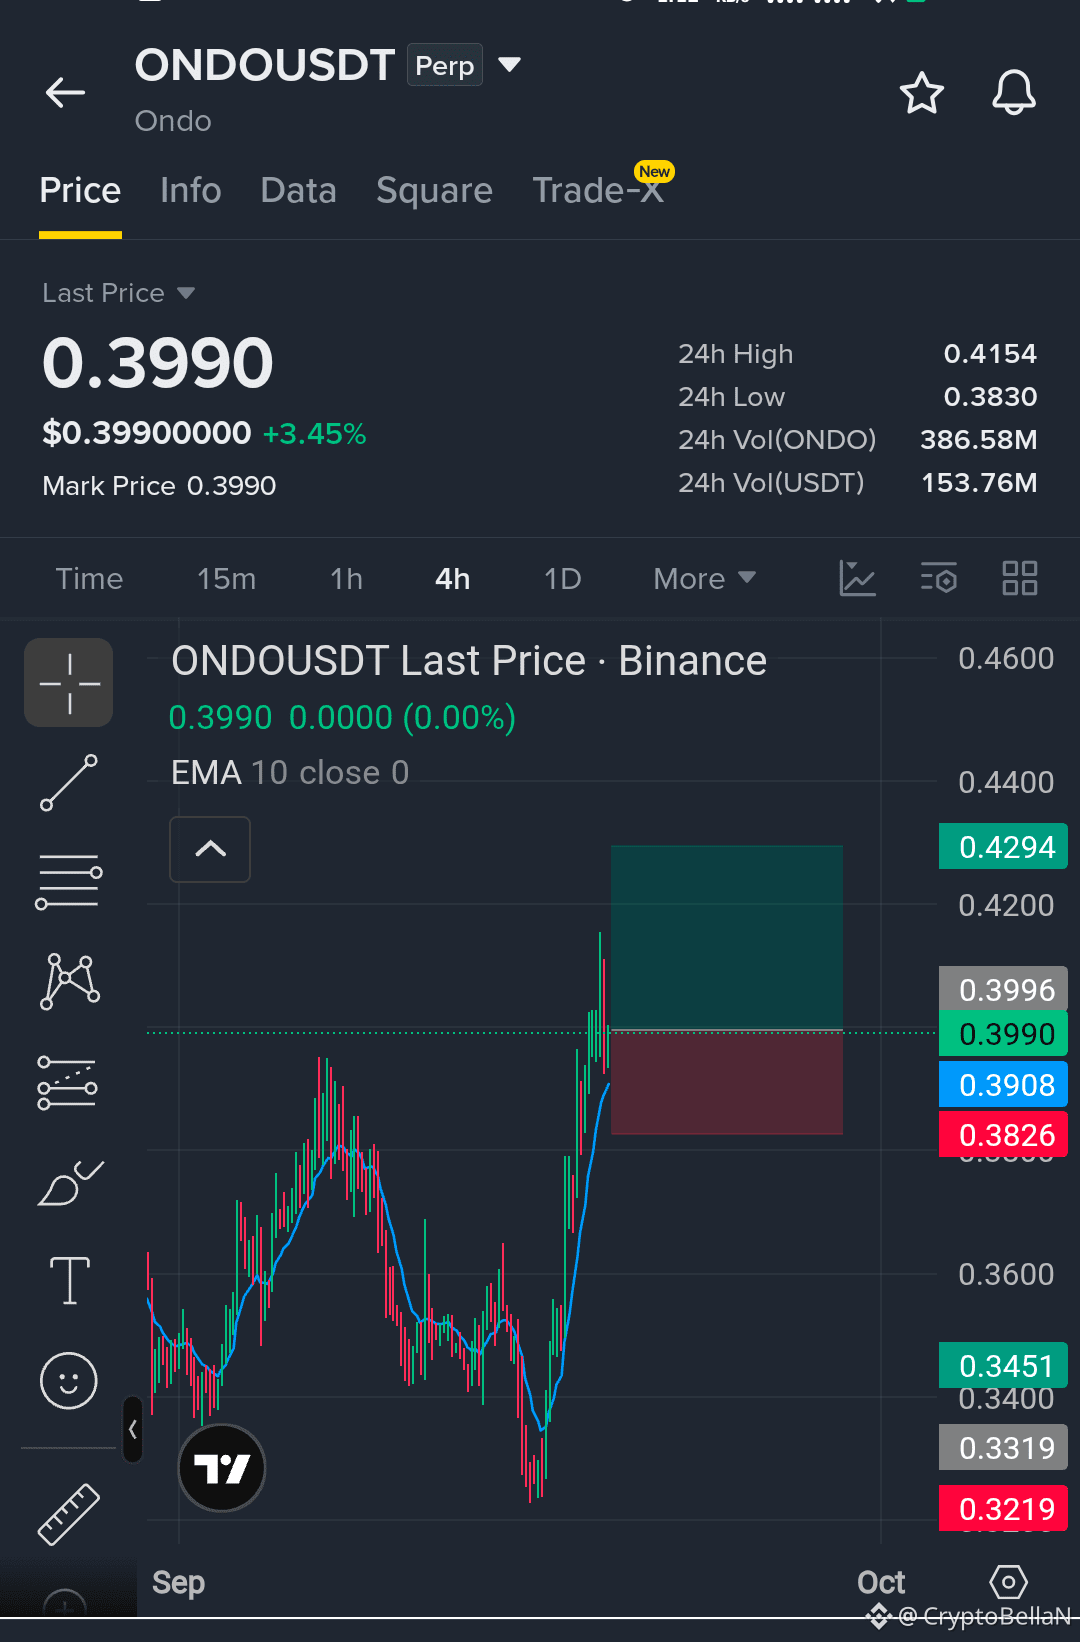
🚀 $ONDO اشترِ إعداد
📍 الدخول: 0.394 – 0.397
🎯 الهدف 1: 0.4141
🎯 الهدف 2: 0.4290
🛑 وقف الخسارة: 0.3822
شراء هبوط #ONDO قرب دعم ماكرو، بهدف العودة إلى القمم المحلية.
⚠️ يبقى حجم التداول منخفضًا وسالبًا في تدفق المتداولين (taker delta)، ما قد يؤخر استمرار الصعود. انتظر تأكيدًا وادِر المخاطر بعناية.
❌ لا تقم بالشراء بكل رأس المال. استخدم حجم مركز يتناسب مع حسابك وقدرتك على تحمل المخاطر.
👀 متابعة $AR R و $SOL طوال اليوم.
{future}(ONDOUSDT)
{future}(ARUSDT)
{future}(SOLUSDT)
🚀 $ONDO اشترِ إعداد
📍 الدخول: 0.394 – 0.397
🎯 الهدف 1: 0.4141
🎯 الهدف 2: 0.4290
🛑 وقف الخسارة: 0.3822
شراء هبوط #ONDO قرب دعم ماكرو، بهدف العودة إلى القمم المحلية.
⚠️ يبقى حجم التداول منخفضًا وسالبًا في تدفق المتداولين (taker delta)، ما قد يؤخر استمرار الصعود. انتظر تأكيدًا وادِر المخاطر بعناية.
❌ لا تقم بالشراء بكل رأس المال. استخدم حجم مركز يتناسب مع حسابك وقدرتك على تحمل المخاطر.
👀 متابعة $AR R و $SOL طوال اليوم.
📍 الدخول: 0.394 – 0.397
🎯 الهدف 1: 0.4141
🎯 الهدف 2: 0.4290
🛑 وقف الخسارة: 0.3822
شراء هبوط #ONDO قرب دعم ماكرو، بهدف العودة إلى القمم المحلية.
⚠️ يبقى حجم التداول منخفضًا وسالبًا في تدفق المتداولين (taker delta)، ما قد يؤخر استمرار الصعود. انتظر تأكيدًا وادِر المخاطر بعناية.
❌ لا تقم بالشراء بكل رأس المال. استخدم حجم مركز يتناسب مع حسابك وقدرتك على تحمل المخاطر.
👀 متابعة $AR R و $SOL طوال اليوم.
1
511
·
--
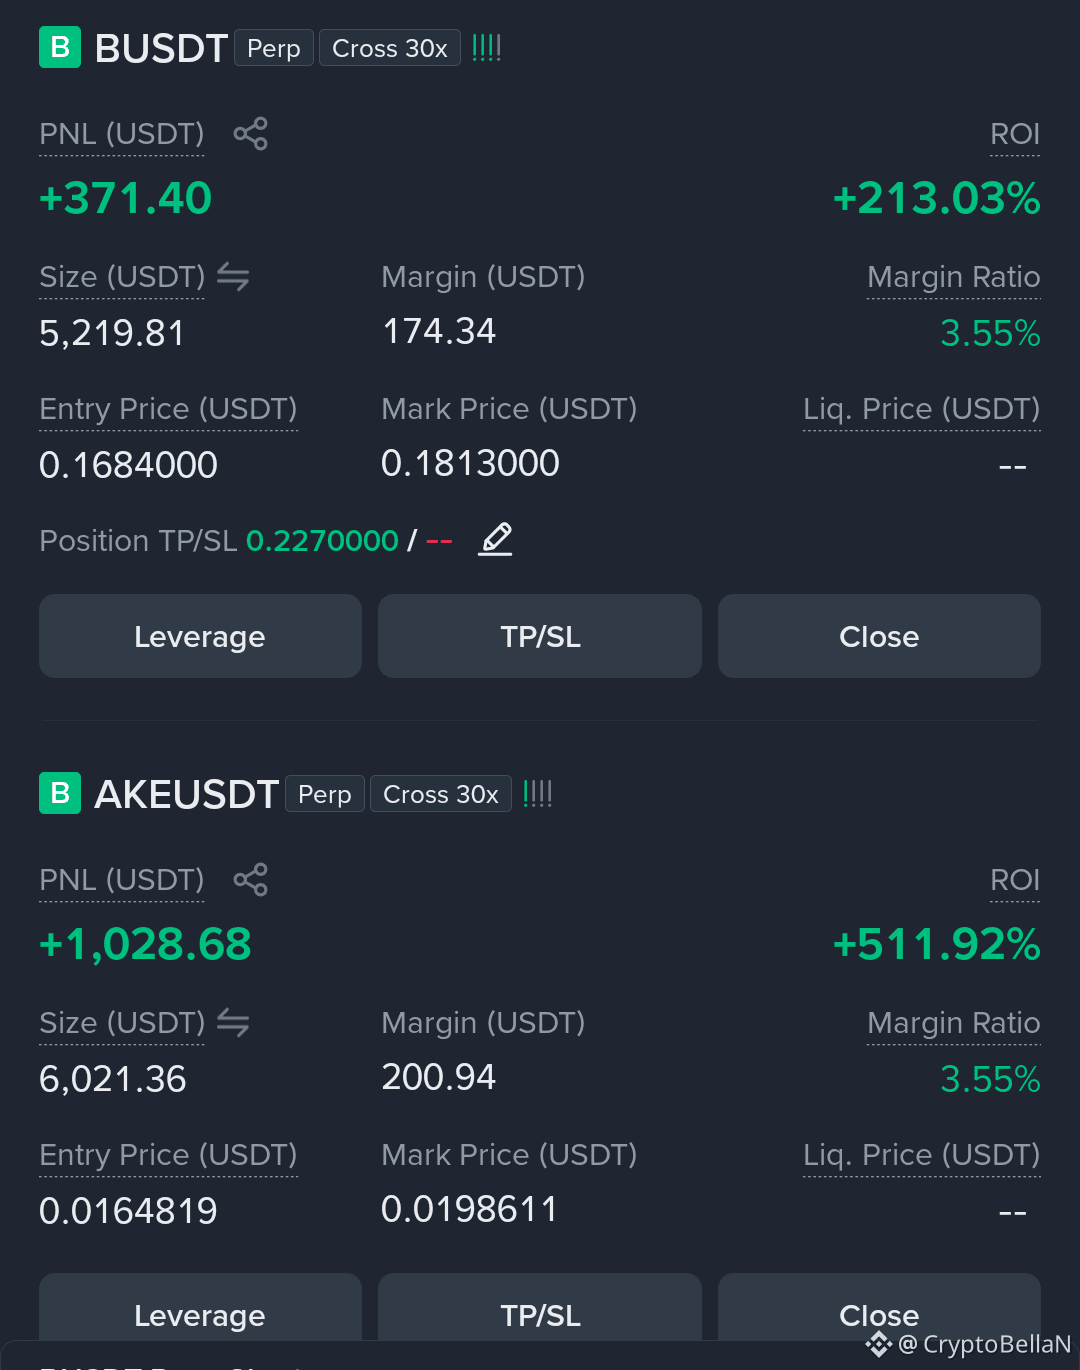
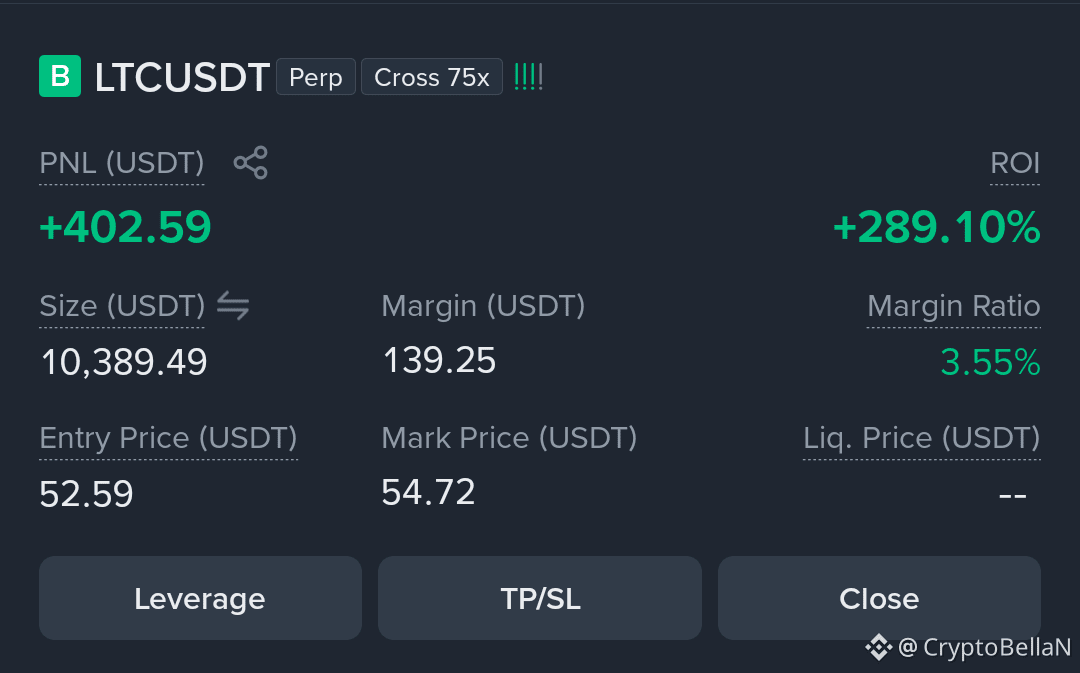
$AKE ، $B و $LTC يسيرون بشكل ممتاز يا شباب 🔥
فقط تحلّوا بالصبر وانتظروا تحقيق الهدف الكامل 🎯
💰 إجمالي الربح: $1,796
استمروا في الاحتفاظ ودعوا الصفقات تأخذ مجراها 🚀
{future}(BUSDT)
{future}(LTCUSDT)
{future}(AKEUSDT)
$AKE ، $B و $LTC يسيرون بشكل ممتاز يا شباب 🔥
فقط تحلّوا بالصبر وانتظروا تحقيق الهدف الكامل 🎯
💰 إجمالي الربح: $1,796
استمروا في الاحتفاظ ودعوا الصفقات تأخذ مجراها 🚀
فقط تحلّوا بالصبر وانتظروا تحقيق الهدف الكامل 🎯
💰 إجمالي الربح: $1,796
استمروا في الاحتفاظ ودعوا الصفقات تأخذ مجراها 🚀
2
1
722
·
--
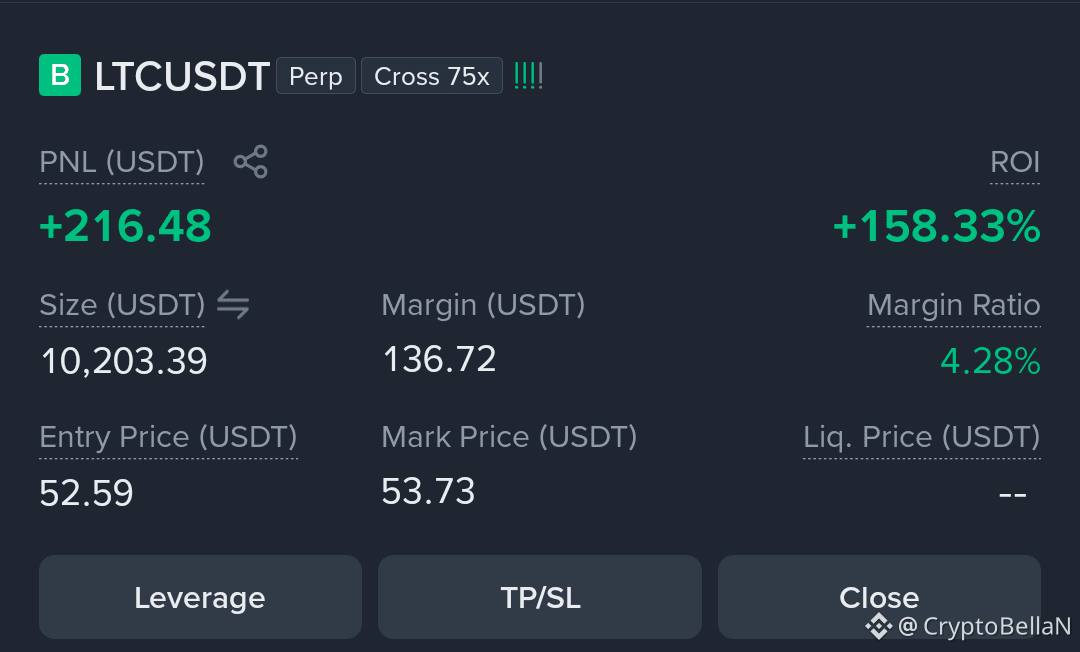
🚀 $LTC يتحرك بشكل رائع يا شباب!
فقط تمسك به ودع الصفقة تستمر. 💰🔥
الإعدادات التالية قيد التحميل 👀
🔴 $BANK
🟢 $UAI
ابقوا على المتابعة يا شباب! 🚀
{future}(LTCUSDT)
{future}(BANKUSDT)
{future}(UAIUSDT)
🚀 $LTC يتحرك بشكل رائع يا شباب!
فقط تمسك به ودع الصفقة تستمر. 💰🔥
الإعدادات التالية قيد التحميل 👀
🔴 $BANK
🟢 $UAI
ابقوا على المتابعة يا شباب! 🚀
فقط تمسك به ودع الصفقة تستمر. 💰🔥
الإعدادات التالية قيد التحميل 👀
🔴 $BANK
🟢 $UAI
ابقوا على المتابعة يا شباب! 🚀
CryptoBellaN
·
--
صاعد🚀 شراء سريع طويل على $LTC
منطقة الدخول: 52.14–52.45
🎯 الهدف 1: 54.80
🎯 الهدف 2: 56.80
🛑 الإبطال: 50.58
#LTC يواصل الارتفاع عند القمم، والثيران يرفضون التخلي عنه. الزخم لا يزال قويًا.
⚠️ كن حذرًا: مؤشر RSI في حالة تشبع شرائي شديد، لذا قد يحدث سحب سيولة محلي حاد قبل الاستمرار.
لا تدخل بكل رأس مالك أبدًا، يا جماعة. استخدم حجم صفقة يناسب حسابك ومستوى المخاطرة لديك.
يبدو هذا جاهزًا 👇👇👇
متابعة $ETH و $BULLA اليوم.
منطقة الدخول: 52.14–52.45
🎯 الهدف 1: 54.80
🎯 الهدف 2: 56.80
🛑 الإبطال: 50.58
#LTC يواصل الارتفاع عند القمم، والثيران يرفضون التخلي عنه. الزخم لا يزال قويًا.
⚠️ كن حذرًا: مؤشر RSI في حالة تشبع شرائي شديد، لذا قد يحدث سحب سيولة محلي حاد قبل الاستمرار.
لا تدخل بكل رأس مالك أبدًا، يا جماعة. استخدم حجم صفقة يناسب حسابك ومستوى المخاطرة لديك.
يبدو هذا جاهزًا 👇👇👇
متابعة $ETH و $BULLA اليوم.
1
2
592
·
--
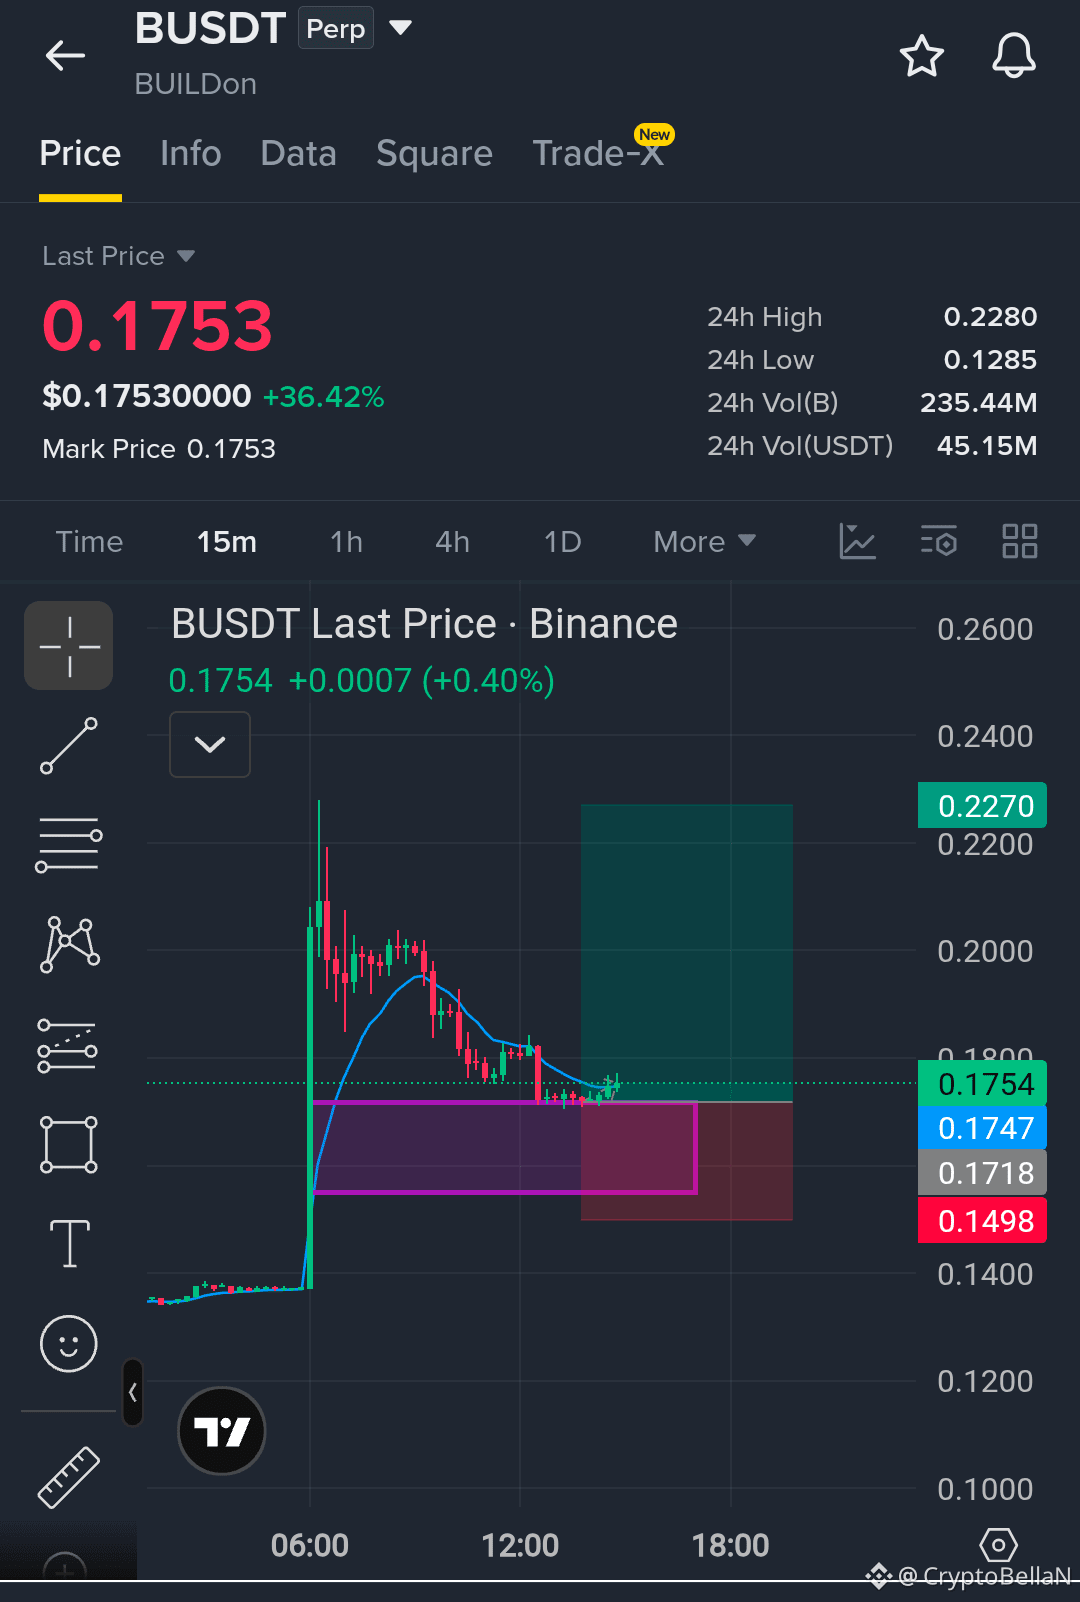
صاعد
🚀 $B الأشخاص الطوال
الدخول: الآن
🎯 TP: 0.2270
🛑 SL: 0.1498
الإعداد نشط. تحلَّ بالصبر وأدر مخاطرَك—لا تُخاطر بكل شيء أبدًا.
قيد المراقبة: $BULLA و $LIGHT 👀
Long #B 👇🔥
{future}(BULLAUSDT)
{future}(LIGHTUSDT)
{future}(BUSDT)
🚀 $B الأشخاص الطوال
الدخول: الآن
🎯 TP: 0.2270
🛑 SL: 0.1498
الإعداد نشط. تحلَّ بالصبر وأدر مخاطرَك—لا تُخاطر بكل شيء أبدًا.
قيد المراقبة: $BULLA و $LIGHT 👀
Long #B 👇🔥
الدخول: الآن
🎯 TP: 0.2270
🛑 SL: 0.1498
الإعداد نشط. تحلَّ بالصبر وأدر مخاطرَك—لا تُخاطر بكل شيء أبدًا.
قيد المراقبة: $BULLA و $LIGHT 👀
Long #B 👇🔥
1
721
·
--
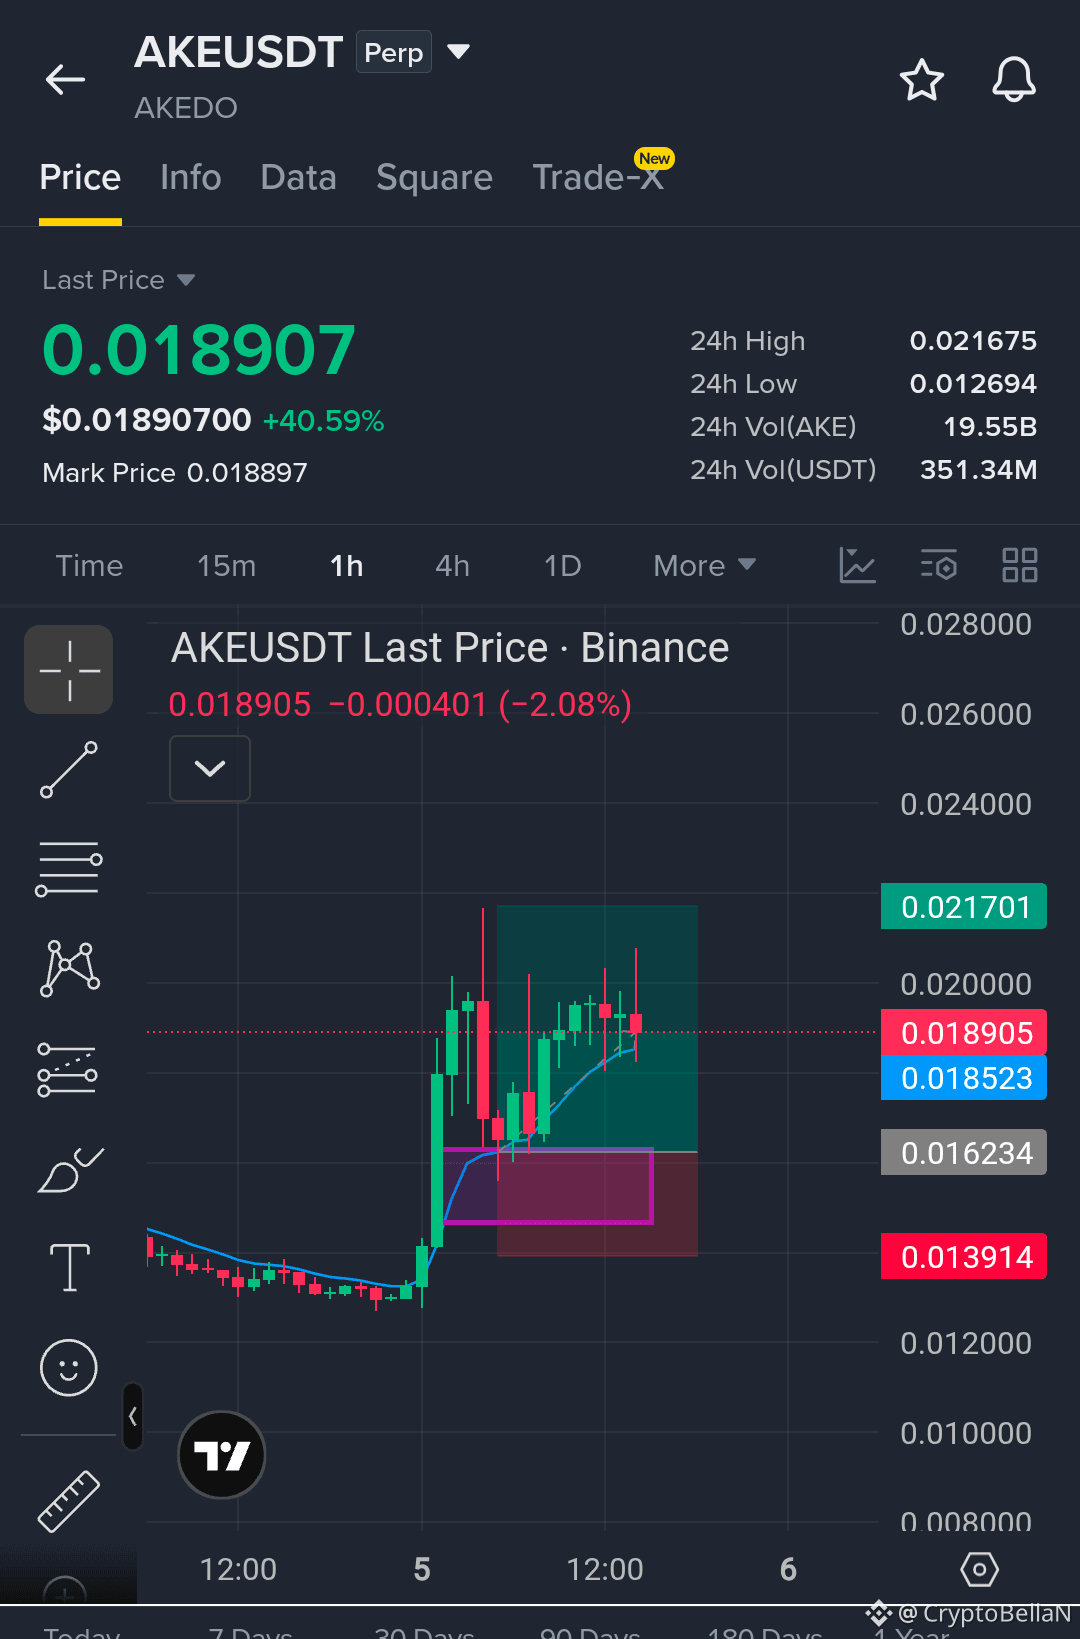
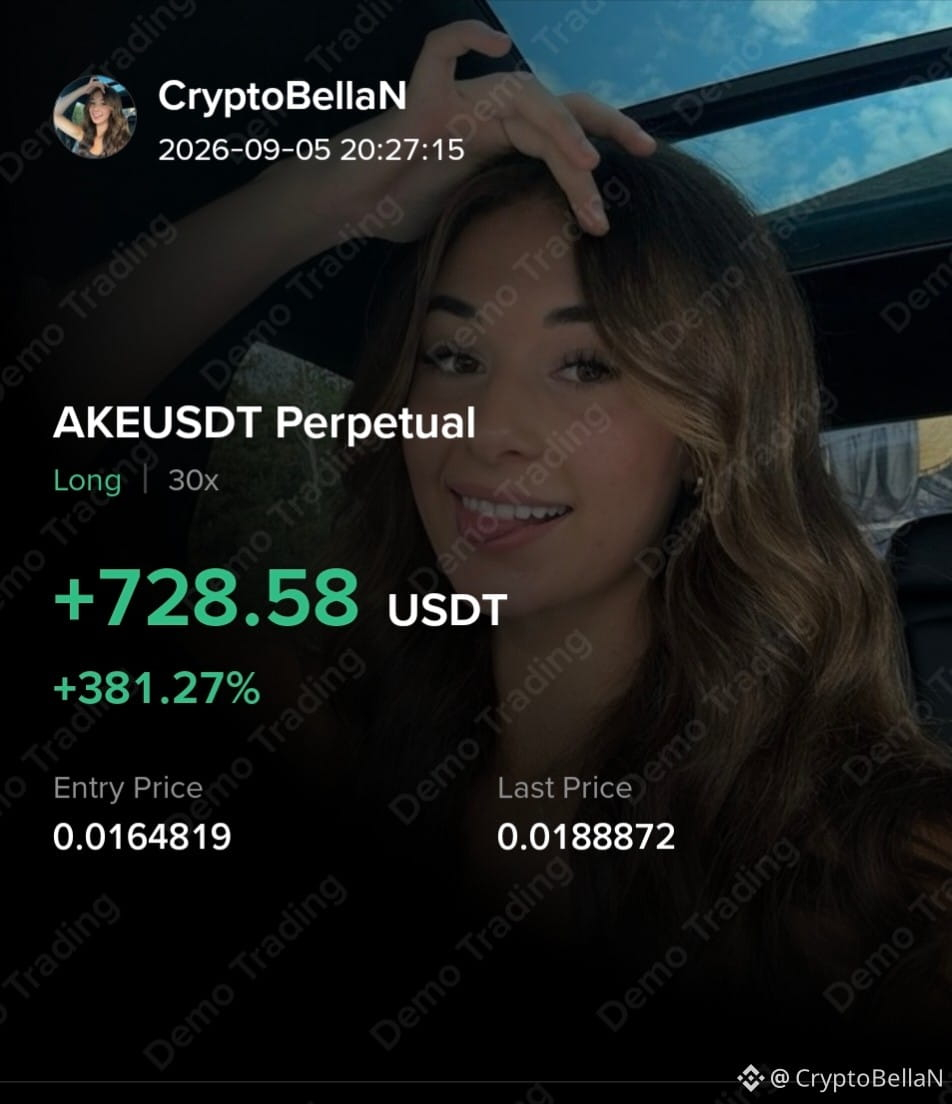
🚀 $AKE يسير بشكل جيد يا شباب!
📈 العائد على حقوق الملكية: +381%
💰 الربح: +$728
فقط تمسكوا به يا شباب. دعوا الصفقة تستمر وأديروا مخاطرَكم. 🔥
أتابع: $BULLA و $LIGHT 👀
{future}(AKEUSDT)
{future}(BULLAUSDT)
{future}(LIGHTUSDT)
🚀 $AKE يسير بشكل جيد يا شباب!
📈 العائد على حقوق الملكية: +381%
💰 الربح: +$728
فقط تمسكوا به يا شباب. دعوا الصفقة تستمر وأديروا مخاطرَكم. 🔥
أتابع: $BULLA و $LIGHT 👀
📈 العائد على حقوق الملكية: +381%
💰 الربح: +$728
فقط تمسكوا به يا شباب. دعوا الصفقة تستمر وأديروا مخاطرَكم. 🔥
أتابع: $BULLA و $LIGHT 👀
CryptoBellaN
·
--
صاعد🚀 $AKE رجال طوال
الدخول: الآن
🎯 TP: $0.0217
🛑 SL: $0.0139
يبدو إعداد الزخم مثيرًا للاهتمام هنا. أدر مخاطرَك وتجنب الدخول بكل أموالك.
راقب: $BULLA و $RIVER 👀
Long #AKE 👇
الدخول: الآن
🎯 TP: $0.0217
🛑 SL: $0.0139
يبدو إعداد الزخم مثيرًا للاهتمام هنا. أدر مخاطرَك وتجنب الدخول بكل أموالك.
راقب: $BULLA و $RIVER 👀
Long #AKE 👇
1
531
·
--
صاعد
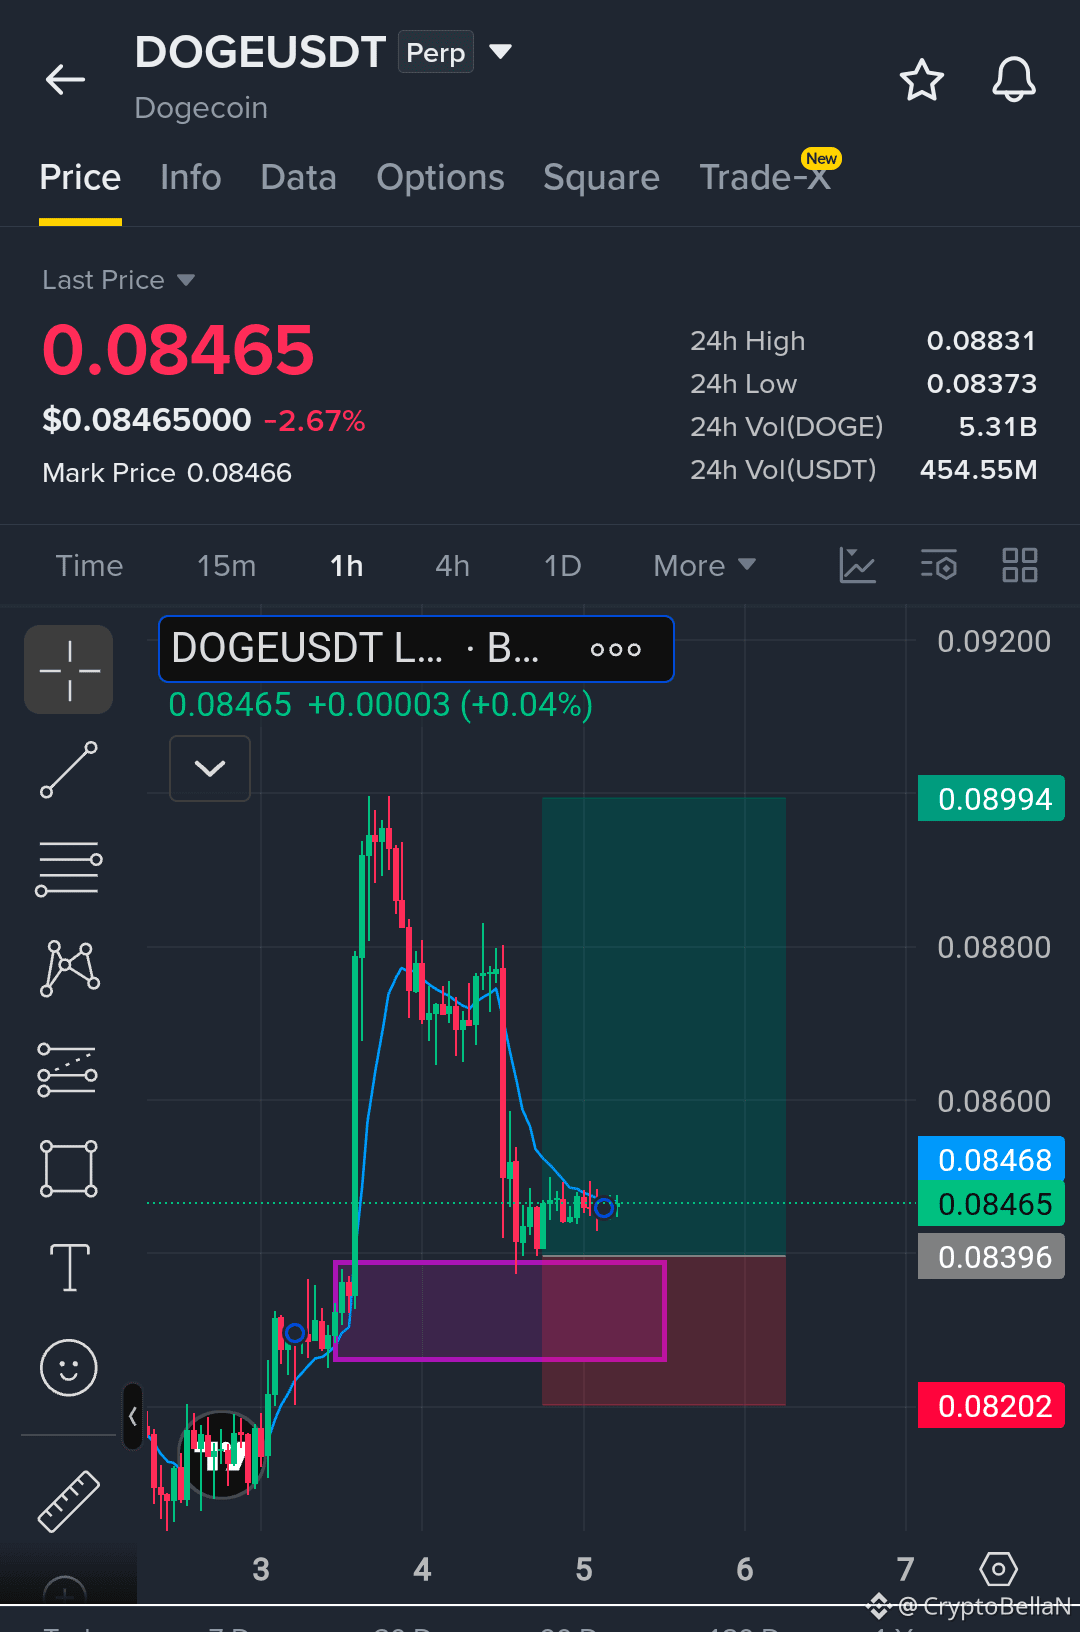
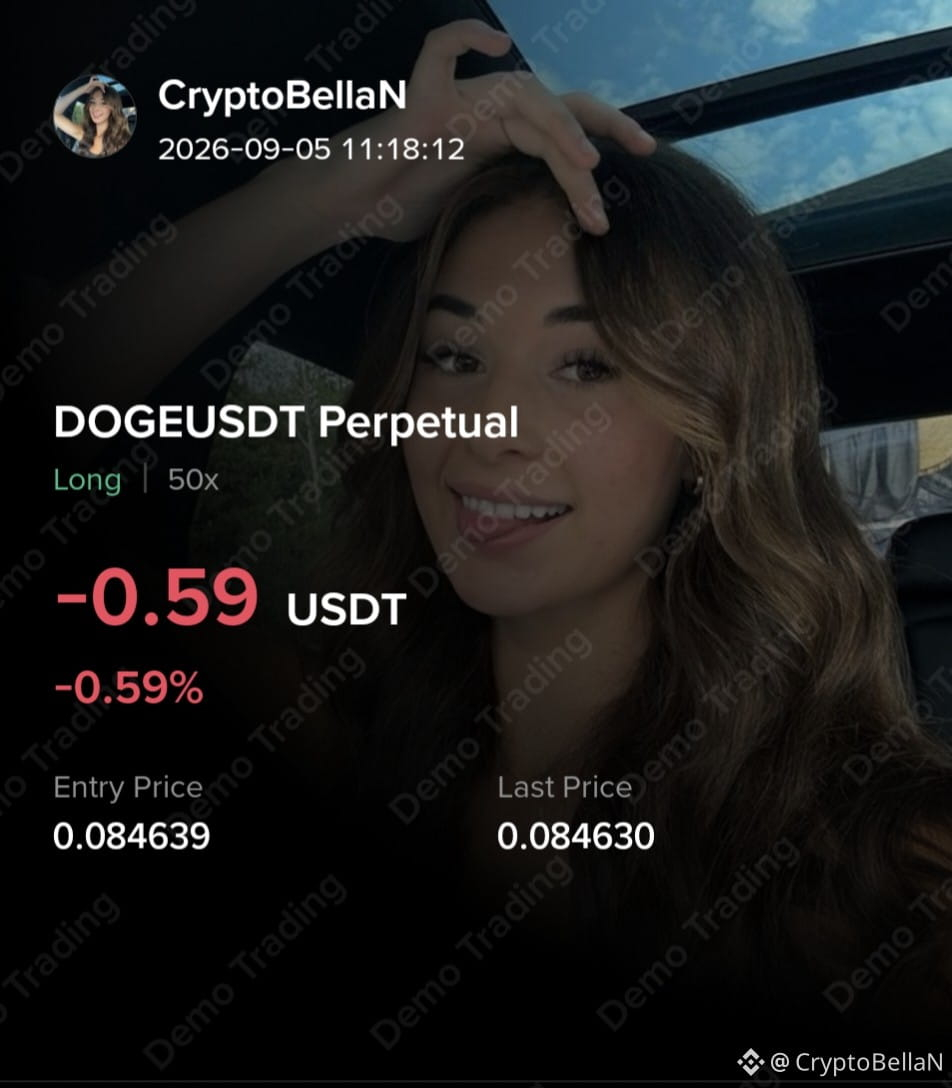
🚀 افتح مركز شراء على $DOGE
الدخول: الآن
🎯 جني الأرباح: $0.0899
🛑 وقف الخسارة: $0.08202
الإعداد جاهز. التزم بالانضباط وأدر مخاطرك.
🔴 بيع: $BANK
🟢 شراء: $BULLA
شراء #DOGE 👇🔥
{future}(DOGEUSDT)
{future}(BANKUSDT)
{future}(BULLAUSDT)
🚀 افتح مركز شراء على $DOGE
الدخول: الآن
🎯 جني الأرباح: $0.0899
🛑 وقف الخسارة: $0.08202
الإعداد جاهز. التزم بالانضباط وأدر مخاطرك.
🔴 بيع: $BANK
🟢 شراء: $BULLA
شراء #DOGE 👇🔥
الدخول: الآن
🎯 جني الأرباح: $0.0899
🛑 وقف الخسارة: $0.08202
الإعداد جاهز. التزم بالانضباط وأدر مخاطرك.
🔴 بيع: $BANK
🟢 شراء: $BULLA
شراء #DOGE 👇🔥
3
440
·
--
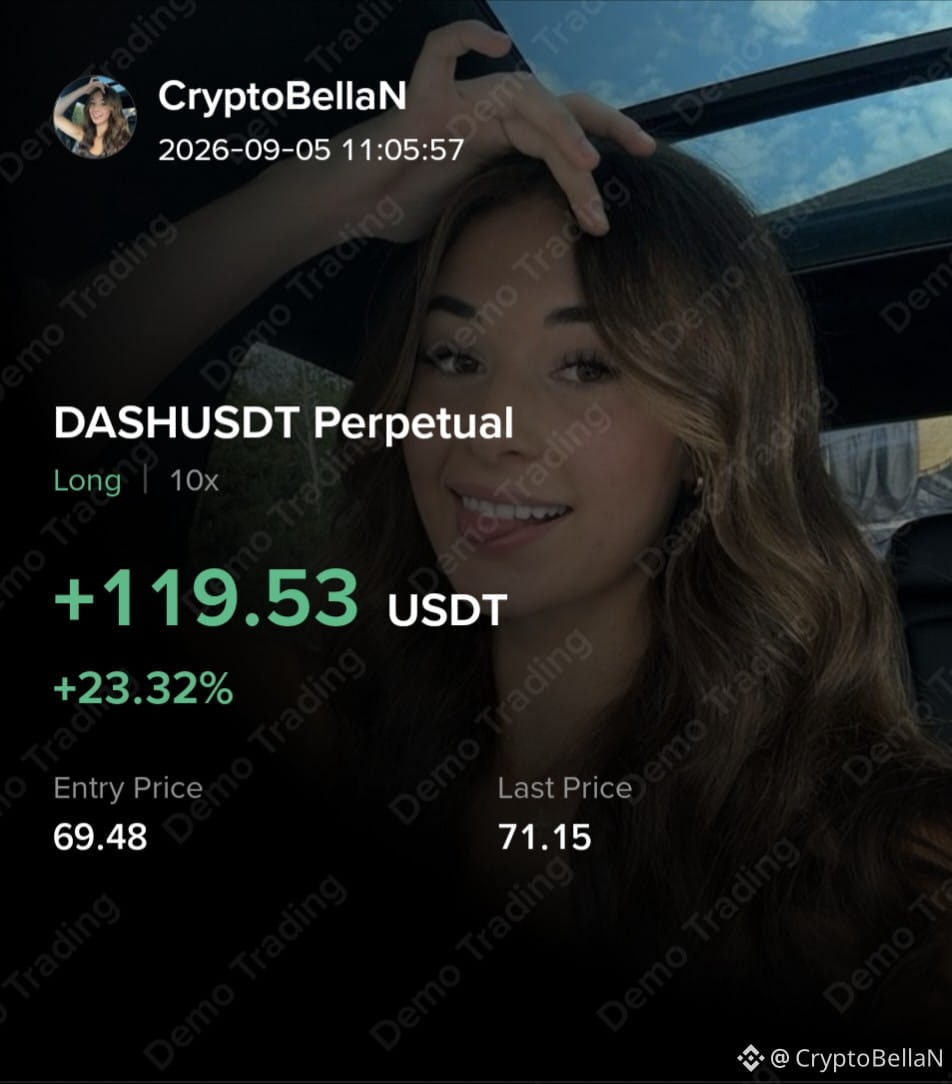
🚀 $DASH يتحرك بشكل جيد يا شباب
الربح: +$120 💰
فقط احتفظ واترك الصفقة تتطور. تحلَّ بالصبر وأدر المخاطرة.
نراقب حاليًا:
🔴 بيع $LIT
🟢 شراء $BULLA
لنواصل التحرك! 🔥
{future}(DASHUSDT)
{future}(LITUSDT)
{future}(BULLAUSDT)
🚀 $DASH يتحرك بشكل جيد يا شباب
الربح: +$120 💰
فقط احتفظ واترك الصفقة تتطور. تحلَّ بالصبر وأدر المخاطرة.
نراقب حاليًا:
🔴 بيع $LIT
🟢 شراء $BULLA
لنواصل التحرك! 🔥
الربح: +$120 💰
فقط احتفظ واترك الصفقة تتطور. تحلَّ بالصبر وأدر المخاطرة.
نراقب حاليًا:
🔴 بيع $LIT
🟢 شراء $BULLA
لنواصل التحرك! 🔥
CryptoBellaN
·
--
صاعد🚀 $DASH لا يزال قويًا — موجة FOMO طويلة كبيرة الجولة 2
إعداد الشراء لا يزال نشطًا 👇
الدخول: 66–70
جني الربح: 72–74
وقف الخسارة: 64
الزخم لا يزال قويًا. راقب منطقة الدخول وأدر المخاطر بعناية.
شراء $DASH 🔥
إعداد الشراء لا يزال نشطًا 👇
الدخول: 66–70
جني الربح: 72–74
وقف الخسارة: 64
الزخم لا يزال قويًا. راقب منطقة الدخول وأدر المخاطر بعناية.
شراء $DASH 🔥
2
497
·
--
صاعد
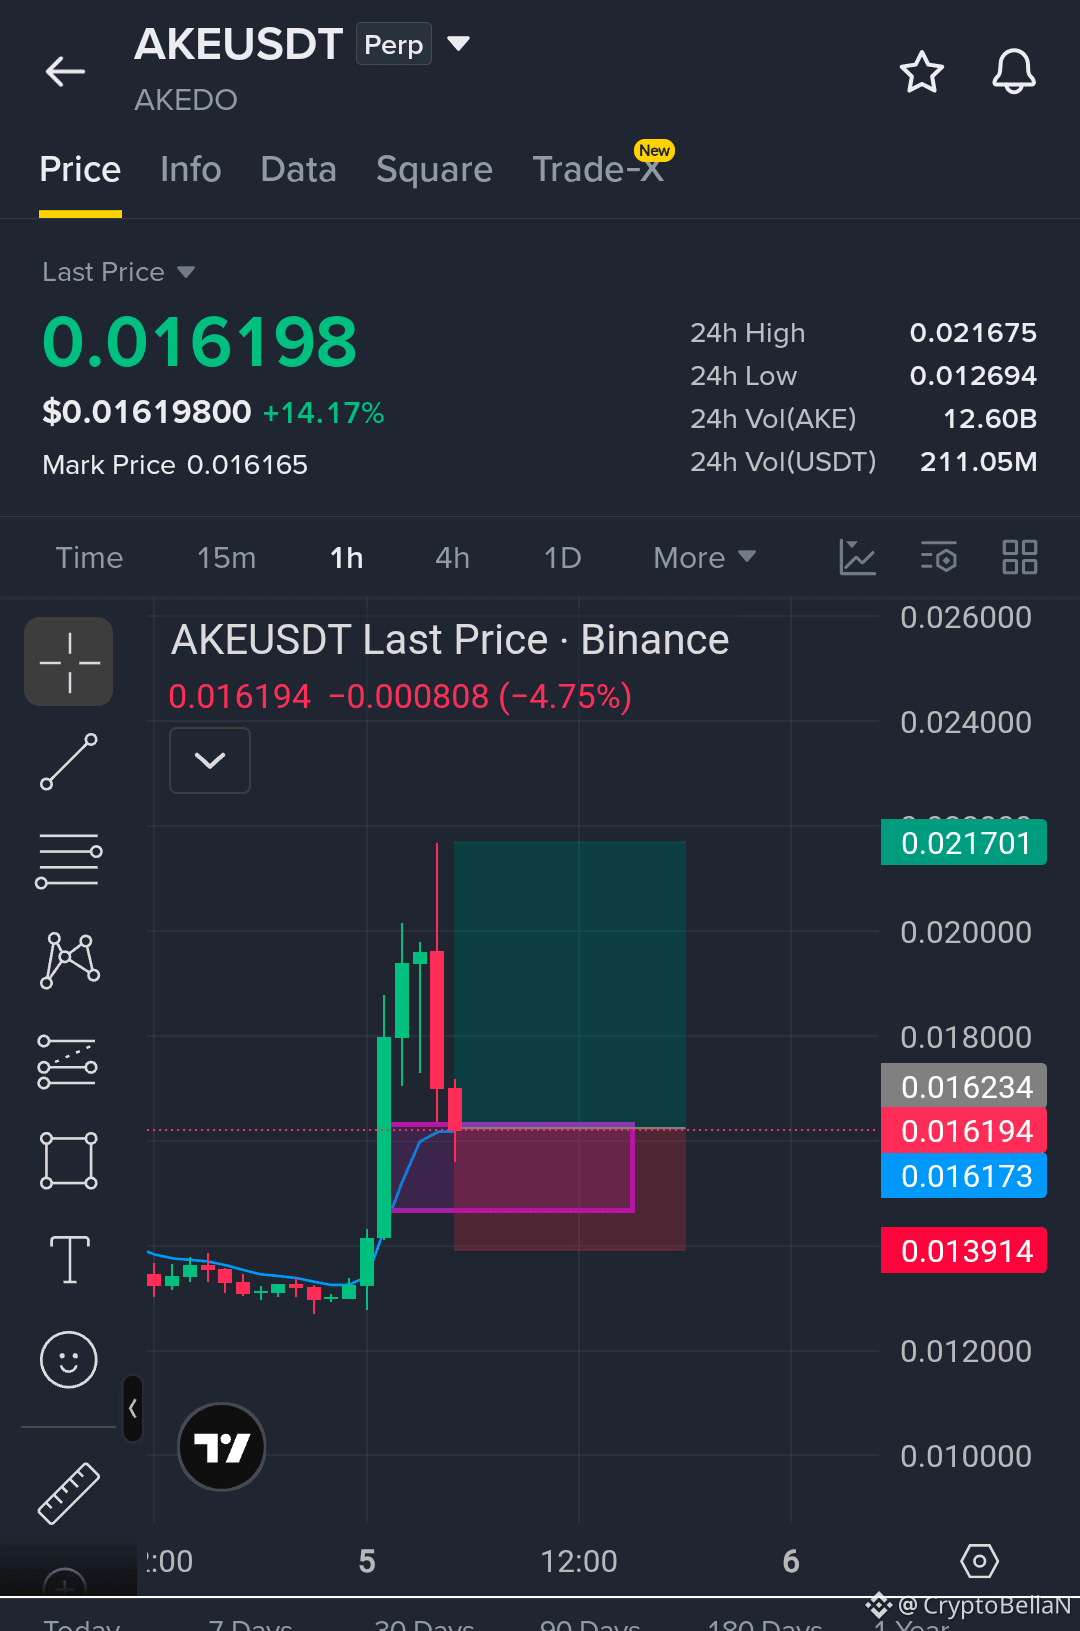
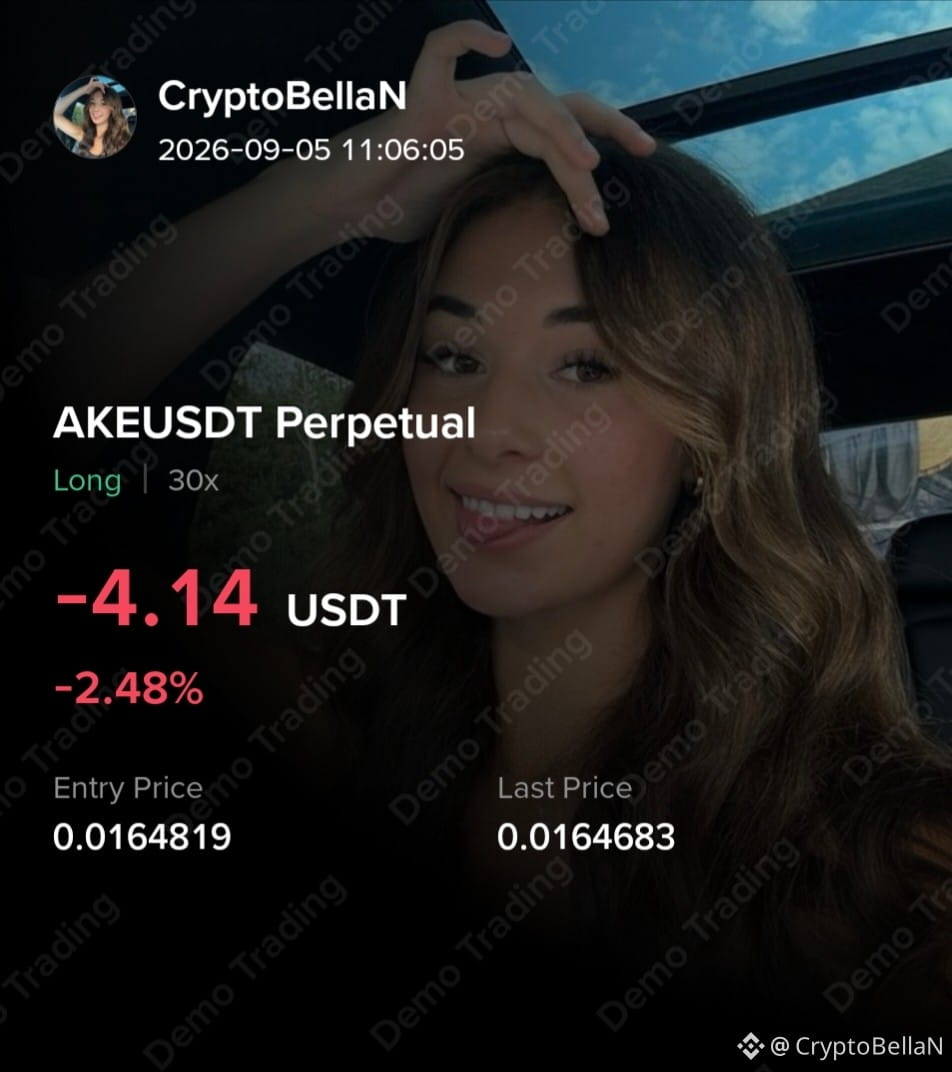
🚀 $AKE رجال طوال
الدخول: الآن
🎯 TP: $0.0217
🛑 SL: $0.0139
يبدو إعداد الزخم مثيرًا للاهتمام هنا. أدر مخاطرَك وتجنب الدخول بكل أموالك.
راقب: $BULLA و $RIVER 👀
Long #AKE 👇
{future}(AKEUSDT)
{future}(BULLAUSDT)
{future}(RIVERUSDT)
🚀 $AKE رجال طوال
الدخول: الآن
🎯 TP: $0.0217
🛑 SL: $0.0139
يبدو إعداد الزخم مثيرًا للاهتمام هنا. أدر مخاطرَك وتجنب الدخول بكل أموالك.
راقب: $BULLA و $RIVER 👀
Long #AKE 👇
الدخول: الآن
🎯 TP: $0.0217
🛑 SL: $0.0139
يبدو إعداد الزخم مثيرًا للاهتمام هنا. أدر مخاطرَك وتجنب الدخول بكل أموالك.
راقب: $BULLA و $RIVER 👀
Long #AKE 👇
1
1
508
·
--
صاعد
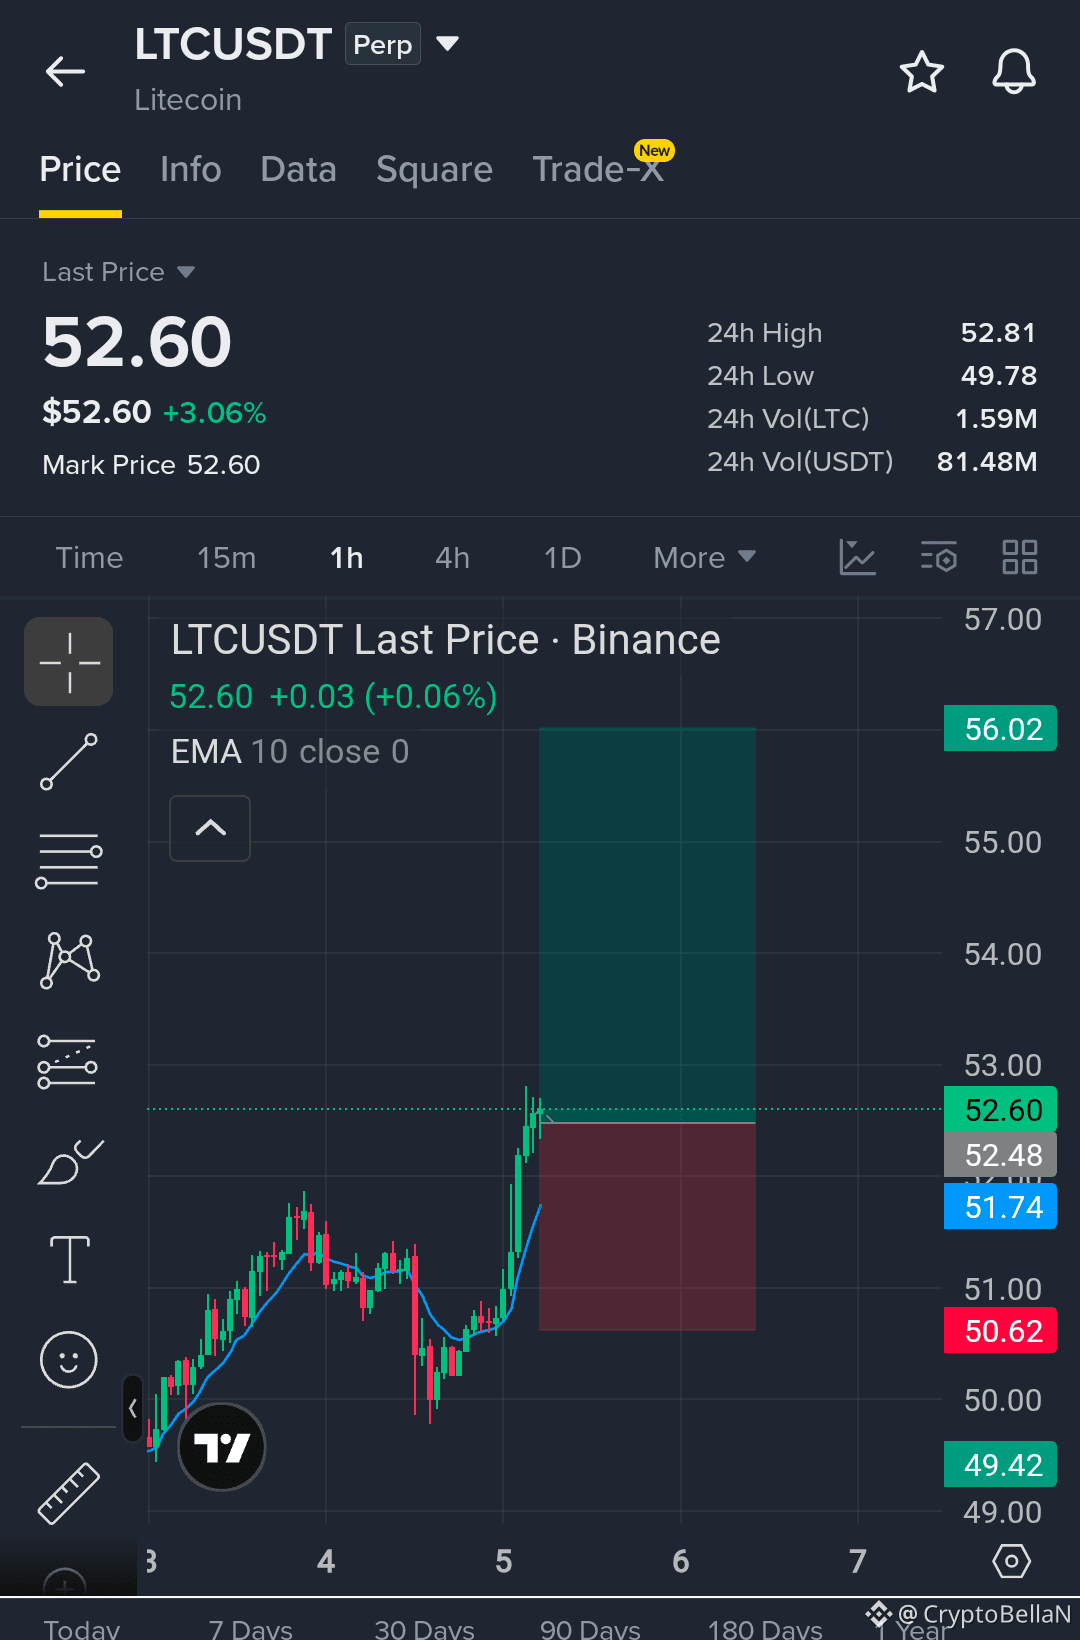
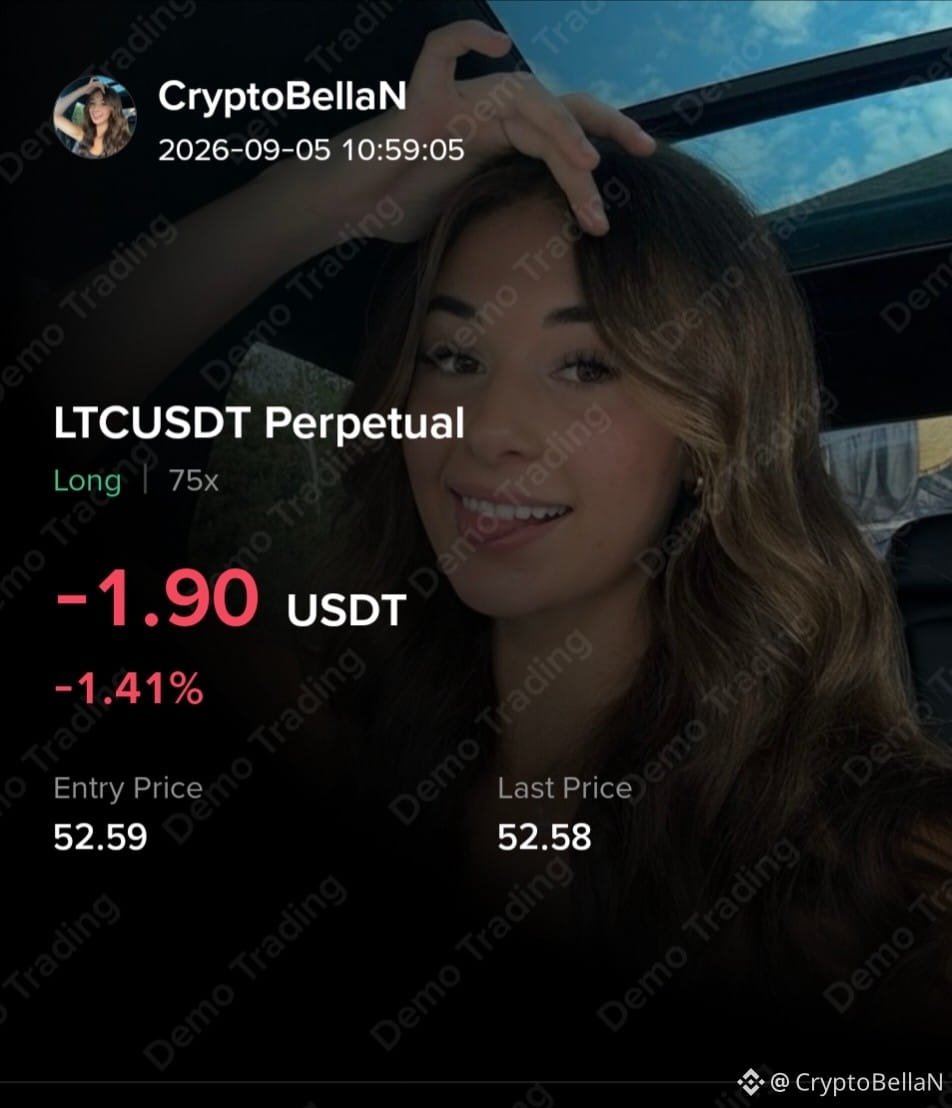
🚀 شراء سريع طويل على $LTC
منطقة الدخول: 52.14–52.45
🎯 الهدف 1: 54.80
🎯 الهدف 2: 56.80
🛑 الإبطال: 50.58
#LTC يواصل الارتفاع عند القمم، والثيران يرفضون التخلي عنه. الزخم لا يزال قويًا.
⚠️ كن حذرًا: مؤشر RSI في حالة تشبع شرائي شديد، لذا قد يحدث سحب سيولة محلي حاد قبل الاستمرار.
لا تدخل بكل رأس مالك أبدًا، يا جماعة. استخدم حجم صفقة يناسب حسابك ومستوى المخاطرة لديك.
يبدو هذا جاهزًا 👇👇👇
متابعة $ETH و $BULLA اليوم.
{future}(LTCUSDT)
{future}(ETHUSDT)
{future}(BULLAUSDT)
🚀 شراء سريع طويل على $LTC
منطقة الدخول: 52.14–52.45
🎯 الهدف 1: 54.80
🎯 الهدف 2: 56.80
🛑 الإبطال: 50.58
#LTC يواصل الارتفاع عند القمم، والثيران يرفضون التخلي عنه. الزخم لا يزال قويًا.
⚠️ كن حذرًا: مؤشر RSI في حالة تشبع شرائي شديد، لذا قد يحدث سحب سيولة محلي حاد قبل الاستمرار.
لا تدخل بكل رأس مالك أبدًا، يا جماعة. استخدم حجم صفقة يناسب حسابك ومستوى المخاطرة لديك.
يبدو هذا جاهزًا 👇👇👇
متابعة $ETH و $BULLA اليوم.
منطقة الدخول: 52.14–52.45
🎯 الهدف 1: 54.80
🎯 الهدف 2: 56.80
🛑 الإبطال: 50.58
#LTC يواصل الارتفاع عند القمم، والثيران يرفضون التخلي عنه. الزخم لا يزال قويًا.
⚠️ كن حذرًا: مؤشر RSI في حالة تشبع شرائي شديد، لذا قد يحدث سحب سيولة محلي حاد قبل الاستمرار.
لا تدخل بكل رأس مالك أبدًا، يا جماعة. استخدم حجم صفقة يناسب حسابك ومستوى المخاطرة لديك.
يبدو هذا جاهزًا 👇👇👇
متابعة $ETH و $BULLA اليوم.
1
1
193
·
--
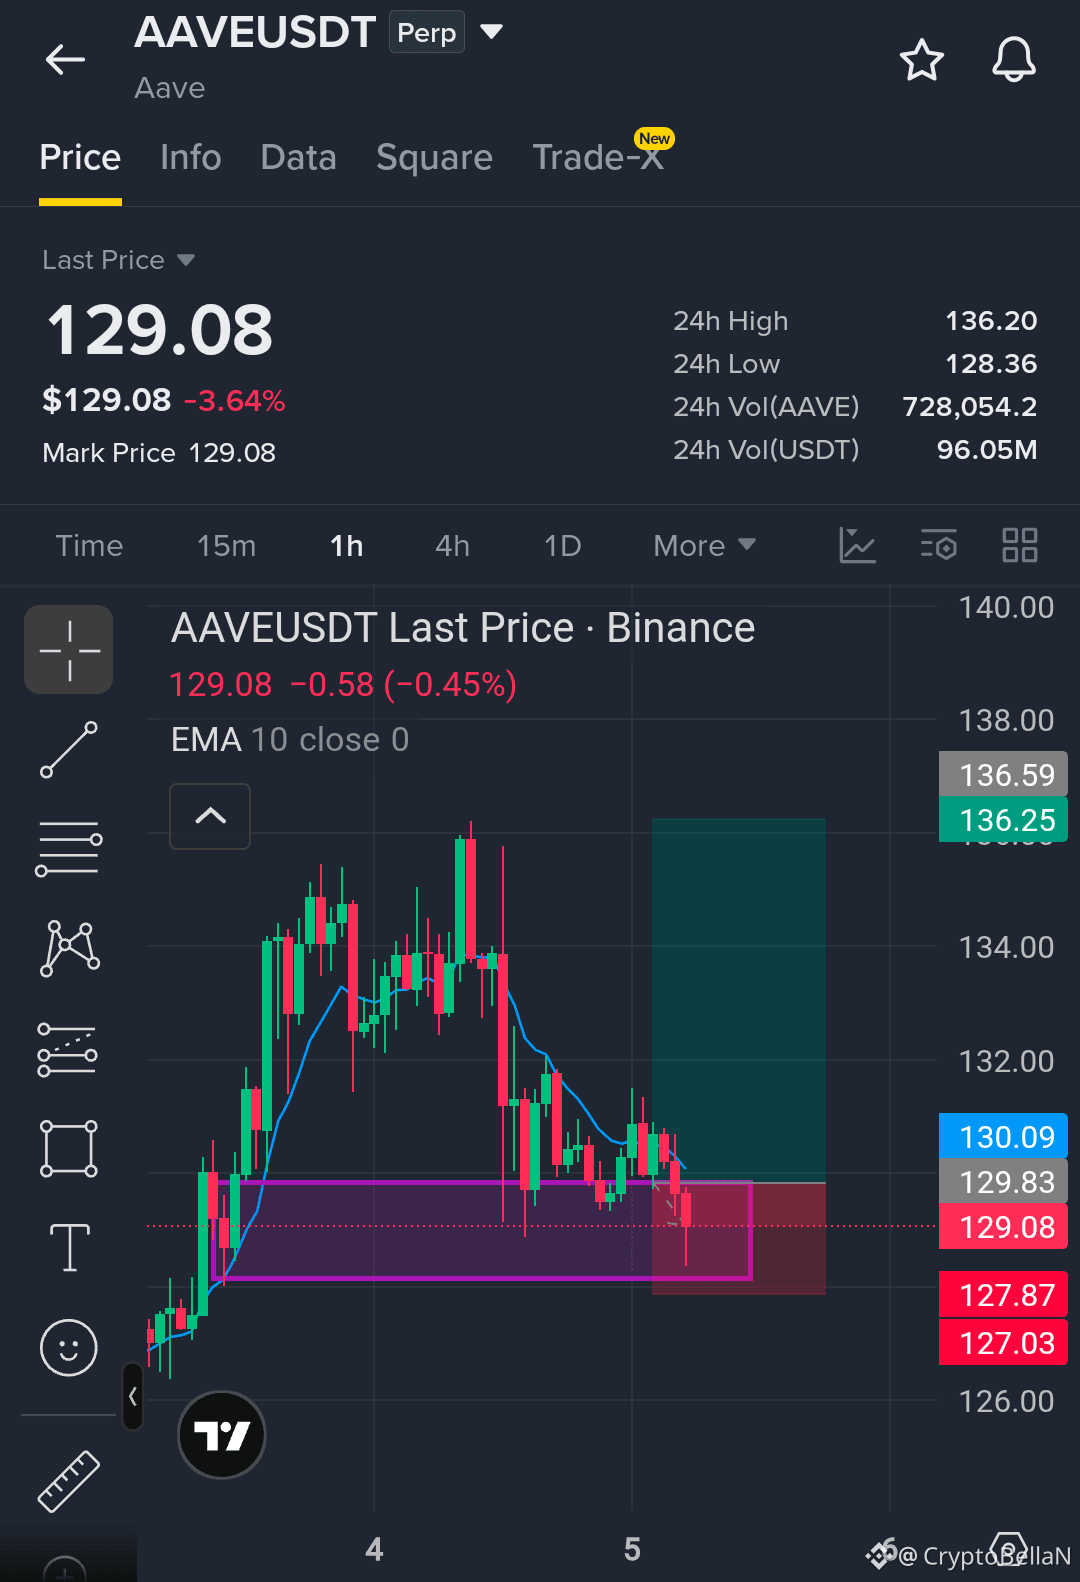
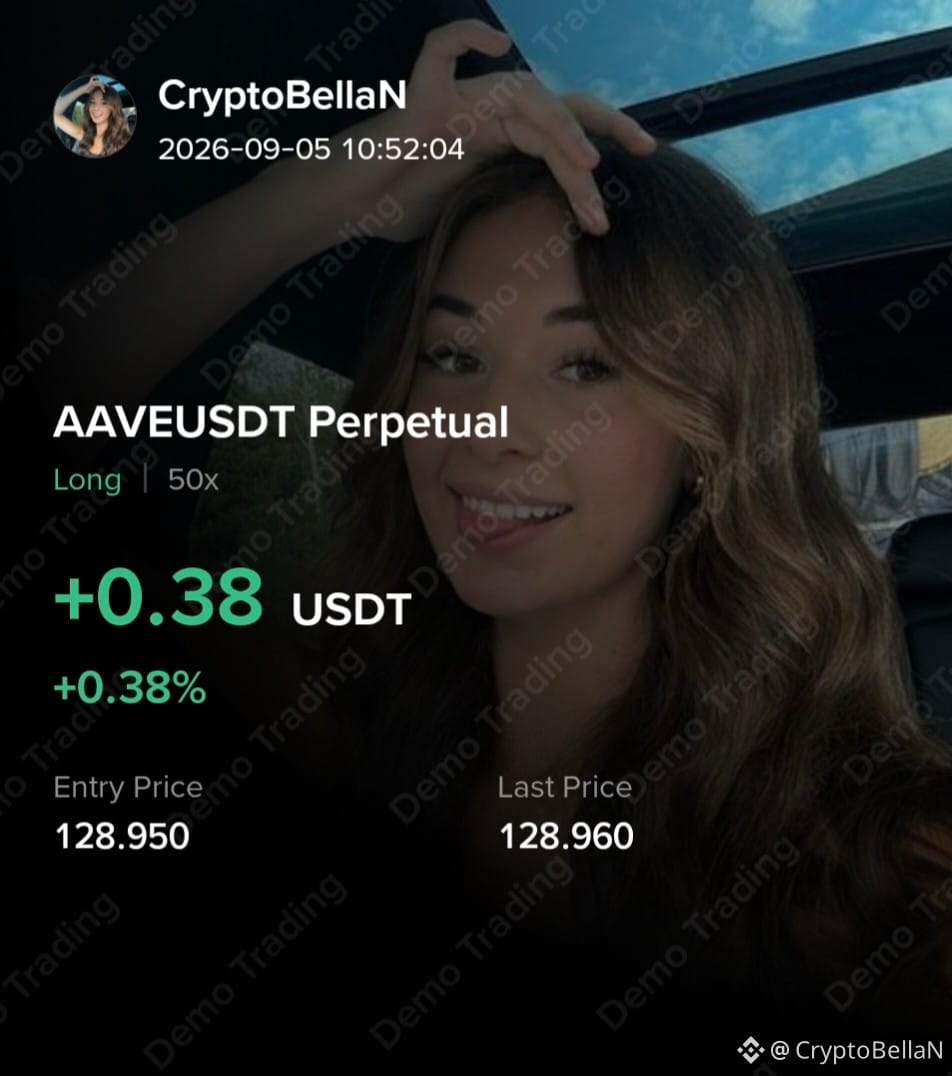
🚀 إعداد شراء طويل على $AAVE
منطقة الدخول: 128.87–129.64
🎯 الهدف 1: 135.44
🎯 الهدف 2: 140.39
🛑 غير صالح: 125.00
#AAVE يختبر الدعم الكلي وقد يكون جاهزًا لارتداد.
⚠️ إذا فشل أدنى مستوى يومي، فقد يكون تسارع الهبوط ممكنًا. لا تدخل بكل رأس المال — استخدم حجم صفقة يناسب مستوى المخاطرة لديك.
إعداد شراء طويل أدناه 👇👇
قيد المراقبة: $SOL و $FLOCK
{future}(AAVEUSDT)
{future}(FLOCKUSDT)
{future}(SOLUSDT)
🚀 إعداد شراء طويل على $AAVE
منطقة الدخول: 128.87–129.64
🎯 الهدف 1: 135.44
🎯 الهدف 2: 140.39
🛑 غير صالح: 125.00
#AAVE يختبر الدعم الكلي وقد يكون جاهزًا لارتداد.
⚠️ إذا فشل أدنى مستوى يومي، فقد يكون تسارع الهبوط ممكنًا. لا تدخل بكل رأس المال — استخدم حجم صفقة يناسب مستوى المخاطرة لديك.
إعداد شراء طويل أدناه 👇👇
قيد المراقبة: $SOL و $FLOCK
منطقة الدخول: 128.87–129.64
🎯 الهدف 1: 135.44
🎯 الهدف 2: 140.39
🛑 غير صالح: 125.00
#AAVE يختبر الدعم الكلي وقد يكون جاهزًا لارتداد.
⚠️ إذا فشل أدنى مستوى يومي، فقد يكون تسارع الهبوط ممكنًا. لا تدخل بكل رأس المال — استخدم حجم صفقة يناسب مستوى المخاطرة لديك.
إعداد شراء طويل أدناه 👇👇
قيد المراقبة: $SOL و $FLOCK
1
175
·
--
صاعد
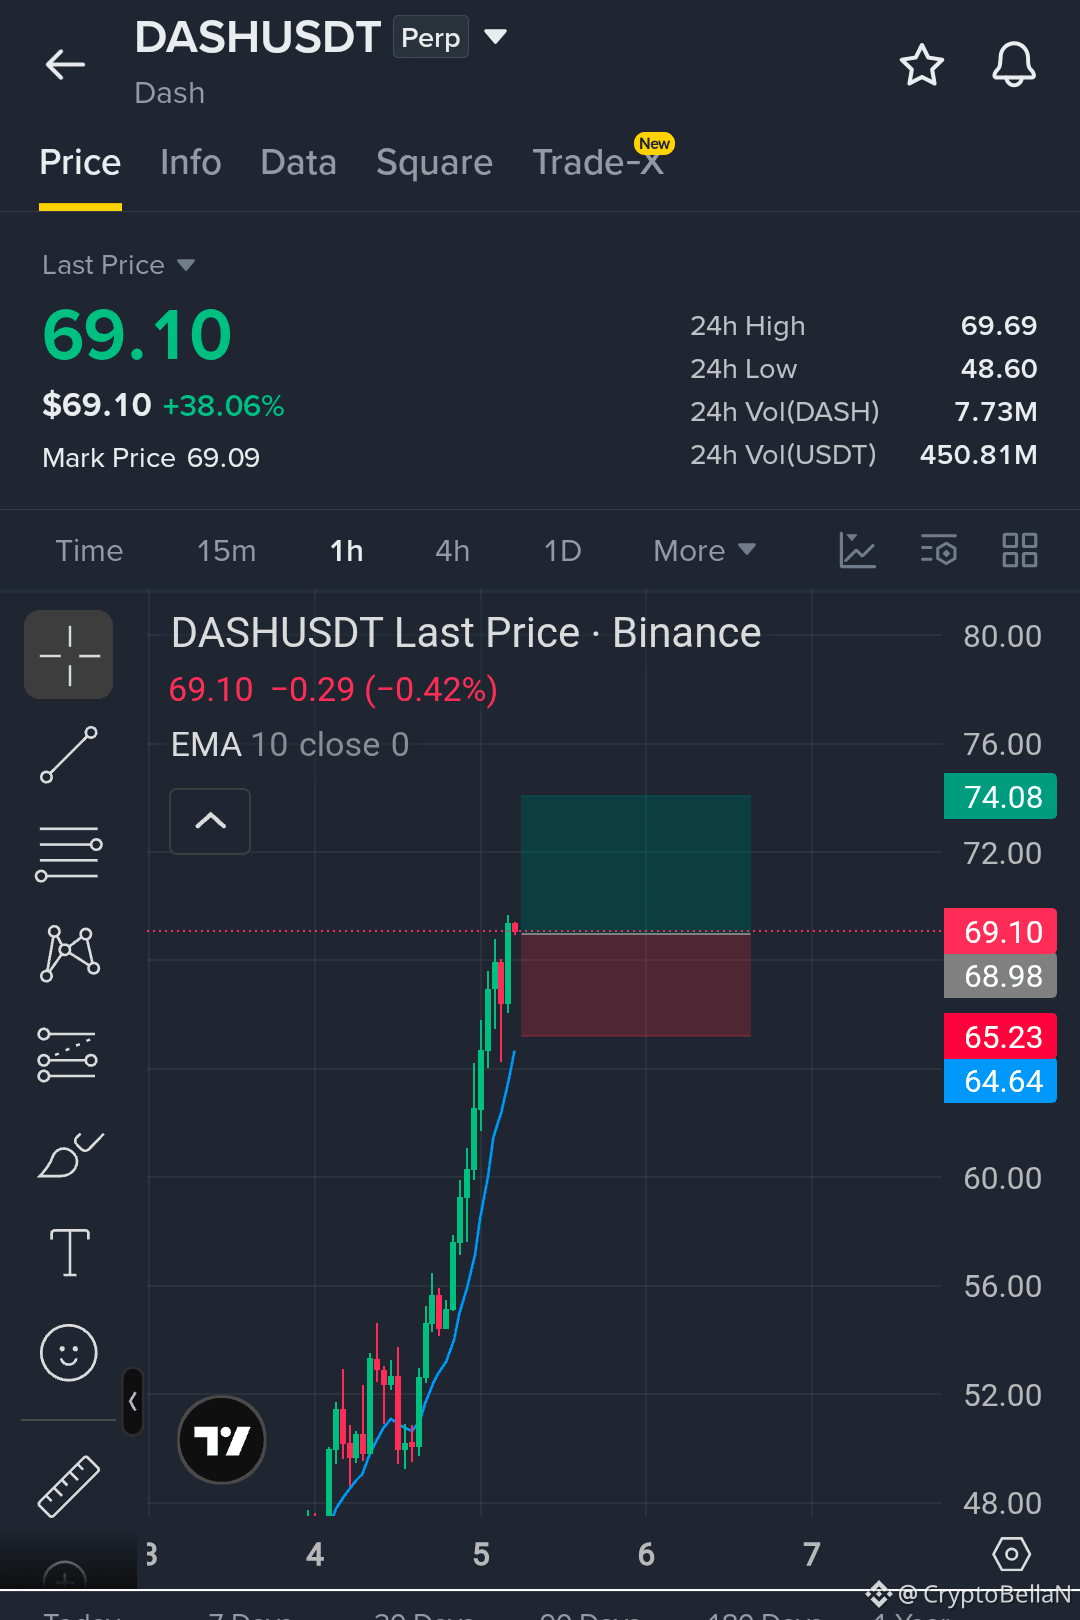
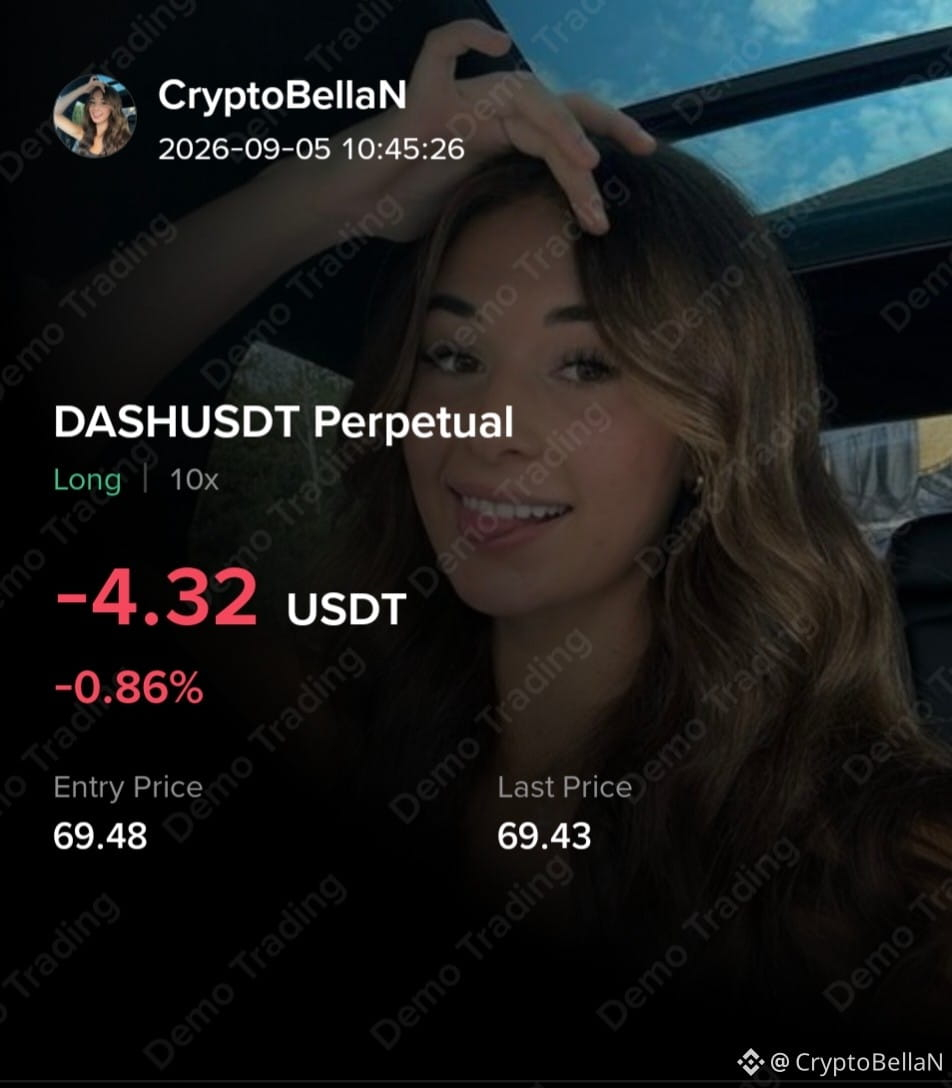
🚀 $DASH لا يزال قويًا — موجة FOMO طويلة كبيرة الجولة 2
إعداد الشراء لا يزال نشطًا 👇
الدخول: 66–70
جني الربح: 72–74
وقف الخسارة: 64
الزخم لا يزال قويًا. راقب منطقة الدخول وأدر المخاطر بعناية.
شراء $DASH 🔥
🚀 $DASH لا يزال قويًا — موجة FOMO طويلة كبيرة الجولة 2
إعداد الشراء لا يزال نشطًا 👇
الدخول: 66–70
جني الربح: 72–74
وقف الخسارة: 64
الزخم لا يزال قويًا. راقب منطقة الدخول وأدر المخاطر بعناية.
شراء $DASH 🔥
إعداد الشراء لا يزال نشطًا 👇
الدخول: 66–70
جني الربح: 72–74
وقف الخسارة: 64
الزخم لا يزال قويًا. راقب منطقة الدخول وأدر المخاطر بعناية.
شراء $DASH 🔥
1
1
157
·
--
صاعد
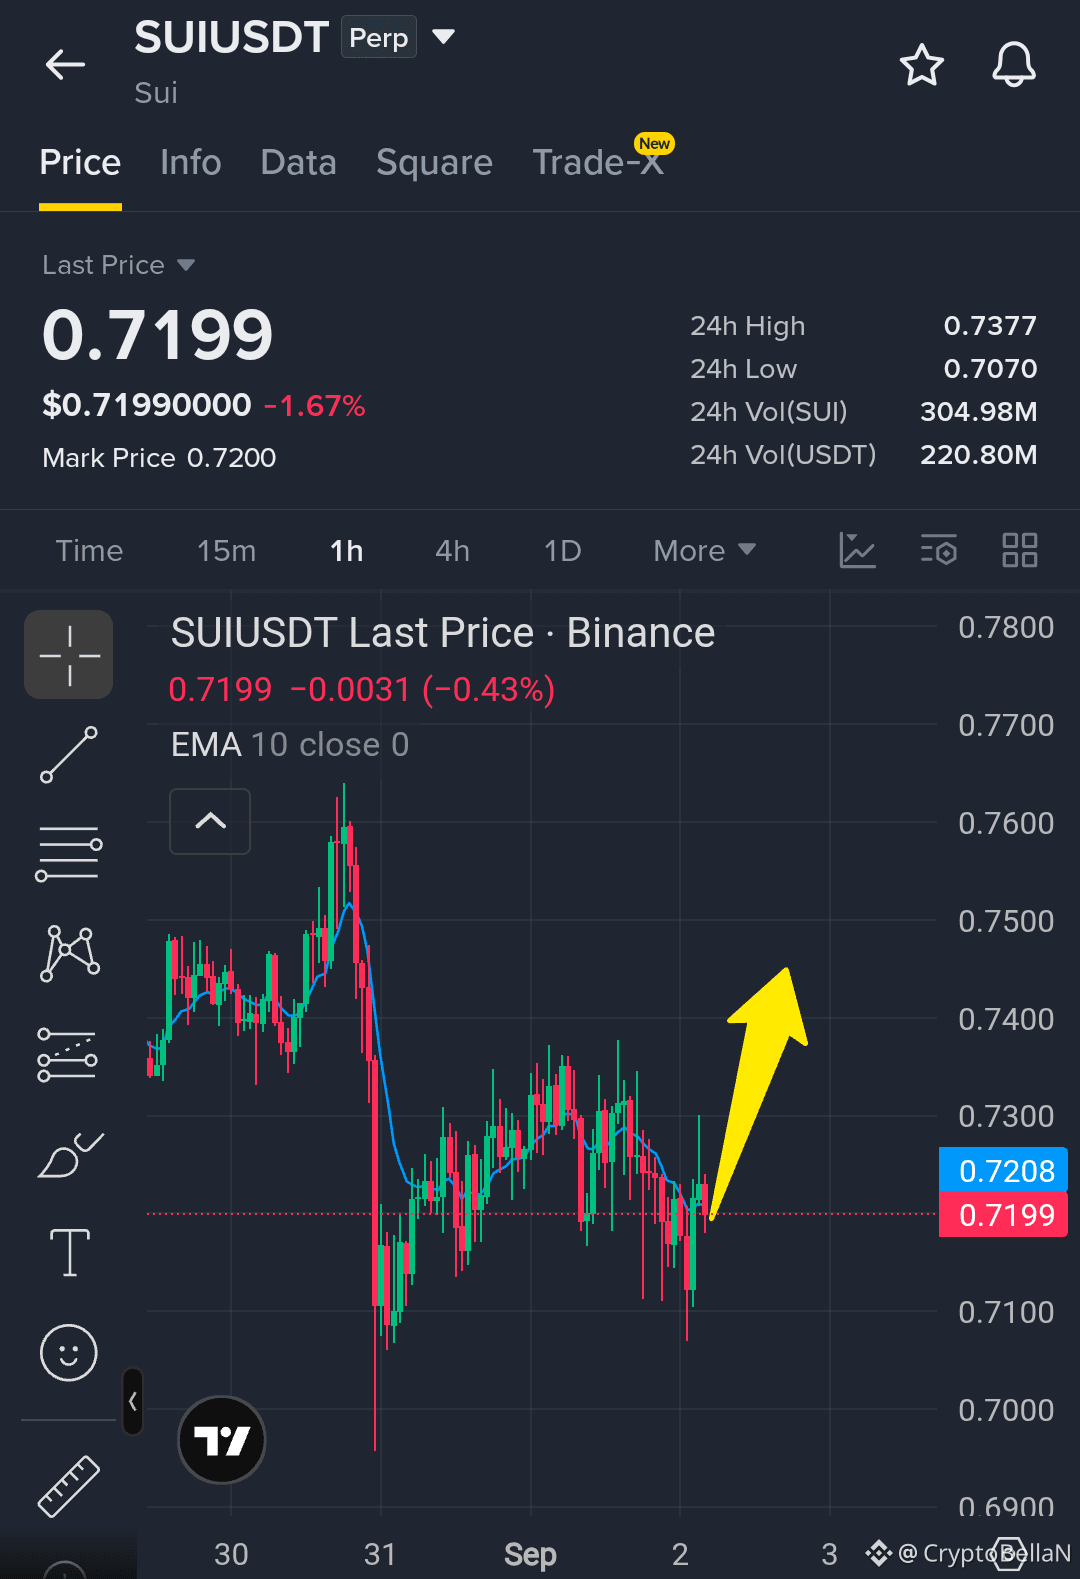
$SUI دعم قبل الخطوة التالية
#SUİ يقوم باختبار منطقة الدعم ويظهر إشارات على احتمال ارتداد. إذا دافع المشترون عن النطاق، فقد تدفع الخطوة التالية نحو أهداف الصعود.
الشراء من هنا على #SUİ
منطقة التداول: 0.7159 – 0.7195
TP1: 0.7524
TP2: 0.7802
SL: 0.6944
المستوى الرئيسي الذي يجب مراقبته هو 0.7070. إذا فشل قاع هذا النطاق، فقد تعود #SUİ لاختبار دعم أعمق قبل محاولة تعافٍ آخر.
لا تضع كل رأس المال دفعة واحدة أبدًا يا صديقي. حدّد حجم مركزك وفقًا لإدارة مخاطرك الخاصة.
نراقب الدفع 👇👇👇
كما نتابع $ACE و $ETH .
{future}(SUIUSDT)
{future}(ACEUSDT)
{future}(ETHUSDT)
$SUI دعم قبل الخطوة التالية
#SUİ يقوم باختبار منطقة الدعم ويظهر إشارات على احتمال ارتداد. إذا دافع المشترون عن النطاق، فقد تدفع الخطوة التالية نحو أهداف الصعود.
الشراء من هنا على #SUİ
منطقة التداول: 0.7159 – 0.7195
TP1: 0.7524
TP2: 0.7802
SL: 0.6944
المستوى الرئيسي الذي يجب مراقبته هو 0.7070. إذا فشل قاع هذا النطاق، فقد تعود #SUİ لاختبار دعم أعمق قبل محاولة تعافٍ آخر.
لا تضع كل رأس المال دفعة واحدة أبدًا يا صديقي. حدّد حجم مركزك وفقًا لإدارة مخاطرك الخاصة.
نراقب الدفع 👇👇👇
كما نتابع $ACE و $ETH .
#SUİ يقوم باختبار منطقة الدعم ويظهر إشارات على احتمال ارتداد. إذا دافع المشترون عن النطاق، فقد تدفع الخطوة التالية نحو أهداف الصعود.
الشراء من هنا على #SUİ
منطقة التداول: 0.7159 – 0.7195
TP1: 0.7524
TP2: 0.7802
SL: 0.6944
المستوى الرئيسي الذي يجب مراقبته هو 0.7070. إذا فشل قاع هذا النطاق، فقد تعود #SUİ لاختبار دعم أعمق قبل محاولة تعافٍ آخر.
لا تضع كل رأس المال دفعة واحدة أبدًا يا صديقي. حدّد حجم مركزك وفقًا لإدارة مخاطرك الخاصة.
نراقب الدفع 👇👇👇
كما نتابع $ACE و $ETH .
1
2
103
·
--
صاعد
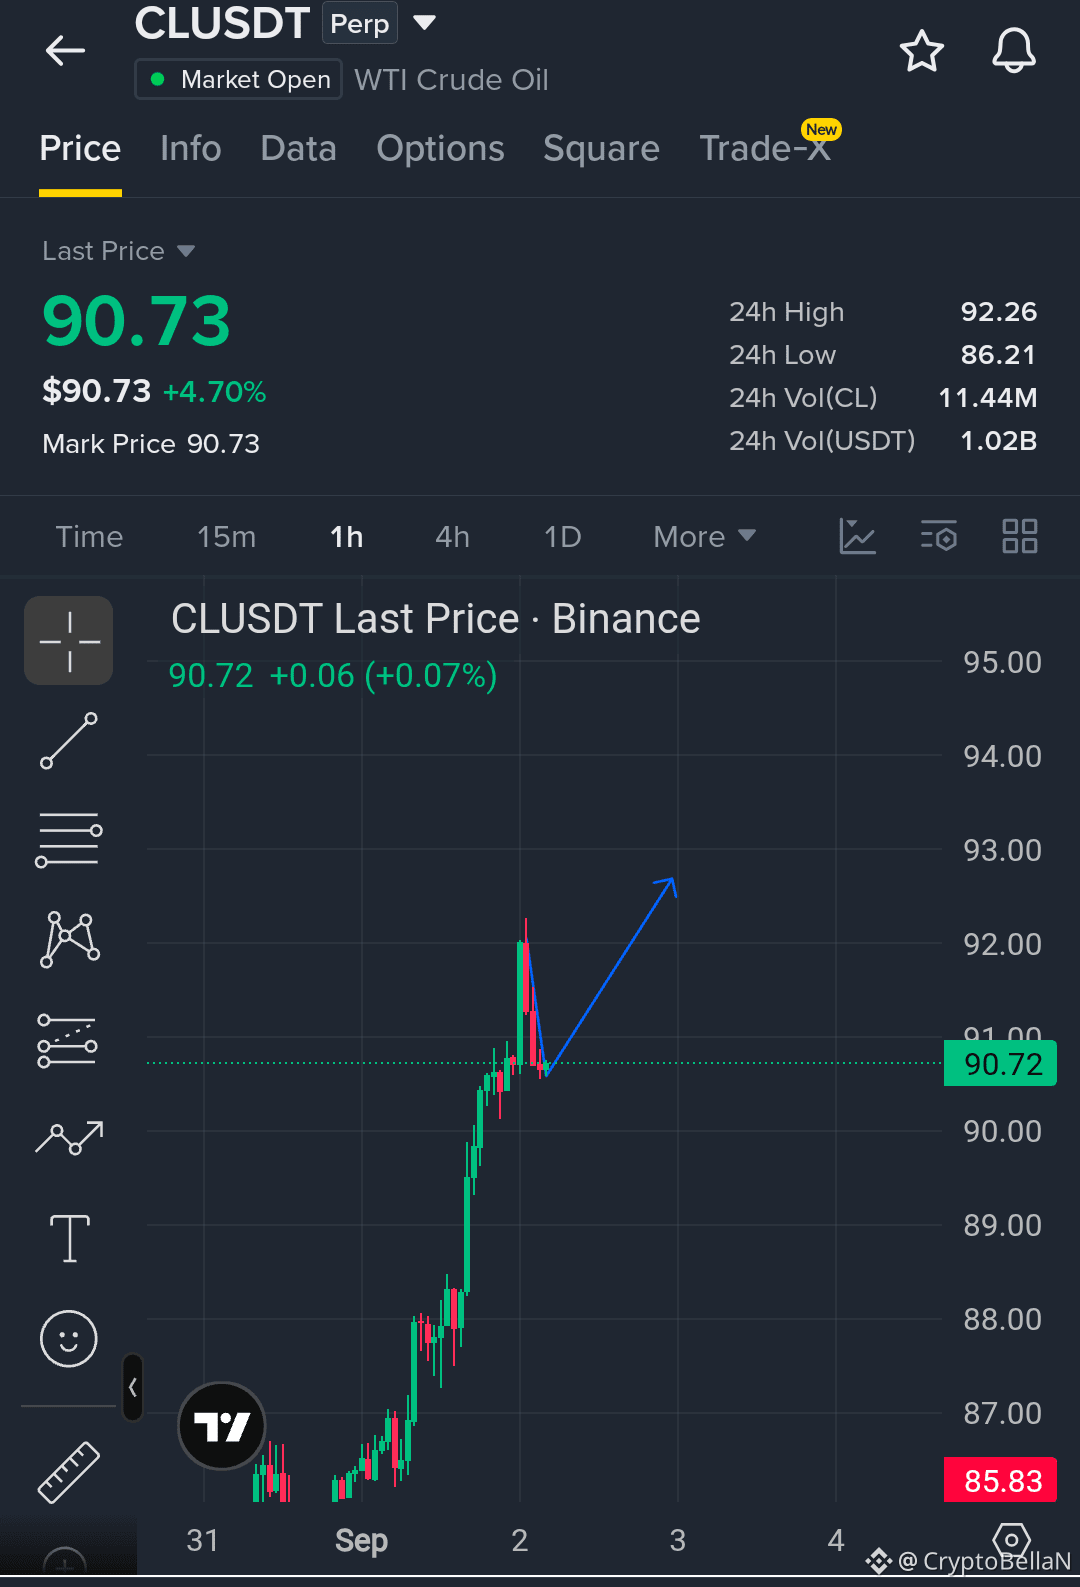
الشراء من الانخفاض عند $CL
#CL يحتفظ بمنطقة الانخفاض بشكل جيد، وقد تكون الخطوة التالية دفعًا باتجاه منطقة 92 قبل أن تدخل الأهداف الأكبر حيز التنفيذ.
الدخول: 89.80 – 90.64
منطقة الربح: 94.38 – 97.71
وقف الخسارة: 87.11
مشترو الانخفاض يتدخلون الآن، بينما قد يتم عصر المراكز القصيرة إذا تم كسر 92 بقوة.
المستوى الرئيسي: دعم 89.50
إذا فشل 89.50، راقب تراجعًا أعمق باتجاه 88.50.
لا تضع كل رأس مالك أبدًا يا صديقي. حافظ على حجم مراكزك بما يتماشى مع مخاطرتك.
مراقبة الاتجاه الصاعد 👇👇👇
وأيضًا متابعة $CLO و $SOL
{future}(CLUSDT)
{future}(CLOUSDT)
{future}(SOLUSDT)
الشراء من الانخفاض عند $CL
#CL يحتفظ بمنطقة الانخفاض بشكل جيد، وقد تكون الخطوة التالية دفعًا باتجاه منطقة 92 قبل أن تدخل الأهداف الأكبر حيز التنفيذ.
الدخول: 89.80 – 90.64
منطقة الربح: 94.38 – 97.71
وقف الخسارة: 87.11
مشترو الانخفاض يتدخلون الآن، بينما قد يتم عصر المراكز القصيرة إذا تم كسر 92 بقوة.
المستوى الرئيسي: دعم 89.50
إذا فشل 89.50، راقب تراجعًا أعمق باتجاه 88.50.
لا تضع كل رأس مالك أبدًا يا صديقي. حافظ على حجم مراكزك بما يتماشى مع مخاطرتك.
مراقبة الاتجاه الصاعد 👇👇👇
وأيضًا متابعة $CLO و $SOL
#CL يحتفظ بمنطقة الانخفاض بشكل جيد، وقد تكون الخطوة التالية دفعًا باتجاه منطقة 92 قبل أن تدخل الأهداف الأكبر حيز التنفيذ.
الدخول: 89.80 – 90.64
منطقة الربح: 94.38 – 97.71
وقف الخسارة: 87.11
مشترو الانخفاض يتدخلون الآن، بينما قد يتم عصر المراكز القصيرة إذا تم كسر 92 بقوة.
المستوى الرئيسي: دعم 89.50
إذا فشل 89.50، راقب تراجعًا أعمق باتجاه 88.50.
لا تضع كل رأس مالك أبدًا يا صديقي. حافظ على حجم مراكزك بما يتماشى مع مخاطرتك.
مراقبة الاتجاه الصاعد 👇👇👇
وأيضًا متابعة $CLO و $SOL
1
191
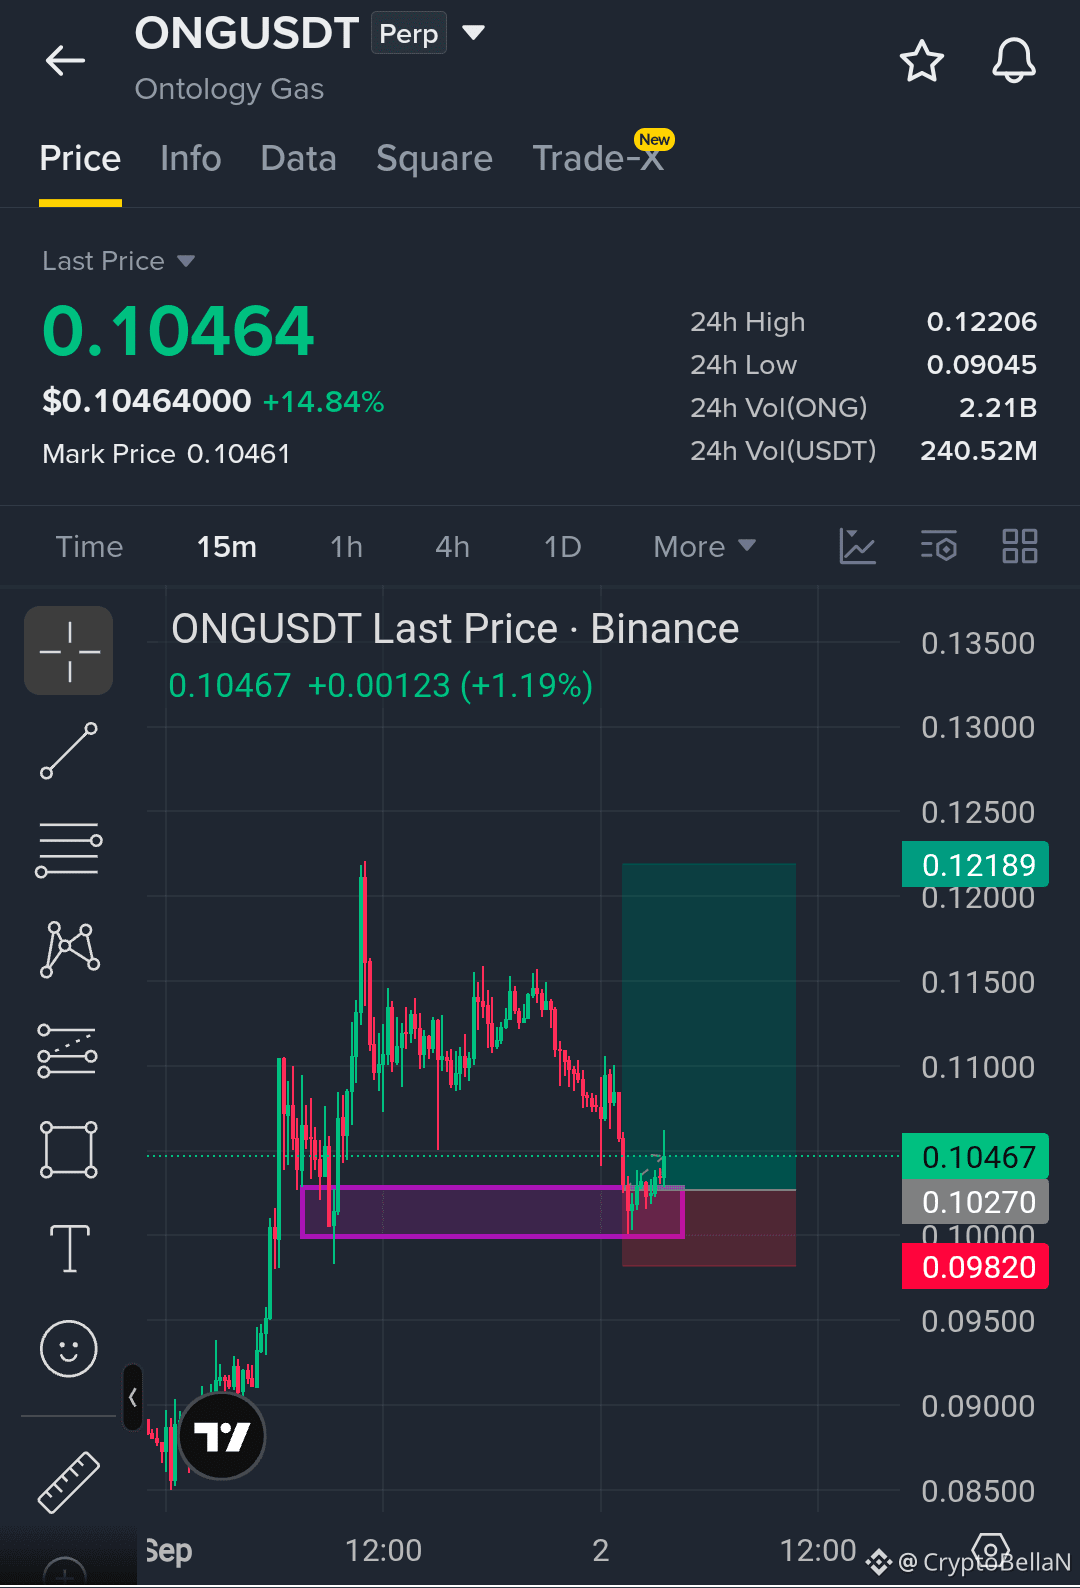
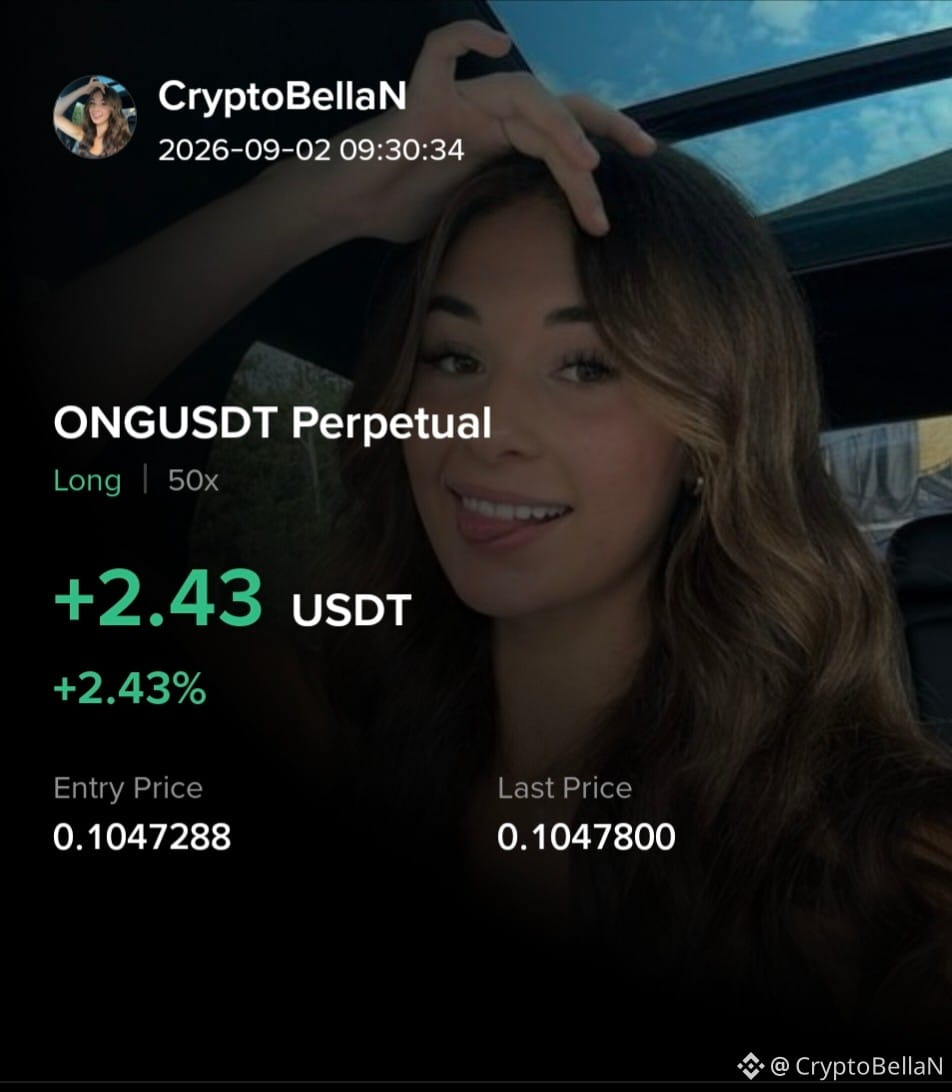
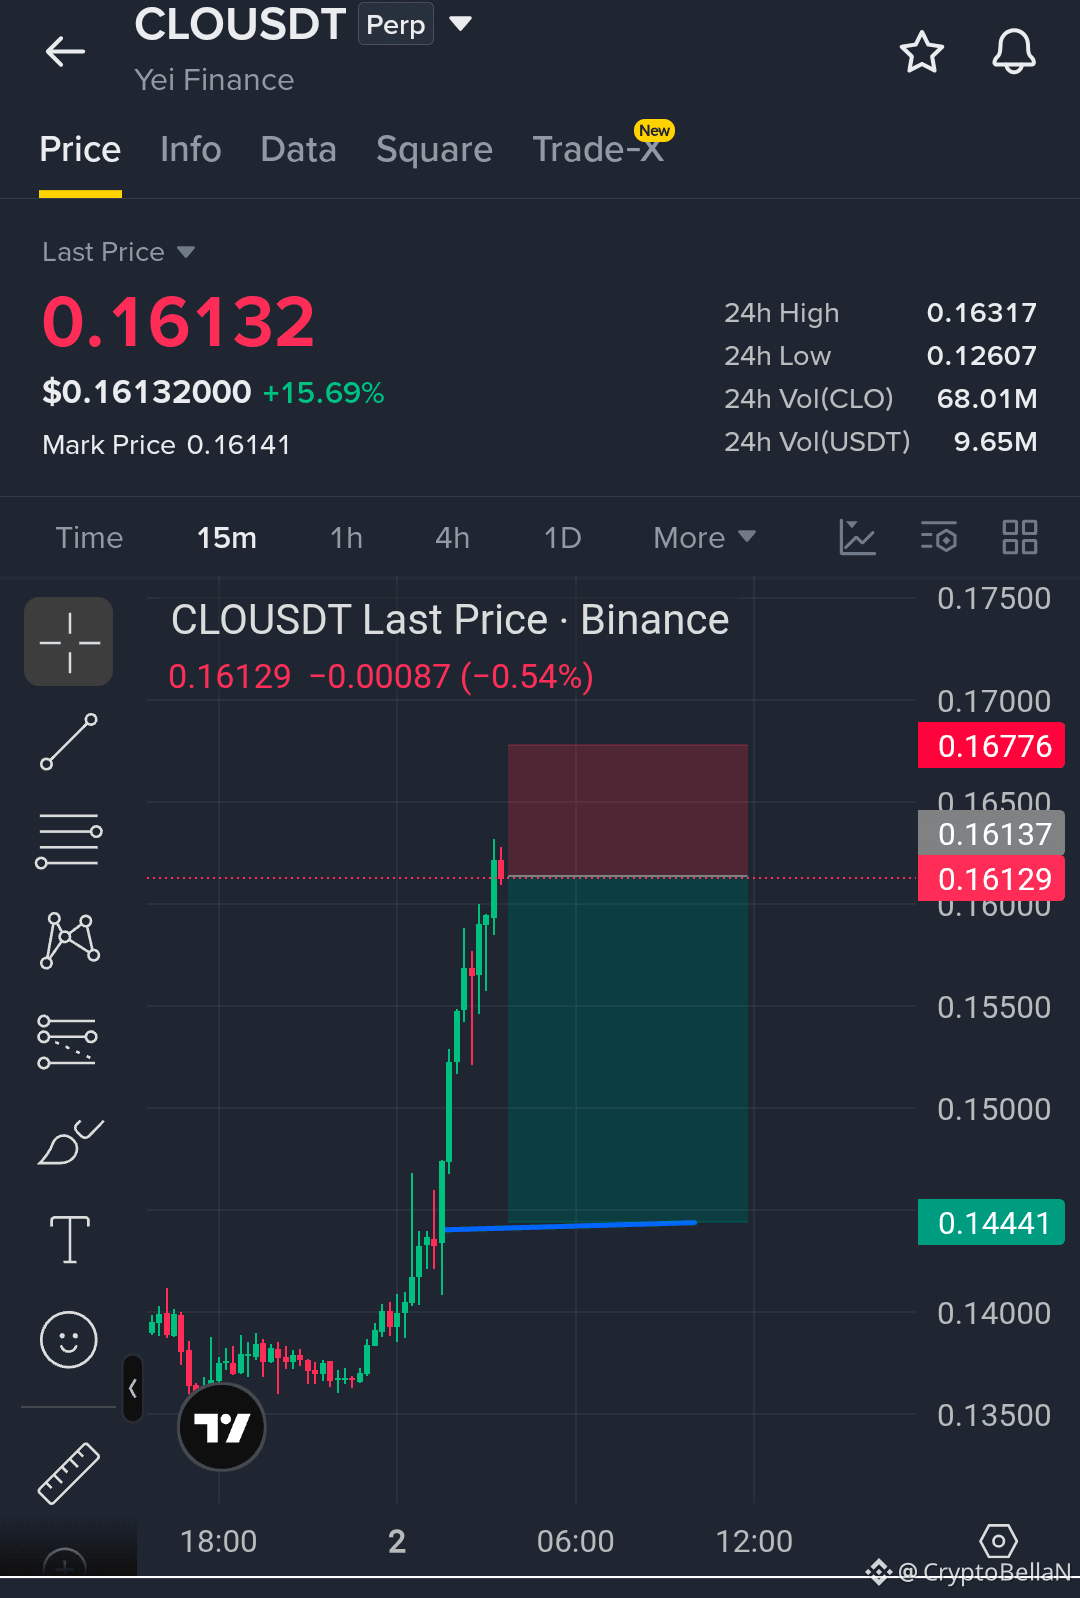
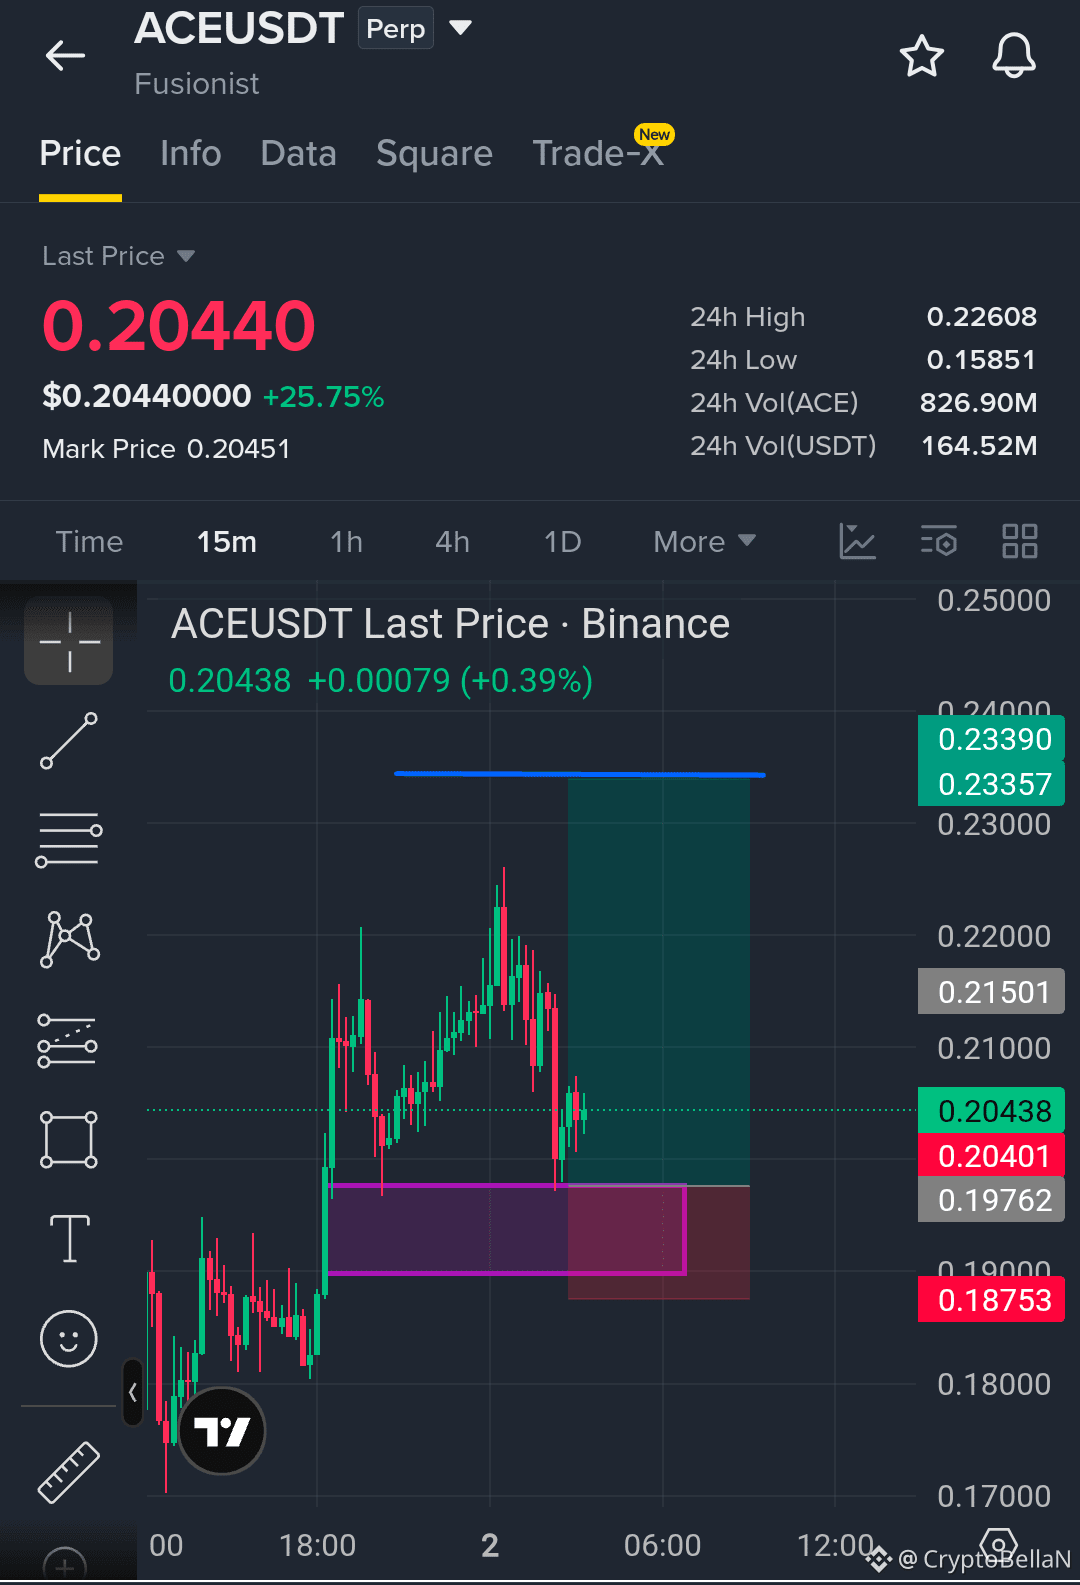
·
--
هابط
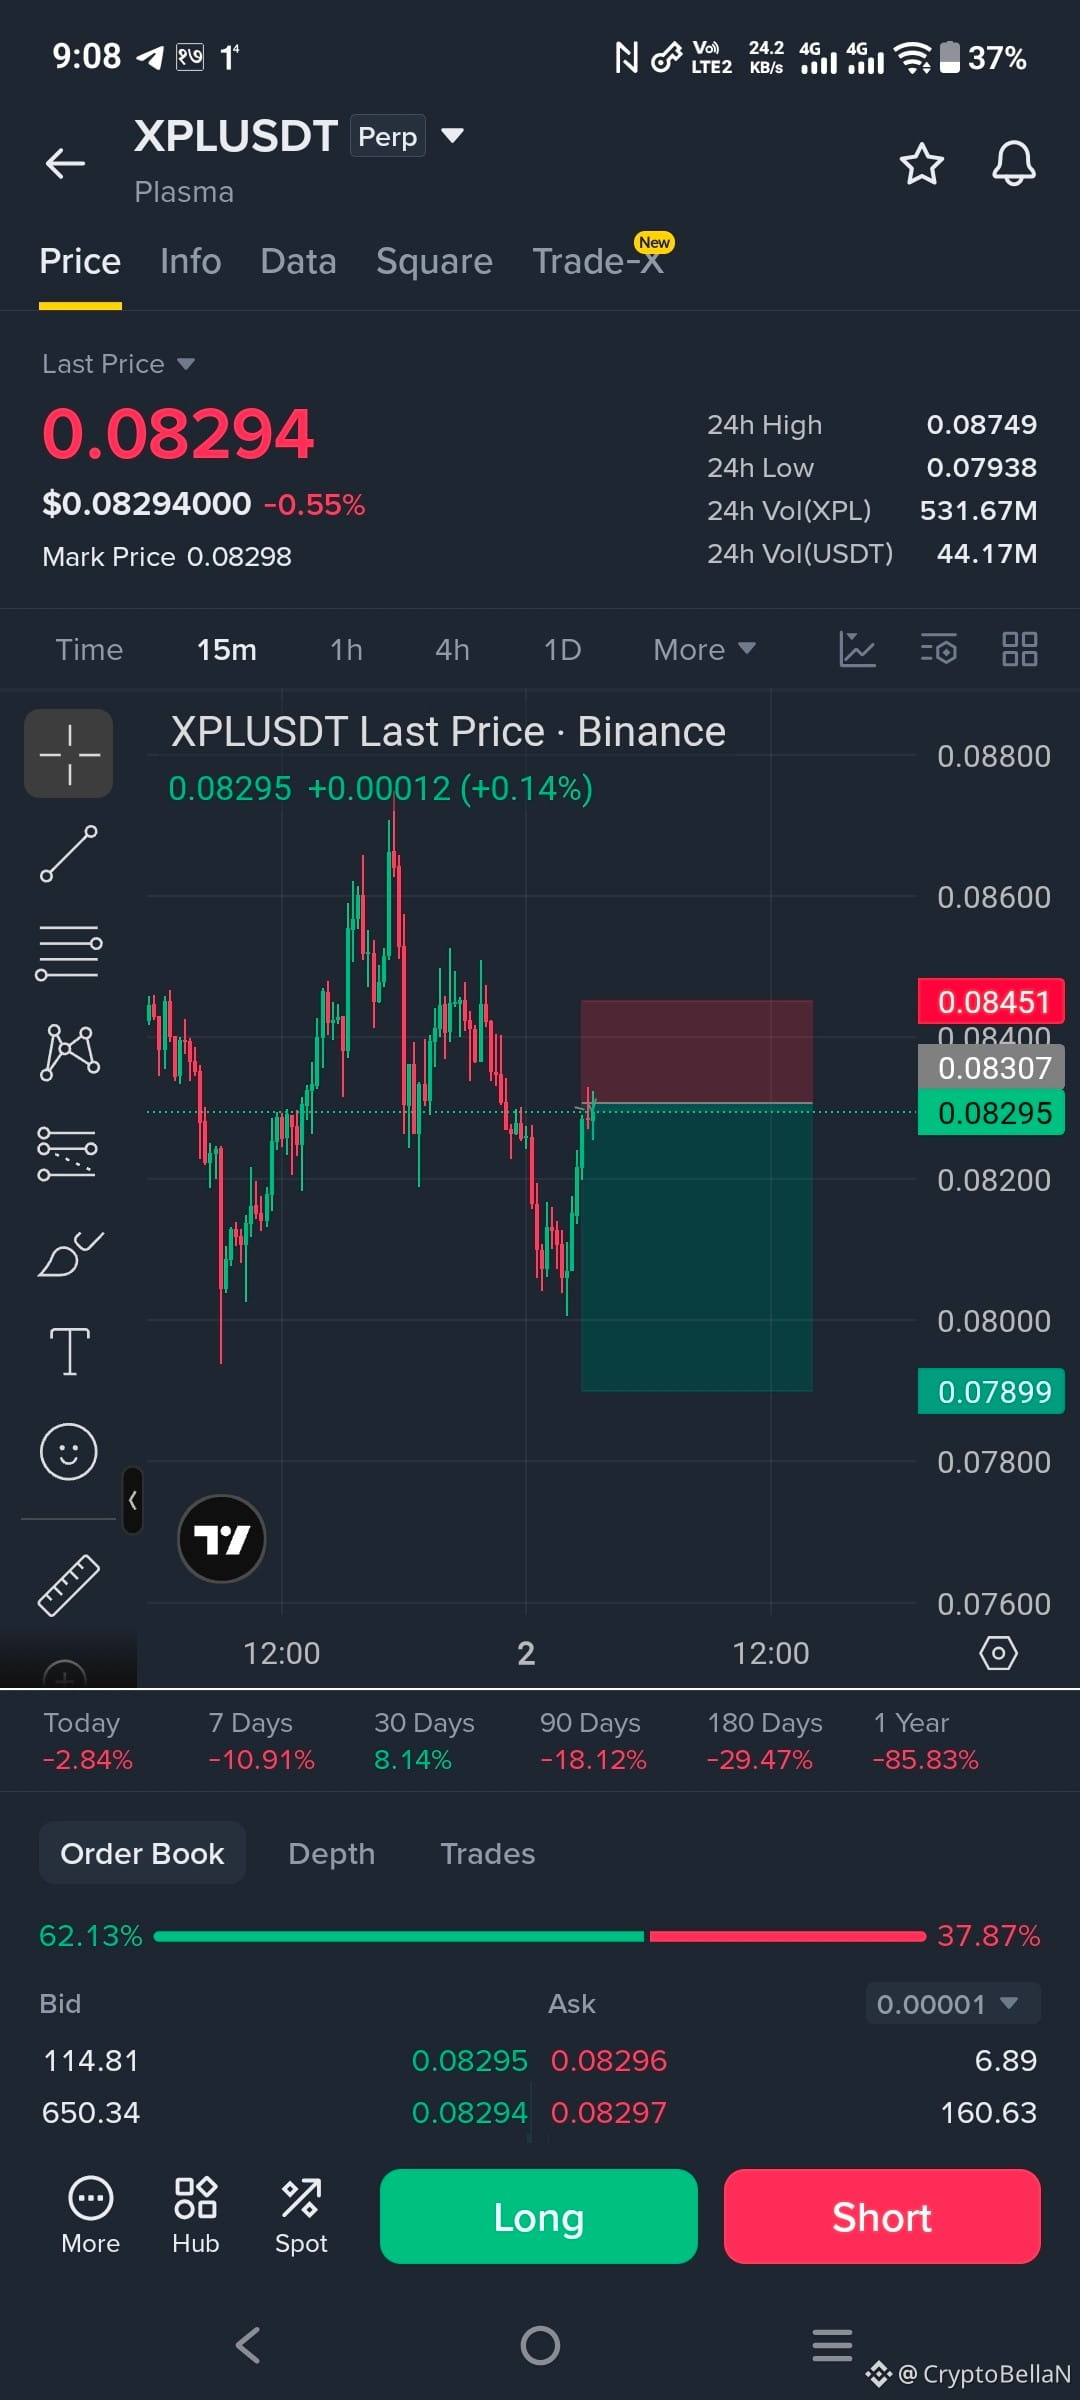
🚨 مزيد من الضغط على المدى القصير باتجاه $XPL
#XPL تُظهر ضعفًا مستمرًا حول منطقة المقاومة. البائعون يتدخلون، وأنا أراقب للحصول على موجة هبوط أخرى. 📉🔥
🔴 إعدادية بيع (SHORT)
الدخول: 0.08237 – 0.08278
🎯 الهدف 1: 0.07990
🎯 الهدف 2: 0.07680
🎯 الهدف 3: 0.07450
🛑 وقف الخسارة: 0.08657
⚠️ إذا عاد السعر واستقر فوق المقاومة، فقد يتم إبطال السيناريو الهبوطي.
لا تطارد الحركة. لا تدخل بكل رأس المال (All-in). إدارة حجم مركزك وإدارة المخاطر بعناية.
تحيز بيع إضافي هنا. 👇👇
أراقب $BTC و $FF للتأكيد. 🚨
{future}(XPLUSDT)
{future}(BTCUSDT)
{future}(FFUSDT)
🚨 مزيد من الضغط على المدى القصير باتجاه $XPL
#XPL تُظهر ضعفًا مستمرًا حول منطقة المقاومة. البائعون يتدخلون، وأنا أراقب للحصول على موجة هبوط أخرى. 📉🔥
🔴 إعدادية بيع (SHORT)
الدخول: 0.08237 – 0.08278
🎯 الهدف 1: 0.07990
🎯 الهدف 2: 0.07680
🎯 الهدف 3: 0.07450
🛑 وقف الخسارة: 0.08657
⚠️ إذا عاد السعر واستقر فوق المقاومة، فقد يتم إبطال السيناريو الهبوطي.
لا تطارد الحركة. لا تدخل بكل رأس المال (All-in). إدارة حجم مركزك وإدارة المخاطر بعناية.
تحيز بيع إضافي هنا. 👇👇
أراقب $BTC و $FF للتأكيد. 🚨
#XPL تُظهر ضعفًا مستمرًا حول منطقة المقاومة. البائعون يتدخلون، وأنا أراقب للحصول على موجة هبوط أخرى. 📉🔥
🔴 إعدادية بيع (SHORT)
الدخول: 0.08237 – 0.08278
🎯 الهدف 1: 0.07990
🎯 الهدف 2: 0.07680
🎯 الهدف 3: 0.07450
🛑 وقف الخسارة: 0.08657
⚠️ إذا عاد السعر واستقر فوق المقاومة، فقد يتم إبطال السيناريو الهبوطي.
لا تطارد الحركة. لا تدخل بكل رأس المال (All-in). إدارة حجم مركزك وإدارة المخاطر بعناية.
تحيز بيع إضافي هنا. 👇👇
أراقب $BTC و $FF للتأكيد. 🚨
1
188
سجّل الدخول لاستكشاف المزيد من المُحتوى
انضم إلى مُستخدمي العملات الرقمية حول العالم على Binance Square
⚡️ احصل على أحدث المعلومات المفيدة عن العملات الرقمية.
💬 موثوقة من قبل أكبر منصّة لتداول العملات الرقمية في العالم.
👍 اكتشف الرؤى الحقيقية من صنّاع المُحتوى الموثوقين.
البريد الإلكتروني / رقم الهاتف
المواضيع الرائجة
NFPWatch
10.4M مشاهدات
16,634 يقومون بالنقاش
أخبار العملات الرقمية | البيتكوين تقترب من 85 ألف دولار مع تراجع عوائد الخزانة الأميركية قبيل تقرير الوظائف الأميركي غير الزراعي
Binance News
·1 إعجاب
·1.4k مشاهدات
BitcoinRisesToward$85K
0 مشاهدات
20 يقومون بالنقاش
AmazonPlansToSell$8BNvidiaChips
510 مشاهدات
27 يقومون بالنقاش