
Link Trading Frenzy
21.3k Posts

Link Trading Frenzy
High win rate intraday refueling📈, make me your money making tool💰.
Occasional Trader
6.1 Years
135 Following
5.5K+ Followers
17.2K+ Liked
Posts
All
Quotes
Videos
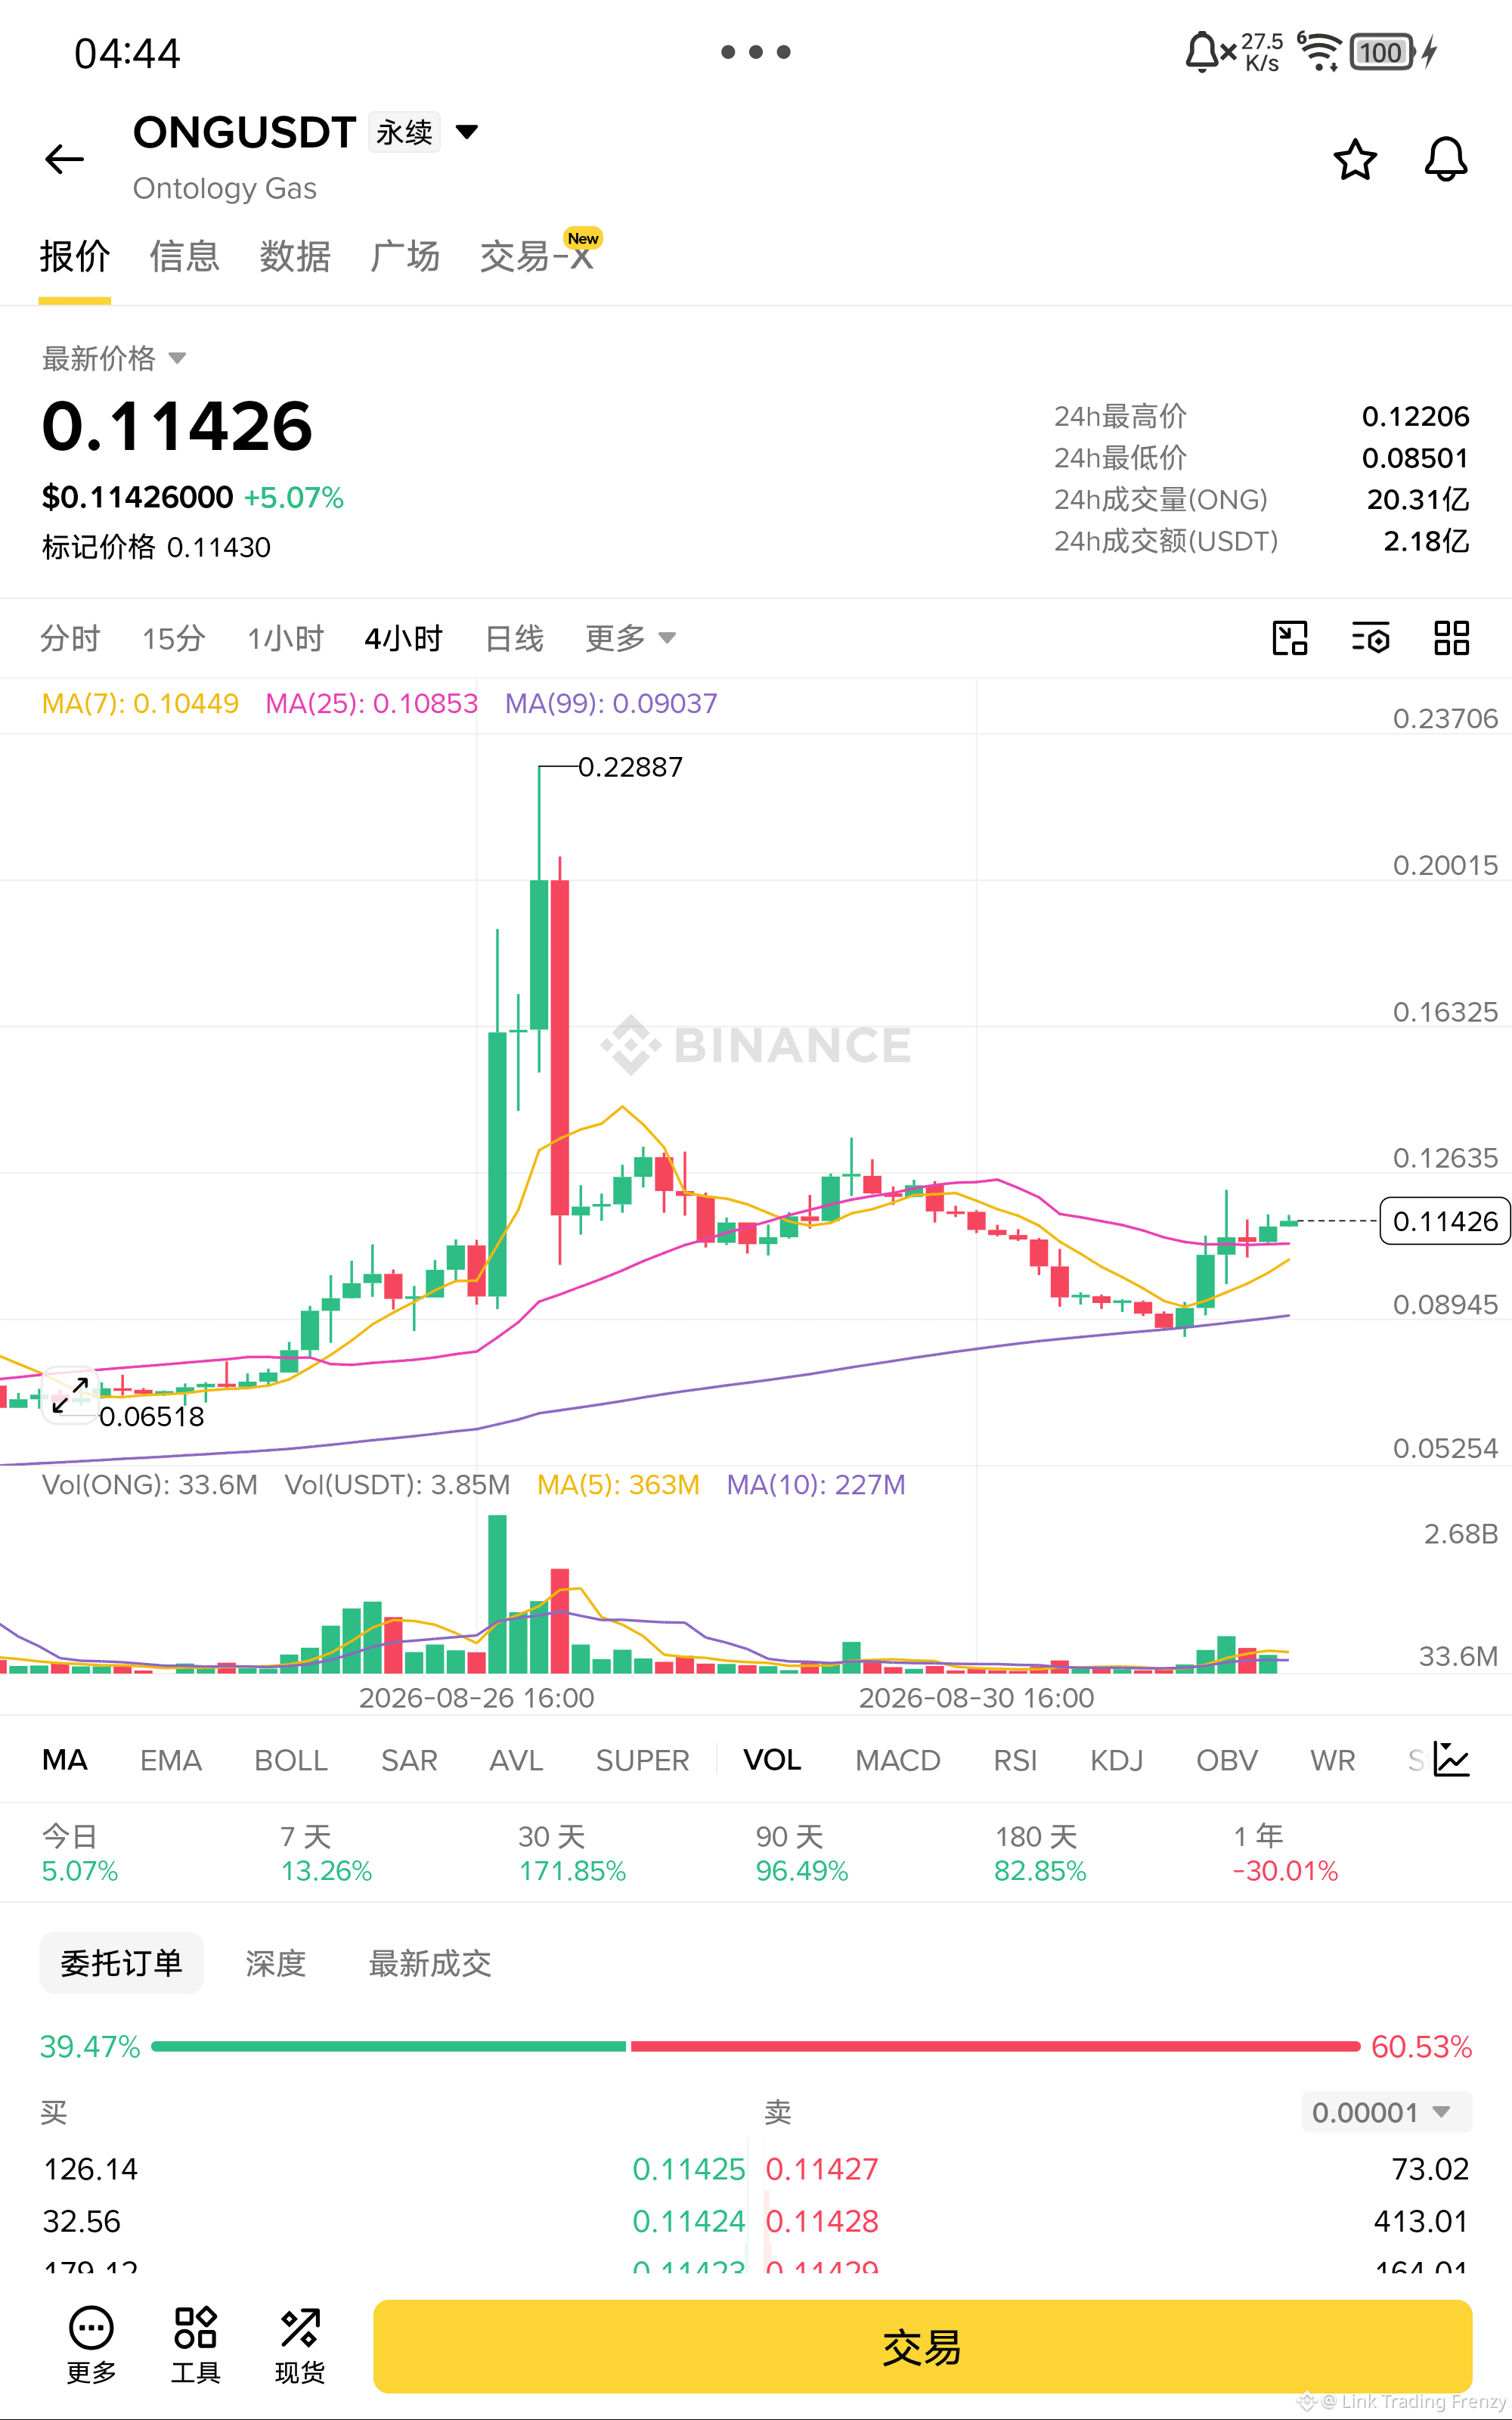
$ONG 0.114 This price action is consolidating with shrinking volume at this level—bears haven’t broken down, and the bulls are still gathering strength!
The price has been pulled up from 0.085, and after pulling back to around the MA25 area, it holds there—showing strong support underneath. All moving averages are spreading upward; MA7 and MA25 have formed a golden cross. The medium-term bullish trend has already begun to take shape. Today’s low-volume consolidation is a typical “pullback and confirmation” after a breakout. As long as 0.108 doesn’t break, it will most likely retest the 0.122 prior high; if it breaks through, it could head to 0.13.
Entry: 0.114
Stop loss: 0.106
Take profit: 0.130
$ONG - Long 🟢
Enter from the lower side below👇
The price has been pulled up from 0.085, and after pulling back to around the MA25 area, it holds there—showing strong support underneath. All moving averages are spreading upward; MA7 and MA25 have formed a golden cross. The medium-term bullish trend has already begun to take shape. Today’s low-volume consolidation is a typical “pullback and confirmation” after a breakout. As long as 0.108 doesn’t break, it will most likely retest the 0.122 prior high; if it breaks through, it could head to 0.13.
Entry: 0.114
Stop loss: 0.106
Take profit: 0.130
$ONG - Long 🟢
Enter from the lower side below👇
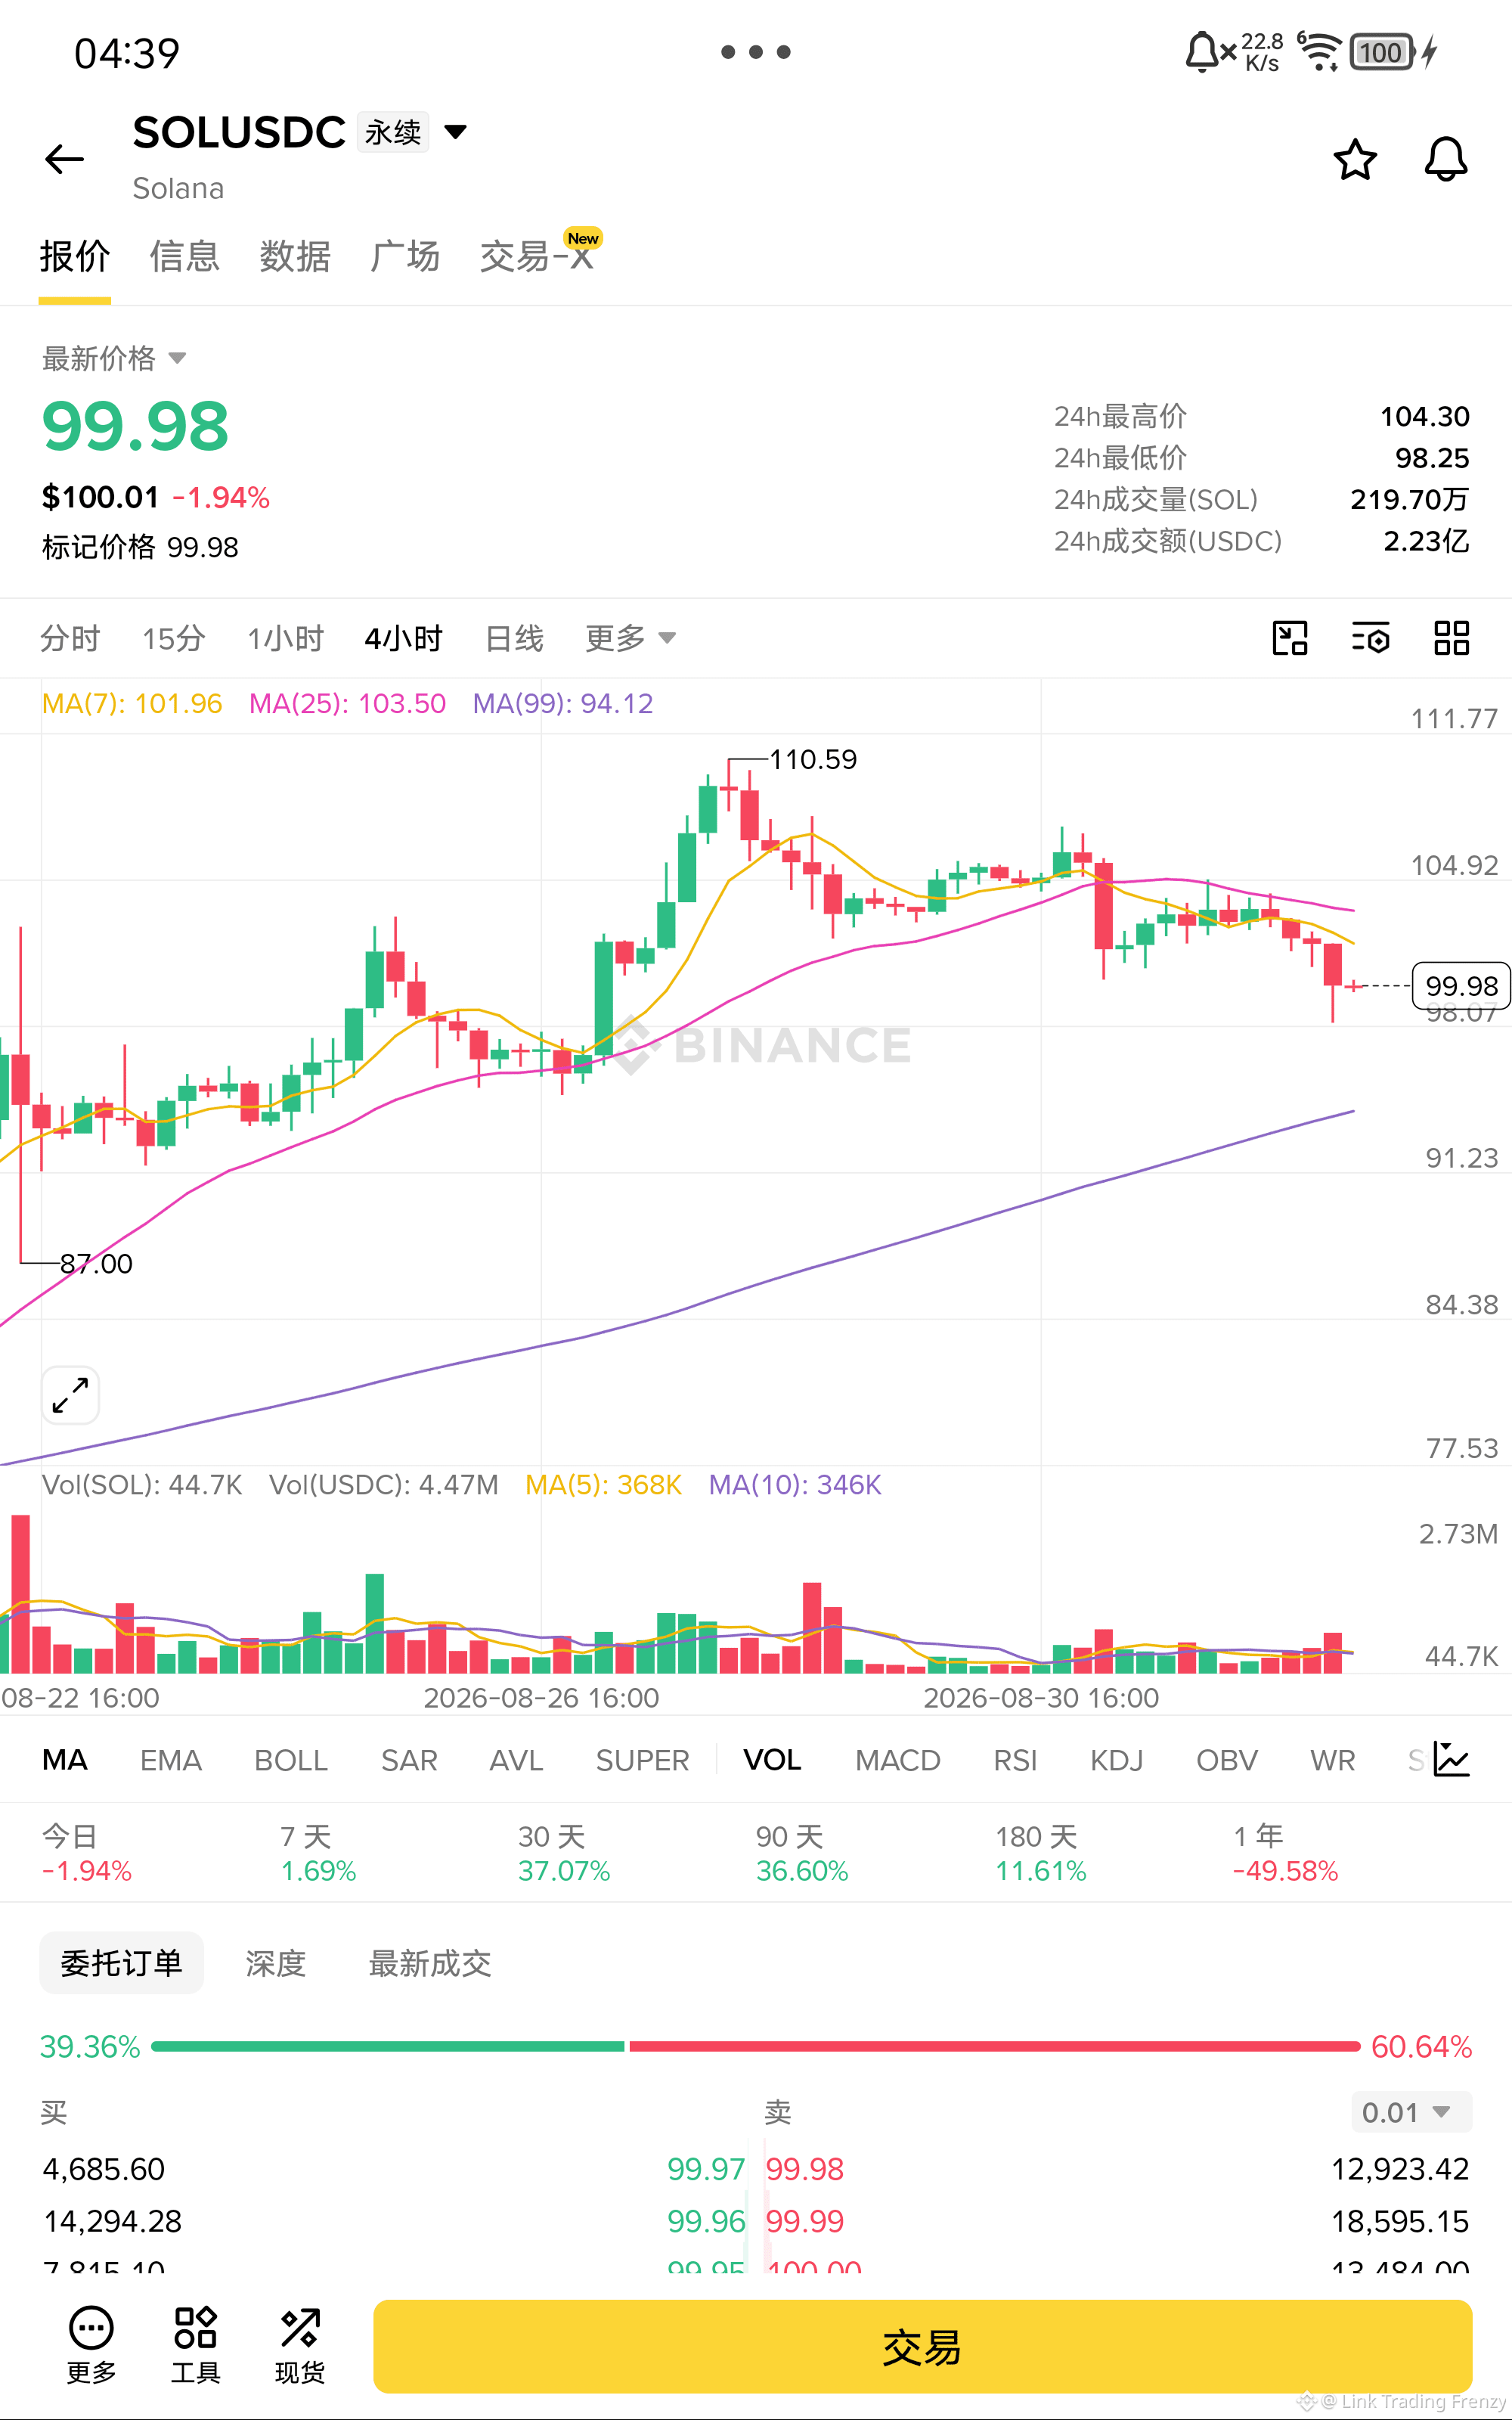
$SOL 99.98This position shows a reduced volume moving sideways horizontally, but it feels more like a pullback continuation during a decline!
After the price dropped from 104 to 98.25, the rebound lacked strength and couldn’t even touch the edge of the MA7, indicating very strong resistance overhead. The MA7 and MA25 are both pressing down, and the medium-term trend is clearly bearish. Once the yesterday’s low at 98.25 is broken, price will likely head straight to around 94 near the MA99. Trading volume is shrinking, and buyers are not active at all—so the short-term outlook remains bearish.
Entry: 99.8
Stop loss: 104.0
Take profit: 94.0
$SOL - Short 🔻
Enter the trade from below👇
After the price dropped from 104 to 98.25, the rebound lacked strength and couldn’t even touch the edge of the MA7, indicating very strong resistance overhead. The MA7 and MA25 are both pressing down, and the medium-term trend is clearly bearish. Once the yesterday’s low at 98.25 is broken, price will likely head straight to around 94 near the MA99. Trading volume is shrinking, and buyers are not active at all—so the short-term outlook remains bearish.
Entry: 99.8
Stop loss: 104.0
Take profit: 94.0
$SOL - Short 🔻
Enter the trade from below👇
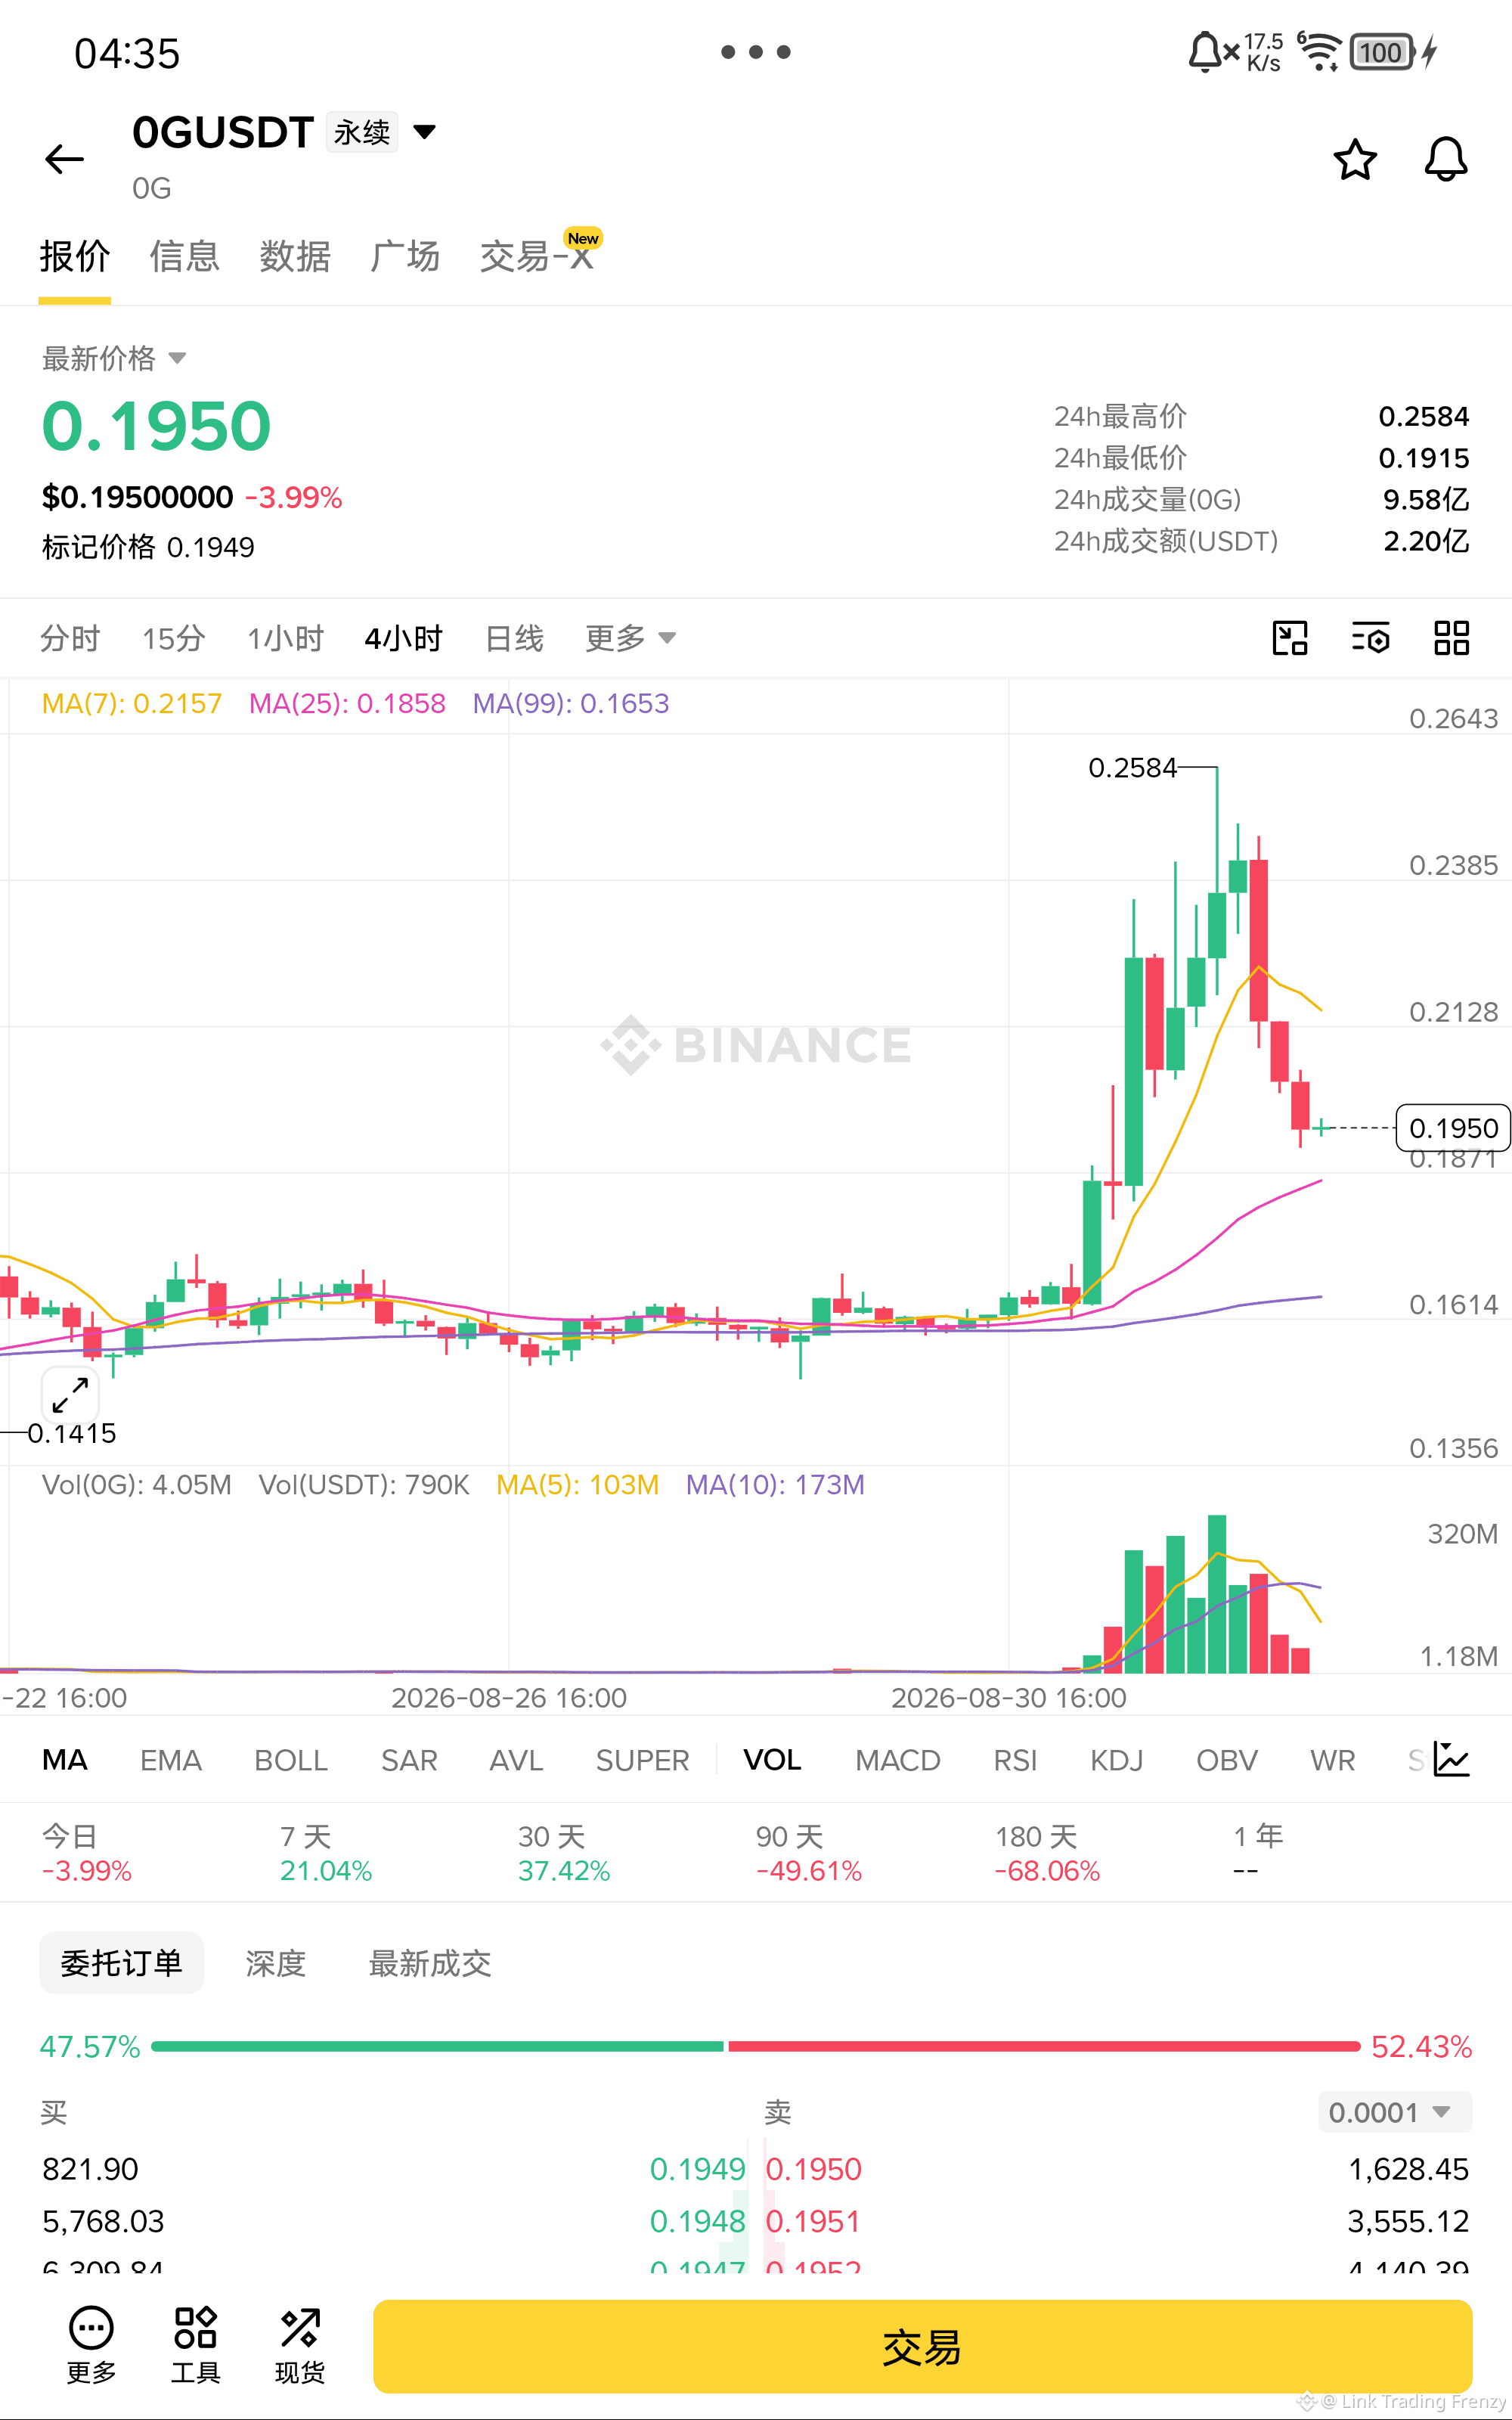
$0G 0.19 At this spot, volume has contracted and the sideways movement is holding—short sellers can’t seem to push it down anymore!
The price dropped from 0.258 all the way to 0.191, down a full 26%, with almost no meaningful rebounds in between. Today, it bounced off 0.1915 after a low-volume test, snapping back to 0.195—indicating that selling pressure is weakening. MA25 at 0.1858 is acting as a floor; as long as the prior low at 0.1915 isn’t broken, the odds are fairly high for an oversold rebound to hit the 0.21–0.215 area.
Entry: 0.195
Stop loss: 0.185
Take profit: 0.215
$OG - Long 🟢
Enter from below 👇
The price dropped from 0.258 all the way to 0.191, down a full 26%, with almost no meaningful rebounds in between. Today, it bounced off 0.1915 after a low-volume test, snapping back to 0.195—indicating that selling pressure is weakening. MA25 at 0.1858 is acting as a floor; as long as the prior low at 0.1915 isn’t broken, the odds are fairly high for an oversold rebound to hit the 0.21–0.215 area.
Entry: 0.195
Stop loss: 0.185
Take profit: 0.215
$OG - Long 🟢
Enter from below 👇
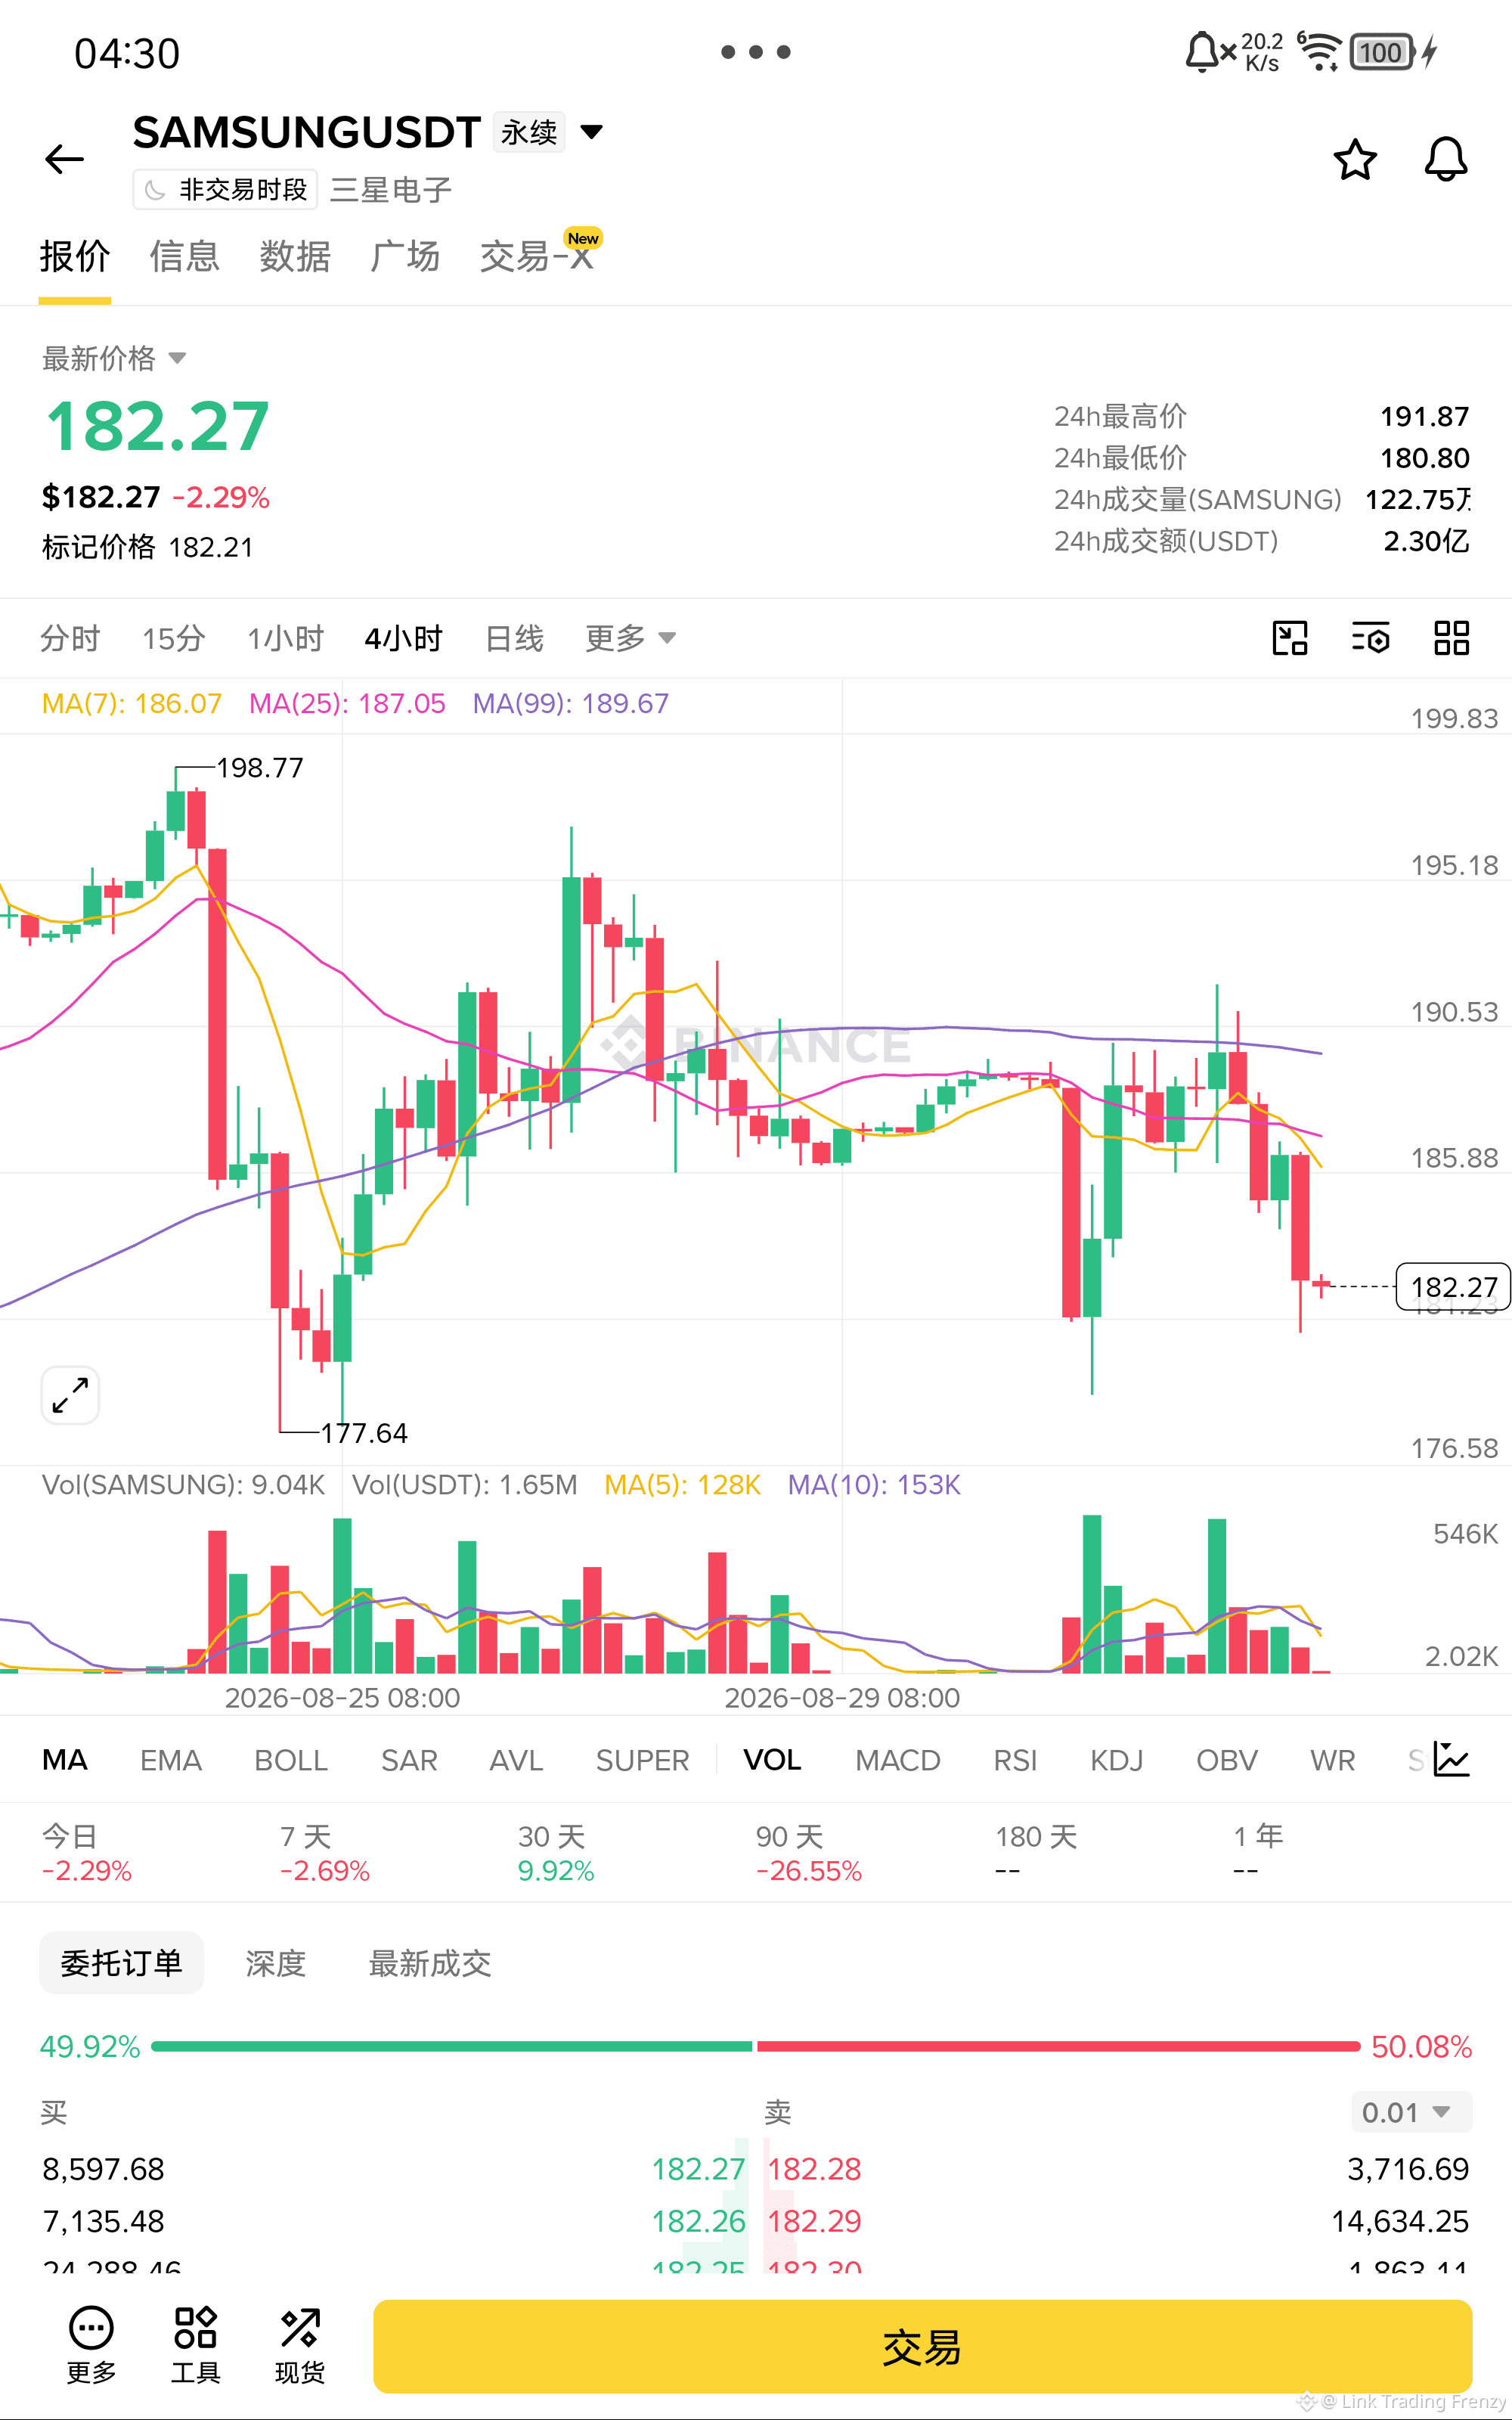
$SAMSUNG 186 This level has repeatedly been unable to get through—shorts are firmly choking it!
After the price fell from 198, it bounced back to 182 but was precisely capped by the MA7. It couldn’t even touch the edge of the MA7, which shows there’s very strong overhead supply. All three moving averages are pressing down above the head, and the shorts’ positioning is very clear. Trading volume continues to shrink; buy orders can’t move it at all. As soon as 177.6, this previous low, is broken, downside space will open up.
Entry: 182.3
Stop loss: 190.0
Take profit: 175.0
$SAMSUNG - Short 🔻
Enter the trade from below👇
After the price fell from 198, it bounced back to 182 but was precisely capped by the MA7. It couldn’t even touch the edge of the MA7, which shows there’s very strong overhead supply. All three moving averages are pressing down above the head, and the shorts’ positioning is very clear. Trading volume continues to shrink; buy orders can’t move it at all. As soon as 177.6, this previous low, is broken, downside space will open up.
Entry: 182.3
Stop loss: 190.0
Take profit: 175.0
$SAMSUNG - Short 🔻
Enter the trade from below👇
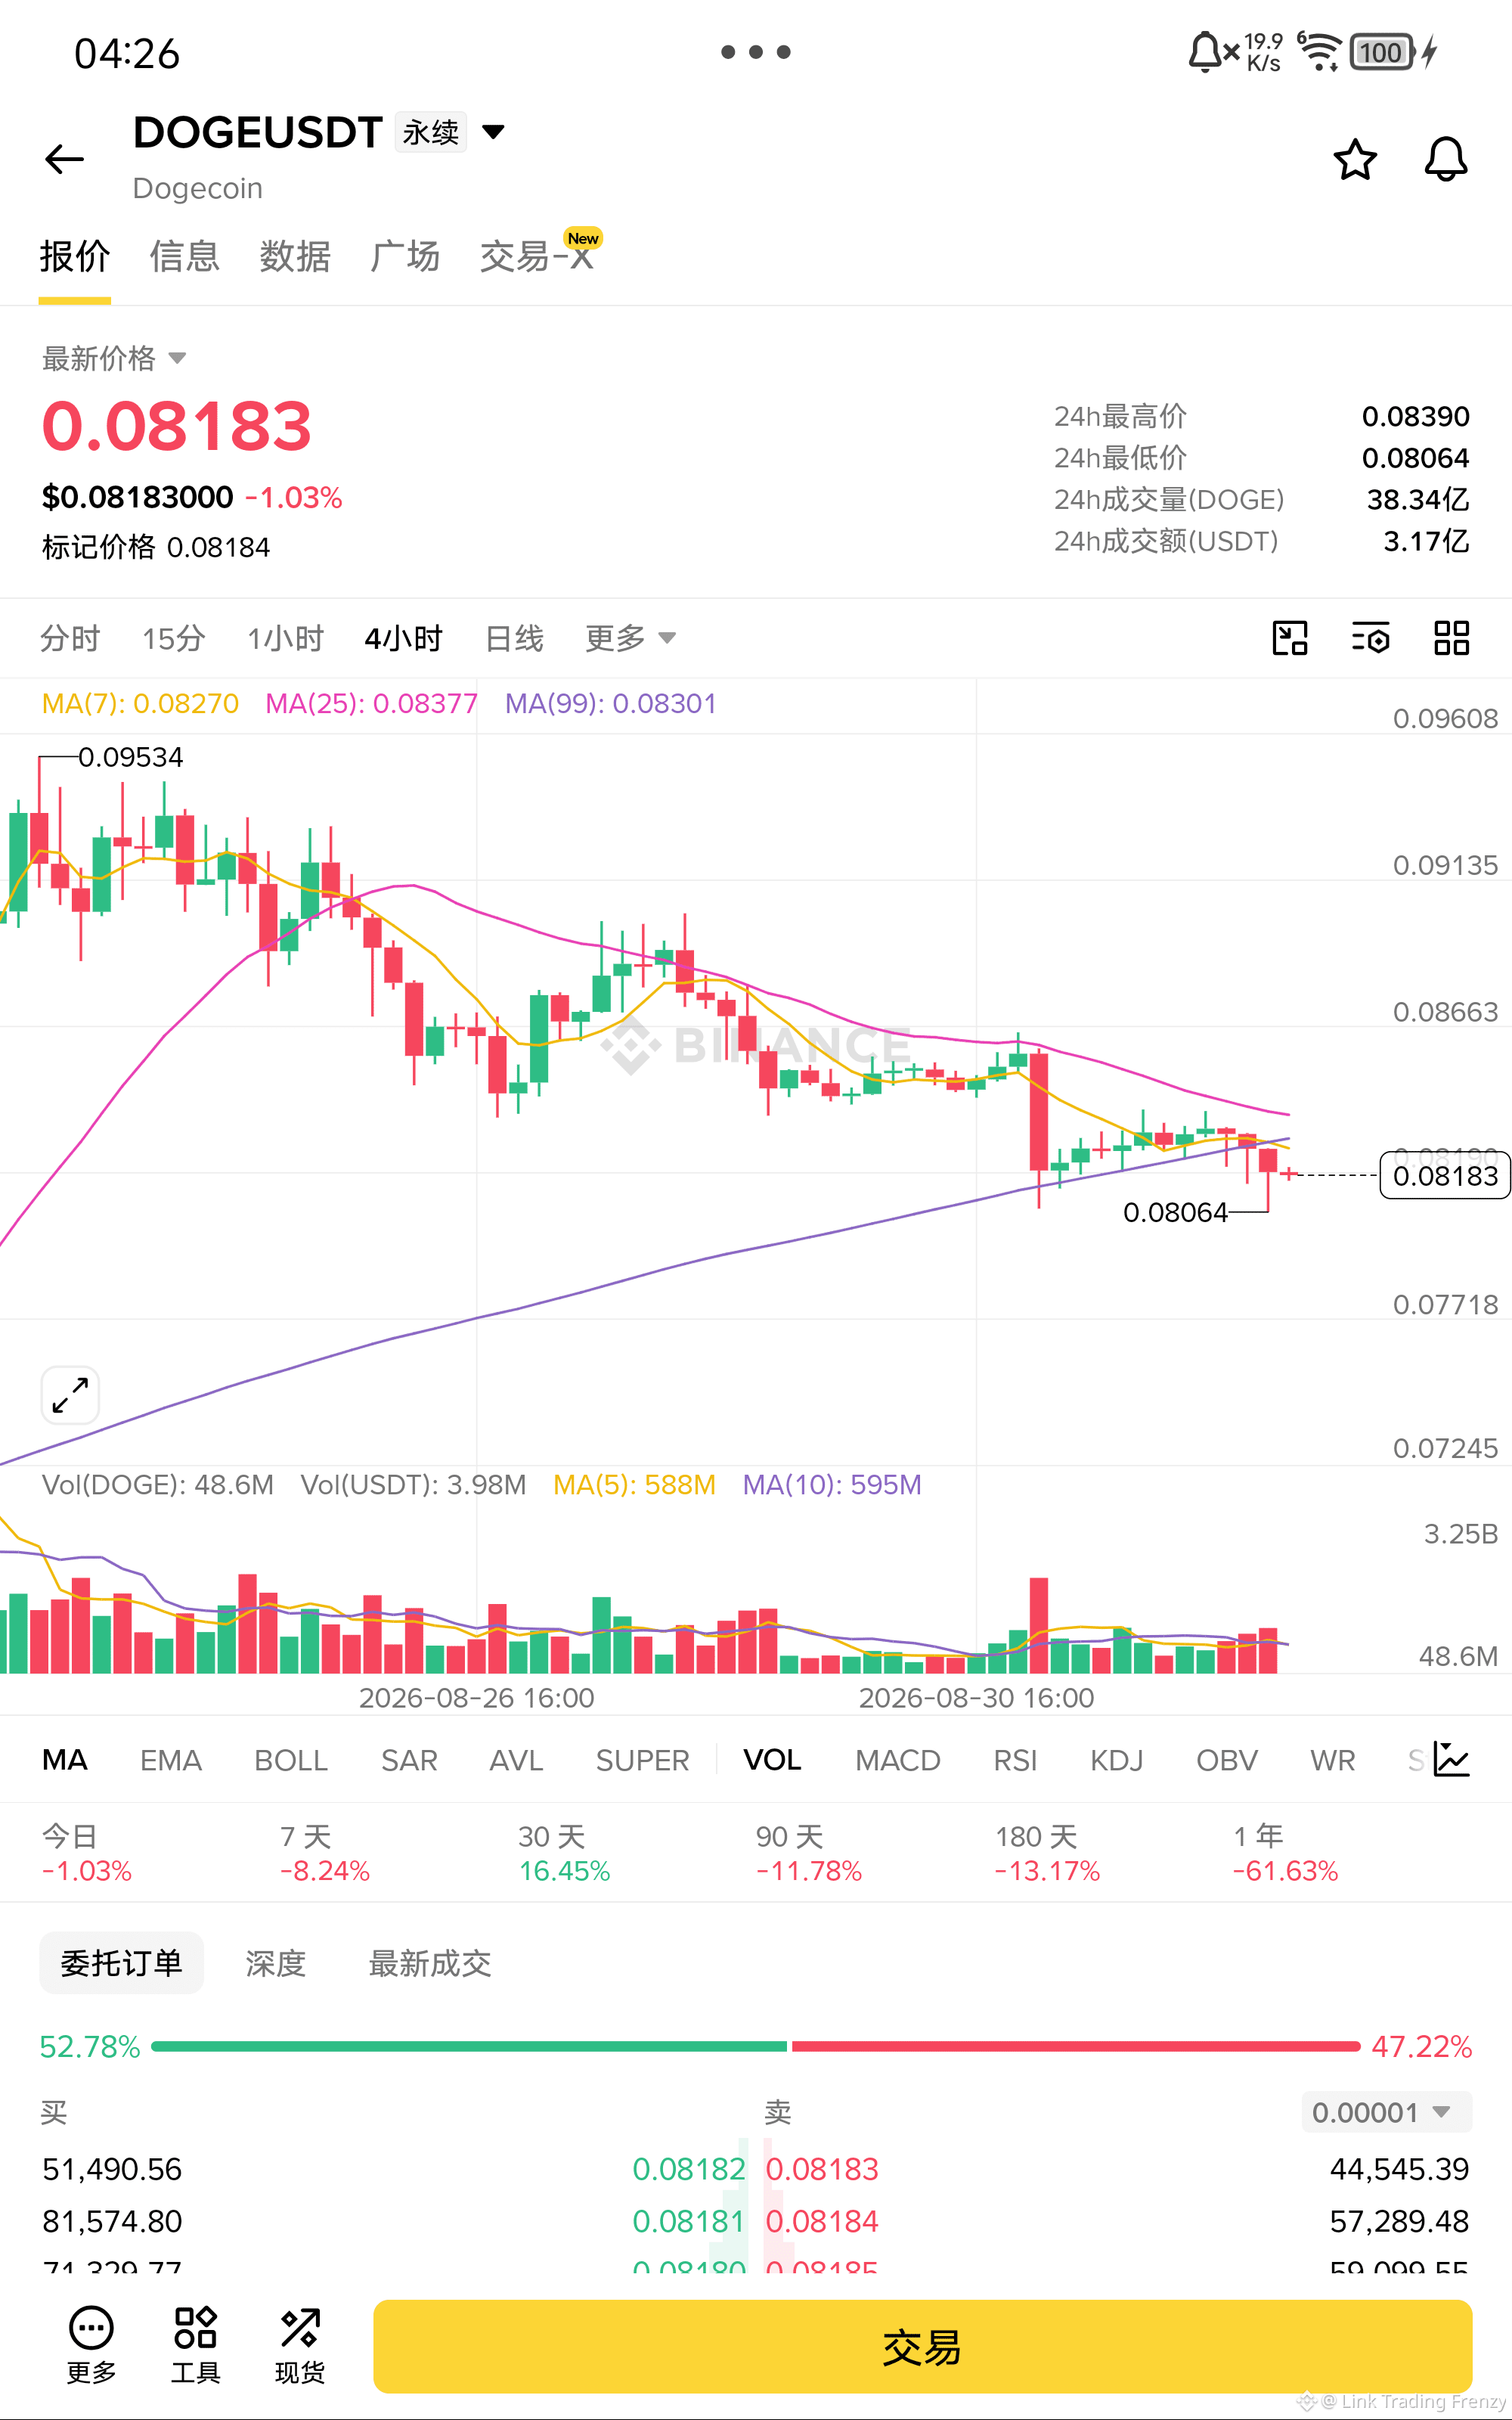
$DOGE 0.08 If this key level breaks, what comes next is truly bottomless!
After the price fell from 0.091 to 0.0806, it rebounded slightly, but it can’t even get back above the MA7, which indicates that the bulls have no strength at all. All three moving averages are staying above and pressing down—an unmistakable bearish alignment. If 0.0806 can’t hold, it’s likely to probe the lows toward 0.075 or even 0.07.
Entry: 0.0818
Stop loss: 0.0855
Take profit: 0.0760
$DOGE - Short 🔻
Enter the trade from below👇
After the price fell from 0.091 to 0.0806, it rebounded slightly, but it can’t even get back above the MA7, which indicates that the bulls have no strength at all. All three moving averages are staying above and pressing down—an unmistakable bearish alignment. If 0.0806 can’t hold, it’s likely to probe the lows toward 0.075 or even 0.07.
Entry: 0.0818
Stop loss: 0.0855
Take profit: 0.0760
$DOGE - Short 🔻
Enter the trade from below👇
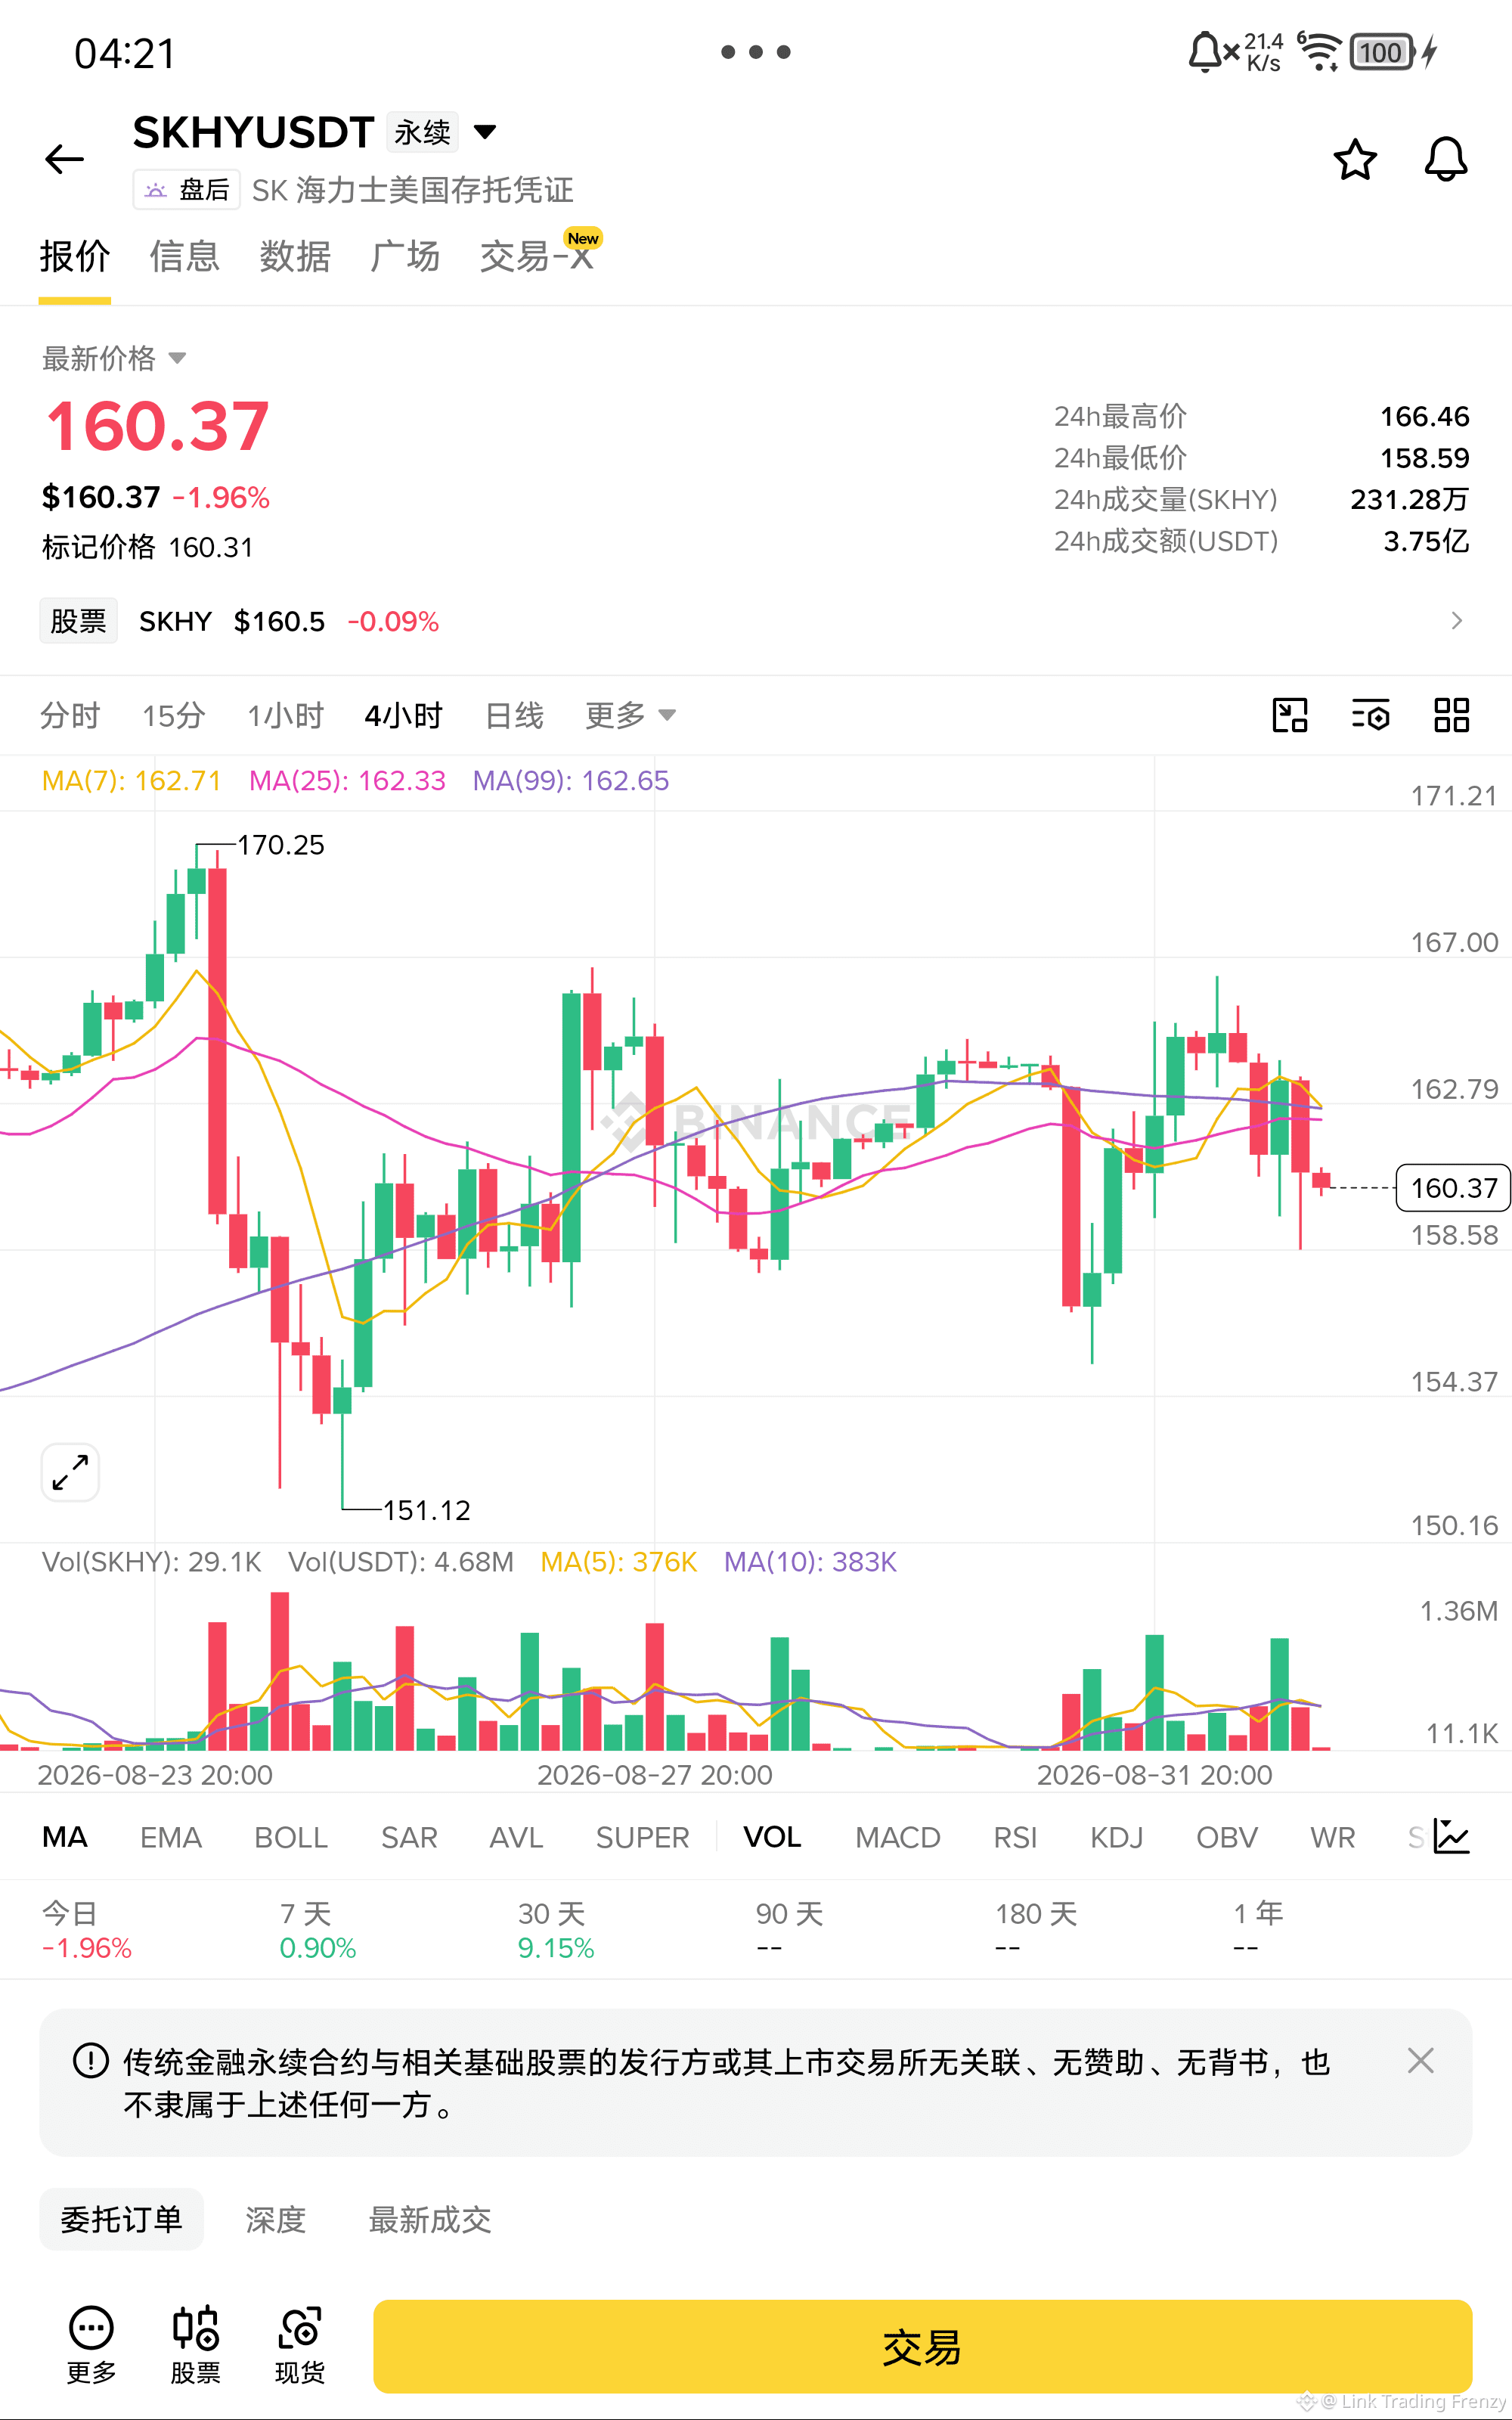
$SKHY Three moving averages are clumped above 162, firmly pressing down—this rebound looks like it will be tough to keep up!
After the price fell from 166 to 158.6, it rebounded to 160.3, but it didn’t even manage to touch the edge of MA7 before being pushed back down. This shows that resistance overhead is very strong. MA7, MA25, and MA99 are all stuck above 162, forming a powerful resistance zone. As long as 160 can’t hold, it’s likely we’ll retest the previous low at 158.6; if that breaks, then it may run toward 151.
Entry: 160.3
Stop loss: 165.0
Take profit: 151.0
$SKHY - 空 🔻
Enter the trade from below👇
After the price fell from 166 to 158.6, it rebounded to 160.3, but it didn’t even manage to touch the edge of MA7 before being pushed back down. This shows that resistance overhead is very strong. MA7, MA25, and MA99 are all stuck above 162, forming a powerful resistance zone. As long as 160 can’t hold, it’s likely we’ll retest the previous low at 158.6; if that breaks, then it may run toward 151.
Entry: 160.3
Stop loss: 165.0
Take profit: 151.0
$SKHY - 空 🔻
Enter the trade from below👇
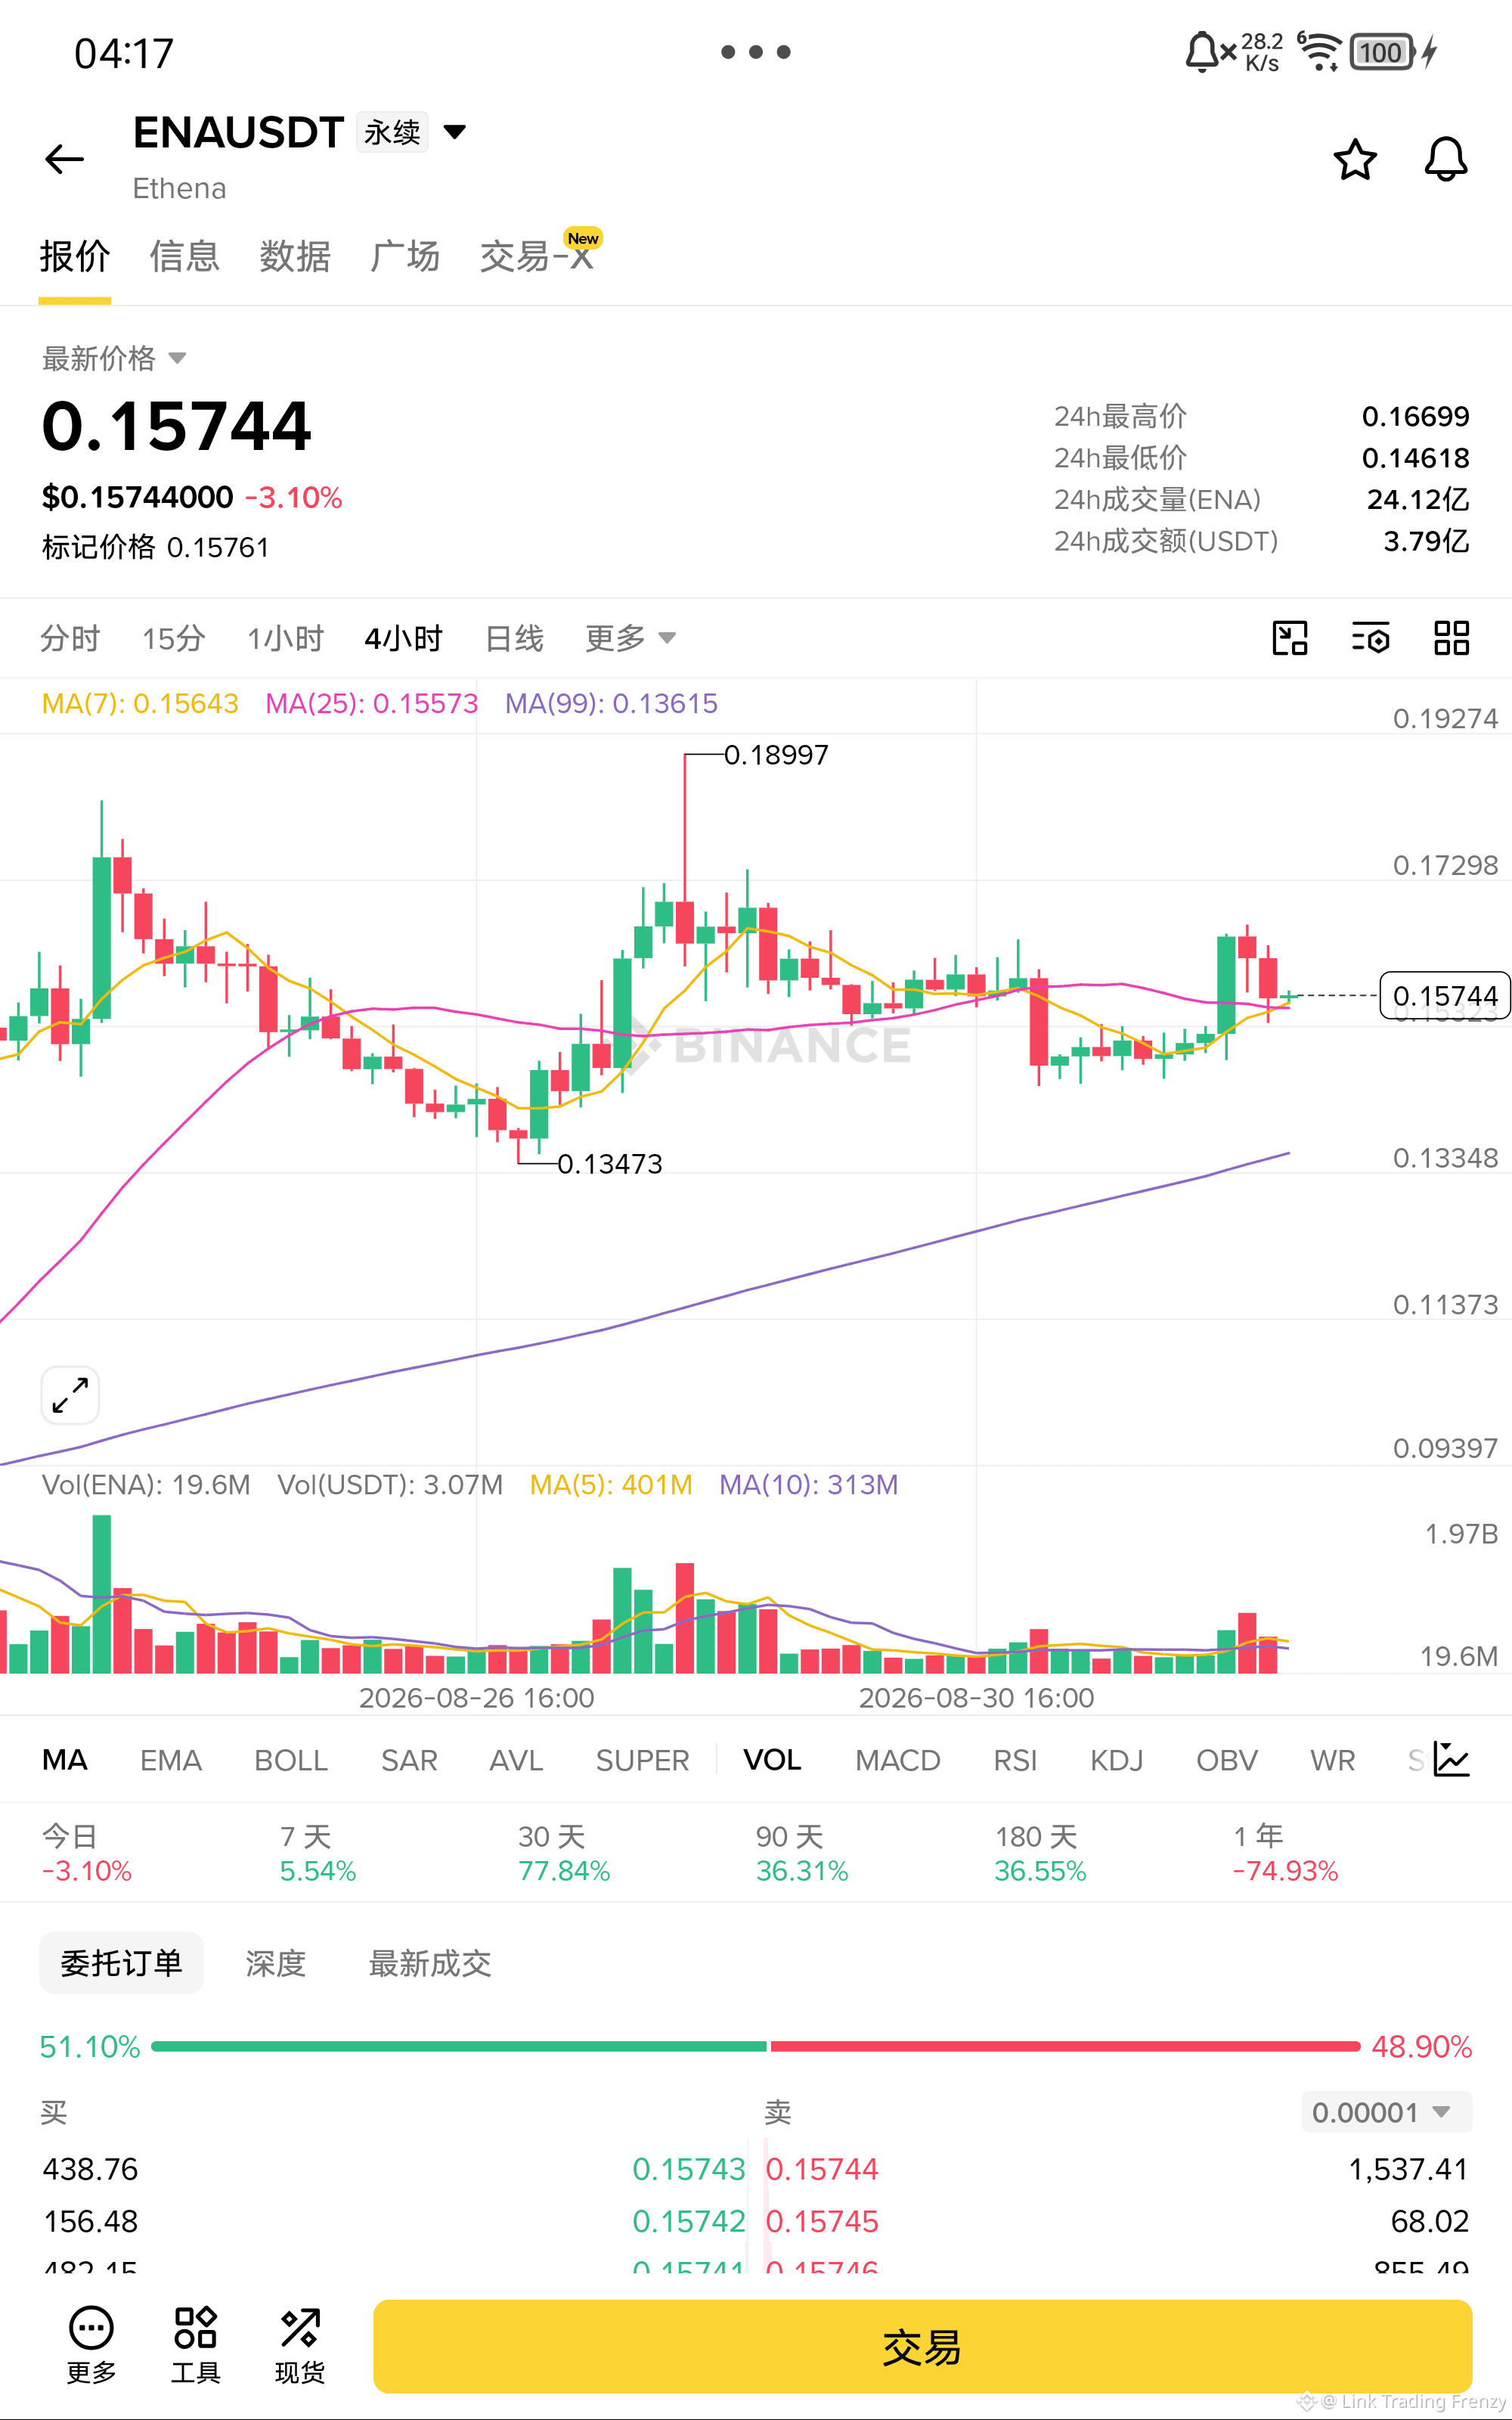
$ENA 0.146 I tested this spot once and it bounced right back up. The support below is quite solid!
After the price pulled back from 0.167 to 0.146, it quickly reclaimed, and then regained MA7 and MA25, indicating that this move was just a normal correction. 0.146 is strong support, and the moving average system is still diverging upward. As long as 0.155 holds and isn’t broken, there’s a decent chance of another rebound to retest 0.167. Short-term bias is mildly bullish—watch for the second wave of upswing.
Entry: 0.157
Stop loss: 0.145
Take profit: 0.167
$ENA - Long 🟢
Enter the trade from below👇
After the price pulled back from 0.167 to 0.146, it quickly reclaimed, and then regained MA7 and MA25, indicating that this move was just a normal correction. 0.146 is strong support, and the moving average system is still diverging upward. As long as 0.155 holds and isn’t broken, there’s a decent chance of another rebound to retest 0.167. Short-term bias is mildly bullish—watch for the second wave of upswing.
Entry: 0.157
Stop loss: 0.145
Take profit: 0.167
$ENA - Long 🟢
Enter the trade from below👇
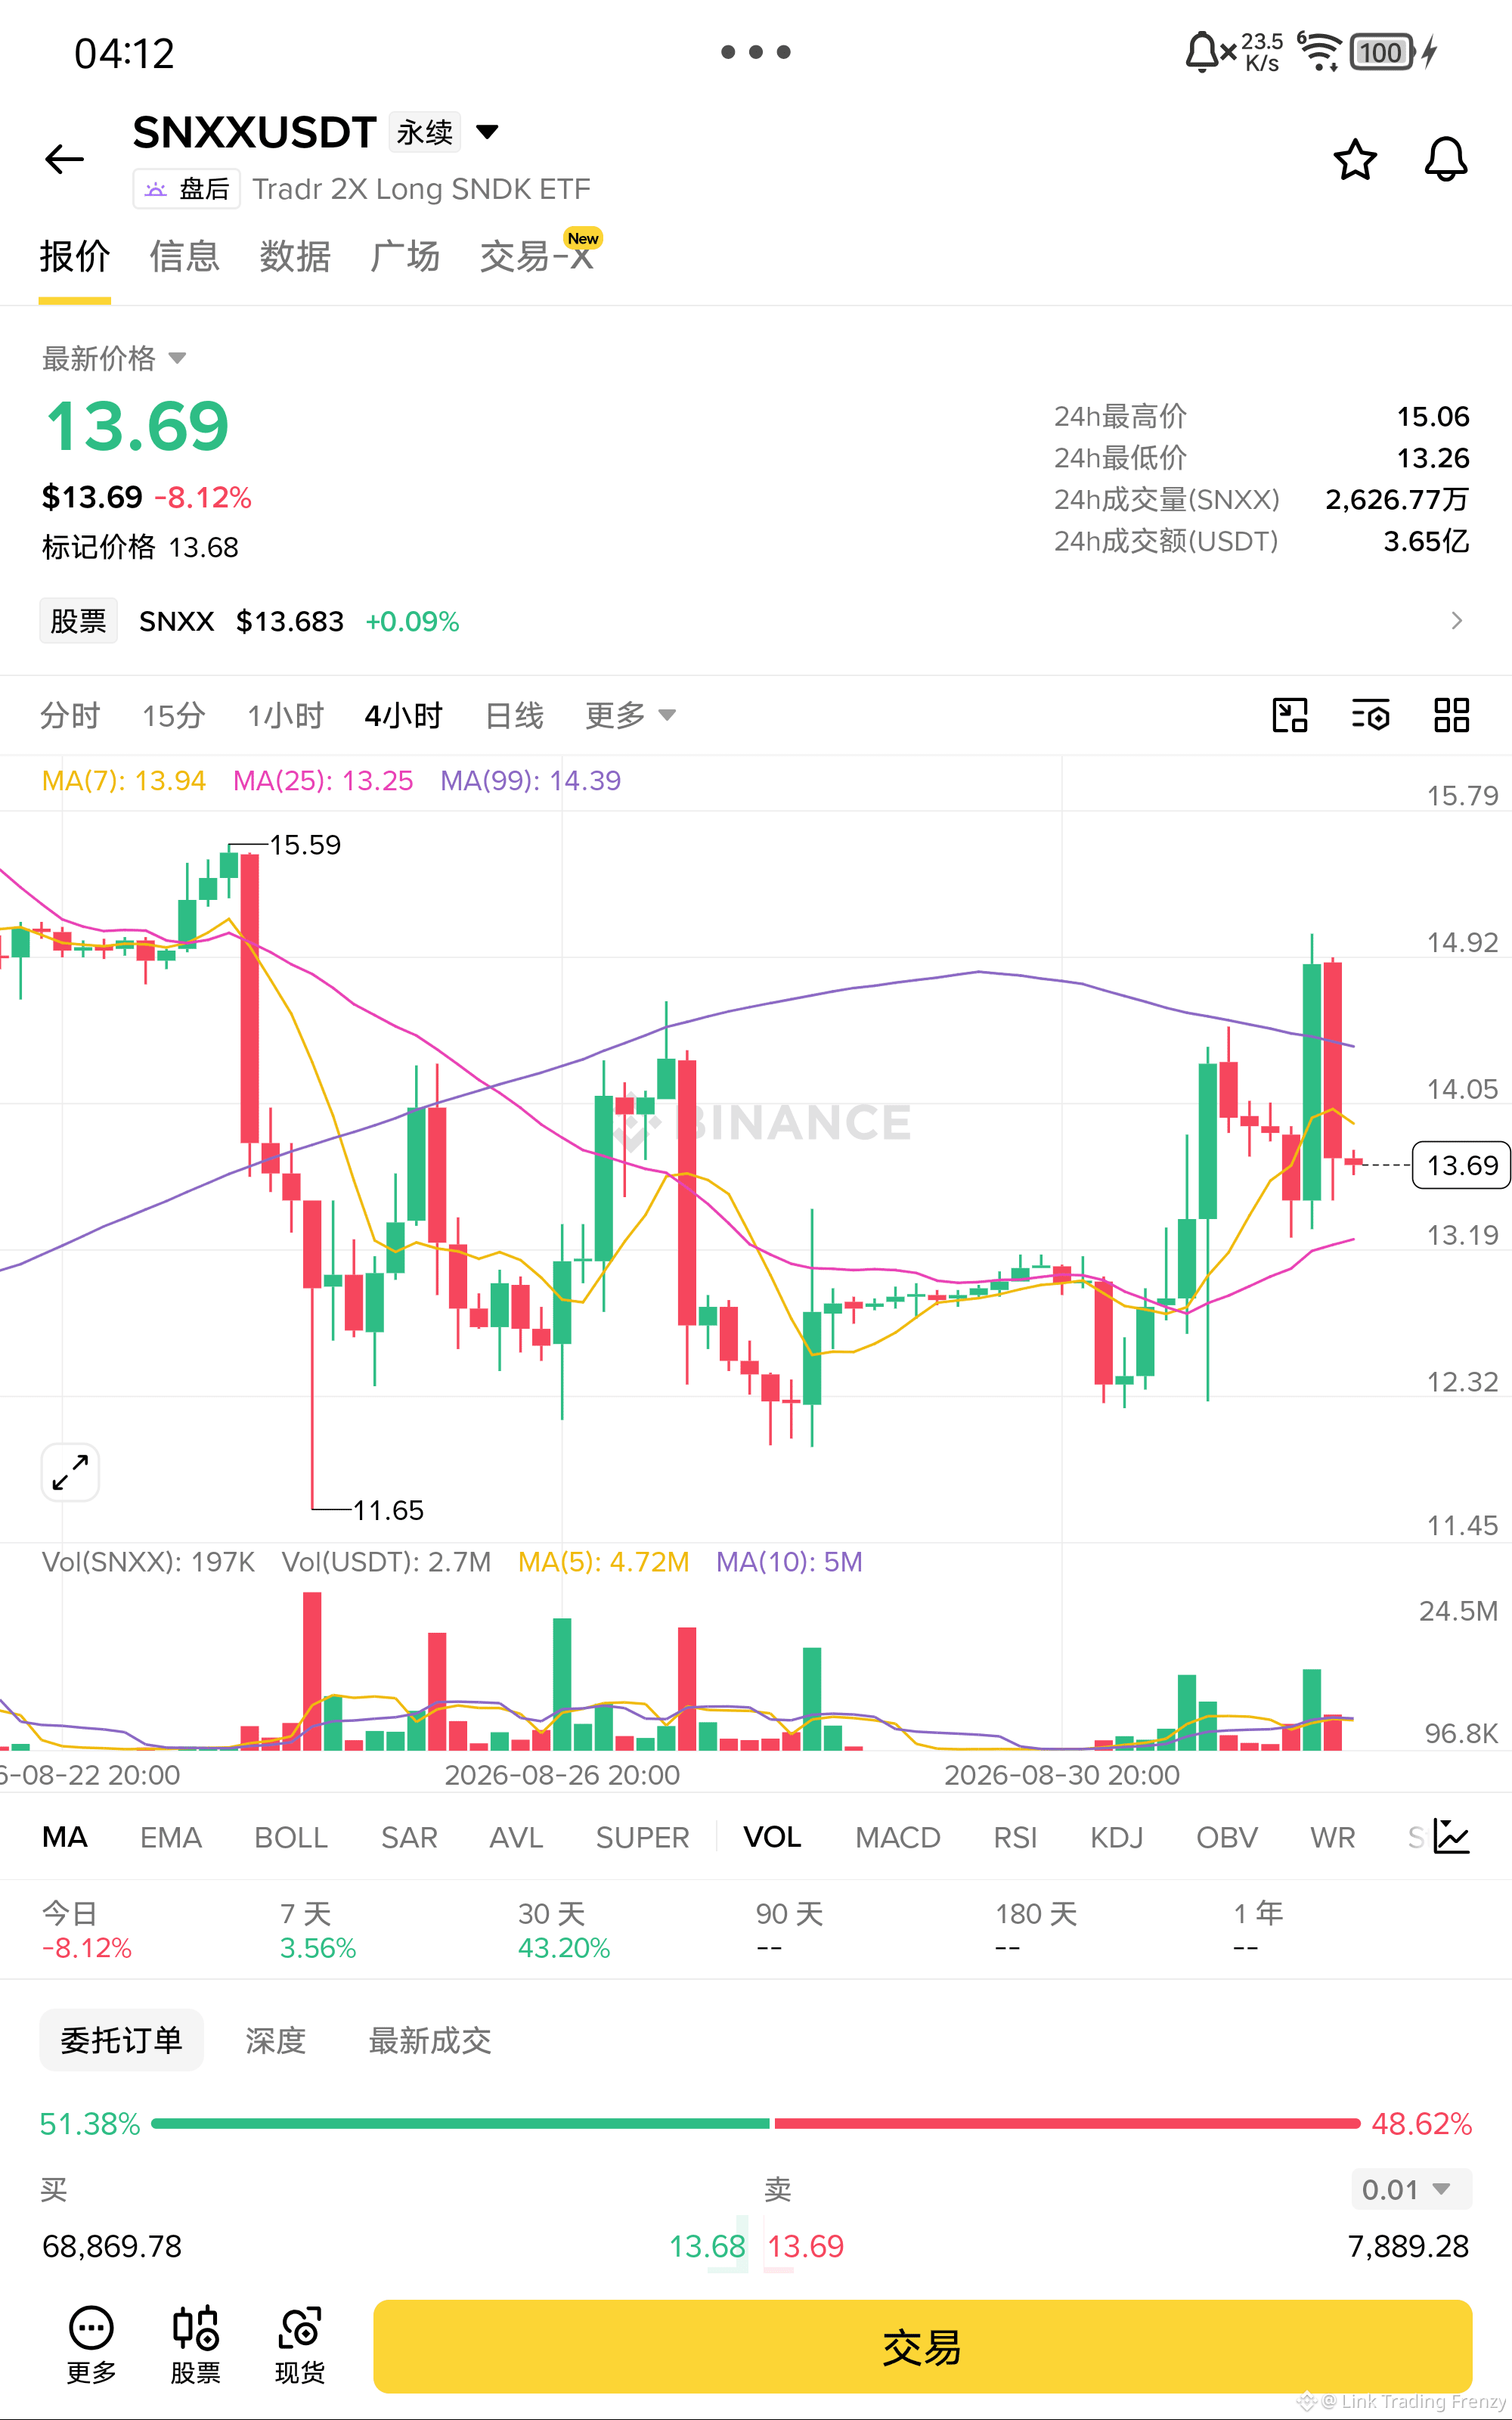
$SNXX 13.26 At this spot, the volume is shrinking while the price holds down—there’s something interesting about the double-bottom structure!
After the price fell from 15 to 13.26, it rebounded to 13.7, with trading volume clearly contracting, indicating that selling pressure is weakening. MA25 is exactly supporting at 13.25. If this level holds, the short-term bottom is likely to show up. As long as 13.26 doesn’t break, there’s a fairly high chance the rebound will run up to 14.5–15.
Entry: 13.70
Stop loss: 13.00
Take profit: 14.80
$SNXX - Long 🟢
Enter from below👇
After the price fell from 15 to 13.26, it rebounded to 13.7, with trading volume clearly contracting, indicating that selling pressure is weakening. MA25 is exactly supporting at 13.25. If this level holds, the short-term bottom is likely to show up. As long as 13.26 doesn’t break, there’s a fairly high chance the rebound will run up to 14.5–15.
Entry: 13.70
Stop loss: 13.00
Take profit: 14.80
$SNXX - Long 🟢
Enter from below👇
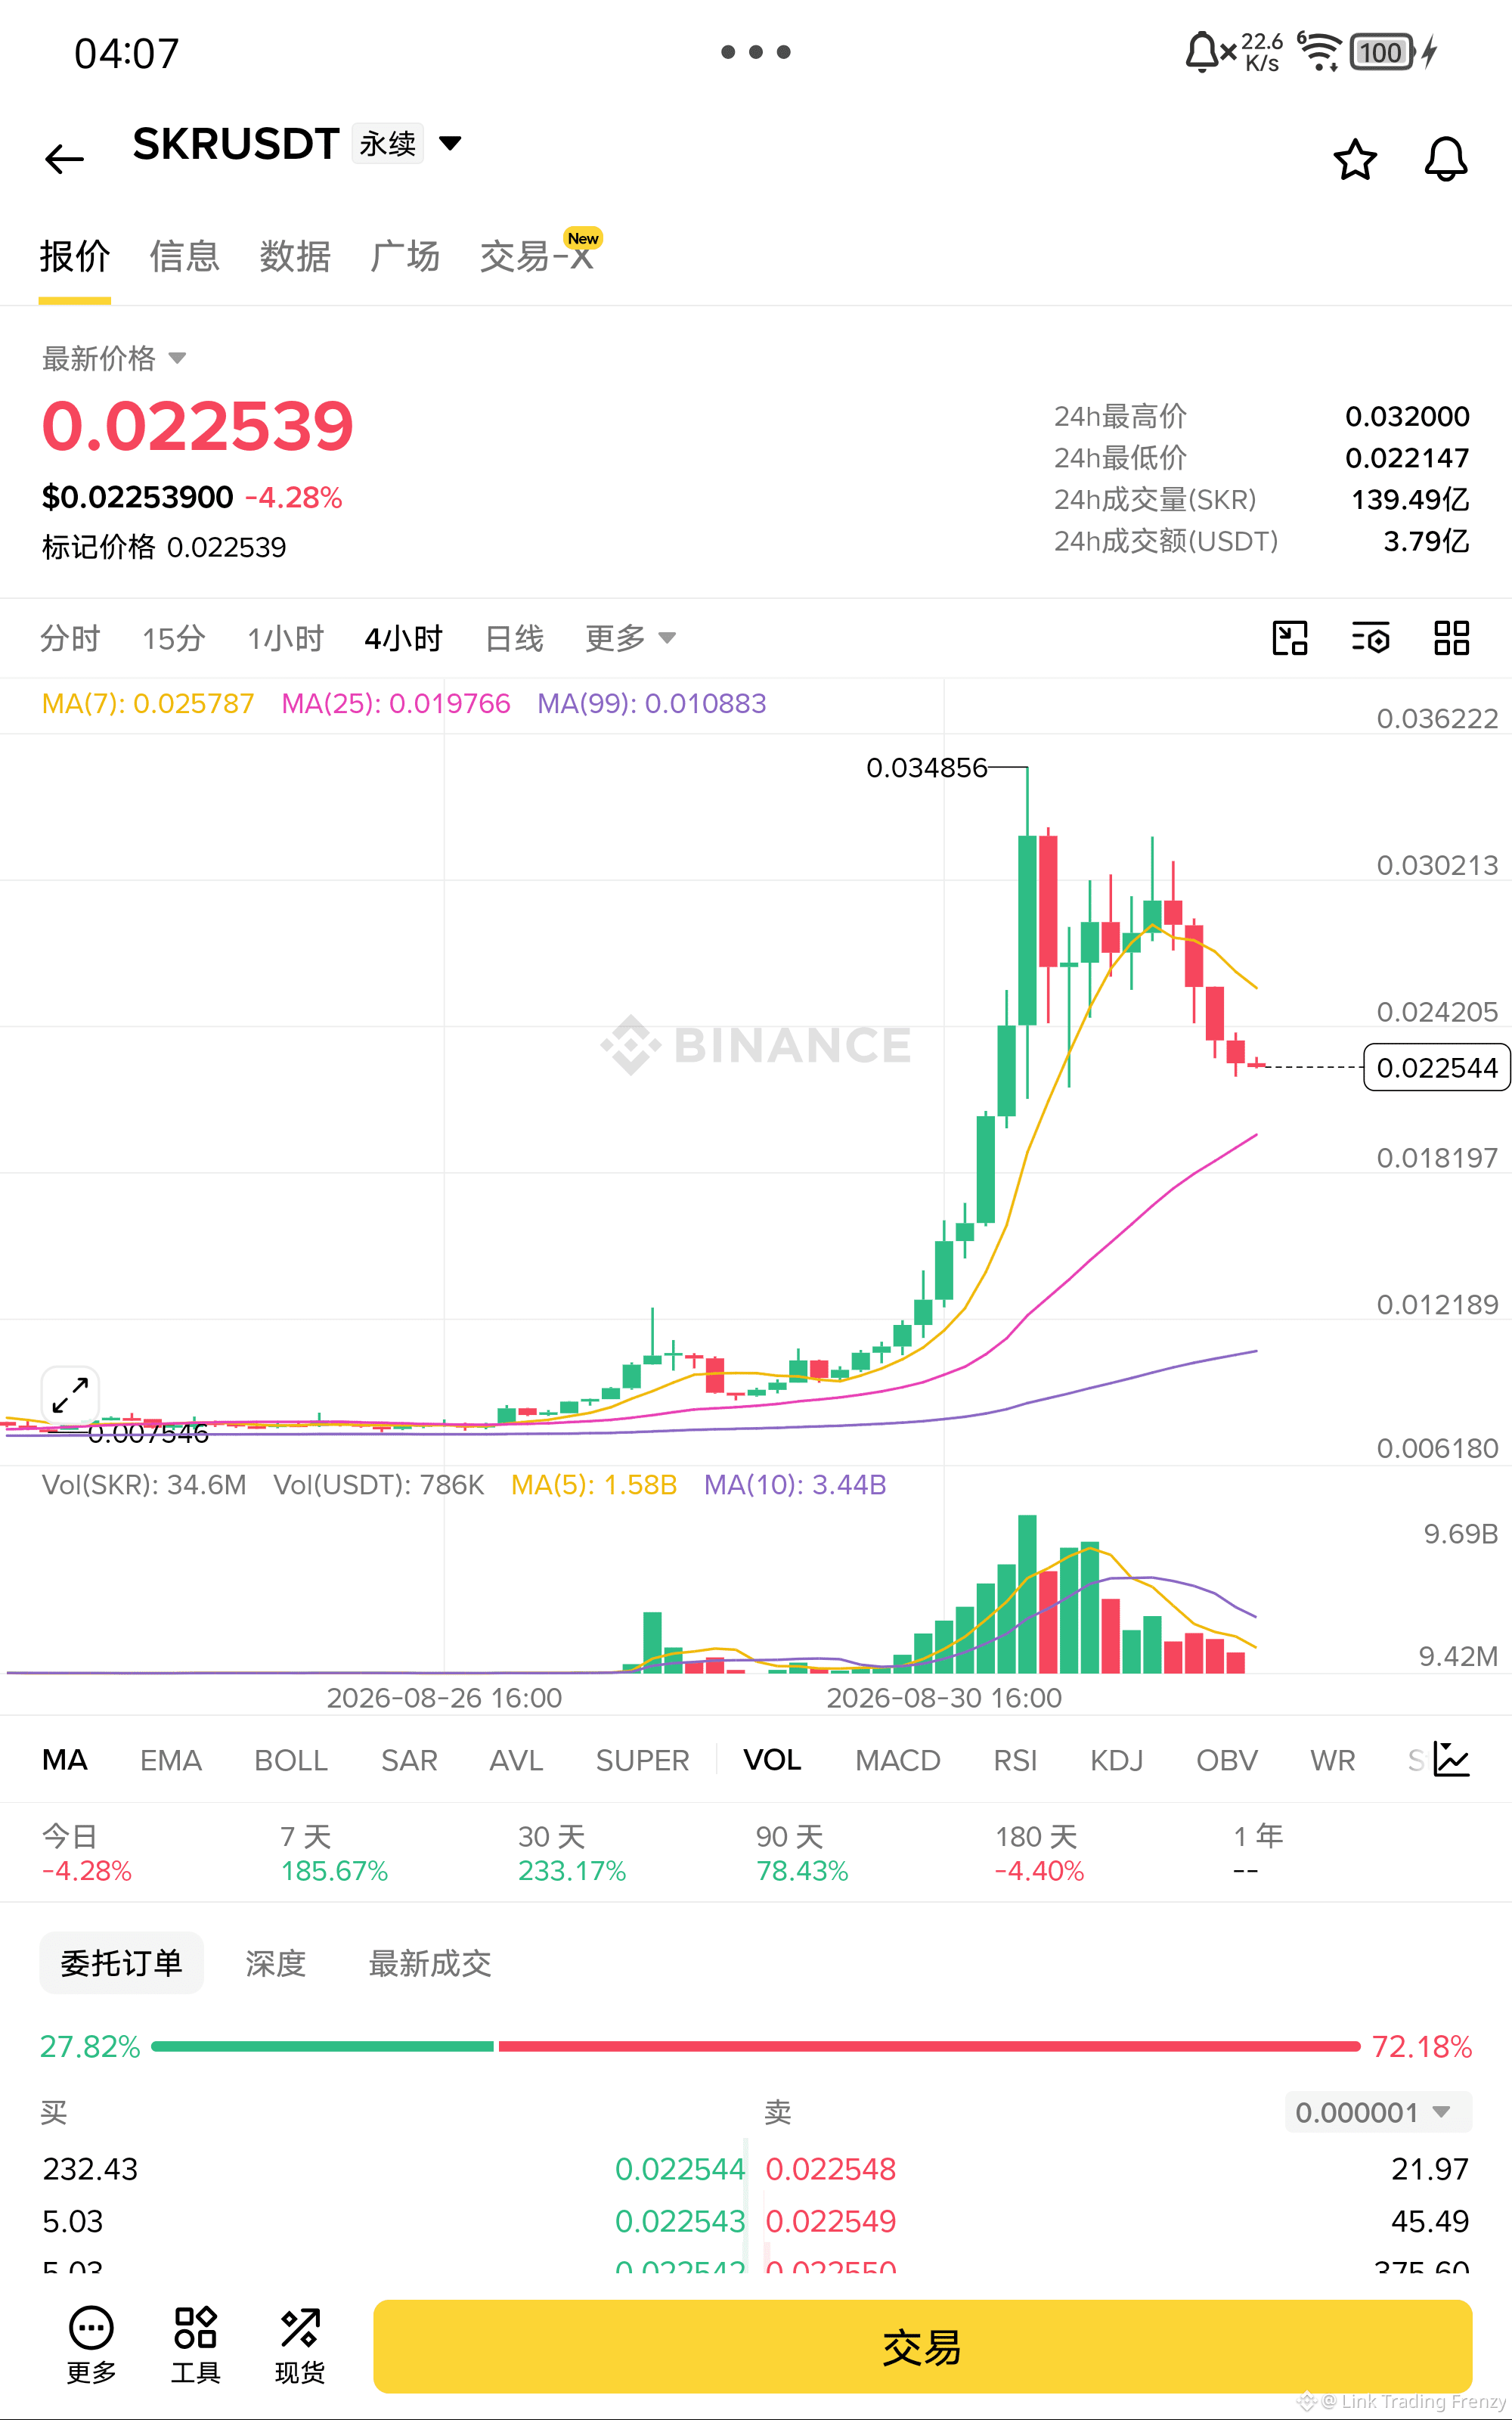
$SKR 0.022 This level held despite decreasing volume, and the short-side momentum is running out!
The price fell from 0.032 to 0.022, and after a consecutive 30% drop, the trading volume clearly shrank, suggesting that the sell pressure is nearly exhausted. Today’s low was 0.0221, which exactly stepped on the prior breakout point. Below that, MA25 near 0.0197 will act as support. As long as it doesn’t break, there’s a high chance of a rebound back to 0.025–0.026.
Bias (short term): bullish — looking for a quick recovery.
Entry: 0.0225
Stop-loss: 0.0195
Take-profit: 0.0260
$SKR - Long 🟢
Enter from below👇
The price fell from 0.032 to 0.022, and after a consecutive 30% drop, the trading volume clearly shrank, suggesting that the sell pressure is nearly exhausted. Today’s low was 0.0221, which exactly stepped on the prior breakout point. Below that, MA25 near 0.0197 will act as support. As long as it doesn’t break, there’s a high chance of a rebound back to 0.025–0.026.
Bias (short term): bullish — looking for a quick recovery.
Entry: 0.0225
Stop-loss: 0.0195
Take-profit: 0.0260
$SKR - Long 🟢
Enter from below👇
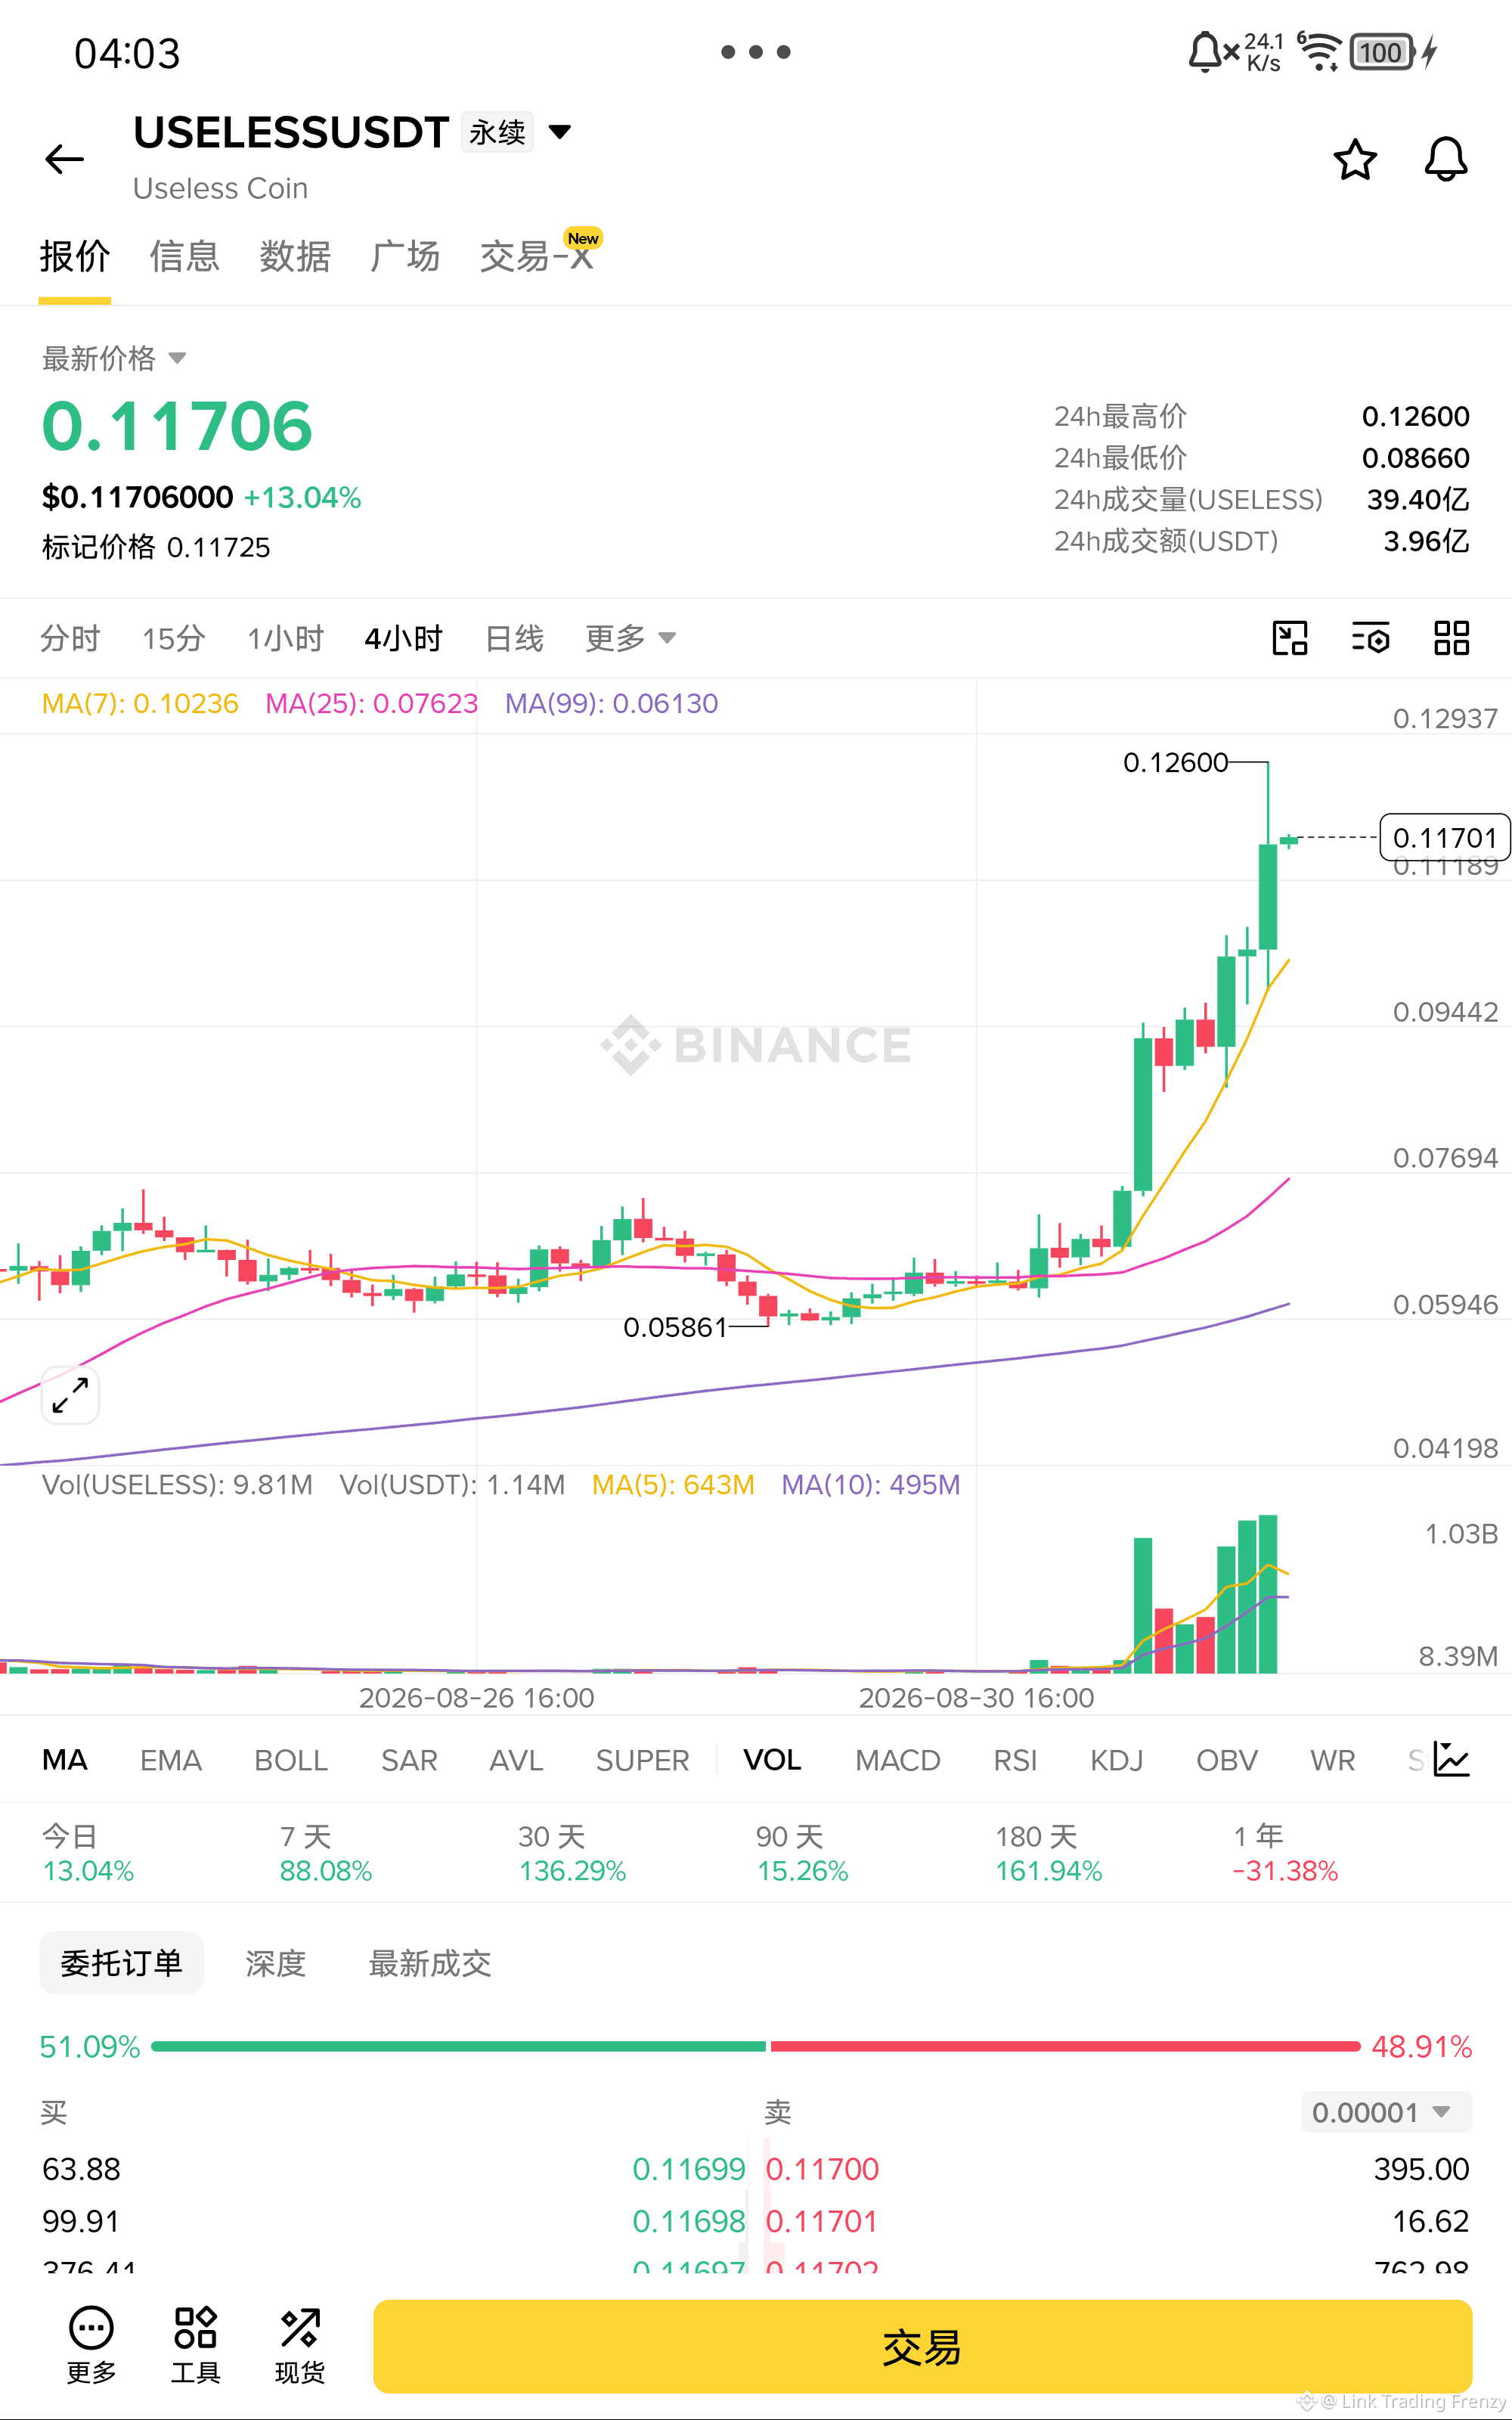
$USELESS This coin's name is useless, but its price action is anything but useless!
The price has surged from 0.086 all the way to 0.117. Even the MA99 has been crossed under, with all moving averages diverging upward—this is already a bullish trend. In the past two days, the price has shrunk in volume while pulling back near 0.117, exactly landing on MA7. This is a classic post-breakout pullback and confirmation. As long as 0.102 holds (doesn't break), it will most likely test the previous high at 0.126 next. Once it goes through, it’s a whole new world.
Entry: 0.117
Stop loss: 0.100
Take profit: 0.135
$USELESS - Long 🟢
Enter from below👇
The price has surged from 0.086 all the way to 0.117. Even the MA99 has been crossed under, with all moving averages diverging upward—this is already a bullish trend. In the past two days, the price has shrunk in volume while pulling back near 0.117, exactly landing on MA7. This is a classic post-breakout pullback and confirmation. As long as 0.102 holds (doesn't break), it will most likely test the previous high at 0.126 next. Once it goes through, it’s a whole new world.
Entry: 0.117
Stop loss: 0.100
Take profit: 0.135
$USELESS - Long 🟢
Enter from below👇
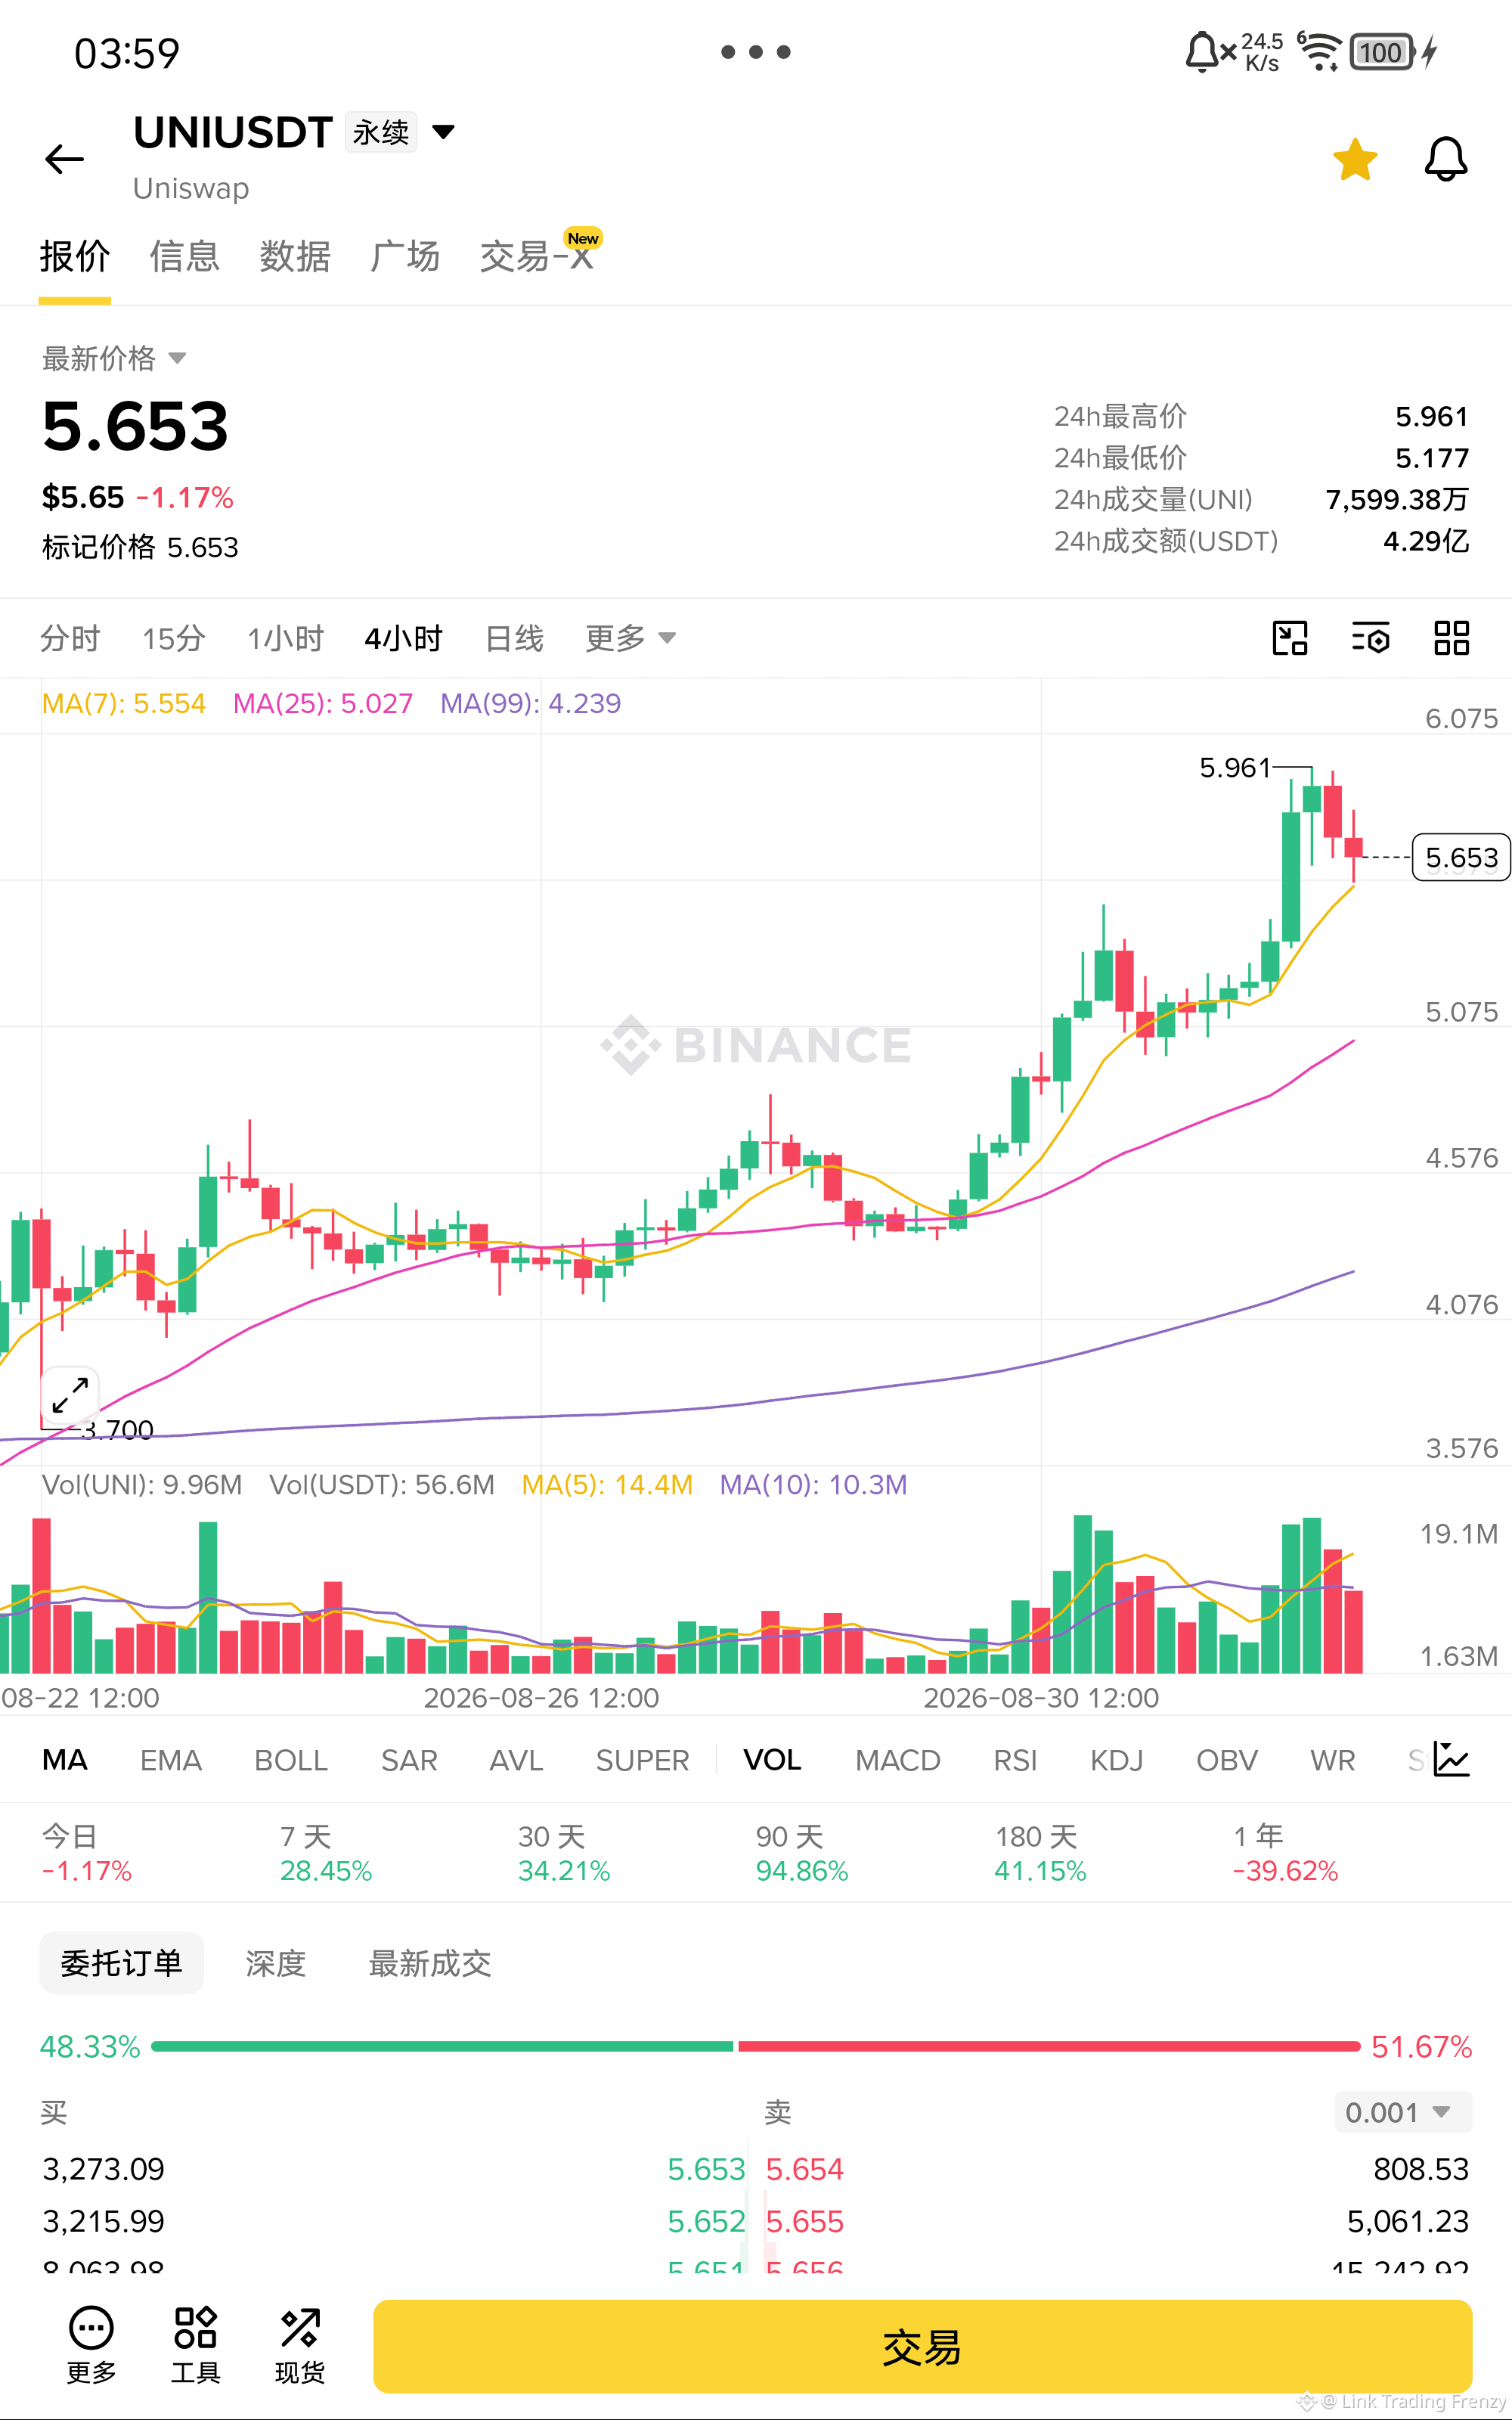
$UNI 5 blocks 5 this position is stable—the shorts can’t push it down anymore!
The price has been pulled up from 5.17 all the way. When it retraced to around 5.55, it was supported by the MA7, which shows strong buying support underneath. Both the MA25 and MA99 are below and have turned upward. The medium-term trend has already flipped to bullish. The pullback came with reduced volume—meaning the main force hasn’t left. As long as 5.5 isn’t broken, there’s a high probability of a retest of the previous high at 5.96.
Entry: 5.65
Stop loss: 5.15
Take profit: 5.95
$UNI - Long 🟢
Enter from the bottom 👇
The price has been pulled up from 5.17 all the way. When it retraced to around 5.55, it was supported by the MA7, which shows strong buying support underneath. Both the MA25 and MA99 are below and have turned upward. The medium-term trend has already flipped to bullish. The pullback came with reduced volume—meaning the main force hasn’t left. As long as 5.5 isn’t broken, there’s a high probability of a retest of the previous high at 5.96.
Entry: 5.65
Stop loss: 5.15
Take profit: 5.95
$UNI - Long 🟢
Enter from the bottom 👇
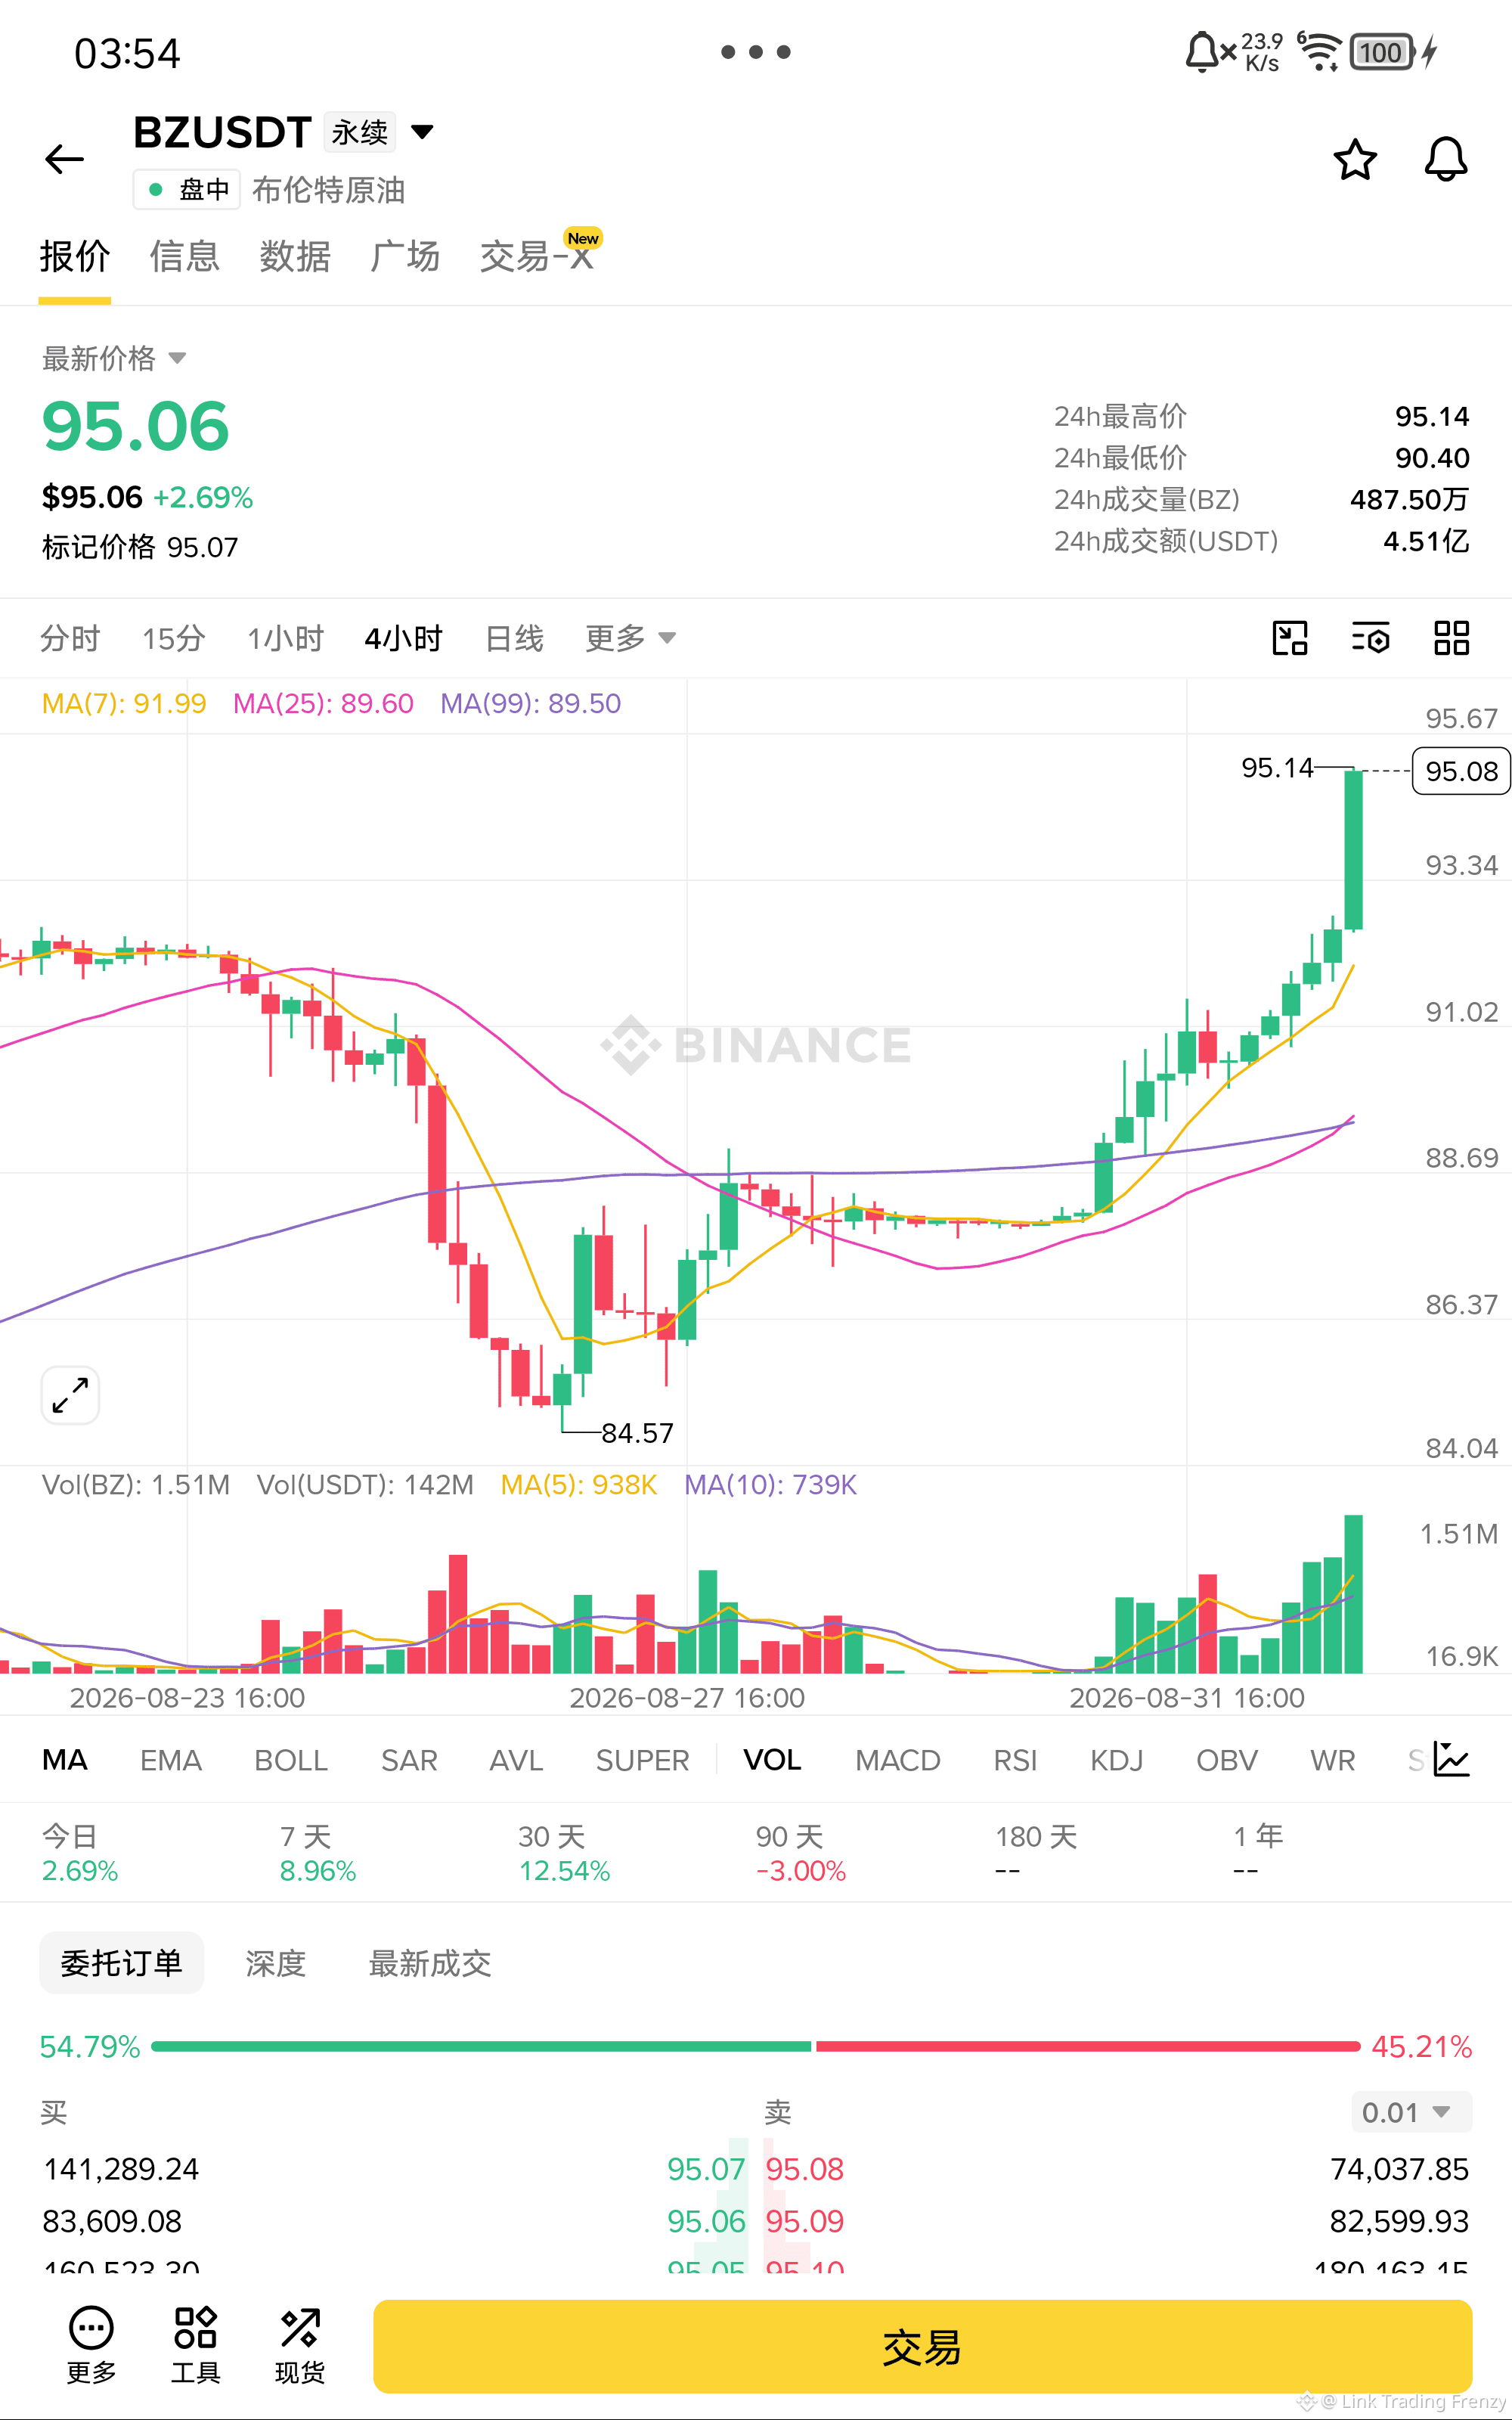
$BZ This wave breaks out with a surge in volume—Brent crude oil’s long position trend is very clear!
Price has jumped above all moving averages at once. MA7 and MA25 have both started to diverge upward, forming a classic bullish arrangement. Today, the volume-driven rally lifted price straight through the 95 level—buyers are very proactive. There’s a small resistance around 96; once it breaks, it should move toward 98–100. As long as MA7 doesn’t break, any pullback is a chance to get in.
Entry: 95.0
Stop loss: 91.5
Take profit: 99.0
$BZ - Long 🟢
Enter from below👇
Price has jumped above all moving averages at once. MA7 and MA25 have both started to diverge upward, forming a classic bullish arrangement. Today, the volume-driven rally lifted price straight through the 95 level—buyers are very proactive. There’s a small resistance around 96; once it breaks, it should move toward 98–100. As long as MA7 doesn’t break, any pullback is a chance to get in.
Entry: 95.0
Stop loss: 91.5
Take profit: 99.0
$BZ - Long 🟢
Enter from below👇
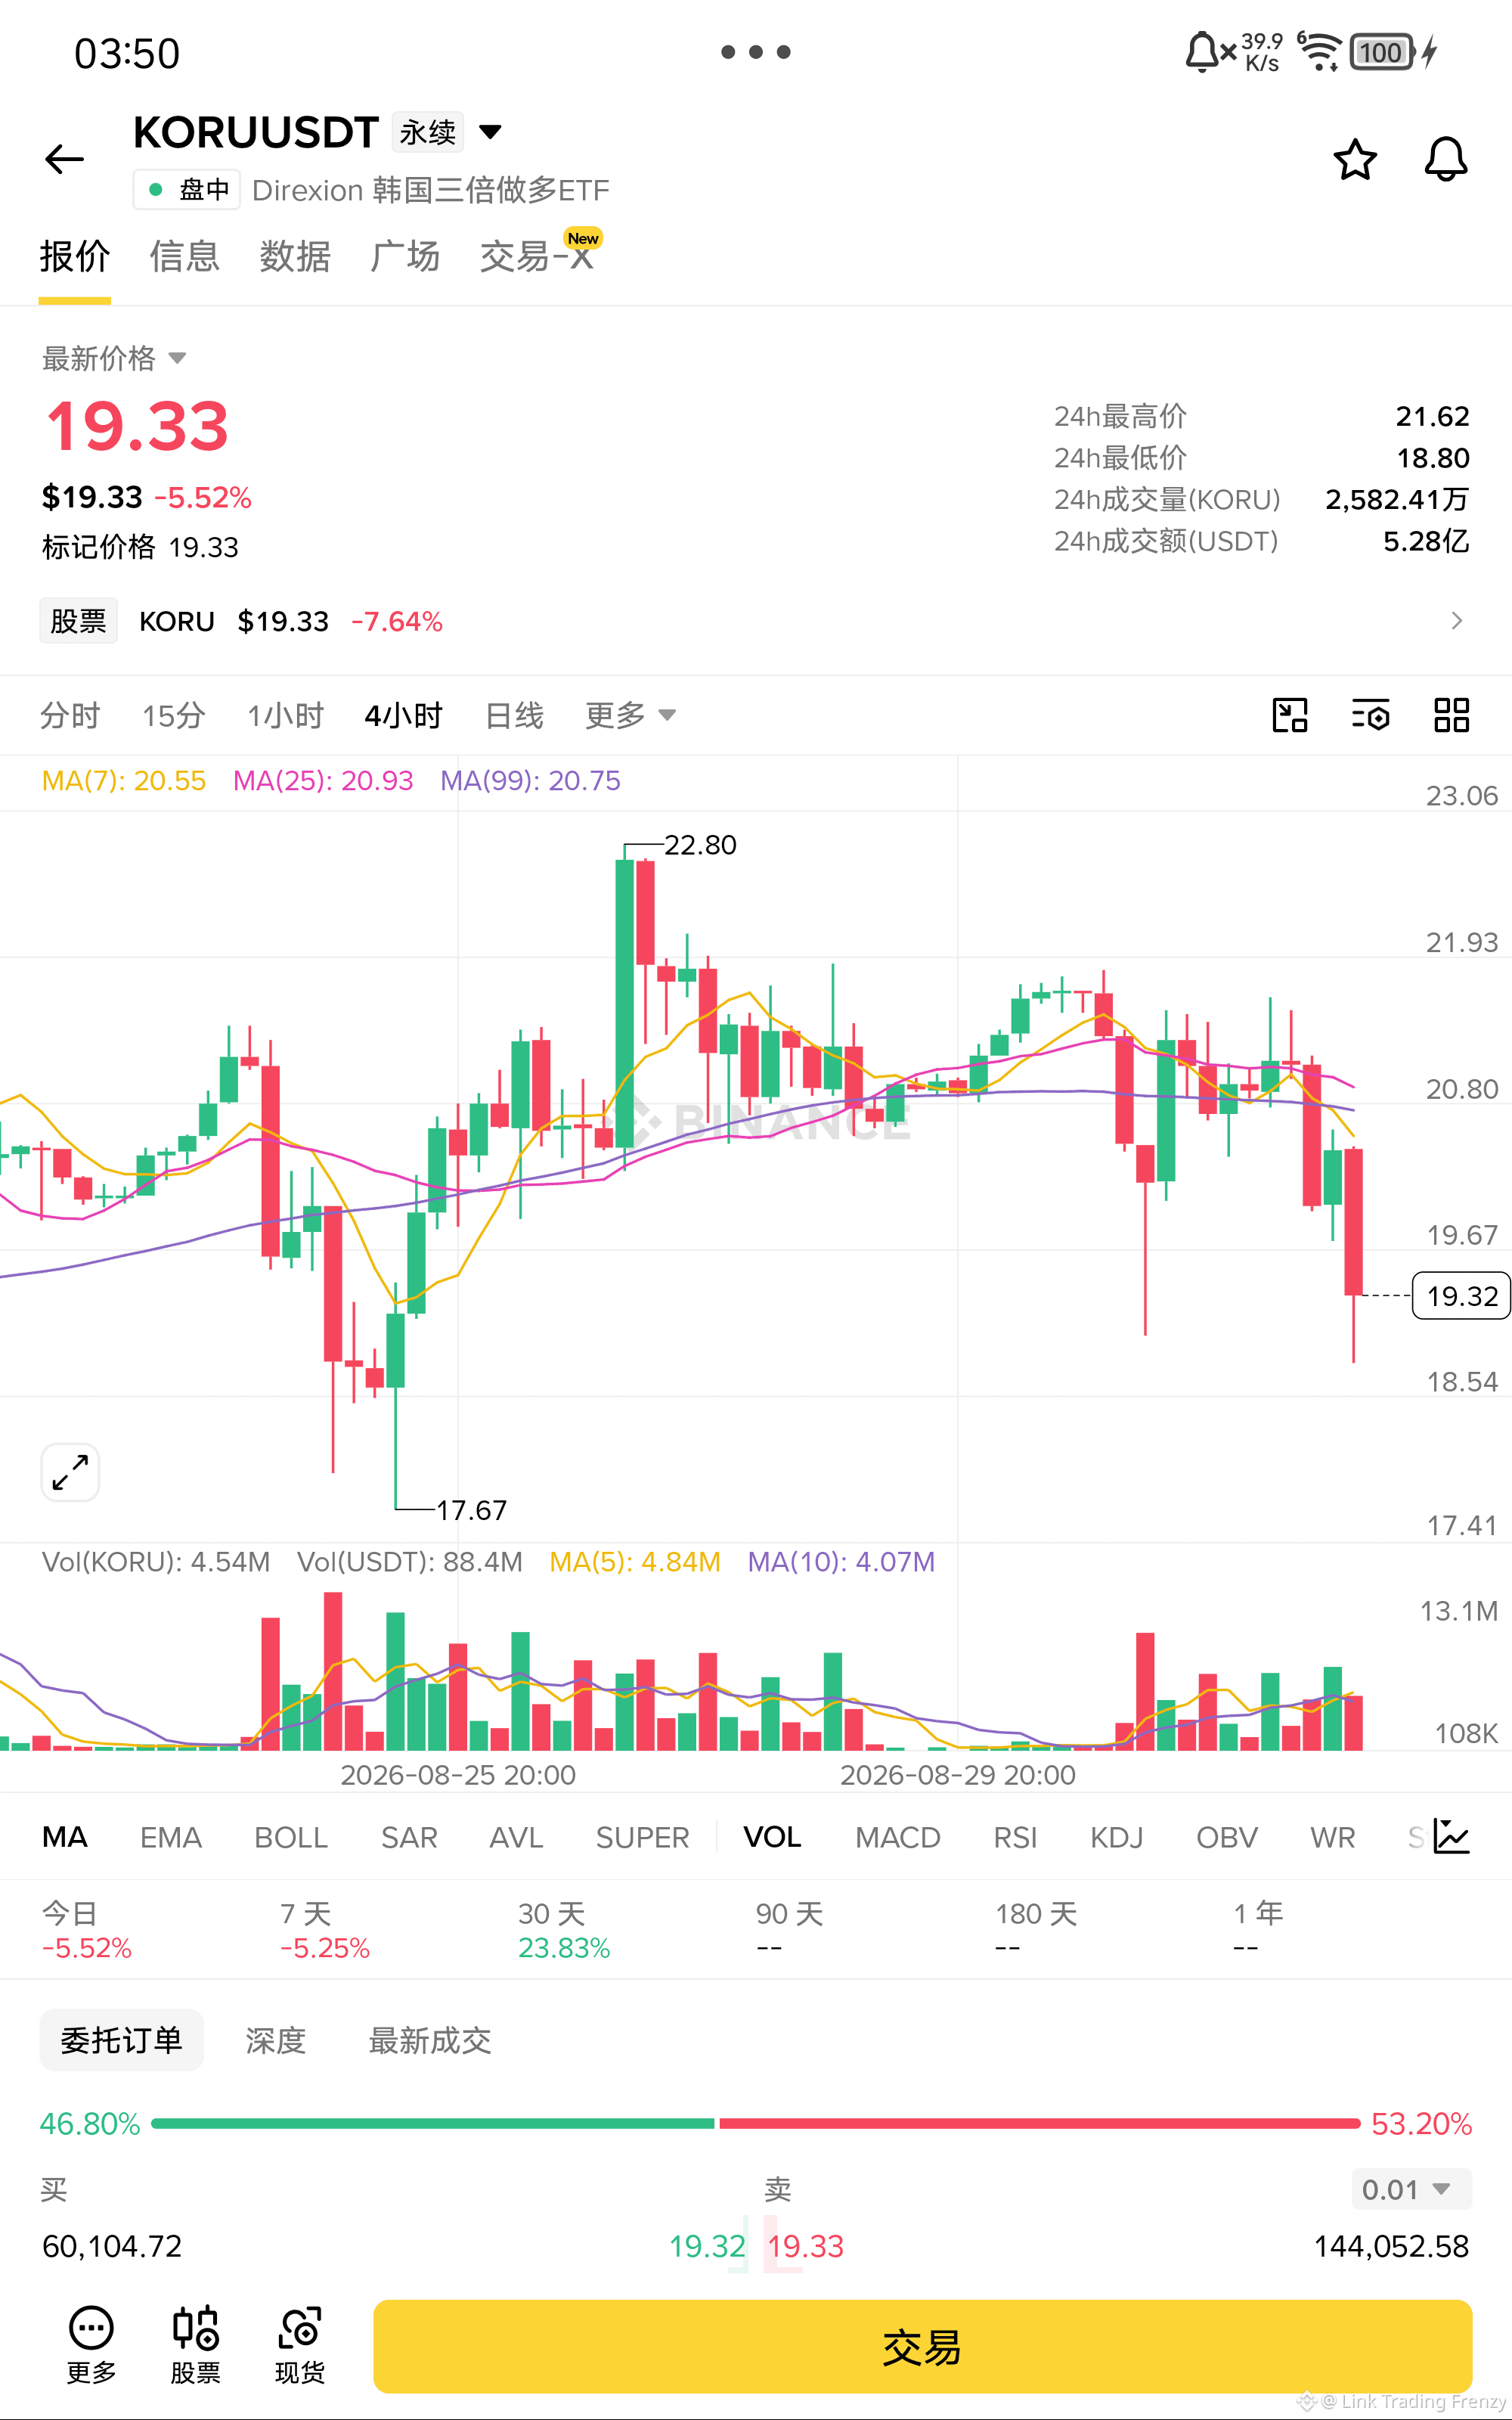
$KORU 18.8 If this recent low breaks, the triple-short momentum will be extremely terrifying!
The price plunged from 22.8 all the way down to 19.33. Along the way, two dead-cat bounces were both accurately rejected by the MA7, indicating that the sell/lock-up orders above are too heavy. Today it continues to set new lows; trading volume has shrunk, and bargain-hunting capital basically doesn’t dare to move. Triple-leveraged products don’t follow logic when they fall. Once 18.8 is lost, it’s likely to be smashed down to below 17.
Entry: 19.3
Stop loss: 21.0
Take profit: 17.0
$KORU - Short 🔻
Enter from the bottom 👇
The price plunged from 22.8 all the way down to 19.33. Along the way, two dead-cat bounces were both accurately rejected by the MA7, indicating that the sell/lock-up orders above are too heavy. Today it continues to set new lows; trading volume has shrunk, and bargain-hunting capital basically doesn’t dare to move. Triple-leveraged products don’t follow logic when they fall. Once 18.8 is lost, it’s likely to be smashed down to below 17.
Entry: 19.3
Stop loss: 21.0
Take profit: 17.0
$KORU - Short 🔻
Enter from the bottom 👇
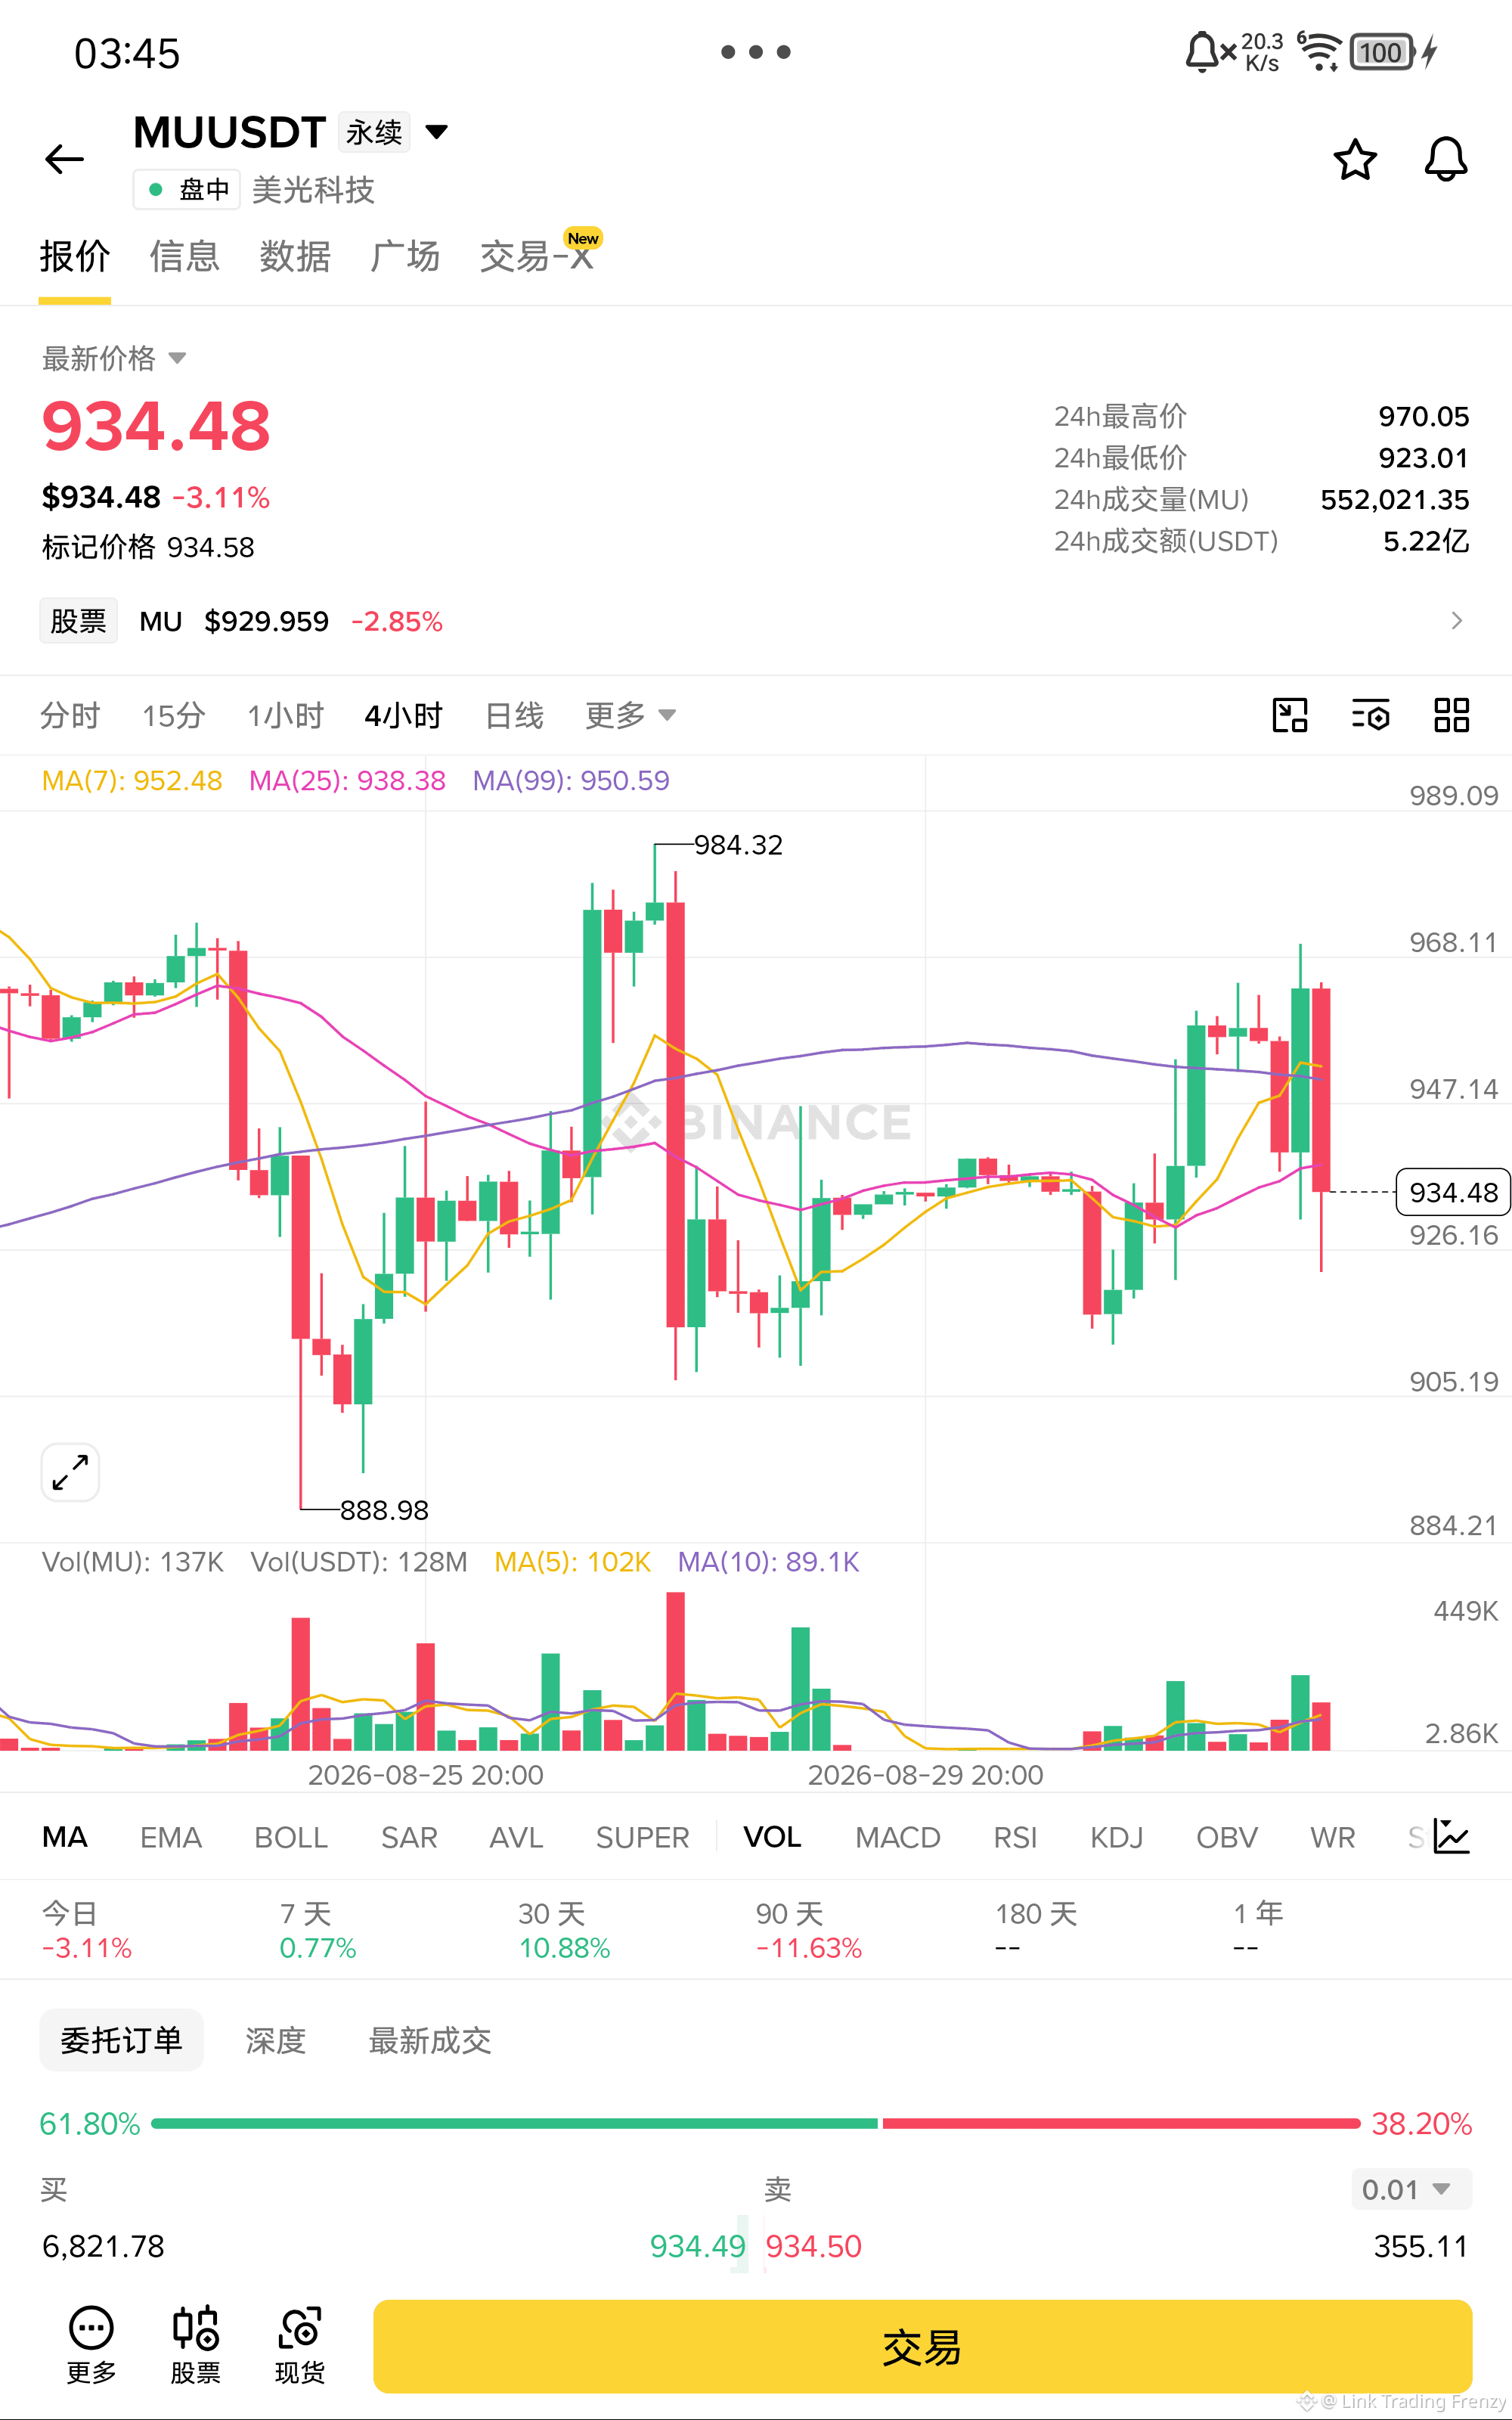
$MU 923 If this previous low is touched one more time, it will most likely break!
The price dropped from 970 to 923, then rebounded to 934, where it was precisely capped by the MA25. It couldn’t even get past the MA7. All the moving averages have turned downward. Today also hit a new low. Every rebound has occurred on declining volume, which shows that the bulls don’t dare to step in at all. As long as 923 can’t hold, the next level is the 900 psychological round-number support.
Entry: 934
Stop Loss: 955
Take Profit: 900
$MU - Sell 🔻
Enter the trade from below👇
The price dropped from 970 to 923, then rebounded to 934, where it was precisely capped by the MA25. It couldn’t even get past the MA7. All the moving averages have turned downward. Today also hit a new low. Every rebound has occurred on declining volume, which shows that the bulls don’t dare to step in at all. As long as 923 can’t hold, the next level is the 900 psychological round-number support.
Entry: 934
Stop Loss: 955
Take Profit: 900
$MU - Sell 🔻
Enter the trade from below👇
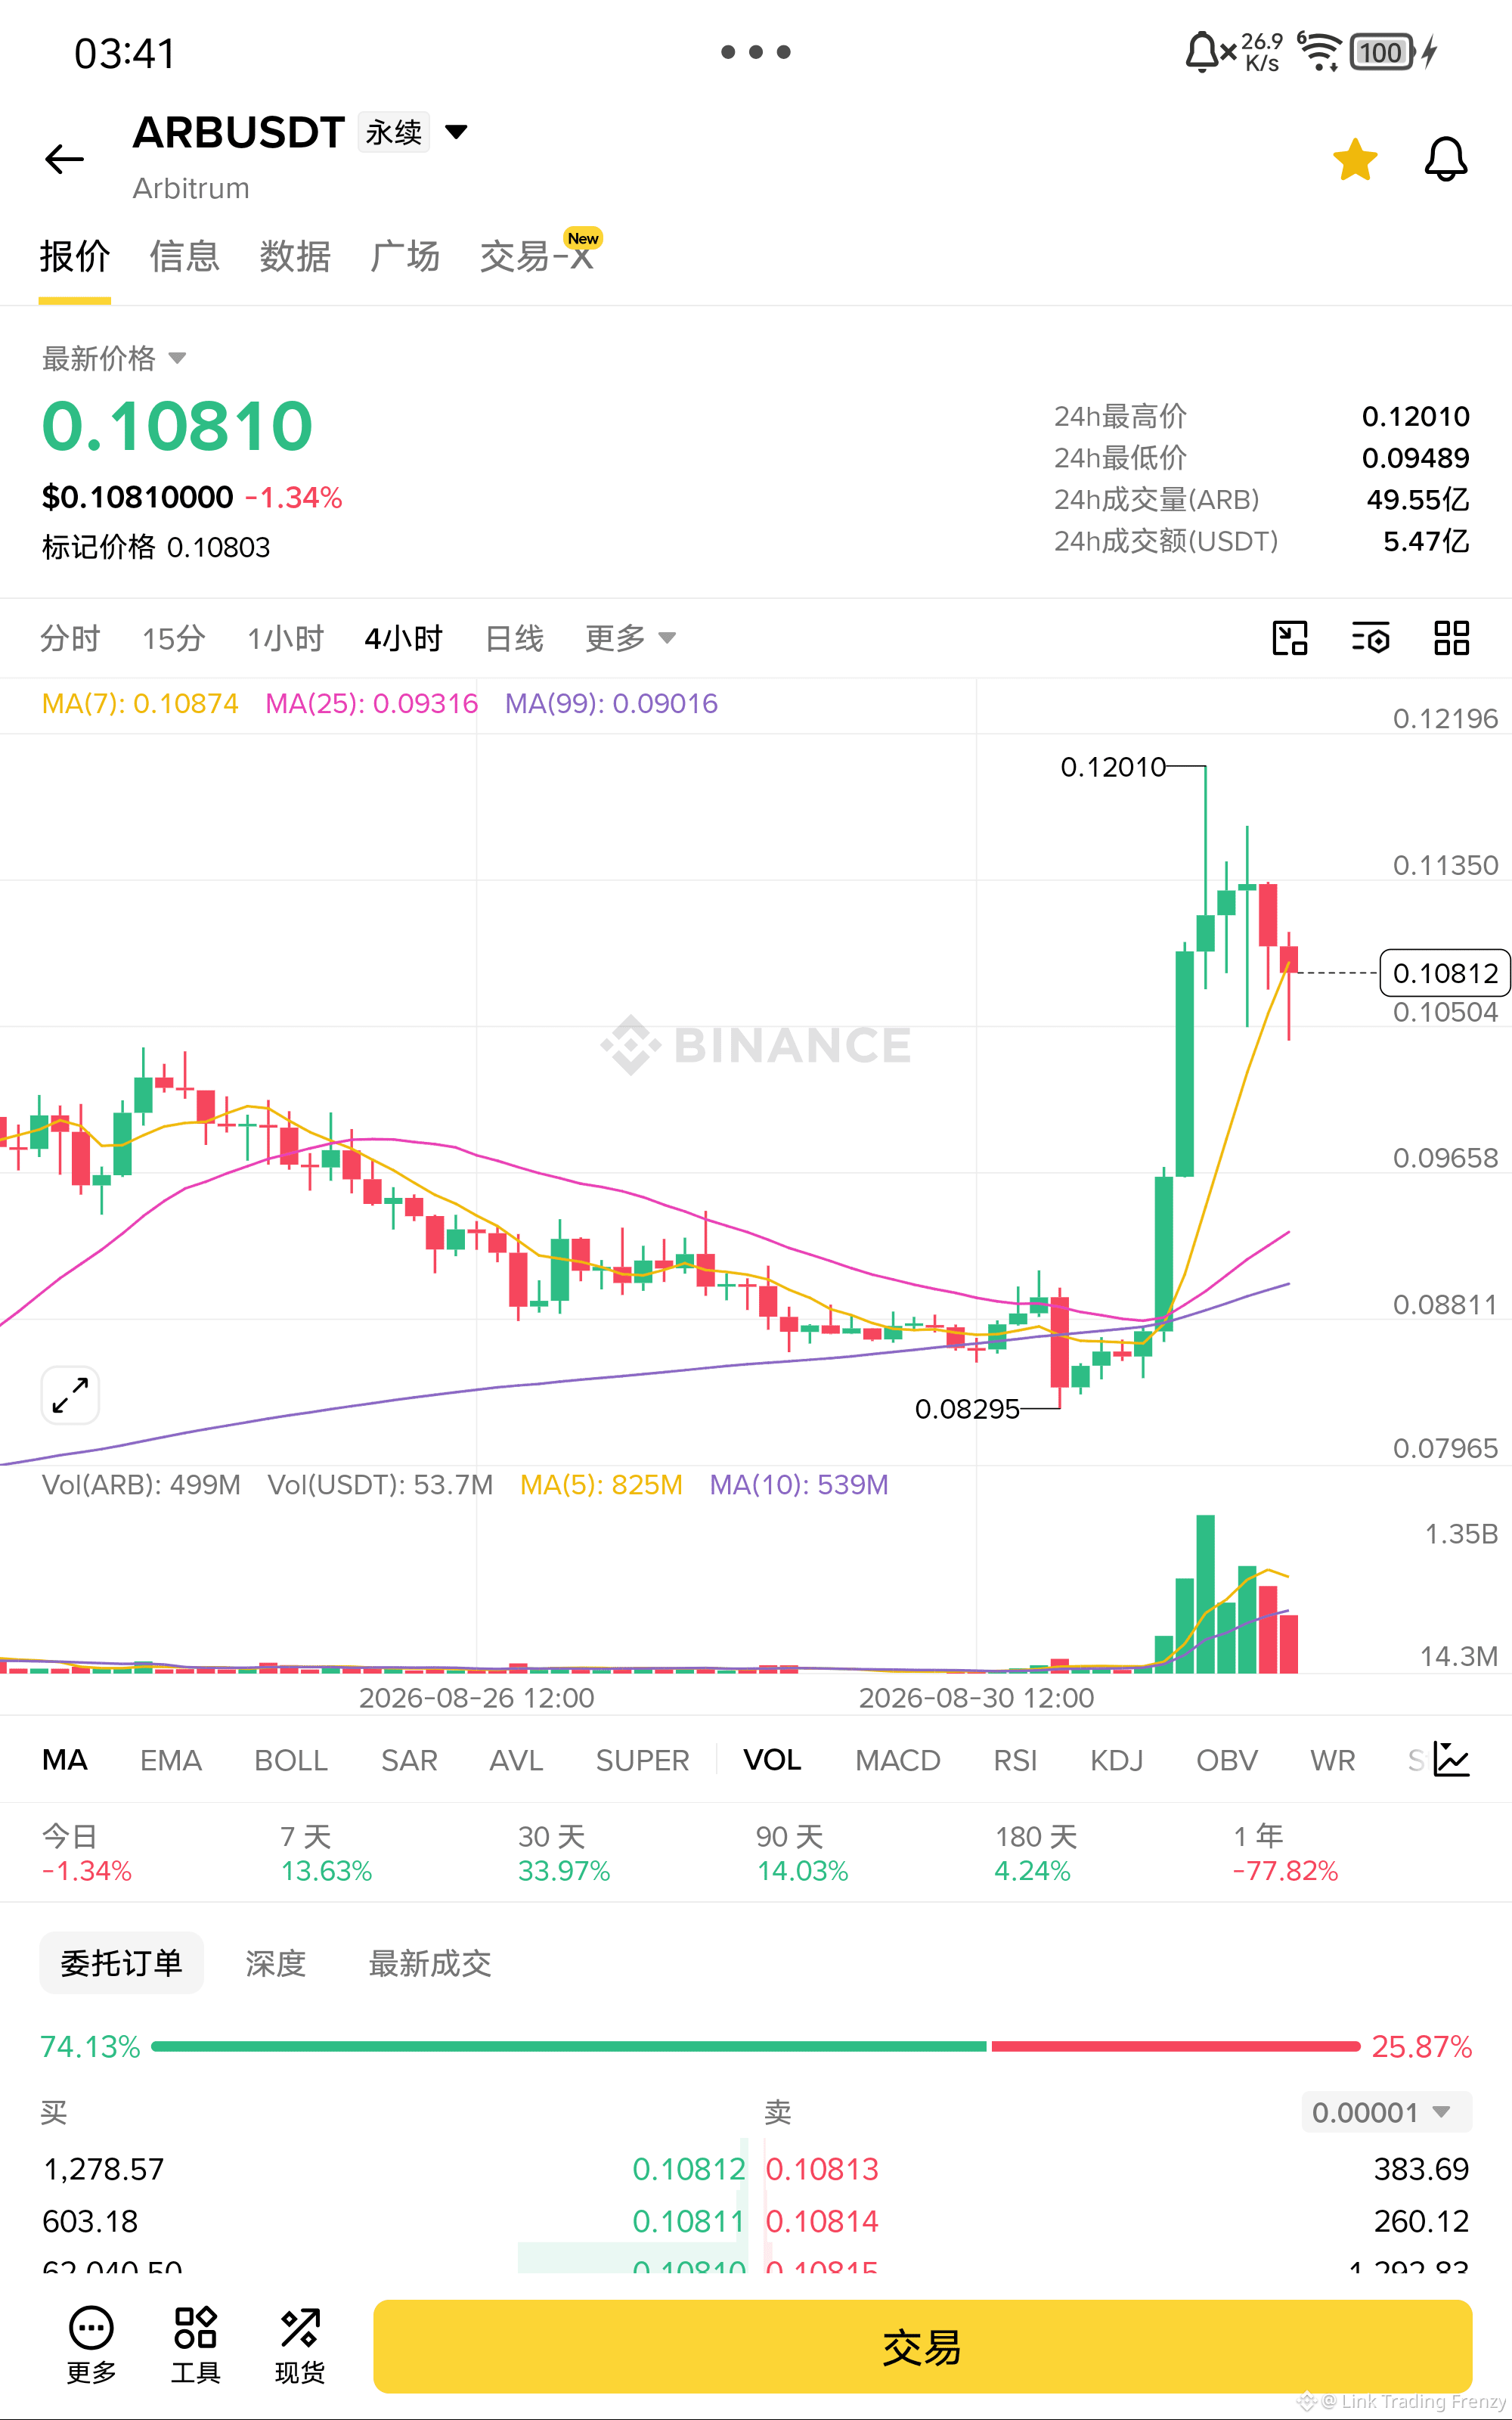
$ARB 0.108 This position has held up horizontally. As long as it doesn’t break, there’s still a chance!
The price has pulled back from 0.12 to 0.108, but both MA25 and MA99 are below and turning upward, so the medium-term trend is still bullish. The pullback with decreasing volume suggests the main players haven’t exited—it's just a normal adjustment. Below, 0.095 is strong support. As long as it holds, the probability of a rebound to retest the 0.12 prior high is very high.
Entry: 0.108
Stop-loss: 0.094
Take-profit: 0.120
$ARB - Long 🟢
Enter from the lower side👇
The price has pulled back from 0.12 to 0.108, but both MA25 and MA99 are below and turning upward, so the medium-term trend is still bullish. The pullback with decreasing volume suggests the main players haven’t exited—it's just a normal adjustment. Below, 0.095 is strong support. As long as it holds, the probability of a rebound to retest the 0.12 prior high is very high.
Entry: 0.108
Stop-loss: 0.094
Take-profit: 0.120
$ARB - Long 🟢
Enter from the lower side👇
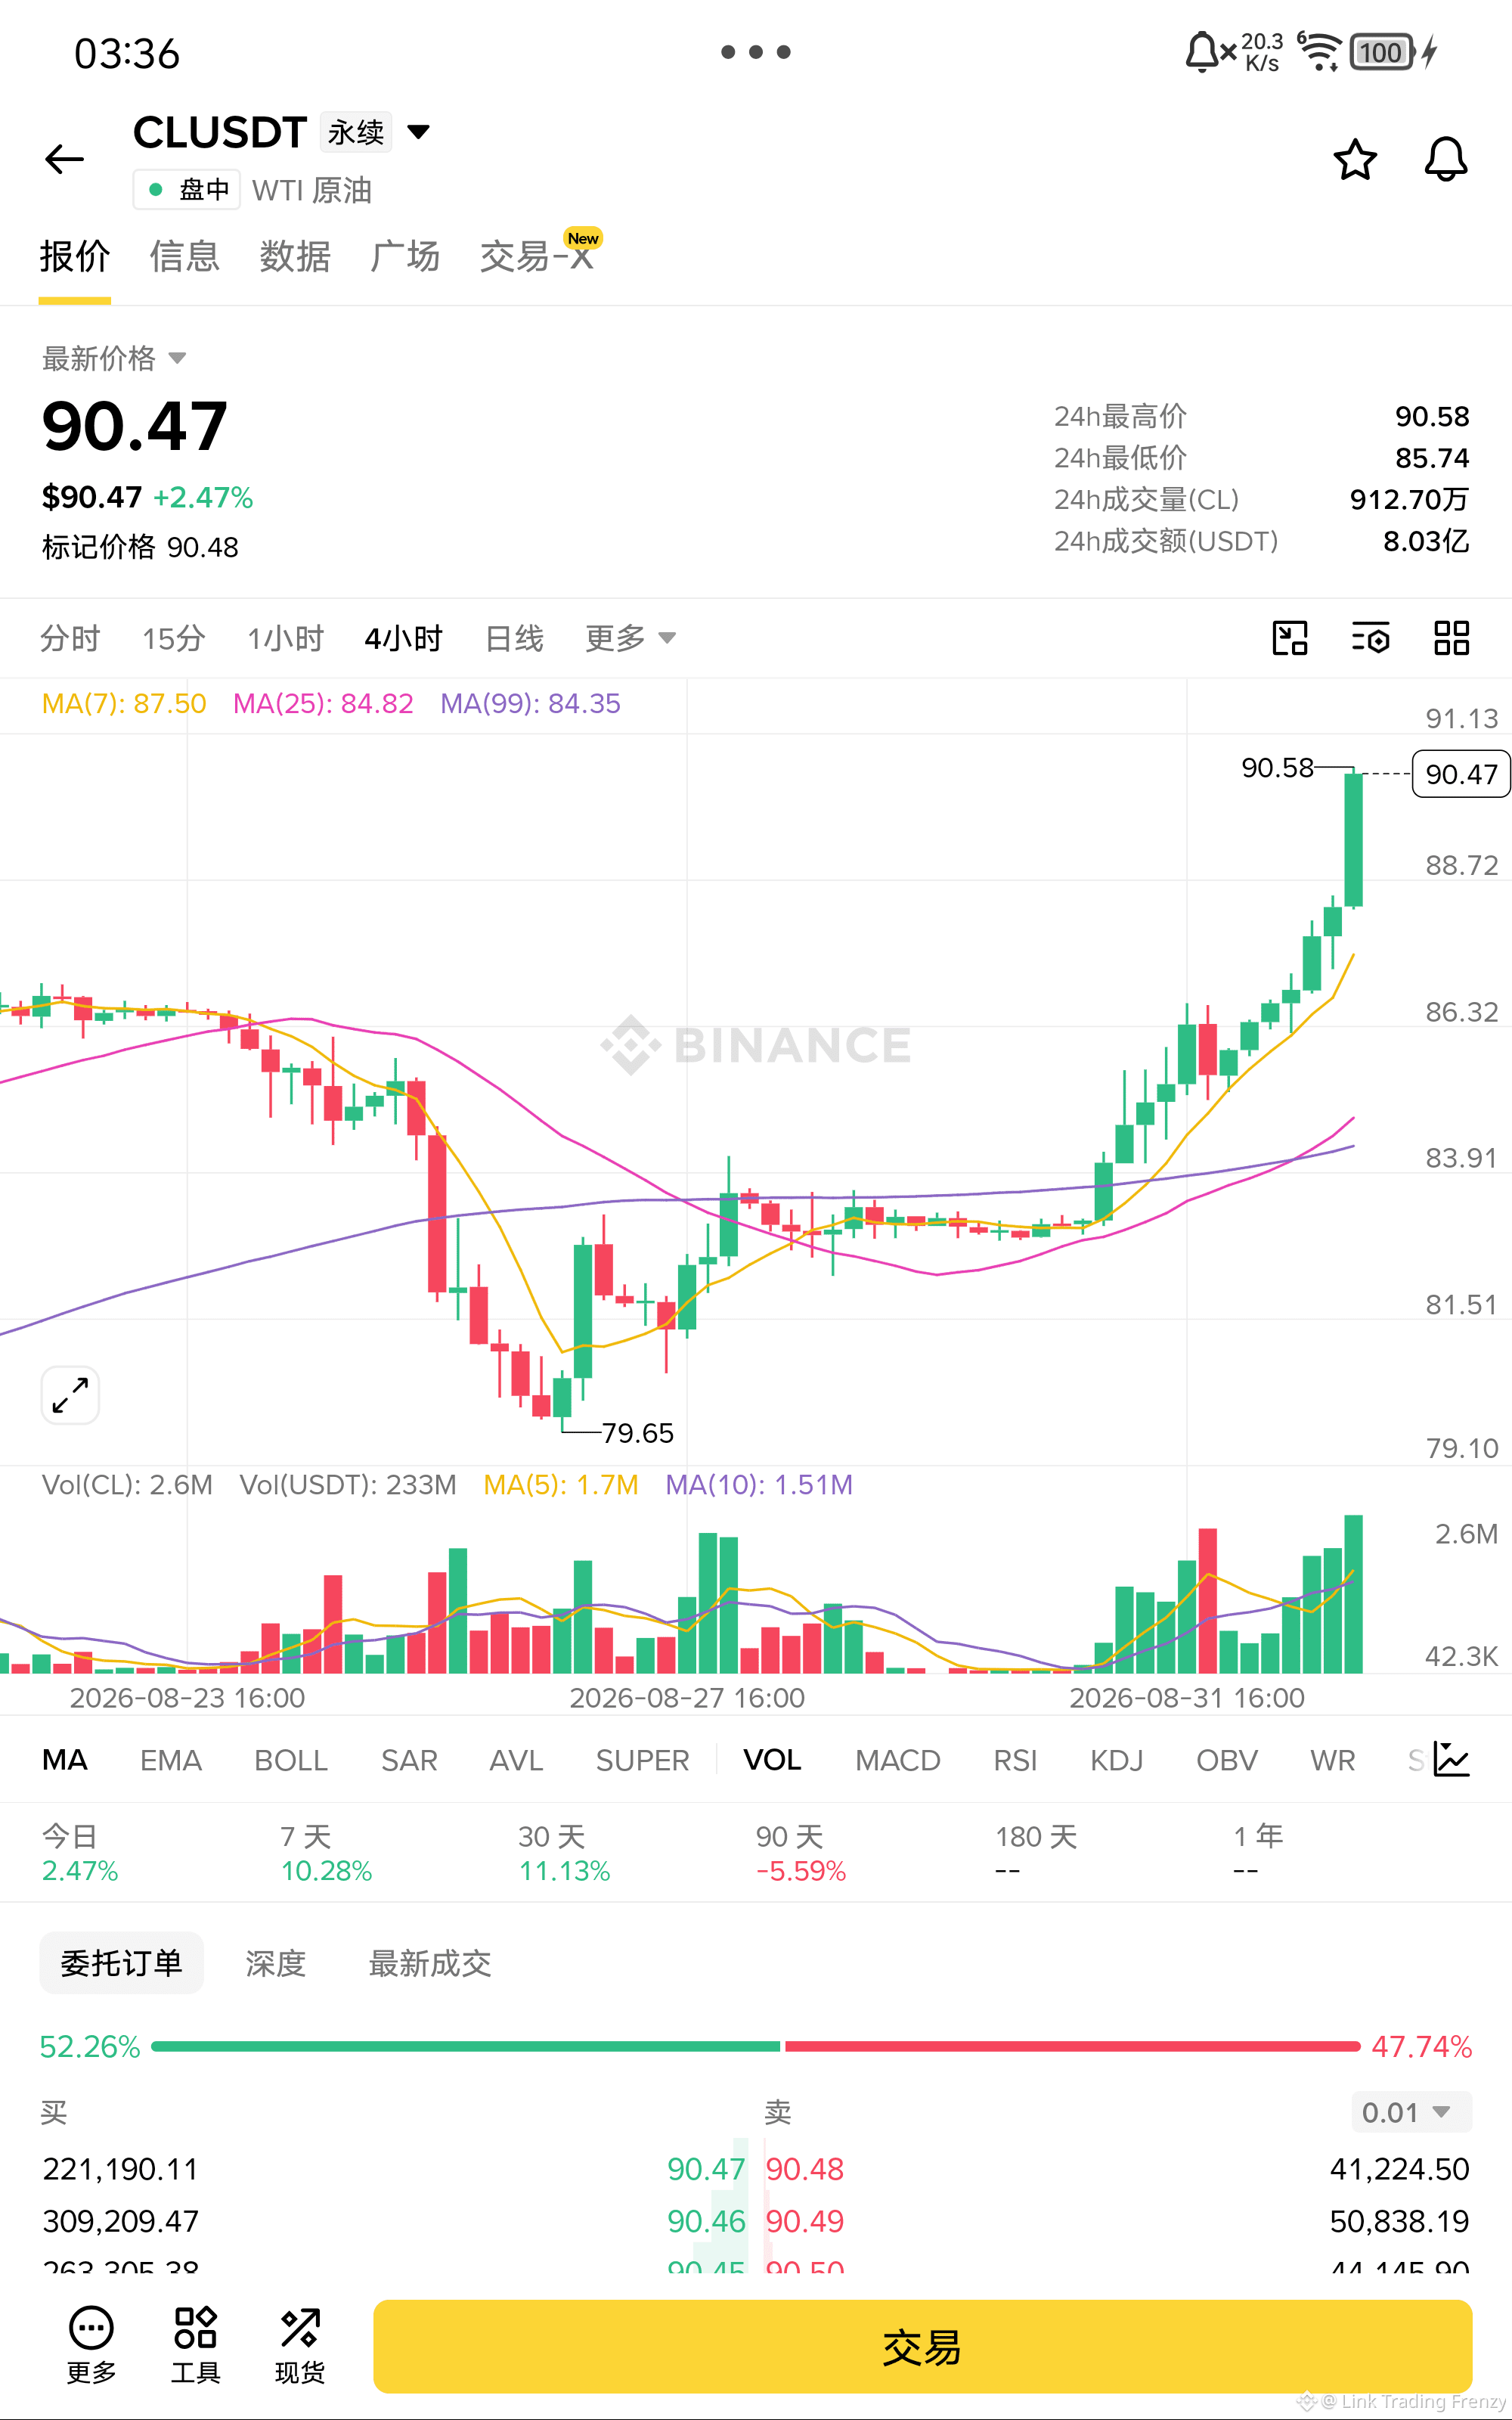
$CL Crude oil: this surge has broken out with heavy volume—are the bulls really getting serious?!
Price has been holding above MA7 and MA25 consecutively. The moving averages are all diverging upward. Today, the increased volume pushed the price up, driving it directly toward the 91 area. Every pullback has failed to break below MA7, which shows buyers are very proactive. Once 91.13 prior high is broken, it should head toward 93–95. Looking for further upside in the short term.
Entry: 90.5
Stop loss: 87.0
Take profit: 93.5
$CL - Long 🟢
Enter from below👇
Price has been holding above MA7 and MA25 consecutively. The moving averages are all diverging upward. Today, the increased volume pushed the price up, driving it directly toward the 91 area. Every pullback has failed to break below MA7, which shows buyers are very proactive. Once 91.13 prior high is broken, it should head toward 93–95. Looking for further upside in the short term.
Entry: 90.5
Stop loss: 87.0
Take profit: 93.5
$CL - Long 🟢
Enter from below👇
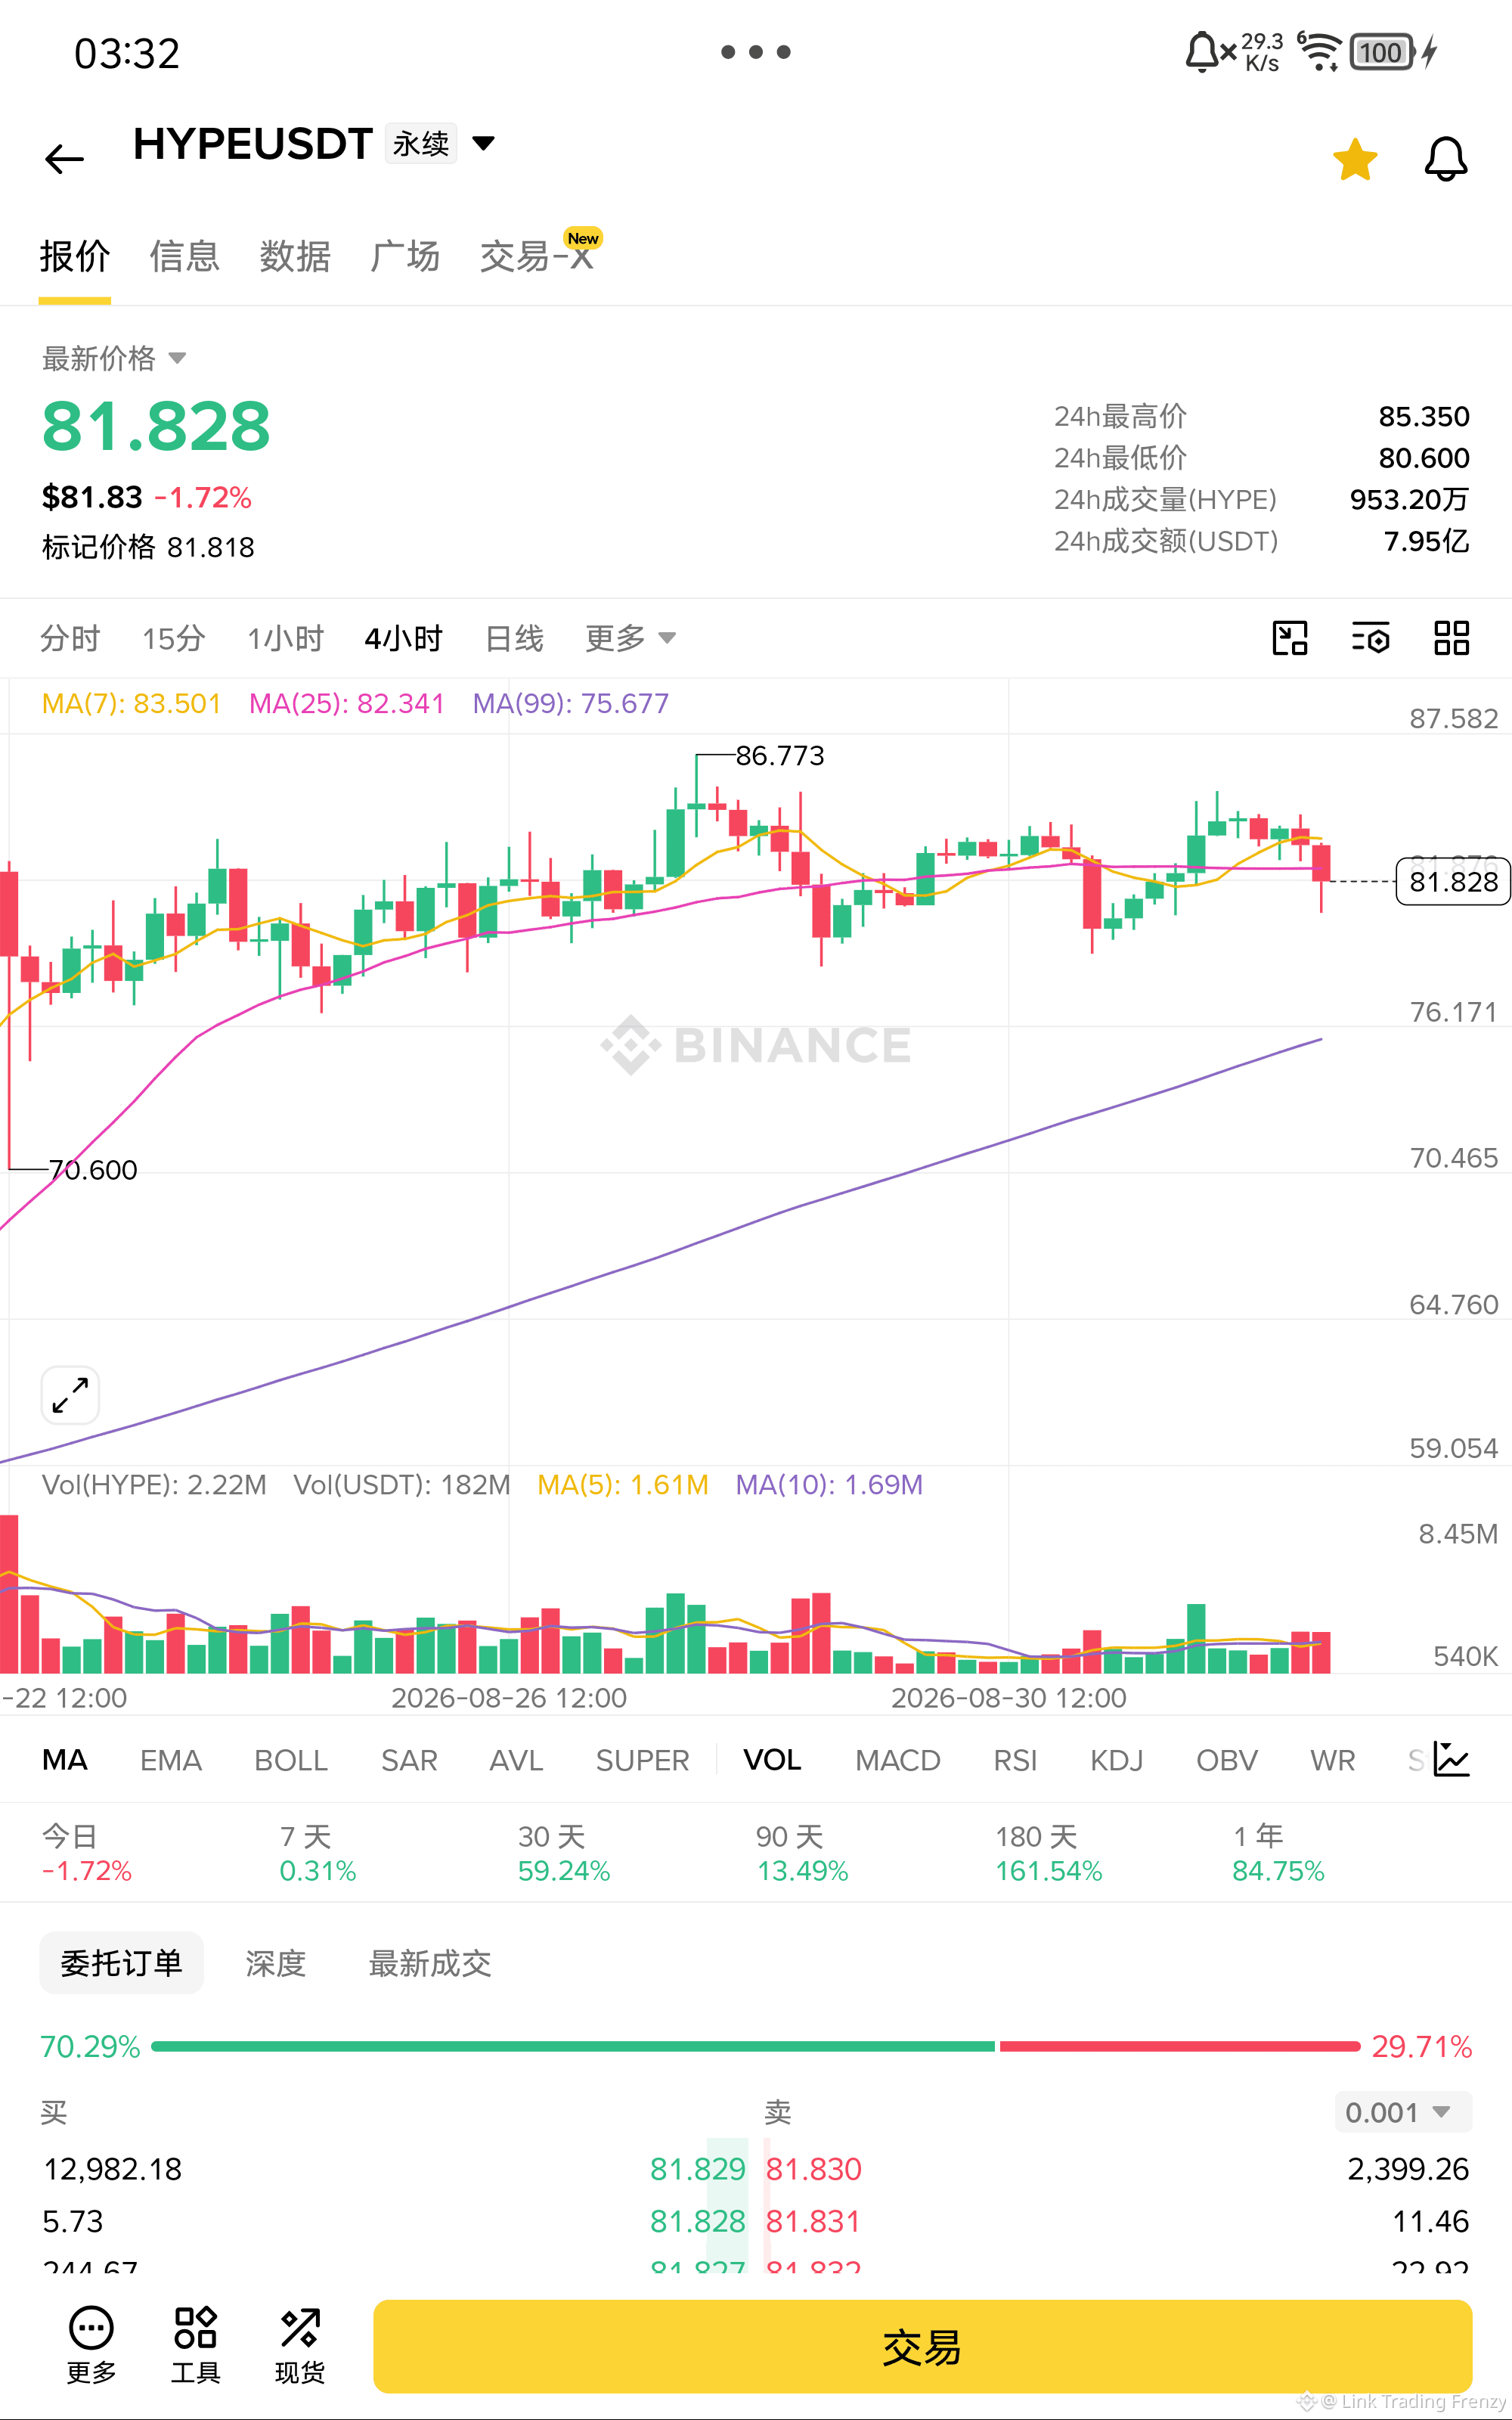
$HYPE 80.6 If this level breaks, everything below will instantly go vacuum!
The price dropped from 85.3 all the way to 80.6, then rebounded to 81.8 but was precisely capped by the MA25, indicating strong overhead sell pressure. Both the MA7 and MA25 have turned downward, and the short-term trend is clearly bearish. As long as the 80.6 previous low can’t hold, it’s likely to move toward the MA99 around 75.7. Still looking bearish in the short term.
Entry: 81.8
Stop loss: 83.6
Take profit: 76.0
$HYPE - Sell 🔻
Enter from the lower side👇
The price dropped from 85.3 all the way to 80.6, then rebounded to 81.8 but was precisely capped by the MA25, indicating strong overhead sell pressure. Both the MA7 and MA25 have turned downward, and the short-term trend is clearly bearish. As long as the 80.6 previous low can’t hold, it’s likely to move toward the MA99 around 75.7. Still looking bearish in the short term.
Entry: 81.8
Stop loss: 83.6
Take profit: 76.0
$HYPE - Sell 🔻
Enter from the lower side👇
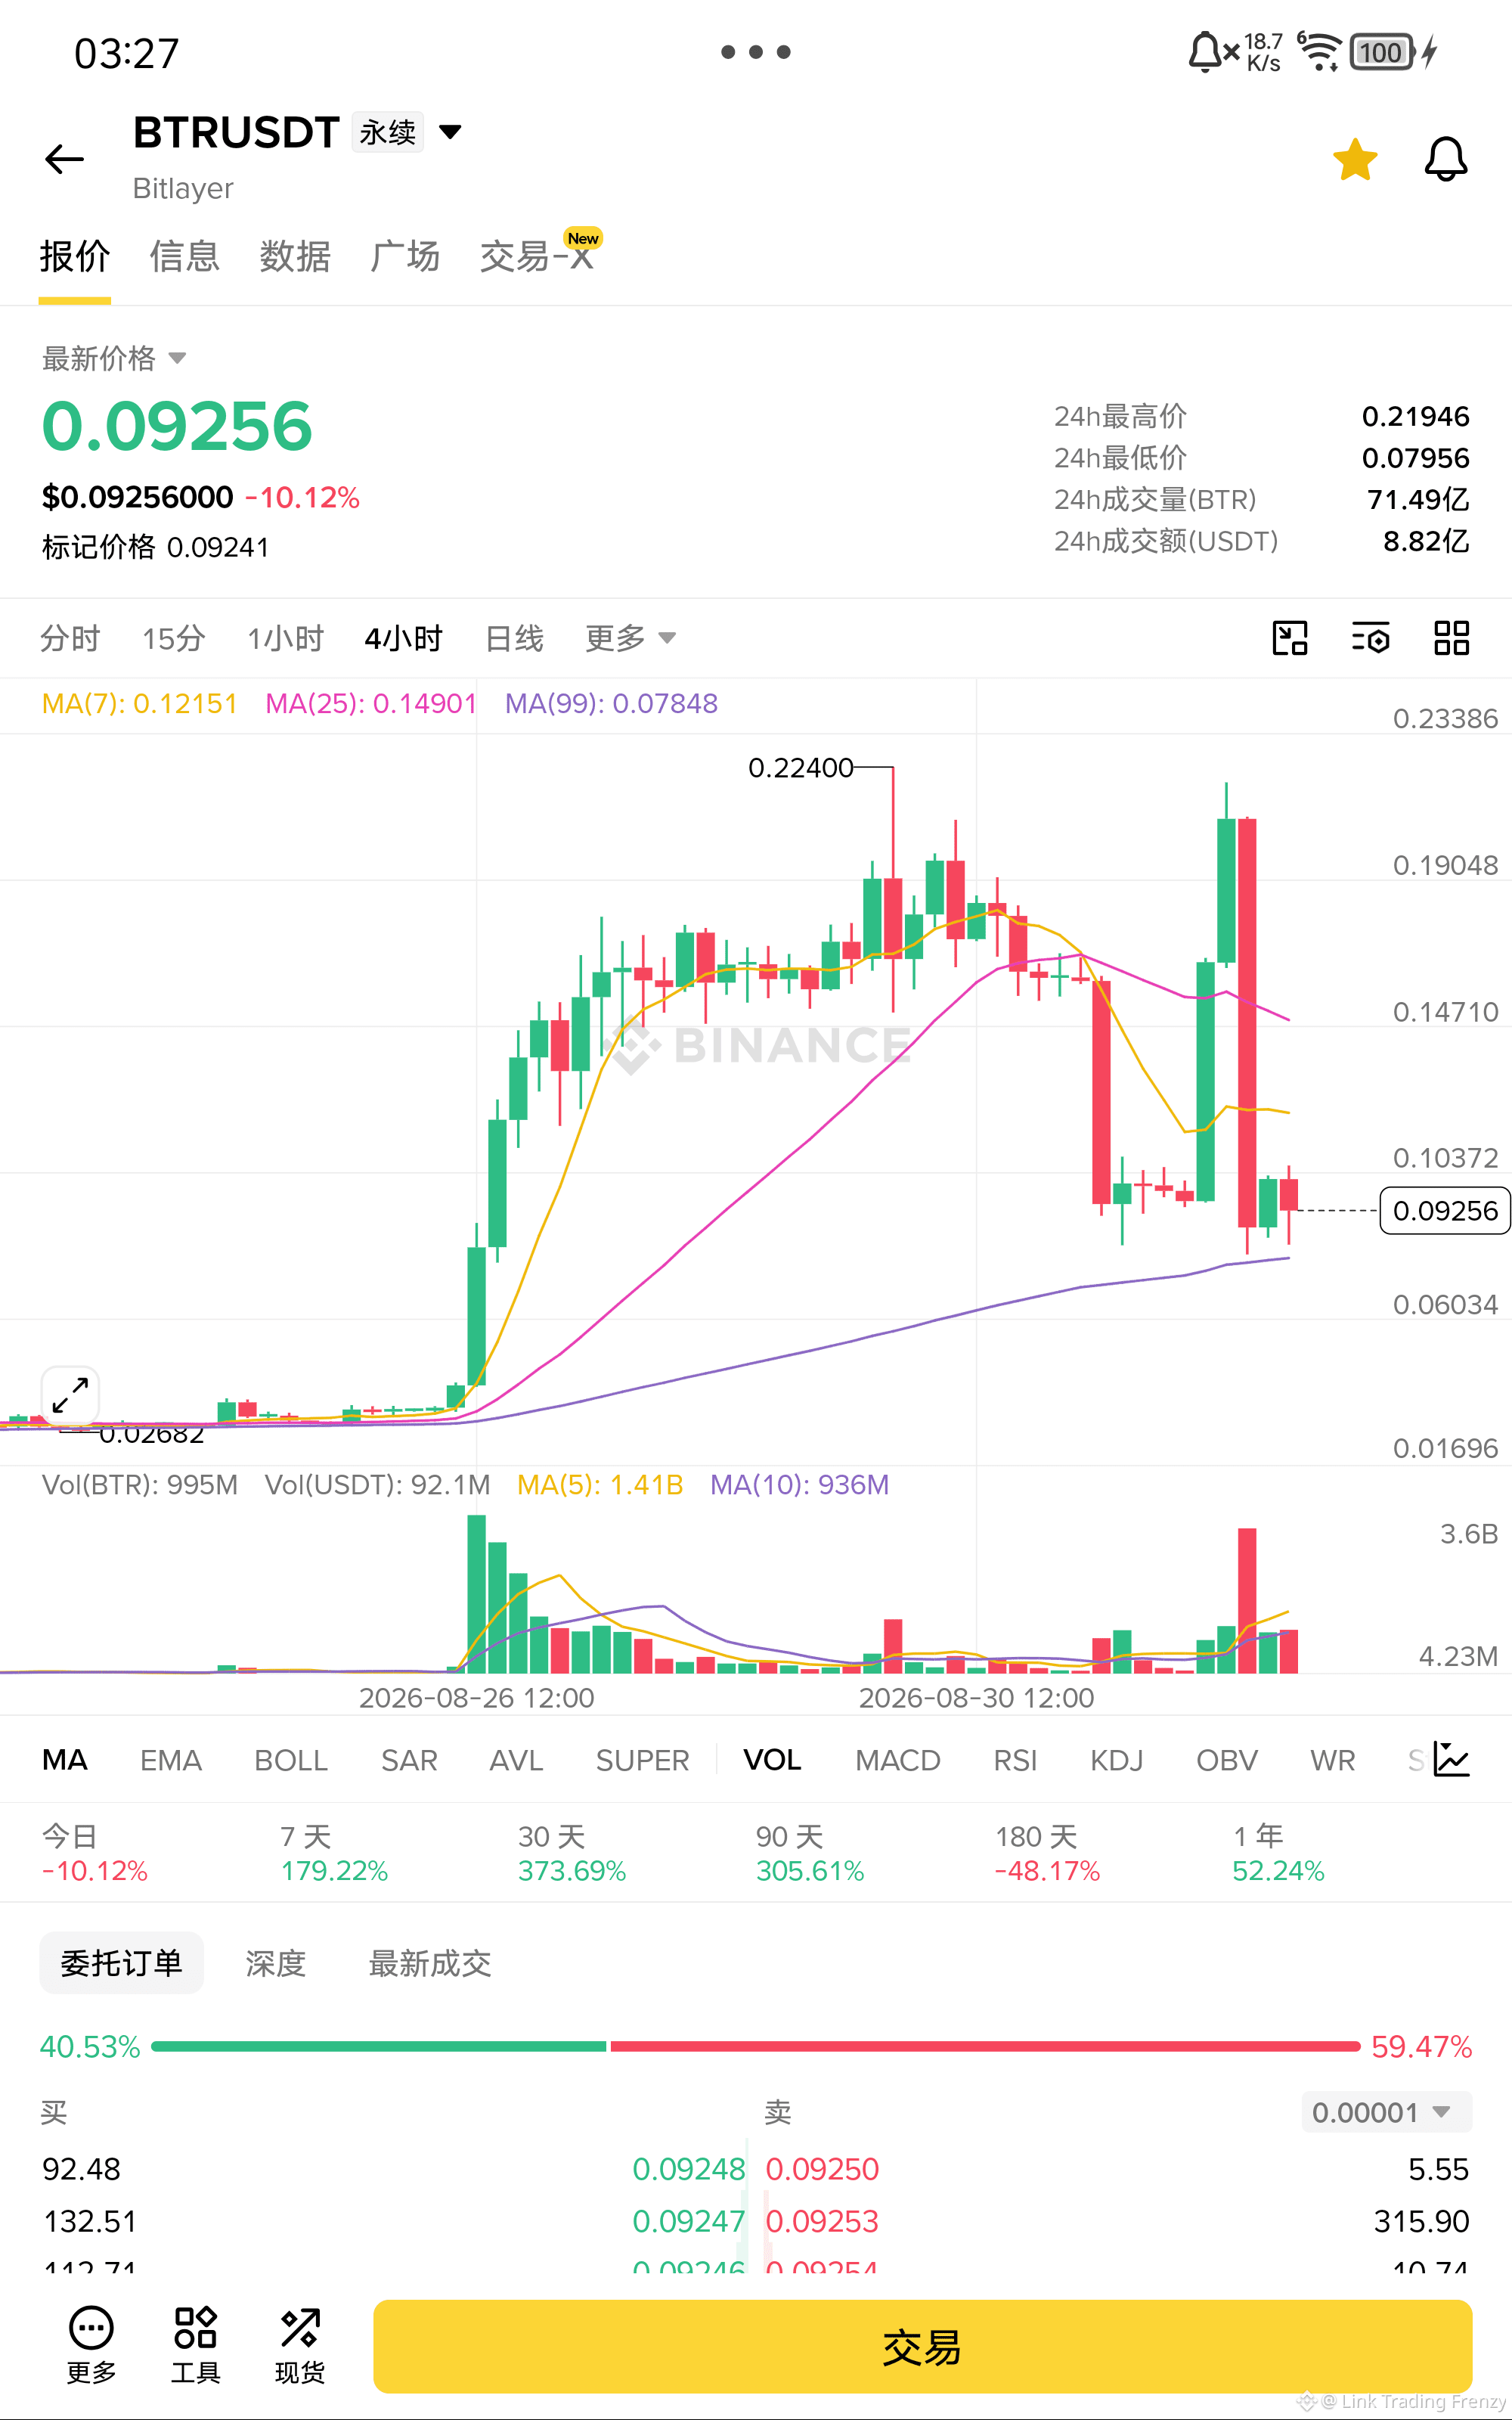
$BTR 0.08 This position can’t be held any longer—below is a bottomless pit!
The price was slashed straight from 0.22 to 0.079. When it rebounded to 0.092, it already fizzled out, showing that the dip-buying capital simply doesn’t dare to chase higher prices. MA7 and MA25 are still hovering above the price like weights overhead; the distance is far, and in the short term they can’t be climbed back to. Trading volume is shrinking, and buy orders are getting weaker. Once the previous low at 0.079 breaks, the odds are high it will head toward 0.06.
Entry: 0.0925
Stop loss: 0.105
Take profit: 0.075
$BTR - Sell 🔻
Enter the trade from below👇
The price was slashed straight from 0.22 to 0.079. When it rebounded to 0.092, it already fizzled out, showing that the dip-buying capital simply doesn’t dare to chase higher prices. MA7 and MA25 are still hovering above the price like weights overhead; the distance is far, and in the short term they can’t be climbed back to. Trading volume is shrinking, and buy orders are getting weaker. Once the previous low at 0.079 breaks, the odds are high it will head toward 0.06.
Entry: 0.0925
Stop loss: 0.105
Take profit: 0.075
$BTR - Sell 🔻
Enter the trade from below👇
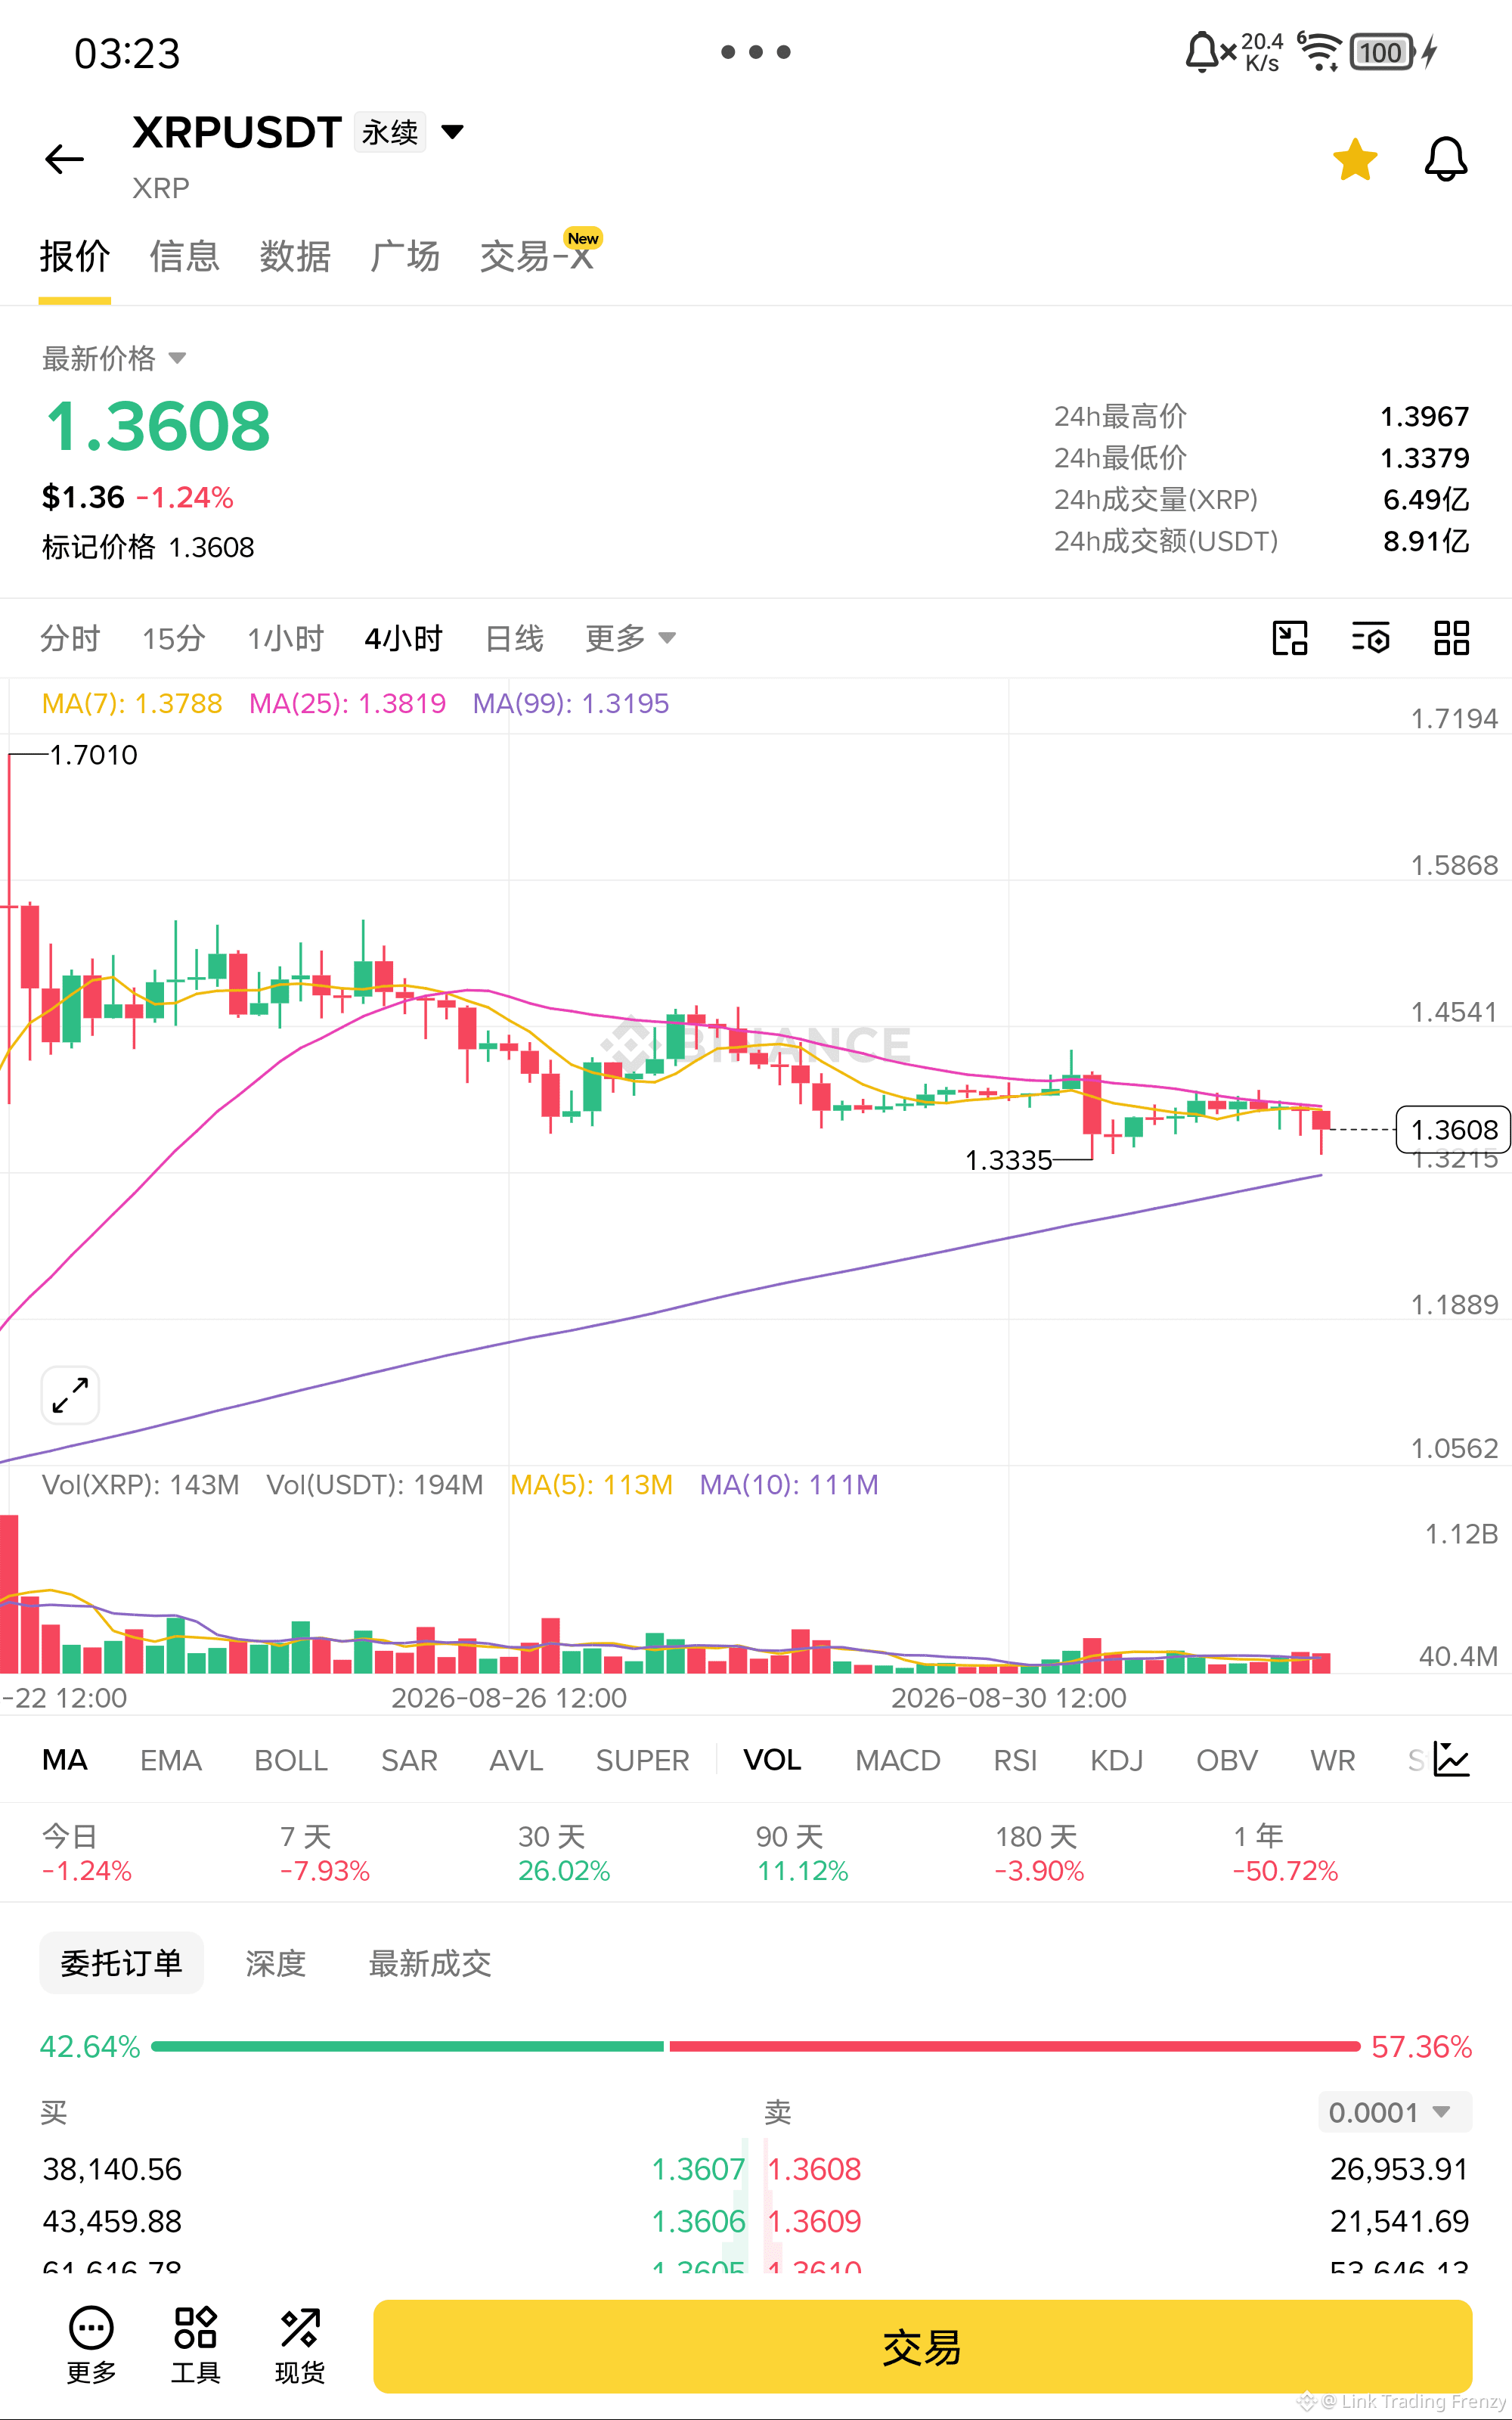
$XRP rebounded 1.38 but couldn’t even reach it—this trend is weak enough!
Price fell from 1.39 all the way to 1.3379, but the rebound up to 1.36 lost momentum quickly. MA7 and MA25 are all pressing above the price. Trading volume didn’t expand along with the rebound, which suggests buyers aren’t active. If the prior low at 1.3379 breaks, price will likely need to find support around 1.32. Keep watching for downside in the short term.
Entry: 1.36
Stop loss: 1.39
Take profit: 1.32
$XRP - Sell 🔻
Enter from below👇
Price fell from 1.39 all the way to 1.3379, but the rebound up to 1.36 lost momentum quickly. MA7 and MA25 are all pressing above the price. Trading volume didn’t expand along with the rebound, which suggests buyers aren’t active. If the prior low at 1.3379 breaks, price will likely need to find support around 1.32. Keep watching for downside in the short term.
Entry: 1.36
Stop loss: 1.39
Take profit: 1.32
$XRP - Sell 🔻
Enter from below👇
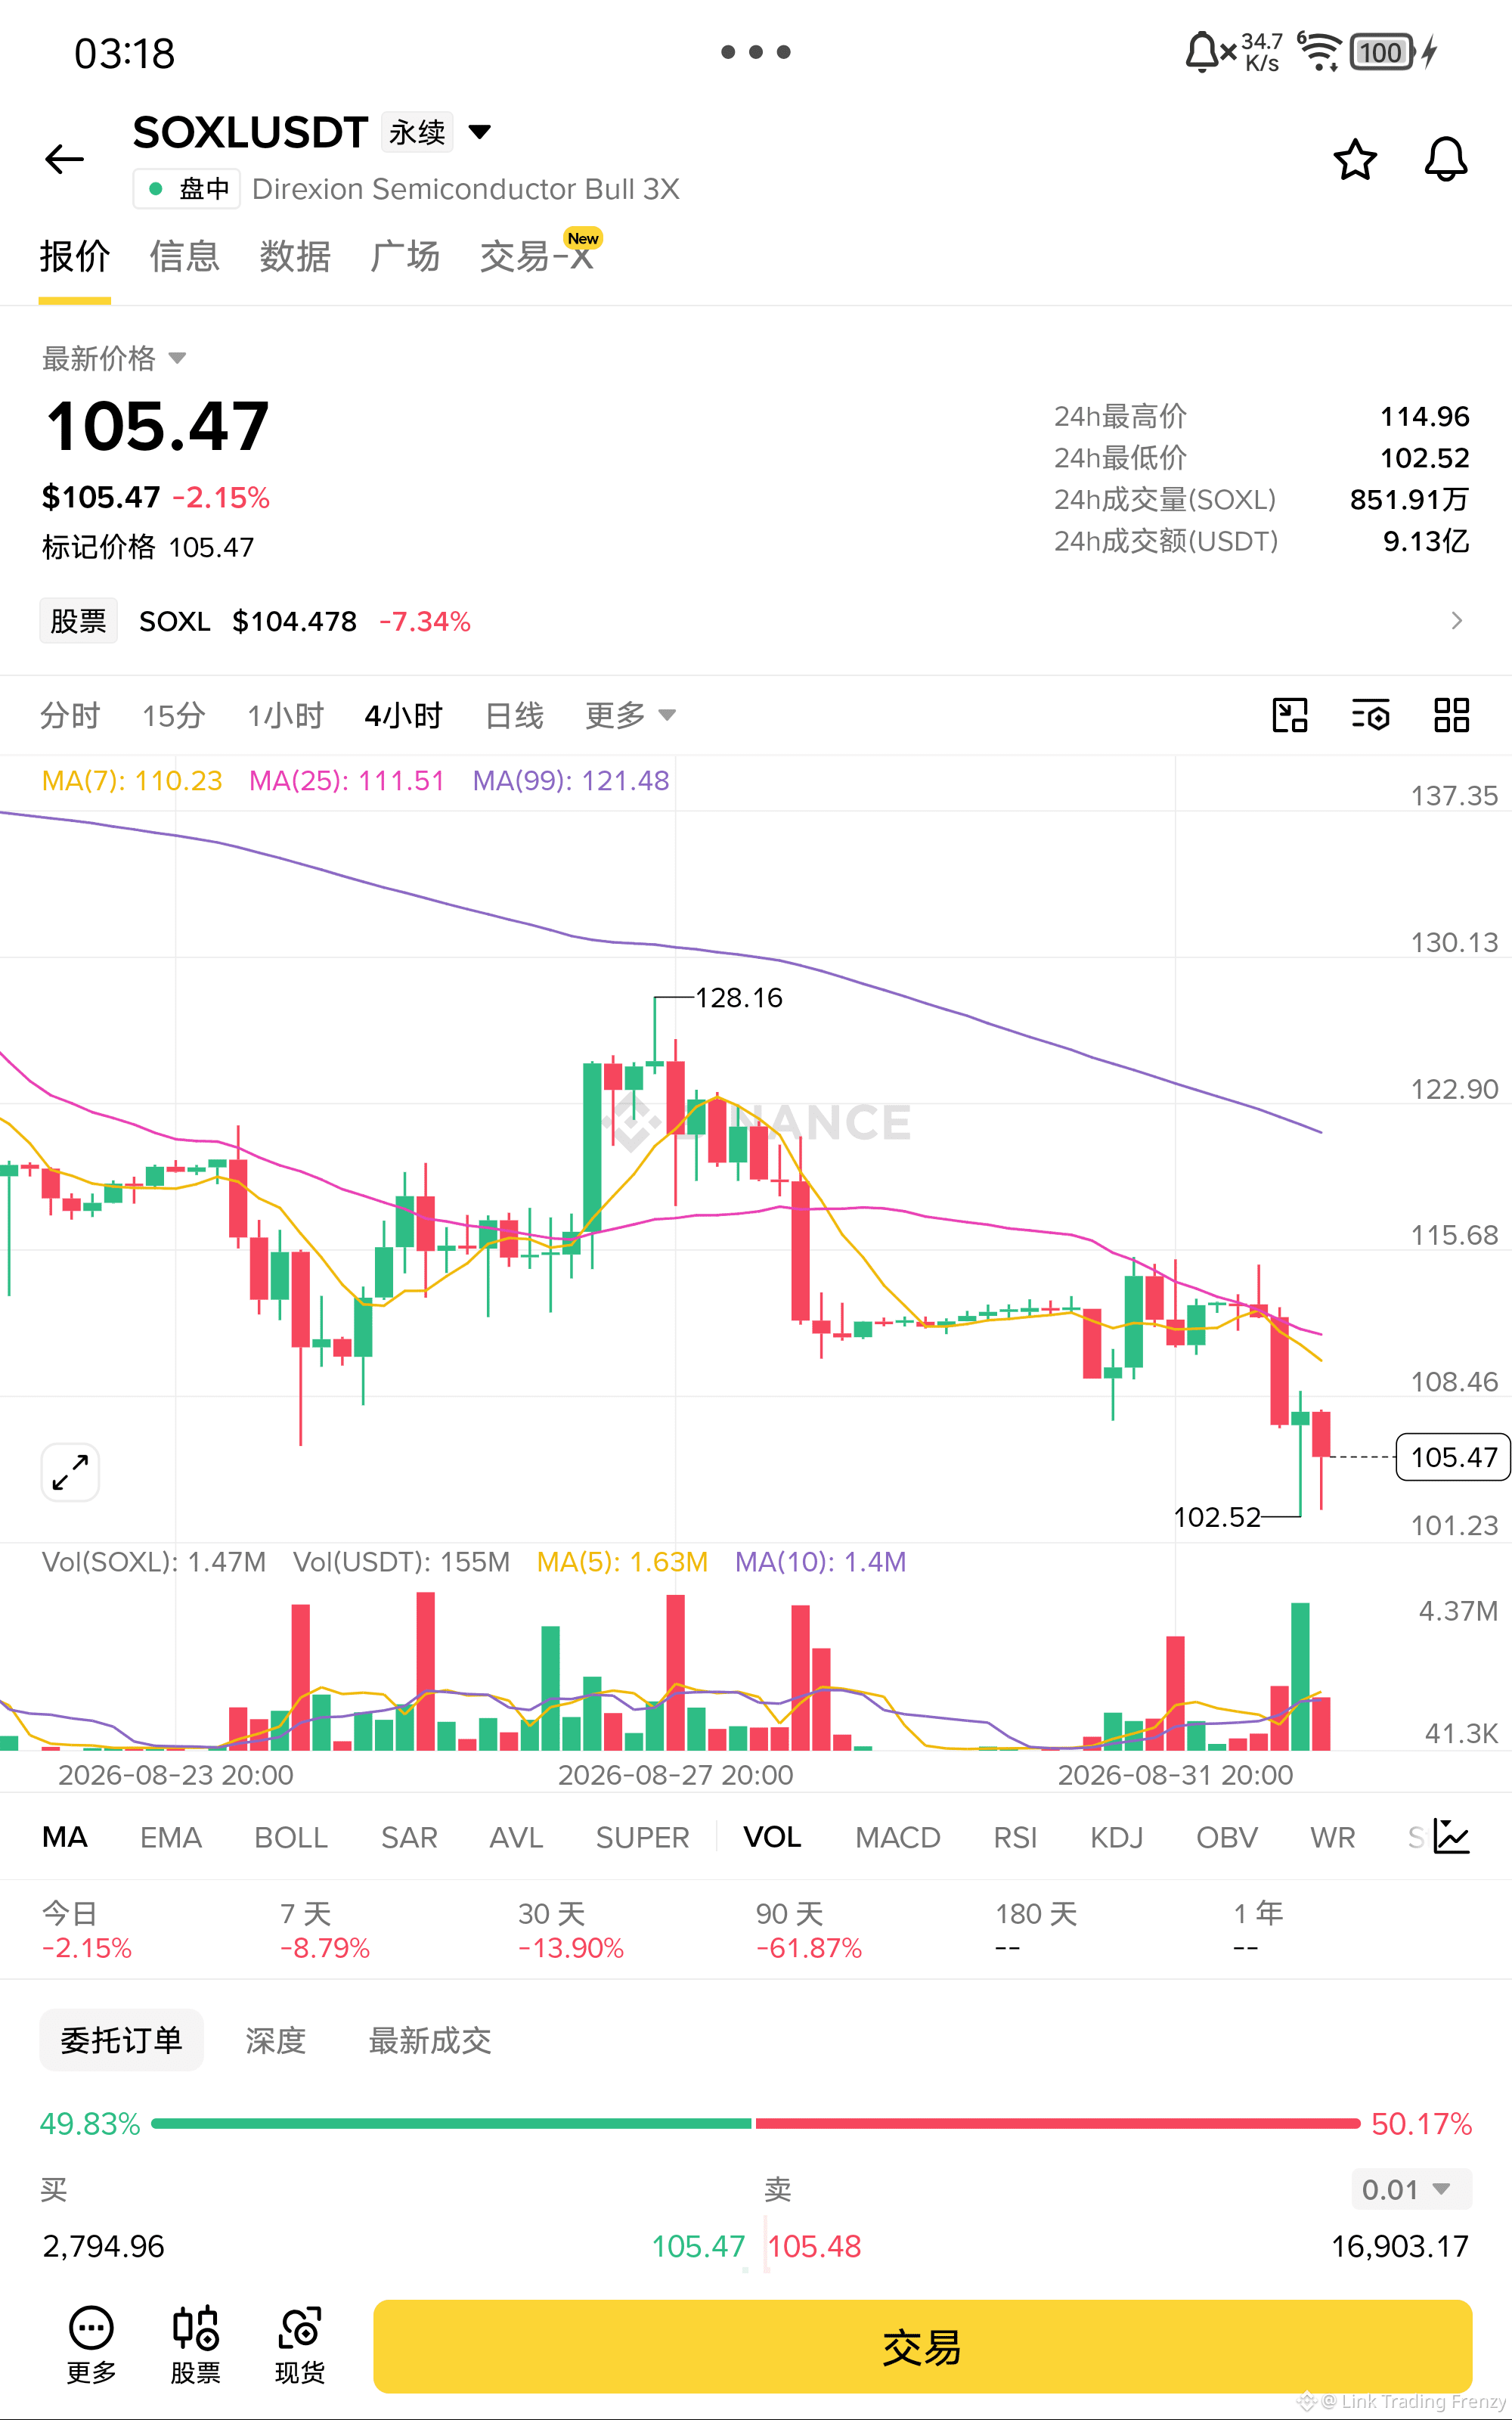
$SOXL 102 Once this low point is breached, below it is the highway!
The price fell from 115 to 102.5, with virtually no meaningful rebound in between. Both the MA7 and MA25 have turned downward and are firmly pressing down. Today continues to make a new low; the increased volume on the decline indicates selling pressure is still being released. As SOXL is a 3x leveraged product, when it drops it falls harder than the underlying stock. In the short term, look for a move down toward around 98.
Entry: 105.0
Stop loss: 112.0
Take profit: 98.0
$SOXL - Short 🔻
Enter the trade from below👇
The price fell from 115 to 102.5, with virtually no meaningful rebound in between. Both the MA7 and MA25 have turned downward and are firmly pressing down. Today continues to make a new low; the increased volume on the decline indicates selling pressure is still being released. As SOXL is a 3x leveraged product, when it drops it falls harder than the underlying stock. In the short term, look for a move down toward around 98.
Entry: 105.0
Stop loss: 112.0
Take profit: 98.0
$SOXL - Short 🔻
Enter the trade from below👇
Log in to explore more content