
RISKEE_MID
267 පෝස්ටු

RISKEE_MID
වාර්තා කරන්න
පරිශීලක අවහිර කරන්න
let’s talk about crypto
විවෘත වෙළෙඳාම
ඉඳහිට වෙළෙන්දා
{වේලාව} වසර
8 හඹා යමින්
41 හඹා යන්නන්
300 කැමති විය
පෝස්ටු
ආයෝජන කළඹ
සියල්ල
උපුටා දැක්වීම්
·
--
ලිපිය
පරිවර්තනය බලන්න
How to Move Tokens Between TON and Ethereum Without a Traditional BridgeHow to Move Tokens Between TON and Ethereum Without a Traditional Bridge
Moving tokens between TON and Ethereum used to be strongly associated with one familiar architecture: use a bridge, lock an asset on one network, wait for the system to recognize the transaction, and receive a representation or released liquidity on the other side.
But cross-chain infrastructure has evolved.
Today, users can approach the same problem from a different direction: instead of asking, “How do I transfer this asset to another blockchain?”, they can ask, “What asset do I want to receive on the other blockchain?”
That distinction is at the heart of resolver-based cross chain swaps.
With a swap-first architecture such as Omniston, developed by STON.fi, the objective is not simply to transport an asset between TON and Ethereum. The system coordinates an exchange between assets on two independent blockchains. A resolver supplies liquidity on the destination side, while linked Hashed Timelock Contracts (HTLCs) connect the two sides of the transaction.
The result is designed around an important principle: the swap should either settle according to its conditions on both sides or return the locked funds through the timelock mechanism.
Why Move Value Between TON and Ethereum?
Blockchains are isolated environments. Ethereum does not inherently know what happened on TON and TON does not inherently know what happened on Ethereum. Moving value between them therefore requires some mechanism for coordinating activity across the two networks.
The reason users want that coordination is usually practical.
A user holding assets on Ethereum may want access to TON based DeFi, TON native tokens, different liquidity opportunities or potentially lower transaction costs for subsequent activity. Conversely, a TON user may want access to Ethereum liquidity, EVM based applications, or assets that primarily exist in the Ethereum ecosystem.
The important point is that the user normally has an outcome in mind rather than an infrastructure preference.
Someone may start with USDT on Ethereum and actually want USDT on TON. Another user may hold an asset on TON but want an Ethereum based token or stablecoin. In both cases, merely moving an equivalent representation across the network is only part of the problem.
This is where the difference between bridge first and swap first architectures becomes important.
Bridge First vs Swap First
A traditional bridge is primarily designed around transferring value from one blockchain to another.
In a classic lock-and-mint model, the source asset is locked in a bridge contract. The destination network then receives a wrapped or mirrored representation. Other bridge architectures can use destination-side liquidity instead of minting a wrapped asset, but the central objective remains transportation of value across networks.
A typical bridge-first flow therefore looks like:
Asset on Ethereum → bridge → asset representation on TON → optional swap → desired TON asset
The user first completes the cross-chain transfer and then handles whatever conversion is necessary after arrival.
A swap-first approach reverses the perspective:
Asset on Ethereum → cross-chain quote → destination asset on TON
Instead of making the intermediate representation the user's main concern, the route is built around the asset the user actually wants to receive.
This is one reason modern cross-chain products can feel considerably different from traditional bridge workflows. A cross-chain swap combines the movement between networks with the exchange itself, making the final destination asset part of the original order.
Neither architecture should be understood as merely a different interface. They make different assumptions about custody, liquidity, settlement and what the user receives at the end.
Bridge-first: transport first
Suppose a user has an asset on Ethereum and wants to participate in TON DeFi.
A bridge may move the value to TON first. Depending on the bridge architecture, the user could receive a wrapped token or another representation supported by that bridge.
The process might then require another swap into the token actually needed for the desired TON application.
That creates additional route-management responsibility. The user has to understand not only how to cross the network boundary, but also whether the resulting token is accepted by the destination protocol.
Swap-first: outcome first
With a cross-chain swap, the user specifies the source asset and destination asset.
For example:
Ethereum USDT → TON USDT
The system does not need to give the user a wrapped Ethereum representation on TON and ask them to perform another conversion. Instead, the destination-side liquidity provider can supply the requested TON-side asset directly.
That is the architectural idea behind Omniston.
The important question changes from:
“How can I move this token across?”
to:
“What do I want to receive on the other chain?”
What Does the User Actually Receive?
This is one of the most important differences to understand.
A bridge can move value while leaving the user with a wrapped or mirrored representation of the original asset. That representation may be perfectly useful, but it can introduce another consideration: whether the destination protocol supports that particular version.
A swap-first architecture targets the destination asset directly.
For example, imagine a user starts with USDT on Ethereum and requests USDT on TON through an Omniston-powered route.
The desired result is not an Ethereum-wrapped representation of USDT on TON. The resolver supplies the requested destination-side asset, so the user receives the appropriate TON side token directly. STON.fi describes this as the practical difference between bridging into a wrapped Jetton and atomically swapping into a destination asset through Omniston.
The same principle works in the opposite direction.
A user might start with a TON asset and request an Ethereum token. The destination is defined by the quote and order rather than by simply reproducing the source asset on another chain.
That distinction makes the architecture particularly useful for users who already know what they want to do after the cross-chain transaction.
Where Resolver Based Execution Enters
The next question is obvious:
If there is no traditional bridge vault holding the user's assets and minting a wrapped representation, who provides the asset on the other chain?
The answer is the resolver.
A resolver is a liquidity provider participating in the Omniston network. It evaluates incoming requests, provides a quote, and commits destination-side liquidity when it agrees to fulfill the trade. Resolvers can compete for requests, meaning the cross-chain transaction can be treated as a liquidity marketplace rather than a single bridge controlled route.
Imagine a user wants to exchange Ethereum USDT for TON USDT.
The user creates a request specifying the source asset, destination asset and amount.
Omniston distributes a Request for Quote, commonly called an RFQ, to participating resolvers.
Resolvers can respond with their proposed execution terms.
A suitable resolver is selected and the two sides of the transaction are then connected through the settlement mechanism.
This matters because the resolver is not simply promising:
“I will send your destination tokens later.”
The protocol's design requires the resolver to commit destination-side assets through the corresponding settlement structure.
That commitment is what gives the system its cryptographic connection between the source and destination transactions.
Understanding HTLCs Without the Jargon
The technical foundation behind this process is the Hashed Timelock Contract, or HTLC.
The name sounds complex, but its purpose can be explained through two ideas:
A secret
and
a deadline.
First, a cryptographic secret is generated.
A hash of that secret is used as the hashlock. The hash can be shared publicly, but the original secret remains hidden until the appropriate stage of execution.
The second component is the timelock.
The contracts define a time condition under which the transaction can either be completed using the secret or refunded after the required period expires.
Omniston links two HTLCs:
A bid HTLC on the source blockchain.An ask HTLC on the destination blockchain.
The two contracts use the same cryptographic condition.
This creates the central relationship between the two chains.
The user's source side asset is locked in the bid HTLC.
The resolver's destination-side asset is locked in the ask HTLC.
The same secret connects them.
How the Atomic Settlement Works
Consider a simplified Ethereum → TON example.
The user has USDT on Ethereum and wants USDT on TON.
Step 1: The order is created
The user specifies the source and destination assets and accepts a quote.
The system creates the cryptographic condition required for settlement, and the user's source-side funds become subject to the bid-side HTLC.
Step 2: A resolver commits
A resolver accepts the trade and commits to fulfilling the destination side.
The resolver supplies the requested TON-side asset.
Step 3: The destination side is locked
The resolver's destination asset is placed into the corresponding HTLC on TON using the same hashlock.
At this point, the source and destination sides are cryptographically connected.
Step 4: The secret is revealed
When the execution condition is satisfied, the secret becomes available on-chain.
The user can use the secret to claim the destination asset from the ask HTLC.
The resolver can use that same secret to claim the source-side asset from the bid HTLC.
One cryptographic event therefore connects both settlements.
Step 5: The timelock provides the fallback
What happens if the swap does not complete?
This is where the second half of HTLC architecture becomes important.
If the secret is never revealed within the required time window, the timelock allows the locked assets to become refundable to their original owners.
The documented Omniston model therefore describes three possible outcomes: successful settlement when the secret is disclosed, a user refund when a resolver fails to respond, or a resolver refund if the secret is never disclosed.
This is what the protocol means by all or nothing settlement.
The goal is not merely to make cross-chain swaps faster or simpler. The settlement logic is designed so the two sides of the transaction remain cryptographically connected.
Why “Without a Bridge” Does Not Mean “Without Infrastructure”
It is worth clarifying the phrase without a traditional bridge.
It does not mean blockchains suddenly communicate directly.
It does not mean there is no liquidity provider.
It does not mean there are no smart contracts.
And it does not mean there is no cross chain execution infrastructure.
Instead, it means the user is not relying on the conventional bridge pattern of putting assets into a shared bridge vault and receiving a wrapped representation on the other network.
Omniston replaces that bridge-first model with a resolver-based execution layer using linked HTLCs. STON.fi's documentation describes Omniston as an aggregation and execution layer capable of working with liquidity sources and resolvers, while the current cross-chain architecture uses resolvers and HTLC based settlement for cross chain execution.
The infrastructure is still there.
It is simply organized around execution of an exchange, rather than transport through a shared vault.
A Practical Example With STON.fi and Omniston
Now consider how the architecture appears from a user's perspective.
Suppose you have USDT on Ethereum and want USDT on TON.
Rather than beginning with a separate bridge, the practical flow through a STON.fi-powered cross-chain interface can be understood as:
Ethereum / USDT → Omniston quote → TON / USDT
The first requirement is a valid destination.
You select Ethereum as the source network, USDT as the source asset, TON as the destination network and the desired TON side asset.
Omniston then obtains quotes through its resolver network.
The resolver's quote determines how much destination-side liquidity will be provided for the source amount under the quoted conditions. STON.fi's developer documentation also describes Omniston integrations as using RFQ requests, quote streaming, transaction construction and trade status tracking.
From the user's perspective, this compresses what could otherwise become a multi-stage workflow into one intended outcome:
“I want this asset on that chain.”
Underneath, however, the protocol is coordinating multiple blockchain operations.
That is an important distinction.
A simple interface does not mean the underlying architecture is simple.
The user sees a swap.
The protocol is coordinating an RFQ, resolver liquidity, source side settlement, destination side settlement, cryptographic conditions and transaction tracking.
Why the Destination Asset Matters
Imagine two possible routes for an Ethereum user entering TON DeFi.
Route A
Ethereum USDT → Bridge → Wrapped USDT on TON → Swap → TON USDT
Route B
Ethereum USDT → Omniston → TON USDT
The two routes have the same broad objective, but the intermediate experience is different.
Route A treats the cross-chain movement as the primary operation and the token conversion as a separate problem.
Route B starts with the final outcome.
This is particularly relevant when the user knows exactly what asset is required on TON.
A destination application may expect a particular TON Jetton rather than an arbitrary wrapped representation. A swap first architecture attempts to solve that requirement before the funds arrive rather than leaving the user to resolve it afterward.
That is why STON.fi describes Omniston's approach as being centered on the destination asset rather than simply moving the source asset across the network.
The Role of RFQ Liquidity
Another important component is the Request for Quote mechanism.
An AMM typically exposes liquidity through pools.
A resolver-based system introduces another liquidity source: professional market participants that can respond to individual requests with executable pricing.
When an Omniston request is broadcast, eligible resolvers can evaluate the trade and return quotes. They bring their own capital and can compete on the execution terms they are prepared to offer.
This creates a marketplace around cross-chain execution.
Instead of relying on one permanent pool containing a representation of assets from multiple chains, destination side liquidity can be supplied by a resolver when a specific order needs to be filled.
For the user, the practical benefit is that the cross chain route can be built around an actual destination quote.
For the infrastructure, the benefit is that liquidity can be coordinated around individual transactions.
What Happens During a Larger Swap?
Large orders do not necessarily have to behave as one indivisible transaction.
The Omniston architecture described by STON.fi supports partial fills by splitting a larger order into separate sub-swaps. Each sub swap can have its own cryptographic secret, hashlock and HTLC pair.
Conceptually, a 1,000 unit order could be divided into multiple smaller executions.
That means one sub-swap can settle while another remains pending or ultimately refunds, depending on the execution conditions.
This is an important distinction from thinking of a cross chain transaction as a single giant transfer.
At the protocol level, the system can coordinate multiple settlement units.
Bridge Risk vs Resolver Based Settlement
The architectural comparison is not simply about speed.
It is also about where trust and risk are concentrated.
A traditional bridge can concentrate substantial value inside contracts or infrastructure responsible for representing or releasing assets on another chain. The security model therefore depends significantly on that bridge's architecture, operators, validators, multisig controls or other verification mechanisms.
The resolver/HTLC model takes a different approach.
Rather than maintaining one shared vault containing the user's destination representation, independent resolvers supply destination side liquidity and the settlement contracts link the source and destination sides.
That does not mean the system has no risks. Users still have to consider smart contract risk, resolver availability, liquidity conditions, incorrect addresses, network conditions and the security of the assets themselves.
But the architecture changes where the risk sits.
The intended security property is enforced by the linked HTLC conditions rather than by trusting a centralized party to manually release the other side of a transfer.
Before You Execute a TON ↔ Ethereum Swap
Even when the protocol is designed to simplify cross chain execution, users should not treat the process as “connect wallet and click blindly.”
The final checks remain important.
1. Check the source network
Make sure the asset is actually on the network you selected.
USDT on Ethereum is not the same on-chain object as USDT on TON, even though they share the same ticker and broader monetary reference.
Always verify the network before signing.
2. Check the destination network
Confirm that TON is actually the destination if that is where you intend to receive the funds.
Likewise, when moving in the opposite direction, verify the specific EVM network.
Cross-chain transactions are network specific.
3. Check the destination asset
Do not focus only on the amount.
Look carefully at the asset you are receiving.
The whole point of the swap-first approach is that the destination asset is part of the requested outcome.
4. Check the wallet address
TON addresses and EVM addresses use different formats.
EVM addresses generally begin with 0x, while TON addresses have a different structure.
A valid address on one network is not automatically a valid destination address for the other. STON.fi specifically recommends verifying the destination chain, token address and wallet compatibility before execution.
5. Review the quote
Do not treat the quote as decorative information.
Check:
amount sent → amount received → network → destination asset → applicable fees → quoted conditions
A quote should make the final outcome understandable before you approve the transaction.
6. Check resolver availability
A resolver needs to be available to fill the request.
If no suitable resolver responds, the order may not initiate.
This is not necessarily a failed transaction. It can simply mean there is not enough resolver liquidity for that particular pair and amount at that moment. STON.fi's description notes that when no resolver responds, no HTLC needs to be locked and the user retains the original funds.
7. Keep enough network gas
Cross chain execution does not eliminate blockchain transaction fees.
The source side wallet still needs enough network-native balance to execute the necessary transaction.
STON.fi's current guidance specifically notes the importance of maintaining sufficient TON for transactions involving the TON wallet.
8. Do not resubmit blindly
A transaction that appears delayed should first be investigated.
Check the relevant blockchain explorer and the transaction or trade status before creating another request.
Submitting the same order repeatedly without understanding the first transaction can make troubleshooting more complicated.
From a User's Perspective, the Flow Is Simple
The complete experience can be reduced to a few visible stages:
Choose the source asset.
Choose the destination network.
Choose the destination asset.
Request a quote.
Review the amount, fees and destination.
Approve the source transaction.
Track the execution.
Behind those actions, Omniston is coordinating a considerably more sophisticated process involving resolvers, RFQs, HTLCs and blockchain settlement.
STON.fi's developer tools expose quote retrieval, transaction construction and trade tracking to applications integrating Omniston, showing that the same infrastructure can sit underneath wallets, DeFi applications and other interfaces rather than existing only as a standalone user experience.
The Bigger Idea: Cross-Chain as an Outcome
The deeper significance of resolver-based cross chain execution is not simply that it removes one button from the user interface.
It changes how cross chain transactions can be designed.
The traditional mental model is:
Move the asset → wait for it to arrive → convert it → use it.
The newer model is:
Specify the asset you want → obtain a quote → settle the exchange across chains.
That difference sounds small, but architecturally it is significant.
The bridge first model is primarily concerned with transporting value.
The swap-first model is primarily concerned with delivering an intended outcome.
Omniston takes that concept further by combining RFQ based resolver liquidity with linked HTLC settlement. The resolver provides the destination-side liquidity, while the shared cryptographic condition connects the source and destination legs. If the required condition is met, both sides can settle; if it is not, the timelock mechanism provides the refund path described by the protocol.
Final Thoughts
Moving tokens between TON and Ethereum does not necessarily require the user to begin with a traditional bridge.
The important distinction is between transport first and outcome first cross-chain architecture.
A bridge-first approach generally focuses on getting value from one blockchain to another, potentially leaving the user with a wrapped or mirrored destination representation that may require another conversion.
A swap-first approach starts with the desired destination asset.
That is the model demonstrated by Omniston.
Through a resolver network, users can request destination focused quotes while independent liquidity providers supply the asset needed on the other side. Linked HTLCs then connect the source and destination transactions through a shared cryptographic condition and timelocks.
For a practical TON ↔ Ethereum route through STON.fi, the important principle is therefore simple:
You are not merely moving a token across a blockchain boundary. You are requesting an asset on the destination chain and allowing the infrastructure to coordinate the exchange that gets you there.
That is what makes resolver-based cross chain execution different from a traditional bridge first workflow.
And before every swap, the practical discipline remains the same: verify the wallet, network, destination asset, quote, fees and transaction status.
The interface may make cross-chain movement look like one swap, but understanding what happens underneath is what allows users to use that simplicity intelligently.
Read more about STONfi here: https://blog.ston.fi/omniston-explained-how-cross-chain-swaps-on-ton-work-without-a-bridge/
How to Move Tokens Between TON and Ethereum Without a Traditional Bridge
How to Move Tokens Between TON and Ethereum Without a Traditional Bridge
Moving tokens between TON and Ethereum used to be strongly associated with one familiar architecture: use a bridge, lock an asset on one network, wait for the system to recognize the transaction, and receive a representation or released liquidity on the other side.
But cross-chain infrastructure has evolved.
Today, users can approach the same problem from a different direction: instead of asking, “How do I transfer this asset to another blockchain?”, they can ask, “What asset do I want to receive on the other blockchain?”
That distinction is at the heart of resolver-based cross chain swaps.
With a swap-first architecture such as Omniston, developed by STON.fi, the objective is not simply to transport an asset between TON and Ethereum. The system coordinates an exchange between assets on two independent blockchains. A resolver supplies liquidity on the destination side, while linked Hashed Timelock Contracts (HTLCs) connect the two sides of the transaction.
The result is designed around an important principle: the swap should either settle according to its conditions on both sides or return the locked funds through the timelock mechanism.
Why Move Value Between TON and Ethereum?
Blockchains are isolated environments. Ethereum does not inherently know what happened on TON and TON does not inherently know what happened on Ethereum. Moving value between them therefore requires some mechanism for coordinating activity across the two networks.
The reason users want that coordination is usually practical.
A user holding assets on Ethereum may want access to TON based DeFi, TON native tokens, different liquidity opportunities or potentially lower transaction costs for subsequent activity. Conversely, a TON user may want access to Ethereum liquidity, EVM based applications, or assets that primarily exist in the Ethereum ecosystem.
The important point is that the user normally has an outcome in mind rather than an infrastructure preference.
Someone may start with USDT on Ethereum and actually want USDT on TON. Another user may hold an asset on TON but want an Ethereum based token or stablecoin. In both cases, merely moving an equivalent representation across the network is only part of the problem.
This is where the difference between bridge first and swap first architectures becomes important.
Bridge First vs Swap First
A traditional bridge is primarily designed around transferring value from one blockchain to another.
In a classic lock-and-mint model, the source asset is locked in a bridge contract. The destination network then receives a wrapped or mirrored representation. Other bridge architectures can use destination-side liquidity instead of minting a wrapped asset, but the central objective remains transportation of value across networks.
A typical bridge-first flow therefore looks like:
Asset on Ethereum → bridge → asset representation on TON → optional swap → desired TON asset
The user first completes the cross-chain transfer and then handles whatever conversion is necessary after arrival.
A swap-first approach reverses the perspective:
Asset on Ethereum → cross-chain quote → destination asset on TON
Instead of making the intermediate representation the user's main concern, the route is built around the asset the user actually wants to receive.
This is one reason modern cross-chain products can feel considerably different from traditional bridge workflows. A cross-chain swap combines the movement between networks with the exchange itself, making the final destination asset part of the original order.
Neither architecture should be understood as merely a different interface. They make different assumptions about custody, liquidity, settlement and what the user receives at the end.
Bridge-first: transport first
Suppose a user has an asset on Ethereum and wants to participate in TON DeFi.
A bridge may move the value to TON first. Depending on the bridge architecture, the user could receive a wrapped token or another representation supported by that bridge.
The process might then require another swap into the token actually needed for the desired TON application.
That creates additional route-management responsibility. The user has to understand not only how to cross the network boundary, but also whether the resulting token is accepted by the destination protocol.
Swap-first: outcome first
With a cross-chain swap, the user specifies the source asset and destination asset.
For example:
Ethereum USDT → TON USDT
The system does not need to give the user a wrapped Ethereum representation on TON and ask them to perform another conversion. Instead, the destination-side liquidity provider can supply the requested TON-side asset directly.
That is the architectural idea behind Omniston.
The important question changes from:
“How can I move this token across?”
to:
“What do I want to receive on the other chain?”
What Does the User Actually Receive?
This is one of the most important differences to understand.
A bridge can move value while leaving the user with a wrapped or mirrored representation of the original asset. That representation may be perfectly useful, but it can introduce another consideration: whether the destination protocol supports that particular version.
A swap-first architecture targets the destination asset directly.
For example, imagine a user starts with USDT on Ethereum and requests USDT on TON through an Omniston-powered route.
The desired result is not an Ethereum-wrapped representation of USDT on TON. The resolver supplies the requested destination-side asset, so the user receives the appropriate TON side token directly. STON.fi describes this as the practical difference between bridging into a wrapped Jetton and atomically swapping into a destination asset through Omniston.
The same principle works in the opposite direction.
A user might start with a TON asset and request an Ethereum token. The destination is defined by the quote and order rather than by simply reproducing the source asset on another chain.
That distinction makes the architecture particularly useful for users who already know what they want to do after the cross-chain transaction.
Where Resolver Based Execution Enters
The next question is obvious:
If there is no traditional bridge vault holding the user's assets and minting a wrapped representation, who provides the asset on the other chain?
The answer is the resolver.
A resolver is a liquidity provider participating in the Omniston network. It evaluates incoming requests, provides a quote, and commits destination-side liquidity when it agrees to fulfill the trade. Resolvers can compete for requests, meaning the cross-chain transaction can be treated as a liquidity marketplace rather than a single bridge controlled route.
Imagine a user wants to exchange Ethereum USDT for TON USDT.
The user creates a request specifying the source asset, destination asset and amount.
Omniston distributes a Request for Quote, commonly called an RFQ, to participating resolvers.
Resolvers can respond with their proposed execution terms.
A suitable resolver is selected and the two sides of the transaction are then connected through the settlement mechanism.
This matters because the resolver is not simply promising:
“I will send your destination tokens later.”
The protocol's design requires the resolver to commit destination-side assets through the corresponding settlement structure.
That commitment is what gives the system its cryptographic connection between the source and destination transactions.
Understanding HTLCs Without the Jargon
The technical foundation behind this process is the Hashed Timelock Contract, or HTLC.
The name sounds complex, but its purpose can be explained through two ideas:
A secret
and
a deadline.
First, a cryptographic secret is generated.
A hash of that secret is used as the hashlock. The hash can be shared publicly, but the original secret remains hidden until the appropriate stage of execution.
The second component is the timelock.
The contracts define a time condition under which the transaction can either be completed using the secret or refunded after the required period expires.
Omniston links two HTLCs:
A bid HTLC on the source blockchain.An ask HTLC on the destination blockchain.
The two contracts use the same cryptographic condition.
This creates the central relationship between the two chains.
The user's source side asset is locked in the bid HTLC.
The resolver's destination-side asset is locked in the ask HTLC.
The same secret connects them.
How the Atomic Settlement Works
Consider a simplified Ethereum → TON example.
The user has USDT on Ethereum and wants USDT on TON.
Step 1: The order is created
The user specifies the source and destination assets and accepts a quote.
The system creates the cryptographic condition required for settlement, and the user's source-side funds become subject to the bid-side HTLC.
Step 2: A resolver commits
A resolver accepts the trade and commits to fulfilling the destination side.
The resolver supplies the requested TON-side asset.
Step 3: The destination side is locked
The resolver's destination asset is placed into the corresponding HTLC on TON using the same hashlock.
At this point, the source and destination sides are cryptographically connected.
Step 4: The secret is revealed
When the execution condition is satisfied, the secret becomes available on-chain.
The user can use the secret to claim the destination asset from the ask HTLC.
The resolver can use that same secret to claim the source-side asset from the bid HTLC.
One cryptographic event therefore connects both settlements.
Step 5: The timelock provides the fallback
What happens if the swap does not complete?
This is where the second half of HTLC architecture becomes important.
If the secret is never revealed within the required time window, the timelock allows the locked assets to become refundable to their original owners.
The documented Omniston model therefore describes three possible outcomes: successful settlement when the secret is disclosed, a user refund when a resolver fails to respond, or a resolver refund if the secret is never disclosed.
This is what the protocol means by all or nothing settlement.
The goal is not merely to make cross-chain swaps faster or simpler. The settlement logic is designed so the two sides of the transaction remain cryptographically connected.
Why “Without a Bridge” Does Not Mean “Without Infrastructure”
It is worth clarifying the phrase without a traditional bridge.
It does not mean blockchains suddenly communicate directly.
It does not mean there is no liquidity provider.
It does not mean there are no smart contracts.
And it does not mean there is no cross chain execution infrastructure.
Instead, it means the user is not relying on the conventional bridge pattern of putting assets into a shared bridge vault and receiving a wrapped representation on the other network.
Omniston replaces that bridge-first model with a resolver-based execution layer using linked HTLCs. STON.fi's documentation describes Omniston as an aggregation and execution layer capable of working with liquidity sources and resolvers, while the current cross-chain architecture uses resolvers and HTLC based settlement for cross chain execution.
The infrastructure is still there.
It is simply organized around execution of an exchange, rather than transport through a shared vault.
A Practical Example With STON.fi and Omniston
Now consider how the architecture appears from a user's perspective.
Suppose you have USDT on Ethereum and want USDT on TON.
Rather than beginning with a separate bridge, the practical flow through a STON.fi-powered cross-chain interface can be understood as:
Ethereum / USDT → Omniston quote → TON / USDT
The first requirement is a valid destination.
You select Ethereum as the source network, USDT as the source asset, TON as the destination network and the desired TON side asset.
Omniston then obtains quotes through its resolver network.
The resolver's quote determines how much destination-side liquidity will be provided for the source amount under the quoted conditions. STON.fi's developer documentation also describes Omniston integrations as using RFQ requests, quote streaming, transaction construction and trade status tracking.
From the user's perspective, this compresses what could otherwise become a multi-stage workflow into one intended outcome:
“I want this asset on that chain.”
Underneath, however, the protocol is coordinating multiple blockchain operations.
That is an important distinction.
A simple interface does not mean the underlying architecture is simple.
The user sees a swap.
The protocol is coordinating an RFQ, resolver liquidity, source side settlement, destination side settlement, cryptographic conditions and transaction tracking.
Why the Destination Asset Matters
Imagine two possible routes for an Ethereum user entering TON DeFi.
Route A
Ethereum USDT → Bridge → Wrapped USDT on TON → Swap → TON USDT
Route B
Ethereum USDT → Omniston → TON USDT
The two routes have the same broad objective, but the intermediate experience is different.
Route A treats the cross-chain movement as the primary operation and the token conversion as a separate problem.
Route B starts with the final outcome.
This is particularly relevant when the user knows exactly what asset is required on TON.
A destination application may expect a particular TON Jetton rather than an arbitrary wrapped representation. A swap first architecture attempts to solve that requirement before the funds arrive rather than leaving the user to resolve it afterward.
That is why STON.fi describes Omniston's approach as being centered on the destination asset rather than simply moving the source asset across the network.
The Role of RFQ Liquidity
Another important component is the Request for Quote mechanism.
An AMM typically exposes liquidity through pools.
A resolver-based system introduces another liquidity source: professional market participants that can respond to individual requests with executable pricing.
When an Omniston request is broadcast, eligible resolvers can evaluate the trade and return quotes. They bring their own capital and can compete on the execution terms they are prepared to offer.
This creates a marketplace around cross-chain execution.
Instead of relying on one permanent pool containing a representation of assets from multiple chains, destination side liquidity can be supplied by a resolver when a specific order needs to be filled.
For the user, the practical benefit is that the cross chain route can be built around an actual destination quote.
For the infrastructure, the benefit is that liquidity can be coordinated around individual transactions.
What Happens During a Larger Swap?
Large orders do not necessarily have to behave as one indivisible transaction.
The Omniston architecture described by STON.fi supports partial fills by splitting a larger order into separate sub-swaps. Each sub swap can have its own cryptographic secret, hashlock and HTLC pair.
Conceptually, a 1,000 unit order could be divided into multiple smaller executions.
That means one sub-swap can settle while another remains pending or ultimately refunds, depending on the execution conditions.
This is an important distinction from thinking of a cross chain transaction as a single giant transfer.
At the protocol level, the system can coordinate multiple settlement units.
Bridge Risk vs Resolver Based Settlement
The architectural comparison is not simply about speed.
It is also about where trust and risk are concentrated.
A traditional bridge can concentrate substantial value inside contracts or infrastructure responsible for representing or releasing assets on another chain. The security model therefore depends significantly on that bridge's architecture, operators, validators, multisig controls or other verification mechanisms.
The resolver/HTLC model takes a different approach.
Rather than maintaining one shared vault containing the user's destination representation, independent resolvers supply destination side liquidity and the settlement contracts link the source and destination sides.
That does not mean the system has no risks. Users still have to consider smart contract risk, resolver availability, liquidity conditions, incorrect addresses, network conditions and the security of the assets themselves.
But the architecture changes where the risk sits.
The intended security property is enforced by the linked HTLC conditions rather than by trusting a centralized party to manually release the other side of a transfer.
Before You Execute a TON ↔ Ethereum Swap
Even when the protocol is designed to simplify cross chain execution, users should not treat the process as “connect wallet and click blindly.”
The final checks remain important.
1. Check the source network
Make sure the asset is actually on the network you selected.
USDT on Ethereum is not the same on-chain object as USDT on TON, even though they share the same ticker and broader monetary reference.
Always verify the network before signing.
2. Check the destination network
Confirm that TON is actually the destination if that is where you intend to receive the funds.
Likewise, when moving in the opposite direction, verify the specific EVM network.
Cross-chain transactions are network specific.
3. Check the destination asset
Do not focus only on the amount.
Look carefully at the asset you are receiving.
The whole point of the swap-first approach is that the destination asset is part of the requested outcome.
4. Check the wallet address
TON addresses and EVM addresses use different formats.
EVM addresses generally begin with 0x, while TON addresses have a different structure.
A valid address on one network is not automatically a valid destination address for the other. STON.fi specifically recommends verifying the destination chain, token address and wallet compatibility before execution.
5. Review the quote
Do not treat the quote as decorative information.
Check:
amount sent → amount received → network → destination asset → applicable fees → quoted conditions
A quote should make the final outcome understandable before you approve the transaction.
6. Check resolver availability
A resolver needs to be available to fill the request.
If no suitable resolver responds, the order may not initiate.
This is not necessarily a failed transaction. It can simply mean there is not enough resolver liquidity for that particular pair and amount at that moment. STON.fi's description notes that when no resolver responds, no HTLC needs to be locked and the user retains the original funds.
7. Keep enough network gas
Cross chain execution does not eliminate blockchain transaction fees.
The source side wallet still needs enough network-native balance to execute the necessary transaction.
STON.fi's current guidance specifically notes the importance of maintaining sufficient TON for transactions involving the TON wallet.
8. Do not resubmit blindly
A transaction that appears delayed should first be investigated.
Check the relevant blockchain explorer and the transaction or trade status before creating another request.
Submitting the same order repeatedly without understanding the first transaction can make troubleshooting more complicated.
From a User's Perspective, the Flow Is Simple
The complete experience can be reduced to a few visible stages:
Choose the source asset.
Choose the destination network.
Choose the destination asset.
Request a quote.
Review the amount, fees and destination.
Approve the source transaction.
Track the execution.
Behind those actions, Omniston is coordinating a considerably more sophisticated process involving resolvers, RFQs, HTLCs and blockchain settlement.
STON.fi's developer tools expose quote retrieval, transaction construction and trade tracking to applications integrating Omniston, showing that the same infrastructure can sit underneath wallets, DeFi applications and other interfaces rather than existing only as a standalone user experience.
The Bigger Idea: Cross-Chain as an Outcome
The deeper significance of resolver-based cross chain execution is not simply that it removes one button from the user interface.
It changes how cross chain transactions can be designed.
The traditional mental model is:
Move the asset → wait for it to arrive → convert it → use it.
The newer model is:
Specify the asset you want → obtain a quote → settle the exchange across chains.
That difference sounds small, but architecturally it is significant.
The bridge first model is primarily concerned with transporting value.
The swap-first model is primarily concerned with delivering an intended outcome.
Omniston takes that concept further by combining RFQ based resolver liquidity with linked HTLC settlement. The resolver provides the destination-side liquidity, while the shared cryptographic condition connects the source and destination legs. If the required condition is met, both sides can settle; if it is not, the timelock mechanism provides the refund path described by the protocol.
Final Thoughts
Moving tokens between TON and Ethereum does not necessarily require the user to begin with a traditional bridge.
The important distinction is between transport first and outcome first cross-chain architecture.
A bridge-first approach generally focuses on getting value from one blockchain to another, potentially leaving the user with a wrapped or mirrored destination representation that may require another conversion.
A swap-first approach starts with the desired destination asset.
That is the model demonstrated by Omniston.
Through a resolver network, users can request destination focused quotes while independent liquidity providers supply the asset needed on the other side. Linked HTLCs then connect the source and destination transactions through a shared cryptographic condition and timelocks.
For a practical TON ↔ Ethereum route through STON.fi, the important principle is therefore simple:
You are not merely moving a token across a blockchain boundary. You are requesting an asset on the destination chain and allowing the infrastructure to coordinate the exchange that gets you there.
That is what makes resolver-based cross chain execution different from a traditional bridge first workflow.
And before every swap, the practical discipline remains the same: verify the wallet, network, destination asset, quote, fees and transaction status.
The interface may make cross-chain movement look like one swap, but understanding what happens underneath is what allows users to use that simplicity intelligently.
Read more about STONfi here: https://blog.ston.fi/omniston-explained-how-cross-chain-swaps-on-ton-work-without-a-bridge/
Moving tokens between TON and Ethereum used to be strongly associated with one familiar architecture: use a bridge, lock an asset on one network, wait for the system to recognize the transaction, and receive a representation or released liquidity on the other side.
But cross-chain infrastructure has evolved.
Today, users can approach the same problem from a different direction: instead of asking, “How do I transfer this asset to another blockchain?”, they can ask, “What asset do I want to receive on the other blockchain?”
That distinction is at the heart of resolver-based cross chain swaps.
With a swap-first architecture such as Omniston, developed by STON.fi, the objective is not simply to transport an asset between TON and Ethereum. The system coordinates an exchange between assets on two independent blockchains. A resolver supplies liquidity on the destination side, while linked Hashed Timelock Contracts (HTLCs) connect the two sides of the transaction.
The result is designed around an important principle: the swap should either settle according to its conditions on both sides or return the locked funds through the timelock mechanism.
Why Move Value Between TON and Ethereum?
Blockchains are isolated environments. Ethereum does not inherently know what happened on TON and TON does not inherently know what happened on Ethereum. Moving value between them therefore requires some mechanism for coordinating activity across the two networks.
The reason users want that coordination is usually practical.
A user holding assets on Ethereum may want access to TON based DeFi, TON native tokens, different liquidity opportunities or potentially lower transaction costs for subsequent activity. Conversely, a TON user may want access to Ethereum liquidity, EVM based applications, or assets that primarily exist in the Ethereum ecosystem.
The important point is that the user normally has an outcome in mind rather than an infrastructure preference.
Someone may start with USDT on Ethereum and actually want USDT on TON. Another user may hold an asset on TON but want an Ethereum based token or stablecoin. In both cases, merely moving an equivalent representation across the network is only part of the problem.
This is where the difference between bridge first and swap first architectures becomes important.
Bridge First vs Swap First
A traditional bridge is primarily designed around transferring value from one blockchain to another.
In a classic lock-and-mint model, the source asset is locked in a bridge contract. The destination network then receives a wrapped or mirrored representation. Other bridge architectures can use destination-side liquidity instead of minting a wrapped asset, but the central objective remains transportation of value across networks.
A typical bridge-first flow therefore looks like:
Asset on Ethereum → bridge → asset representation on TON → optional swap → desired TON asset
The user first completes the cross-chain transfer and then handles whatever conversion is necessary after arrival.
A swap-first approach reverses the perspective:
Asset on Ethereum → cross-chain quote → destination asset on TON
Instead of making the intermediate representation the user's main concern, the route is built around the asset the user actually wants to receive.
This is one reason modern cross-chain products can feel considerably different from traditional bridge workflows. A cross-chain swap combines the movement between networks with the exchange itself, making the final destination asset part of the original order.
Neither architecture should be understood as merely a different interface. They make different assumptions about custody, liquidity, settlement and what the user receives at the end.
Bridge-first: transport first
Suppose a user has an asset on Ethereum and wants to participate in TON DeFi.
A bridge may move the value to TON first. Depending on the bridge architecture, the user could receive a wrapped token or another representation supported by that bridge.
The process might then require another swap into the token actually needed for the desired TON application.
That creates additional route-management responsibility. The user has to understand not only how to cross the network boundary, but also whether the resulting token is accepted by the destination protocol.
Swap-first: outcome first
With a cross-chain swap, the user specifies the source asset and destination asset.
For example:
Ethereum USDT → TON USDT
The system does not need to give the user a wrapped Ethereum representation on TON and ask them to perform another conversion. Instead, the destination-side liquidity provider can supply the requested TON-side asset directly.
That is the architectural idea behind Omniston.
The important question changes from:
“How can I move this token across?”
to:
“What do I want to receive on the other chain?”
What Does the User Actually Receive?
This is one of the most important differences to understand.
A bridge can move value while leaving the user with a wrapped or mirrored representation of the original asset. That representation may be perfectly useful, but it can introduce another consideration: whether the destination protocol supports that particular version.
A swap-first architecture targets the destination asset directly.
For example, imagine a user starts with USDT on Ethereum and requests USDT on TON through an Omniston-powered route.
The desired result is not an Ethereum-wrapped representation of USDT on TON. The resolver supplies the requested destination-side asset, so the user receives the appropriate TON side token directly. STON.fi describes this as the practical difference between bridging into a wrapped Jetton and atomically swapping into a destination asset through Omniston.
The same principle works in the opposite direction.
A user might start with a TON asset and request an Ethereum token. The destination is defined by the quote and order rather than by simply reproducing the source asset on another chain.
That distinction makes the architecture particularly useful for users who already know what they want to do after the cross-chain transaction.
Where Resolver Based Execution Enters
The next question is obvious:
If there is no traditional bridge vault holding the user's assets and minting a wrapped representation, who provides the asset on the other chain?
The answer is the resolver.
A resolver is a liquidity provider participating in the Omniston network. It evaluates incoming requests, provides a quote, and commits destination-side liquidity when it agrees to fulfill the trade. Resolvers can compete for requests, meaning the cross-chain transaction can be treated as a liquidity marketplace rather than a single bridge controlled route.
Imagine a user wants to exchange Ethereum USDT for TON USDT.
The user creates a request specifying the source asset, destination asset and amount.
Omniston distributes a Request for Quote, commonly called an RFQ, to participating resolvers.
Resolvers can respond with their proposed execution terms.
A suitable resolver is selected and the two sides of the transaction are then connected through the settlement mechanism.
This matters because the resolver is not simply promising:
“I will send your destination tokens later.”
The protocol's design requires the resolver to commit destination-side assets through the corresponding settlement structure.
That commitment is what gives the system its cryptographic connection between the source and destination transactions.
Understanding HTLCs Without the Jargon
The technical foundation behind this process is the Hashed Timelock Contract, or HTLC.
The name sounds complex, but its purpose can be explained through two ideas:
A secret
and
a deadline.
First, a cryptographic secret is generated.
A hash of that secret is used as the hashlock. The hash can be shared publicly, but the original secret remains hidden until the appropriate stage of execution.
The second component is the timelock.
The contracts define a time condition under which the transaction can either be completed using the secret or refunded after the required period expires.
Omniston links two HTLCs:
A bid HTLC on the source blockchain.An ask HTLC on the destination blockchain.
The two contracts use the same cryptographic condition.
This creates the central relationship between the two chains.
The user's source side asset is locked in the bid HTLC.
The resolver's destination-side asset is locked in the ask HTLC.
The same secret connects them.
How the Atomic Settlement Works
Consider a simplified Ethereum → TON example.
The user has USDT on Ethereum and wants USDT on TON.
Step 1: The order is created
The user specifies the source and destination assets and accepts a quote.
The system creates the cryptographic condition required for settlement, and the user's source-side funds become subject to the bid-side HTLC.
Step 2: A resolver commits
A resolver accepts the trade and commits to fulfilling the destination side.
The resolver supplies the requested TON-side asset.
Step 3: The destination side is locked
The resolver's destination asset is placed into the corresponding HTLC on TON using the same hashlock.
At this point, the source and destination sides are cryptographically connected.
Step 4: The secret is revealed
When the execution condition is satisfied, the secret becomes available on-chain.
The user can use the secret to claim the destination asset from the ask HTLC.
The resolver can use that same secret to claim the source-side asset from the bid HTLC.
One cryptographic event therefore connects both settlements.
Step 5: The timelock provides the fallback
What happens if the swap does not complete?
This is where the second half of HTLC architecture becomes important.
If the secret is never revealed within the required time window, the timelock allows the locked assets to become refundable to their original owners.
The documented Omniston model therefore describes three possible outcomes: successful settlement when the secret is disclosed, a user refund when a resolver fails to respond, or a resolver refund if the secret is never disclosed.
This is what the protocol means by all or nothing settlement.
The goal is not merely to make cross-chain swaps faster or simpler. The settlement logic is designed so the two sides of the transaction remain cryptographically connected.
Why “Without a Bridge” Does Not Mean “Without Infrastructure”
It is worth clarifying the phrase without a traditional bridge.
It does not mean blockchains suddenly communicate directly.
It does not mean there is no liquidity provider.
It does not mean there are no smart contracts.
And it does not mean there is no cross chain execution infrastructure.
Instead, it means the user is not relying on the conventional bridge pattern of putting assets into a shared bridge vault and receiving a wrapped representation on the other network.
Omniston replaces that bridge-first model with a resolver-based execution layer using linked HTLCs. STON.fi's documentation describes Omniston as an aggregation and execution layer capable of working with liquidity sources and resolvers, while the current cross-chain architecture uses resolvers and HTLC based settlement for cross chain execution.
The infrastructure is still there.
It is simply organized around execution of an exchange, rather than transport through a shared vault.
A Practical Example With STON.fi and Omniston
Now consider how the architecture appears from a user's perspective.
Suppose you have USDT on Ethereum and want USDT on TON.
Rather than beginning with a separate bridge, the practical flow through a STON.fi-powered cross-chain interface can be understood as:
Ethereum / USDT → Omniston quote → TON / USDT
The first requirement is a valid destination.
You select Ethereum as the source network, USDT as the source asset, TON as the destination network and the desired TON side asset.
Omniston then obtains quotes through its resolver network.
The resolver's quote determines how much destination-side liquidity will be provided for the source amount under the quoted conditions. STON.fi's developer documentation also describes Omniston integrations as using RFQ requests, quote streaming, transaction construction and trade status tracking.
From the user's perspective, this compresses what could otherwise become a multi-stage workflow into one intended outcome:
“I want this asset on that chain.”
Underneath, however, the protocol is coordinating multiple blockchain operations.
That is an important distinction.
A simple interface does not mean the underlying architecture is simple.
The user sees a swap.
The protocol is coordinating an RFQ, resolver liquidity, source side settlement, destination side settlement, cryptographic conditions and transaction tracking.
Why the Destination Asset Matters
Imagine two possible routes for an Ethereum user entering TON DeFi.
Route A
Ethereum USDT → Bridge → Wrapped USDT on TON → Swap → TON USDT
Route B
Ethereum USDT → Omniston → TON USDT
The two routes have the same broad objective, but the intermediate experience is different.
Route A treats the cross-chain movement as the primary operation and the token conversion as a separate problem.
Route B starts with the final outcome.
This is particularly relevant when the user knows exactly what asset is required on TON.
A destination application may expect a particular TON Jetton rather than an arbitrary wrapped representation. A swap first architecture attempts to solve that requirement before the funds arrive rather than leaving the user to resolve it afterward.
That is why STON.fi describes Omniston's approach as being centered on the destination asset rather than simply moving the source asset across the network.
The Role of RFQ Liquidity
Another important component is the Request for Quote mechanism.
An AMM typically exposes liquidity through pools.
A resolver-based system introduces another liquidity source: professional market participants that can respond to individual requests with executable pricing.
When an Omniston request is broadcast, eligible resolvers can evaluate the trade and return quotes. They bring their own capital and can compete on the execution terms they are prepared to offer.
This creates a marketplace around cross-chain execution.
Instead of relying on one permanent pool containing a representation of assets from multiple chains, destination side liquidity can be supplied by a resolver when a specific order needs to be filled.
For the user, the practical benefit is that the cross chain route can be built around an actual destination quote.
For the infrastructure, the benefit is that liquidity can be coordinated around individual transactions.
What Happens During a Larger Swap?
Large orders do not necessarily have to behave as one indivisible transaction.
The Omniston architecture described by STON.fi supports partial fills by splitting a larger order into separate sub-swaps. Each sub swap can have its own cryptographic secret, hashlock and HTLC pair.
Conceptually, a 1,000 unit order could be divided into multiple smaller executions.
That means one sub-swap can settle while another remains pending or ultimately refunds, depending on the execution conditions.
This is an important distinction from thinking of a cross chain transaction as a single giant transfer.
At the protocol level, the system can coordinate multiple settlement units.
Bridge Risk vs Resolver Based Settlement
The architectural comparison is not simply about speed.
It is also about where trust and risk are concentrated.
A traditional bridge can concentrate substantial value inside contracts or infrastructure responsible for representing or releasing assets on another chain. The security model therefore depends significantly on that bridge's architecture, operators, validators, multisig controls or other verification mechanisms.
The resolver/HTLC model takes a different approach.
Rather than maintaining one shared vault containing the user's destination representation, independent resolvers supply destination side liquidity and the settlement contracts link the source and destination sides.
That does not mean the system has no risks. Users still have to consider smart contract risk, resolver availability, liquidity conditions, incorrect addresses, network conditions and the security of the assets themselves.
But the architecture changes where the risk sits.
The intended security property is enforced by the linked HTLC conditions rather than by trusting a centralized party to manually release the other side of a transfer.
Before You Execute a TON ↔ Ethereum Swap
Even when the protocol is designed to simplify cross chain execution, users should not treat the process as “connect wallet and click blindly.”
The final checks remain important.
1. Check the source network
Make sure the asset is actually on the network you selected.
USDT on Ethereum is not the same on-chain object as USDT on TON, even though they share the same ticker and broader monetary reference.
Always verify the network before signing.
2. Check the destination network
Confirm that TON is actually the destination if that is where you intend to receive the funds.
Likewise, when moving in the opposite direction, verify the specific EVM network.
Cross-chain transactions are network specific.
3. Check the destination asset
Do not focus only on the amount.
Look carefully at the asset you are receiving.
The whole point of the swap-first approach is that the destination asset is part of the requested outcome.
4. Check the wallet address
TON addresses and EVM addresses use different formats.
EVM addresses generally begin with 0x, while TON addresses have a different structure.
A valid address on one network is not automatically a valid destination address for the other. STON.fi specifically recommends verifying the destination chain, token address and wallet compatibility before execution.
5. Review the quote
Do not treat the quote as decorative information.
Check:
amount sent → amount received → network → destination asset → applicable fees → quoted conditions
A quote should make the final outcome understandable before you approve the transaction.
6. Check resolver availability
A resolver needs to be available to fill the request.
If no suitable resolver responds, the order may not initiate.
This is not necessarily a failed transaction. It can simply mean there is not enough resolver liquidity for that particular pair and amount at that moment. STON.fi's description notes that when no resolver responds, no HTLC needs to be locked and the user retains the original funds.
7. Keep enough network gas
Cross chain execution does not eliminate blockchain transaction fees.
The source side wallet still needs enough network-native balance to execute the necessary transaction.
STON.fi's current guidance specifically notes the importance of maintaining sufficient TON for transactions involving the TON wallet.
8. Do not resubmit blindly
A transaction that appears delayed should first be investigated.
Check the relevant blockchain explorer and the transaction or trade status before creating another request.
Submitting the same order repeatedly without understanding the first transaction can make troubleshooting more complicated.
From a User's Perspective, the Flow Is Simple
The complete experience can be reduced to a few visible stages:
Choose the source asset.
Choose the destination network.
Choose the destination asset.
Request a quote.
Review the amount, fees and destination.
Approve the source transaction.
Track the execution.
Behind those actions, Omniston is coordinating a considerably more sophisticated process involving resolvers, RFQs, HTLCs and blockchain settlement.
STON.fi's developer tools expose quote retrieval, transaction construction and trade tracking to applications integrating Omniston, showing that the same infrastructure can sit underneath wallets, DeFi applications and other interfaces rather than existing only as a standalone user experience.
The Bigger Idea: Cross-Chain as an Outcome
The deeper significance of resolver-based cross chain execution is not simply that it removes one button from the user interface.
It changes how cross chain transactions can be designed.
The traditional mental model is:
Move the asset → wait for it to arrive → convert it → use it.
The newer model is:
Specify the asset you want → obtain a quote → settle the exchange across chains.
That difference sounds small, but architecturally it is significant.
The bridge first model is primarily concerned with transporting value.
The swap-first model is primarily concerned with delivering an intended outcome.
Omniston takes that concept further by combining RFQ based resolver liquidity with linked HTLC settlement. The resolver provides the destination-side liquidity, while the shared cryptographic condition connects the source and destination legs. If the required condition is met, both sides can settle; if it is not, the timelock mechanism provides the refund path described by the protocol.
Final Thoughts
Moving tokens between TON and Ethereum does not necessarily require the user to begin with a traditional bridge.
The important distinction is between transport first and outcome first cross-chain architecture.
A bridge-first approach generally focuses on getting value from one blockchain to another, potentially leaving the user with a wrapped or mirrored destination representation that may require another conversion.
A swap-first approach starts with the desired destination asset.
That is the model demonstrated by Omniston.
Through a resolver network, users can request destination focused quotes while independent liquidity providers supply the asset needed on the other side. Linked HTLCs then connect the source and destination transactions through a shared cryptographic condition and timelocks.
For a practical TON ↔ Ethereum route through STON.fi, the important principle is therefore simple:
You are not merely moving a token across a blockchain boundary. You are requesting an asset on the destination chain and allowing the infrastructure to coordinate the exchange that gets you there.
That is what makes resolver-based cross chain execution different from a traditional bridge first workflow.
And before every swap, the practical discipline remains the same: verify the wallet, network, destination asset, quote, fees and transaction status.
The interface may make cross-chain movement look like one swap, but understanding what happens underneath is what allows users to use that simplicity intelligently.
Read more about STONfi here: https://blog.ston.fi/omniston-explained-how-cross-chain-swaps-on-ton-work-without-a-bridge/
57
·
--
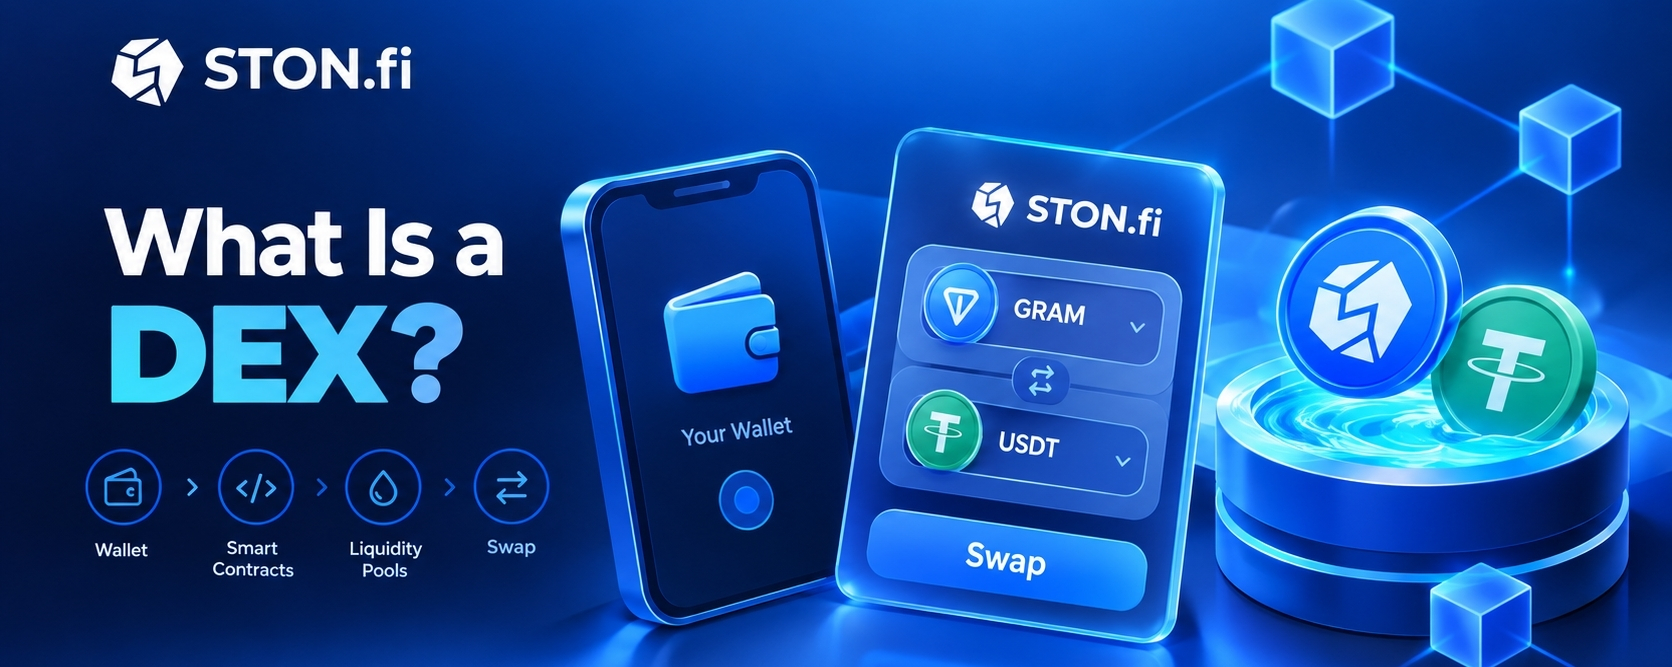
ලිපිය
පරිවර්තනය බලන්න
What Is a DEX and How Does It Work?What Is a DEX and How Does It Work?
Decentralized exchanges, commonly called DEXs, are one of the fundamental building blocks of decentralized finance (DeFi). They allow users to exchange digital assets directly through blockchain infrastructure rather than depositing funds into a centrally controlled exchange account.
But a DEX is more than an interface with a “Swap” button. Underneath that interface are wallets, smart contracts, liquidity, pricing mechanisms, transaction messages and, in many cases, automated market makers (AMMs).
Understanding these components makes it easier to understand what actually happens when you exchange one token for another.
1. What Is a Decentralized Exchange?
A decentralized exchange is a blockchain-based trading system in which users interact with smart contracts or other on-chain mechanisms to execute asset exchanges without handing custody of their funds to a traditional centralized exchange.
The important distinction is where control and execution reside.
On a centralized exchange (CEX), a user normally deposits assets into an account controlled by the exchange. The platform maintains an internal ledger and operates the matching and settlement infrastructure.
With a DEX, the user's wallet remains the starting point for the transaction. Instead of transferring assets to an exchange-controlled balance first, the user authorizes blockchain transactions that interact with the exchange's smart contracts or liquidity infrastructure.
This does not mean every component surrounding a DEX must be decentralized. A DEX can have a web interface, APIs, indexing services or other infrastructure operated by particular entities. What matters is that the relevant asset-exchange logic and settlement are executed according to blockchain-based rules rather than requiring a centralized custodian to take possession of the user's trading funds.
That distinction also explains why “DEX” and “decentralized application” are not interchangeable terms. A DEX is a particular type of financial application that uses decentralized infrastructure to facilitate asset exchange.
2. Self Custody: Your Wallet Is the Starting Point
Self custody is one of the most important concepts behind DEX trading.
A self custodial wallet gives the user control over the private key or recovery credentials needed to authorize transactions. Instead of asking a company to move funds on the user's behalf, the user signs the transaction and the blockchain network processes it.
On TON, wallets are themselves smart contract based accounts. A wallet contract verifies signatures and uses transaction sequencing mechanisms such as seqno to prevent replayed transactions. The private key remains the critical authorization mechanism.
This changes the normal exchange experience.
You do not typically:
Deposit → receive an exchange balance → place a trade → withdraw.
Instead, the basic DEX model is closer to:
Connect wallet → select assets → review quote → authorize transaction → smart contracts execute → receive the output asset.
Self-custody provides control, but it also transfers responsibility to the user. Losing a recovery phrase, signing a malicious transaction, selecting the wrong token contract or misunderstanding transaction parameters can create risks that a centralized intermediary might otherwise absorb.
For TON specifically, fungible assets are generally represented using Jettons. TON documentation describes Jettons as consisting of a master contract plus individual wallet contracts associated with holders, rather than one centralized token-balance database.
3. Smart Contracts: The Execution Engine
Smart contracts are the programmable infrastructure that makes a DEX possible.
A smart contract is code deployed on a blockchain that responds to transactions and messages according to predefined rules. On TON, smart contracts contain code and persistent data and communicate through messages.
For a DEX, smart contracts can manage functions such as:
holding and accounting for liquidity;calculating swap outcomes;receiving one asset and sending another;enforcing transaction conditions;distributing trading fees;issuing or accounting for liquidity-provider positions.
The key idea is that the exchange does not need an employee sitting behind the interface approving each trade.
The user signs a transaction, the blockchain processes it, and the contract executes its programmed logic.
This is why a DEX can operate continuously and transparently. The rules are encoded into blockchain infrastructure rather than relying entirely on an institution's internal database.
However, smart contracts are not automatically safe simply because they are on a blockchain. Bugs, flawed economic assumptions, malicious token contracts and poorly designed integrations can still create risks. Users therefore need to distinguish non-custodial execution from risk-free execution.
4. AMMs and Liquidity Pools
One of the most widely used DEX designs is the Automated Market Maker, or AMM.
Traditional markets often rely on buyers and sellers placing orders. An AMM takes a different approach: liquidity is deposited into pools and mathematical rules determine how assets are exchanged.
Imagine a pool containing two assets:
Asset A + Asset B
Liquidity providers deposit the assets into the pool. Traders can then swap one asset for the other directly against that liquidity.
Instead of asking:
“Is there another trader willing to sell me this exact amount?”
the AMM asks:
“Given the current state of the pool and its pricing rules, how much of the other asset can this transaction receive?”
This is one of the biggest conceptual differences between an AMM and an order-book exchange.
How does the pool determine the price?
The answer depends on the AMM's mathematical design.
A common model uses a constant-product relationship such as:
x × y = k
The important intuition is not the formula itself, but what happens when a trade changes the quantities of the two assets in the pool.
Suppose a pool contains $100,000 worth of Asset A and $100,000 worth of Asset B.
A relatively small trade changes the pool ratio only slightly.
A much larger trade moves the ratio more significantly.
That movement affects the effective execution price. This is why trade size and available liquidity matter.
Price impact vs. slippage
These concepts are often confused.
Price impact is the effect that your own trade has on the pool's price because your transaction changes the pool's asset ratio.
Slippage generally refers to the difference between the expected execution and the eventual execution caused by market or price changes during the transaction process.
STON.fi's educational material similarly distinguishes price impact from slippage and explains why larger trades relative to available liquidity can produce larger price impact.
This is one reason liquidity depth matters. A large pool can generally absorb a given trade more easily than a shallow pool.
5. Where Does DEX Liquidity Come From?
Liquidity does not simply appear.
It is supplied by liquidity providers, often called LPs.
An LP deposits assets into a liquidity pool so traders can use that capital.
For example, an LP might contribute:
$5,000 worth of $GRAM + $5,000 worth of another token
The liquidity becomes available for swaps.
In return, liquidity providers can receive a share of eligible trading fees generated by transactions using the pool. The exact mechanics depend on the DEX and pool design.
This creates an important relationship:
Traders need liquidity.
Liquidity providers supply liquidity.
Trading generates fees.
The protocol's smart contracts distribute those fees according to its rules.
Liquidity provision also introduces risks. If the relative prices of the deposited assets change significantly, an LP can experience impermanent loss compared with simply holding the assets outside the pool. STON.fi's documentation specifically explains this relationship between changing asset ratios and LP returns.
Therefore, the existence of an attractive APR does not automatically mean a liquidity position is profitable. Trading fees, token prices, incentives, volatility and impermanent loss all matter.
6. AMM vs. Order Book: The High Level Difference
An order-book DEX resembles the traditional trading model.
Users submit orders such as:
Buy 10 tokens at $5
or:
Sell 10 tokens at $5.10
A trade occurs when compatible orders meet.
An AMM DEX does not require a conventional list of matching buy and sell orders. Instead, trades interact with liquidity pools and pricing algorithms.
The distinction can be summarized conceptually:
Order BookAMMBuy and sell ordersLiquidity poolsOrders seek counterpartiesPool provides liquidityMatching engine/logicPricing algorithmTraders interact through bids and asksTraders interact with pool liquidityExecution depends on matching liquidityExecution depends heavily on pool state
Neither model removes the need for liquidity. They simply organize that liquidity differently.
STON.fi is an example of the AMM approach. STON.fi's own educational material describes AMM DEXs as pool based systems and distinguishes them from order-book DEXs.
7. A Simple Wallet to Swap Flow
Now put all of the pieces together.
Imagine a user wants to swap $GRAM for USDT on TON.
Step 1: Connect the wallet
The user opens the DEX interface and connects a compatible TON wallet.
The DEX interface can read the wallet address and relevant blockchain information, while the wallet remains responsible for authorizing transactions.
Step 2: Choose the assets
The user selects:
From: $GRAM
To: USDT
The interface then requests information about available liquidity and possible execution routes.
Step 3: Receive a quote
The DEX calculates an expected output amount.
The displayed result can depend on:
available liquidity;trade size;pool pricing;fees;price impact;slippage settings;and, where aggregation is involved, available routes across liquidity sources.
This quote is important because the headline market price is not necessarily the exact price a particular transaction will receive.
Step 4: Review the transaction
The user reviews the amount being exchanged and the expected amount received.
A self-custodial wallet may also show the transaction details and required network fee.
Step 5: Sign
The user approves the transaction in the wallet.
The private key authorizes the transaction; it is not handed to the DEX interface.
Step 6: Blockchain execution
The transaction reaches the blockchain.
The relevant smart contracts process the messages, move the input asset according to the protocol's rules, calculate the output and deliver the resulting asset.
Step 7: Receive the output
Once the transaction settles, the user's wallet reflects the received token.
There is no traditional exchange balance that needs to be withdrawn.
The blockchain itself records the resulting state.
That is the fundamental DEX experience:
Wallet → Authorization → Smart-contract execution → On-chain settlement → Wallet
8. STON.fi as a Practical Example on TON
STON.fi provides a concrete example of how these concepts come together within the TON ecosystem.
STON.fi is a decentralized exchange built on TON and uses the AMM model for its native liquidity infrastructure. Its pools provide liquidity against which swaps can execute, while users interact through their wallets rather than depositing funds into a conventional custodial exchange account.
The STON.fi guide organizes the user journey around connecting a wallet, swapping assets, understanding rate and price impact, providing liquidity, evaluating pools and managing other DeFi functions.
A STON.fi swap
A simplified STON.fi swap therefore looks like:
Connect TON wallet
Select the asset to sell
Select the asset to receive
Review rate, price impact and minimum received
Check network and swap costs
Confirm in wallet
Smart contracts execute the transaction
Receive the selected asset
The important point is that STON.fi is the practical implementation, while the underlying principles are the general DEX concepts discussed above.
9. Liquidity on STON.fi
STON.fi's liquidity pools are the infrastructure that allows AMM based swaps to take place.
Users can provide liquidity to supported pairs, becoming liquidity providers rather than simply traders.
The platform also provides pool information such as:
TVL the total value locked in the pool.
24-hour volume the amount traded through the pair over the specified period.
APR an estimate based on recent pool activity rather than a guaranteed future return.
STON.fi notes that higher liquidity can help accommodate larger transactions with less price impact, while volume influences the fees available to liquidity providers. It also warns that pool metrics can change significantly with market conditions.
This illustrates a central principle of DeFi:
Liquidity is not just a number displayed on a dashboard. It directly influences trading execution.
10. STON.fi and Permissionless Liquidity
Another important aspect of decentralized exchange infrastructure is permissionless participation.
STON.fi's documentation explains that tokens can become swappable at the protocol level through the creation of liquidity pools. The interface may nevertheless apply visibility or safety policies to certain assets.
This demonstrates an important distinction:
Protocol availability ≠ interface endorsement.
A token existing on-chain or having a pool does not automatically mean the token is legitimate, safe or officially endorsed.
Users still need to verify token contract addresses, liquidity, project information and transaction details.
STON.fi also notes that some assets can be hidden from the interface while remaining accessible through contract level or other interfaces, while certain categories can be filtered or blocked at the application layer.
That is why a DEX should never be treated as a substitute for personal verification.
11. Fees: What Are You Actually Paying?
DEX transactions can involve more than one type of cost.
There may be:
Network fees paid for blockchain computation and transaction processing.
DEX or pool fees charged according to the exchange and pool's fee structure.
Price impact an economic cost arising because your own transaction changes the pool's effective price.
Slippage the movement between expected and actual execution within the permitted transaction conditions.
On STON.fi, its documentation has described a default 0.3% swap fee structure for applicable pools, with 0.2% allocated to liquidity providers and 0.1% to the protocol; however, users should always check the current pool/interface information because fee structures can change.
Network fees are separate from the exchange's trading fee.
On TON, $GRAM is the native asset used for network fees and smart contract execution. TON documentation identifies Toncoin as the native cryptocurrency used to pay transaction and smart contract execution costs.
This means holding only the token you want to trade is not always sufficient. A user may also need some native network asset to pay for blockchain execution.
12. Routing and Fragmented Liquidity
There is another challenge beyond simply having liquidity: where the best liquidity exists.
Suppose one DEX has the best route for Token A → Token B, while another has deeper liquidity for a different part of the transaction.
An aggregator or routing layer can compare available liquidity sources and construct an execution path.
This is particularly relevant to the current STON.fi experience.
STON.fi introduced Omniston as a liquidity aggregation and routing layer and its documentation states that smart routing is enabled by default in the STON.fi dApp, allowing liquidity from multiple DEXs to be considered rather than restricting every swap to a single pool or protocol.
The distinction is important:
STON.fi's AMM pools provide liquidity infrastructure.
Omniston can aggregate and route liquidity across sources.
This helps explain why a modern DEX interface can feel simpler than the underlying infrastructure actually is.
The user sees:
“Swap A for B.”
Behind the interface, the system may need to determine:
Which pool?
Which liquidity source?
Which route?
What output?
What price impact?
What execution conditions?
That complexity can be abstracted away from the user while still being settled through blockchain-based mechanisms.
13. What a DEX Does Not Guarantee
Decentralization does not automatically mean:
No risk.
It does not guarantee that every token is legitimate.
It does not guarantee that every price is favorable.
It does not guarantee unlimited liquidity.
It does not eliminate smart-contract risk.
It does not eliminate market volatility.
It does not guarantee that a transaction cannot fail.
And self-custody does not mean someone else can recover your funds if you lose your recovery credentials.
The DEX removes or reduces particular forms of intermediary dependence, but the user takes on more responsibility for understanding what they are signing and interacting with.
14. The Bigger Picture
A DEX can be understood as the intersection of several technologies:
Wallets provide user-controlled authorization.
Blockchains provide the settlement layer.
Smart contracts provide programmable execution.
Liquidity pools provide capital for swaps.
AMMs provide mathematical pricing mechanisms.
Liquidity providers supply trading capital.
Routing systems can connect fragmented liquidity.
Interfaces turn this technical infrastructure into a usable product.
Remove any one of these components and the experience changes significantly.
This is why the “Swap” button is actually the final layer of a much deeper system.
Conclusion
A decentralized exchange is fundamentally a way to exchange digital assets through blockchain-based infrastructure without relying on a conventional centralized custodian to hold and settle the user's trading balance.
AMM-based DEXs achieve this by replacing traditional order matching with liquidity pools and mathematical pricing mechanisms. Liquidity providers supply the assets that traders use, while smart contracts enforce the rules for swaps and fee distribution.
The user experience can be remarkably simple:
Connect wallet → choose assets → review quote → sign → settle on-chain.
But underneath that simplicity are liquidity management, pricing algorithms, smart contracts, network transactions, fees, slippage, price impact and security considerations.
STON.fi provides a practical example on TON. Its AMM liquidity pools demonstrate the core mechanics of decentralized exchange trading, while its broader routing infrastructure, including Omniston, illustrates how modern DEX experiences can aggregate liquidity beyond a single pool.
The most useful way to think about a DEX, therefore, is not simply as a decentralized version of a traditional exchange.
It is a programmable, wallet driven financial system where liquidity, pricing and settlement are coordinated through blockchain infrastructure and smart contracts.
Once that model is understood, the next time you connect a wallet and press “Swap,” you can see what is really happening behind the button.
Read more about STONfi DEX : blog.ston.fi
What Is a DEX and How Does It Work?
What Is a DEX and How Does It Work?
Decentralized exchanges, commonly called DEXs, are one of the fundamental building blocks of decentralized finance (DeFi). They allow users to exchange digital assets directly through blockchain infrastructure rather than depositing funds into a centrally controlled exchange account.
But a DEX is more than an interface with a “Swap” button. Underneath that interface are wallets, smart contracts, liquidity, pricing mechanisms, transaction messages and, in many cases, automated market makers (AMMs).
Understanding these components makes it easier to understand what actually happens when you exchange one token for another.
1. What Is a Decentralized Exchange?
A decentralized exchange is a blockchain-based trading system in which users interact with smart contracts or other on-chain mechanisms to execute asset exchanges without handing custody of their funds to a traditional centralized exchange.
The important distinction is where control and execution reside.
On a centralized exchange (CEX), a user normally deposits assets into an account controlled by the exchange. The platform maintains an internal ledger and operates the matching and settlement infrastructure.
With a DEX, the user's wallet remains the starting point for the transaction. Instead of transferring assets to an exchange-controlled balance first, the user authorizes blockchain transactions that interact with the exchange's smart contracts or liquidity infrastructure.
This does not mean every component surrounding a DEX must be decentralized. A DEX can have a web interface, APIs, indexing services or other infrastructure operated by particular entities. What matters is that the relevant asset-exchange logic and settlement are executed according to blockchain-based rules rather than requiring a centralized custodian to take possession of the user's trading funds.
That distinction also explains why “DEX” and “decentralized application” are not interchangeable terms. A DEX is a particular type of financial application that uses decentralized infrastructure to facilitate asset exchange.
2. Self Custody: Your Wallet Is the Starting Point
Self custody is one of the most important concepts behind DEX trading.
A self custodial wallet gives the user control over the private key or recovery credentials needed to authorize transactions. Instead of asking a company to move funds on the user's behalf, the user signs the transaction and the blockchain network processes it.
On TON, wallets are themselves smart contract based accounts. A wallet contract verifies signatures and uses transaction sequencing mechanisms such as seqno to prevent replayed transactions. The private key remains the critical authorization mechanism.
This changes the normal exchange experience.
You do not typically:
Deposit → receive an exchange balance → place a trade → withdraw.
Instead, the basic DEX model is closer to:
Connect wallet → select assets → review quote → authorize transaction → smart contracts execute → receive the output asset.
Self-custody provides control, but it also transfers responsibility to the user. Losing a recovery phrase, signing a malicious transaction, selecting the wrong token contract or misunderstanding transaction parameters can create risks that a centralized intermediary might otherwise absorb.
For TON specifically, fungible assets are generally represented using Jettons. TON documentation describes Jettons as consisting of a master contract plus individual wallet contracts associated with holders, rather than one centralized token-balance database.
3. Smart Contracts: The Execution Engine
Smart contracts are the programmable infrastructure that makes a DEX possible.
A smart contract is code deployed on a blockchain that responds to transactions and messages according to predefined rules. On TON, smart contracts contain code and persistent data and communicate through messages.
For a DEX, smart contracts can manage functions such as:
holding and accounting for liquidity;calculating swap outcomes;receiving one asset and sending another;enforcing transaction conditions;distributing trading fees;issuing or accounting for liquidity-provider positions.
The key idea is that the exchange does not need an employee sitting behind the interface approving each trade.
The user signs a transaction, the blockchain processes it, and the contract executes its programmed logic.
This is why a DEX can operate continuously and transparently. The rules are encoded into blockchain infrastructure rather than relying entirely on an institution's internal database.
However, smart contracts are not automatically safe simply because they are on a blockchain. Bugs, flawed economic assumptions, malicious token contracts and poorly designed integrations can still create risks. Users therefore need to distinguish non-custodial execution from risk-free execution.
4. AMMs and Liquidity Pools
One of the most widely used DEX designs is the Automated Market Maker, or AMM.
Traditional markets often rely on buyers and sellers placing orders. An AMM takes a different approach: liquidity is deposited into pools and mathematical rules determine how assets are exchanged.
Imagine a pool containing two assets:
Asset A + Asset B
Liquidity providers deposit the assets into the pool. Traders can then swap one asset for the other directly against that liquidity.
Instead of asking:
“Is there another trader willing to sell me this exact amount?”
the AMM asks:
“Given the current state of the pool and its pricing rules, how much of the other asset can this transaction receive?”
This is one of the biggest conceptual differences between an AMM and an order-book exchange.
How does the pool determine the price?
The answer depends on the AMM's mathematical design.
A common model uses a constant-product relationship such as:
x × y = k
The important intuition is not the formula itself, but what happens when a trade changes the quantities of the two assets in the pool.
Suppose a pool contains $100,000 worth of Asset A and $100,000 worth of Asset B.
A relatively small trade changes the pool ratio only slightly.
A much larger trade moves the ratio more significantly.
That movement affects the effective execution price. This is why trade size and available liquidity matter.
Price impact vs. slippage
These concepts are often confused.
Price impact is the effect that your own trade has on the pool's price because your transaction changes the pool's asset ratio.
Slippage generally refers to the difference between the expected execution and the eventual execution caused by market or price changes during the transaction process.
STON.fi's educational material similarly distinguishes price impact from slippage and explains why larger trades relative to available liquidity can produce larger price impact.
This is one reason liquidity depth matters. A large pool can generally absorb a given trade more easily than a shallow pool.
5. Where Does DEX Liquidity Come From?
Liquidity does not simply appear.
It is supplied by liquidity providers, often called LPs.
An LP deposits assets into a liquidity pool so traders can use that capital.
For example, an LP might contribute:
$5,000 worth of $GRAM + $5,000 worth of another token
The liquidity becomes available for swaps.
In return, liquidity providers can receive a share of eligible trading fees generated by transactions using the pool. The exact mechanics depend on the DEX and pool design.
This creates an important relationship:
Traders need liquidity.
Liquidity providers supply liquidity.
Trading generates fees.
The protocol's smart contracts distribute those fees according to its rules.
Liquidity provision also introduces risks. If the relative prices of the deposited assets change significantly, an LP can experience impermanent loss compared with simply holding the assets outside the pool. STON.fi's documentation specifically explains this relationship between changing asset ratios and LP returns.
Therefore, the existence of an attractive APR does not automatically mean a liquidity position is profitable. Trading fees, token prices, incentives, volatility and impermanent loss all matter.
6. AMM vs. Order Book: The High Level Difference
An order-book DEX resembles the traditional trading model.
Users submit orders such as:
Buy 10 tokens at $5
or:
Sell 10 tokens at $5.10
A trade occurs when compatible orders meet.
An AMM DEX does not require a conventional list of matching buy and sell orders. Instead, trades interact with liquidity pools and pricing algorithms.
The distinction can be summarized conceptually:
Order BookAMMBuy and sell ordersLiquidity poolsOrders seek counterpartiesPool provides liquidityMatching engine/logicPricing algorithmTraders interact through bids and asksTraders interact with pool liquidityExecution depends on matching liquidityExecution depends heavily on pool state
Neither model removes the need for liquidity. They simply organize that liquidity differently.
STON.fi is an example of the AMM approach. STON.fi's own educational material describes AMM DEXs as pool based systems and distinguishes them from order-book DEXs.
7. A Simple Wallet to Swap Flow
Now put all of the pieces together.
Imagine a user wants to swap $GRAM for USDT on TON.
Step 1: Connect the wallet
The user opens the DEX interface and connects a compatible TON wallet.
The DEX interface can read the wallet address and relevant blockchain information, while the wallet remains responsible for authorizing transactions.
Step 2: Choose the assets
The user selects:
From: $GRAM
To: USDT
The interface then requests information about available liquidity and possible execution routes.
Step 3: Receive a quote
The DEX calculates an expected output amount.
The displayed result can depend on:
available liquidity;trade size;pool pricing;fees;price impact;slippage settings;and, where aggregation is involved, available routes across liquidity sources.
This quote is important because the headline market price is not necessarily the exact price a particular transaction will receive.
Step 4: Review the transaction
The user reviews the amount being exchanged and the expected amount received.
A self-custodial wallet may also show the transaction details and required network fee.
Step 5: Sign
The user approves the transaction in the wallet.
The private key authorizes the transaction; it is not handed to the DEX interface.
Step 6: Blockchain execution
The transaction reaches the blockchain.
The relevant smart contracts process the messages, move the input asset according to the protocol's rules, calculate the output and deliver the resulting asset.
Step 7: Receive the output
Once the transaction settles, the user's wallet reflects the received token.
There is no traditional exchange balance that needs to be withdrawn.
The blockchain itself records the resulting state.
That is the fundamental DEX experience:
Wallet → Authorization → Smart-contract execution → On-chain settlement → Wallet
8. STON.fi as a Practical Example on TON
STON.fi provides a concrete example of how these concepts come together within the TON ecosystem.
STON.fi is a decentralized exchange built on TON and uses the AMM model for its native liquidity infrastructure. Its pools provide liquidity against which swaps can execute, while users interact through their wallets rather than depositing funds into a conventional custodial exchange account.
The STON.fi guide organizes the user journey around connecting a wallet, swapping assets, understanding rate and price impact, providing liquidity, evaluating pools and managing other DeFi functions.
A STON.fi swap
A simplified STON.fi swap therefore looks like:
Connect TON wallet
Select the asset to sell
Select the asset to receive
Review rate, price impact and minimum received
Check network and swap costs
Confirm in wallet
Smart contracts execute the transaction
Receive the selected asset
The important point is that STON.fi is the practical implementation, while the underlying principles are the general DEX concepts discussed above.
9. Liquidity on STON.fi
STON.fi's liquidity pools are the infrastructure that allows AMM based swaps to take place.
Users can provide liquidity to supported pairs, becoming liquidity providers rather than simply traders.
The platform also provides pool information such as:
TVL the total value locked in the pool.
24-hour volume the amount traded through the pair over the specified period.
APR an estimate based on recent pool activity rather than a guaranteed future return.
STON.fi notes that higher liquidity can help accommodate larger transactions with less price impact, while volume influences the fees available to liquidity providers. It also warns that pool metrics can change significantly with market conditions.
This illustrates a central principle of DeFi:
Liquidity is not just a number displayed on a dashboard. It directly influences trading execution.
10. STON.fi and Permissionless Liquidity
Another important aspect of decentralized exchange infrastructure is permissionless participation.
STON.fi's documentation explains that tokens can become swappable at the protocol level through the creation of liquidity pools. The interface may nevertheless apply visibility or safety policies to certain assets.
This demonstrates an important distinction:
Protocol availability ≠ interface endorsement.
A token existing on-chain or having a pool does not automatically mean the token is legitimate, safe or officially endorsed.
Users still need to verify token contract addresses, liquidity, project information and transaction details.
STON.fi also notes that some assets can be hidden from the interface while remaining accessible through contract level or other interfaces, while certain categories can be filtered or blocked at the application layer.
That is why a DEX should never be treated as a substitute for personal verification.
11. Fees: What Are You Actually Paying?
DEX transactions can involve more than one type of cost.
There may be:
Network fees paid for blockchain computation and transaction processing.
DEX or pool fees charged according to the exchange and pool's fee structure.
Price impact an economic cost arising because your own transaction changes the pool's effective price.
Slippage the movement between expected and actual execution within the permitted transaction conditions.
On STON.fi, its documentation has described a default 0.3% swap fee structure for applicable pools, with 0.2% allocated to liquidity providers and 0.1% to the protocol; however, users should always check the current pool/interface information because fee structures can change.
Network fees are separate from the exchange's trading fee.
On TON, $GRAM is the native asset used for network fees and smart contract execution. TON documentation identifies Toncoin as the native cryptocurrency used to pay transaction and smart contract execution costs.
This means holding only the token you want to trade is not always sufficient. A user may also need some native network asset to pay for blockchain execution.
12. Routing and Fragmented Liquidity
There is another challenge beyond simply having liquidity: where the best liquidity exists.
Suppose one DEX has the best route for Token A → Token B, while another has deeper liquidity for a different part of the transaction.
An aggregator or routing layer can compare available liquidity sources and construct an execution path.
This is particularly relevant to the current STON.fi experience.
STON.fi introduced Omniston as a liquidity aggregation and routing layer and its documentation states that smart routing is enabled by default in the STON.fi dApp, allowing liquidity from multiple DEXs to be considered rather than restricting every swap to a single pool or protocol.
The distinction is important:
STON.fi's AMM pools provide liquidity infrastructure.
Omniston can aggregate and route liquidity across sources.
This helps explain why a modern DEX interface can feel simpler than the underlying infrastructure actually is.
The user sees:
“Swap A for B.”
Behind the interface, the system may need to determine:
Which pool?
Which liquidity source?
Which route?
What output?
What price impact?
What execution conditions?
That complexity can be abstracted away from the user while still being settled through blockchain-based mechanisms.
13. What a DEX Does Not Guarantee
Decentralization does not automatically mean:
No risk.
It does not guarantee that every token is legitimate.
It does not guarantee that every price is favorable.
It does not guarantee unlimited liquidity.
It does not eliminate smart-contract risk.
It does not eliminate market volatility.
It does not guarantee that a transaction cannot fail.
And self-custody does not mean someone else can recover your funds if you lose your recovery credentials.
The DEX removes or reduces particular forms of intermediary dependence, but the user takes on more responsibility for understanding what they are signing and interacting with.
14. The Bigger Picture
A DEX can be understood as the intersection of several technologies:
Wallets provide user-controlled authorization.
Blockchains provide the settlement layer.
Smart contracts provide programmable execution.
Liquidity pools provide capital for swaps.
AMMs provide mathematical pricing mechanisms.
Liquidity providers supply trading capital.
Routing systems can connect fragmented liquidity.
Interfaces turn this technical infrastructure into a usable product.
Remove any one of these components and the experience changes significantly.
This is why the “Swap” button is actually the final layer of a much deeper system.
Conclusion
A decentralized exchange is fundamentally a way to exchange digital assets through blockchain-based infrastructure without relying on a conventional centralized custodian to hold and settle the user's trading balance.
AMM-based DEXs achieve this by replacing traditional order matching with liquidity pools and mathematical pricing mechanisms. Liquidity providers supply the assets that traders use, while smart contracts enforce the rules for swaps and fee distribution.
The user experience can be remarkably simple:
Connect wallet → choose assets → review quote → sign → settle on-chain.
But underneath that simplicity are liquidity management, pricing algorithms, smart contracts, network transactions, fees, slippage, price impact and security considerations.
STON.fi provides a practical example on TON. Its AMM liquidity pools demonstrate the core mechanics of decentralized exchange trading, while its broader routing infrastructure, including Omniston, illustrates how modern DEX experiences can aggregate liquidity beyond a single pool.
The most useful way to think about a DEX, therefore, is not simply as a decentralized version of a traditional exchange.
It is a programmable, wallet driven financial system where liquidity, pricing and settlement are coordinated through blockchain infrastructure and smart contracts.
Once that model is understood, the next time you connect a wallet and press “Swap,” you can see what is really happening behind the button.
Read more about STONfi DEX : blog.ston.fi
Decentralized exchanges, commonly called DEXs, are one of the fundamental building blocks of decentralized finance (DeFi). They allow users to exchange digital assets directly through blockchain infrastructure rather than depositing funds into a centrally controlled exchange account.
But a DEX is more than an interface with a “Swap” button. Underneath that interface are wallets, smart contracts, liquidity, pricing mechanisms, transaction messages and, in many cases, automated market makers (AMMs).
Understanding these components makes it easier to understand what actually happens when you exchange one token for another.
1. What Is a Decentralized Exchange?
A decentralized exchange is a blockchain-based trading system in which users interact with smart contracts or other on-chain mechanisms to execute asset exchanges without handing custody of their funds to a traditional centralized exchange.
The important distinction is where control and execution reside.
On a centralized exchange (CEX), a user normally deposits assets into an account controlled by the exchange. The platform maintains an internal ledger and operates the matching and settlement infrastructure.
With a DEX, the user's wallet remains the starting point for the transaction. Instead of transferring assets to an exchange-controlled balance first, the user authorizes blockchain transactions that interact with the exchange's smart contracts or liquidity infrastructure.
This does not mean every component surrounding a DEX must be decentralized. A DEX can have a web interface, APIs, indexing services or other infrastructure operated by particular entities. What matters is that the relevant asset-exchange logic and settlement are executed according to blockchain-based rules rather than requiring a centralized custodian to take possession of the user's trading funds.
That distinction also explains why “DEX” and “decentralized application” are not interchangeable terms. A DEX is a particular type of financial application that uses decentralized infrastructure to facilitate asset exchange.
2. Self Custody: Your Wallet Is the Starting Point
Self custody is one of the most important concepts behind DEX trading.
A self custodial wallet gives the user control over the private key or recovery credentials needed to authorize transactions. Instead of asking a company to move funds on the user's behalf, the user signs the transaction and the blockchain network processes it.
On TON, wallets are themselves smart contract based accounts. A wallet contract verifies signatures and uses transaction sequencing mechanisms such as seqno to prevent replayed transactions. The private key remains the critical authorization mechanism.
This changes the normal exchange experience.
You do not typically:
Deposit → receive an exchange balance → place a trade → withdraw.
Instead, the basic DEX model is closer to:
Connect wallet → select assets → review quote → authorize transaction → smart contracts execute → receive the output asset.
Self-custody provides control, but it also transfers responsibility to the user. Losing a recovery phrase, signing a malicious transaction, selecting the wrong token contract or misunderstanding transaction parameters can create risks that a centralized intermediary might otherwise absorb.
For TON specifically, fungible assets are generally represented using Jettons. TON documentation describes Jettons as consisting of a master contract plus individual wallet contracts associated with holders, rather than one centralized token-balance database.
3. Smart Contracts: The Execution Engine
Smart contracts are the programmable infrastructure that makes a DEX possible.
A smart contract is code deployed on a blockchain that responds to transactions and messages according to predefined rules. On TON, smart contracts contain code and persistent data and communicate through messages.
For a DEX, smart contracts can manage functions such as:
holding and accounting for liquidity;calculating swap outcomes;receiving one asset and sending another;enforcing transaction conditions;distributing trading fees;issuing or accounting for liquidity-provider positions.
The key idea is that the exchange does not need an employee sitting behind the interface approving each trade.
The user signs a transaction, the blockchain processes it, and the contract executes its programmed logic.
This is why a DEX can operate continuously and transparently. The rules are encoded into blockchain infrastructure rather than relying entirely on an institution's internal database.
However, smart contracts are not automatically safe simply because they are on a blockchain. Bugs, flawed economic assumptions, malicious token contracts and poorly designed integrations can still create risks. Users therefore need to distinguish non-custodial execution from risk-free execution.
4. AMMs and Liquidity Pools
One of the most widely used DEX designs is the Automated Market Maker, or AMM.
Traditional markets often rely on buyers and sellers placing orders. An AMM takes a different approach: liquidity is deposited into pools and mathematical rules determine how assets are exchanged.
Imagine a pool containing two assets:
Asset A + Asset B
Liquidity providers deposit the assets into the pool. Traders can then swap one asset for the other directly against that liquidity.
Instead of asking:
“Is there another trader willing to sell me this exact amount?”
the AMM asks:
“Given the current state of the pool and its pricing rules, how much of the other asset can this transaction receive?”
This is one of the biggest conceptual differences between an AMM and an order-book exchange.
How does the pool determine the price?
The answer depends on the AMM's mathematical design.
A common model uses a constant-product relationship such as:
x × y = k
The important intuition is not the formula itself, but what happens when a trade changes the quantities of the two assets in the pool.
Suppose a pool contains $100,000 worth of Asset A and $100,000 worth of Asset B.
A relatively small trade changes the pool ratio only slightly.
A much larger trade moves the ratio more significantly.
That movement affects the effective execution price. This is why trade size and available liquidity matter.
Price impact vs. slippage
These concepts are often confused.
Price impact is the effect that your own trade has on the pool's price because your transaction changes the pool's asset ratio.
Slippage generally refers to the difference between the expected execution and the eventual execution caused by market or price changes during the transaction process.
STON.fi's educational material similarly distinguishes price impact from slippage and explains why larger trades relative to available liquidity can produce larger price impact.
This is one reason liquidity depth matters. A large pool can generally absorb a given trade more easily than a shallow pool.
5. Where Does DEX Liquidity Come From?
Liquidity does not simply appear.
It is supplied by liquidity providers, often called LPs.
An LP deposits assets into a liquidity pool so traders can use that capital.
For example, an LP might contribute:
$5,000 worth of $GRAM + $5,000 worth of another token
The liquidity becomes available for swaps.
In return, liquidity providers can receive a share of eligible trading fees generated by transactions using the pool. The exact mechanics depend on the DEX and pool design.
This creates an important relationship:
Traders need liquidity.
Liquidity providers supply liquidity.
Trading generates fees.
The protocol's smart contracts distribute those fees according to its rules.
Liquidity provision also introduces risks. If the relative prices of the deposited assets change significantly, an LP can experience impermanent loss compared with simply holding the assets outside the pool. STON.fi's documentation specifically explains this relationship between changing asset ratios and LP returns.
Therefore, the existence of an attractive APR does not automatically mean a liquidity position is profitable. Trading fees, token prices, incentives, volatility and impermanent loss all matter.
6. AMM vs. Order Book: The High Level Difference
An order-book DEX resembles the traditional trading model.
Users submit orders such as:
Buy 10 tokens at $5
or:
Sell 10 tokens at $5.10
A trade occurs when compatible orders meet.
An AMM DEX does not require a conventional list of matching buy and sell orders. Instead, trades interact with liquidity pools and pricing algorithms.
The distinction can be summarized conceptually:
Order BookAMMBuy and sell ordersLiquidity poolsOrders seek counterpartiesPool provides liquidityMatching engine/logicPricing algorithmTraders interact through bids and asksTraders interact with pool liquidityExecution depends on matching liquidityExecution depends heavily on pool state
Neither model removes the need for liquidity. They simply organize that liquidity differently.
STON.fi is an example of the AMM approach. STON.fi's own educational material describes AMM DEXs as pool based systems and distinguishes them from order-book DEXs.
7. A Simple Wallet to Swap Flow
Now put all of the pieces together.
Imagine a user wants to swap $GRAM for USDT on TON.
Step 1: Connect the wallet
The user opens the DEX interface and connects a compatible TON wallet.
The DEX interface can read the wallet address and relevant blockchain information, while the wallet remains responsible for authorizing transactions.
Step 2: Choose the assets
The user selects:
From: $GRAM
To: USDT
The interface then requests information about available liquidity and possible execution routes.
Step 3: Receive a quote
The DEX calculates an expected output amount.
The displayed result can depend on:
available liquidity;trade size;pool pricing;fees;price impact;slippage settings;and, where aggregation is involved, available routes across liquidity sources.
This quote is important because the headline market price is not necessarily the exact price a particular transaction will receive.
Step 4: Review the transaction
The user reviews the amount being exchanged and the expected amount received.
A self-custodial wallet may also show the transaction details and required network fee.
Step 5: Sign
The user approves the transaction in the wallet.
The private key authorizes the transaction; it is not handed to the DEX interface.
Step 6: Blockchain execution
The transaction reaches the blockchain.
The relevant smart contracts process the messages, move the input asset according to the protocol's rules, calculate the output and deliver the resulting asset.
Step 7: Receive the output
Once the transaction settles, the user's wallet reflects the received token.
There is no traditional exchange balance that needs to be withdrawn.
The blockchain itself records the resulting state.
That is the fundamental DEX experience:
Wallet → Authorization → Smart-contract execution → On-chain settlement → Wallet
8. STON.fi as a Practical Example on TON
STON.fi provides a concrete example of how these concepts come together within the TON ecosystem.
STON.fi is a decentralized exchange built on TON and uses the AMM model for its native liquidity infrastructure. Its pools provide liquidity against which swaps can execute, while users interact through their wallets rather than depositing funds into a conventional custodial exchange account.
The STON.fi guide organizes the user journey around connecting a wallet, swapping assets, understanding rate and price impact, providing liquidity, evaluating pools and managing other DeFi functions.
A STON.fi swap
A simplified STON.fi swap therefore looks like:
Connect TON wallet
Select the asset to sell
Select the asset to receive
Review rate, price impact and minimum received
Check network and swap costs
Confirm in wallet
Smart contracts execute the transaction
Receive the selected asset
The important point is that STON.fi is the practical implementation, while the underlying principles are the general DEX concepts discussed above.
9. Liquidity on STON.fi
STON.fi's liquidity pools are the infrastructure that allows AMM based swaps to take place.
Users can provide liquidity to supported pairs, becoming liquidity providers rather than simply traders.
The platform also provides pool information such as:
TVL the total value locked in the pool.
24-hour volume the amount traded through the pair over the specified period.
APR an estimate based on recent pool activity rather than a guaranteed future return.
STON.fi notes that higher liquidity can help accommodate larger transactions with less price impact, while volume influences the fees available to liquidity providers. It also warns that pool metrics can change significantly with market conditions.
This illustrates a central principle of DeFi:
Liquidity is not just a number displayed on a dashboard. It directly influences trading execution.
10. STON.fi and Permissionless Liquidity
Another important aspect of decentralized exchange infrastructure is permissionless participation.
STON.fi's documentation explains that tokens can become swappable at the protocol level through the creation of liquidity pools. The interface may nevertheless apply visibility or safety policies to certain assets.
This demonstrates an important distinction:
Protocol availability ≠ interface endorsement.
A token existing on-chain or having a pool does not automatically mean the token is legitimate, safe or officially endorsed.
Users still need to verify token contract addresses, liquidity, project information and transaction details.
STON.fi also notes that some assets can be hidden from the interface while remaining accessible through contract level or other interfaces, while certain categories can be filtered or blocked at the application layer.
That is why a DEX should never be treated as a substitute for personal verification.
11. Fees: What Are You Actually Paying?
DEX transactions can involve more than one type of cost.
There may be:
Network fees paid for blockchain computation and transaction processing.
DEX or pool fees charged according to the exchange and pool's fee structure.
Price impact an economic cost arising because your own transaction changes the pool's effective price.
Slippage the movement between expected and actual execution within the permitted transaction conditions.
On STON.fi, its documentation has described a default 0.3% swap fee structure for applicable pools, with 0.2% allocated to liquidity providers and 0.1% to the protocol; however, users should always check the current pool/interface information because fee structures can change.
Network fees are separate from the exchange's trading fee.
On TON, $GRAM is the native asset used for network fees and smart contract execution. TON documentation identifies Toncoin as the native cryptocurrency used to pay transaction and smart contract execution costs.
This means holding only the token you want to trade is not always sufficient. A user may also need some native network asset to pay for blockchain execution.
12. Routing and Fragmented Liquidity
There is another challenge beyond simply having liquidity: where the best liquidity exists.
Suppose one DEX has the best route for Token A → Token B, while another has deeper liquidity for a different part of the transaction.
An aggregator or routing layer can compare available liquidity sources and construct an execution path.
This is particularly relevant to the current STON.fi experience.
STON.fi introduced Omniston as a liquidity aggregation and routing layer and its documentation states that smart routing is enabled by default in the STON.fi dApp, allowing liquidity from multiple DEXs to be considered rather than restricting every swap to a single pool or protocol.
The distinction is important:
STON.fi's AMM pools provide liquidity infrastructure.
Omniston can aggregate and route liquidity across sources.
This helps explain why a modern DEX interface can feel simpler than the underlying infrastructure actually is.
The user sees:
“Swap A for B.”
Behind the interface, the system may need to determine:
Which pool?
Which liquidity source?
Which route?
What output?
What price impact?
What execution conditions?
That complexity can be abstracted away from the user while still being settled through blockchain-based mechanisms.
13. What a DEX Does Not Guarantee
Decentralization does not automatically mean:
No risk.
It does not guarantee that every token is legitimate.
It does not guarantee that every price is favorable.
It does not guarantee unlimited liquidity.
It does not eliminate smart-contract risk.
It does not eliminate market volatility.
It does not guarantee that a transaction cannot fail.
And self-custody does not mean someone else can recover your funds if you lose your recovery credentials.
The DEX removes or reduces particular forms of intermediary dependence, but the user takes on more responsibility for understanding what they are signing and interacting with.
14. The Bigger Picture
A DEX can be understood as the intersection of several technologies:
Wallets provide user-controlled authorization.
Blockchains provide the settlement layer.
Smart contracts provide programmable execution.
Liquidity pools provide capital for swaps.
AMMs provide mathematical pricing mechanisms.
Liquidity providers supply trading capital.
Routing systems can connect fragmented liquidity.
Interfaces turn this technical infrastructure into a usable product.
Remove any one of these components and the experience changes significantly.
This is why the “Swap” button is actually the final layer of a much deeper system.
Conclusion
A decentralized exchange is fundamentally a way to exchange digital assets through blockchain-based infrastructure without relying on a conventional centralized custodian to hold and settle the user's trading balance.
AMM-based DEXs achieve this by replacing traditional order matching with liquidity pools and mathematical pricing mechanisms. Liquidity providers supply the assets that traders use, while smart contracts enforce the rules for swaps and fee distribution.
The user experience can be remarkably simple:
Connect wallet → choose assets → review quote → sign → settle on-chain.
But underneath that simplicity are liquidity management, pricing algorithms, smart contracts, network transactions, fees, slippage, price impact and security considerations.
STON.fi provides a practical example on TON. Its AMM liquidity pools demonstrate the core mechanics of decentralized exchange trading, while its broader routing infrastructure, including Omniston, illustrates how modern DEX experiences can aggregate liquidity beyond a single pool.
The most useful way to think about a DEX, therefore, is not simply as a decentralized version of a traditional exchange.
It is a programmable, wallet driven financial system where liquidity, pricing and settlement are coordinated through blockchain infrastructure and smart contracts.
Once that model is understood, the next time you connect a wallet and press “Swap,” you can see what is really happening behind the button.
Read more about STONfi DEX : blog.ston.fi
1
254
·
--
ලිපිය
පරිවර්තනය බලන්න
Why Did My STON.fi Transaction Fail?Why Did My STON.fi Transaction Fail? A Complete Guide to Diagnosing Failed Transactions
A failed transaction on STON.fi can be frustrating, especially when your wallet shows an error without clearly explaining what went wrong. But a failed operation does not automatically mean that the STON.fi protocol is broken.
The cause can be much closer to the user: insufficient $GRAM for network fees, a change in market conditions, excessive price impact, slippage limits, wallet or connection issues, a token specific problem, a farm lock, or an actual on chain execution failure.
The most reliable way to troubleshoot the problem is to identify exactly what operation you were performing, determine whether the transaction was actually broadcast to the TON blockchain and then inspect the relevant conditions before trying again.
STON.fi’s Help Center separates issues across transactions, withdrawals, token problems and technical issues, while its swap documentation explains the price, slippage and blockchain fee conditions that can affect execution.
1. Start by Identifying the Operation
The first question should always be: What were you trying to do?
A swap, liquidity withdrawal, farm withdrawal, pool operation and token transfer can fail for different reasons.
For example, a liquidity withdrawal requires $GRAM to cover the blockchain fee. STON.fi explicitly instructs users who cannot withdraw liquidity to first verify their $GRAM balance before assuming there is a protocol problem.
Farming operations can introduce another condition: some farms have a lock-up period. If a user attempts to withdraw while the position is still locked, the transaction may not be available regardless of the wallet balance. STON.fi recommends checking the remaining lock period first, then checking the $GRAM balance and reconnecting the wallet if necessary.
This makes the operation type an important diagnostic clue.
Before retrying, determine whether the failed action was:
A token swap
Check the quoted rate, price impact, minimum received, slippage tolerance, token warnings and $GRAM available for the blockchain fee.
A liquidity withdrawal
Check whether the wallet contains sufficient $GRAM and whether the wallet connection is functioning correctly.
A farm withdrawal or close operation
Check for an active lock-up period, sufficient $GRAM, wallet connectivity and, where necessary, whether another compatible wallet produces the same result.
A custombtoken interaction
Verify the token contract address, metadata, decimals, liquidity and any warnings before interacting again. STON.fi specifically warns that a custom token's name, ticker or logo does not prove that it is legitimate.
Correctly identifying the operation prevents you from applying the wrong solution.
2. Check Your Wallet's $GRAM Balance
One of the simplest causes of failed transactions is also one of the easiest to overlook: the wallet needs enough $GRAM to pay the network fee.
STON.fi describes the blockchain fee as the network cost required to execute a transaction, and its documentation states that users need $GRAM in the wallet for network fees. The exact fee depends on the operation and can be displayed in the interface before confirmation.
This matters because the token you are swapping is not necessarily the asset used to pay the blockchain fee.
For example, you could hold enough USDT to perform a swap but still be unable to execute the transaction if your wallet does not have enough $GRAM for the required network fees.
STON.fi's withdrawal documentation makes the same point: withdrawals from liquidity pools and farms require $GRAM to cover blockchain fees.
Why the balance can be misleading
Having a non-zero $GRAM balance does not automatically mean that it is sufficient.
A transaction may require more network value than the amount currently available after accounting for the transaction's processing requirements. TON transactions can include storage, gas, action and forwarding fees depending on the message flow.
Therefore, do not simply ask:
"Do I have $GRAM?"
Ask:
"Do I have enough $GRAM for this specific operation?"
The blockchain-fee field shown by STON.fi before signing is useful for this check.
3. Understand Slippage and Price Impact
For swaps, one of the most important distinctions is between price impact and slippage.
They are related, but they are not the same thing.
Price impact
Price impact refers to how much your own trade changes the price inside the liquidity pool.
Because STON.fi uses an automated market maker model, swapping tokens changes the ratio of assets in a pool. A large swap relative to the available liquidity can therefore move the pool price significantly.
This means a swap can fail to provide the expected execution even when the market itself has not moved dramatically. The trade may simply be too large compared with the available liquidity.
Slippage
Slippage is different.
It describes the difference between the price you see when requesting the transaction and the actual price when the transaction executes on-chain.
Network delays, market volatility and other traders can cause the expected price to change between those two moments.
STON.fi currently documents a default 1% slippage tolerance and a default 5% price-impact threshold. These values can be changed in the swap settings, but increasing them exposes the user to potentially worse execution.
This is why blindly increasing slippage is not a proper troubleshooting strategy.
If the transaction fails because the market moved outside the accepted limits, the correct question is not simply:
"How do I make the transaction go through?"
It is:
"Why did the expected execution become unacceptable?"
You may need to reduce the trade size, wait for market conditions to stabilize, or reconsider the selected token pair rather than simply accepting a worse rate.
4. Check the Minimum Received and Swap Details
Before confirming a swap, STON.fi displays several important parameters.
Swap rate tells you how much of the output asset you are expected to receive.
Price impact indicates how much your trade affects the pool price.
Minimum received represents the lowest amount of the output token you should receive under the configured slippage conditions.
Blockchain fee indicates the network cost required to execute the transaction.
These numbers should be reviewed before signing, not only after something goes wrong.
A transaction that looked attractive at the beginning can become less favorable if the market moves, liquidity changes, or the expected execution price deteriorates.
Large orders deserve particular attention because a large trade against a relatively small pool can create significantly higher price impact. STON.fi notes that splitting a large swap into smaller trades can reduce price impact, although multiple transactions also introduce additional fees and therefore do not automatically guarantee a better overall result.
5. Pay Attention to Token Warnings
Not every failed or problematic transaction is caused by liquidity or network conditions.
The token itself may be the problem.
STON.fi allows users to import custom tokens by entering their smart-contract address. However, the platform explicitly warns users to obtain the correct official contract address and independently research the token because fraudulent tokens can copy legitimate names, symbols and logos.
This is particularly important when interacting with unfamiliar assets.
A token may look legitimate because its displayed name and logo resemble a known project, while its underlying contract is completely different.
TON's own documentation reinforces this security concern: token metadata alone should not be treated as authentication, because attackers can create fake jettons with matching names, symbols and images.
Before retrying a transaction involving a custom token, verify:
the official contract address;the token's metadata and decimals;whether sufficient liquidity exists;whether the asset is actually the intended token;whether STON.fi displays a warning;whether the token has unusual or suspicious behavior.
STON.fi's glossary also identifies fake tokens and honeypots as known risks.
A failed transaction is sometimes a warning to investigate an asset more carefully rather than something to force through.
6. Check Whether the Transaction Was Actually Broadcast
This is one of the most important diagnostic steps.
There is a difference between:
A transaction that was never successfully submitted by the wallet
and
A transaction that was submitted to TON but failed during blockchain execution.
If the wallet refused the request before broadcasting it, there may be no corresponding on-chain transaction to inspect.
But if the transaction reached the blockchain, its execution can be investigated using a TON explorer.
TON's documentation explains that transaction links can be generated using the account address, logical time and transaction hash, allowing the transaction to be inspected through an explorer.
Therefore, after a failed transaction, look for the transaction hash or explorer link provided by the wallet or application.
If there is no transaction record, focus first on the wallet, connection, signing or submission stage.
If there is an on chain transaction, inspect its blockchain status and execution details.
7. Read the TON Transaction Result
An explorer can reveal information that a simple wallet error message may not show.
TON transactions are processed through different execution phases, including storage, compute and action phases. Depending on what went wrong, the blockchain may record an execution failure or generate a bounced message.
A bounce is particularly useful as a diagnostic signal. TON documentation explains that a bounce message can be generated when a bounceable message fails during contract execution or when an action fails under the appropriate conditions.
This means a transaction appearing as "failed" does not tell the entire story by itself.
Look at the transaction trace and determine:
Was the transaction included on-chain?Which contract received the message?Did execution reach the expected contract?Was there a compute-phase failure?Was there an action-phase failure?Was the message bounced?Was there an indication of insufficient funds?Did a subsequent message succeed or fail?
For complex operations, one user action can involve several blockchain messages. Examining the transaction trace can therefore provide more information than relying on the first error displayed in the wallet.
8. Wallet and Connection Problems Can Also Be the Cause
STON.fi's own troubleshooting guidance repeatedly recommends reconnecting the wallet when an operation fails.
For certain withdrawal problems, STON.fi suggests disconnecting and reconnecting the wallet, then, when necessary, trying the same wallet through another compatible TON wallet application. If the operation works in another wallet, the problem may be associated with the original wallet application rather than the STON.fi protocol.
This is an important diagnostic method because it helps isolate the source of the failure.
For example:
Failure only in one wallet:
There may be a wallet-specific connection, signing or implementation issue.
Failure across multiple compatible wallets:
The problem is less likely to be limited to one wallet application and may require investigation at the protocol or blockchain level.
STON.fi specifically recommends contacting the wallet's support team when an issue appears only in that wallet, while issues reproduced across wallets should be escalated to STON.fi support.
9. Farming and Withdrawal Transactions Have Extra Conditions
Not every transaction is a swap.
Farming positions can have lock-up periods, and those restrictions must be checked before treating an unsuccessful withdrawal as a technical failure.
STON.fi states that the lock period is shown before a farming position is confirmed. If a "blocking" message appears, the first step is to verify whether the lock-up period has expired. After that, check the $GRAM balance and reconnect the wallet if necessary.
Likewise, closing a farming position can require $GRAM for the network fee. STON.fi's troubleshooting sequence is to check the lock period, verify the $GRAM balance, reconnect the wallet and then try a different compatible wallet if the problem continues.
This demonstrates why the operation type matters so much: a failed swap and a blocked farm withdrawal are not necessarily diagnosed in the same way.
10. Do Not Immediately Retry the Same Transaction
One of the most common mistakes is repeatedly pressing Retry without understanding the cause.
If the problem is insufficient $GRAM, another attempt will not solve it.
If the problem is excessive price impact, immediately repeating the same trade may produce the same result.
If the market has moved beyond your slippage tolerance, retrying without reconsidering the quote can leave you in exactly the same situation.
If the token itself is suspicious, repeated attempts can increase your exposure to the underlying risk.
And if the transaction has already been broadcast, creating another transaction before checking its status can make it harder to understand what actually happened.
A better sequence is:
Identify → Inspect → Diagnose → Correct → Retry.
Not:
Fail → Retry → Fail → Retry.
11. A Practical STON.fi Troubleshooting Workflow
When a STON.fi transaction fails, work through the following sequence.
Step 1: Identify the operation
Was it a swap, liquidity deposit, liquidity withdrawal, farming action, staking operation or token interaction?
Step 2: Check the wallet
Confirm that the correct wallet is connected and that it contains enough $GRAM to cover the network fee.
Step 3: Review the transaction parameters
For swaps, check:
swap rate;price impact;minimum received;slippage tolerance;selected route or execution option;blockchain fee.
STON.fi exposes these parameters to help users understand the transaction before confirmation.
Step 4: Check token legitimacy
For unfamiliar or manually imported tokens, verify the official contract address and investigate any warnings before interacting further.
Step 5: Check transaction status on-chain
Find the transaction hash and inspect it with a TON explorer. Determine whether the transaction was broadcast, executed, bounced or failed during one of the execution phases.
Step 6: Isolate the source
Reconnect the wallet.
If appropriate, test the same wallet in another compatible TON wallet application. STON.fi uses this approach in its own troubleshooting documentation to distinguish wallet side issues from broader problems.
Step 7: Correct the actual cause
Add sufficient $GRAM if fees are the problem.
Wait or reconsider the trade if market movement is the problem.
Reduce trade size if price impact is excessive.
Verify the token if the asset is unfamiliar.
Wait for a farm lock-up to expire if the position is still locked.
Reconnect or change the wallet application if the problem appears wallet-specific.
Step 8: Retry only after diagnosis
Once the likely cause has been identified and corrected, a new attempt becomes meaningful.
What Information Should You Collect for Support?
When the issue continues after basic troubleshooting, avoid sending only a message such as:
"My transaction failed."
That gives support very little information to work with.
Instead, collect the relevant transaction data.
Include:
Wallet address: preferably the public address involved in the transaction.
Transaction hash or explorer link: when the transaction was actually broadcast.
Operation type: swap, withdrawal, farming, liquidity, etc.
Token pair: for swaps.
Amount: the amount attempted.
Approximate time of the transaction: useful for locating the event.
Error message: provide the exact wording shown by STON.fi or your wallet.
Wallet application: identify which TON-compatible wallet was used.
Screenshots: where useful, especially for displaying the exact error or warning.
Do not provide your seed phrase, private key, recovery phrase or other sensitive wallet credentials to anyone claiming to be support.
STON.fi directs users to its official support channels when troubleshooting cannot resolve the issue.
The Key Lesson
A failed STON.fi transaction is not automatically a protocol failure.
The most effective troubleshooting approach is to locate where the transaction failed.
It may have failed before broadcasting because of the wallet or connection.
It may have been rejected because there was insufficient $GRAM for network fees.
It may have become unacceptable because of price impact or slippage.
It may have been restricted by a farm's lock-up conditions.
It may involve a token that requires additional verification.
Or the transaction may have reached TON and failed during blockchain execution.
The solution is therefore not to blindly increase slippage or repeatedly press retry.
The correct approach is to identify the operation, check the wallet balance, review the transaction parameters, verify the token, inspect the TON transaction status, isolate the likely cause and only then retry.
That turns a vague "transaction failed" message into a structured troubleshooting process.
Final Diagnostic Checklist
Operation: What exactly was I trying to do?
$GRAM: Is there enough native $GRAM for the network fee?
Swap conditions: Did price impact or slippage exceed the acceptable limits?
Minimum received: Did the expected output change?
Token: Is the contract address legitimate and is the asset safe to interact with?
Wallet: Is the correct wallet connected and responding properly?
Explorer: Was the transaction actually broadcast, and what happened on-chain?
Farm/withdrawal: Is there an active lock or another operation-specific restriction?
Retry: Have I identified and corrected the likely cause before submitting another transaction?
Support: Do I have the transaction hash, wallet address, operation details, timestamp and error message ready?
Troubleshooting becomes much easier once these questions are answered in order.
STON.fi's official Help Center remains the primary reference for transaction and withdrawal issues, while TON's explorer and blockchain documentation provide the deeper on-chain evidence needed when a transaction has already been broadcast.
$NVDAB
Why Did My STON.fi Transaction Fail?
Why Did My STON.fi Transaction Fail? A Complete Guide to Diagnosing Failed Transactions
A failed transaction on STON.fi can be frustrating, especially when your wallet shows an error without clearly explaining what went wrong. But a failed operation does not automatically mean that the STON.fi protocol is broken.
The cause can be much closer to the user: insufficient $GRAM for network fees, a change in market conditions, excessive price impact, slippage limits, wallet or connection issues, a token specific problem, a farm lock, or an actual on chain execution failure.
The most reliable way to troubleshoot the problem is to identify exactly what operation you were performing, determine whether the transaction was actually broadcast to the TON blockchain and then inspect the relevant conditions before trying again.
STON.fi’s Help Center separates issues across transactions, withdrawals, token problems and technical issues, while its swap documentation explains the price, slippage and blockchain fee conditions that can affect execution.
1. Start by Identifying the Operation
The first question should always be: What were you trying to do?
A swap, liquidity withdrawal, farm withdrawal, pool operation and token transfer can fail for different reasons.
For example, a liquidity withdrawal requires $GRAM to cover the blockchain fee. STON.fi explicitly instructs users who cannot withdraw liquidity to first verify their $GRAM balance before assuming there is a protocol problem.
Farming operations can introduce another condition: some farms have a lock-up period. If a user attempts to withdraw while the position is still locked, the transaction may not be available regardless of the wallet balance. STON.fi recommends checking the remaining lock period first, then checking the $GRAM balance and reconnecting the wallet if necessary.
This makes the operation type an important diagnostic clue.
Before retrying, determine whether the failed action was:
A token swap
Check the quoted rate, price impact, minimum received, slippage tolerance, token warnings and $GRAM available for the blockchain fee.
A liquidity withdrawal
Check whether the wallet contains sufficient $GRAM and whether the wallet connection is functioning correctly.
A farm withdrawal or close operation
Check for an active lock-up period, sufficient $GRAM, wallet connectivity and, where necessary, whether another compatible wallet produces the same result.
A custombtoken interaction
Verify the token contract address, metadata, decimals, liquidity and any warnings before interacting again. STON.fi specifically warns that a custom token's name, ticker or logo does not prove that it is legitimate.
Correctly identifying the operation prevents you from applying the wrong solution.
2. Check Your Wallet's $GRAM Balance
One of the simplest causes of failed transactions is also one of the easiest to overlook: the wallet needs enough $GRAM to pay the network fee.
STON.fi describes the blockchain fee as the network cost required to execute a transaction, and its documentation states that users need $GRAM in the wallet for network fees. The exact fee depends on the operation and can be displayed in the interface before confirmation.
This matters because the token you are swapping is not necessarily the asset used to pay the blockchain fee.
For example, you could hold enough USDT to perform a swap but still be unable to execute the transaction if your wallet does not have enough $GRAM for the required network fees.
STON.fi's withdrawal documentation makes the same point: withdrawals from liquidity pools and farms require $GRAM to cover blockchain fees.
Why the balance can be misleading
Having a non-zero $GRAM balance does not automatically mean that it is sufficient.
A transaction may require more network value than the amount currently available after accounting for the transaction's processing requirements. TON transactions can include storage, gas, action and forwarding fees depending on the message flow.
Therefore, do not simply ask:
"Do I have $GRAM?"
Ask:
"Do I have enough $GRAM for this specific operation?"
The blockchain-fee field shown by STON.fi before signing is useful for this check.
3. Understand Slippage and Price Impact
For swaps, one of the most important distinctions is between price impact and slippage.
They are related, but they are not the same thing.
Price impact
Price impact refers to how much your own trade changes the price inside the liquidity pool.
Because STON.fi uses an automated market maker model, swapping tokens changes the ratio of assets in a pool. A large swap relative to the available liquidity can therefore move the pool price significantly.
This means a swap can fail to provide the expected execution even when the market itself has not moved dramatically. The trade may simply be too large compared with the available liquidity.
Slippage
Slippage is different.
It describes the difference between the price you see when requesting the transaction and the actual price when the transaction executes on-chain.
Network delays, market volatility and other traders can cause the expected price to change between those two moments.
STON.fi currently documents a default 1% slippage tolerance and a default 5% price-impact threshold. These values can be changed in the swap settings, but increasing them exposes the user to potentially worse execution.
This is why blindly increasing slippage is not a proper troubleshooting strategy.
If the transaction fails because the market moved outside the accepted limits, the correct question is not simply:
"How do I make the transaction go through?"
It is:
"Why did the expected execution become unacceptable?"
You may need to reduce the trade size, wait for market conditions to stabilize, or reconsider the selected token pair rather than simply accepting a worse rate.
4. Check the Minimum Received and Swap Details
Before confirming a swap, STON.fi displays several important parameters.
Swap rate tells you how much of the output asset you are expected to receive.
Price impact indicates how much your trade affects the pool price.
Minimum received represents the lowest amount of the output token you should receive under the configured slippage conditions.
Blockchain fee indicates the network cost required to execute the transaction.
These numbers should be reviewed before signing, not only after something goes wrong.
A transaction that looked attractive at the beginning can become less favorable if the market moves, liquidity changes, or the expected execution price deteriorates.
Large orders deserve particular attention because a large trade against a relatively small pool can create significantly higher price impact. STON.fi notes that splitting a large swap into smaller trades can reduce price impact, although multiple transactions also introduce additional fees and therefore do not automatically guarantee a better overall result.
5. Pay Attention to Token Warnings
Not every failed or problematic transaction is caused by liquidity or network conditions.
The token itself may be the problem.
STON.fi allows users to import custom tokens by entering their smart-contract address. However, the platform explicitly warns users to obtain the correct official contract address and independently research the token because fraudulent tokens can copy legitimate names, symbols and logos.
This is particularly important when interacting with unfamiliar assets.
A token may look legitimate because its displayed name and logo resemble a known project, while its underlying contract is completely different.
TON's own documentation reinforces this security concern: token metadata alone should not be treated as authentication, because attackers can create fake jettons with matching names, symbols and images.
Before retrying a transaction involving a custom token, verify:
the official contract address;the token's metadata and decimals;whether sufficient liquidity exists;whether the asset is actually the intended token;whether STON.fi displays a warning;whether the token has unusual or suspicious behavior.
STON.fi's glossary also identifies fake tokens and honeypots as known risks.
A failed transaction is sometimes a warning to investigate an asset more carefully rather than something to force through.
6. Check Whether the Transaction Was Actually Broadcast
This is one of the most important diagnostic steps.
There is a difference between:
A transaction that was never successfully submitted by the wallet
and
A transaction that was submitted to TON but failed during blockchain execution.
If the wallet refused the request before broadcasting it, there may be no corresponding on-chain transaction to inspect.
But if the transaction reached the blockchain, its execution can be investigated using a TON explorer.
TON's documentation explains that transaction links can be generated using the account address, logical time and transaction hash, allowing the transaction to be inspected through an explorer.
Therefore, after a failed transaction, look for the transaction hash or explorer link provided by the wallet or application.
If there is no transaction record, focus first on the wallet, connection, signing or submission stage.
If there is an on chain transaction, inspect its blockchain status and execution details.
7. Read the TON Transaction Result
An explorer can reveal information that a simple wallet error message may not show.
TON transactions are processed through different execution phases, including storage, compute and action phases. Depending on what went wrong, the blockchain may record an execution failure or generate a bounced message.
A bounce is particularly useful as a diagnostic signal. TON documentation explains that a bounce message can be generated when a bounceable message fails during contract execution or when an action fails under the appropriate conditions.
This means a transaction appearing as "failed" does not tell the entire story by itself.
Look at the transaction trace and determine:
Was the transaction included on-chain?Which contract received the message?Did execution reach the expected contract?Was there a compute-phase failure?Was there an action-phase failure?Was the message bounced?Was there an indication of insufficient funds?Did a subsequent message succeed or fail?
For complex operations, one user action can involve several blockchain messages. Examining the transaction trace can therefore provide more information than relying on the first error displayed in the wallet.
8. Wallet and Connection Problems Can Also Be the Cause
STON.fi's own troubleshooting guidance repeatedly recommends reconnecting the wallet when an operation fails.
For certain withdrawal problems, STON.fi suggests disconnecting and reconnecting the wallet, then, when necessary, trying the same wallet through another compatible TON wallet application. If the operation works in another wallet, the problem may be associated with the original wallet application rather than the STON.fi protocol.
This is an important diagnostic method because it helps isolate the source of the failure.
For example:
Failure only in one wallet:
There may be a wallet-specific connection, signing or implementation issue.
Failure across multiple compatible wallets:
The problem is less likely to be limited to one wallet application and may require investigation at the protocol or blockchain level.
STON.fi specifically recommends contacting the wallet's support team when an issue appears only in that wallet, while issues reproduced across wallets should be escalated to STON.fi support.
9. Farming and Withdrawal Transactions Have Extra Conditions
Not every transaction is a swap.
Farming positions can have lock-up periods, and those restrictions must be checked before treating an unsuccessful withdrawal as a technical failure.
STON.fi states that the lock period is shown before a farming position is confirmed. If a "blocking" message appears, the first step is to verify whether the lock-up period has expired. After that, check the $GRAM balance and reconnect the wallet if necessary.
Likewise, closing a farming position can require $GRAM for the network fee. STON.fi's troubleshooting sequence is to check the lock period, verify the $GRAM balance, reconnect the wallet and then try a different compatible wallet if the problem continues.
This demonstrates why the operation type matters so much: a failed swap and a blocked farm withdrawal are not necessarily diagnosed in the same way.
10. Do Not Immediately Retry the Same Transaction
One of the most common mistakes is repeatedly pressing Retry without understanding the cause.
If the problem is insufficient $GRAM, another attempt will not solve it.
If the problem is excessive price impact, immediately repeating the same trade may produce the same result.
If the market has moved beyond your slippage tolerance, retrying without reconsidering the quote can leave you in exactly the same situation.
If the token itself is suspicious, repeated attempts can increase your exposure to the underlying risk.
And if the transaction has already been broadcast, creating another transaction before checking its status can make it harder to understand what actually happened.
A better sequence is:
Identify → Inspect → Diagnose → Correct → Retry.
Not:
Fail → Retry → Fail → Retry.
11. A Practical STON.fi Troubleshooting Workflow
When a STON.fi transaction fails, work through the following sequence.
Step 1: Identify the operation
Was it a swap, liquidity deposit, liquidity withdrawal, farming action, staking operation or token interaction?
Step 2: Check the wallet
Confirm that the correct wallet is connected and that it contains enough $GRAM to cover the network fee.
Step 3: Review the transaction parameters
For swaps, check:
swap rate;price impact;minimum received;slippage tolerance;selected route or execution option;blockchain fee.
STON.fi exposes these parameters to help users understand the transaction before confirmation.
Step 4: Check token legitimacy
For unfamiliar or manually imported tokens, verify the official contract address and investigate any warnings before interacting further.
Step 5: Check transaction status on-chain
Find the transaction hash and inspect it with a TON explorer. Determine whether the transaction was broadcast, executed, bounced or failed during one of the execution phases.
Step 6: Isolate the source
Reconnect the wallet.
If appropriate, test the same wallet in another compatible TON wallet application. STON.fi uses this approach in its own troubleshooting documentation to distinguish wallet side issues from broader problems.
Step 7: Correct the actual cause
Add sufficient $GRAM if fees are the problem.
Wait or reconsider the trade if market movement is the problem.
Reduce trade size if price impact is excessive.
Verify the token if the asset is unfamiliar.
Wait for a farm lock-up to expire if the position is still locked.
Reconnect or change the wallet application if the problem appears wallet-specific.
Step 8: Retry only after diagnosis
Once the likely cause has been identified and corrected, a new attempt becomes meaningful.
What Information Should You Collect for Support?
When the issue continues after basic troubleshooting, avoid sending only a message such as:
"My transaction failed."
That gives support very little information to work with.
Instead, collect the relevant transaction data.
Include:
Wallet address: preferably the public address involved in the transaction.
Transaction hash or explorer link: when the transaction was actually broadcast.
Operation type: swap, withdrawal, farming, liquidity, etc.
Token pair: for swaps.
Amount: the amount attempted.
Approximate time of the transaction: useful for locating the event.
Error message: provide the exact wording shown by STON.fi or your wallet.
Wallet application: identify which TON-compatible wallet was used.
Screenshots: where useful, especially for displaying the exact error or warning.
Do not provide your seed phrase, private key, recovery phrase or other sensitive wallet credentials to anyone claiming to be support.
STON.fi directs users to its official support channels when troubleshooting cannot resolve the issue.
The Key Lesson
A failed STON.fi transaction is not automatically a protocol failure.
The most effective troubleshooting approach is to locate where the transaction failed.
It may have failed before broadcasting because of the wallet or connection.
It may have been rejected because there was insufficient $GRAM for network fees.
It may have become unacceptable because of price impact or slippage.
It may have been restricted by a farm's lock-up conditions.
It may involve a token that requires additional verification.
Or the transaction may have reached TON and failed during blockchain execution.
The solution is therefore not to blindly increase slippage or repeatedly press retry.
The correct approach is to identify the operation, check the wallet balance, review the transaction parameters, verify the token, inspect the TON transaction status, isolate the likely cause and only then retry.
That turns a vague "transaction failed" message into a structured troubleshooting process.
Final Diagnostic Checklist
Operation: What exactly was I trying to do?
$GRAM: Is there enough native $GRAM for the network fee?
Swap conditions: Did price impact or slippage exceed the acceptable limits?
Minimum received: Did the expected output change?
Token: Is the contract address legitimate and is the asset safe to interact with?
Wallet: Is the correct wallet connected and responding properly?
Explorer: Was the transaction actually broadcast, and what happened on-chain?
Farm/withdrawal: Is there an active lock or another operation-specific restriction?
Retry: Have I identified and corrected the likely cause before submitting another transaction?
Support: Do I have the transaction hash, wallet address, operation details, timestamp and error message ready?
Troubleshooting becomes much easier once these questions are answered in order.
STON.fi's official Help Center remains the primary reference for transaction and withdrawal issues, while TON's explorer and blockchain documentation provide the deeper on-chain evidence needed when a transaction has already been broadcast.
$NVDAB
A failed transaction on STON.fi can be frustrating, especially when your wallet shows an error without clearly explaining what went wrong. But a failed operation does not automatically mean that the STON.fi protocol is broken.
The cause can be much closer to the user: insufficient $GRAM for network fees, a change in market conditions, excessive price impact, slippage limits, wallet or connection issues, a token specific problem, a farm lock, or an actual on chain execution failure.
The most reliable way to troubleshoot the problem is to identify exactly what operation you were performing, determine whether the transaction was actually broadcast to the TON blockchain and then inspect the relevant conditions before trying again.
STON.fi’s Help Center separates issues across transactions, withdrawals, token problems and technical issues, while its swap documentation explains the price, slippage and blockchain fee conditions that can affect execution.
1. Start by Identifying the Operation
The first question should always be: What were you trying to do?
A swap, liquidity withdrawal, farm withdrawal, pool operation and token transfer can fail for different reasons.
For example, a liquidity withdrawal requires $GRAM to cover the blockchain fee. STON.fi explicitly instructs users who cannot withdraw liquidity to first verify their $GRAM balance before assuming there is a protocol problem.
Farming operations can introduce another condition: some farms have a lock-up period. If a user attempts to withdraw while the position is still locked, the transaction may not be available regardless of the wallet balance. STON.fi recommends checking the remaining lock period first, then checking the $GRAM balance and reconnecting the wallet if necessary.
This makes the operation type an important diagnostic clue.
Before retrying, determine whether the failed action was:
A token swap
Check the quoted rate, price impact, minimum received, slippage tolerance, token warnings and $GRAM available for the blockchain fee.
A liquidity withdrawal
Check whether the wallet contains sufficient $GRAM and whether the wallet connection is functioning correctly.
A farm withdrawal or close operation
Check for an active lock-up period, sufficient $GRAM, wallet connectivity and, where necessary, whether another compatible wallet produces the same result.
A custombtoken interaction
Verify the token contract address, metadata, decimals, liquidity and any warnings before interacting again. STON.fi specifically warns that a custom token's name, ticker or logo does not prove that it is legitimate.
Correctly identifying the operation prevents you from applying the wrong solution.
2. Check Your Wallet's $GRAM Balance
One of the simplest causes of failed transactions is also one of the easiest to overlook: the wallet needs enough $GRAM to pay the network fee.
STON.fi describes the blockchain fee as the network cost required to execute a transaction, and its documentation states that users need $GRAM in the wallet for network fees. The exact fee depends on the operation and can be displayed in the interface before confirmation.
This matters because the token you are swapping is not necessarily the asset used to pay the blockchain fee.
For example, you could hold enough USDT to perform a swap but still be unable to execute the transaction if your wallet does not have enough $GRAM for the required network fees.
STON.fi's withdrawal documentation makes the same point: withdrawals from liquidity pools and farms require $GRAM to cover blockchain fees.
Why the balance can be misleading
Having a non-zero $GRAM balance does not automatically mean that it is sufficient.
A transaction may require more network value than the amount currently available after accounting for the transaction's processing requirements. TON transactions can include storage, gas, action and forwarding fees depending on the message flow.
Therefore, do not simply ask:
"Do I have $GRAM?"
Ask:
"Do I have enough $GRAM for this specific operation?"
The blockchain-fee field shown by STON.fi before signing is useful for this check.
3. Understand Slippage and Price Impact
For swaps, one of the most important distinctions is between price impact and slippage.
They are related, but they are not the same thing.
Price impact
Price impact refers to how much your own trade changes the price inside the liquidity pool.
Because STON.fi uses an automated market maker model, swapping tokens changes the ratio of assets in a pool. A large swap relative to the available liquidity can therefore move the pool price significantly.
This means a swap can fail to provide the expected execution even when the market itself has not moved dramatically. The trade may simply be too large compared with the available liquidity.
Slippage
Slippage is different.
It describes the difference between the price you see when requesting the transaction and the actual price when the transaction executes on-chain.
Network delays, market volatility and other traders can cause the expected price to change between those two moments.
STON.fi currently documents a default 1% slippage tolerance and a default 5% price-impact threshold. These values can be changed in the swap settings, but increasing them exposes the user to potentially worse execution.
This is why blindly increasing slippage is not a proper troubleshooting strategy.
If the transaction fails because the market moved outside the accepted limits, the correct question is not simply:
"How do I make the transaction go through?"
It is:
"Why did the expected execution become unacceptable?"
You may need to reduce the trade size, wait for market conditions to stabilize, or reconsider the selected token pair rather than simply accepting a worse rate.
4. Check the Minimum Received and Swap Details
Before confirming a swap, STON.fi displays several important parameters.
Swap rate tells you how much of the output asset you are expected to receive.
Price impact indicates how much your trade affects the pool price.
Minimum received represents the lowest amount of the output token you should receive under the configured slippage conditions.
Blockchain fee indicates the network cost required to execute the transaction.
These numbers should be reviewed before signing, not only after something goes wrong.
A transaction that looked attractive at the beginning can become less favorable if the market moves, liquidity changes, or the expected execution price deteriorates.
Large orders deserve particular attention because a large trade against a relatively small pool can create significantly higher price impact. STON.fi notes that splitting a large swap into smaller trades can reduce price impact, although multiple transactions also introduce additional fees and therefore do not automatically guarantee a better overall result.
5. Pay Attention to Token Warnings
Not every failed or problematic transaction is caused by liquidity or network conditions.
The token itself may be the problem.
STON.fi allows users to import custom tokens by entering their smart-contract address. However, the platform explicitly warns users to obtain the correct official contract address and independently research the token because fraudulent tokens can copy legitimate names, symbols and logos.
This is particularly important when interacting with unfamiliar assets.
A token may look legitimate because its displayed name and logo resemble a known project, while its underlying contract is completely different.
TON's own documentation reinforces this security concern: token metadata alone should not be treated as authentication, because attackers can create fake jettons with matching names, symbols and images.
Before retrying a transaction involving a custom token, verify:
the official contract address;the token's metadata and decimals;whether sufficient liquidity exists;whether the asset is actually the intended token;whether STON.fi displays a warning;whether the token has unusual or suspicious behavior.
STON.fi's glossary also identifies fake tokens and honeypots as known risks.
A failed transaction is sometimes a warning to investigate an asset more carefully rather than something to force through.
6. Check Whether the Transaction Was Actually Broadcast
This is one of the most important diagnostic steps.
There is a difference between:
A transaction that was never successfully submitted by the wallet
and
A transaction that was submitted to TON but failed during blockchain execution.
If the wallet refused the request before broadcasting it, there may be no corresponding on-chain transaction to inspect.
But if the transaction reached the blockchain, its execution can be investigated using a TON explorer.
TON's documentation explains that transaction links can be generated using the account address, logical time and transaction hash, allowing the transaction to be inspected through an explorer.
Therefore, after a failed transaction, look for the transaction hash or explorer link provided by the wallet or application.
If there is no transaction record, focus first on the wallet, connection, signing or submission stage.
If there is an on chain transaction, inspect its blockchain status and execution details.
7. Read the TON Transaction Result
An explorer can reveal information that a simple wallet error message may not show.
TON transactions are processed through different execution phases, including storage, compute and action phases. Depending on what went wrong, the blockchain may record an execution failure or generate a bounced message.
A bounce is particularly useful as a diagnostic signal. TON documentation explains that a bounce message can be generated when a bounceable message fails during contract execution or when an action fails under the appropriate conditions.
This means a transaction appearing as "failed" does not tell the entire story by itself.
Look at the transaction trace and determine:
Was the transaction included on-chain?Which contract received the message?Did execution reach the expected contract?Was there a compute-phase failure?Was there an action-phase failure?Was the message bounced?Was there an indication of insufficient funds?Did a subsequent message succeed or fail?
For complex operations, one user action can involve several blockchain messages. Examining the transaction trace can therefore provide more information than relying on the first error displayed in the wallet.
8. Wallet and Connection Problems Can Also Be the Cause
STON.fi's own troubleshooting guidance repeatedly recommends reconnecting the wallet when an operation fails.
For certain withdrawal problems, STON.fi suggests disconnecting and reconnecting the wallet, then, when necessary, trying the same wallet through another compatible TON wallet application. If the operation works in another wallet, the problem may be associated with the original wallet application rather than the STON.fi protocol.
This is an important diagnostic method because it helps isolate the source of the failure.
For example:
Failure only in one wallet:
There may be a wallet-specific connection, signing or implementation issue.
Failure across multiple compatible wallets:
The problem is less likely to be limited to one wallet application and may require investigation at the protocol or blockchain level.
STON.fi specifically recommends contacting the wallet's support team when an issue appears only in that wallet, while issues reproduced across wallets should be escalated to STON.fi support.
9. Farming and Withdrawal Transactions Have Extra Conditions
Not every transaction is a swap.
Farming positions can have lock-up periods, and those restrictions must be checked before treating an unsuccessful withdrawal as a technical failure.
STON.fi states that the lock period is shown before a farming position is confirmed. If a "blocking" message appears, the first step is to verify whether the lock-up period has expired. After that, check the $GRAM balance and reconnect the wallet if necessary.
Likewise, closing a farming position can require $GRAM for the network fee. STON.fi's troubleshooting sequence is to check the lock period, verify the $GRAM balance, reconnect the wallet and then try a different compatible wallet if the problem continues.
This demonstrates why the operation type matters so much: a failed swap and a blocked farm withdrawal are not necessarily diagnosed in the same way.
10. Do Not Immediately Retry the Same Transaction
One of the most common mistakes is repeatedly pressing Retry without understanding the cause.
If the problem is insufficient $GRAM, another attempt will not solve it.
If the problem is excessive price impact, immediately repeating the same trade may produce the same result.
If the market has moved beyond your slippage tolerance, retrying without reconsidering the quote can leave you in exactly the same situation.
If the token itself is suspicious, repeated attempts can increase your exposure to the underlying risk.
And if the transaction has already been broadcast, creating another transaction before checking its status can make it harder to understand what actually happened.
A better sequence is:
Identify → Inspect → Diagnose → Correct → Retry.
Not:
Fail → Retry → Fail → Retry.
11. A Practical STON.fi Troubleshooting Workflow
When a STON.fi transaction fails, work through the following sequence.
Step 1: Identify the operation
Was it a swap, liquidity deposit, liquidity withdrawal, farming action, staking operation or token interaction?
Step 2: Check the wallet
Confirm that the correct wallet is connected and that it contains enough $GRAM to cover the network fee.
Step 3: Review the transaction parameters
For swaps, check:
swap rate;price impact;minimum received;slippage tolerance;selected route or execution option;blockchain fee.
STON.fi exposes these parameters to help users understand the transaction before confirmation.
Step 4: Check token legitimacy
For unfamiliar or manually imported tokens, verify the official contract address and investigate any warnings before interacting further.
Step 5: Check transaction status on-chain
Find the transaction hash and inspect it with a TON explorer. Determine whether the transaction was broadcast, executed, bounced or failed during one of the execution phases.
Step 6: Isolate the source
Reconnect the wallet.
If appropriate, test the same wallet in another compatible TON wallet application. STON.fi uses this approach in its own troubleshooting documentation to distinguish wallet side issues from broader problems.
Step 7: Correct the actual cause
Add sufficient $GRAM if fees are the problem.
Wait or reconsider the trade if market movement is the problem.
Reduce trade size if price impact is excessive.
Verify the token if the asset is unfamiliar.
Wait for a farm lock-up to expire if the position is still locked.
Reconnect or change the wallet application if the problem appears wallet-specific.
Step 8: Retry only after diagnosis
Once the likely cause has been identified and corrected, a new attempt becomes meaningful.
What Information Should You Collect for Support?
When the issue continues after basic troubleshooting, avoid sending only a message such as:
"My transaction failed."
That gives support very little information to work with.
Instead, collect the relevant transaction data.
Include:
Wallet address: preferably the public address involved in the transaction.
Transaction hash or explorer link: when the transaction was actually broadcast.
Operation type: swap, withdrawal, farming, liquidity, etc.
Token pair: for swaps.
Amount: the amount attempted.
Approximate time of the transaction: useful for locating the event.
Error message: provide the exact wording shown by STON.fi or your wallet.
Wallet application: identify which TON-compatible wallet was used.
Screenshots: where useful, especially for displaying the exact error or warning.
Do not provide your seed phrase, private key, recovery phrase or other sensitive wallet credentials to anyone claiming to be support.
STON.fi directs users to its official support channels when troubleshooting cannot resolve the issue.
The Key Lesson
A failed STON.fi transaction is not automatically a protocol failure.
The most effective troubleshooting approach is to locate where the transaction failed.
It may have failed before broadcasting because of the wallet or connection.
It may have been rejected because there was insufficient $GRAM for network fees.
It may have become unacceptable because of price impact or slippage.
It may have been restricted by a farm's lock-up conditions.
It may involve a token that requires additional verification.
Or the transaction may have reached TON and failed during blockchain execution.
The solution is therefore not to blindly increase slippage or repeatedly press retry.
The correct approach is to identify the operation, check the wallet balance, review the transaction parameters, verify the token, inspect the TON transaction status, isolate the likely cause and only then retry.
That turns a vague "transaction failed" message into a structured troubleshooting process.
Final Diagnostic Checklist
Operation: What exactly was I trying to do?
$GRAM: Is there enough native $GRAM for the network fee?
Swap conditions: Did price impact or slippage exceed the acceptable limits?
Minimum received: Did the expected output change?
Token: Is the contract address legitimate and is the asset safe to interact with?
Wallet: Is the correct wallet connected and responding properly?
Explorer: Was the transaction actually broadcast, and what happened on-chain?
Farm/withdrawal: Is there an active lock or another operation-specific restriction?
Retry: Have I identified and corrected the likely cause before submitting another transaction?
Support: Do I have the transaction hash, wallet address, operation details, timestamp and error message ready?
Troubleshooting becomes much easier once these questions are answered in order.
STON.fi's official Help Center remains the primary reference for transaction and withdrawal issues, while TON's explorer and blockchain documentation provide the deeper on-chain evidence needed when a transaction has already been broadcast.
$NVDAB
1
347
·
--
ලිපිය
පරිවර්තනය බලන්න
How to Import a Custom Token by Contract Address on STON.fiHow to Import a Custom Token by Contract Address on STON.fi
Decentralized finance gives users access to a wide range of assets, including tokens that may not immediately appear in a decentralized exchange’s normal token search. On STON.fi, users can manually import a custom token by entering its smart contract address.
This feature is useful when a token is new, has limited visibility in the interface, or is available only through its contract address. However, there is one principle every user should understand before proceeding:
Being able to import a token does not mean the token is safe, legitimate, endorsed, or recommended by STON.fi.
STON.fi explicitly advises users to research a custom token themselves because the platform cannot verify whether every manually imported token is trustworthy.
What Does “Importing a Token” Mean?
A token’s smart contract address is its unique on chain identifier. Names, symbols and logos can be copied, but the contract address identifies the specific asset you are interacting with.
When you manually import a token on STON.fi, you are essentially telling the interface which on chain asset you want to interact with. The process does not create a new token, modify its smart contract or make the project legitimate.
STON.fi’s official process is straightforward: open the Swap interface, open the token selector, paste the token’s smart-contract address, verify the displayed metadata and confirm the import.
Step 1: Get the Correct Contract Address
The most important step happens before you even open STON.fi.
Obtain the token’s smart-contract address from an official and trustworthy source. This could be the project’s verified official website, official documentation or another authoritative channel that clearly identifies the token contract.
Do not assume that a familiar name, ticker, logo or social-media post represents the genuine token.
Scammers can create assets with names and symbols that closely resemble established projects. STON.fi specifically warns that scam tokens regularly copy popular names.
A useful rule is:
Verify the address, not just the name.
Even a token displayed with the expected name and symbol should be treated cautiously until its contract address has been independently confirmed.
Step 2: Open STON.fi and the Token Selector
Once you have verified the address, open STON.fi and navigate to the Swap interface.
From there, open the token selector. This is where you choose the asset you want to send or receive.
STON.fi allows users to search for a token using its smart contract address when the asset is not readily available through the normal token search.
Step 3: Paste the Smart-Contract Address
Paste the token’s contract address into the search field.
STON.fi will attempt to identify the asset associated with that address. This is the point where you should slow down rather than immediately confirming the import.
The interface should display token information such as its name, symbol and decimals. Compare these details with the information supplied by the project’s legitimate sources.
The goal is not simply to make the token appear in your list. The goal is to make sure the asset displayed by STON.fi corresponds to the asset you intended to interact with.
Step 4: Verify the Metadata and Any Warnings
Before confirming the import, examine the information presented by STON.fi.
Check the:
Name
Does it match the expected token?
Symbol
Is the ticker consistent with the official project information?
Decimals
Does the displayed token configuration correspond to the expected asset?
Warnings or labels
Does STON.fi indicate that the token has characteristics requiring additional caution?
This step matters because token metadata alone should never be treated as proof of legitimacy.
STON.fi has introduced interface labels for certain non-standard or potentially risky tokens, including categories such as Fake, Honeypot, Taxable, Suspicious and DMCA Notice. Depending on the category, the interface can restrict how the asset is accessed or whether it can be swapped through the STON.fi dApp.
For example, a honeypot may allow users to buy a token while preventing normal selling. A taxable token may deduct additional fees during transfers. A fake token may imitate the identity of a legitimate asset.
These distinctions are important because “token available on chain” and “token safe to trade” are two very different statements.
Step 5: Confirm the Import
After verifying the address, metadata and warnings, you can confirm the import.
STON.fi’s official help documentation states that once the import is confirmed, the token appears in your list and becomes available for swaps, subject to the interface’s applicable restrictions and policies.
At this stage, remember that the import has only made the asset accessible through the interface.
It has not certified the token.
Importing Is Not the Same as Trusting
This is perhaps the most important concept in the entire process.
A custom token import is an interface function. It is not an endorsement.
STON.fi explicitly states that it cannot verify whether a custom token is trustworthy and instructs users to research the asset before interacting with it.
Therefore:
Import ≠ verification.
Import ≠ endorsement.
Import ≠ security guarantee.
The responsibility for evaluating the asset remains with the user.
This distinction is fundamental to decentralized systems. Tokens can exist on-chain without receiving approval from a centralized authority and STON.fi’s interface applies its own policies and safety signals without determining what assets are allowed to exist on the blockchain.
Check Liquidity Before You Swap
Finding the correct token is only the beginning. Before executing a trade, examine the available liquidity.
A token can have the correct contract address and still have extremely low liquidity.
Low liquidity can make a swap expensive because a relatively large transaction can move the pool price significantly. This can lead to substantial price impact and a much worse execution rate than expected.
STON.fi’s own guidance emphasizes checking liquidity when working with newly added or custom assets. Its documentation also notes that fragmented or shallow liquidity can worsen swap conditions.
Before swapping, therefore, consider:
How much liquidity does the pool have?
How large is your trade compared with that liquidity?
What price impact does STON.fi show?
How much will you actually receive?
Is the market sufficiently active for you to exit the position later?
A token being tradable does not automatically mean there is a healthy market for it.
Look Beyond the Interface
A professional approach to custom token trading goes beyond simply checking whether the token appears on STON.fi.
Research the project independently.
Verify that the official website publishes the same contract address. Check the project’s documented token information and official communication channels. Examine the token’s on chain activity and available liquidity. Look for unusual mechanics, transfer restrictions, excessive taxes or other conditions that could affect your ability to trade.
STON.fi recommends that users do their own research before interacting with custom tokens, while its token labeling system is designed to provide additional context for assets that exhibit particular characteristics.
Why Contract Address Import Matters
Manual importing solves a practical problem in an open DeFi ecosystem.
New tokens may not immediately appear through a normal name-based search. Some assets may intentionally require users to enter their contract address, while others may be subject to interface policies that affect how they are displayed.
Using the contract address gives the user a precise way to identify the intended on-chain asset.
But this precision only works when the address itself is correct.
That is why the safest workflow is:
Official source → Verify contract address → Paste into STON.fi → Check metadata → Review warnings → Check liquidity → Evaluate the trade → Confirm only when satisfied.
The Bottom Line
Importing a custom token on STON.fi is simple, but the simplicity of the interface should not make users careless.
Start by obtaining the correct contract address from an official source. Open STON.fi’s Swap interface, use the token selector, paste the address and carefully verify the name, symbol and decimals. Review any warnings or labels before confirming the import. Once imported, investigate the token and its liquidity before executing a swap.
Most importantly, remember:
Manual import is an access feature, not a safety endorsement.
STON.fi can provide interface-level information and warnings, but users must independently determine whether a custom token is legitimate, sufficiently liquid and appropriate for their intended transaction.
In DeFi, the contract address tells you which asset you are interacting with.
It does not tell you whether you should trust it.
Read more about this Here: https://help.ston.fi/hc/en-us/articles/28370514499228-How-do-I-add-or-import-a-custom-token-using-its-contract-address
#CPIWatch #CryptoSectorsFallSecondDay
How to Import a Custom Token by Contract Address on STON.fi
How to Import a Custom Token by Contract Address on STON.fi
Decentralized finance gives users access to a wide range of assets, including tokens that may not immediately appear in a decentralized exchange’s normal token search. On STON.fi, users can manually import a custom token by entering its smart contract address.
This feature is useful when a token is new, has limited visibility in the interface, or is available only through its contract address. However, there is one principle every user should understand before proceeding:
Being able to import a token does not mean the token is safe, legitimate, endorsed, or recommended by STON.fi.
STON.fi explicitly advises users to research a custom token themselves because the platform cannot verify whether every manually imported token is trustworthy.
What Does “Importing a Token” Mean?
A token’s smart contract address is its unique on chain identifier. Names, symbols and logos can be copied, but the contract address identifies the specific asset you are interacting with.
When you manually import a token on STON.fi, you are essentially telling the interface which on chain asset you want to interact with. The process does not create a new token, modify its smart contract or make the project legitimate.
STON.fi’s official process is straightforward: open the Swap interface, open the token selector, paste the token’s smart-contract address, verify the displayed metadata and confirm the import.
Step 1: Get the Correct Contract Address
The most important step happens before you even open STON.fi.
Obtain the token’s smart-contract address from an official and trustworthy source. This could be the project’s verified official website, official documentation or another authoritative channel that clearly identifies the token contract.
Do not assume that a familiar name, ticker, logo or social-media post represents the genuine token.
Scammers can create assets with names and symbols that closely resemble established projects. STON.fi specifically warns that scam tokens regularly copy popular names.
A useful rule is:
Verify the address, not just the name.
Even a token displayed with the expected name and symbol should be treated cautiously until its contract address has been independently confirmed.
Step 2: Open STON.fi and the Token Selector
Once you have verified the address, open STON.fi and navigate to the Swap interface.
From there, open the token selector. This is where you choose the asset you want to send or receive.
STON.fi allows users to search for a token using its smart contract address when the asset is not readily available through the normal token search.
Step 3: Paste the Smart-Contract Address
Paste the token’s contract address into the search field.
STON.fi will attempt to identify the asset associated with that address. This is the point where you should slow down rather than immediately confirming the import.
The interface should display token information such as its name, symbol and decimals. Compare these details with the information supplied by the project’s legitimate sources.
The goal is not simply to make the token appear in your list. The goal is to make sure the asset displayed by STON.fi corresponds to the asset you intended to interact with.
Step 4: Verify the Metadata and Any Warnings
Before confirming the import, examine the information presented by STON.fi.
Check the:
Name
Does it match the expected token?
Symbol
Is the ticker consistent with the official project information?
Decimals
Does the displayed token configuration correspond to the expected asset?
Warnings or labels
Does STON.fi indicate that the token has characteristics requiring additional caution?
This step matters because token metadata alone should never be treated as proof of legitimacy.
STON.fi has introduced interface labels for certain non-standard or potentially risky tokens, including categories such as Fake, Honeypot, Taxable, Suspicious and DMCA Notice. Depending on the category, the interface can restrict how the asset is accessed or whether it can be swapped through the STON.fi dApp.
For example, a honeypot may allow users to buy a token while preventing normal selling. A taxable token may deduct additional fees during transfers. A fake token may imitate the identity of a legitimate asset.
These distinctions are important because “token available on chain” and “token safe to trade” are two very different statements.
Step 5: Confirm the Import
After verifying the address, metadata and warnings, you can confirm the import.
STON.fi’s official help documentation states that once the import is confirmed, the token appears in your list and becomes available for swaps, subject to the interface’s applicable restrictions and policies.
At this stage, remember that the import has only made the asset accessible through the interface.
It has not certified the token.
Importing Is Not the Same as Trusting
This is perhaps the most important concept in the entire process.
A custom token import is an interface function. It is not an endorsement.
STON.fi explicitly states that it cannot verify whether a custom token is trustworthy and instructs users to research the asset before interacting with it.
Therefore:
Import ≠ verification.
Import ≠ endorsement.
Import ≠ security guarantee.
The responsibility for evaluating the asset remains with the user.
This distinction is fundamental to decentralized systems. Tokens can exist on-chain without receiving approval from a centralized authority and STON.fi’s interface applies its own policies and safety signals without determining what assets are allowed to exist on the blockchain.
Check Liquidity Before You Swap
Finding the correct token is only the beginning. Before executing a trade, examine the available liquidity.
A token can have the correct contract address and still have extremely low liquidity.
Low liquidity can make a swap expensive because a relatively large transaction can move the pool price significantly. This can lead to substantial price impact and a much worse execution rate than expected.
STON.fi’s own guidance emphasizes checking liquidity when working with newly added or custom assets. Its documentation also notes that fragmented or shallow liquidity can worsen swap conditions.
Before swapping, therefore, consider:
How much liquidity does the pool have?
How large is your trade compared with that liquidity?
What price impact does STON.fi show?
How much will you actually receive?
Is the market sufficiently active for you to exit the position later?
A token being tradable does not automatically mean there is a healthy market for it.
Look Beyond the Interface
A professional approach to custom token trading goes beyond simply checking whether the token appears on STON.fi.
Research the project independently.
Verify that the official website publishes the same contract address. Check the project’s documented token information and official communication channels. Examine the token’s on chain activity and available liquidity. Look for unusual mechanics, transfer restrictions, excessive taxes or other conditions that could affect your ability to trade.
STON.fi recommends that users do their own research before interacting with custom tokens, while its token labeling system is designed to provide additional context for assets that exhibit particular characteristics.
Why Contract Address Import Matters
Manual importing solves a practical problem in an open DeFi ecosystem.
New tokens may not immediately appear through a normal name-based search. Some assets may intentionally require users to enter their contract address, while others may be subject to interface policies that affect how they are displayed.
Using the contract address gives the user a precise way to identify the intended on-chain asset.
But this precision only works when the address itself is correct.
That is why the safest workflow is:
Official source → Verify contract address → Paste into STON.fi → Check metadata → Review warnings → Check liquidity → Evaluate the trade → Confirm only when satisfied.
The Bottom Line
Importing a custom token on STON.fi is simple, but the simplicity of the interface should not make users careless.
Start by obtaining the correct contract address from an official source. Open STON.fi’s Swap interface, use the token selector, paste the address and carefully verify the name, symbol and decimals. Review any warnings or labels before confirming the import. Once imported, investigate the token and its liquidity before executing a swap.
Most importantly, remember:
Manual import is an access feature, not a safety endorsement.
STON.fi can provide interface-level information and warnings, but users must independently determine whether a custom token is legitimate, sufficiently liquid and appropriate for their intended transaction.
In DeFi, the contract address tells you which asset you are interacting with.
It does not tell you whether you should trust it.
Read more about this Here: https://help.ston.fi/hc/en-us/articles/28370514499228-How-do-I-add-or-import-a-custom-token-using-its-contract-address
#CPIWatch #CryptoSectorsFallSecondDay
Decentralized finance gives users access to a wide range of assets, including tokens that may not immediately appear in a decentralized exchange’s normal token search. On STON.fi, users can manually import a custom token by entering its smart contract address.
This feature is useful when a token is new, has limited visibility in the interface, or is available only through its contract address. However, there is one principle every user should understand before proceeding:
Being able to import a token does not mean the token is safe, legitimate, endorsed, or recommended by STON.fi.
STON.fi explicitly advises users to research a custom token themselves because the platform cannot verify whether every manually imported token is trustworthy.
What Does “Importing a Token” Mean?
A token’s smart contract address is its unique on chain identifier. Names, symbols and logos can be copied, but the contract address identifies the specific asset you are interacting with.
When you manually import a token on STON.fi, you are essentially telling the interface which on chain asset you want to interact with. The process does not create a new token, modify its smart contract or make the project legitimate.
STON.fi’s official process is straightforward: open the Swap interface, open the token selector, paste the token’s smart-contract address, verify the displayed metadata and confirm the import.
Step 1: Get the Correct Contract Address
The most important step happens before you even open STON.fi.
Obtain the token’s smart-contract address from an official and trustworthy source. This could be the project’s verified official website, official documentation or another authoritative channel that clearly identifies the token contract.
Do not assume that a familiar name, ticker, logo or social-media post represents the genuine token.
Scammers can create assets with names and symbols that closely resemble established projects. STON.fi specifically warns that scam tokens regularly copy popular names.
A useful rule is:
Verify the address, not just the name.
Even a token displayed with the expected name and symbol should be treated cautiously until its contract address has been independently confirmed.
Step 2: Open STON.fi and the Token Selector
Once you have verified the address, open STON.fi and navigate to the Swap interface.
From there, open the token selector. This is where you choose the asset you want to send or receive.
STON.fi allows users to search for a token using its smart contract address when the asset is not readily available through the normal token search.
Step 3: Paste the Smart-Contract Address
Paste the token’s contract address into the search field.
STON.fi will attempt to identify the asset associated with that address. This is the point where you should slow down rather than immediately confirming the import.
The interface should display token information such as its name, symbol and decimals. Compare these details with the information supplied by the project’s legitimate sources.
The goal is not simply to make the token appear in your list. The goal is to make sure the asset displayed by STON.fi corresponds to the asset you intended to interact with.
Step 4: Verify the Metadata and Any Warnings
Before confirming the import, examine the information presented by STON.fi.
Check the:
Name
Does it match the expected token?
Symbol
Is the ticker consistent with the official project information?
Decimals
Does the displayed token configuration correspond to the expected asset?
Warnings or labels
Does STON.fi indicate that the token has characteristics requiring additional caution?
This step matters because token metadata alone should never be treated as proof of legitimacy.
STON.fi has introduced interface labels for certain non-standard or potentially risky tokens, including categories such as Fake, Honeypot, Taxable, Suspicious and DMCA Notice. Depending on the category, the interface can restrict how the asset is accessed or whether it can be swapped through the STON.fi dApp.
For example, a honeypot may allow users to buy a token while preventing normal selling. A taxable token may deduct additional fees during transfers. A fake token may imitate the identity of a legitimate asset.
These distinctions are important because “token available on chain” and “token safe to trade” are two very different statements.
Step 5: Confirm the Import
After verifying the address, metadata and warnings, you can confirm the import.
STON.fi’s official help documentation states that once the import is confirmed, the token appears in your list and becomes available for swaps, subject to the interface’s applicable restrictions and policies.
At this stage, remember that the import has only made the asset accessible through the interface.
It has not certified the token.
Importing Is Not the Same as Trusting
This is perhaps the most important concept in the entire process.
A custom token import is an interface function. It is not an endorsement.
STON.fi explicitly states that it cannot verify whether a custom token is trustworthy and instructs users to research the asset before interacting with it.
Therefore:
Import ≠ verification.
Import ≠ endorsement.
Import ≠ security guarantee.
The responsibility for evaluating the asset remains with the user.
This distinction is fundamental to decentralized systems. Tokens can exist on-chain without receiving approval from a centralized authority and STON.fi’s interface applies its own policies and safety signals without determining what assets are allowed to exist on the blockchain.
Check Liquidity Before You Swap
Finding the correct token is only the beginning. Before executing a trade, examine the available liquidity.
A token can have the correct contract address and still have extremely low liquidity.
Low liquidity can make a swap expensive because a relatively large transaction can move the pool price significantly. This can lead to substantial price impact and a much worse execution rate than expected.
STON.fi’s own guidance emphasizes checking liquidity when working with newly added or custom assets. Its documentation also notes that fragmented or shallow liquidity can worsen swap conditions.
Before swapping, therefore, consider:
How much liquidity does the pool have?
How large is your trade compared with that liquidity?
What price impact does STON.fi show?
How much will you actually receive?
Is the market sufficiently active for you to exit the position later?
A token being tradable does not automatically mean there is a healthy market for it.
Look Beyond the Interface
A professional approach to custom token trading goes beyond simply checking whether the token appears on STON.fi.
Research the project independently.
Verify that the official website publishes the same contract address. Check the project’s documented token information and official communication channels. Examine the token’s on chain activity and available liquidity. Look for unusual mechanics, transfer restrictions, excessive taxes or other conditions that could affect your ability to trade.
STON.fi recommends that users do their own research before interacting with custom tokens, while its token labeling system is designed to provide additional context for assets that exhibit particular characteristics.
Why Contract Address Import Matters
Manual importing solves a practical problem in an open DeFi ecosystem.
New tokens may not immediately appear through a normal name-based search. Some assets may intentionally require users to enter their contract address, while others may be subject to interface policies that affect how they are displayed.
Using the contract address gives the user a precise way to identify the intended on-chain asset.
But this precision only works when the address itself is correct.
That is why the safest workflow is:
Official source → Verify contract address → Paste into STON.fi → Check metadata → Review warnings → Check liquidity → Evaluate the trade → Confirm only when satisfied.
The Bottom Line
Importing a custom token on STON.fi is simple, but the simplicity of the interface should not make users careless.
Start by obtaining the correct contract address from an official source. Open STON.fi’s Swap interface, use the token selector, paste the address and carefully verify the name, symbol and decimals. Review any warnings or labels before confirming the import. Once imported, investigate the token and its liquidity before executing a swap.
Most importantly, remember:
Manual import is an access feature, not a safety endorsement.
STON.fi can provide interface-level information and warnings, but users must independently determine whether a custom token is legitimate, sufficiently liquid and appropriate for their intended transaction.
In DeFi, the contract address tells you which asset you are interacting with.
It does not tell you whether you should trust it.
Read more about this Here: https://help.ston.fi/hc/en-us/articles/28370514499228-How-do-I-add-or-import-a-custom-token-using-its-contract-address
#CPIWatch #CryptoSectorsFallSecondDay
1
62
·
--
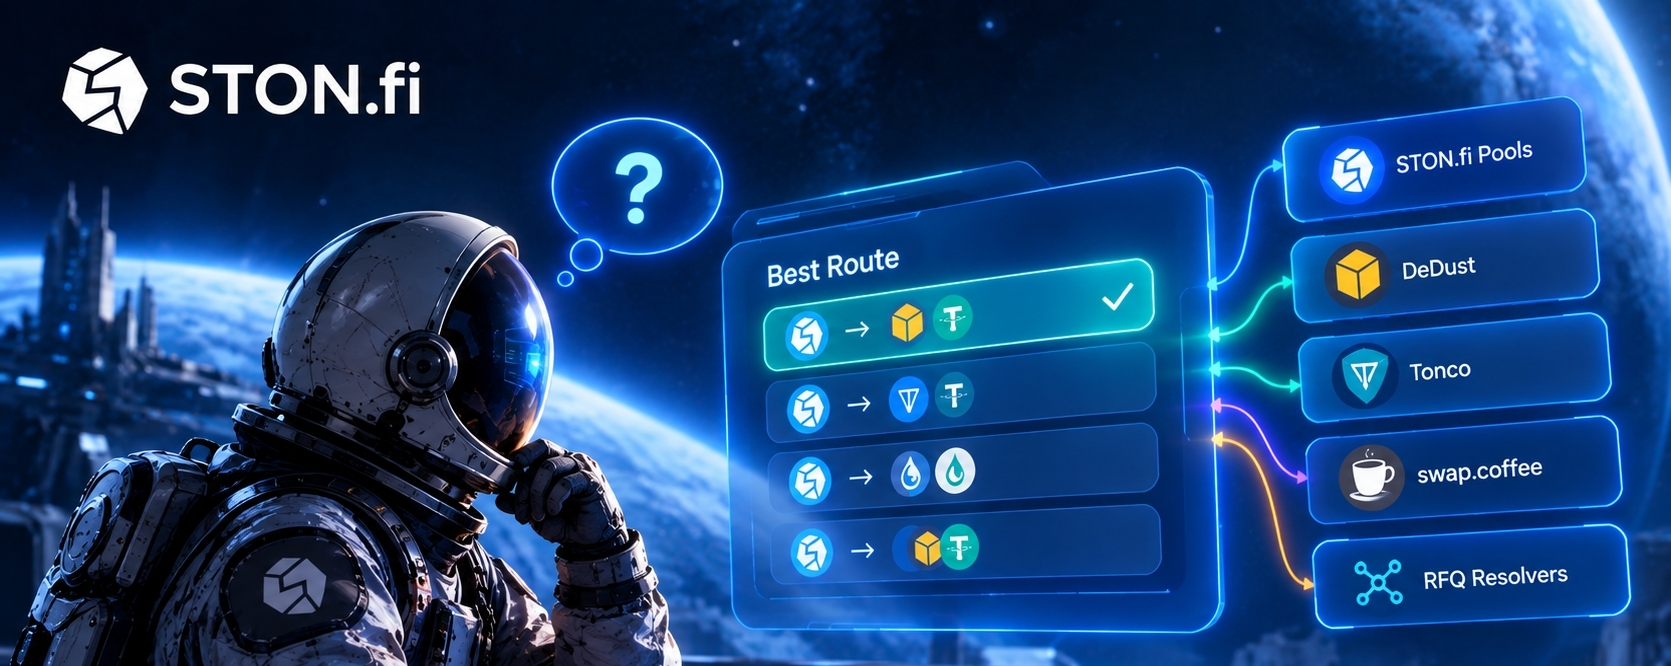
ලිපිය
Omniston යනු කුමක්ද සහ එය STON.fi Swaps වැඩිදියුණු කරන්නේ කෙසේදOmniston යනු කුමක්ද සහ එය STON.fi swaps වැඩිදියුණු කරන්නේ කෙසේද
Decentralized exchanges token swapping පහසු කර ඇත, නමුත් පසුබිමේ තවමත් ලොකු ගැටලුවක් තිබෙනවා: liquidity fragmented වීම.
Swap එකක් සඳහා හොඳම මිල සෑම විටම එක් liquidity pool එකක හෝ එකම decentralized exchange එකක තිබේ යැයි නොවේ. එක් මූලාශ්රයකට ගැඹුරු liquidity තිබිය හැක; තවත් එකකට වඩා හොඳ මිලක් තිබිය හැක; resolver එකට එම trade එක සඳහා තරඟකාරී quote එකක් ලබාදිය හැක.
මෙතැනදී Omniston වැදගත් වෙනවා.
STON.fi swaps වල පසුබිමෙහි Omniston යනු liquidity aggregation සහ execution layer එකයි. swap එකක් එක pool එකකට පමණක් සීමා කිරීම වෙනුවට, එයට තරඟ කරන quotes ඉල්ලා ගත හැක, සම්බන්ධ liquidity sources අතර ඇති routes සංසන්දනය කර, trade එක සඳහා වඩා ශක්තිමත් වලංගු execution එක තෝරා ගත හැක.
Omniston යනු කුමක්ද සහ එය STON.fi Swaps වැඩිදියුණු කරන්නේ කෙසේද
Omniston යනු කුමක්ද සහ එය STON.fi swaps වැඩිදියුණු කරන්නේ කෙසේද
Decentralized exchanges token swapping පහසු කර ඇත, නමුත් පසුබිමේ තවමත් ලොකු ගැටලුවක් තිබෙනවා: liquidity fragmented වීම.
Swap එකක් සඳහා හොඳම මිල සෑම විටම එක් liquidity pool එකක හෝ එකම decentralized exchange එකක තිබේ යැයි නොවේ. එක් මූලාශ්රයකට ගැඹුරු liquidity තිබිය හැක; තවත් එකකට වඩා හොඳ මිලක් තිබිය හැක; resolver එකට එම trade එක සඳහා තරඟකාරී quote එකක් ලබාදිය හැක.
මෙතැනදී Omniston වැදගත් වෙනවා.
STON.fi swaps වල පසුබිමෙහි Omniston යනු liquidity aggregation සහ execution layer එකයි. swap එකක් එක pool එකකට පමණක් සීමා කිරීම වෙනුවට, එයට තරඟ කරන quotes ඉල්ලා ගත හැක, සම්බන්ධ liquidity sources අතර ඇති routes සංසන්දනය කර, trade එක සඳහා වඩා ශක්තිමත් වලංගු execution එක තෝරා ගත හැක.
Decentralized exchanges token swapping පහසු කර ඇත, නමුත් පසුබිමේ තවමත් ලොකු ගැටලුවක් තිබෙනවා: liquidity fragmented වීම.
Swap එකක් සඳහා හොඳම මිල සෑම විටම එක් liquidity pool එකක හෝ එකම decentralized exchange එකක තිබේ යැයි නොවේ. එක් මූලාශ්රයකට ගැඹුරු liquidity තිබිය හැක; තවත් එකකට වඩා හොඳ මිලක් තිබිය හැක; resolver එකට එම trade එක සඳහා තරඟකාරී quote එකක් ලබාදිය හැක.
මෙතැනදී Omniston වැදගත් වෙනවා.
STON.fi swaps වල පසුබිමෙහි Omniston යනු liquidity aggregation සහ execution layer එකයි. swap එකක් එක pool එකකට පමණක් සීමා කිරීම වෙනුවට, එයට තරඟ කරන quotes ඉල්ලා ගත හැක, සම්බන්ධ liquidity sources අතර ඇති routes සංසන්දනය කර, trade එක සඳහා වඩා ශක්තිමත් වලංගු execution එක තෝරා ගත හැක.
1
165
·
--
ලිපිය
STON.fi හි WStable Pools: Weighted Stable Swap Liquidity පිළිබඳ තවත් ගැඹුරු බැල්මක්STON.fi හි WStable Pools: Weighted Stable Swap Liquidity පිළිබඳ තවත් ගැඹුරු බැල්මක්
විකේන්ද්රීය මූල්ය (decentralized finance) තුළ, සෑම වත්කම් යුගලයක්ම සාමාන්ය 50/50 වෙළඳ යුගලයක් ලෙස හැසිරෙන්නේ නැහැ.
සමහර වත්කම් බොහෝ තරම් සම්බන්ධිත (highly correlated) වුවත් සම්පූර්ණයෙන්ම එකිනෙකට සමාන නොවිය හැක. උදාහරණයක් ලෙස දියරශීලි ස්ටේකින් ටෝකනයක් (liquid staking token) සහ එහි යටින් පවතින වත්කම. ඒවා සාමාන්යයෙන් එකටම චලනය විය හැකි නමුත්, ස්ටේකින් ප්රතිලාභ එකතු වන විට ඒවා අතර ඇති හුවමාරු සම්බන්ධතාවය ක්රමයෙන් වෙනස් විය හැක.
ඒ වෙලාවේ STON.fi හි WStable සංචිත (pools) ප්රයෝජනවත් වෙනවා.
WStable යනු Weighted Stable Swap සඳහා වූ කෙටි නාමයක් වන අතර එය WSS ලෙසද හැඳින්වෙනවා. මෙය StableSwap වර්ගයේ වක්රයක කාර්යක්ෂම මිලකරණ හැසිරීම (pricing behavior) සහ අභිරුචි වත්කම් බර (asset weights) සහ සාපේක්ෂ අනුපාත (relative rate) පරාමිතියක් සමඟ එකතුවන විශේෂිත දියරශීලිත්ව සංචිත (liquidity pool) සැලසුමකි.
STON.fi හි WStable Pools: Weighted Stable Swap Liquidity පිළිබඳ තවත් ගැඹුරු බැල්මක්
STON.fi හි WStable Pools: Weighted Stable Swap Liquidity පිළිබඳ තවත් ගැඹුරු බැල්මක්
විකේන්ද්රීය මූල්ය (decentralized finance) තුළ, සෑම වත්කම් යුගලයක්ම සාමාන්ය 50/50 වෙළඳ යුගලයක් ලෙස හැසිරෙන්නේ නැහැ.
සමහර වත්කම් බොහෝ තරම් සම්බන්ධිත (highly correlated) වුවත් සම්පූර්ණයෙන්ම එකිනෙකට සමාන නොවිය හැක. උදාහරණයක් ලෙස දියරශීලි ස්ටේකින් ටෝකනයක් (liquid staking token) සහ එහි යටින් පවතින වත්කම. ඒවා සාමාන්යයෙන් එකටම චලනය විය හැකි නමුත්, ස්ටේකින් ප්රතිලාභ එකතු වන විට ඒවා අතර ඇති හුවමාරු සම්බන්ධතාවය ක්රමයෙන් වෙනස් විය හැක.
ඒ වෙලාවේ STON.fi හි WStable සංචිත (pools) ප්රයෝජනවත් වෙනවා.
WStable යනු Weighted Stable Swap සඳහා වූ කෙටි නාමයක් වන අතර එය WSS ලෙසද හැඳින්වෙනවා. මෙය StableSwap වර්ගයේ වක්රයක කාර්යක්ෂම මිලකරණ හැසිරීම (pricing behavior) සහ අභිරුචි වත්කම් බර (asset weights) සහ සාපේක්ෂ අනුපාත (relative rate) පරාමිතියක් සමඟ එකතුවන විශේෂිත දියරශීලිත්ව සංචිත (liquidity pool) සැලසුමකි.
විකේන්ද්රීය මූල්ය (decentralized finance) තුළ, සෑම වත්කම් යුගලයක්ම සාමාන්ය 50/50 වෙළඳ යුගලයක් ලෙස හැසිරෙන්නේ නැහැ.
සමහර වත්කම් බොහෝ තරම් සම්බන්ධිත (highly correlated) වුවත් සම්පූර්ණයෙන්ම එකිනෙකට සමාන නොවිය හැක. උදාහරණයක් ලෙස දියරශීලි ස්ටේකින් ටෝකනයක් (liquid staking token) සහ එහි යටින් පවතින වත්කම. ඒවා සාමාන්යයෙන් එකටම චලනය විය හැකි නමුත්, ස්ටේකින් ප්රතිලාභ එකතු වන විට ඒවා අතර ඇති හුවමාරු සම්බන්ධතාවය ක්රමයෙන් වෙනස් විය හැක.
ඒ වෙලාවේ STON.fi හි WStable සංචිත (pools) ප්රයෝජනවත් වෙනවා.
WStable යනු Weighted Stable Swap සඳහා වූ කෙටි නාමයක් වන අතර එය WSS ලෙසද හැඳින්වෙනවා. මෙය StableSwap වර්ගයේ වක්රයක කාර්යක්ෂම මිලකරණ හැසිරීම (pricing behavior) සහ අභිරුචි වත්කම් බර (asset weights) සහ සාපේක්ෂ අනුපාත (relative rate) පරාමිතියක් සමඟ එකතුවන විශේෂිත දියරශීලිත්ව සංචිත (liquidity pool) සැලසුමකි.
1
267
·
--
ලිපිය
ஒம்னிஸ்டன் ஒருங்கிணைப்பாளர்களுக்கான பரிந்துரை கட்டணங்களை எப்படி கையாளுகிறதுஒம்னிஸ்டன் ஒருங்கிணைப்பாளர்களுக்கான பரிந்துரை கட்டணங்களை எப்படி கையாளுகிறது
ஒரு வாலெட்டின் மூலம், ஒரு வர்த்தக டெர்மினல் மூலம் அல்லது ஒரு டெலிகிராம் பாட்டின் மூலம் நகரும் ஒவ்வொரு ஸ்வாப்பும், அந்த பயன்பாடு சேர்த்த மதிப்பின் ஒரு தருணத்தை பிரதிநிதித்துவப்படுத்துகிறது: அது பயனரை கண்டுபிடித்தது, இடைமுகத்தை உருவாக்கியது, மற்றும் அவர்களின் TON வாலெட்டிற்கான இணைப்பை கையாள்ந்தது. ஒம்னிஸ்டனின் பரிந்துரை அமைப்பு அந்த மதிப்பை வருமானமாக மாற்றும் механизмம். ஒரு வர்த்தகத்தின் மீது கட்டணத்தை மேலே பொருத்துவதற்கு பதிலாக, ஒருங்கிணைப்பாளர்கள் தங்களின் கமிஷனை நேரடியாக விலை-கண்டறிதல் செயல்முறையில் செருக ஒம்னிஸ்டன் அனுமதிக்கிறது; இதனால், தீர்ப்பாளர்கள் போட்டியிடத் தொடங்குவதற்கு முன்பே அந்த கட்டணம் மேற்கோளில் (quote) சேர்க்கப்பட்டிருக்கும்.
ஒம்னிஸ்டன் ஒருங்கிணைப்பாளர்களுக்கான பரிந்துரை கட்டணங்களை எப்படி கையாளுகிறது
ஒம்னிஸ்டன் ஒருங்கிணைப்பாளர்களுக்கான பரிந்துரை கட்டணங்களை எப்படி கையாளுகிறது
ஒரு வாலெட்டின் மூலம், ஒரு வர்த்தக டெர்மினல் மூலம் அல்லது ஒரு டெலிகிராம் பாட்டின் மூலம் நகரும் ஒவ்வொரு ஸ்வாப்பும், அந்த பயன்பாடு சேர்த்த மதிப்பின் ஒரு தருணத்தை பிரதிநிதித்துவப்படுத்துகிறது: அது பயனரை கண்டுபிடித்தது, இடைமுகத்தை உருவாக்கியது, மற்றும் அவர்களின் TON வாலெட்டிற்கான இணைப்பை கையாள்ந்தது. ஒம்னிஸ்டனின் பரிந்துரை அமைப்பு அந்த மதிப்பை வருமானமாக மாற்றும் механизмம். ஒரு வர்த்தகத்தின் மீது கட்டணத்தை மேலே பொருத்துவதற்கு பதிலாக, ஒருங்கிணைப்பாளர்கள் தங்களின் கமிஷனை நேரடியாக விலை-கண்டறிதல் செயல்முறையில் செருக ஒம்னிஸ்டன் அனுமதிக்கிறது; இதனால், தீர்ப்பாளர்கள் போட்டியிடத் தொடங்குவதற்கு முன்பே அந்த கட்டணம் மேற்கோளில் (quote) சேர்க்கப்பட்டிருக்கும்.
ஒரு வாலெட்டின் மூலம், ஒரு வர்த்தக டெர்மினல் மூலம் அல்லது ஒரு டெலிகிராம் பாட்டின் மூலம் நகரும் ஒவ்வொரு ஸ்வாப்பும், அந்த பயன்பாடு சேர்த்த மதிப்பின் ஒரு தருணத்தை பிரதிநிதித்துவப்படுத்துகிறது: அது பயனரை கண்டுபிடித்தது, இடைமுகத்தை உருவாக்கியது, மற்றும் அவர்களின் TON வாலெட்டிற்கான இணைப்பை கையாள்ந்தது. ஒம்னிஸ்டனின் பரிந்துரை அமைப்பு அந்த மதிப்பை வருமானமாக மாற்றும் механизмம். ஒரு வர்த்தகத்தின் மீது கட்டணத்தை மேலே பொருத்துவதற்கு பதிலாக, ஒருங்கிணைப்பாளர்கள் தங்களின் கமிஷனை நேரடியாக விலை-கண்டறிதல் செயல்முறையில் செருக ஒம்னிஸ்டன் அனுமதிக்கிறது; இதனால், தீர்ப்பாளர்கள் போட்டியிடத் தொடங்குவதற்கு முன்பே அந்த கட்டணம் மேற்கோளில் (quote) சேர்க்கப்பட்டிருக்கும்.
1
87
·
--
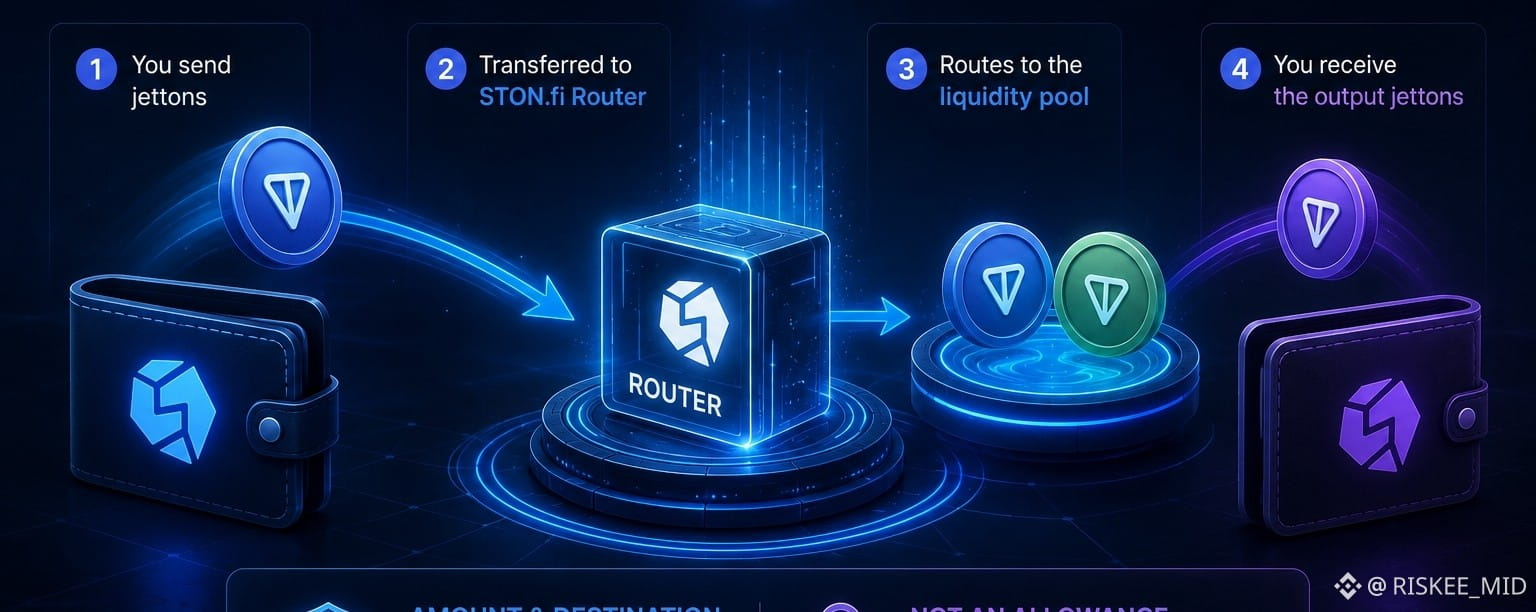
ලිපිය
தீங்கிழைக்கும் ஜெட்டான் கோரிக்கை STON.fi பயனரை பாதிக்குமா?தீங்கிழைக்கும் ஜெட்டான் கோரிக்கை STON.fi பயனரை பாதிக்குமா?
DeFi дахь பாதுகாப்பு என்பது நீங்கள் பயன்படுத்தும் புரோட்டோகால் மட்டுமே அல்ல. உங்கள் வாலெட் அங்கீகரிக்குமாறு கேட்கப்படுவது என்ன என்பதைத் துல்லியமாகப் புரிந்துகொள்வதும் இதேபோல முக்கியம்.
TON மீது உள்ள STON.fi பயனர்களுக்கு, அடிக்கடி கவனிக்கப்படாமல் போகும் ஒரு முக்கிய வேறுபாடு உள்ளது: சாதாரண TON ஜெட்டான்கள் ERC-20 பாணி approve மற்றும் allowance (அனுமதி) மாடலை பயன்படுத்துவதில்லை. TEP-74 இன் கீழ், ஒரு ஜெட்டான் பரிமாற்றம் என்பது பின்னர் இன்னொரு ஒப்பந்தம் செலவிடக்கூடிய மீள்பயன்பாட்டு allowance-ஐ வழங்குவதல்ல; அது குறிப்பிட்ட பரிமாற்றக் கோரிக்கையை அங்கீகரிக்கிறது.
அந்த வேறுபாடு, தீங்கிழைக்கும் ஸ்வாப் கோரிக்கைகள், போலி இடைமுகங்கள் மற்றும் வாலெட் அனுமதிகளை பயனர்கள் எப்படி எண்ண வேண்டும் என்பதை மாற்றுகிறது.
தீங்கிழைக்கும் ஜெட்டான் கோரிக்கை STON.fi பயனரை பாதிக்குமா?
தீங்கிழைக்கும் ஜெட்டான் கோரிக்கை STON.fi பயனரை பாதிக்குமா?
DeFi дахь பாதுகாப்பு என்பது நீங்கள் பயன்படுத்தும் புரோட்டோகால் மட்டுமே அல்ல. உங்கள் வாலெட் அங்கீகரிக்குமாறு கேட்கப்படுவது என்ன என்பதைத் துல்லியமாகப் புரிந்துகொள்வதும் இதேபோல முக்கியம்.
TON மீது உள்ள STON.fi பயனர்களுக்கு, அடிக்கடி கவனிக்கப்படாமல் போகும் ஒரு முக்கிய வேறுபாடு உள்ளது: சாதாரண TON ஜெட்டான்கள் ERC-20 பாணி approve மற்றும் allowance (அனுமதி) மாடலை பயன்படுத்துவதில்லை. TEP-74 இன் கீழ், ஒரு ஜெட்டான் பரிமாற்றம் என்பது பின்னர் இன்னொரு ஒப்பந்தம் செலவிடக்கூடிய மீள்பயன்பாட்டு allowance-ஐ வழங்குவதல்ல; அது குறிப்பிட்ட பரிமாற்றக் கோரிக்கையை அங்கீகரிக்கிறது.
அந்த வேறுபாடு, தீங்கிழைக்கும் ஸ்வாப் கோரிக்கைகள், போலி இடைமுகங்கள் மற்றும் வாலெட் அனுமதிகளை பயனர்கள் எப்படி எண்ண வேண்டும் என்பதை மாற்றுகிறது.
DeFi дахь பாதுகாப்பு என்பது நீங்கள் பயன்படுத்தும் புரோட்டோகால் மட்டுமே அல்ல. உங்கள் வாலெட் அங்கீகரிக்குமாறு கேட்கப்படுவது என்ன என்பதைத் துல்லியமாகப் புரிந்துகொள்வதும் இதேபோல முக்கியம்.
TON மீது உள்ள STON.fi பயனர்களுக்கு, அடிக்கடி கவனிக்கப்படாமல் போகும் ஒரு முக்கிய வேறுபாடு உள்ளது: சாதாரண TON ஜெட்டான்கள் ERC-20 பாணி approve மற்றும் allowance (அனுமதி) மாடலை பயன்படுத்துவதில்லை. TEP-74 இன் கீழ், ஒரு ஜெட்டான் பரிமாற்றம் என்பது பின்னர் இன்னொரு ஒப்பந்தம் செலவிடக்கூடிய மீள்பயன்பாட்டு allowance-ஐ வழங்குவதல்ல; அது குறிப்பிட்ட பரிமாற்றக் கோரிக்கையை அங்கீகரிக்கிறது.
அந்த வேறுபாடு, தீங்கிழைக்கும் ஸ்வாப் கோரிக்கைகள், போலி இடைமுகங்கள் மற்றும் வாலெட் அனுமதிகளை பயனர்கள் எப்படி எண்ண வேண்டும் என்பதை மாற்றுகிறது.
1
171
·
--
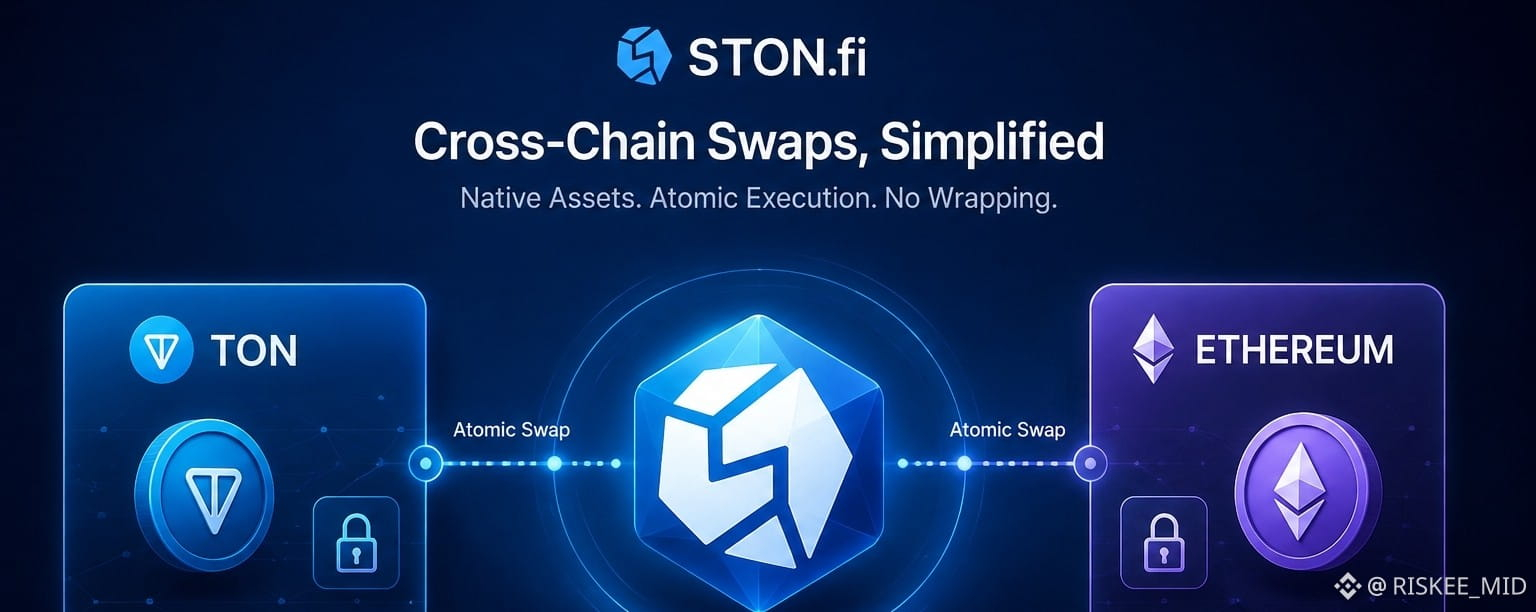
ලිපිය
Omniston විසින් TON සහ Ethereum සම්බන්ධ කරන්නේ කෙසේදTON සහ Ethereum හුවමාරුව
STON.fi හි ද්වි-ශෘඛානු-ජාල (cross-chain) හුවමාරු ප්රවේශය සරල අදහසක් මත පදනම් වේ: භාවිතා කරන්නන්ට තම වත්කම් මුලින්ම wrap කළ නියෝජන ලෙසට හැරවීමට අවශ්ය නොවී, ස්වාධීන බ්ලොක්චේන් අතරින් වටිනාකම හුවමාරු කිරීමට හැකිවිය යුතුය.
Omniston සමඟින්, STON.fi විසින් TON සහ Ethereum වැනි ජාල අතර හුවමාරු සම්බන්ධීකරණය සඳහා Request for Quote (RFQ) සහ Hashed Timelock Contracts (HTLCs) සමඟ resolver මත පදනම් වූ ක්රියාත්මක කිරීමේ (execution) ආකෘතියක් භාවිතා කරයි. සාම්ප්රදායික lock-and-mint bridge එකක් මත රඳා නොසිට, මෙම පද්ධතිය මඟින් ගමනාන්ත බ්ලොක්චේන් තුළ භාවිතා කරන්නා ඇත්තටම ඉල්ලූ වත්කම ලබාදීමට සැලසුම් කර ඇත.
Omniston විසින් TON සහ Ethereum සම්බන්ධ කරන්නේ කෙසේද
TON සහ Ethereum හුවමාරුව
STON.fi හි ද්වි-ශෘඛානු-ජාල (cross-chain) හුවමාරු ප්රවේශය සරල අදහසක් මත පදනම් වේ: භාවිතා කරන්නන්ට තම වත්කම් මුලින්ම wrap කළ නියෝජන ලෙසට හැරවීමට අවශ්ය නොවී, ස්වාධීන බ්ලොක්චේන් අතරින් වටිනාකම හුවමාරු කිරීමට හැකිවිය යුතුය.
Omniston සමඟින්, STON.fi විසින් TON සහ Ethereum වැනි ජාල අතර හුවමාරු සම්බන්ධීකරණය සඳහා Request for Quote (RFQ) සහ Hashed Timelock Contracts (HTLCs) සමඟ resolver මත පදනම් වූ ක්රියාත්මක කිරීමේ (execution) ආකෘතියක් භාවිතා කරයි. සාම්ප්රදායික lock-and-mint bridge එකක් මත රඳා නොසිට, මෙම පද්ධතිය මඟින් ගමනාන්ත බ්ලොක්චේන් තුළ භාවිතා කරන්නා ඇත්තටම ඉල්ලූ වත්කම ලබාදීමට සැලසුම් කර ඇත.
STON.fi හි ද්වි-ශෘඛානු-ජාල (cross-chain) හුවමාරු ප්රවේශය සරල අදහසක් මත පදනම් වේ: භාවිතා කරන්නන්ට තම වත්කම් මුලින්ම wrap කළ නියෝජන ලෙසට හැරවීමට අවශ්ය නොවී, ස්වාධීන බ්ලොක්චේන් අතරින් වටිනාකම හුවමාරු කිරීමට හැකිවිය යුතුය.
Omniston සමඟින්, STON.fi විසින් TON සහ Ethereum වැනි ජාල අතර හුවමාරු සම්බන්ධීකරණය සඳහා Request for Quote (RFQ) සහ Hashed Timelock Contracts (HTLCs) සමඟ resolver මත පදනම් වූ ක්රියාත්මක කිරීමේ (execution) ආකෘතියක් භාවිතා කරයි. සාම්ප්රදායික lock-and-mint bridge එකක් මත රඳා නොසිට, මෙම පද්ධතිය මඟින් ගමනාන්ත බ්ලොක්චේන් තුළ භාවිතා කරන්නා ඇත්තටම ඉල්ලූ වත්කම ලබාදීමට සැලසුම් කර ඇත.
1
101
·
--
ලිපිය
Omniston Atomic Swap ආකෘතියට සාපේක්ෂව Bridge Risk යනු කුමක්ද?Omniston Atomic Swap ආකෘතියට සාපේක්ෂව Bridge Risk යනු කුමක්ද?
විකේන්ද්රීය මූල්යය (DeFi) බහු ජාල හරහා ව්යාප්ත වන විට, පරිසර පද්ධති අතර වත්කම් මාරු කිරීම එහි වඩාත් වැදගත් — සහ වඩාත් අවදානම් සහිත — ක්රියාකාරකමක් බවට පත්ව ඇත. එක් පරිශීලකයෙකු එක් බ්ලොක්චේන් එකක වත්කමක් තබාගෙන සිටිය හැකි නමුත්, තවත් බ්ලොක්චේන් එකක ඊට සමාන වත්කමක් අවශ්ය විය හැක. සාම්ප්රදායිකව, පාලම් (bridges) විසින් ද්රවශීලීතාව එක්රැස් කිරීම (pooled liquidity), ඔතාගත් වත්කම් (wrapped assets), වලංගුකරුවන් (validators), relayers, හෝ වෙනත් සම්බන්ධීකරණ යාන්ත්රණ හරහා දාමයන් අතර සම්බන්ධතාවයක් නිර්මාණය කිරීමෙන් මෙම ගැටලුව විසඳා ඇත.
කෙසේ වෙතත්, මෙම පද්ධති අමතර විශ්වාසය සහ ආරක්ෂක උපකල්පන ඇතුළත් කරයි.
Omniston Atomic Swap ආකෘතියට සාපේක්ෂව Bridge Risk යනු කුමක්ද?
Omniston Atomic Swap ආකෘතියට සාපේක්ෂව Bridge Risk යනු කුමක්ද?
විකේන්ද්රීය මූල්යය (DeFi) බහු ජාල හරහා ව්යාප්ත වන විට, පරිසර පද්ධති අතර වත්කම් මාරු කිරීම එහි වඩාත් වැදගත් — සහ වඩාත් අවදානම් සහිත — ක්රියාකාරකමක් බවට පත්ව ඇත. එක් පරිශීලකයෙකු එක් බ්ලොක්චේන් එකක වත්කමක් තබාගෙන සිටිය හැකි නමුත්, තවත් බ්ලොක්චේන් එකක ඊට සමාන වත්කමක් අවශ්ය විය හැක. සාම්ප්රදායිකව, පාලම් (bridges) විසින් ද්රවශීලීතාව එක්රැස් කිරීම (pooled liquidity), ඔතාගත් වත්කම් (wrapped assets), වලංගුකරුවන් (validators), relayers, හෝ වෙනත් සම්බන්ධීකරණ යාන්ත්රණ හරහා දාමයන් අතර සම්බන්ධතාවයක් නිර්මාණය කිරීමෙන් මෙම ගැටලුව විසඳා ඇත.
කෙසේ වෙතත්, මෙම පද්ධති අමතර විශ්වාසය සහ ආරක්ෂක උපකල්පන ඇතුළත් කරයි.
විකේන්ද්රීය මූල්යය (DeFi) බහු ජාල හරහා ව්යාප්ත වන විට, පරිසර පද්ධති අතර වත්කම් මාරු කිරීම එහි වඩාත් වැදගත් — සහ වඩාත් අවදානම් සහිත — ක්රියාකාරකමක් බවට පත්ව ඇත. එක් පරිශීලකයෙකු එක් බ්ලොක්චේන් එකක වත්කමක් තබාගෙන සිටිය හැකි නමුත්, තවත් බ්ලොක්චේන් එකක ඊට සමාන වත්කමක් අවශ්ය විය හැක. සාම්ප්රදායිකව, පාලම් (bridges) විසින් ද්රවශීලීතාව එක්රැස් කිරීම (pooled liquidity), ඔතාගත් වත්කම් (wrapped assets), වලංගුකරුවන් (validators), relayers, හෝ වෙනත් සම්බන්ධීකරණ යාන්ත්රණ හරහා දාමයන් අතර සම්බන්ධතාවයක් නිර්මාණය කිරීමෙන් මෙම ගැටලුව විසඳා ඇත.
කෙසේ වෙතත්, මෙම පද්ධති අමතර විශ්වාසය සහ ආරක්ෂක උපකල්පන ඇතුළත් කරයි.
1
83
·
--
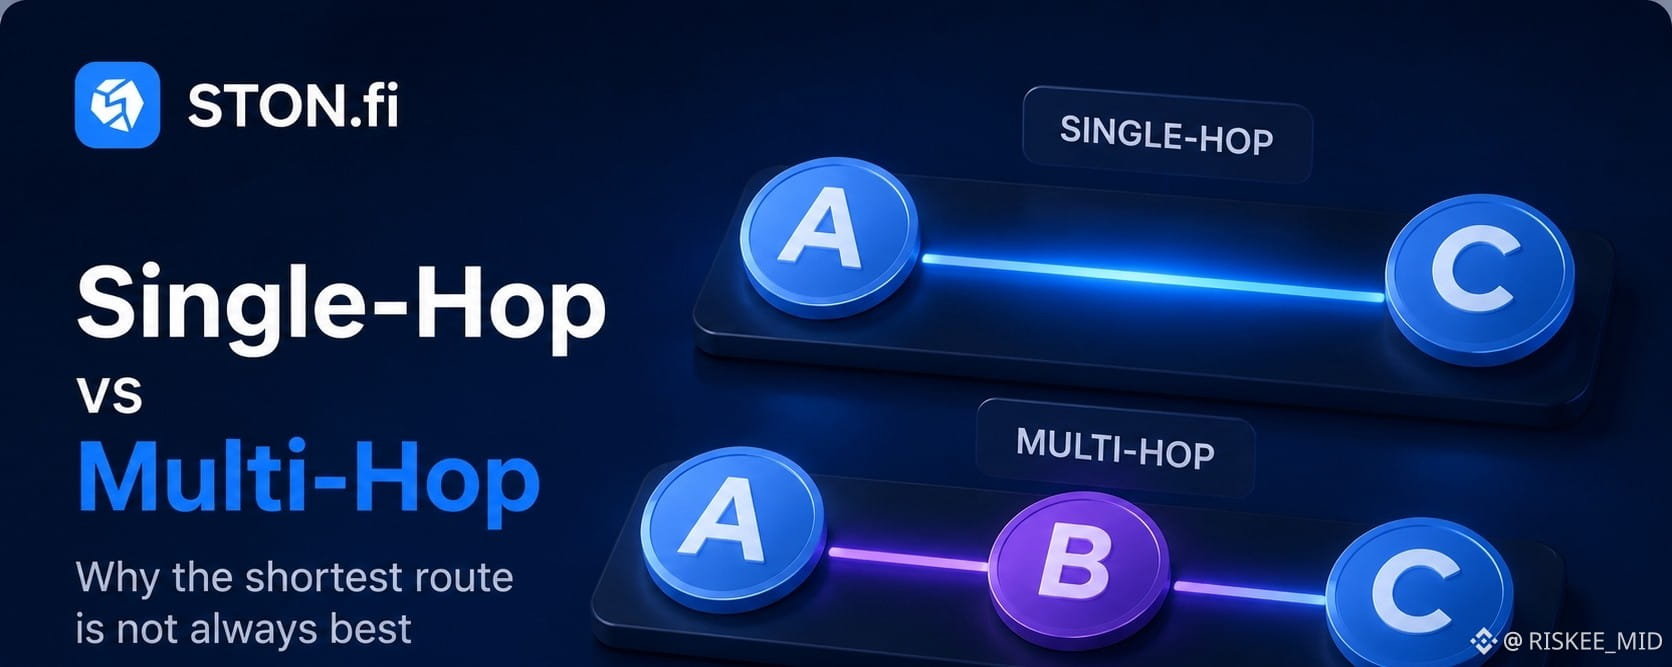
ලිපිය
STON.fi හි Single-Hop vs Multi-Hop හුවමාරු: කෙටිම මාර්ගය සෑමවිටම හොඳම නොවන හේතුවSTON.fi හි Single Hop හා Multi Hop හුවමාරු: කෙටිම මාර්ගය සෑමවිටම හොඳම නොවන හේතුව
විකේන්ද්රිත වෙළඳාමේදී, කෙටිම මාර්ගය ද වඩාත් කාර්යක්ෂම විය යුතු යැයි සිතීම පහසුය. Token A සිට Token C වෙත සෘජු හුවමාරුව, පළමුව Token B හරහා යාමට වඩා සරල යැයි පෙනේ. අඩු පරිවර්තනවලට අඩු ගාස්තු, අඩු සංකීර්ණතාව සහ වඩා හොඳ ක්රියාත්මක කිරීම ලැබෙන බවක් ලෙස අදහස් විය හැක.
නමුත් DeFi තුළ සරලත්වයම අනිවාර්යයෙන්ම කාර්යක්ෂමතාව අදහස් නොකරයි.
STON.fi හිදී, සමහර විට single-hop මාර්ගය හොඳම විකල්පය විය හැකි අතර, පොකූල් හරහා ද්රවශීලතාව අසම වශයෙන් බෙදී තිබෙන විට multi-hop මාර්ගයක් අවසාන ප්රතිඵලය වඩා හොඳ කර දිය හැක. එබැවින් වඩා වැදගත් ප්රශ්නය “මෙම හුවමාරුව කොපමණ hops භාවිතා කරනවාද?” නොව, “අදාළ සියලු වියදම් වලින් පසුව මම ඇත්තටම ලබාගන්නේ ගමනාන්ත ටෝකනය කොපමණද?” යන්නයි.
STON.fi හි Single-Hop vs Multi-Hop හුවමාරු: කෙටිම මාර්ගය සෑමවිටම හොඳම නොවන හේතුව
STON.fi හි Single Hop හා Multi Hop හුවමාරු: කෙටිම මාර්ගය සෑමවිටම හොඳම නොවන හේතුව
විකේන්ද්රිත වෙළඳාමේදී, කෙටිම මාර්ගය ද වඩාත් කාර්යක්ෂම විය යුතු යැයි සිතීම පහසුය. Token A සිට Token C වෙත සෘජු හුවමාරුව, පළමුව Token B හරහා යාමට වඩා සරල යැයි පෙනේ. අඩු පරිවර්තනවලට අඩු ගාස්තු, අඩු සංකීර්ණතාව සහ වඩා හොඳ ක්රියාත්මක කිරීම ලැබෙන බවක් ලෙස අදහස් විය හැක.
නමුත් DeFi තුළ සරලත්වයම අනිවාර්යයෙන්ම කාර්යක්ෂමතාව අදහස් නොකරයි.
STON.fi හිදී, සමහර විට single-hop මාර්ගය හොඳම විකල්පය විය හැකි අතර, පොකූල් හරහා ද්රවශීලතාව අසම වශයෙන් බෙදී තිබෙන විට multi-hop මාර්ගයක් අවසාන ප්රතිඵලය වඩා හොඳ කර දිය හැක. එබැවින් වඩා වැදගත් ප්රශ්නය “මෙම හුවමාරුව කොපමණ hops භාවිතා කරනවාද?” නොව, “අදාළ සියලු වියදම් වලින් පසුව මම ඇත්තටම ලබාගන්නේ ගමනාන්ත ටෝකනය කොපමණද?” යන්නයි.
විකේන්ද්රිත වෙළඳාමේදී, කෙටිම මාර්ගය ද වඩාත් කාර්යක්ෂම විය යුතු යැයි සිතීම පහසුය. Token A සිට Token C වෙත සෘජු හුවමාරුව, පළමුව Token B හරහා යාමට වඩා සරල යැයි පෙනේ. අඩු පරිවර්තනවලට අඩු ගාස්තු, අඩු සංකීර්ණතාව සහ වඩා හොඳ ක්රියාත්මක කිරීම ලැබෙන බවක් ලෙස අදහස් විය හැක.
නමුත් DeFi තුළ සරලත්වයම අනිවාර්යයෙන්ම කාර්යක්ෂමතාව අදහස් නොකරයි.
STON.fi හිදී, සමහර විට single-hop මාර්ගය හොඳම විකල්පය විය හැකි අතර, පොකූල් හරහා ද්රවශීලතාව අසම වශයෙන් බෙදී තිබෙන විට multi-hop මාර්ගයක් අවසාන ප්රතිඵලය වඩා හොඳ කර දිය හැක. එබැවින් වඩා වැදගත් ප්රශ්නය “මෙම හුවමාරුව කොපමණ hops භාවිතා කරනවාද?” නොව, “අදාළ සියලු වියදම් වලින් පසුව මම ඇත්තටම ලබාගන්නේ ගමනාන්ත ටෝකනය කොපමණද?” යන්නයි.
1
84
·
--
ඔරකල් අවදානම යනු කුමක්ද සහ එය STON.fi වත්කම් සම්බන්ධයෙන් කවදා වැදගත් වන්නේද?ඔරකල් අවදානම යනු කුමක්ද සහ එය STON.fi වත්කම් සම්බන්ධයෙන් කවදා වැදගත් වන්නේද?
DeFi එක් බලවත් අදහසක් වටා ගොඩනැගී ඇත: සාම්ප්රදායික මැදිහත්කරුවෙකු මත රඳා නොසිටිමින් ස්මාර්ට් කොන්ත්රාත් මගින් මූල්ය නීති ක්රියාත්මක කළ හැකිය. නමුත් ස්මාර්ට් කොන්ත්රාත් තම බ්ලොක්චේන් එකෙන් පිටත සිදුවන්නේ කුමක්ද ස්වයංක්රීයව දැනගත නොහැක. යම් යෙදුමකට බාහිර තොරතුරු අවශ්ය වන විට—උදාහරණයක් ලෙස වත්කම් මිලක්, රක්ෂිත මට්ටමක්, හෝ බ්ලොක්චේන් එකෙන් පිටත වත්කමක තත්ත්වය—එම තොරතුරු ඔන්-චේන් වෙත ගෙන ඒමට යම් යාන්ත්රණයක් අවශ්ය වේ.
එතැනදී තමයි ඔරකල් අවදානම කතාබහට පැමිණෙන්නේ.
ඔරකල් අවදානම යනු කුමක්ද සහ එය STON.fi වත්කම් සම්බන්ධයෙන් කවදා වැදගත් වන්නේද?
ඔරකල් අවදානම යනු කුමක්ද සහ එය STON.fi වත්කම් සම්බන්ධයෙන් කවදා වැදගත් වන්නේද?
DeFi එක් බලවත් අදහසක් වටා ගොඩනැගී ඇත: සාම්ප්රදායික මැදිහත්කරුවෙකු මත රඳා නොසිටිමින් ස්මාර්ට් කොන්ත්රාත් මගින් මූල්ය නීති ක්රියාත්මක කළ හැකිය. නමුත් ස්මාර්ට් කොන්ත්රාත් තම බ්ලොක්චේන් එකෙන් පිටත සිදුවන්නේ කුමක්ද ස්වයංක්රීයව දැනගත නොහැක. යම් යෙදුමකට බාහිර තොරතුරු අවශ්ය වන විට—උදාහරණයක් ලෙස වත්කම් මිලක්, රක්ෂිත මට්ටමක්, හෝ බ්ලොක්චේන් එකෙන් පිටත වත්කමක තත්ත්වය—එම තොරතුරු ඔන්-චේන් වෙත ගෙන ඒමට යම් යාන්ත්රණයක් අවශ්ය වේ.
එතැනදී තමයි ඔරකල් අවදානම කතාබහට පැමිණෙන්නේ.
DeFi එක් බලවත් අදහසක් වටා ගොඩනැගී ඇත: සාම්ප්රදායික මැදිහත්කරුවෙකු මත රඳා නොසිටිමින් ස්මාර්ට් කොන්ත්රාත් මගින් මූල්ය නීති ක්රියාත්මක කළ හැකිය. නමුත් ස්මාර්ට් කොන්ත්රාත් තම බ්ලොක්චේන් එකෙන් පිටත සිදුවන්නේ කුමක්ද ස්වයංක්රීයව දැනගත නොහැක. යම් යෙදුමකට බාහිර තොරතුරු අවශ්ය වන විට—උදාහරණයක් ලෙස වත්කම් මිලක්, රක්ෂිත මට්ටමක්, හෝ බ්ලොක්චේන් එකෙන් පිටත වත්කමක තත්ත්වය—එම තොරතුරු ඔන්-චේන් වෙත ගෙන ඒමට යම් යාන්ත්රණයක් අවශ්ය වේ.
එතැනදී තමයි ඔරකල් අවදානම කතාබහට පැමිණෙන්නේ.
1
103
·
--
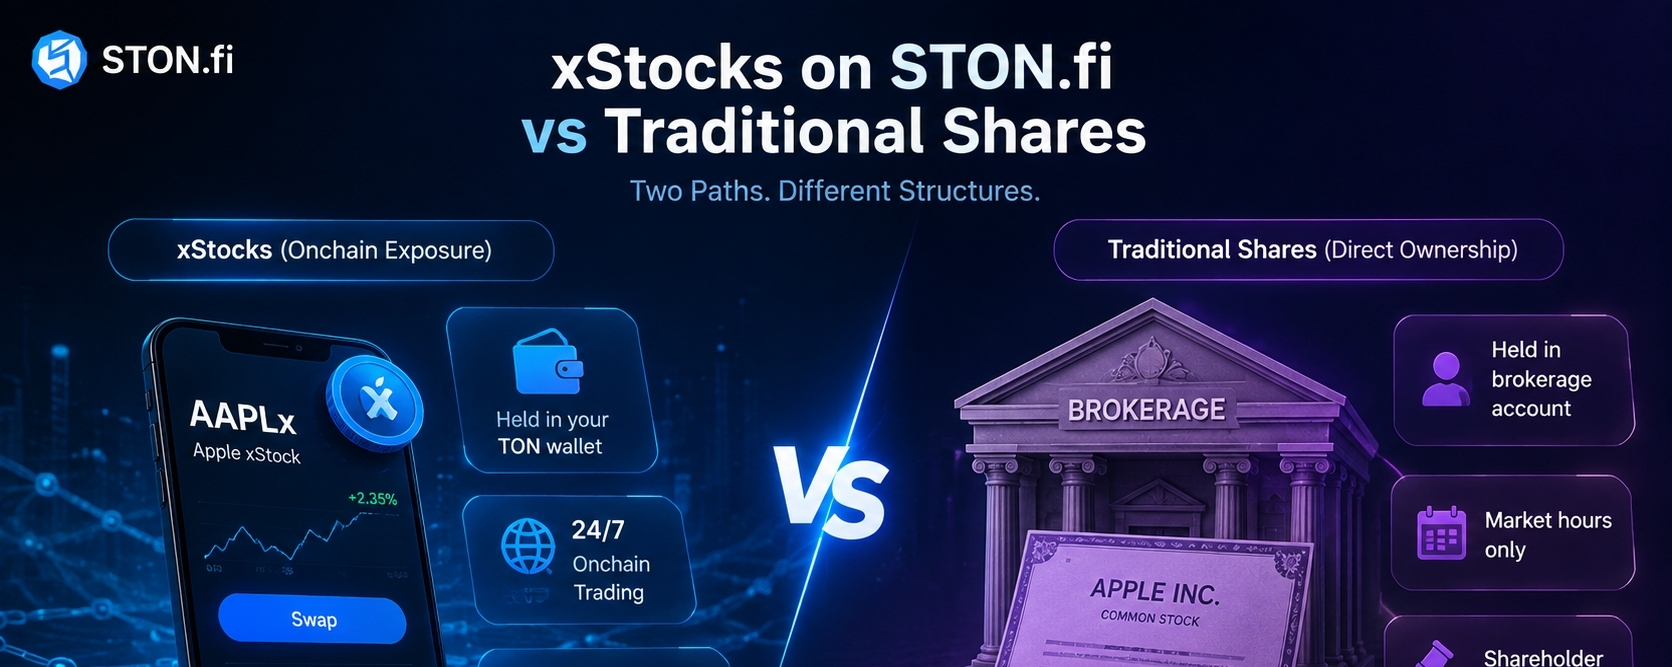
ලිපිය
STONfi හි xStocks සහ සාම්ප්රදායික කොටස් අතර ඇති වෙනස කුමක්ද?STONfi හි xStocks සහ සාම්ප්රදායික කොටස් අතර ඇති වෙනස කුමක්ද?
මුලින්ම බැලූ විට, AAPLx හෝ TSLAx වැනි xStock එකක් Apple හෝ Tesla කොටසක් හිමිකර ගැනීමට සමාන ලෙස පෙනෙන්නට පුළුවන්. මිල අදාළ යටත් වත්කම අනුගමනය කිරීමට සකස් කර ඇති අතර, ටෝකනය බ්ලොක්චේන් වොලට් එකක තබා ගත හැකි අතර, ඩිවිඩන්ඩ් වැනි සමාගම් ක්රියාකාරකම් (corporate actions) ද onchain ලෙස පිළිබිඹු කළ හැක.
නමුත් සමානකම් එතැනින් අවසන් වේ.
xStock එක සාමාන්ය සමාගම් කොටසක් හා සමාන නීතිමය උපකරණයක් නොවේ. එය යටිගැටුමක් (equity) හෝ ETF එකක් නියෝජනය කරන ටෝකනීකරණ ලද ප්රතිනිර්මාණයකි; බ්ලොක්චේන් යටිතල පහසුකම් භාවිතා කරමින් හුවමාරු, භාරකාරත්වය (custody) සහ වෙළඳාම සඳහා සක්රීය බ්ලොක්චේන් මත ආර්ථික නිරාවරණයක් ලබා දීමට එය නිර්මාණය කර ඇත. ඒ අතර xStocks පවසන්නේ, එය නියාමනය කළ භාරකාරත්වයක තබා ඇති අදාළ යටත් ආරක්ෂකාව (underlying security) සමඟ 1:1 අනුබද්ධව ඇති බවයි; එසේම ටෝකනයම සහය දක්වන බ්ලොක්චේන්වල තබාගෙන හුවමාරු කළ හැක.
STONfi හි xStocks සහ සාම්ප්රදායික කොටස් අතර ඇති වෙනස කුමක්ද?
STONfi හි xStocks සහ සාම්ප්රදායික කොටස් අතර ඇති වෙනස කුමක්ද?
මුලින්ම බැලූ විට, AAPLx හෝ TSLAx වැනි xStock එකක් Apple හෝ Tesla කොටසක් හිමිකර ගැනීමට සමාන ලෙස පෙනෙන්නට පුළුවන්. මිල අදාළ යටත් වත්කම අනුගමනය කිරීමට සකස් කර ඇති අතර, ටෝකනය බ්ලොක්චේන් වොලට් එකක තබා ගත හැකි අතර, ඩිවිඩන්ඩ් වැනි සමාගම් ක්රියාකාරකම් (corporate actions) ද onchain ලෙස පිළිබිඹු කළ හැක.
නමුත් සමානකම් එතැනින් අවසන් වේ.
xStock එක සාමාන්ය සමාගම් කොටසක් හා සමාන නීතිමය උපකරණයක් නොවේ. එය යටිගැටුමක් (equity) හෝ ETF එකක් නියෝජනය කරන ටෝකනීකරණ ලද ප්රතිනිර්මාණයකි; බ්ලොක්චේන් යටිතල පහසුකම් භාවිතා කරමින් හුවමාරු, භාරකාරත්වය (custody) සහ වෙළඳාම සඳහා සක්රීය බ්ලොක්චේන් මත ආර්ථික නිරාවරණයක් ලබා දීමට එය නිර්මාණය කර ඇත. ඒ අතර xStocks පවසන්නේ, එය නියාමනය කළ භාරකාරත්වයක තබා ඇති අදාළ යටත් ආරක්ෂකාව (underlying security) සමඟ 1:1 අනුබද්ධව ඇති බවයි; එසේම ටෝකනයම සහය දක්වන බ්ලොක්චේන්වල තබාගෙන හුවමාරු කළ හැක.
මුලින්ම බැලූ විට, AAPLx හෝ TSLAx වැනි xStock එකක් Apple හෝ Tesla කොටසක් හිමිකර ගැනීමට සමාන ලෙස පෙනෙන්නට පුළුවන්. මිල අදාළ යටත් වත්කම අනුගමනය කිරීමට සකස් කර ඇති අතර, ටෝකනය බ්ලොක්චේන් වොලට් එකක තබා ගත හැකි අතර, ඩිවිඩන්ඩ් වැනි සමාගම් ක්රියාකාරකම් (corporate actions) ද onchain ලෙස පිළිබිඹු කළ හැක.
නමුත් සමානකම් එතැනින් අවසන් වේ.
xStock එක සාමාන්ය සමාගම් කොටසක් හා සමාන නීතිමය උපකරණයක් නොවේ. එය යටිගැටුමක් (equity) හෝ ETF එකක් නියෝජනය කරන ටෝකනීකරණ ලද ප්රතිනිර්මාණයකි; බ්ලොක්චේන් යටිතල පහසුකම් භාවිතා කරමින් හුවමාරු, භාරකාරත්වය (custody) සහ වෙළඳාම සඳහා සක්රීය බ්ලොක්චේන් මත ආර්ථික නිරාවරණයක් ලබා දීමට එය නිර්මාණය කර ඇත. ඒ අතර xStocks පවසන්නේ, එය නියාමනය කළ භාරකාරත්වයක තබා ඇති අදාළ යටත් ආරක්ෂකාව (underlying security) සමඟ 1:1 අනුබද්ධව ඇති බවයි; එසේම ටෝකනයම සහය දක්වන බ්ලොක්චේන්වල තබාගෙන හුවමාරු කළ හැක.
1
90
·
--
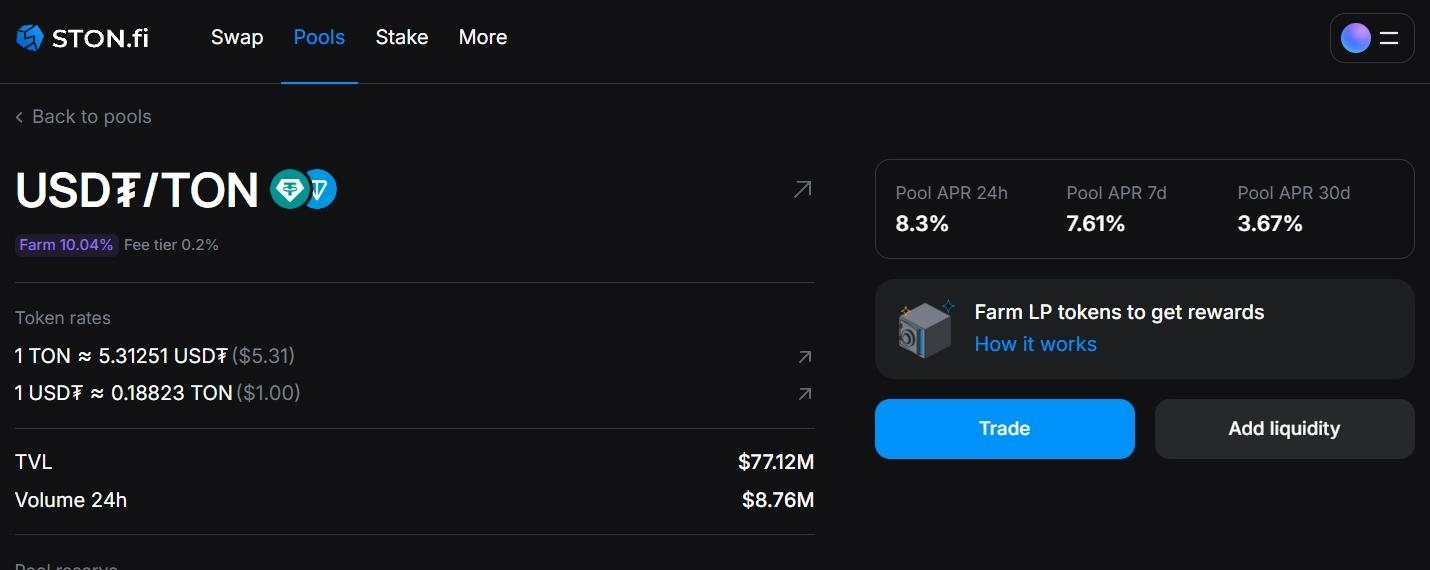
ලිපිය
STONfi vs Base DEXs: Native TON Liquidity and Omniston ExecutionSTONfi vs Base DEXs: Native TON Liquidity and Omniston Execution
децентрализড் 트레이ডинг은 интерфեյс पर क़िरक़ से देखते रहने से ध्यान हटाकर daha بنیادی सवाल पूछना शुरू करते ही समझ میں بہت آسان ہوجاتا है:
لیکوئڈٹی کہاں رہتی ہے، اور تجارت واقعی طور پر کیسے انجام پاتی ہے؟
Base पर चलने वाले DEXs, जैसे Uniswap और Aerodrome, और TON पर STONfi की तुलना करते समय यह فرق महत्वपूर्ण होता है।
پہلی نظر میں، یہ موازنہ شاید صرف TON versus Base جیسا نظر آئے۔ تاہم، اصل میں زیادہ مفید موازنہ ایک native لیکویڈیٹی ماحول اور ایک execution architecture کے درمیان ہے جو مختلف نیٹ ورکس میں موجود لیکویڈیٹی کو باہم ہم آہنگ کر سکے۔
STONfi vs Base DEXs: Native TON Liquidity and Omniston Execution
STONfi vs Base DEXs: Native TON Liquidity and Omniston Execution
децентрализড் 트레이ডинг은 интерфեյс पर क़िरक़ से देखते रहने से ध्यान हटाकर daha بنیادی सवाल पूछना शुरू करते ही समझ میں بہت آسان ہوجاتا है:
لیکوئڈٹی کہاں رہتی ہے، اور تجارت واقعی طور پر کیسے انجام پاتی ہے؟
Base पर चलने वाले DEXs, जैसे Uniswap और Aerodrome, और TON पर STONfi की तुलना करते समय यह فرق महत्वपूर्ण होता है।
پہلی نظر میں، یہ موازنہ شاید صرف TON versus Base جیسا نظر آئے۔ تاہم، اصل میں زیادہ مفید موازنہ ایک native لیکویڈیٹی ماحول اور ایک execution architecture کے درمیان ہے جو مختلف نیٹ ورکس میں موجود لیکویڈیٹی کو باہم ہم آہنگ کر سکے۔
децентрализড் 트레이ডинг은 интерфեյс पर क़िरक़ से देखते रहने से ध्यान हटाकर daha بنیادی सवाल पूछना शुरू करते ही समझ میں بہت آسان ہوجاتا है:
لیکوئڈٹی کہاں رہتی ہے، اور تجارت واقعی طور پر کیسے انجام پاتی ہے؟
Base पर चलने वाले DEXs, जैसे Uniswap और Aerodrome, और TON पर STONfi की तुलना करते समय यह فرق महत्वपूर्ण होता है।
پہلی نظر میں، یہ موازنہ شاید صرف TON versus Base جیسا نظر آئے۔ تاہم، اصل میں زیادہ مفید موازنہ ایک native لیکویڈیٹی ماحول اور ایک execution architecture کے درمیان ہے جو مختلف نیٹ ورکس میں موجود لیکویڈیٹی کو باہم ہم آہنگ کر سکے۔
1
84
·
--
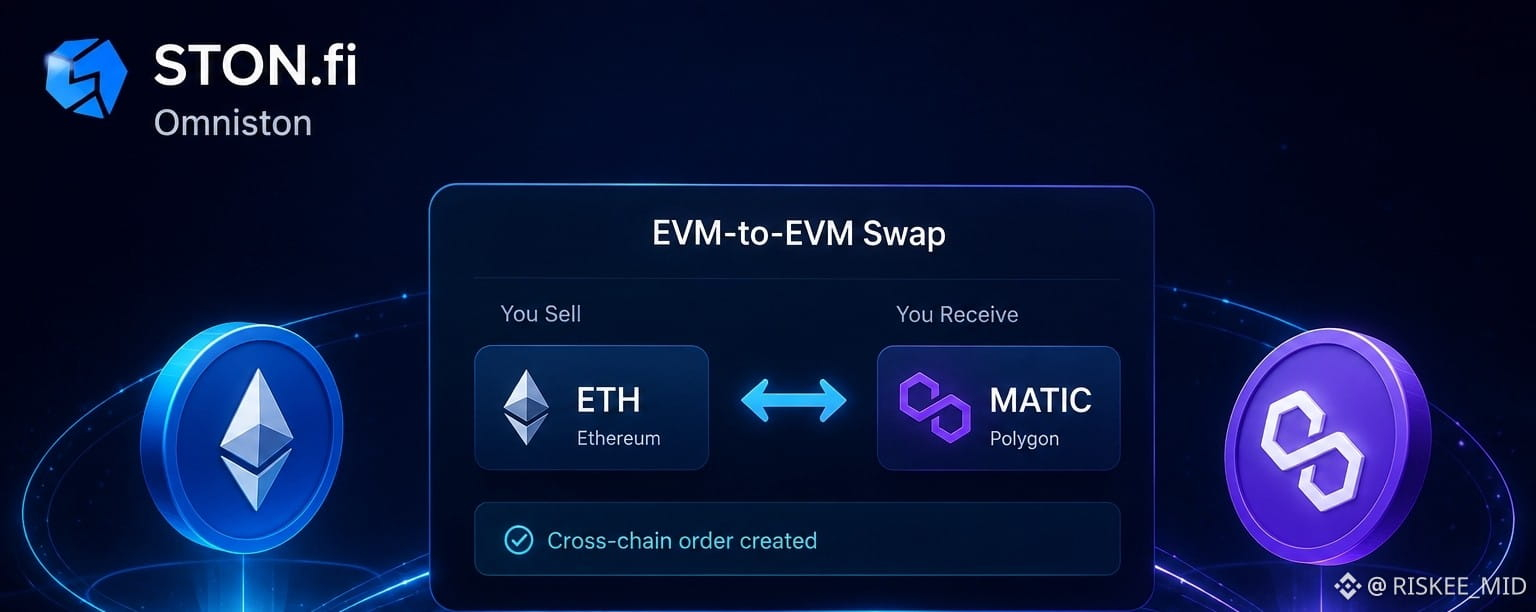
ලිපිය
STON.fi මත EVM සිට EVM දක්වා හුවමාරු Omniston ක්රියාත්මක කරන ආකාරයSTON.fi මත EVM සිට EVM දක්වා හුවමාරු Omniston ක්රියාත්මක කරන ආකාරය
රට හරහා (cross-chain) වෙළඳාම බොහෝවිට, එක බ්ලොක්චේන් එකකින් තවත් බ්ලොක්චේන් එකකට වත්කමක් ගෙන යාම, විමධ්යගත හුවමාරුවක (decentralized exchange) ටෝකන දෙකක් හුවමාරු කිරීම තරම් සරල යැයි පෙන්වයි.
සැබෑවටම, යටින් පවතින ක්රියාවලිය බොහෝවිට ඊට වඩා සංකීර්ණ විය හැක.
සාමාන්ය DEX හුවමාරුවක් සාමාන්යයෙන් එකම බ්ලොක්චේන් තුළ සිදුවේ. ද්රවශීලතාවය එම ජාලය තුළ රඳා පවතින අතර, ගනුදෙනු එකම ලෙජරයේ ඇති කොන්ත්රාත් මගින් ක්රියාත්මක කරනු ලබන අතර, සම්පූර්ණ වෙළඳාම එක් දාමයක ක්රියාත්මක කිරීමේ පරිසරය තුළින්ම අනුගමනය කරයි.
STON.fi මත EVM සිට EVM දක්වා හුවමාරු Omniston ක්රියාත්මක කරන ආකාරය
STON.fi මත EVM සිට EVM දක්වා හුවමාරු Omniston ක්රියාත්මක කරන ආකාරය
රට හරහා (cross-chain) වෙළඳාම බොහෝවිට, එක බ්ලොක්චේන් එකකින් තවත් බ්ලොක්චේන් එකකට වත්කමක් ගෙන යාම, විමධ්යගත හුවමාරුවක (decentralized exchange) ටෝකන දෙකක් හුවමාරු කිරීම තරම් සරල යැයි පෙන්වයි.
සැබෑවටම, යටින් පවතින ක්රියාවලිය බොහෝවිට ඊට වඩා සංකීර්ණ විය හැක.
සාමාන්ය DEX හුවමාරුවක් සාමාන්යයෙන් එකම බ්ලොක්චේන් තුළ සිදුවේ. ද්රවශීලතාවය එම ජාලය තුළ රඳා පවතින අතර, ගනුදෙනු එකම ලෙජරයේ ඇති කොන්ත්රාත් මගින් ක්රියාත්මක කරනු ලබන අතර, සම්පූර්ණ වෙළඳාම එක් දාමයක ක්රියාත්මක කිරීමේ පරිසරය තුළින්ම අනුගමනය කරයි.
රට හරහා (cross-chain) වෙළඳාම බොහෝවිට, එක බ්ලොක්චේන් එකකින් තවත් බ්ලොක්චේන් එකකට වත්කමක් ගෙන යාම, විමධ්යගත හුවමාරුවක (decentralized exchange) ටෝකන දෙකක් හුවමාරු කිරීම තරම් සරල යැයි පෙන්වයි.
සැබෑවටම, යටින් පවතින ක්රියාවලිය බොහෝවිට ඊට වඩා සංකීර්ණ විය හැක.
සාමාන්ය DEX හුවමාරුවක් සාමාන්යයෙන් එකම බ්ලොක්චේන් තුළ සිදුවේ. ද්රවශීලතාවය එම ජාලය තුළ රඳා පවතින අතර, ගනුදෙනු එකම ලෙජරයේ ඇති කොන්ත්රාත් මගින් ක්රියාත්මක කරනු ලබන අතර, සම්පූර්ණ වෙළඳාම එක් දාමයක ක්රියාත්මක කිරීමේ පරිසරය තුළින්ම අනුගමනය කරයි.
1
111
·
--
ලිපිය
Ինչպես STONfi-ն է մշակում Bounceable և Non-Bounceable հասցեները TON-ումԻնչպես STONfi-ն է մշակում Bounceable և Non-Bounceable հասցեները TON-ում
TON адресները կարող են տարբեր տեսք ունենալ՝ միևնույն ճշգրիտ on-chain հաշիվը ցույց տալու դեպքում։
Տիպիկ օրինակ է այն տարբերությունը, երբ հասցեն սկսվում է EQ... և մեկը՝ UQ...-ով։ Առաջինը ծանոթ է bounceable (կտրվող) user-friendly ներկայացմամբ, իսկ երկրորդը՝ non-bounceable (չկտրվող) ներկայացմամբ։ Չնայած տարբեր նախածանցներին՝ երկուսն էլ կարող են ցույց տալ նույն հիմքում ընկած TON հաշիվը, քանի որ հաշիվը որոշվում է իր workchain-ով և 256-bit account identifier-ով։ Bounceable կամ non-bounceable տարբերությունը կոդավորված է որպես մետատվյալ user-friendly ներկայացման մեջ՝ այլ հաշիվ ստեղծելու փոխարեն։
Ինչպես STONfi-ն է մշակում Bounceable և Non-Bounceable հասցեները TON-ում
Ինչպես STONfi-ն է մշակում Bounceable և Non-Bounceable հասցեները TON-ում
TON адресները կարող են տարբեր տեսք ունենալ՝ միևնույն ճշգրիտ on-chain հաշիվը ցույց տալու դեպքում։
Տիպիկ օրինակ է այն տարբերությունը, երբ հասցեն սկսվում է EQ... և մեկը՝ UQ...-ով։ Առաջինը ծանոթ է bounceable (կտրվող) user-friendly ներկայացմամբ, իսկ երկրորդը՝ non-bounceable (չկտրվող) ներկայացմամբ։ Չնայած տարբեր նախածանցներին՝ երկուսն էլ կարող են ցույց տալ նույն հիմքում ընկած TON հաշիվը, քանի որ հաշիվը որոշվում է իր workchain-ով և 256-bit account identifier-ով։ Bounceable կամ non-bounceable տարբերությունը կոդավորված է որպես մետատվյալ user-friendly ներկայացման մեջ՝ այլ հաշիվ ստեղծելու փոխարեն։
TON адресները կարող են տարբեր տեսք ունենալ՝ միևնույն ճշգրիտ on-chain հաշիվը ցույց տալու դեպքում։
Տիպիկ օրինակ է այն տարբերությունը, երբ հասցեն սկսվում է EQ... և մեկը՝ UQ...-ով։ Առաջինը ծանոթ է bounceable (կտրվող) user-friendly ներկայացմամբ, իսկ երկրորդը՝ non-bounceable (չկտրվող) ներկայացմամբ։ Չնայած տարբեր նախածանցներին՝ երկուսն էլ կարող են ցույց տալ նույն հիմքում ընկած TON հաշիվը, քանի որ հաշիվը որոշվում է իր workchain-ով և 256-bit account identifier-ով։ Bounceable կամ non-bounceable տարբերությունը կոդավորված է որպես մետատվյալ user-friendly ներկայացման մեջ՝ այլ հաշիվ ստեղծելու փոխարեն։
1
1
516
·
--
ලිපිය
xStocks සමඟ STON.fi හි ටෝකනීකරණය කරන ලද කොටස් හුවමාරු කරන්නේ කෙසේදxStocks සමඟ STON.fi හි ටෝකනීකරණය කරන ලද කොටස් (Tokenized Stocks) හුවමාරු කරන්නේ කෙසේද
ටိုකනීකරණය කරන ලද කොටස් (tokenized stocks) සම්ප්රදායික මූල්යය හා බ්ලොක්චේන් මත පදනම් වූ වෙළඳාම අතර ඇති වඩාත් රසවත් සම්බන්ධයක් බවට පත්වෙමින් තිබේ. STON.fi හිදී, මෙම අත්දැකීම xStocks හරහා ලබාගත හැක — තෝරාගත් කොටස් සහ ETF-ලට ආර්ථික නිරාවරණයක් (economic exposure) ලබාදෙන, ටෝකනීකරණය කරන ලද ආකාරයෙන් පරිශීලකයන්ට ලබාදෙන බ්ලොක්චේන් මත පදනම් වූ උපකරණ.
සාම්ප්රදායික බ්රෝකර් වර්ක්ෆ්ලෝවක් හරහා නොගොස්, සුදුසුකම් ලැබූ පරිශීලකයන්ට TON wallet එකක් සම්බන්ධ කළ හැක, AAPLx වැනි xStock එකක් තෝරාගෙන, ඔවුන්ට වියදම් කිරීමට අවශ්ය වත්කම තෝරාගෙන, මිල (quote) නැවත බලලා, ගනුදෙනුව තහවුරු කළ හැක. ප්රතිඵලය වන්නේ, DeFi භාවිතා කරන ඕනෑම පරිශීලකයකුට හුරුපුරුදු ලෙස දැනෙන වෙළඳ අත්දැකීමක් වන අතර, ටෝකනීකරණය කරන ලද මූල්ය නිෂ්පාදනයක ව්යුහය සහ අවදානම් තවමත් පිළිබිඹු කරයි.
xStocks සමඟ STON.fi හි ටෝකනීකරණය කරන ලද කොටස් හුවමාරු කරන්නේ කෙසේද
xStocks සමඟ STON.fi හි ටෝකනීකරණය කරන ලද කොටස් (Tokenized Stocks) හුවමාරු කරන්නේ කෙසේද
ටိုකනීකරණය කරන ලද කොටස් (tokenized stocks) සම්ප්රදායික මූල්යය හා බ්ලොක්චේන් මත පදනම් වූ වෙළඳාම අතර ඇති වඩාත් රසවත් සම්බන්ධයක් බවට පත්වෙමින් තිබේ. STON.fi හිදී, මෙම අත්දැකීම xStocks හරහා ලබාගත හැක — තෝරාගත් කොටස් සහ ETF-ලට ආර්ථික නිරාවරණයක් (economic exposure) ලබාදෙන, ටෝකනීකරණය කරන ලද ආකාරයෙන් පරිශීලකයන්ට ලබාදෙන බ්ලොක්චේන් මත පදනම් වූ උපකරණ.
සාම්ප්රදායික බ්රෝකර් වර්ක්ෆ්ලෝවක් හරහා නොගොස්, සුදුසුකම් ලැබූ පරිශීලකයන්ට TON wallet එකක් සම්බන්ධ කළ හැක, AAPLx වැනි xStock එකක් තෝරාගෙන, ඔවුන්ට වියදම් කිරීමට අවශ්ය වත්කම තෝරාගෙන, මිල (quote) නැවත බලලා, ගනුදෙනුව තහවුරු කළ හැක. ප්රතිඵලය වන්නේ, DeFi භාවිතා කරන ඕනෑම පරිශීලකයකුට හුරුපුරුදු ලෙස දැනෙන වෙළඳ අත්දැකීමක් වන අතර, ටෝකනීකරණය කරන ලද මූල්ය නිෂ්පාදනයක ව්යුහය සහ අවදානම් තවමත් පිළිබිඹු කරයි.
ටိုකනීකරණය කරන ලද කොටස් (tokenized stocks) සම්ප්රදායික මූල්යය හා බ්ලොක්චේන් මත පදනම් වූ වෙළඳාම අතර ඇති වඩාත් රසවත් සම්බන්ධයක් බවට පත්වෙමින් තිබේ. STON.fi හිදී, මෙම අත්දැකීම xStocks හරහා ලබාගත හැක — තෝරාගත් කොටස් සහ ETF-ලට ආර්ථික නිරාවරණයක් (economic exposure) ලබාදෙන, ටෝකනීකරණය කරන ලද ආකාරයෙන් පරිශීලකයන්ට ලබාදෙන බ්ලොක්චේන් මත පදනම් වූ උපකරණ.
සාම්ප්රදායික බ්රෝකර් වර්ක්ෆ්ලෝවක් හරහා නොගොස්, සුදුසුකම් ලැබූ පරිශීලකයන්ට TON wallet එකක් සම්බන්ධ කළ හැක, AAPLx වැනි xStock එකක් තෝරාගෙන, ඔවුන්ට වියදම් කිරීමට අවශ්ය වත්කම තෝරාගෙන, මිල (quote) නැවත බලලා, ගනුදෙනුව තහවුරු කළ හැක. ප්රතිඵලය වන්නේ, DeFi භාවිතා කරන ඕනෑම පරිශීලකයකුට හුරුපුරුදු ලෙස දැනෙන වෙළඳ අත්දැකීමක් වන අතර, ටෝකනීකරණය කරන ලද මූල්ය නිෂ්පාදනයක ව්යුහය සහ අවදානම් තවමත් පිළිබිඹු කරයි.
107
·
--
ලිපිය
Crypto ආරක්ෂාව ගනුදෙනුවට පෙර ආරම්භ වේ: ඔබේ Self-Custodial Wallet ආරක්ෂා කරගැනීමට ප්රායෝගික මාර්ගෝපදේශයක්Crypto ආරක්ෂාව ඔබ ගනුදෙනුව කරන පෙර ආරම්භ වේ: ඔබේ Self-Custodial wallet ආරක්ෂා කරගැනීමට ප්රායෝගික මාර්ගෝපදේශයක්
crypto හිදී ආරක්ෂක දෝෂ බොහෝ විට ගනුදෙනුවක් කරන මොහොතේම ආරම්භ වන්නේ නැත.
බොහෝ විට ඒවා සිදු වන්නේ ගනුදෙනුවට සති හෝ මාස කිහිපයකට කලින්දීය. කෙනෙක් wallet එකක් නිර්මාණය කරන අතර seed phrase එක ලියලා, පහසු තැනක සුරක්ෂිත කර, පසුව නිසි backup එකක් සකස් කරගන්නම් කියා තමන්ටම කියාගනියි.
එම “පසුව” කියන දේ self custody හිදී ඇතිවිය හැකි විශාලම ආරක්ෂක අවදානම් වලින් එකක් බවට පත්විය හැකිය.
තවත් වැඩි පිරිසක් wallets, Telegram Mini Apps, DeFi යෙදුම්, decentralized exchanges සහ STONfi වැනි liquidity protocols හරහා TON ecosystem වෙත ඇතුළුවෙන විට, wallet වෙත ප්රවේශය ආරක්ෂා කරගන්නේ කෙසේද යන්න දැන ගැනීම, ecosystem භාවිතා කරන්නේ කෙසේද යන්න දැන ගැනීම තරම්ම වැදගත් වෙමින් පවතී.
Crypto ආරක්ෂාව ගනුදෙනුවට පෙර ආරම්භ වේ: ඔබේ Self-Custodial Wallet ආරක්ෂා කරගැනීමට ප්රායෝගික මාර්ගෝපදේශයක්
Crypto ආරක්ෂාව ඔබ ගනුදෙනුව කරන පෙර ආරම්භ වේ: ඔබේ Self-Custodial wallet ආරක්ෂා කරගැනීමට ප්රායෝගික මාර්ගෝපදේශයක්
crypto හිදී ආරක්ෂක දෝෂ බොහෝ විට ගනුදෙනුවක් කරන මොහොතේම ආරම්භ වන්නේ නැත.
බොහෝ විට ඒවා සිදු වන්නේ ගනුදෙනුවට සති හෝ මාස කිහිපයකට කලින්දීය. කෙනෙක් wallet එකක් නිර්මාණය කරන අතර seed phrase එක ලියලා, පහසු තැනක සුරක්ෂිත කර, පසුව නිසි backup එකක් සකස් කරගන්නම් කියා තමන්ටම කියාගනියි.
එම “පසුව” කියන දේ self custody හිදී ඇතිවිය හැකි විශාලම ආරක්ෂක අවදානම් වලින් එකක් බවට පත්විය හැකිය.
තවත් වැඩි පිරිසක් wallets, Telegram Mini Apps, DeFi යෙදුම්, decentralized exchanges සහ STONfi වැනි liquidity protocols හරහා TON ecosystem වෙත ඇතුළුවෙන විට, wallet වෙත ප්රවේශය ආරක්ෂා කරගන්නේ කෙසේද යන්න දැන ගැනීම, ecosystem භාවිතා කරන්නේ කෙසේද යන්න දැන ගැනීම තරම්ම වැදගත් වෙමින් පවතී.
crypto හිදී ආරක්ෂක දෝෂ බොහෝ විට ගනුදෙනුවක් කරන මොහොතේම ආරම්භ වන්නේ නැත.
බොහෝ විට ඒවා සිදු වන්නේ ගනුදෙනුවට සති හෝ මාස කිහිපයකට කලින්දීය. කෙනෙක් wallet එකක් නිර්මාණය කරන අතර seed phrase එක ලියලා, පහසු තැනක සුරක්ෂිත කර, පසුව නිසි backup එකක් සකස් කරගන්නම් කියා තමන්ටම කියාගනියි.
එම “පසුව” කියන දේ self custody හිදී ඇතිවිය හැකි විශාලම ආරක්ෂක අවදානම් වලින් එකක් බවට පත්විය හැකිය.
තවත් වැඩි පිරිසක් wallets, Telegram Mini Apps, DeFi යෙදුම්, decentralized exchanges සහ STONfi වැනි liquidity protocols හරහා TON ecosystem වෙත ඇතුළුවෙන විට, wallet වෙත ප්රවේශය ආරක්ෂා කරගන්නේ කෙසේද යන්න දැන ගැනීම, ecosystem භාවිතා කරන්නේ කෙසේද යන්න දැන ගැනීම තරම්ම වැදගත් වෙමින් පවතී.
108
·
--
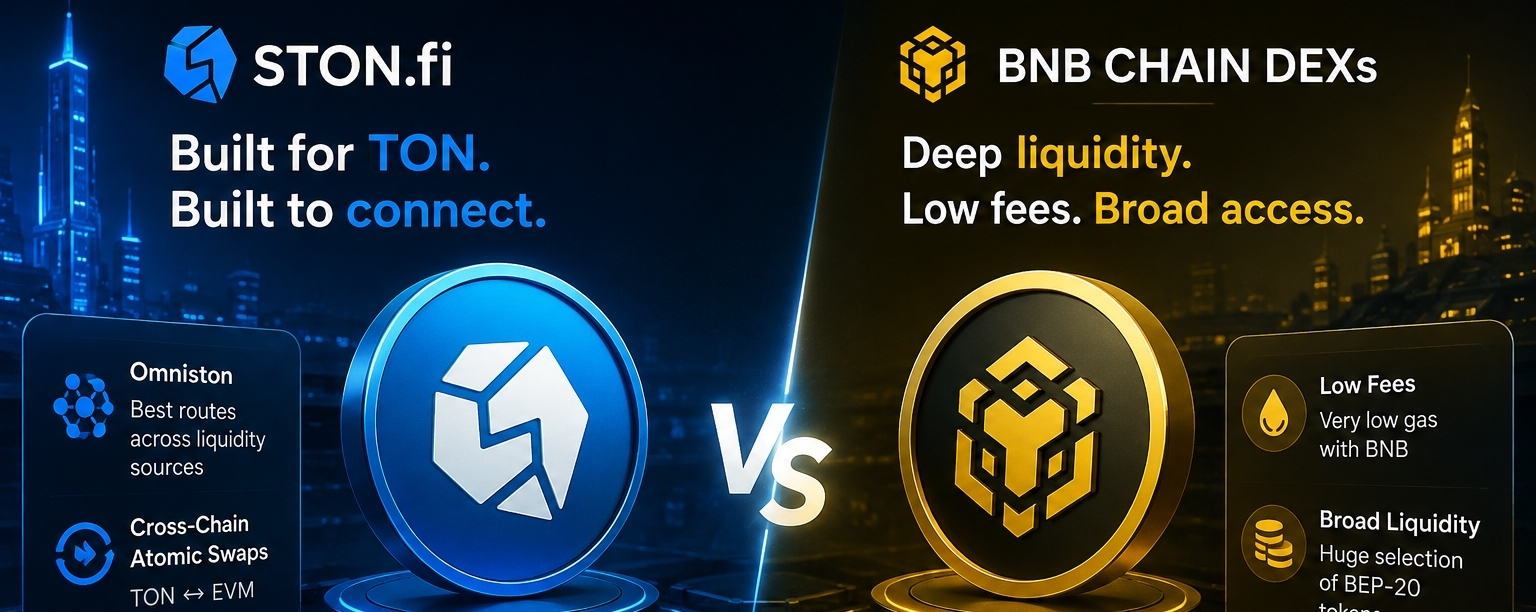
ලිපිය
STON.fi සහ BNB Chain DEXs: ගාස්තු, Liquidity, සහ Cross-Chain ප්රවේශයSTON.fi සහ BNB Chain DEXs: ගාස්තු, Liquidity, සහ Cross-Chain ප්රවේශය
Decentralized exchanges සියල්ලම එකම ආකාරයේ user journey සඳහා ගොඩනඟා නැත. සමහර ඒවා එක් ecosystem එකක් තුළම රැඳී පවතින trade සඳහා හොඳම ලෙස සවි කර ඇති අතර, තවත් කිහිපයක් cross-chain ගමන් කිරීම අයත් කරගැනීමට සරල සහ වඩා කාර්යක්ෂම ලෙස සැලසුම් කර ඇත. STON.fi ව හා BNB Smart Chain හි DEXs සමඟ සසඳන විට, මුල්ම වැදගත් ප්රශ්නය “පත්රය මත අඩුම ගාස්තුව කුමන වේදිකාවේද?” කියන එක පමණක් නොවේ. සැබෑ ප්රශ්නය වන්නේ ඔබගේ assets දැනටමත් කොහි තිබේද, එම pair එකට ඇති liquidity කුමක්ද, සහ ඔබට native swap එකක් ද අවශ්යද නැත්නම් cross-chain route එකක් ද අවශ්යද යන්නයි.
STON.fi සහ BNB Chain DEXs: ගාස්තු, Liquidity, සහ Cross-Chain ප්රවේශය
STON.fi සහ BNB Chain DEXs: ගාස්තු, Liquidity, සහ Cross-Chain ප්රවේශය
Decentralized exchanges සියල්ලම එකම ආකාරයේ user journey සඳහා ගොඩනඟා නැත. සමහර ඒවා එක් ecosystem එකක් තුළම රැඳී පවතින trade සඳහා හොඳම ලෙස සවි කර ඇති අතර, තවත් කිහිපයක් cross-chain ගමන් කිරීම අයත් කරගැනීමට සරල සහ වඩා කාර්යක්ෂම ලෙස සැලසුම් කර ඇත. STON.fi ව හා BNB Smart Chain හි DEXs සමඟ සසඳන විට, මුල්ම වැදගත් ප්රශ්නය “පත්රය මත අඩුම ගාස්තුව කුමන වේදිකාවේද?” කියන එක පමණක් නොවේ. සැබෑ ප්රශ්නය වන්නේ ඔබගේ assets දැනටමත් කොහි තිබේද, එම pair එකට ඇති liquidity කුමක්ද, සහ ඔබට native swap එකක් ද අවශ්යද නැත්නම් cross-chain route එකක් ද අවශ්යද යන්නයි.
Decentralized exchanges සියල්ලම එකම ආකාරයේ user journey සඳහා ගොඩනඟා නැත. සමහර ඒවා එක් ecosystem එකක් තුළම රැඳී පවතින trade සඳහා හොඳම ලෙස සවි කර ඇති අතර, තවත් කිහිපයක් cross-chain ගමන් කිරීම අයත් කරගැනීමට සරල සහ වඩා කාර්යක්ෂම ලෙස සැලසුම් කර ඇත. STON.fi ව හා BNB Smart Chain හි DEXs සමඟ සසඳන විට, මුල්ම වැදගත් ප්රශ්නය “පත්රය මත අඩුම ගාස්තුව කුමන වේදිකාවේද?” කියන එක පමණක් නොවේ. සැබෑ ප්රශ්නය වන්නේ ඔබගේ assets දැනටමත් කොහි තිබේද, එම pair එකට ඇති liquidity කුමක්ද, සහ ඔබට native swap එකක් ද අවශ්යද නැත්නම් cross-chain route එකක් ද අවශ්යද යන්නයි.
1
79
·
--
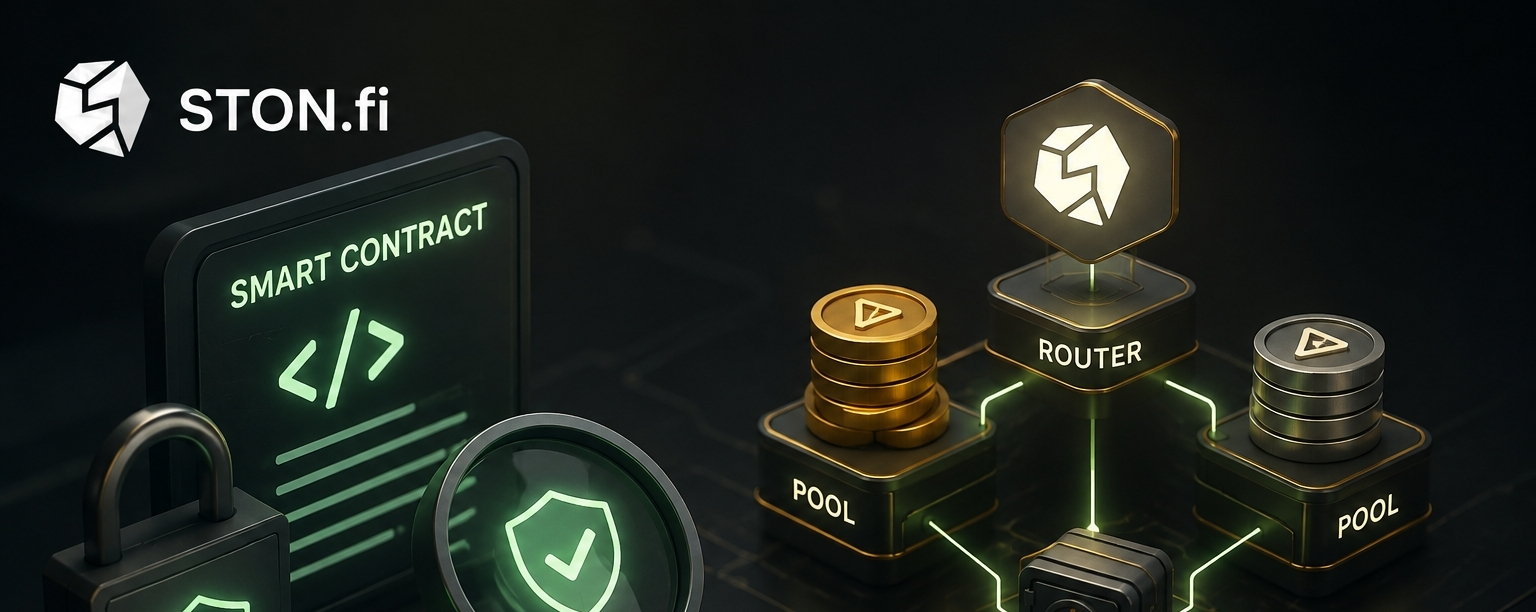
ලිපිය
STON.fi පරිශීලකයන්ට ස්මාර්ට් කොන්ත්රාත් අවදානම අදහස් කරන්නේ කුමක්ද?STON.fi පරිශීලකයන්ට ස්මාර්ට් කොන්ත්රාත් අවදානම අදහස් කරන්නේ කුමක්ද?
ප්රතිපත්තිමය මූල්යකරණයේ (decentralized finance) අවදානම ගැන කතා කරන විට බොහෝවිට සංවාදය ආරම්භ වන්නේ මිලේ අස්ථිරතාවය, වොලට් (wallet) ආරක්ෂාව, නැතහොත් phishing වංචා වැනි දේවල් වලින්. නමුත් STON.fi පරිශීලකයන් සඳහා, බොහෝවිට අවබෝධ නොවන ලෙස පවතින වැදගත්ම අවදානමක් වන්නේ ස්මාර්ට් කොන්ත්රාත් අවදානම (smart contract risk) ය.
ස්මාර්ට් කොන්ත්රාත් අවදානම යනු, ස්වாப් එකක් (swap), ලිකිඩිටි ක්රියාවක් (liquidity action), හෝ ඒ හා සම්බන්ධ ක්රියාවලියක් පිටුපස ඇති on-chain කේතය තුළ දුර්වලතාවක් තිබීම, අනපේක්ෂිත ලෙස ක්රියා කිරීම, හෝ වෙනත් කොන්ත්රාත් එකක් සමඟ අරමුණට නොගැලපෙන ආකාරයෙන් අන්තර්ක්රියා කිරීම සිදු විය හැකි බවයි. සරලව කිවහොත්, මෙය කේත (code) හා ක්රියාත්මක කිරීමේ (execution) අවදානමකි. එය වොලට් එකට ප්රවේශය අහිමි වීම වැනි දෙයක් නොවේ, තවද එය වෙළඳපොළ චලනය (market movement) වැනි දෙයක්ද නොවේ. පරිශීලකයා අපේක්ෂා කළ දේට වඩා වෙනස් ප්රතිඵලයක් ලබා දීම, කොන්ත්රාත් එකම අසාර්ථක වීම, හෝ වෙනත් කොන්ත්රාත් සමඟ සන්නිවේදනය කරන ආකාරය හේතුවෙන් එය සූරාකෑමට ලක්වීම (exploited) වැනි අවදානම් ය.
STON.fi පරිශීලකයන්ට ස්මාර්ට් කොන්ත්රාත් අවදානම අදහස් කරන්නේ කුමක්ද?
STON.fi පරිශීලකයන්ට ස්මාර්ට් කොන්ත්රාත් අවදානම අදහස් කරන්නේ කුමක්ද?
ප්රතිපත්තිමය මූල්යකරණයේ (decentralized finance) අවදානම ගැන කතා කරන විට බොහෝවිට සංවාදය ආරම්භ වන්නේ මිලේ අස්ථිරතාවය, වොලට් (wallet) ආරක්ෂාව, නැතහොත් phishing වංචා වැනි දේවල් වලින්. නමුත් STON.fi පරිශීලකයන් සඳහා, බොහෝවිට අවබෝධ නොවන ලෙස පවතින වැදගත්ම අවදානමක් වන්නේ ස්මාර්ට් කොන්ත්රාත් අවදානම (smart contract risk) ය.
ස්මාර්ට් කොන්ත්රාත් අවදානම යනු, ස්වாப් එකක් (swap), ලිකිඩිටි ක්රියාවක් (liquidity action), හෝ ඒ හා සම්බන්ධ ක්රියාවලියක් පිටුපස ඇති on-chain කේතය තුළ දුර්වලතාවක් තිබීම, අනපේක්ෂිත ලෙස ක්රියා කිරීම, හෝ වෙනත් කොන්ත්රාත් එකක් සමඟ අරමුණට නොගැලපෙන ආකාරයෙන් අන්තර්ක්රියා කිරීම සිදු විය හැකි බවයි. සරලව කිවහොත්, මෙය කේත (code) හා ක්රියාත්මක කිරීමේ (execution) අවදානමකි. එය වොලට් එකට ප්රවේශය අහිමි වීම වැනි දෙයක් නොවේ, තවද එය වෙළඳපොළ චලනය (market movement) වැනි දෙයක්ද නොවේ. පරිශීලකයා අපේක්ෂා කළ දේට වඩා වෙනස් ප්රතිඵලයක් ලබා දීම, කොන්ත්රාත් එකම අසාර්ථක වීම, හෝ වෙනත් කොන්ත්රාත් සමඟ සන්නිවේදනය කරන ආකාරය හේතුවෙන් එය සූරාකෑමට ලක්වීම (exploited) වැනි අවදානම් ය.
ප්රතිපත්තිමය මූල්යකරණයේ (decentralized finance) අවදානම ගැන කතා කරන විට බොහෝවිට සංවාදය ආරම්භ වන්නේ මිලේ අස්ථිරතාවය, වොලට් (wallet) ආරක්ෂාව, නැතහොත් phishing වංචා වැනි දේවල් වලින්. නමුත් STON.fi පරිශීලකයන් සඳහා, බොහෝවිට අවබෝධ නොවන ලෙස පවතින වැදගත්ම අවදානමක් වන්නේ ස්මාර්ට් කොන්ත්රාත් අවදානම (smart contract risk) ය.
ස්මාර්ට් කොන්ත්රාත් අවදානම යනු, ස්වாப් එකක් (swap), ලිකිඩිටි ක්රියාවක් (liquidity action), හෝ ඒ හා සම්බන්ධ ක්රියාවලියක් පිටුපස ඇති on-chain කේතය තුළ දුර්වලතාවක් තිබීම, අනපේක්ෂිත ලෙස ක්රියා කිරීම, හෝ වෙනත් කොන්ත්රාත් එකක් සමඟ අරමුණට නොගැලපෙන ආකාරයෙන් අන්තර්ක්රියා කිරීම සිදු විය හැකි බවයි. සරලව කිවහොත්, මෙය කේත (code) හා ක්රියාත්මක කිරීමේ (execution) අවදානමකි. එය වොලට් එකට ප්රවේශය අහිමි වීම වැනි දෙයක් නොවේ, තවද එය වෙළඳපොළ චලනය (market movement) වැනි දෙයක්ද නොවේ. පරිශීලකයා අපේක්ෂා කළ දේට වඩා වෙනස් ප්රතිඵලයක් ලබා දීම, කොන්ත්රාත් එකම අසාර්ථක වීම, හෝ වෙනත් කොන්ත්රාත් සමඟ සන්නිවේදනය කරන ආකාරය හේතුවෙන් එය සූරාකෑමට ලක්වීම (exploited) වැනි අවදානම් ය.
1
89
තවත් අන්තර්ගතයන් ගවේෂණය කිරීමට ඇතුල් වන්න
Binance චතුරශ්රය හි ගෝලීය ක්රිප්ටෝ පරිශීලකයින් හා එක්වන්න
⚡️ ක්රිප්ටෝ පිළිබඳ නවතම සහ ප්රයෝජනවත් තොරතුරු ලබා ගන්න.
💬 ලොව විශාලතම ක්රිප්ටෝ හුවමාරුව මගින් විශ්වාස කෙරේ.
👍 සත්යායනය කරන ලද නිර්මාණකරුවන්ගෙන් සැබෑ විදසුන් සොයා ගන්න.
විද්යුත් තැපෑල / දුරකථන අංකය
නැගී එන මාතෘකා
AIStocksWhatNext
699,872 views
5,243 සාකච්ඡා කරමින්
අපගේ ඉතාමත් ජනප්රිය හැෂ්ටැග් ව්යාපාරයේදී “Share & Win” මඟින් ගමනාගමන ත්යාග ලබා ගන්න
✨මාතෘකාව: AI කොටස් ඉහළ යමින් පවතිද්දී තවත් ආයෝජන අවස්ථා මොනවාද?
👉සම්බන්ධ වන්නේ කෙසේද:
හැෂ්ටැග් #AIStocksWhatNext සමඟ කෙටි පෝස්ට් එකක් හෝ ලිපියක් පළ කරන්න
ඔබ බුලිෂ් ද බෙයරිෂ් ද යන්න සඳහන් කර ඔබේ AI කොටස් හෝ වෙළඳාම පළ කරන්න — වෙළඳ විජට් එක භාවිතා කිරීම ඔබේ සුදුසුකම වැඩි කළ හැක.
දත්ත හෝ චාර්ට් බෙදාගනිමින් සහ AI මඟින් ජනනය කළ රූප මඟහරිමින් ඔබගේ පෝස්ට් එක තවදුරටත් ශක්තිමත් කළ හැක.
✍️පහත කෝණ අනුව අන්තර්ගතය සාදන්න:
- Nvidia පවසන්නේ ලබන වසරේ චිප් විකුණුම් දෙගුණ වන බවත්, ඉහළ AI සමාගම් දිගටම වාර්තාගත ආදායම් ලබා ගැනීමත් සිදුවන බවත් ය. ඒ සඳහා ඇති compute වියදමද අතිවිශාලය. ඇත්තටම AI ඉල්ලුම ඉහළ යනවාද? තව කොතරම් කාලයක් මෙය පවතින්න පුළුවන්ද? AI කොටස් මුළුම තැනම ඉහළ ගොස් ඇත. මෙය සැබෑ breakout එකක්ද, නැත්තම් කෙටි කාලීන bounce එකක්ද?
- කර්මාන්තයේ නායකයෝ AI සංවර්ධනය මන්දගාමී කිරීමට කියා සිටින අතර, Trump “AI Force” එකක් ගොඩනඟීමට සැලසුම් කරමින්, අනාගතයේ AI එක්සත් ජනපදයේ GDP වලින් 25%ක් දක්වා ගත හැකි බව පවසයි. ඔබ කාගේ පැත්තේද? AI කොටස් සඳහා ප්රාන්ත මට්ටමේ සහාය දිගුකාලීන ජයග්රහණයක් වේද?
- ඔබ AI කොටස් මිලදී ගන්නවාද? අපගේ වෙළඳ බෙදාගැනීමේ විජට් එක හරහා ඔබේ AI-අදාළ වෙළඳාම/පැවැත්වීම් බෙදාගන්න.
⏰ව්යාපාර කාලය:
- 2026-09-22 7:00 - 2026-09-24 4:00 UTC
🎁ත්යාගය:
- ඉහත මාර්ගෝපදේශවලට අනුකූල වන අතර වචන 100කට වඩා අඩංගු සුදුසුකම් ලත් පෝස්ට් පරීක්ෂා කරනු ලබන අතර, 500 සිට 3,000 දක්වා වූ අහඹු ගමනාගමන වැඩිවීමක් ලැබීමටද ඉඩ ඇත. ඔබේ පෝස්ට් එක තෝරාගනු ලැබුවහොත් ඔබට ඔබේ feed secretary වෙතින් දැනුම්දීමක් ලැබෙනු ඇත.
- ඔබගේ ලිපිය Binance Square Official හි පළ කිරීමට අවස්ථාවක් ලබා ගන්න
ඔබේ පෝස්ට් එකට අදහස් අවශ්යද? මාතෘකා පිටුවට පිවිසෙන්න #AIStocksWhatNext හෝ Square Guide on How to Post for Better Reach.
Binance Square Official
·514 කැමත්ත දැක්වීම්
·1.4M views
21SharesLaunchesEuropesFirstZcashETP
18,048 views
623 සාකච්ඡා කරමින්
CardanoJoinsX402PaymentStandard
12,699 views
476 සාකච්ඡා කරමින්