
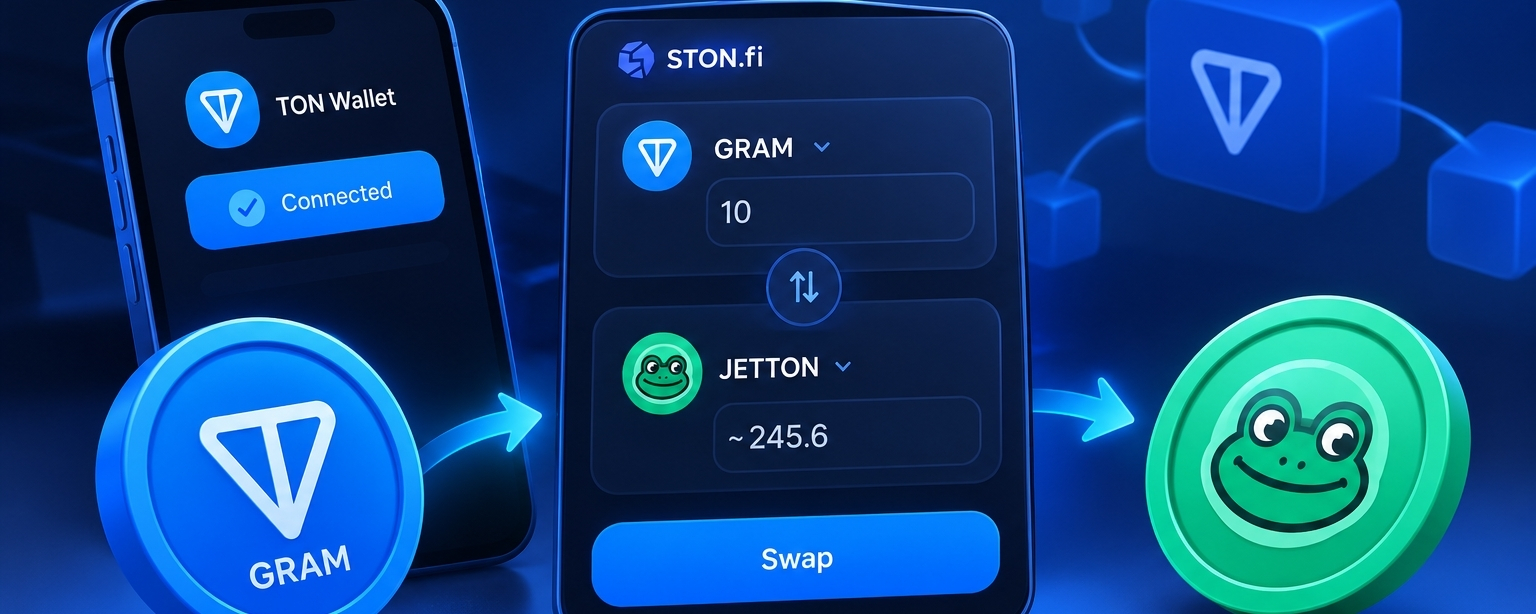

A Beginner-Friendly Guide to Token Swapping on $TON Using $STON.fi
The TON ecosystem has grown into a space where users can interact with decentralised applications, explore different tokens, and exchange digital assets without relying entirely on centralised exchanges.
However, if you are new to $TON, one question may come to mind:
How can you exchange $GRAM for another token on $TON without sending your funds to a centralised exchange first?
The process is simpler than many beginners expect.
With a compatible $TON wallet and a decentralised exchange (DEX) such as $STON.fi, you can swap GRAM for a supported $TON jetton directly from your wallet.
You do not need to create a separate trading account on a centralised exchange to perform this type of swap. Instead, you connect your wallet, select the tokens, review the transaction details, and approve the swap.
But before clicking any buttons, it is important to understand what you are exchanging, how the process works, and which details deserve your attention.
Let's walk through the process step by step.
1. Understanding GRAM and Jettons on TON
Before making your first swap, you need to understand the two types of assets involved.
What is $GRAM?
$GRAM is the name currently used for the native TON currency, formerly known as Toncoin. It is used to pay blockchain transaction fees and can also serve as the asset you exchange for other tokens.
When interacting with STON.fi, you need to keep some GRAM in your wallet to cover the blockchain fees associated with your swap.
This is important because having enough GRAM to buy another token is not the same as having enough GRAM to complete the transaction.
If you spend your entire available balance on a swap, you could leave yourself without enough funds for the network fee. A portion of your balance should therefore remain available for transaction costs.
What are TON jettons?
Jettons are fungible tokens issued on The Open Network (TON).
Think of them as digital assets that operate within the TON ecosystem. Different jettons can have different purposes, including governance, utility, community participation, and other applications.
For example, a $TON user might hold $GRAM but want to acquire another supported jetton to explore a particular decentralised application.
Rather than transferring funds to a centralised exchange, the user may be able to exchange $GRAM directly for that jetton through a DEX.
However, not every token is automatically available for swapping. The token must be supported by the interface and have a suitable trading route and sufficient liquidity.
The key difference: $GRAM is the native TON currency used for network operations, while jettons are tokens issued on $TON
Understanding this distinction helps you recognise why you need $GRAM for transaction fees even when the asset you want to receive is a jetton.
2. What Is a DEX, and Why Use One?
A decentralised exchange, or DEX, is a platform that enables users to exchange digital assets through blockchain-based protocols and smart contracts.
Unlike a traditional centralised exchange, a DEX can allow you to trade directly from your own compatible wallet without depositing your funds into an exchange-controlled trading account.
$STON.fi is one example of a decentralised exchange built for the TON ecosystem.
It provides an interface where users can select supported tokens, enter an amount, review the proposed swap, and confirm the transaction through their connected wallet.
This wallet-based approach offers several practical advantages.
You maintain control of your wallet. You approve the transaction from your wallet rather than handing your recovery phrase to a trading platform.
You can review the swap before confirming it. The interface displays important information about the expected output and transaction costs.
You can interact with TON-based tokens. Where a suitable market and route exist, you can exchange GRAM for a supported jetton.
However, using a DEX does not eliminate risk. Smart-contract vulnerabilities, malicious tokens, low liquidity, price movements, and wallet security problems can still affect your experience.
That is why understanding each step matters.
3. Step One: Prepare Your TON Wallet
Before opening a DEX, make sure you have a compatible TON wallet.
Examples include Tonkeeper, Wallet in Telegram, and My Wallet, formerly known as MyTonWallet.
Your chosen wallet must support the connection method offered by STON.fi.
If you do not already have a wallet, download one from its official source and follow the wallet provider's setup instructions.
During setup, you may receive a recovery phrase.
Keep this phrase private and secure. Never share it with anyone claiming to be a STON.fi representative, and never enter it into a website simply because the website asks you to connect your wallet.
Next, ensure that your wallet contains:
Enough GRAM to cover the amount you want to swap.
An additional balance to cover blockchain transaction fees.
The correct TON-based assets, if you already hold tokens you intend to exchange.
If your wallet contains only a small amount of GRAM, consider the transaction fee before deciding how much to swap.
STON.fi's interface may reserve an amount for transaction execution, so you should not assume that your entire displayed balance is available to exchange.
4. Step Two: Open STON.fi and Connect Your Wallet
Once your wallet is ready, visit the official STON.fi application:
https://app.ston.fi/swap
Check that you are using the correct website before connecting your wallet.
On the swap page, look for the Connect Wallet option.
Select it to view the supported wallet options.
Choose your wallet from the list. Depending on your device, the connection may open your wallet application directly or ask you to scan a QR code.
Review the connection request in your wallet and approve it if everything looks correct.
Once connected, the DEX can display the wallet information needed to prepare a swap.
Remember that connecting your wallet is different from authorising a transaction. A connection allows the application to interact with your wallet, while an actual swap requires you to review and approve a transaction separately.
Never share your private keys or recovery phrase to complete either step.
5. Step Three: Select GRAM as the Input Token
Now comes the most important part: selecting the assets you want to exchange.
On the STON.fi swap interface, you should see fields for the token you want to send and the token you want to receive.
The first field may be labelled "You send," "From," or something similar, depending on the interface version.
This is your input token.
Open the token selector and choose GRAM.
If the token is not immediately visible, use the search function where available. Make sure you select the correct asset rather than a token with a similar name or symbol.
Token names and symbols can be copied by fraudulent tokens, so never rely on the name alone when verifying an unfamiliar asset.
For a token you have not used before, check its official information and contract address against a reliable source.
After selecting GRAM, enter the amount you want to exchange.
For example, imagine you have 10 GRAM and want to swap only part of that balance for another token.
You could enter 5 GRAM as your hypothetical input amount, provided your balance and the interface allow it.
This is only an illustration, not a live quote or a recommendation to trade a particular amount.
Once you enter the amount, the interface will calculate the estimated quantity of the token you could receive.
Do not assume that the displayed estimate is guaranteed. The final amount can depend on liquidity, price movements, the selected route, and the transaction's execution conditions.
6. Step Four: Select the TON Jetton You Want to Receive
After choosing GRAM as your input token, select the asset you want to receive.
This is the output token.
In the second token field, search for the jetton you want to acquire.
For example, you might choose STON or another supported TON jetton, provided it is available for swapping and a suitable route exists.
Before selecting a token, verify that it is the correct asset.
This is especially important when dealing with newly launched tokens, community tokens, or assets with names similar to established projects.
If you cannot find the token, do not automatically assume that it is unavailable everywhere. It may not be supported by the interface, may require verification through its contract address, or may lack a suitable trading route or liquidity.
Once you have selected the correct output token, the interface should display an estimated amount based on your input and the available trading conditions.
Take your time here.
Selecting the wrong output token can result in receiving an asset that is not the one you intended to acquire.
7. Step Five: Understand the Swap Details Before Confirming
This is where careful users distinguish themselves from people who simply click buttons.
STON.fi displays transaction information to help you understand what the swap is expected to do.
Before proceeding, review the route, price impact, estimated output, minimum received, and blockchain fee.
Let's examine what each term means.
A. The swap route
The route describes how the exchange is expected to take place.
Depending on the available liquidity and the assets involved, the DEX may use a direct trading pool or another supported route to complete the swap.
The route matters because it helps determine how the transaction is executed and what output you can expect.
If the interface provides route information, review it before approving the transaction.
B. Price impact
Price impact describes how your trade affects the price available through the relevant liquidity pool or pools.
A larger swap relative to the available liquidity can produce a greater price impact.
For example, a small trade in a liquid market may receive a rate close to the displayed market price. A much larger trade in a shallow pool may receive a less favourable rate.
This means the number of tokens you receive depends not only on the amount of GRAM you exchange but also on the liquidity available for that trading pair.
A high price impact is a reason to pause and reassess the transaction.
You may decide to reduce the amount, investigate the available liquidity, or avoid the trade altogether.
C. Estimated amount
The estimated amount is the quantity of the output jetton that the interface calculates you should receive under the displayed conditions.
Suppose the interface estimates that your GRAM could be exchanged for 100 units of a particular jetton.
That figure is an illustration only. It is not a current market quote.
The actual amount can change if market conditions move or the transaction executes under different conditions.
Always review the current estimate displayed by STON.fi rather than relying on a previous screenshot, old price information, or someone else's transaction.
D. Minimum received
Minimum received is the minimum output amount you are willing to accept under the transaction's slippage settings.
Slippage refers to the difference between the expected exchange rate and the rate available when the transaction is executed.
The market may move between the moment you initiate the swap and the moment the blockchain processes it.
The minimum-received setting helps define the acceptable output limit for the transaction.
If the swap cannot meet the required conditions, it may fail rather than execute below the permitted minimum.
Do not confuse minimum received with the estimated amount. The estimate describes the expected output, while the minimum received defines a lower limit under the configured transaction conditions.
A lower minimum may allow more price movement, but it can also expose you to a less favourable execution price.
Avoid changing slippage settings without understanding the consequences.
E. Blockchain fee
The blockchain fee is the cost associated with processing the transaction on TON.
Even though you are exchanging GRAM for a jetton, you still need GRAM available to pay the network fee.
The estimated fee can depend on the transaction route and execution requirements.
STON.fi displays the estimated blockchain fee before confirmation, allowing you to check whether you have enough funds to proceed.
The estimated amount is not necessarily identical to the final cost in every case.
Always retain a suitable balance for network operations instead of attempting to exchange every unit of GRAM in your wallet.
A useful rule: Never confirm a swap simply because the estimated output looks attractive. Check all the transaction details first.
8. Step Six: Confirm the Swap in Your Wallet
After selecting your tokens and reviewing the transaction details, you can proceed if you are satisfied with the terms.
Click the Swap button on STON.fi.
Your connected wallet should display a transaction request.
Read the request carefully and make sure it corresponds to the action you intended to perform.
Check the transaction details presented by your wallet, including the amount and any relevant fee information.
If everything looks correct, approve the transaction.
If the request is unexpected, the amount differs from what you intended, or anything appears suspicious, reject it and investigate before proceeding.
Once you approve the transaction, it is submitted for processing on the TON blockchain.
Do not repeatedly approve new requests just because the first transaction appears to be taking longer than expected. Check the transaction status first.
After a successful swap, the output jetton should appear in your wallet.
Depending on the wallet, you may need to refresh the asset list or add the token to the displayed assets.
If the transaction is confirmed on-chain but the token is not immediately visible, check the transaction details using a trusted blockchain explorer and verify that the wallet is displaying the correct asset.
If the swap fails, review the transaction status and any error information before trying again.
9. Common Mistakes to Avoid When Swapping GRAM
Even a straightforward swap can go wrong if you overlook important details.
Here are several mistakes worth avoiding.
Mistake 1: Selecting a fake token
A fraudulent token may use the same name or symbol as a legitimate asset.
Always verify unfamiliar tokens using reliable information, including the correct contract address.
Mistake 2: Spending the entire GRAM balance
You need GRAM for blockchain fees. Swapping your entire available balance may leave you without enough funds for the transaction or future network operations.
Mistake 3: Ignoring price impact
A swap that appears attractive at first may offer a poor execution rate if liquidity is limited.
Review the price impact before proceeding.
Mistake 4: Confusing estimated output with guaranteed output
The amount displayed before confirmation is an estimate. Market changes and execution conditions can affect the final result.
Pay attention to minimum received and the applicable slippage settings.
Mistake 5: Increasing slippage without understanding it
Changing slippage settings can affect whether a transaction succeeds and how much price movement it will tolerate.
Do not increase the setting simply to force a transaction through.
Mistake 6: Approving an unexpected wallet request
Always check what your wallet is asking you to approve. Reject requests that do not match the swap you intended to make.
Mistake 7: Assuming every TON jetton is safe
A token being available through a DEX does not automatically make it trustworthy.
Research the project, token contract, liquidity, and potential risks before deciding whether to acquire an asset.
10. Why This Matters for the TON Ecosystem
The ability to exchange assets directly from a wallet is an important part of decentralised finance.
Users can explore different TON-based tokens without necessarily moving their funds to a centralised exchange first.
This can make on-chain participation more accessible, especially for people who want to understand decentralised trading through practical experience.
However, accessibility should go hand in hand with education.
Understanding how wallets connect to applications, how jettons work, why liquidity matters, and how blockchain fees are paid helps users make better-informed decisions.
STON.fi provides an interface for this process, bringing token selection, swap estimates, and wallet confirmation into one workflow.
For beginners, learning these steps is a useful foundation for exploring the wider TON ecosystem.
Final Thoughts
Swapping GRAM for a TON jetton directly from your wallet does not have to be complicated.
The process involves preparing a compatible wallet, connecting it to STON.fi, selecting GRAM as the input asset, choosing the desired jetton, reviewing the transaction details, and confirming the swap through your wallet.
The most important part is not how quickly you can complete the transaction. It is how carefully you understand what you are approving.
Always verify the token, review the route and price impact, check the estimated output and minimum received, and keep enough GRAM for blockchain fees.
A few moments of careful checking can help you avoid costly mistakes.
If you want to explore the process, start with the official STON.fi swap interface and its educational resources:
https://app.ston.fi/swap
Learn first. Verify every detail. Confirm only when you understand the transaction.
Disclaimer: This article is for educational purposes only and is not financial advice. Cryptocurrency transactions carry risks, including price volatility, liquidity limitations, smart-contract vulnerabilities, and fraudulent tokens. Always conduct your own research before interacting with any digital asset or decentralised application.
Also, explore the links below;
https://ston.fi/cross-chain-swap-from-ton-to-base
https://ston.fi/how-to-send-usdt-from-ton-to-base