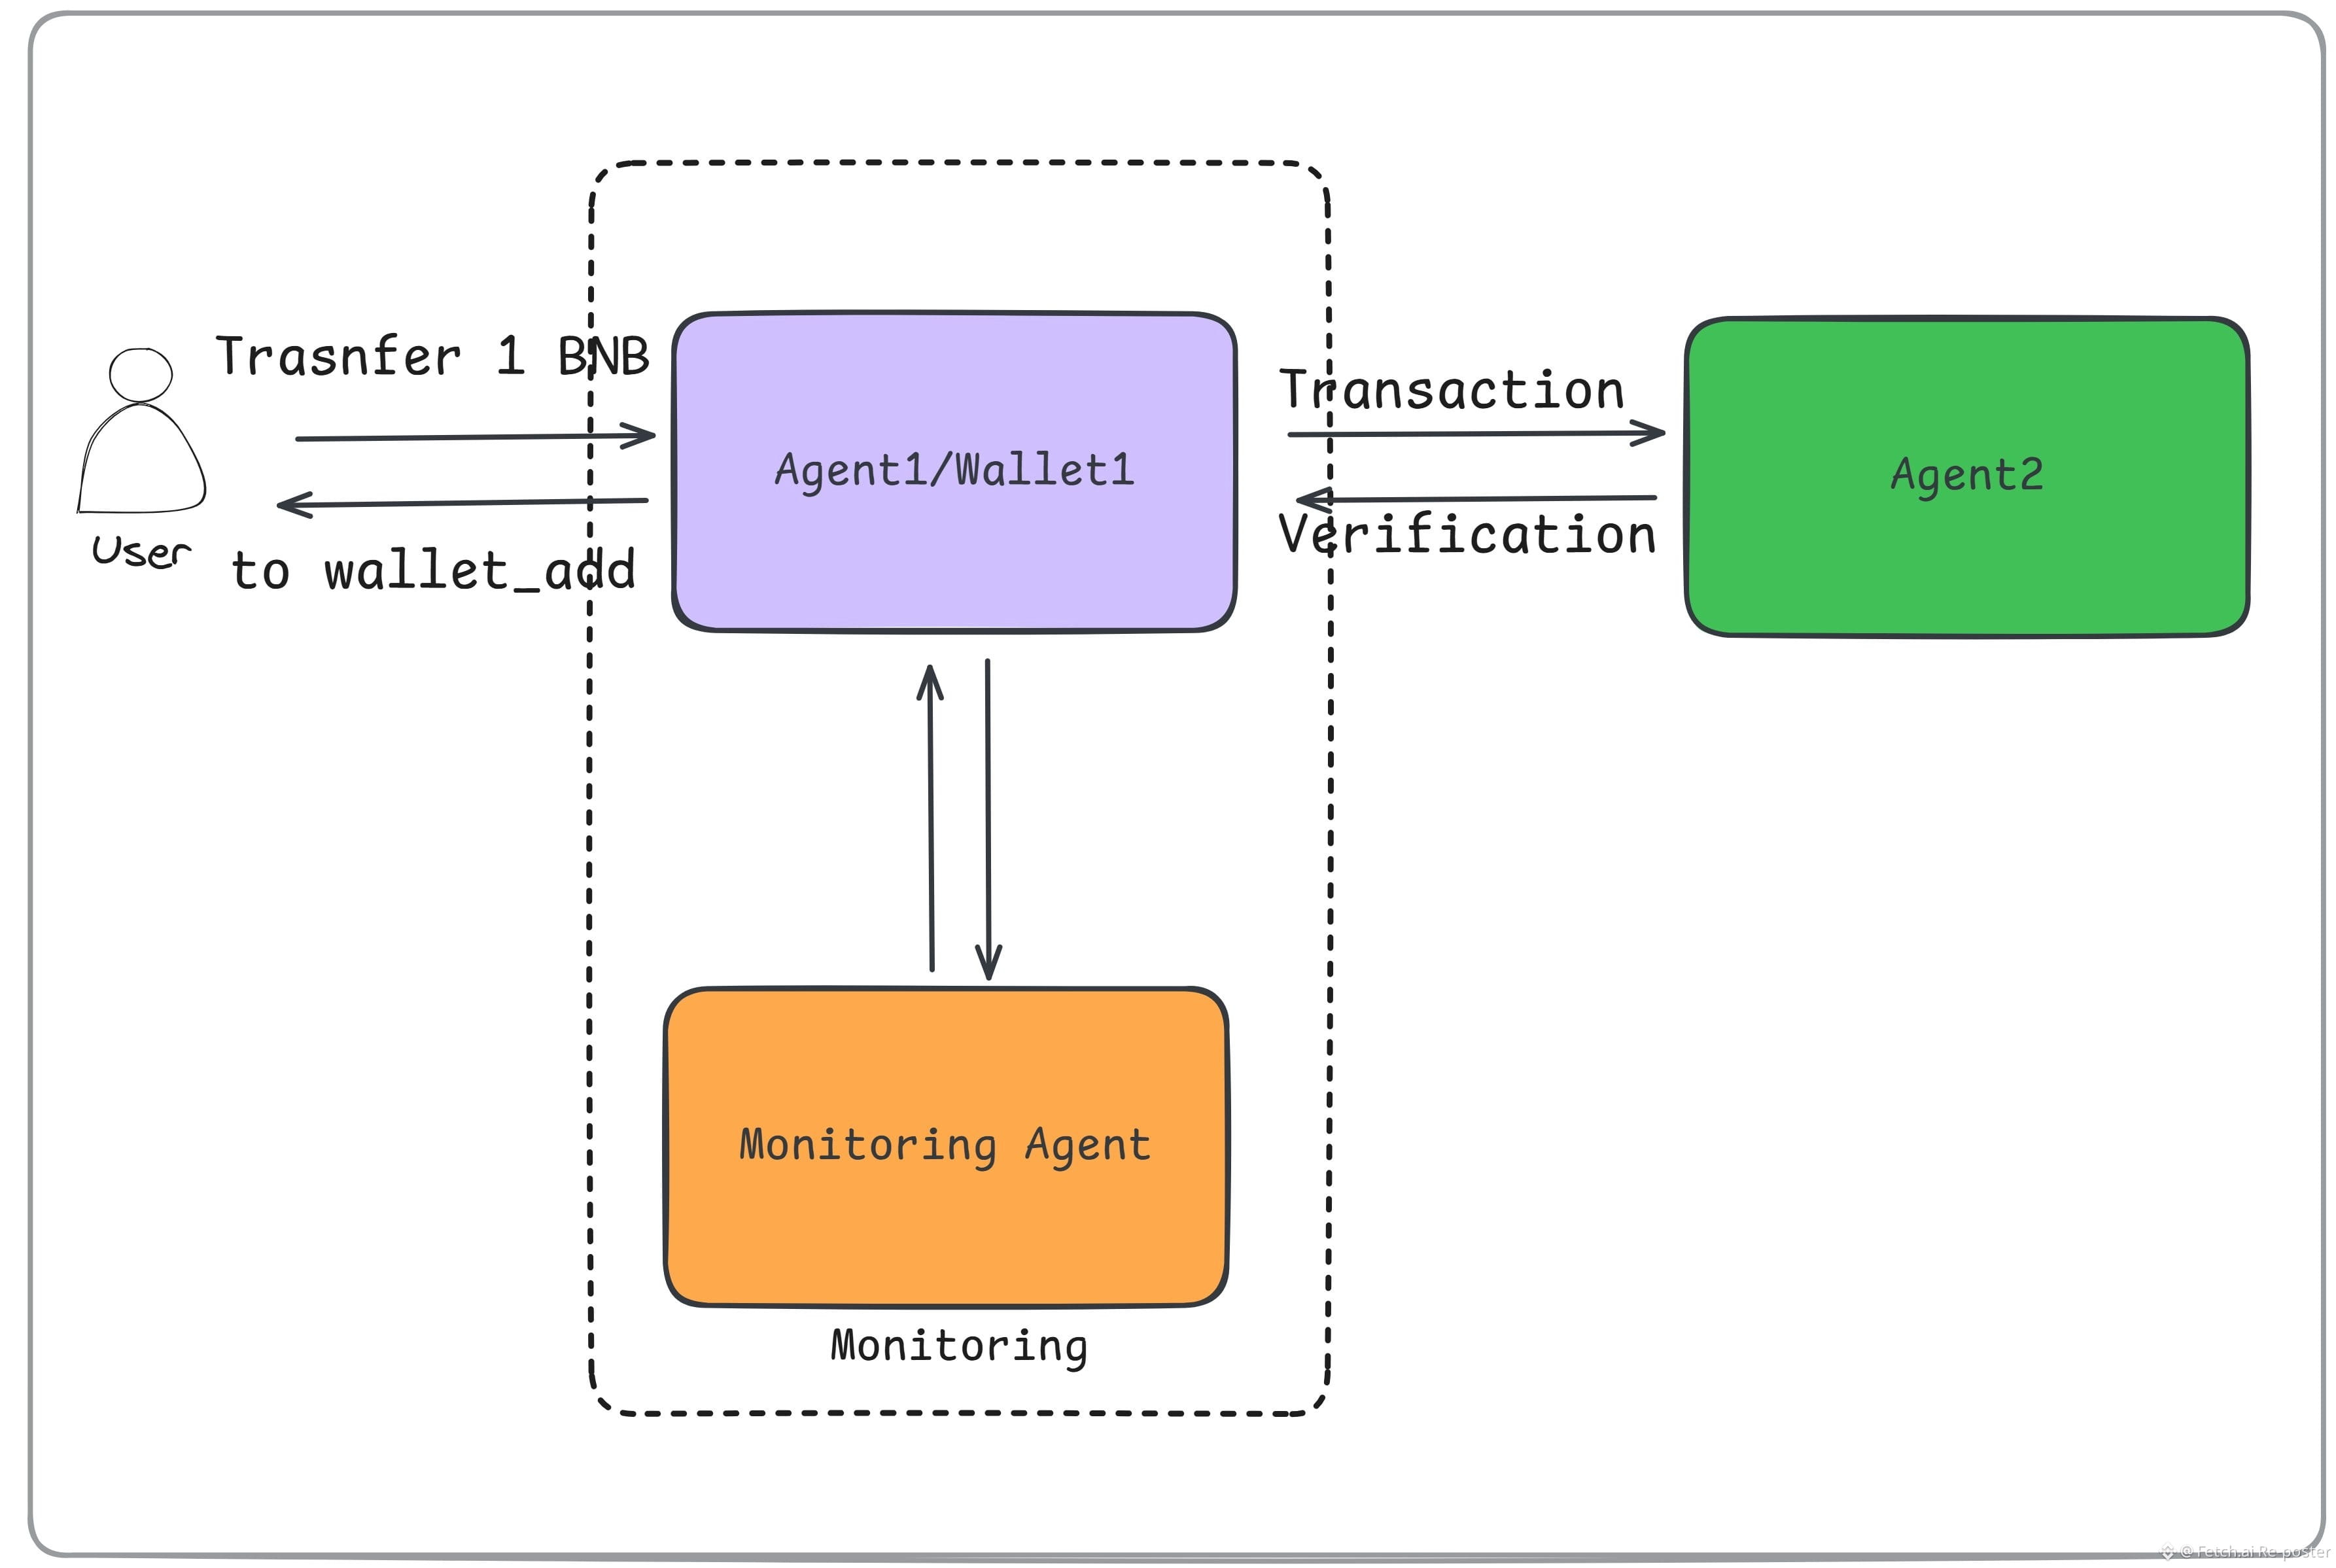
Creating a seamless @BNBCHAIN transaction process is highly achievable by deploying a workflow featuring 3x uAgents. Here is a look at how this architecture operates in practice.
The system relies on three specialized components working together. The first is Agent 1, which serves as the Sender. This agent is responsible for accepting a /send/bnb command, signing the transaction via Web3, and broadcasting it directly to the BNB Testnet. After completing this step, it forwards the resulting tx_hash to the second component.
Agent 2 takes on the role of the Validator. Once it receives the hash from the first agent, it reviews the information on BscScan and provides a status update, marking the transaction as either confirmed or rejected.
The final piece of the setup is Agent 3, functioning as the Monitor. Its main purpose is to continuously scan new blocks, carefully observe your wallet, and log any matching activity it detects along the way.
To get started with this project, you will need to execute pip install uagents web3 python-dotenv requests in your command line. Furthermore, you must ensure that your USER_KEY, USER_WALLET, and BSCSCAN_API_KEY are all safely stored as environment variables.
If you would like to follow a detailed, step-by-step tutorial on building this specific configuration on the BNB Testnet, please check out the @fetch_ai_IL Resource Library at https://innovationlab.fetch.ai/resources/docs/examples/on-chain-examples/bnb-chain-agents
The system relies on three specialized components working together. The first is Agent 1, which serves as the Sender. This agent is responsible for accepting a /send/bnb command, signing the transaction via Web3, and broadcasting it directly to the BNB Testnet. After completing this step, it forwards the resulting tx_hash to the second component.
Agent 2 takes on the role of the Validator. Once it receives the hash from the first agent, it reviews the information on BscScan and provides a status update, marking the transaction as either confirmed or rejected.
The final piece of the setup is Agent 3, functioning as the Monitor. Its main purpose is to continuously scan new blocks, carefully observe your wallet, and log any matching activity it detects along the way.
To get started with this project, you will need to execute pip install uagents web3 python-dotenv requests in your command line. Furthermore, you must ensure that your USER_KEY, USER_WALLET, and BSCSCAN_API_KEY are all safely stored as environment variables.
If you would like to follow a detailed, step-by-step tutorial on building this specific configuration on the BNB Testnet, please check out the @fetch_ai_IL Resource Library at https://innovationlab.fetch.ai/resources/docs/examples/on-chain-examples/bnb-chain-agents