Binance Square
Nomoss
569 Posts

Nomoss

Square Verified
Trade the trend. Trust the process
12 Following
27 Followers
558 Liked
Posts
·
--
Bearish
Don't be fooled by the calm surface, $HEI is on the verge of a sharp downturn. $HEI - SHORT🔴 Entry: 0.1819 SL: 0.545 TP1: 0.00029 TP2: -0.1813 TP3: -0.3629 ⚠️ Move SL to Breakeven once TP1 is hit !!! A liquidity sweep is looming, driven by a support-resistance reaction on the 1H chart. As I glance at the 1D chart, I'm reminded that $HEI is currently trading above its EMA50, lending a bullish tone to the broader trend - which, of course, we're positioning against with this SHORT trade, so caution is warranted. Are you short it, waiting for the momentum to shift? Click here to Trade 👇 {future}(HEIUSDT)
Don't be fooled by the calm surface, $HEI is on the verge of a sharp downturn.
$HEI - SHORT🔴

Entry: 0.1819
SL: 0.545
TP1: 0.00029
TP2: -0.1813
TP3: -0.3629
⚠️ Move SL to Breakeven once TP1 is hit !!!

A liquidity sweep is looming, driven by a support-resistance reaction on the 1H chart.

As I glance at the 1D chart, I'm reminded that $HEI is currently trading above its EMA50, lending a bullish tone to the broader trend - which, of course, we're positioning against with this SHORT trade, so caution is warranted.

Are you short it, waiting for the momentum to shift?
Click here to Trade 👇
·
--
Bearish
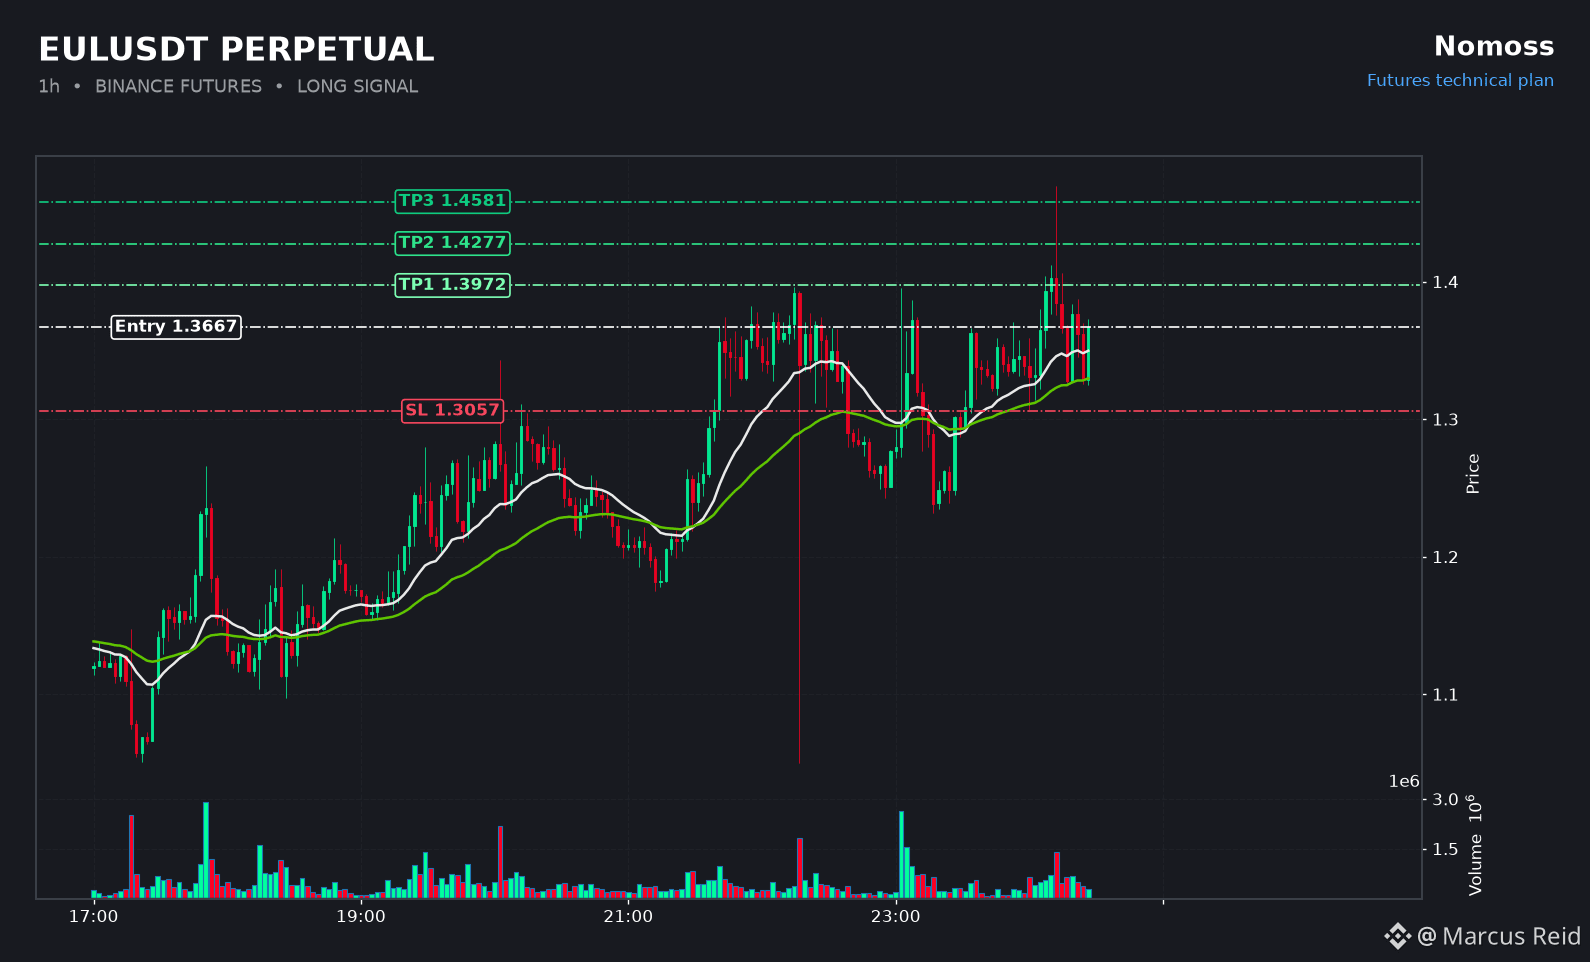
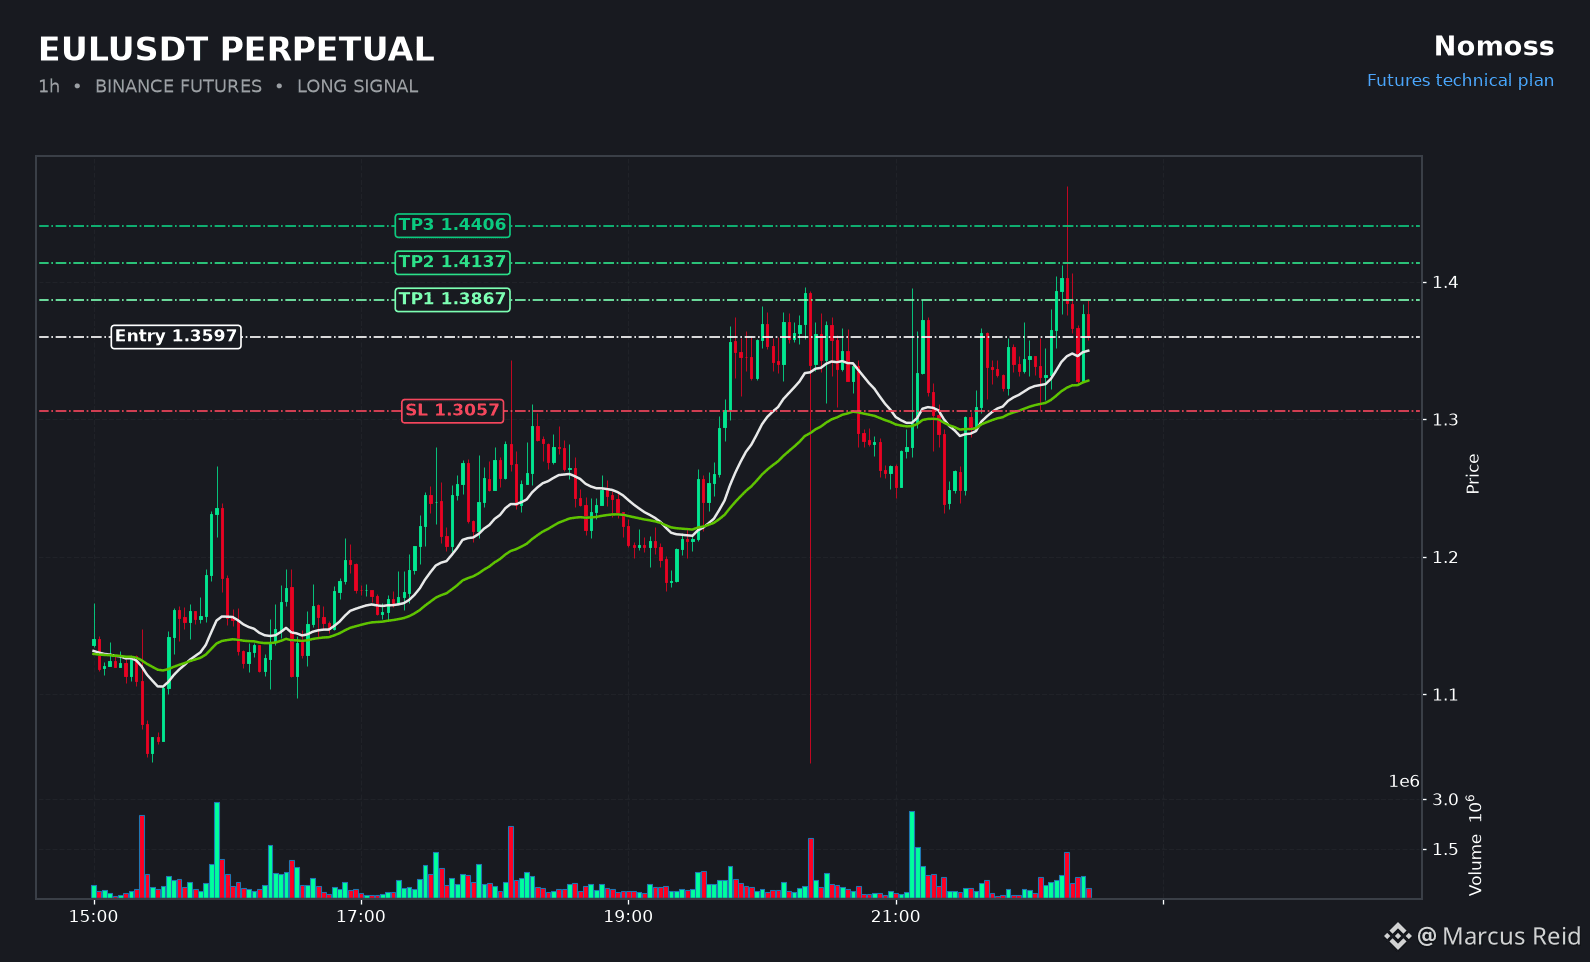
A seemingly unstoppable $EUL rally might just be on the verge of a sharp reversal. $EUL - SHORT🔴 Entry: 1.2515 SL: 1.4106 TP1: 1.172 TP2: 1.0924 TP3: 1.0129 ⚠️ Move SL to Breakeven once TP1 is hit !!! With the RSI indicating exhaustion, a momentum shift appears to be unfolding on the 1H chart. But here's the twist - while the 1D chart suggests a bullish tone with $EUL price currently above its EMA50, our SHORT trade positions us against this broader trend, underscoring the importance of disciplined risk management. What if the it price drops despite the bullish 1D bias - are you prepared for the potential fallout? Click here to Trade 👇 {future}(EULUSDT)
A seemingly unstoppable $EUL rally might just be on the verge of a sharp reversal.
$EUL - SHORT🔴

Entry: 1.2515
SL: 1.4106
TP1: 1.172
TP2: 1.0924
TP3: 1.0129
⚠️ Move SL to Breakeven once TP1 is hit !!!

With the RSI indicating exhaustion, a momentum shift appears to be unfolding on the 1H chart.

But here's the twist - while the 1D chart suggests a bullish tone with $EUL price currently above its EMA50, our SHORT trade positions us against this broader trend, underscoring the importance of disciplined risk management.

What if the it price drops despite the bullish 1D bias - are you prepared for the potential fallout?
Click here to Trade 👇
·
--
Bullish
$TUT is poised for a breakout as its price action becomes increasingly compressed. $TUT - LONG🟢 Entry: 0.026 SL: 0.02407 TP1: 0.02696 TP2: 0.02793 TP3: 0.02889 ⚠️ Move SL to Breakeven once TP1 is hit !!! The 1H chart suggests a potential explosion in volatility, given the tightening range. On a higher timeframe, the 1D chart reveals a bullish undertone, with the price hovering above its EMA50, which aligns with our long bias, making this trade more compelling. Do you think $TUT has the potential to capitalize on this compressed energy and drive higher? Click here to Trade 👇 {future}(TUTUSDT)
$TUT is poised for a breakout as its price action becomes increasingly compressed.
$TUT - LONG🟢

Entry: 0.026
SL: 0.02407
TP1: 0.02696
TP2: 0.02793
TP3: 0.02889
⚠️ Move SL to Breakeven once TP1 is hit !!!

The 1H chart suggests a potential explosion in volatility, given the tightening range.
On a higher timeframe, the 1D chart reveals a bullish undertone, with the price hovering above its EMA50, which aligns with our long bias, making this trade more compelling.

Do you think $TUT has the potential to capitalize on this compressed energy and drive higher?
Click here to Trade 👇
·
--
Bullish
Beware, a potentially lucrative trade is unfolding on the $ALLO chart, but it requires a keen eye for detail. $ALLO - LONG Entry: 0.2984 SL: 0.2536 TP1: 0.3209 TP2: 0.3433 TP3: 0.3658 ⚠️ Move SL to Breakeven once TP1 is hit !!! The 1H chart is signaling a potential LONG opportunity, driven by a support-resistance reaction that could trigger a liquidity sweep. But here's the catch - the 1D chart tells a different story, with the price trading below its EMA50, indicating a bearish bias that our trade will be moving against, making it crucial to manage position size carefully. Are you already in this $ALLO trade, or are you waiting for a clearer signal? Click here to Trade 👇 {future}(ALLOUSDT)
Beware, a potentially lucrative trade is unfolding on the $ALLO chart, but it requires a keen eye for detail.
$ALLO - LONG
Entry: 0.2984
SL: 0.2536
TP1: 0.3209
TP2: 0.3433
TP3: 0.3658
⚠️ Move SL to Breakeven once TP1 is hit !!!

The 1H chart is signaling a potential LONG opportunity, driven by a support-resistance reaction that could trigger a liquidity sweep.
But here's the catch - the 1D chart tells a different story, with the price trading below its EMA50, indicating a bearish bias that our trade will be moving against, making it crucial to manage position size carefully.

Are you already in this $ALLO trade, or are you waiting for a clearer signal?
Click here to Trade 👇
·
--
Bullish
It's counterintuitive to go long when the momentum seems sluggish, but that's exactly what the $HFT chart is telling me to do. $HFT - LONG🟢 Entry: 0.02961 SL: 0.01707 TP1: 0.03588 TP2: 0.04215 TP3: 0.04842 ⚠️ Move SL to Breakeven once TP1 is hit !!! The confluence of the RSI and EMA20/EMA50 on the 1H chart hints at a brewing momentum shift, suggesting a potential breakout. Considering the higher timeframe, I note that the 1D chart has a bullish bias with the price trading above its EMA50. This actually supports our long trade, as the broader trend is in our favor. Do you agree that $HFT has the momentum to push higher, or will it stall? Click here to Trade 👇 {future}(HFTUSDT)
It's counterintuitive to go long when the momentum seems sluggish, but that's exactly what the $HFT chart is telling me to do.

$HFT - LONG🟢

Entry: 0.02961
SL: 0.01707
TP1: 0.03588
TP2: 0.04215
TP3: 0.04842
⚠️ Move SL to Breakeven once TP1 is hit !!!

The confluence of the RSI and EMA20/EMA50 on the 1H chart hints at a brewing momentum shift, suggesting a potential breakout.

Considering the higher timeframe, I note that the 1D chart has a bullish bias with the price trading above its EMA50. This actually supports our long trade, as the broader trend is in our favor.

Do you agree that $HFT has the momentum to push higher, or will it stall?
Click here to Trade 👇
·
--
Bullish
The $RIVER train is leaving the station, and you don't want to be left standing on the platform. $RIVER - LONG🟢 Entry: 3.305 SL: 2.483 TP1: 3.716 TP2: 4.127 TP3: 4.538 ⚠️ Move SL to Breakeven once TP1 is hit !!! The squeeze is on, with $RIVER price action indicating a potential liquidity sweep - my eyes are on the support-resistance reaction. On the 1D chart, I notice the price is trading below its EMA50, which suggests a bearish bias - a fact that doesn't necessarily align with our 1H LONG trade, so let's keep a watchful eye on position size. What happens when this trade breaks through its current resistance levels? Click here to Trade 👇 {future}(RIVERUSDT)
The $RIVER train is leaving the station, and you don't want to be left standing on the platform.
$RIVER - LONG🟢

Entry: 3.305
SL: 2.483
TP1: 3.716
TP2: 4.127
TP3: 4.538
⚠️ Move SL to Breakeven once TP1 is hit !!!

The squeeze is on, with $RIVER price action indicating a potential liquidity sweep - my eyes are on the support-resistance reaction.

On the 1D chart, I notice the price is trading below its EMA50, which suggests a bearish bias - a fact that doesn't necessarily align with our 1H LONG trade, so let's keep a watchful eye on position size.

What happens when this trade breaks through its current resistance levels?
Click here to Trade 👇
·
--
Bearish
Beware, a reversal might be looming for $PIEVERSE . $PIEVERSE - SHORT Entry: 0.7588 SL: 0.8308 TP1: 0.7228 TP2: 0.6868 TP3: 0.6508 ⚠️ Move SL to Breakeven once TP1 is hit !!! The 1H chart is signaling a potential SHORT opportunity, driven by the RSI and EMA alignment. This convergence of indicators suggests a momentum shift may be underway for $PIEVERSE . As I consider the broader context, the 1D chart shows a bullish bias, with the price above its EMA50, indicating that our trade is venturing into counter-trend territory on the higher timeframe, specifically the 1D, which demands cautious position sizing. Do you think this SHORT trade will defy the 1D bullish trend, or will it ultimately follow the broader market bias? Click here to Trade 👇 {future}(PIEVERSEUSDT)
Beware, a reversal might be looming for $PIEVERSE .

$PIEVERSE - SHORT
Entry: 0.7588
SL: 0.8308
TP1: 0.7228
TP2: 0.6868
TP3: 0.6508
⚠️ Move SL to Breakeven once TP1 is hit !!!

The 1H chart is signaling a potential SHORT opportunity, driven by the RSI and EMA alignment. This convergence of indicators suggests a momentum shift may be underway for $PIEVERSE . As I consider the broader context, the 1D chart shows a bullish bias, with the price above its EMA50, indicating that our trade is venturing into counter-trend territory on the higher timeframe, specifically the 1D, which demands cautious position sizing.

Do you think this SHORT trade will defy the 1D bullish trend, or will it ultimately follow the broader market bias?
Click here to Trade 👇
·
--
Bearish
A 16.1 RSI reading on the 1H chart is a stark reminder that $CC is due for a correction. $CC - SHORT Entry: 0.09022 SL: 0.1043 TP1: 0.08319 TP2: 0.07616 TP3: 0.06913 ⚠️ Move SL to Breakeven once TP1 is hit !!! The 1H chart is flashing a compelling SHORT signal, with volatility compression hinting at an imminent expansion. On a higher timeframe, the 1D chart confirms the bearish bias, with price trading below its EMA50 - our 1H SHORT trade is moving in tandem with this broader trend. Can $CC really sustain a rally in the face of such a bearish landscape? Click here to Trade 👇 {future}(CCUSDT)
A 16.1 RSI reading on the 1H chart is a stark reminder that $CC is due for a correction.

$CC - SHORT
Entry: 0.09022
SL: 0.1043
TP1: 0.08319
TP2: 0.07616
TP3: 0.06913
⚠️ Move SL to Breakeven once TP1 is hit !!!

The 1H chart is flashing a compelling SHORT signal, with volatility compression hinting at an imminent expansion.

On a higher timeframe, the 1D chart confirms the bearish bias, with price trading below its EMA50 - our 1H SHORT trade is moving in tandem with this broader trend.

Can $CC really sustain a rally in the face of such a bearish landscape?
Click here to Trade 👇
·
--
Bullish
The $币安人生 is on the cusp of a significant move, and the 1H chart is flashing a buy signal. $币安人生 - LONG🟢 Entry: 0.5569 SL: 0.4959 TP1: 0.5874 TP2: 0.6179 TP3: 0.6484 ⚠️ Move SL to Breakeven once TP1 is hit !!! The current trend structure is hinting at a potential breakout. As I analyze the chart, I notice the RSI and EMA20/EMA50 are positioned for a momentum shift. However, a glance at the 1D chart reveals the price is trading below its EMA50, indicating a bearish bias - which makes this trade a bit riskier. Do you think $币安人生 will overcome the 1D bearish bias and push higher? Click here to Trade 👇
The $币安人生 is on the cusp of a significant move, and the 1H chart is flashing a buy signal.

$币安人生 - LONG🟢
Entry: 0.5569
SL: 0.4959
TP1: 0.5874
TP2: 0.6179
TP3: 0.6484
⚠️ Move SL to Breakeven once TP1 is hit !!!

The current trend structure is hinting at a potential breakout.
As I analyze the chart, I notice the RSI and EMA20/EMA50 are positioned for a momentum shift. However, a glance at the 1D chart reveals the price is trading below its EMA50, indicating a bearish bias - which makes this trade a bit riskier.

Do you think $币安人生 will overcome the 1D bearish bias and push higher?
Click here to Trade 👇
·
--
Bullish
$SKYAI trade, but the charts are telling a story I couldn't ignore. $SKYAI - LONG🟢 Entry: 0.1011 SL: 0.06033 TP1: 0.1214 TP2: 0.1418 TP3: 0.1622 ⚠️ Move SL to Breakeven once TP1 is hit !!! The convergence of technical indicators on the 1H chart is what initially caught my attention, with the RSI and EMA20/EMA50 alignment suggesting a potential momentum shift. But here's the interesting part: when I stepped back to look at the 1D chart, I saw that $SKYAI is currently trading above its EMA50, which indicates a bullish bias - and this trade is actually moving in sync with that broader trend. Will it continue to ride this bullish wave, or will it prove to be a fleeting opportunity? Click here to Trade 👇 {future}(SKYAIUSDT)
$SKYAI trade, but the charts are telling a story I couldn't ignore.

$SKYAI - LONG🟢

Entry: 0.1011
SL: 0.06033
TP1: 0.1214
TP2: 0.1418
TP3: 0.1622
⚠️ Move SL to Breakeven once TP1 is hit !!!

The convergence of technical indicators on the 1H chart is what initially caught my attention, with the RSI and EMA20/EMA50 alignment suggesting a potential momentum shift.

But here's the interesting part: when I stepped back to look at the 1D chart, I saw that $SKYAI is currently trading above its EMA50, which indicates a bullish bias - and this trade is actually moving in sync with that broader trend.

Will it continue to ride this bullish wave, or will it prove to be a fleeting opportunity?
Click here to Trade 👇
·
--
Bearish
A staggering 83% of traders are caught off guard by sudden trend reversals, making them ripe for a SHORT opportunity. $TUT - SHORT Entry: 0.02435 SL: 0.03133 TP1: 0.02086 TP2: 0.01737 TP3: 0.01388 ⚠️ Move SL to Breakeven once TP1 is hit !!! The $TUT chart is setting up for a potentially profitable SHORT trade, driven by a unique alignment of technical indicators. But here's the contrast - while the 1H chart presents a compelling case for a SHORT, the 1D chart tells a different story, with the price currently above its EMA50, indicating a bullish bias. This means our trade is essentially swimming against the tide, which demands a more cautious approach to position sizing. Are you already in this trade, or are you waiting for a clearer signal to join? Click here to Trade 👇 {future}(TUTUSDT)
A staggering 83% of traders are caught off guard by sudden trend reversals, making them ripe for a SHORT opportunity.

$TUT - SHORT
Entry: 0.02435
SL: 0.03133
TP1: 0.02086
TP2: 0.01737
TP3: 0.01388
⚠️ Move SL to Breakeven once TP1 is hit !!!

The $TUT chart is setting up for a potentially profitable SHORT trade, driven by a unique alignment of technical indicators.

But here's the contrast - while the 1H chart presents a compelling case for a SHORT, the 1D chart tells a different story, with the price currently above its EMA50, indicating a bullish bias. This means our trade is essentially swimming against the tide, which demands a more cautious approach to position sizing.

Are you already in this trade, or are you waiting for a clearer signal to join?
Click here to Trade 👇
·
--
Bullish
As I dive into the $BTW chart, a intriguing setup is unfolding. $BTW - LONG🟢 Entry: 0.1881 SL: 0.1433 TP1: 0.2106 TP2: 0.233 TP3: 0.2554 ⚠️ Move SL to Breakeven once TP1 is hit !!! The interplay between the EMA20 and EMA50 is particularly noteworthy, suggesting a potential shift in momentum. But here's a nuanced perspective - while the 1H chart presents a compelling case for a LONG, a look at the 1D chart reveals the price is trading above its EMA50, indicating a bullish bias that supports our trade, yet also underscores the complexity of this setup. What happens next, will $BTW break through resistance or stall? Click here to Trade 👇 {future}(BTWUSDT)
As I dive into the $BTW chart, a intriguing setup is unfolding.
$BTW - LONG🟢
Entry: 0.1881
SL: 0.1433
TP1: 0.2106
TP2: 0.233
TP3: 0.2554
⚠️ Move SL to Breakeven once TP1 is hit !!!
The interplay between the EMA20 and EMA50 is particularly noteworthy, suggesting a potential shift in momentum.
But here's a nuanced perspective - while the 1H chart presents a compelling case for a LONG, a look at the 1D chart reveals the price is trading above its EMA50, indicating a bullish bias that supports our trade, yet also underscores the complexity of this setup.
What happens next, will $BTW break through resistance or stall?
Click here to Trade 👇
·
--
Bullish
What's the likelihood that $MMT is on the cusp of a significant move, and we're just not seeing it yet? $MMT - LONG🟢 Entry: 0.1744 SL: 0.1545 TP1: 0.1844 TP2: 0.1943 TP3: 0.2042 ⚠️ Move SL to Breakeven once TP1 is hit !!! The RSI is flashing a subtle warning sign, hinting at a potential shift in the trend's momentum. But here's the thing - while the 1H chart presents a compelling case for a LONG, a glance at the 1D chart reveals a bullish undertone, with the price trading above its EMA50, which intriguingly aligns with our trade's direction. Are you already positioned in this $MMT trade, or are you waiting for a more conclusive signal to jump in? Click here to Trade 👇 {future}(MMTUSDT)
What's the likelihood that $MMT is on the cusp of a significant move, and we're just not seeing it yet?

$MMT - LONG🟢

Entry: 0.1744
SL: 0.1545
TP1: 0.1844
TP2: 0.1943
TP3: 0.2042
⚠️ Move SL to Breakeven once TP1 is hit !!!

The RSI is flashing a subtle warning sign, hinting at a potential shift in the trend's momentum.

But here's the thing - while the 1H chart presents a compelling case for a LONG, a glance at the 1D chart reveals a bullish undertone, with the price trading above its EMA50, which intriguingly aligns with our trade's direction.

Are you already positioned in this $MMT trade, or are you waiting for a more conclusive signal to jump in?

Click here to Trade 👇
·
--
Bullish
A critical juncture is approaching for $UB , as the current trend hangs in the balance. $UB - LONG Entry: 0.1678 SL: 0.1247 TP1: 0.1893 TP2: 0.2108 TP3: 0.2324 Move SL to Breakeven once TP1 is hit !!! The interplay between the EMA20 and EMA50 on the 1H chart is particularly noteworthy, suggesting a potential shift in momentum. But here's the catch: while the 1H chart presents a compelling case for a LONG, the 1D chart tells a story of its own, with the price currently above its EMA50, indicating a bullish bias that actually supports our trade. Will $UB defy the skeptics and push higher, or will it succumb to the pressure? Click here to Trade 👇 {future}(UBUSDT)
A critical juncture is approaching for $UB , as the current trend hangs in the balance.

$UB - LONG
Entry: 0.1678
SL: 0.1247
TP1: 0.1893
TP2: 0.2108
TP3: 0.2324
Move SL to Breakeven once TP1 is hit !!!

The interplay between the EMA20 and EMA50 on the 1H chart is particularly noteworthy, suggesting a potential shift in momentum.
But here's the catch: while the 1H chart presents a compelling case for a LONG, the 1D chart tells a story of its own, with the price currently above its EMA50, indicating a bullish bias that actually supports our trade.

Will $UB defy the skeptics and push higher, or will it succumb to the pressure?
Click here to Trade 👇
·
--
Bullish
71% of traders miss out on lucrative opportunities due to overly cautious approaches. $ADA - LONG🟢 Entry: 0.2068 SL: 0.1856 TP1: 0.2174 TP2: 0.228 TP3: 0.2386 ⚠️ Move SL to Breakeven once TP1 is hit !!! The current RSI level of 71.0 is flashing a warning sign, indicating a potential exhaustion of the current trend, which could lead to a reversal. Given the bullish bias on the 1D chart, with the price trading above its EMA50, this trade appears to be moving in tandem with the broader trend, prompting a more aggressive approach to position sizing. Are you already in this $ADA trade, or are you waiting for a clearer signal to join? Click here to Trade 👇 {future}(ADAUSDT)
71% of traders miss out on lucrative opportunities due to overly cautious approaches.
$ADA - LONG🟢

Entry: 0.2068
SL: 0.1856
TP1: 0.2174
TP2: 0.228
TP3: 0.2386
⚠️ Move SL to Breakeven once TP1 is hit !!!

The current RSI level of 71.0 is flashing a warning sign, indicating a potential exhaustion of the current trend, which could lead to a reversal.

Given the bullish bias on the 1D chart, with the price trading above its EMA50, this trade appears to be moving in tandem with the broader trend, prompting a more aggressive approach to position sizing.

Are you already in this $ADA trade, or are you waiting for a clearer signal to join?
Click here to Trade 👇
·
--
Bullish
$JCT chart that could ignite a spark. $JCT - LONG🟢 Entry: 0.004547 SL: 0.004087 TP1: 0.004777 TP2: 0.005007 TP3: 0.005237 ⚠️ Move SL to Breakeven once TP1 is hit !!! The setup here is intriguing, driven by a liquidity sweep that could react off support-resistance levels, potentially propelling $JCT upward. On the 1D chart, the bullish bias is evident, with the price trading above its EMA50 - a fact that somewhat aligns with our 1H LONG trade, suggesting the broader trend is in our favor. Do you think this it trade has the momentum to break through resistance, or will it stall? Click here to Trade 👇 {future}(JCTUSDT)
$JCT chart that could ignite a spark.

$JCT - LONG🟢
Entry: 0.004547
SL: 0.004087
TP1: 0.004777
TP2: 0.005007
TP3: 0.005237
⚠️ Move SL to Breakeven once TP1 is hit !!!

The setup here is intriguing, driven by a liquidity sweep that could react off support-resistance levels, potentially propelling $JCT upward.

On the 1D chart, the bullish bias is evident, with the price trading above its EMA50 - a fact that somewhat aligns with our 1H LONG trade, suggesting the broader trend is in our favor.

Do you think this it trade has the momentum to break through resistance, or will it stall?
Click here to Trade 👇
·
--
Bearish
It seems like the bears are finally waking up from their hibernation on $JTO . $JTO - SHORT🔴 Entry: 0.4784 SL: 0.5241 TP1: 0.4556 TP2: 0.4327 TP3: 0.4098 ⚠️ Move SL to Breakeven once TP1 is hit !!! The momentum shift on the 1H chart is what caught my attention, as it indicates a potential reversal in the making. Given the 1D chart's bearish bias, with the price trading below its EMA50, it's clear that this SHORT trade is moving with the broader trend - a fact that informs my approach to position sizing and stop discipline. Are you already short $JTO , or are you waiting for a clearer signal to jump into the trade? Click here to Trade 👇 {future}(JTOUSDT)
It seems like the bears are finally waking up from their hibernation on $JTO .

$JTO - SHORT🔴
Entry: 0.4784
SL: 0.5241
TP1: 0.4556
TP2: 0.4327
TP3: 0.4098
⚠️ Move SL to Breakeven once TP1 is hit !!!

The momentum shift on the 1H chart is what caught my attention, as it indicates a potential reversal in the making.

Given the 1D chart's bearish bias, with the price trading below its EMA50, it's clear that this SHORT trade is moving with the broader trend - a fact that informs my approach to position sizing and stop discipline.

Are you already short $JTO , or are you waiting for a clearer signal to jump into the trade?
Click here to Trade 👇
·
--
Bearish
The irony of $龙虾's current setup is that it's screaming for a correction, and I'm more than happy to oblige. $龙虾 - SHORT Entry: 0.02098 SL: 0.02641 TP1: 0.01826 TP2: 0.01555 TP3: 0.01283 ⚠️ Move SL to Breakeven once TP1 is hit !!! The RSI is flashing a warning sign, indicating a potential exhaustion of the current trend. This, coupled with the EMA20 and EMA50, suggests a reversal might be on the horizon. Considering the higher timeframe, the 1D chart reveals a bullish bias, with the price trading above its EMA50, which means our SHORT trade is navigating choppy waters - a fact that demands caution and a careful eye on position sizing. What happens next, will $龙虾 find a way to shrug off this exhaustion and push higher, or will it finally succumb to the selling pressure? Click here to Trade 👇
The irony of $龙虾's current setup is that it's screaming for a correction, and I'm more than happy to oblige.

$龙虾 - SHORT
Entry: 0.02098
SL: 0.02641
TP1: 0.01826
TP2: 0.01555
TP3: 0.01283
⚠️ Move SL to Breakeven once TP1 is hit !!!

The RSI is flashing a warning sign, indicating a potential exhaustion of the current trend. This, coupled with the EMA20 and EMA50, suggests a reversal might be on the horizon. Considering the higher timeframe, the 1D chart reveals a bullish bias, with the price trading above its EMA50, which means our SHORT trade is navigating choppy waters - a fact that demands caution and a careful eye on position sizing.

What happens next, will $龙虾 find a way to shrug off this exhaustion and push higher, or will it finally succumb to the selling pressure?
Click here to Trade 👇
·
--
Bullish
With a 70.6 RSI on the 1H chart, $TAKE is flashing a compelling buy signal. $TAKE - LONG🟢 Entry: 0.06491 SL: 0.03683 TP1: 0.07895 TP2: 0.09299 TP3: 0.107 ⚠️ Move SL to Breakeven once TP1 is hit !!! The current setup on $TAKE is driven by a favorable combination of indicators, which points to a potential upside. On a higher note, checking the 1D chart reveals the price is currently above its EMA50, which is a bullish sign - this 1H LONG trade seems to be moving in sync with that 1D bias. Are you already riding this trade, or are you waiting for a clearer signal to jump in? Click here to Trade 👇 {future}(TAKEUSDT)
With a 70.6 RSI on the 1H chart, $TAKE is flashing a compelling buy signal.

$TAKE - LONG🟢
Entry: 0.06491
SL: 0.03683
TP1: 0.07895
TP2: 0.09299
TP3: 0.107
⚠️ Move SL to Breakeven once TP1 is hit !!!

The current setup on $TAKE is driven by a favorable combination of indicators, which points to a potential upside.
On a higher note, checking the 1D chart reveals the price is currently above its EMA50, which is a bullish sign - this 1H LONG trade seems to be moving in sync with that 1D bias.

Are you already riding this trade, or are you waiting for a clearer signal to jump in?
Click here to Trade 👇
·
--
Bullish
Can a shift in momentum be the catalyst for a surprise upswing in $币安人生?$币安人生 - LONG🟢 Entry: 0.5428 SL: 0.4858 TP1: 0.5713 TP2: 0.5998 TP3: 0.6283 ⚠️ Move SL to Breakeven once TP1 is hit !!! The 1H chart's indicators are flashing signs of a potential reversal, driven by a momentum shift that could propel $币安人生 upward. However, the 1D chart's bearish lean, with the price trading below its EMA50, does give me pause - taking a LONG trade against this trend means I need to be cautious and manage my position size accordingly. What happens next, will it find a way to break through the current resistance, or will it succumb to the broader bearish momentum? Click here to Trade 👇
Can a shift in momentum be the catalyst for a surprise upswing in $币安人生?$币安人生 - LONG🟢

Entry: 0.5428
SL: 0.4858
TP1: 0.5713
TP2: 0.5998
TP3: 0.6283
⚠️ Move SL to Breakeven once TP1 is hit !!!

The 1H chart's indicators are flashing signs of a potential reversal, driven by a momentum shift that could propel $币安人生 upward.

However, the 1D chart's bearish lean, with the price trading below its EMA50, does give me pause - taking a LONG trade against this trend means I need to be cautious and manage my position size accordingly.

What happens next, will it find a way to break through the current resistance, or will it succumb to the broader bearish momentum?
Click here to Trade 👇
Log in to explore more content
Join global crypto users on Binance Square
⚡️ Get latest and useful information about crypto.
💬 Trusted by the world’s largest crypto exchange.
👍 Discover real insights from verified creators.
Email / Phone number
Sitemap
Cookie Preferences
Platform T&Cs