

أميرة سيد
2.6k ໂພສ

أميرة سيد
ລາຍງານ
ບລັອກຜູ້ໃຊ້
Professional Trader | Free Chart Analysis | Signal & Update about Crypto |
ເປີດການຊື້ຂາຍ
ຜູ້ຊື້ຂາຍຊົ່ວຄາວ
1.3 ປີ
29 ກໍາລັງຕິດຕາມ
1.0K+ ຜູ້ຕິດຕາມ
499 Liked
ໂພສ
Portfolio
ທັງໝົດ
ວົງຢືມ
·
--
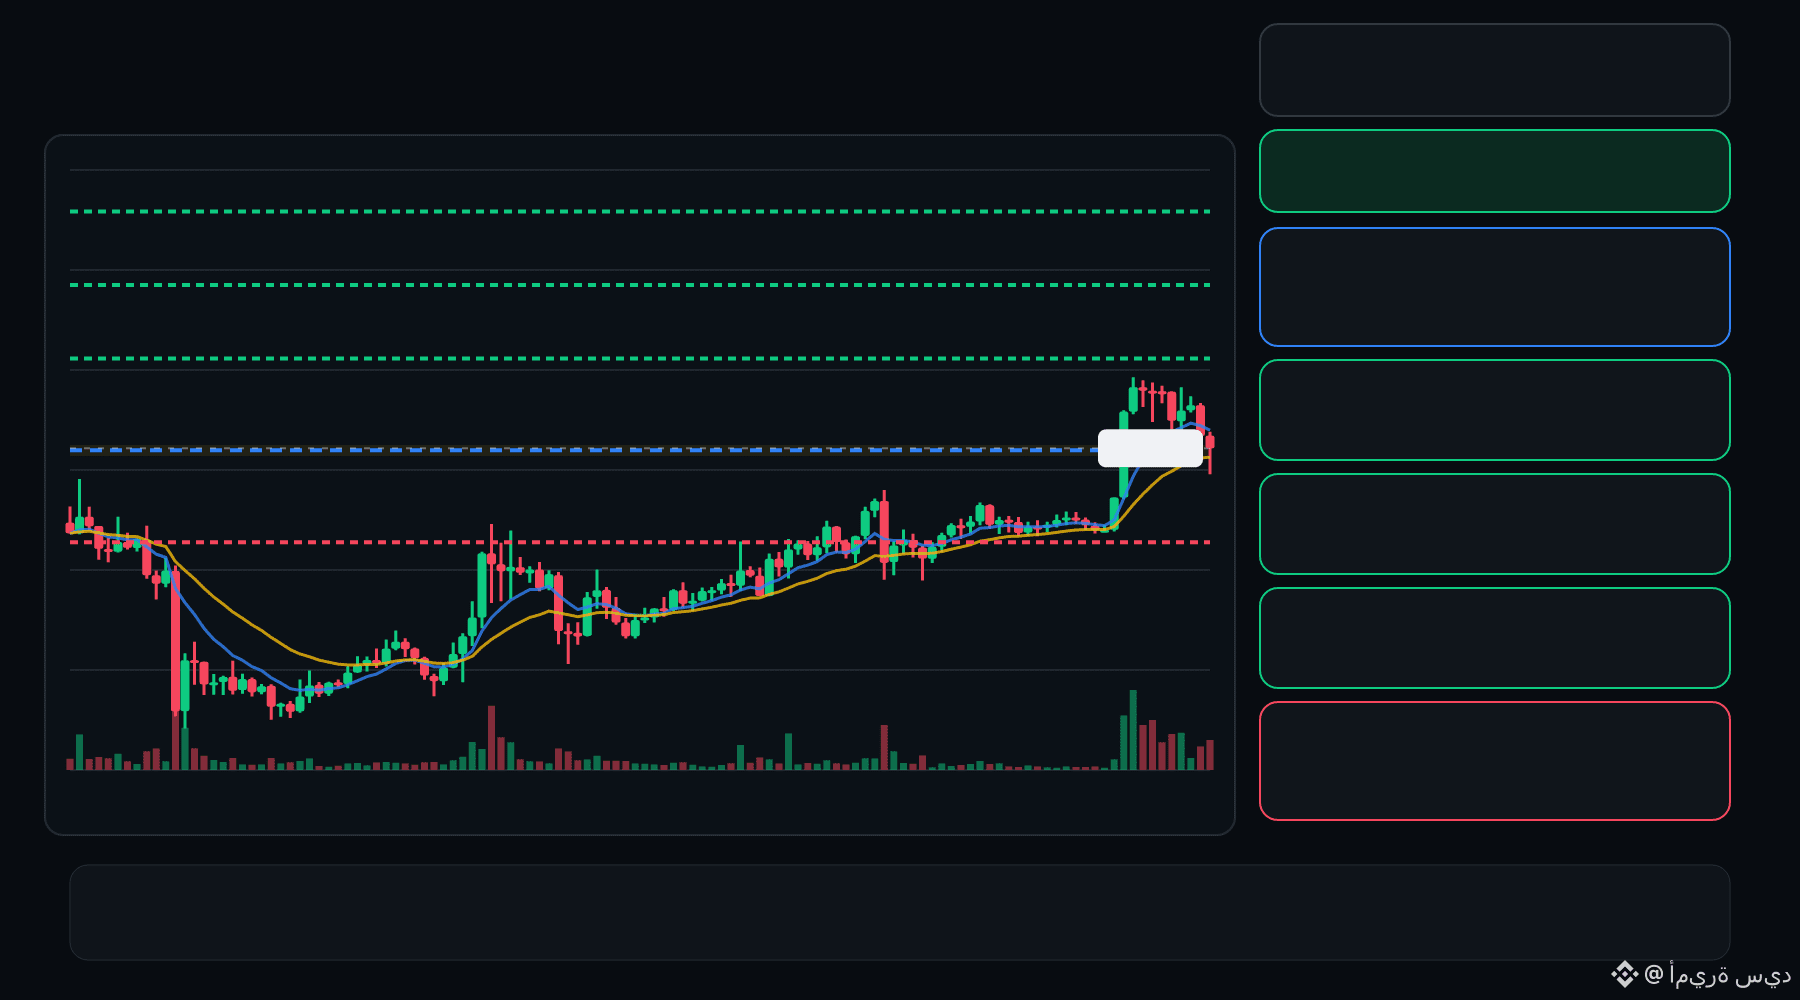
🟢 EVAA bulls are defending the pullback… is continuation setting up ⁉️
🟩 EVAA LONG
Entry: 1.365 – 1.377
TP1: 1.470
TP2: 1.549
TP3: 1.628
Stop Loss: 1.272
The 15M chart shows a bullish structure with momentum and volume confirmation. A controlled retest of the entry zone may give the setup a cleaner trigger.
Plan: Wait for confirmation/rejection inside the entry zone; don’t chase the move.
DYOR | Manage Risk | Avoid Over-Leverage
3
·
--
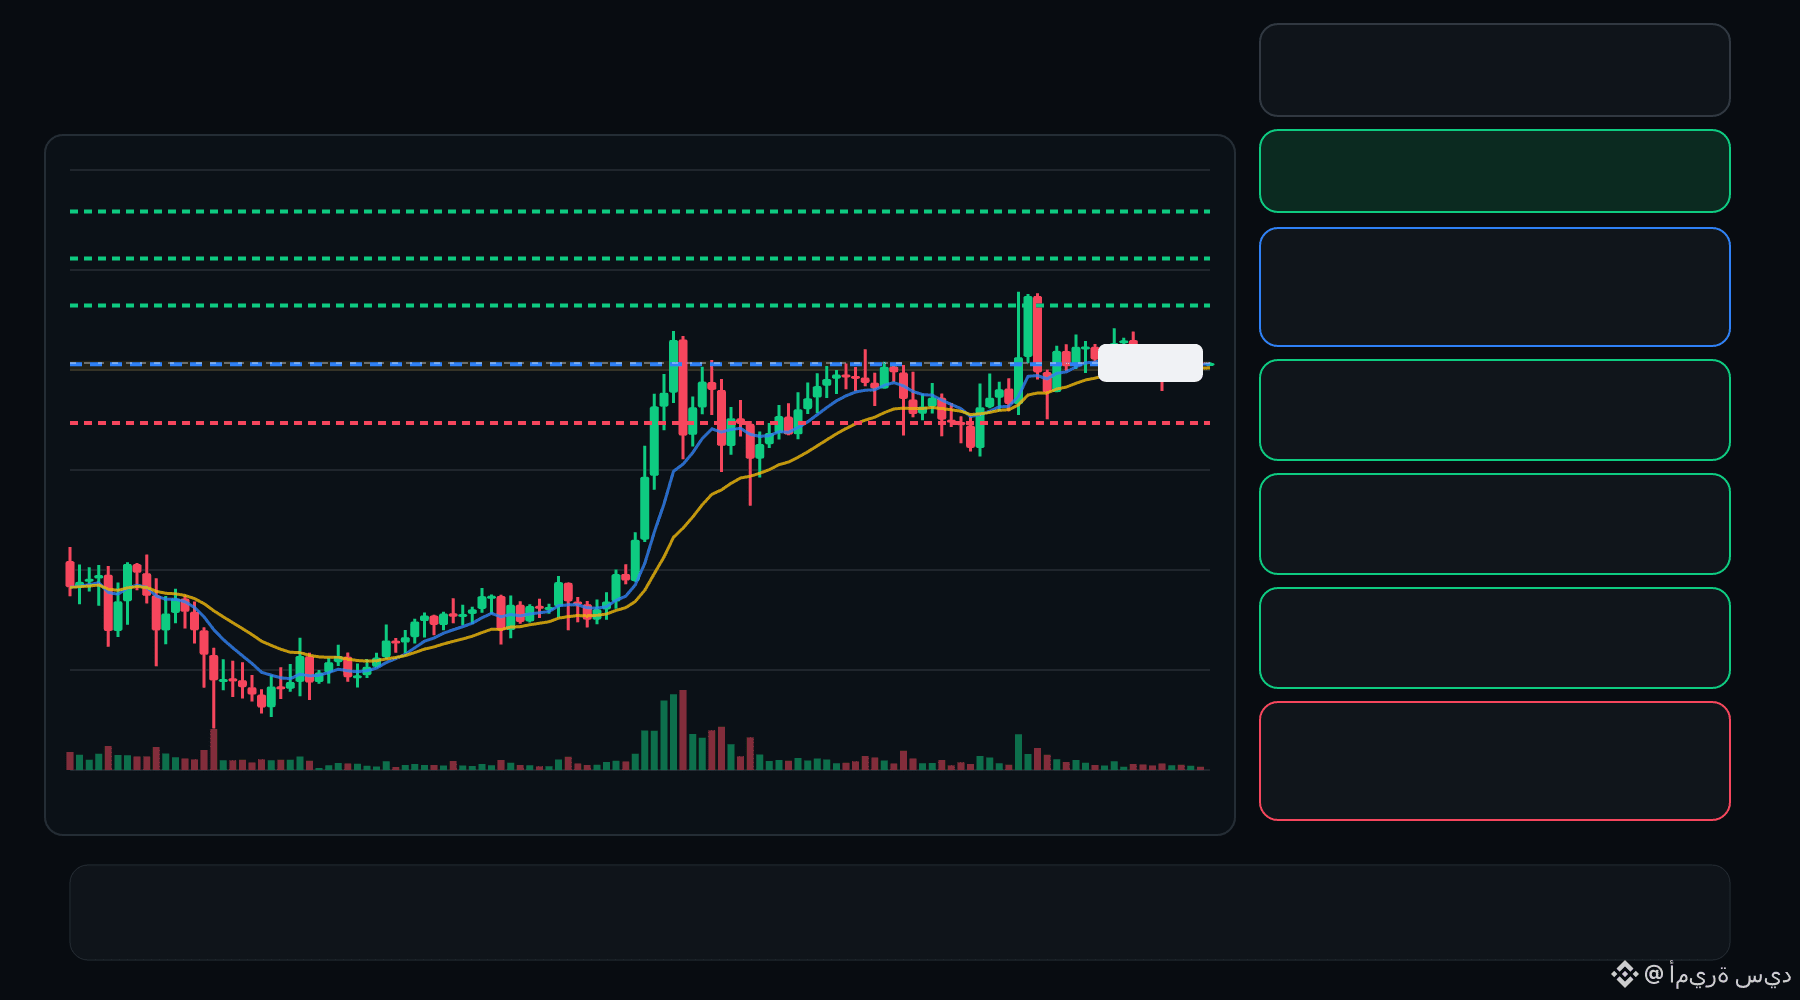
🟢 MAGMA bulls are defending the pullback… is continuation setting up ⁉️
🟩 MAGMA LONG
Entry: 0.4227 – 0.4240
TP1: 0.4351
TP2: 0.4444
TP3: 0.4538
Stop Loss: 0.4117
The 15M chart shows a bullish structure with momentum and volume confirmation. A controlled retest of the entry zone may give the setup a cleaner trigger.
Plan: Wait for confirmation/rejection inside the entry zone; don’t chase the move.
DYOR | Manage Risk | Avoid Over-Leverage
·
--
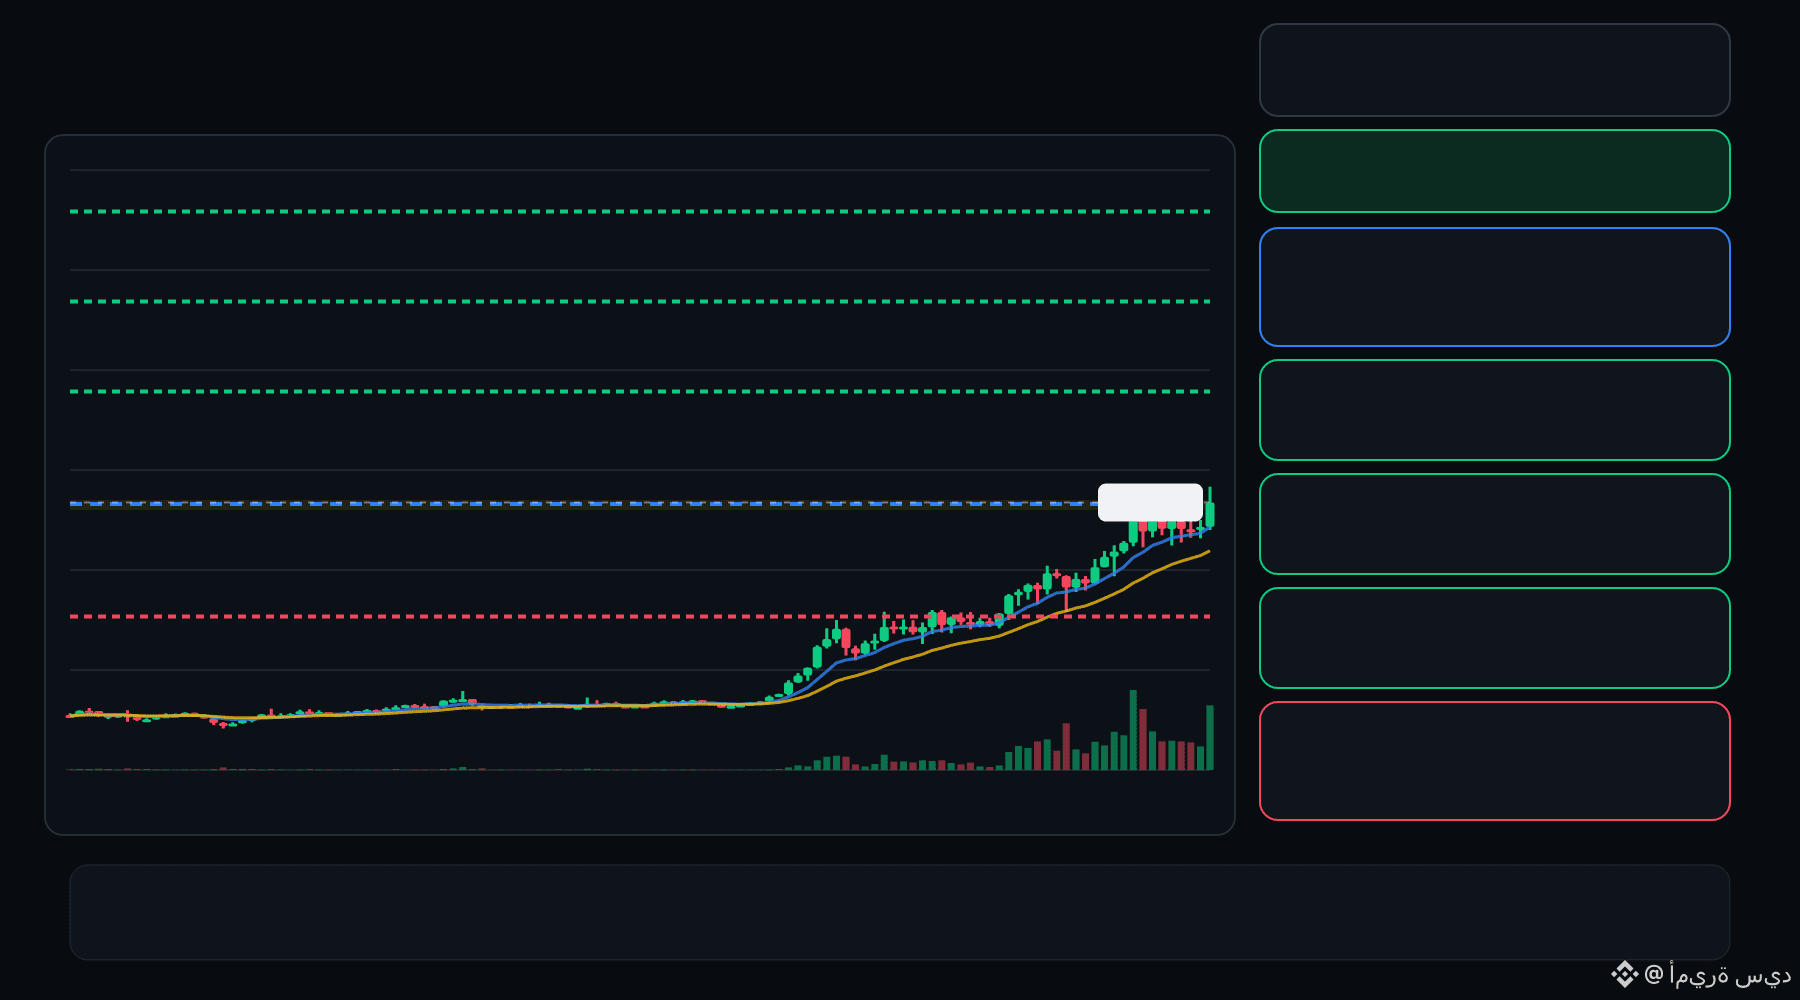
🟢 ESPORTS bulls are defending the pullback… is continuation setting up ⁉️
🟩 ESPORTS LONG
Entry: 0.009853 – 0.009964
TP1: 0.01148
TP2: 0.01274
TP3: 0.01399
Stop Loss: 0.008338
The 15M chart shows a bullish structure with momentum and volume confirmation. A controlled retest of the entry zone may give the setup a cleaner trigger.
Plan: Wait for confirmation/rejection inside the entry zone; don’t chase the move.
DYOR | Manage Risk | Avoid Over-Leverage
15
·
--
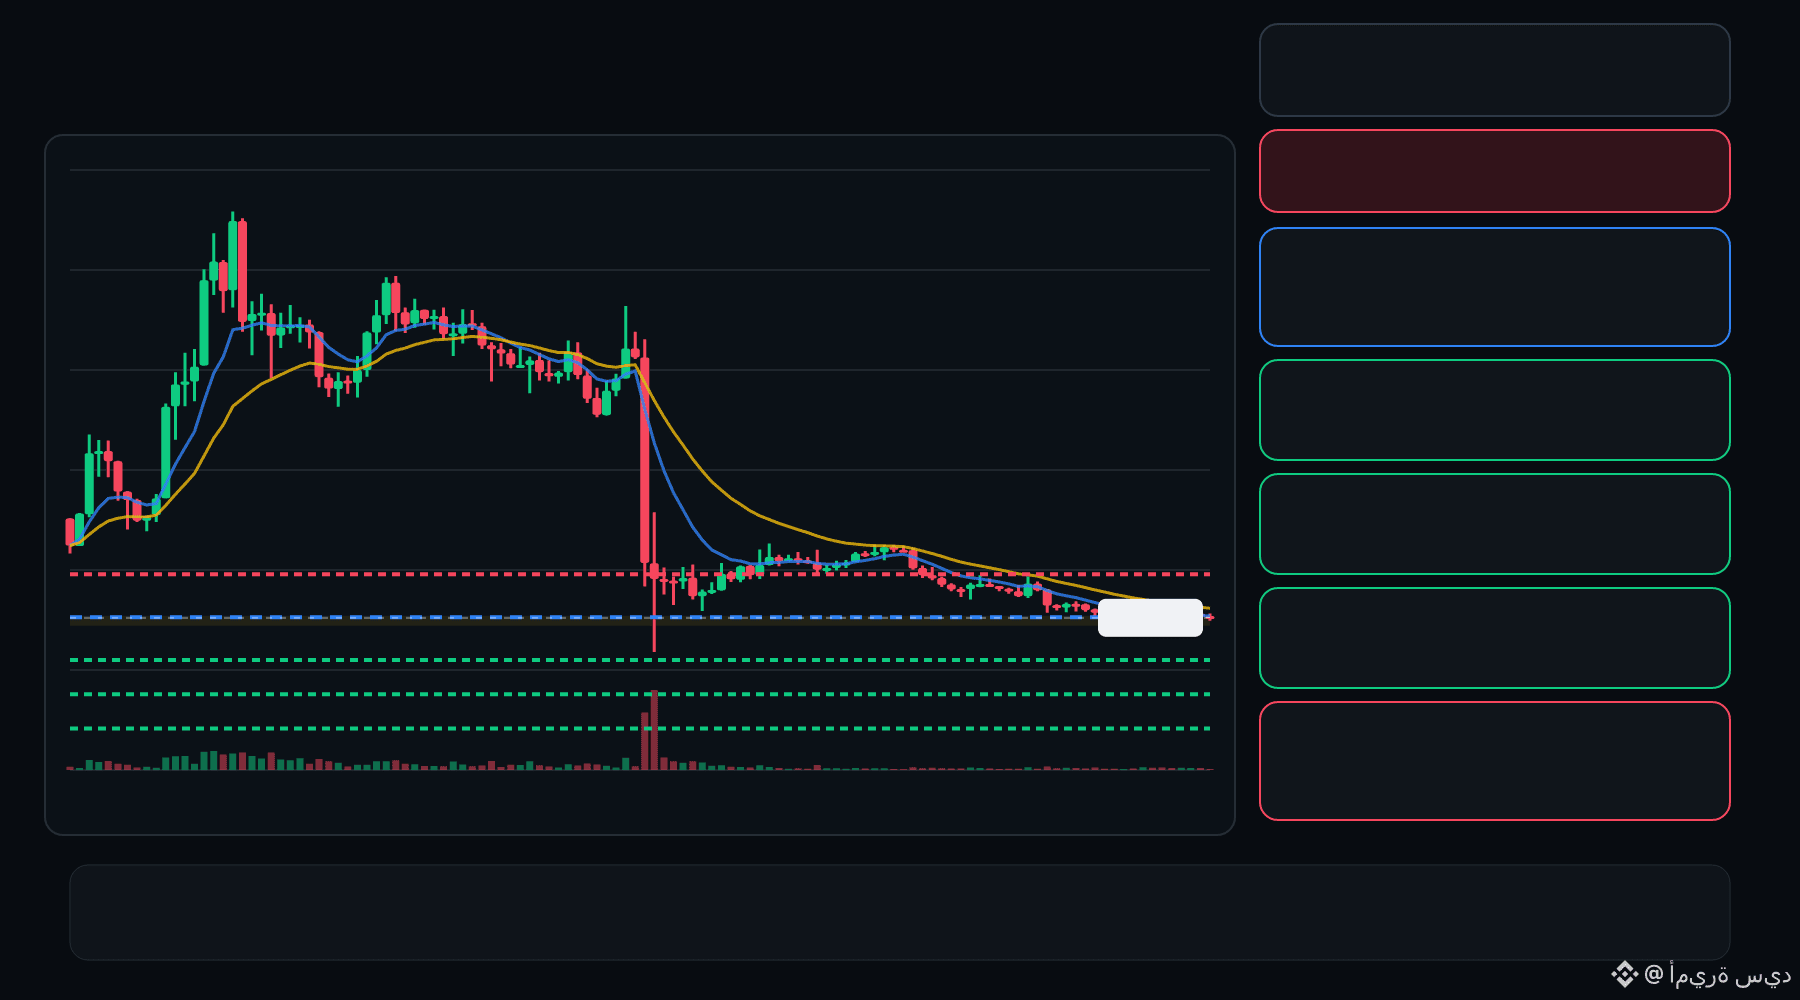
🔴 SOPH bears are pressing the pullback… is the rejection getting deeper ⁉️
🔴 SOPH SHORT
Entry: 0.001502 – 0.001509
TP1: 0.001404
TP2: 0.001322
TP3: 0.001241
Stop Loss: 0.001607
The 15M chart shows a bearish structure with momentum and volume confirmation. A controlled retest of the entry zone may give the setup a cleaner trigger.
Plan: Wait for confirmation/rejection inside the entry zone; don’t chase the move.
DYOR | Manage Risk | Avoid Over-Leverage
2
·
--
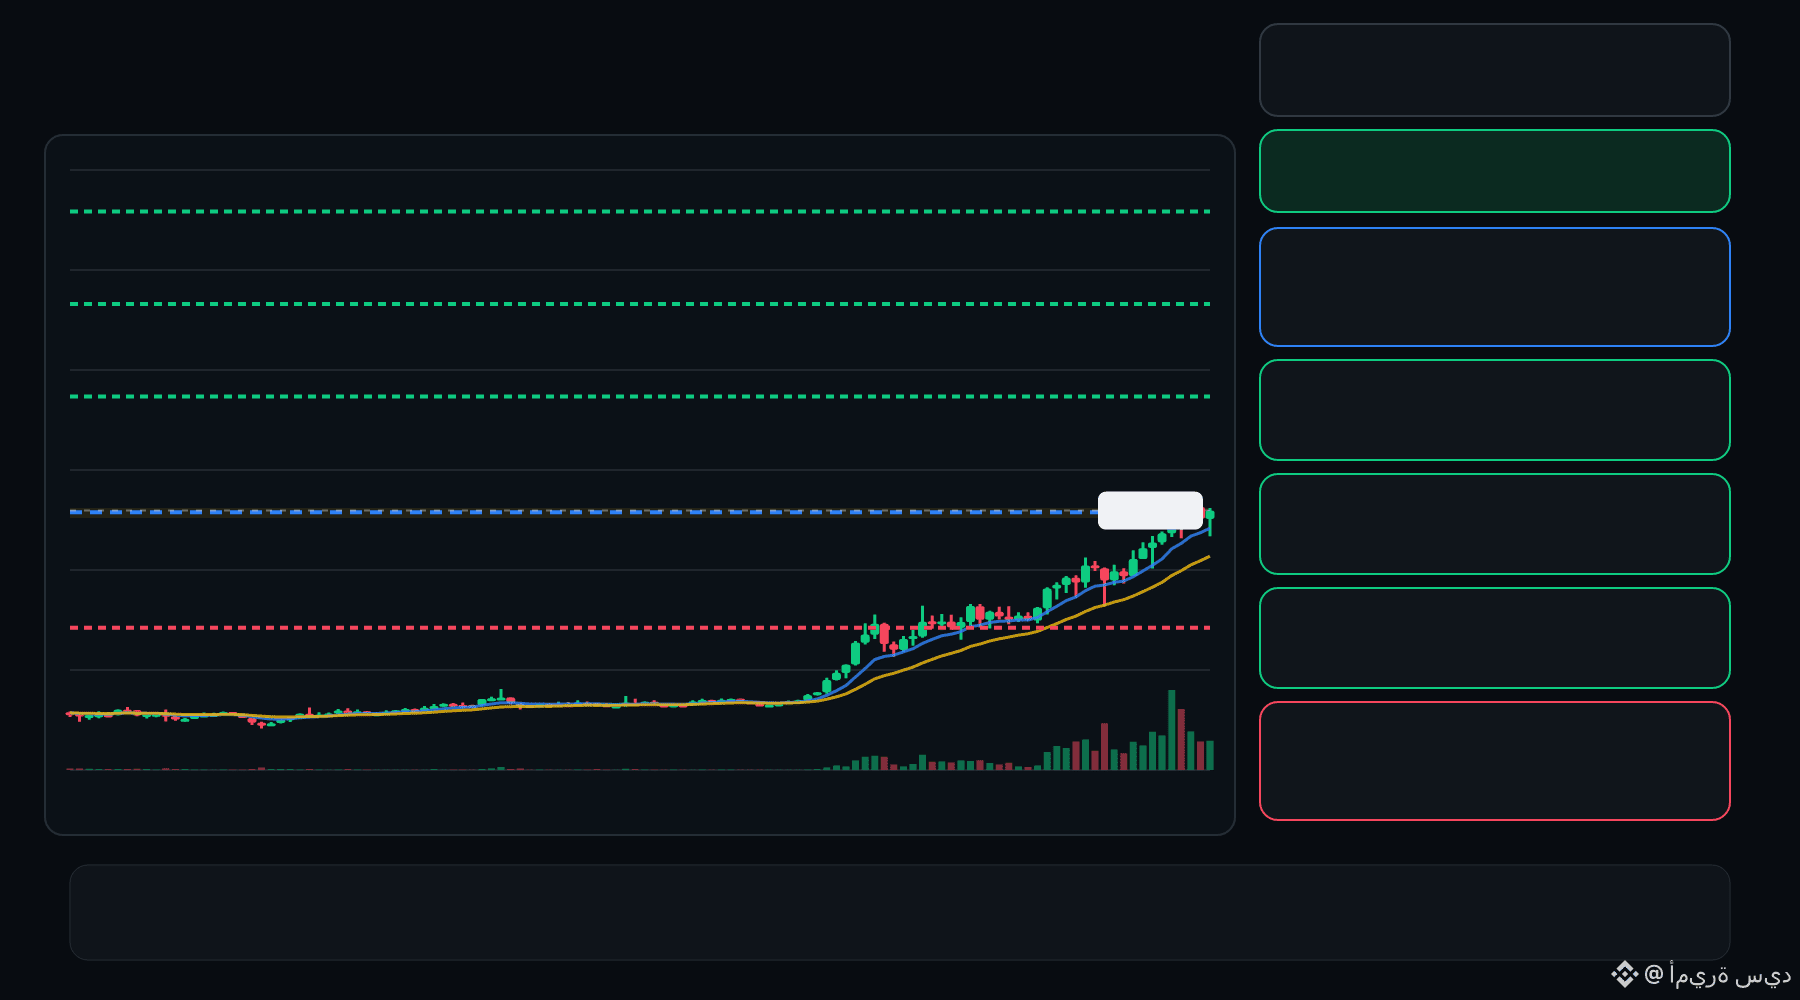
🟢 ESPORTS bulls are defending the pullback… is continuation setting up ⁉️
🟩 ESPORTS LONG
Entry: 0.009595 – 0.009704
TP1: 0.01119
TP2: 0.01242
TP3: 0.01365
Stop Loss: 0.008113
The 15M chart shows a bullish structure with momentum and volume confirmation. A controlled retest of the entry zone may give the setup a cleaner trigger.
Plan: Wait for confirmation/rejection inside the entry zone; don’t chase the move.
DYOR | Manage Risk | Avoid Over-Leverage
3
·
--
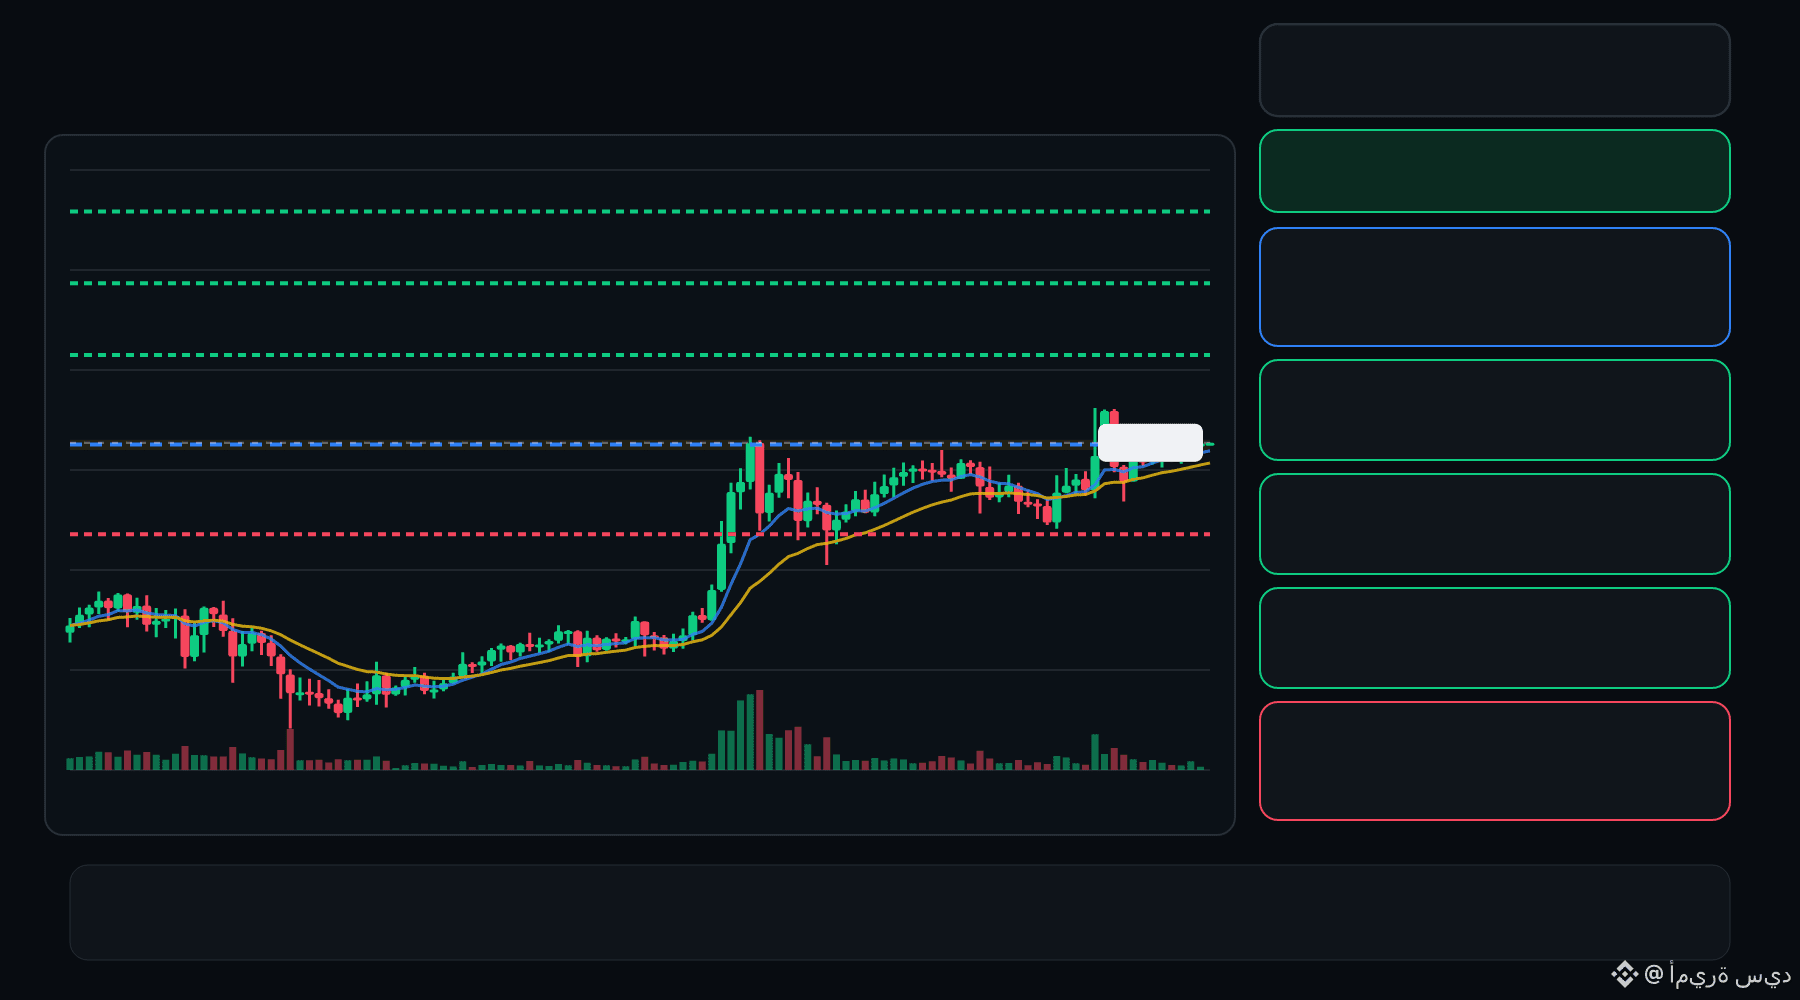
🟢 MAGMA bulls are defending the pullback… is continuation setting up ⁉️
🟩 MAGMA LONG
Entry: 0.4265 – 0.4292
TP1: 0.4521
TP2: 0.4716
TP3: 0.4910
Stop Loss: 0.4035
The 15M chart shows a bullish structure with momentum and volume confirmation. A controlled retest of the entry zone may give the setup a cleaner trigger.
Plan: Wait for confirmation/rejection inside the entry zone; don’t chase the move.
DYOR | Manage Risk | Avoid Over-Leverage
1
·
--
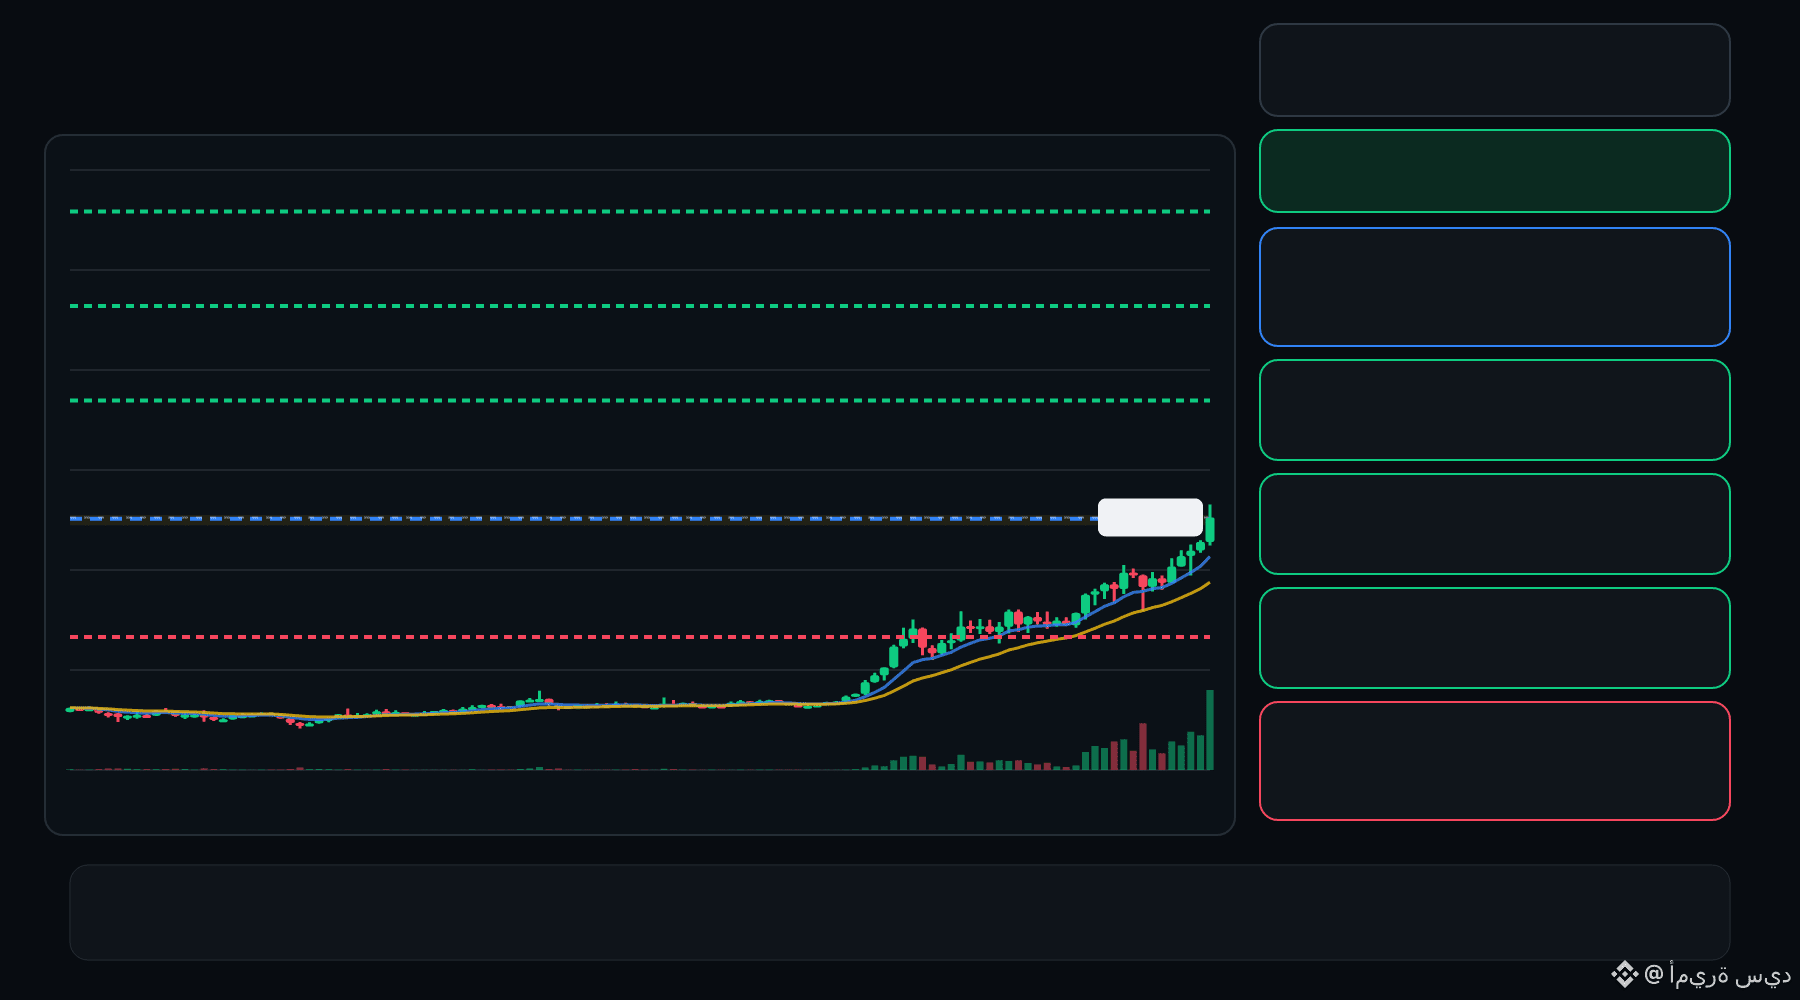
🟢 ESPORTS bulls are defending the pullback… is continuation setting up ⁉️
🟩 ESPORTS LONG
Entry: 0.009640 – 0.009740
TP1: 0.01133
TP2: 0.01265
TP3: 0.01396
Stop Loss: 0.008048
The 15M chart shows a bullish structure with momentum and volume confirmation. A controlled retest of the entry zone may give the setup a cleaner trigger.
Plan: Wait for confirmation/rejection inside the entry zone; don’t chase the move.
DYOR | Manage Risk | Avoid Over-Leverage
5
·
--
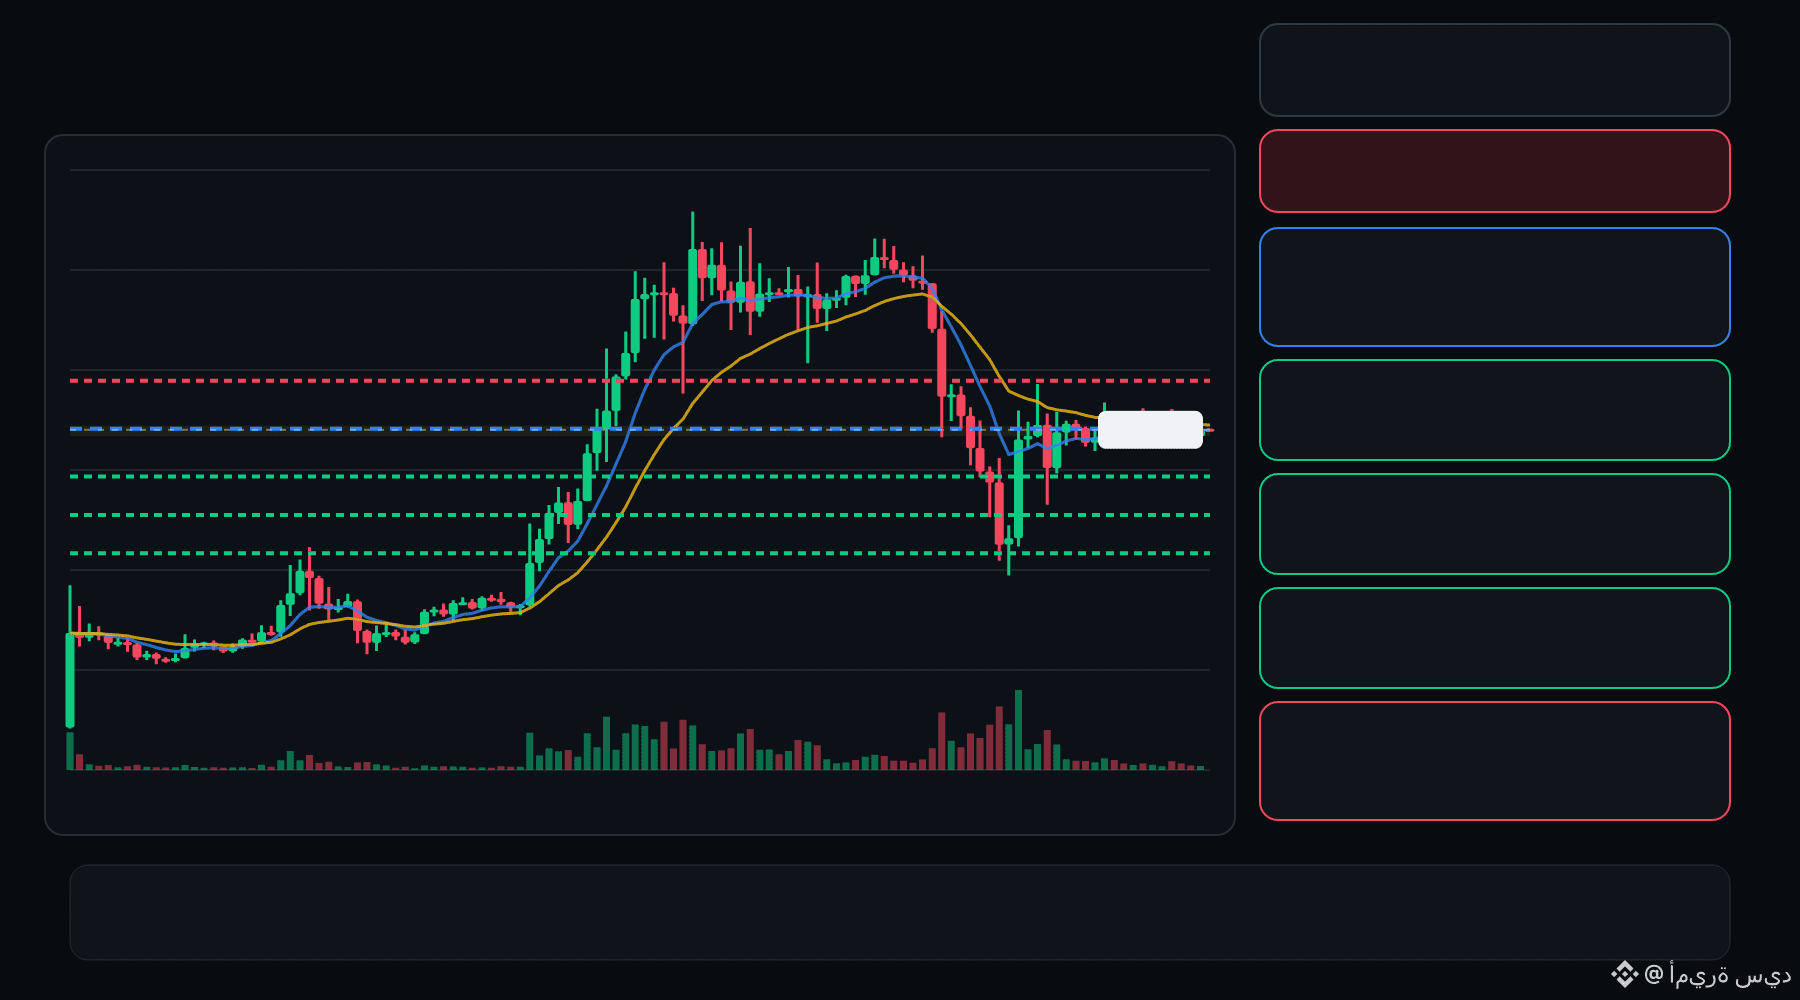
🔴 AIN bears are pressing the pullback… is the rejection getting deeper ⁉️
🔴 AIN SHORT
Entry: 0.2306 – 0.2323
TP1: 0.2179
TP2: 0.2071
TP3: 0.1963
Stop Loss: 0.2449
The 15M chart shows a bearish structure with momentum and volume confirmation. A controlled retest of the entry zone may give the setup a cleaner trigger.
Plan: Wait for confirmation/rejection inside the entry zone; don’t chase the move.
DYOR | Manage Risk | Avoid Over-Leverage
20
·
--
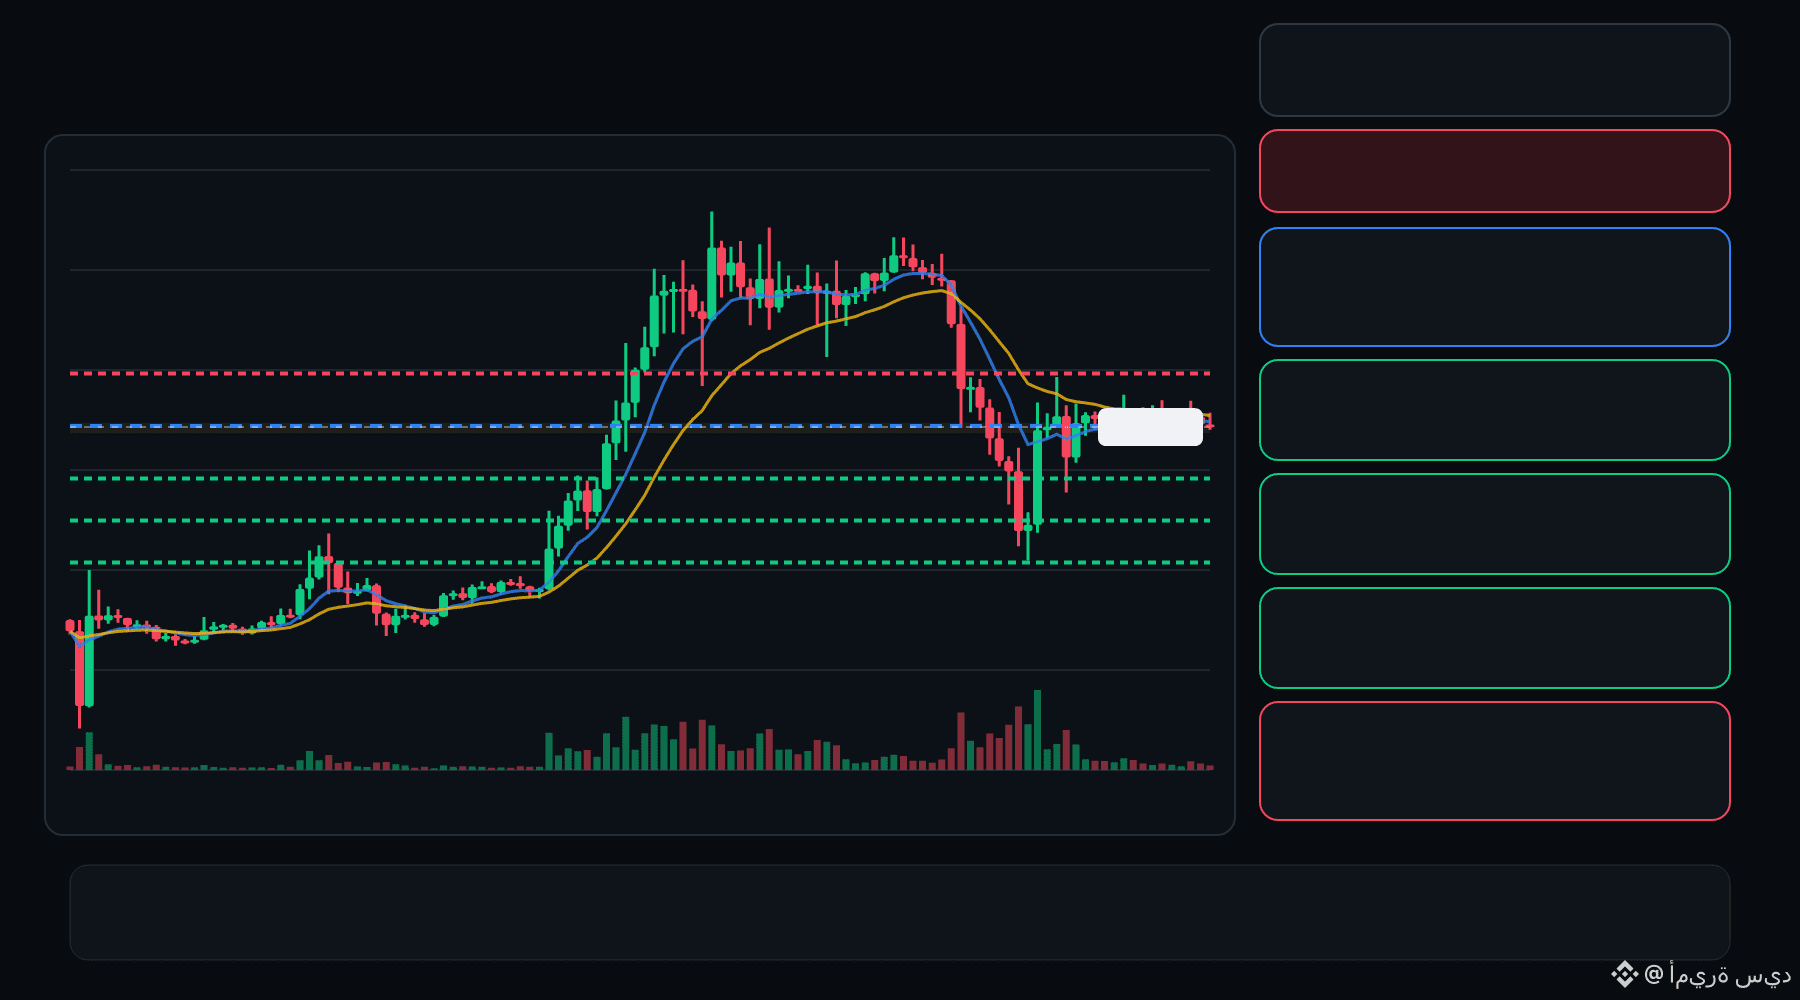
🔴 AIN bears are pressing the pullback… is the rejection getting deeper ⁉️
🔴 AIN SHORT
Entry: 0.2287 – 0.2306
TP1: 0.2142
TP2: 0.2018
TP3: 0.1895
Stop Loss: 0.2451
The 15M chart shows a bearish structure with momentum and volume confirmation. A controlled retest of the entry zone may give the setup a cleaner trigger.
Plan: Wait for confirmation/rejection inside the entry zone; don’t chase the move.
DYOR | Manage Risk | Avoid Over-Leverage
5
·
--
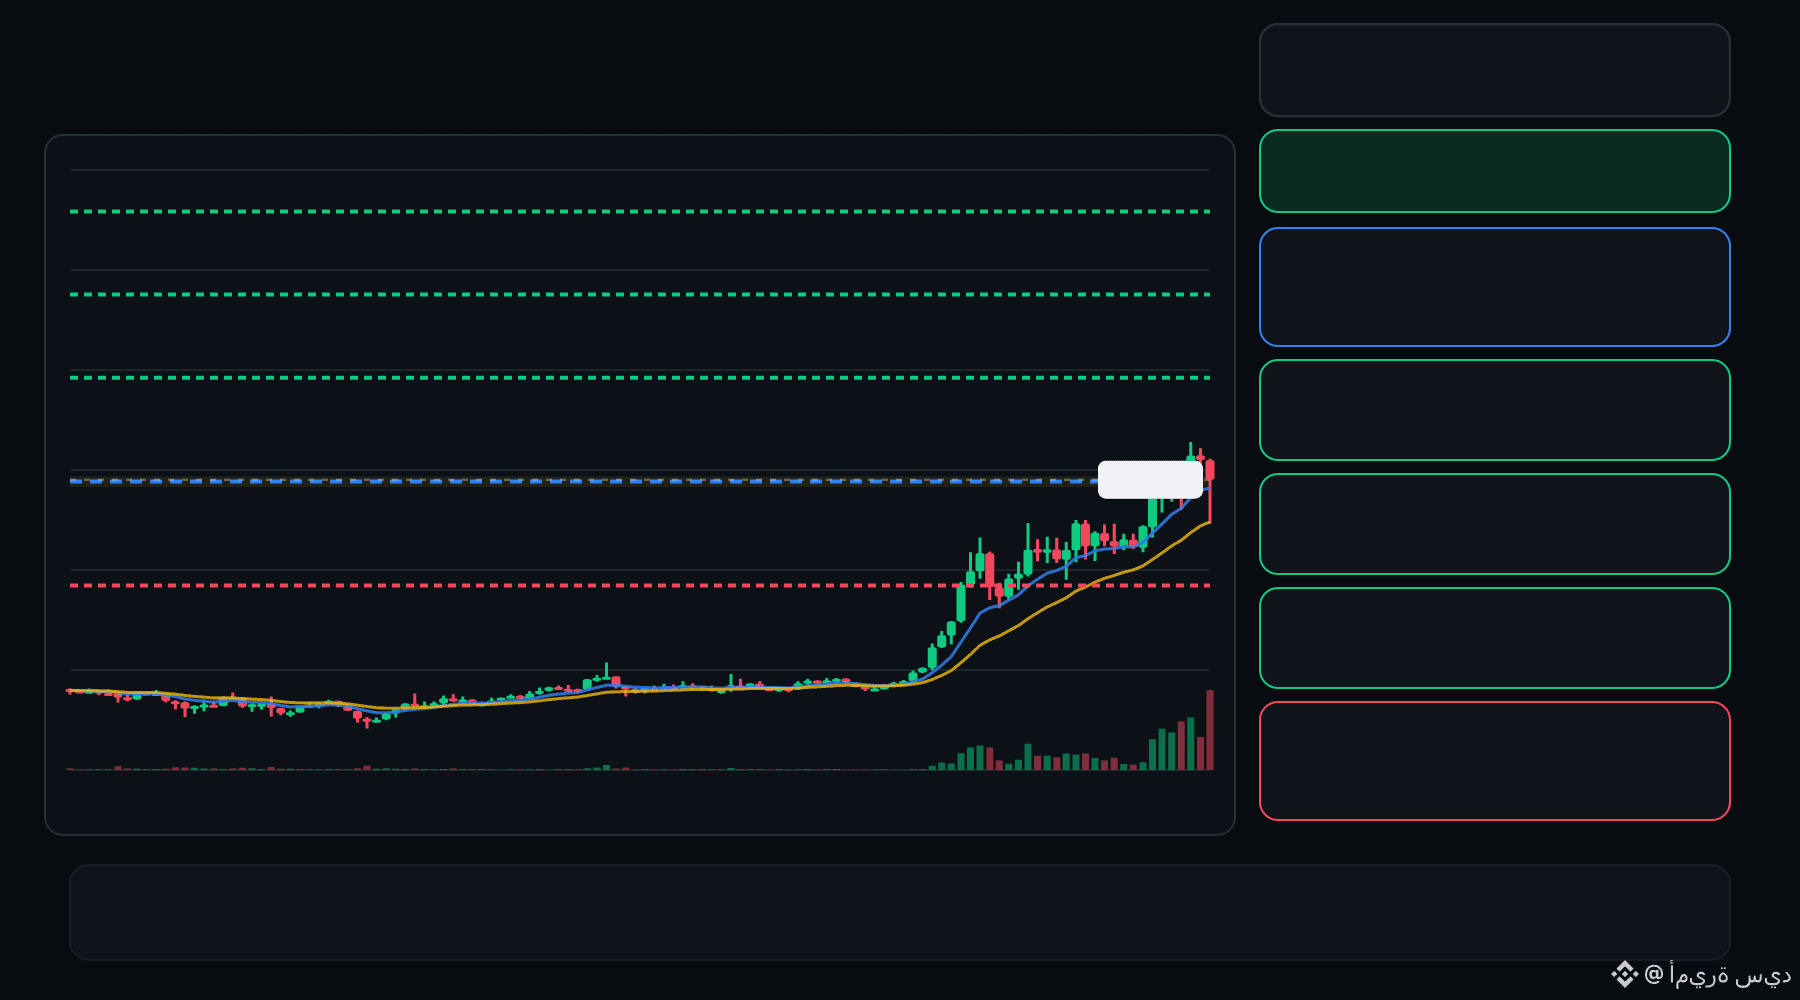
🟢 ESPORTS bulls are defending the pullback… is continuation setting up ⁉️
🟩 ESPORTS LONG
Entry: 0.008694 – 0.008776
TP1: 0.009559
TP2: 0.01022
TP3: 0.01088
Stop Loss: 0.007910
The 15M chart shows a bullish structure with momentum and volume confirmation. A controlled retest of the entry zone may give the setup a cleaner trigger.
Plan: Wait for confirmation/rejection inside the entry zone; don’t chase the move.
DYOR | Manage Risk | Avoid Over-Leverage
5
·
--
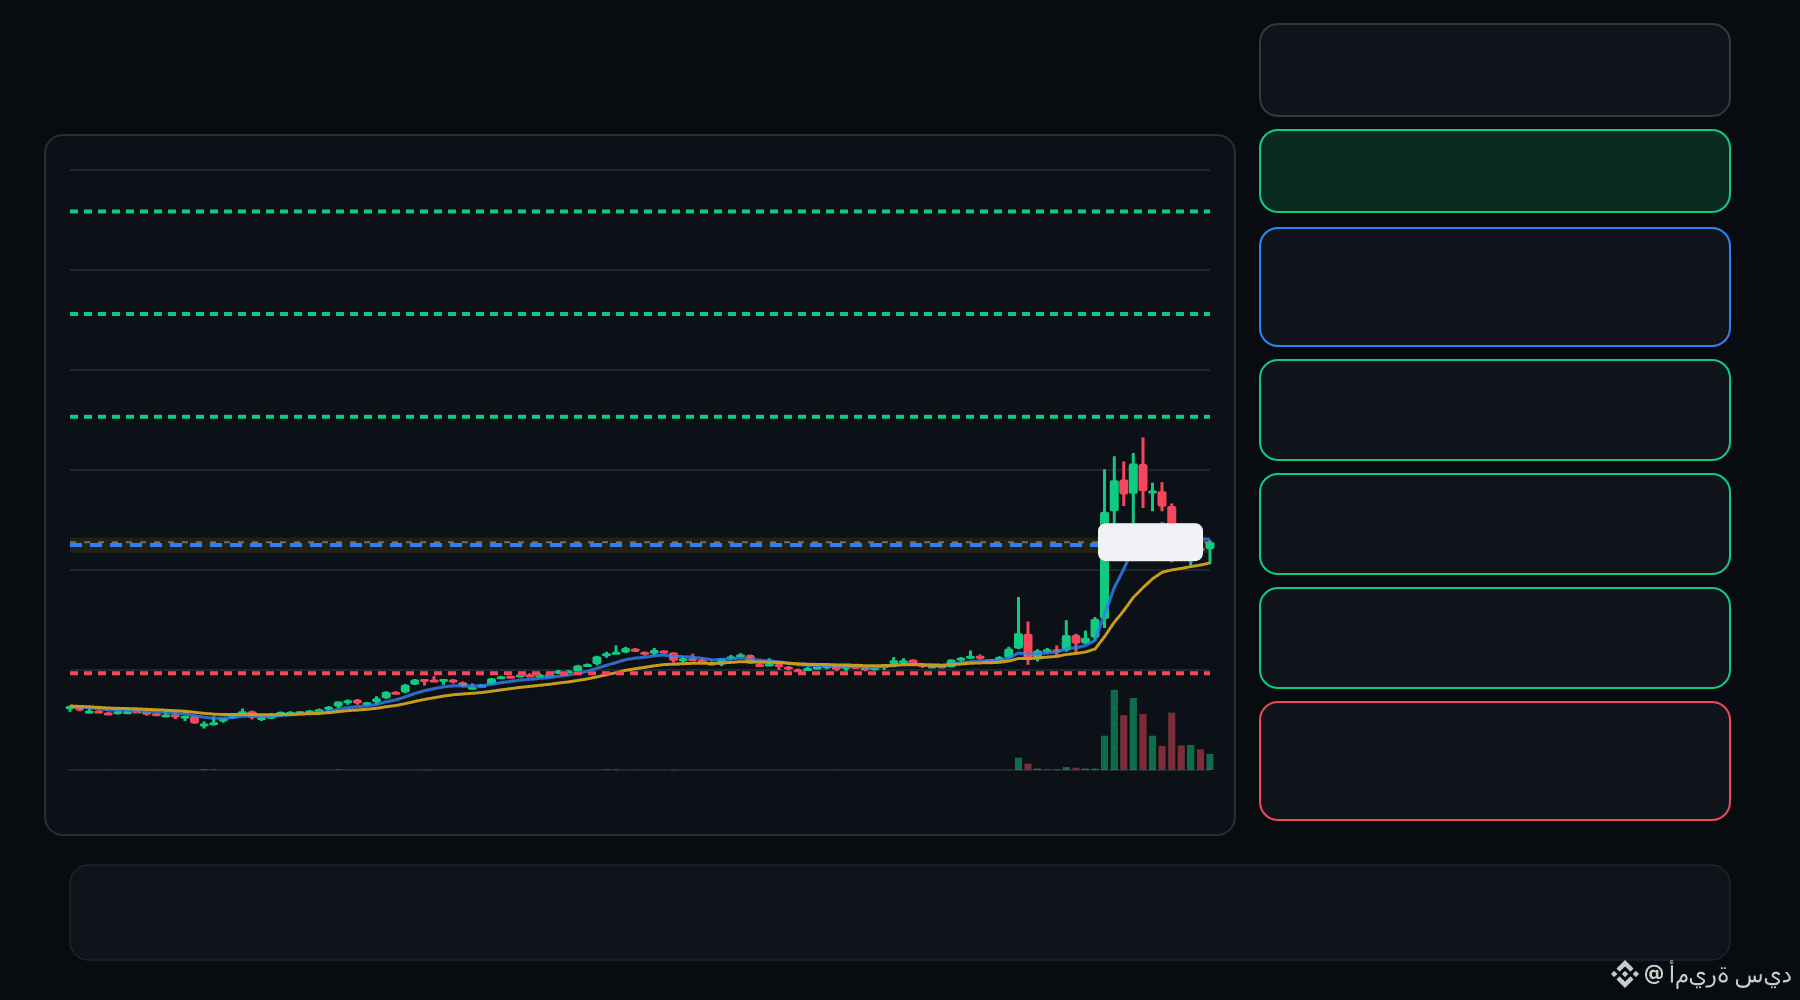
🟢 COW bulls are defending the pullback… is continuation setting up ⁉️
🟩 COW LONG
Entry: 0.1339 – 0.1362
TP1: 0.1549
TP2: 0.1709
TP3: 0.1868
Stop Loss: 0.1152
The 15M chart shows a bullish structure with momentum and volume confirmation. A controlled retest of the entry zone may give the setup a cleaner trigger.
Plan: Wait for confirmation/rejection inside the entry zone; don’t chase the move.
DYOR | Manage Risk | Avoid Over-Leverage
3
·
--
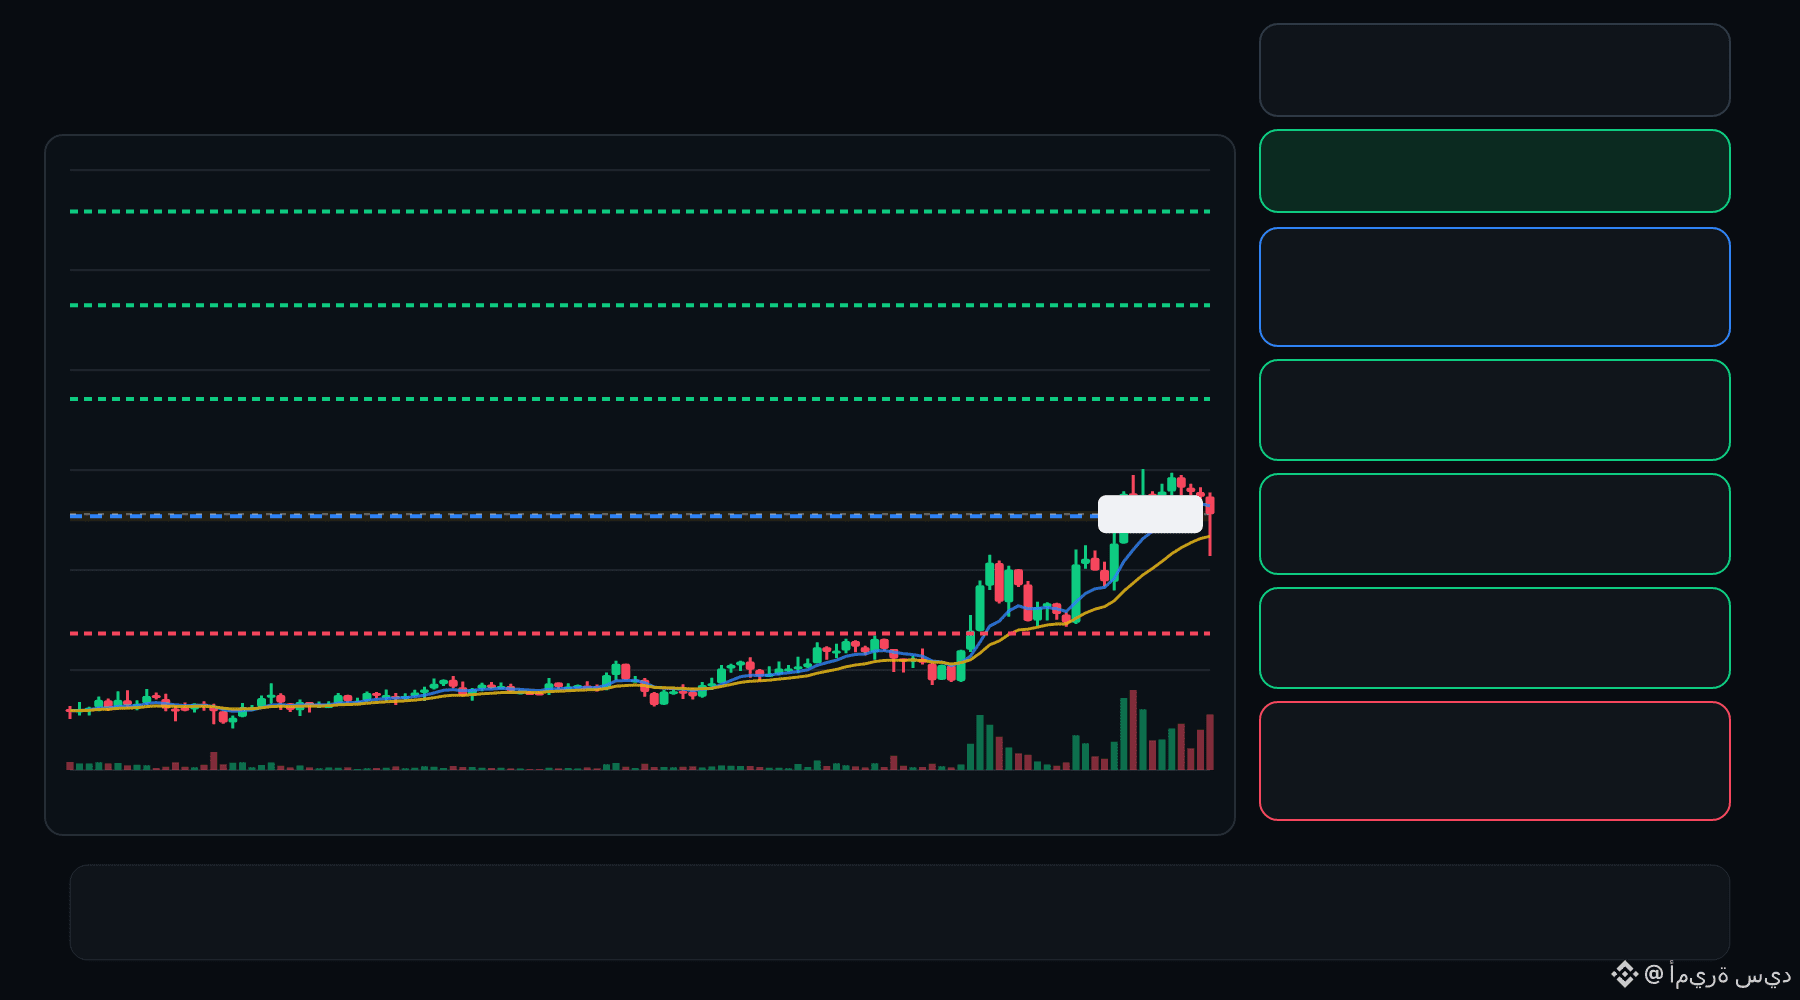
🟢 UAI bulls are defending the pullback… is continuation setting up ⁉️
🟩 UAI LONG
Entry: 0.3088 – 0.3113
TP1: 0.3370
TP2: 0.3585
TP3: 0.3800
Stop Loss: 0.2831
The 15M chart shows a bullish structure with momentum and volume confirmation. A controlled retest of the entry zone may give the setup a cleaner trigger.
Plan: Wait for confirmation/rejection inside the entry zone; don’t chase the move.
DYOR | Manage Risk | Avoid Over-Leverage
2
·
--
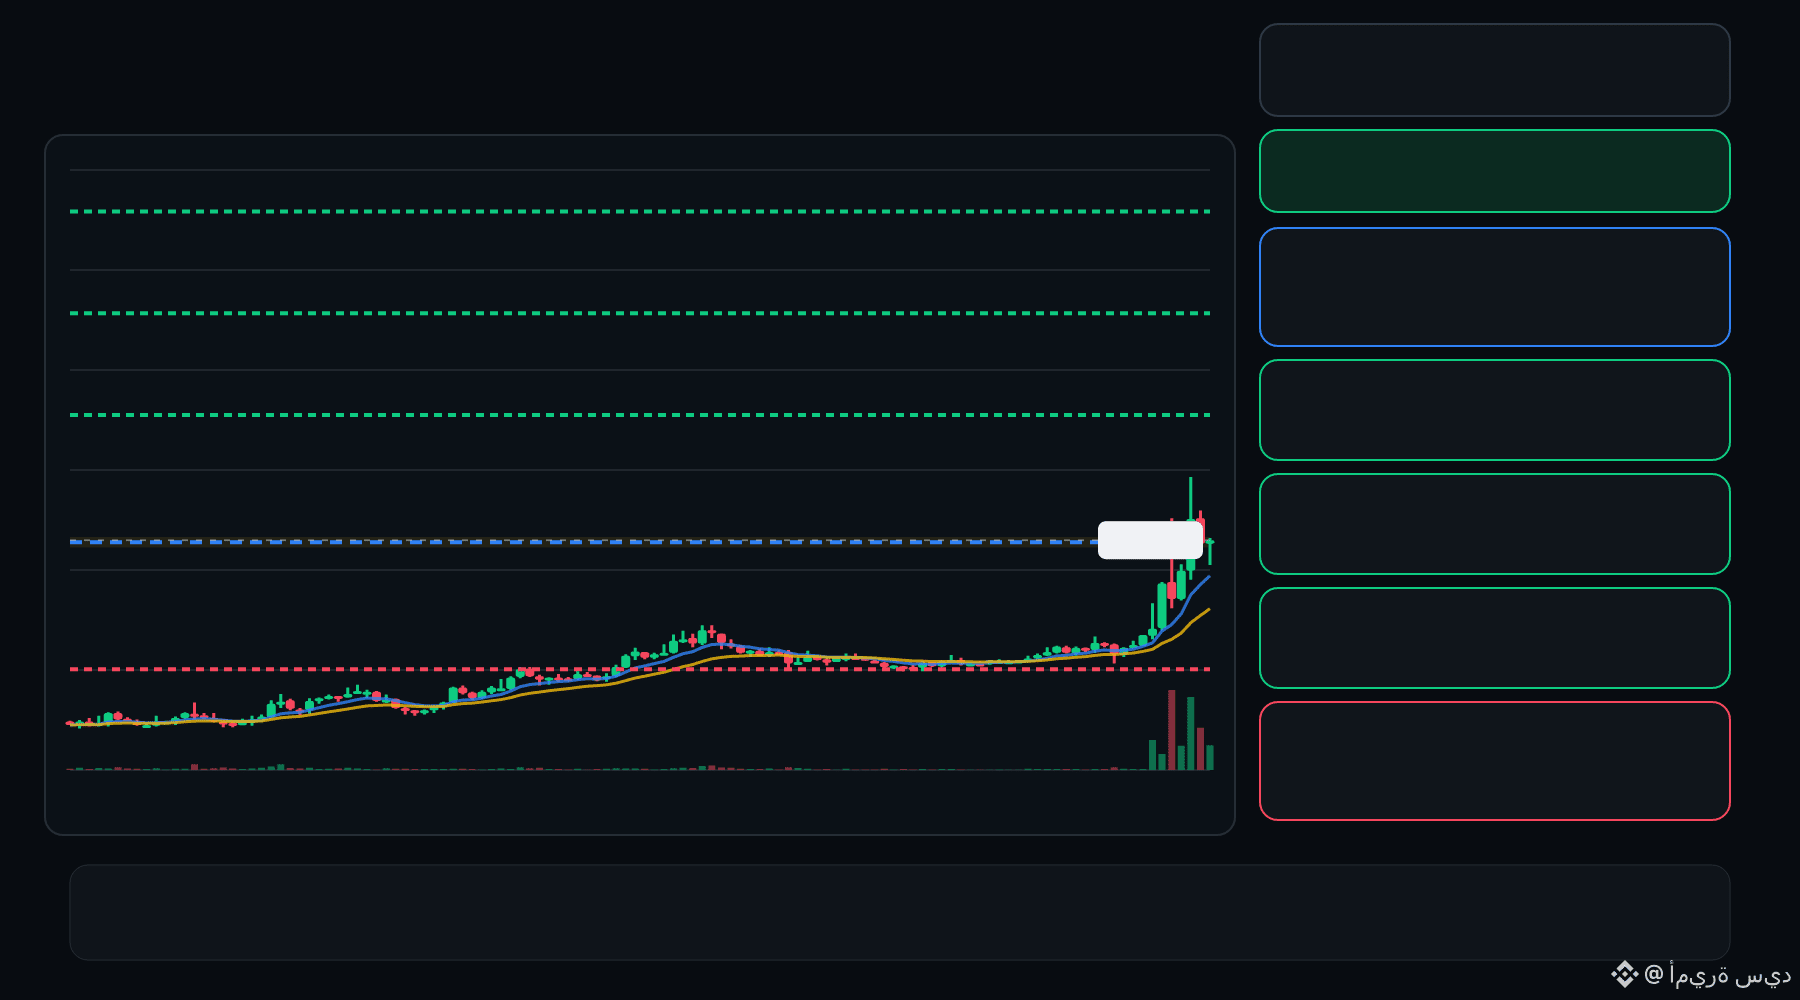
🟢 RED bulls are defending the pullback… is continuation setting up ⁉️
🟩 RED LONG
Entry: 0.1459 – 0.1474
TP1: 0.1646
TP2: 0.1789
TP3: 0.1933
Stop Loss: 0.1287
The 15M chart shows a bullish structure with momentum and volume confirmation. A controlled retest of the entry zone may give the setup a cleaner trigger.
Plan: Wait for confirmation/rejection inside the entry zone; don’t chase the move.
DYOR | Manage Risk | Avoid Over-Leverage
·
--
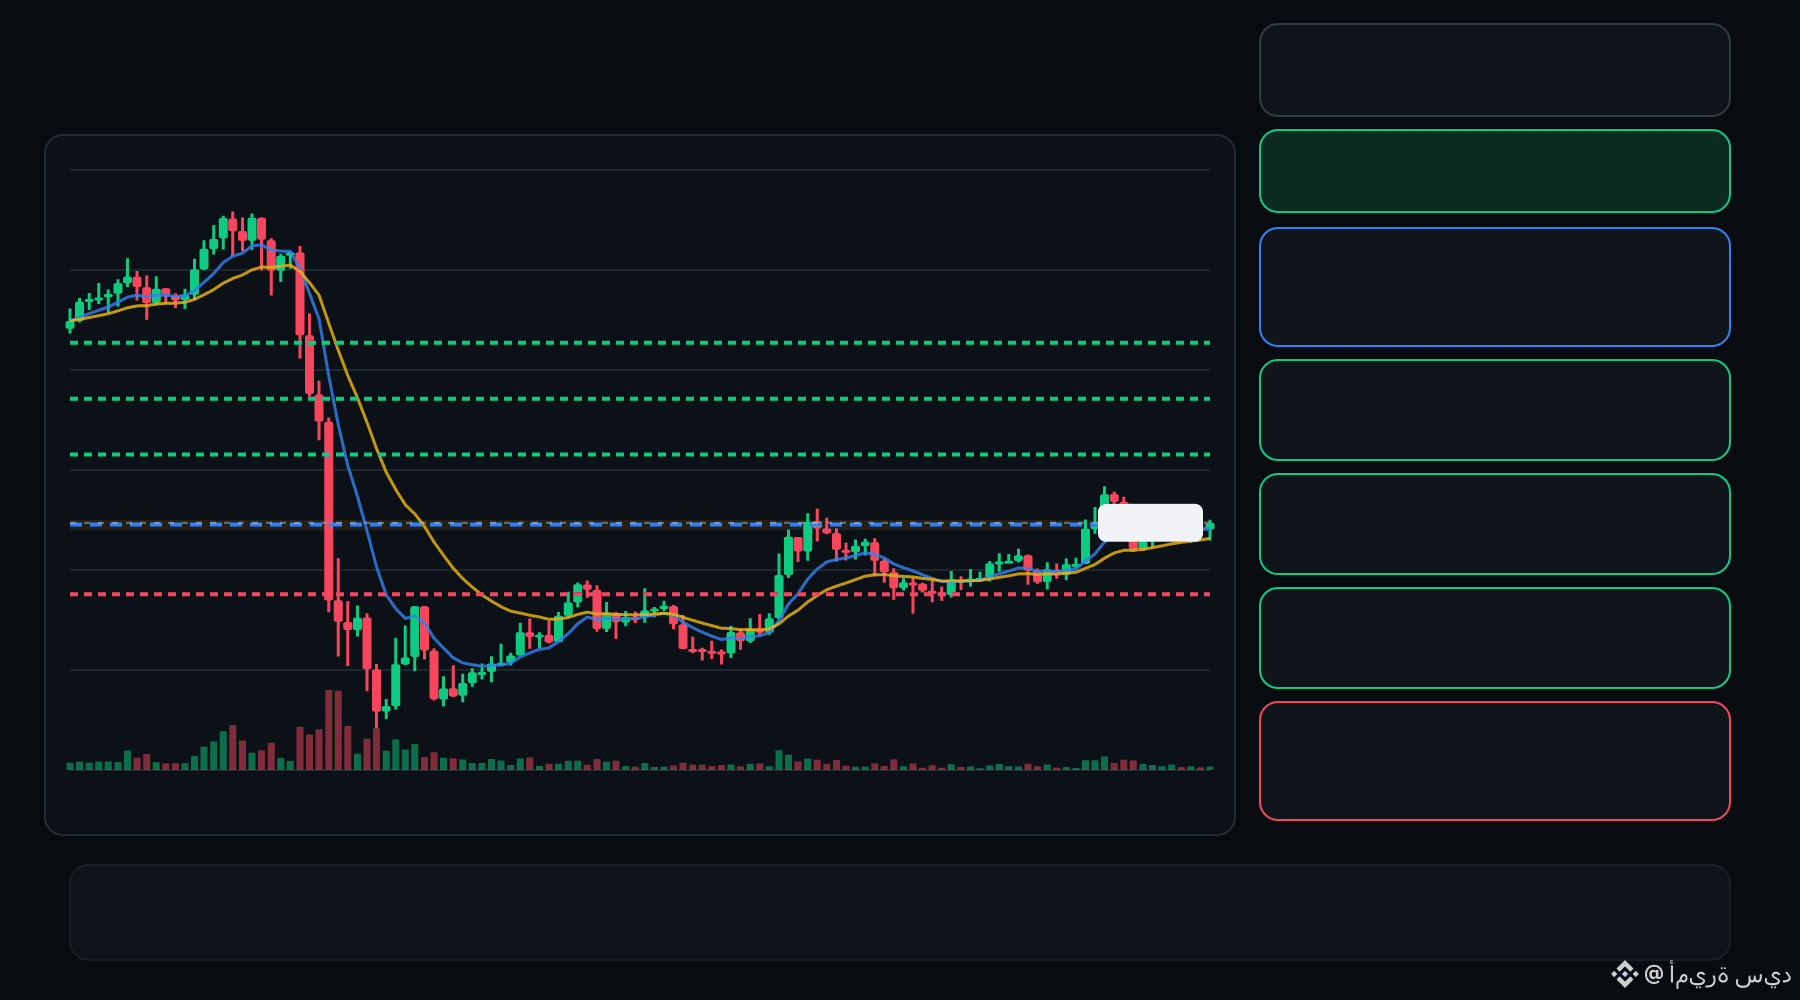
🟢 BLESS bulls are defending the pullback… is continuation setting up ⁉️
🟩 BLESS LONG
Entry: 0.01061 – 0.01070
TP1: 0.01138
TP2: 0.01197
TP3: 0.01256
Stop Loss: 0.009918
The 15M chart shows a bullish structure with momentum and volume confirmation. A controlled retest of the entry zone may give the setup a cleaner trigger.
Plan: Wait for confirmation/rejection inside the entry zone; don’t chase the move.
DYOR | Manage Risk | Avoid Over-Leverage
·
--
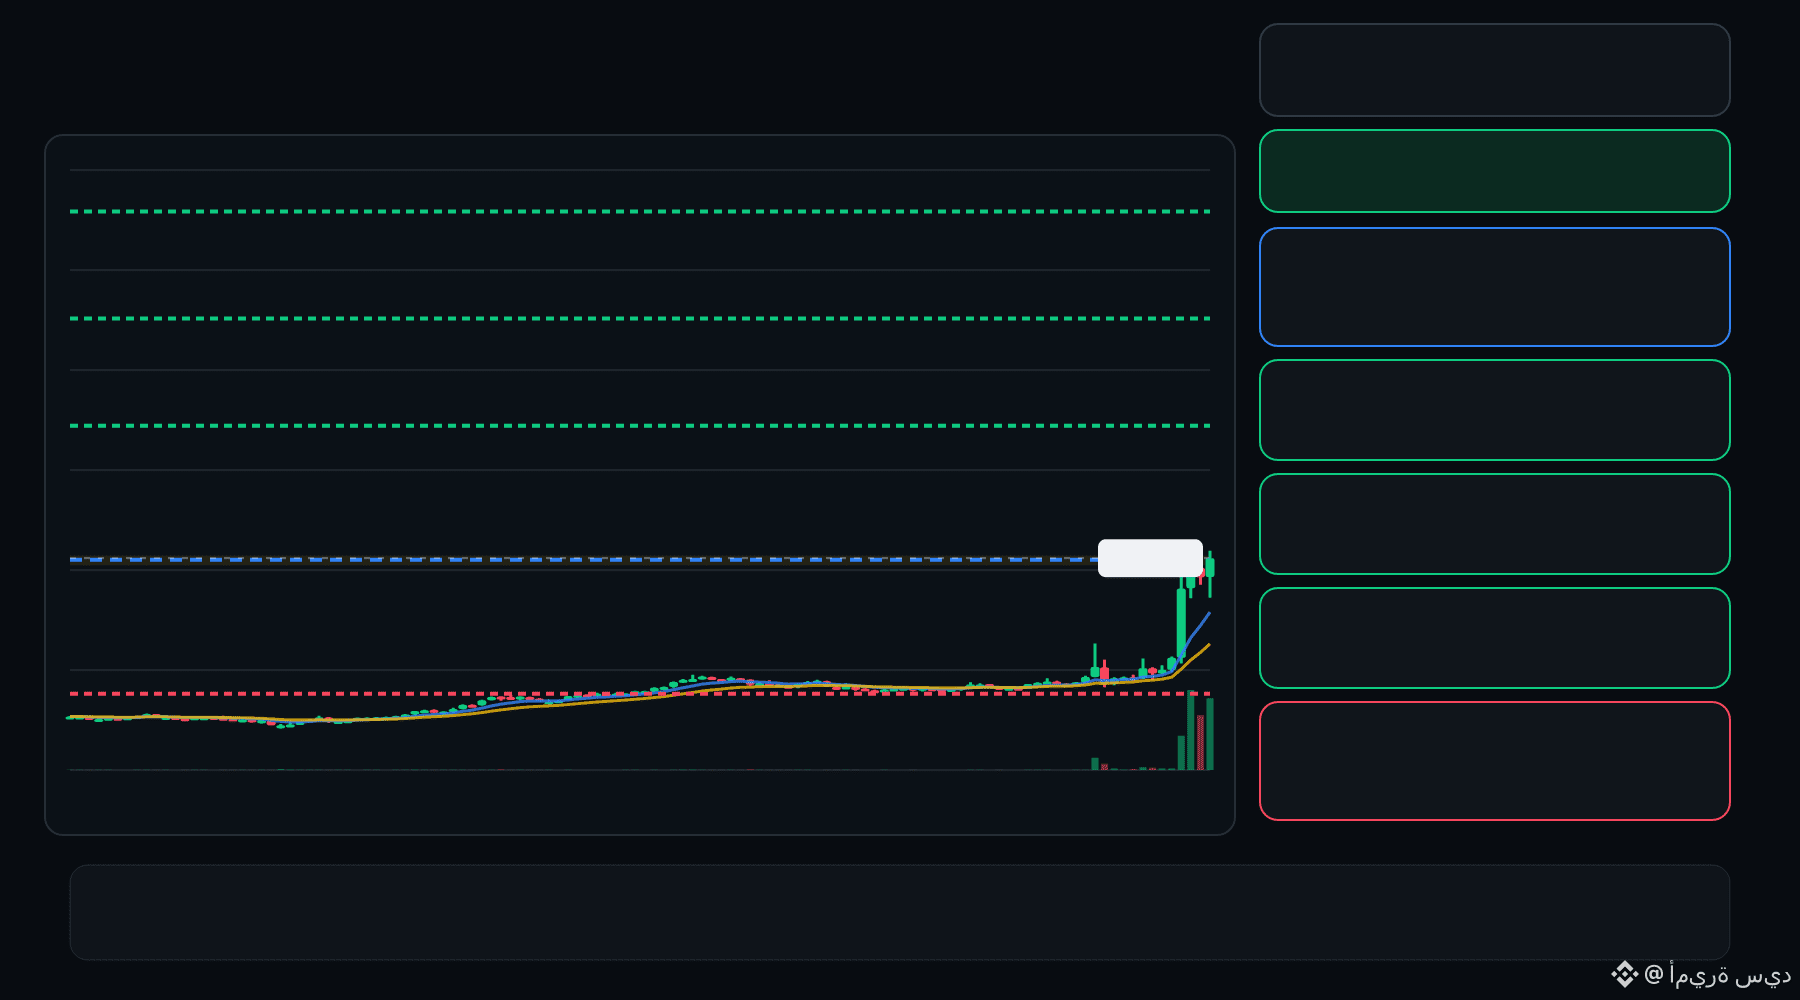
🟢 COW bulls are defending the pullback… is continuation setting up ⁉️
🟩 COW LONG
Entry: 0.1461 – 0.1481
TP1: 0.1793
TP2: 0.2050
TP3: 0.2307
Stop Loss: 0.1150
The 15M chart shows a bullish structure with momentum and volume confirmation. A controlled retest of the entry zone may give the setup a cleaner trigger.
Plan: Wait for confirmation/rejection inside the entry zone; don’t chase the move.
DYOR | Manage Risk | Avoid Over-Leverage
·
--
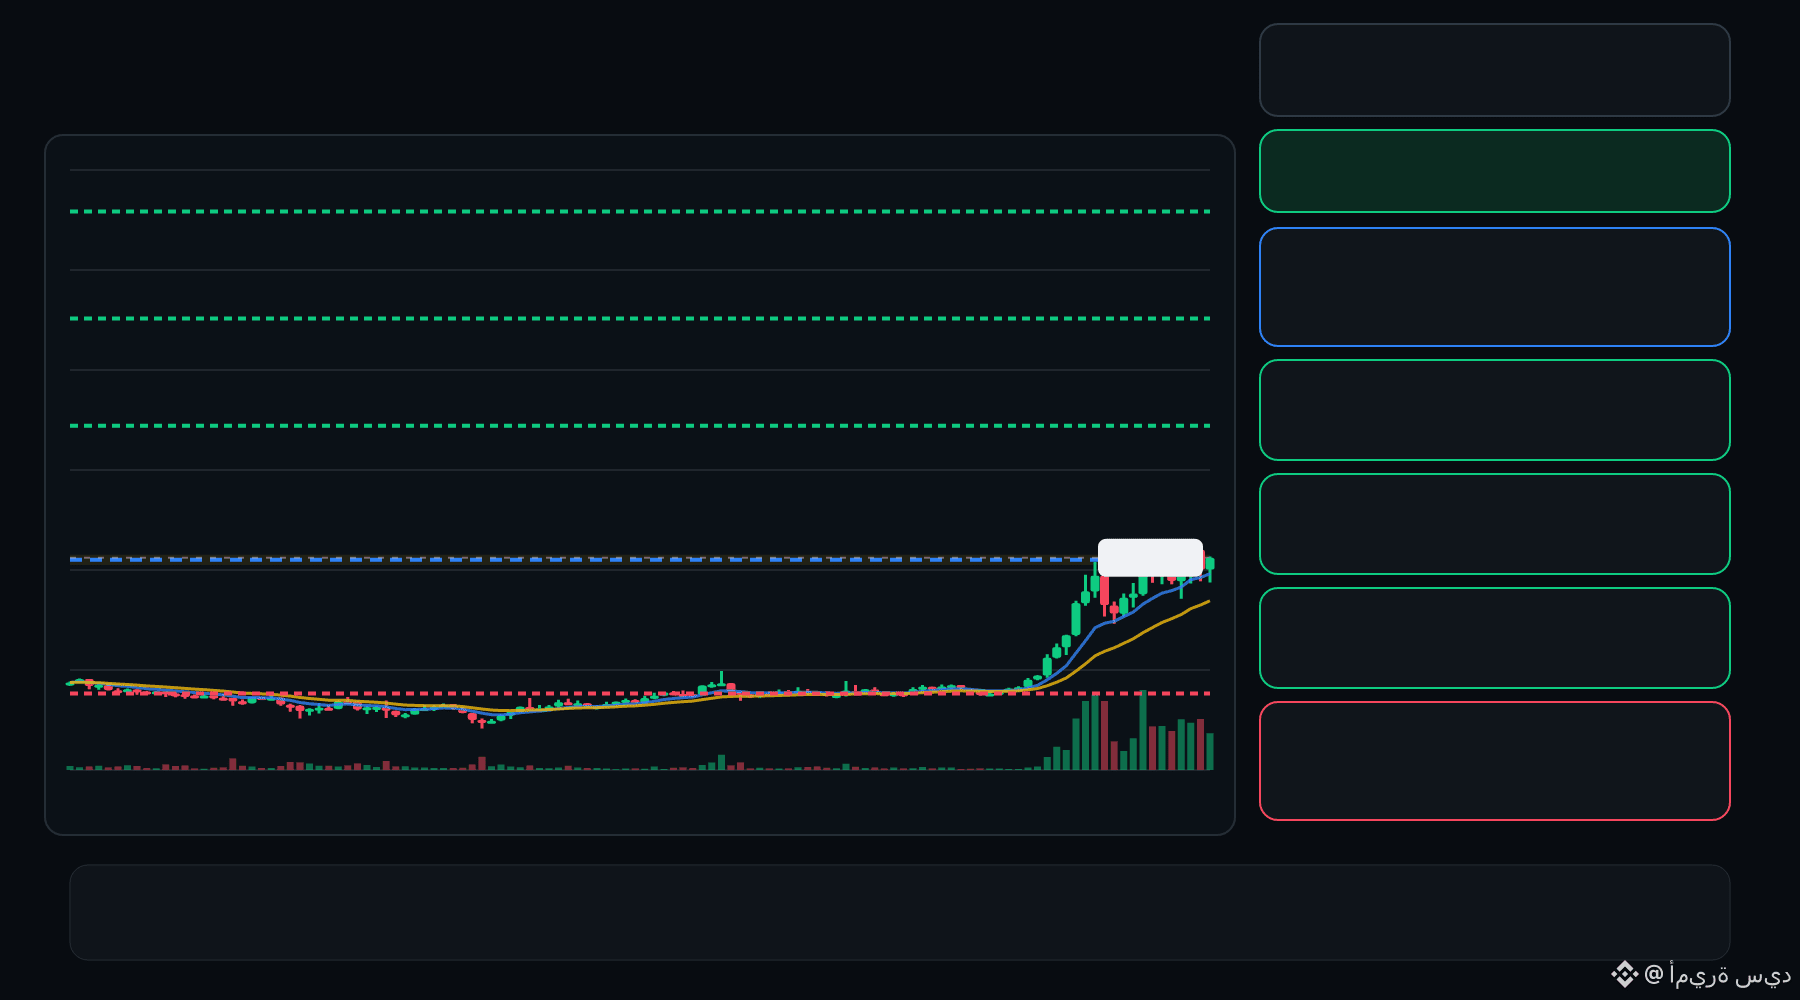
🟢 ESPORTS bulls are defending the pullback… is continuation setting up ⁉️
🟩 ESPORTS LONG
Entry: 0.008268 – 0.008355
TP1: 0.009530
TP2: 0.01051
TP3: 0.01148
Stop Loss: 0.007093
The 15M chart shows a bullish structure with momentum and volume confirmation. A controlled retest of the entry zone may give the setup a cleaner trigger.
Plan: Wait for confirmation/rejection inside the entry zone; don’t chase the move.
DYOR | Manage Risk | Avoid Over-Leverage
·
--
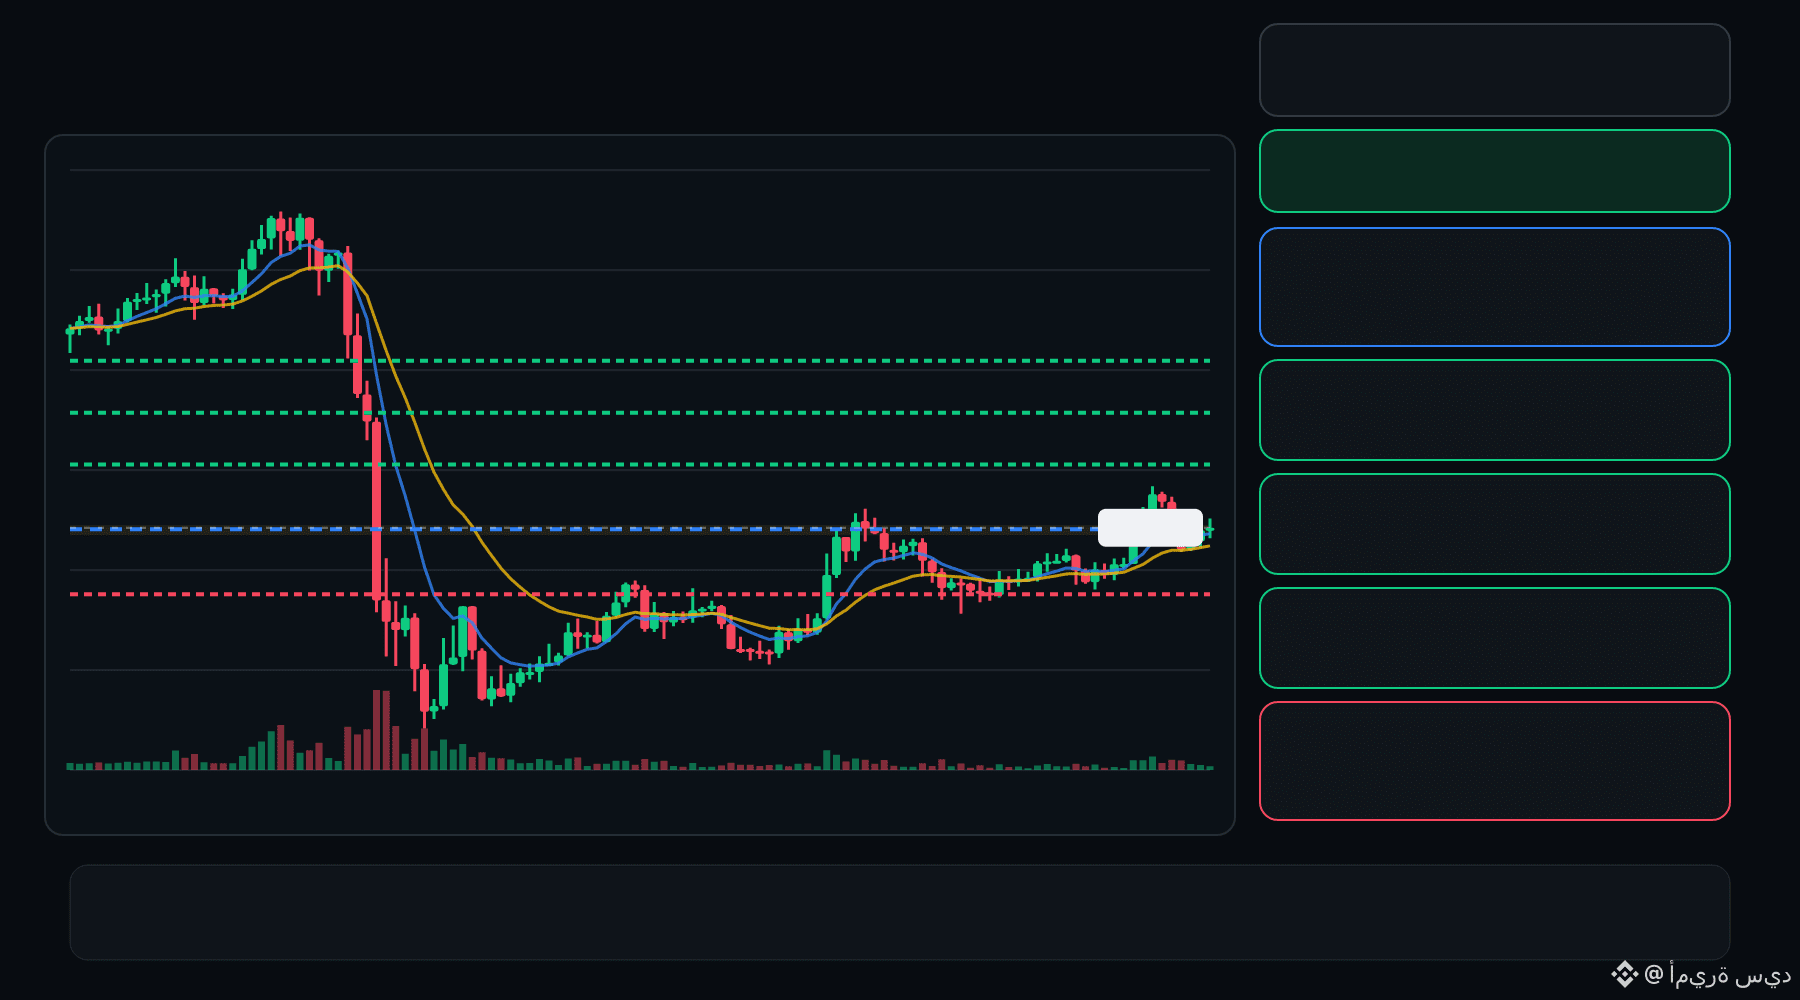
🟢 BLESS bulls are defending the pullback… is continuation setting up ⁉️
🟩 BLESS LONG
Entry: 0.01056 – 0.01064
TP1: 0.01128
TP2: 0.01182
TP3: 0.01237
Stop Loss: 0.009919
The 15M chart shows a bullish structure with momentum and volume confirmation. A controlled retest of the entry zone may give the setup a cleaner trigger.
Plan: Wait for confirmation/rejection inside the entry zone; don’t chase the move.
DYOR | Manage Risk | Avoid Over-Leverage
·
--
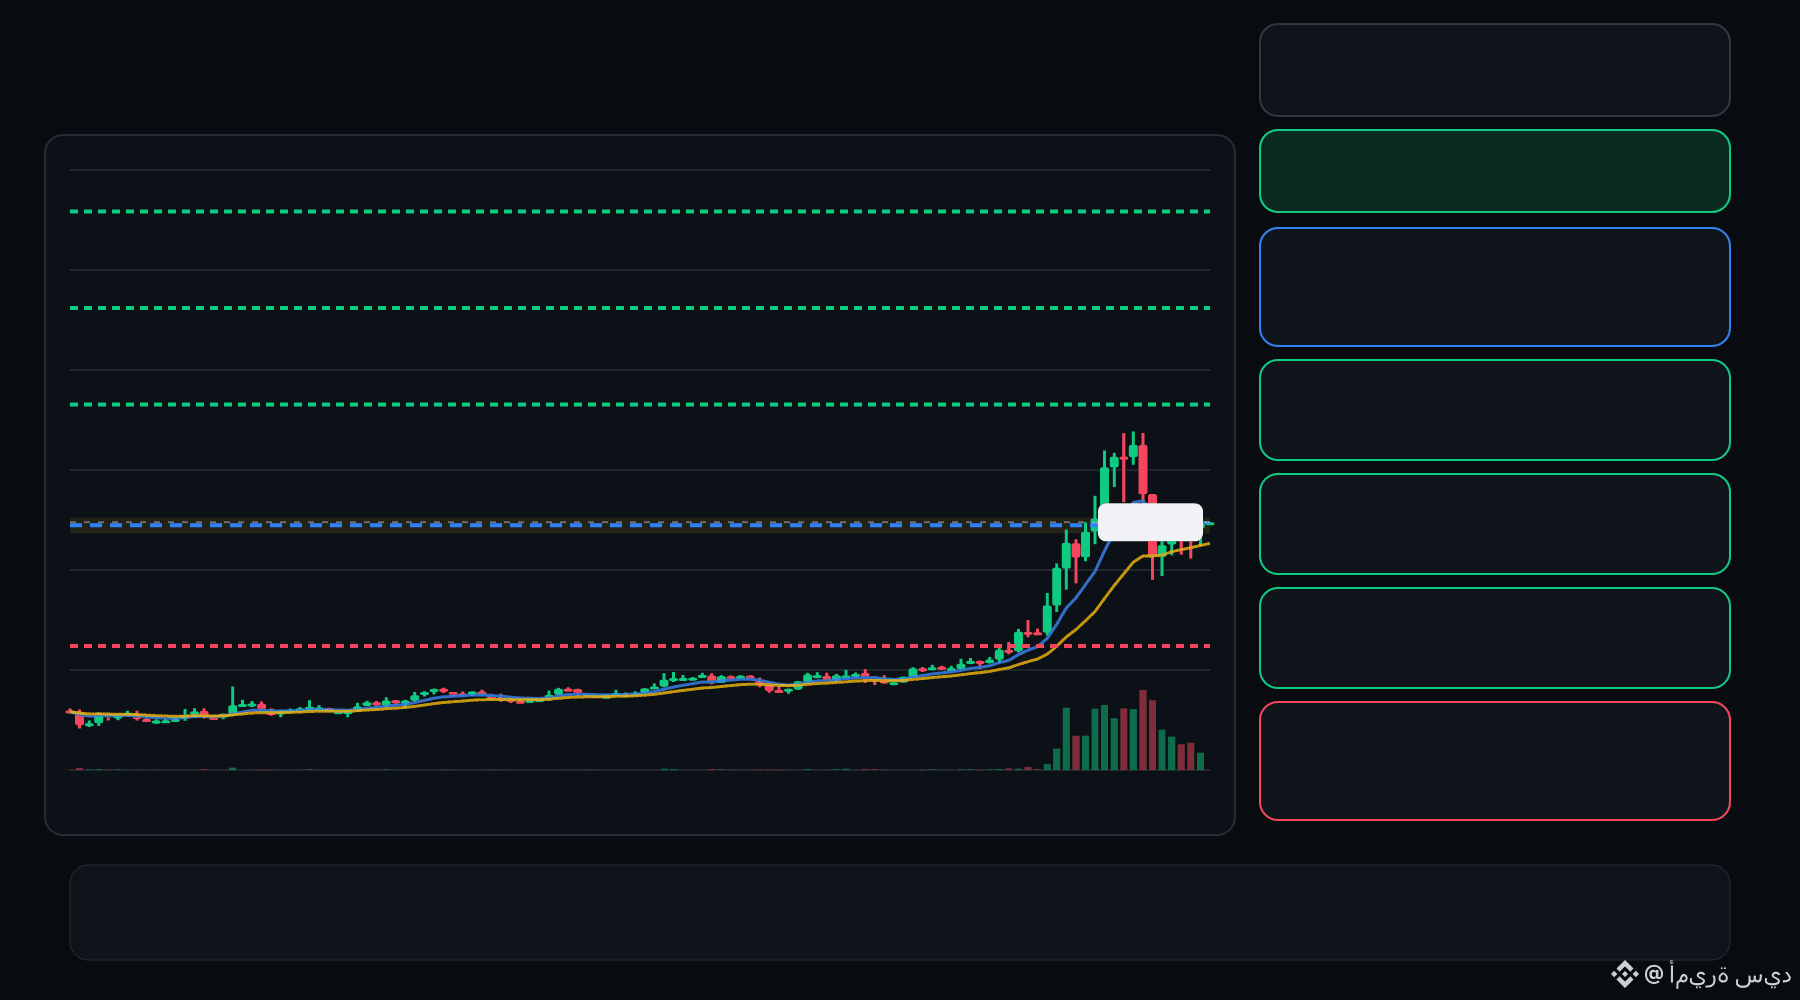
🟢 AIOT bulls are defending the pullback… is continuation setting up ⁉️
🟩 AIOT LONG
Entry: 0.08529 – 0.08669
TP1: 0.09667
TP2: 0.1052
TP3: 0.1138
Stop Loss: 0.07530
The 15M chart shows a bullish structure with momentum and volume confirmation. A controlled retest of the entry zone may give the setup a cleaner trigger.
Plan: Wait for confirmation/rejection inside the entry zone; don’t chase the move.
DYOR | Manage Risk | Avoid Over-Leverage
1
·
--
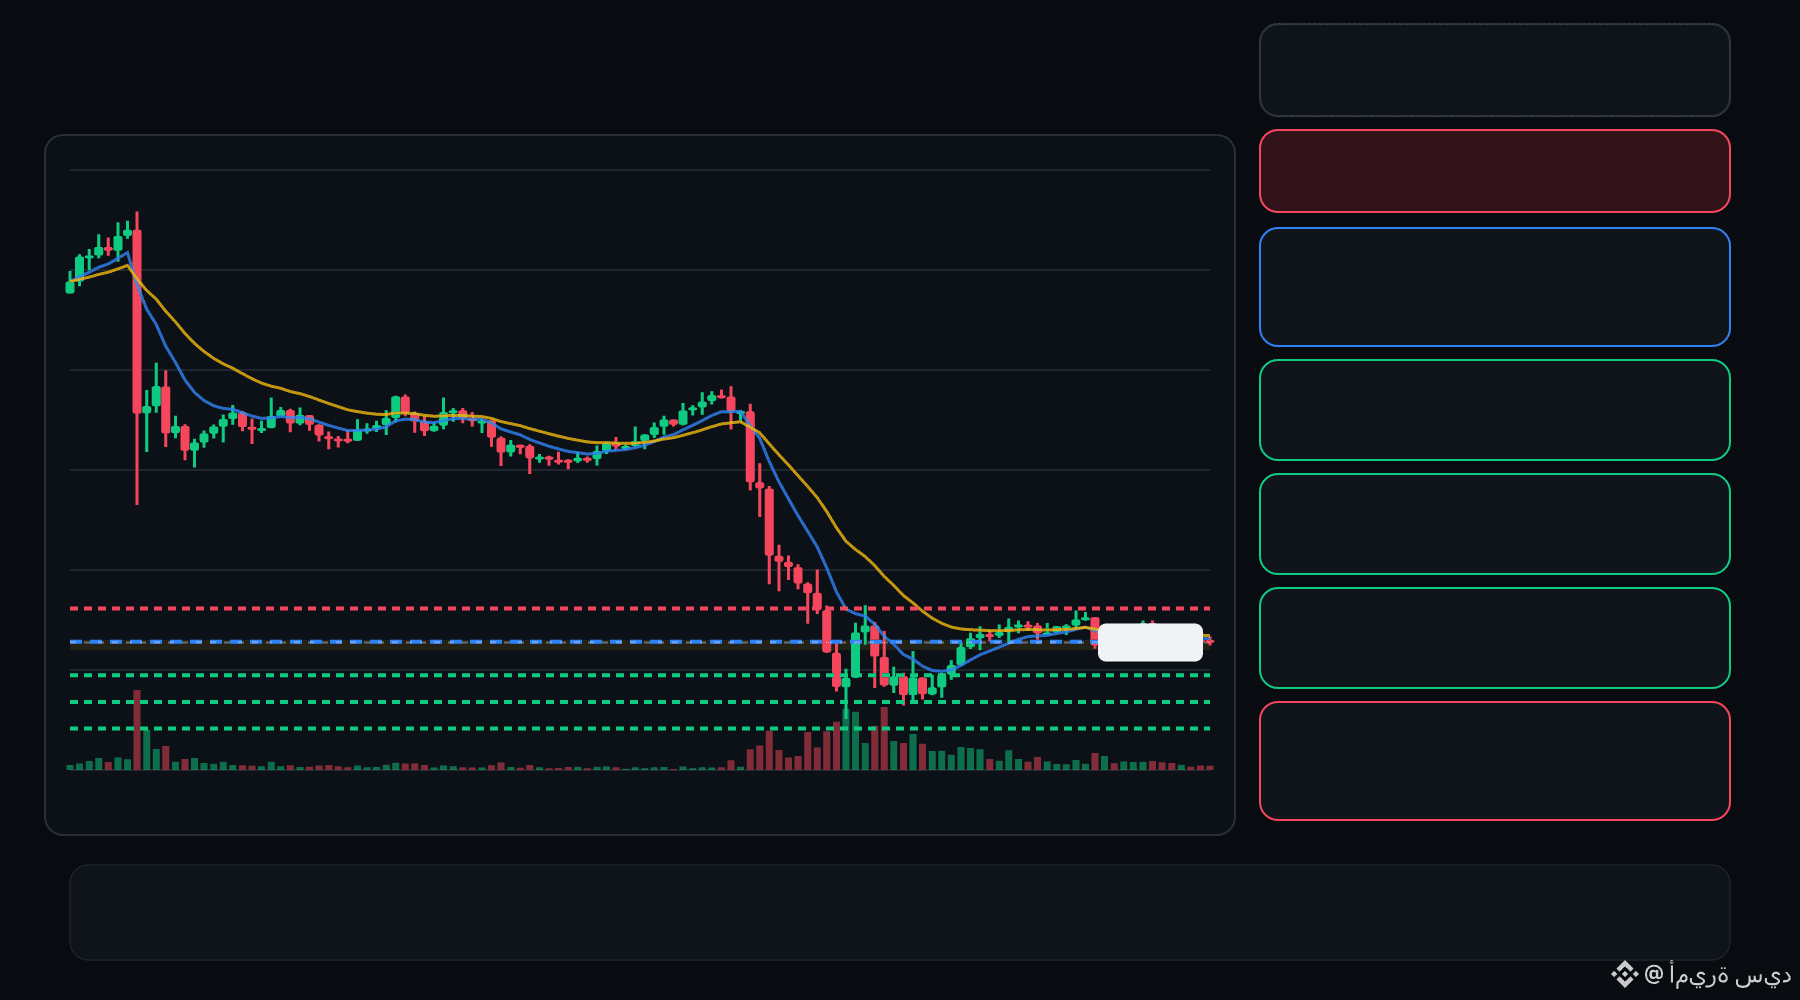
🔴 Q bears are pressing the pullback… is the rejection getting deeper ⁉️
🔴 Q SHORT
Entry: 0.03159 – 0.03185
TP1: 0.02933
TP2: 0.02742
TP3: 0.02551
Stop Loss: 0.03411
The 15M chart shows a bearish structure with momentum and volume confirmation. A controlled retest of the entry zone may give the setup a cleaner trigger.
Plan: Wait for confirmation/rejection inside the entry zone; don’t chase the move.
DYOR | Manage Risk | Avoid Over-Leverage
6
·
--
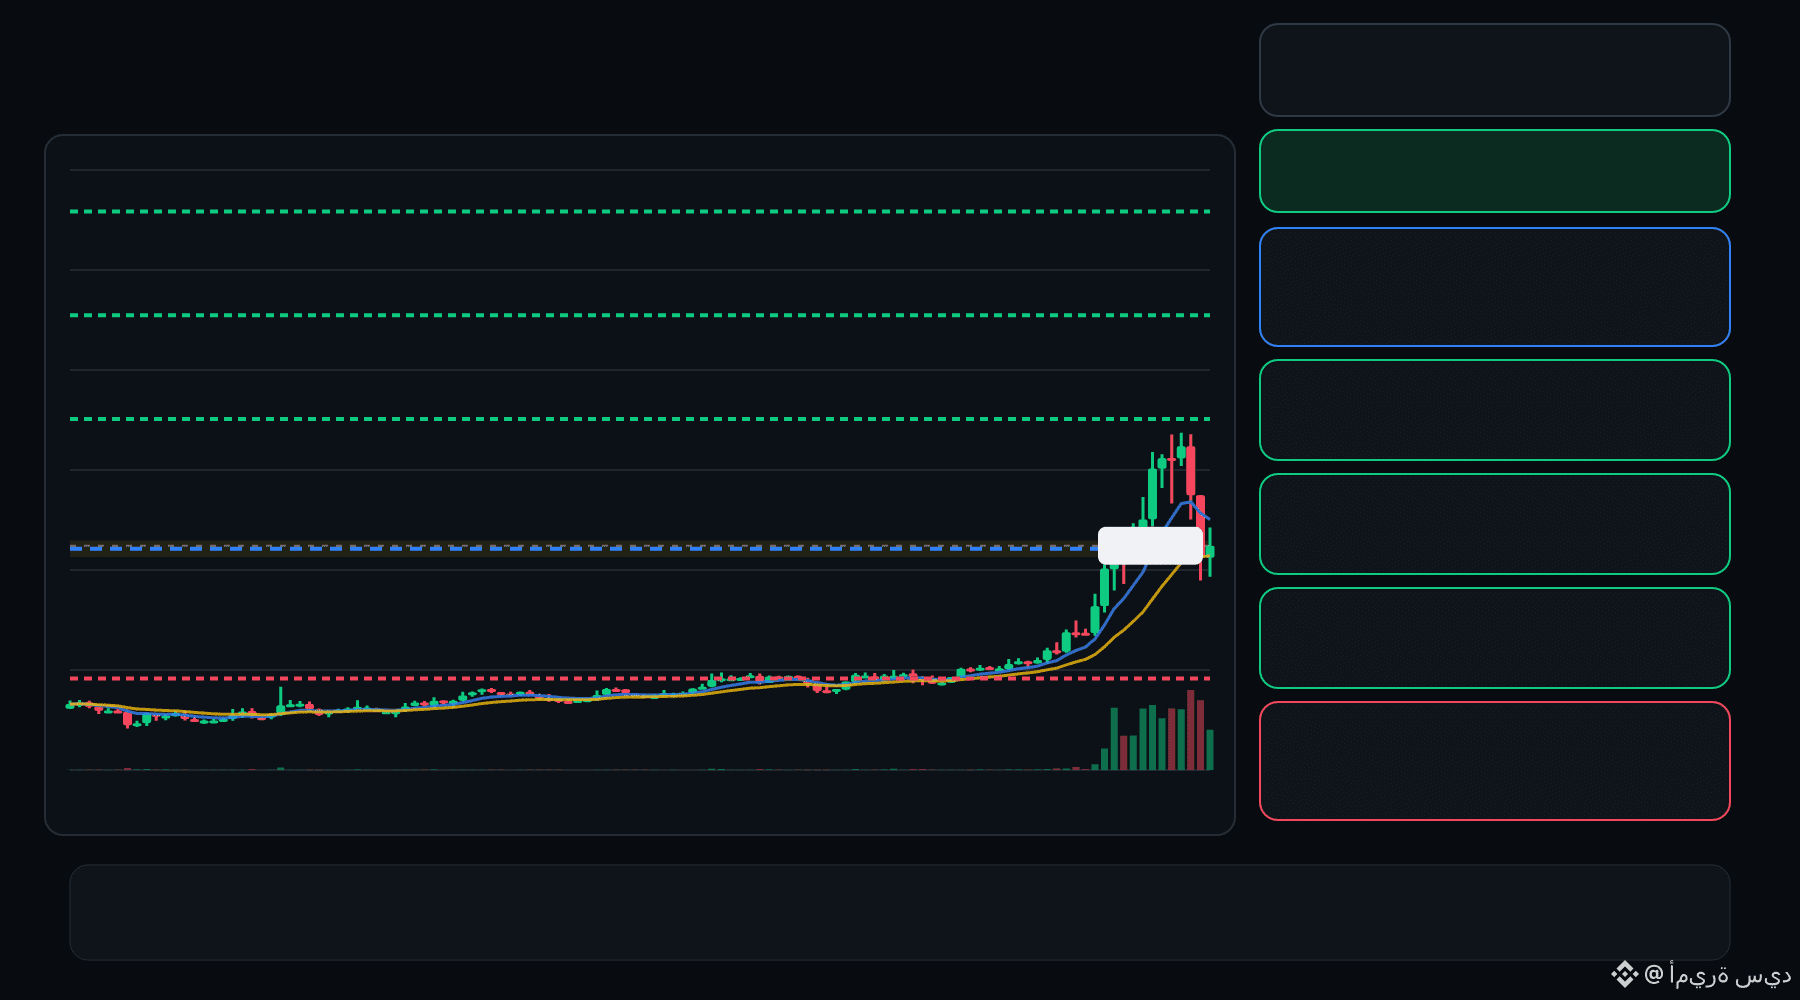
🟢 AIOT bulls are defending the pullback… is continuation setting up ⁉️
🟩 AIOT LONG
Entry: 0.08326 – 0.08472
TP1: 0.09552
TP2: 0.1048
TP3: 0.1140
Stop Loss: 0.07245
The 15M chart shows a bullish structure with momentum and volume confirmation. A controlled retest of the entry zone may give the setup a cleaner trigger.
Plan: Wait for confirmation/rejection inside the entry zone; don’t chase the move.
DYOR | Manage Risk | Avoid Over-Leverage
ເຂົ້າສູ່ລະບົບເພື່ອສຳຫຼວດເນື້ອຫາເພີ່ມເຕີມ
ເຂົ້າຮ່ວມກຸ່ມຜູ້ໃຊ້ຄຣິບໂຕທົ່ວໂລກໃນ Binance Square.
⚡️ ໄດ້ຮັບຂໍ້ມູນຫຼ້າສຸດ ແລະ ທີ່ມີປະໂຫຍດກ່ຽວກັບຄຣິບໂຕ.
💬 ໄດ້ຮັບຄວາມໄວ້ວາງໃຈຈາກຕະຫຼາດແລກປ່ຽນຄຣິບໂຕທີ່ໃຫຍ່ທີ່ສຸດໃນໂລກ.
👍 ຄົ້ນຫາຂໍ້ມູນເຊີງເລິກທີ່ແທ້ຈາກນັກສ້າງທີ່ໄດ້ຮັບການຢືນຢັນ.
ອີເມວ / ເບີໂທລະສັບ
ຫົວຂໍ້ທີ່ກໍາລັງນິຍົມ
BinanceSAFUFundTransferCompleted7499BTC
22,418 ຄັ້ງທີ່ເບິ່ງ
605 ກຳລັງສົນທະນາ
Binance Says SAFU Fund Transfer Completed, Covering 7,499 BTC
Binance News
·26 ຖືກໃຈ
·12.8k ຄັ້ງທີ່ເບິ່ງ
BinanceRecovery90% of stolen assets
94,303 ຄັ້ງທີ່ເບິ່ງ
147 ກຳລັງສົນທະນາ
YiHe:ProofOfReserves:10TokensAt100%Backing
107,618 ຄັ້ງທີ່ເບິ່ງ
635 ກຳລັງສົນທະນາ