

أميرة سيد
2.6k Жариялаулар

أميرة سيد
Хабарлау
Пайдаланушыны блоктау
Professional Trader | Free Chart Analysis | Signal & Update about Crypto |
Ашық сауда
Кездейсоқ трейдер
1.3 жыл
29 Жазылым
1.0K+ Жазылушылар
499 лайк басылған
Жазбалар
Портфолио
Барлығы
Баға ұсыныстары
·
--
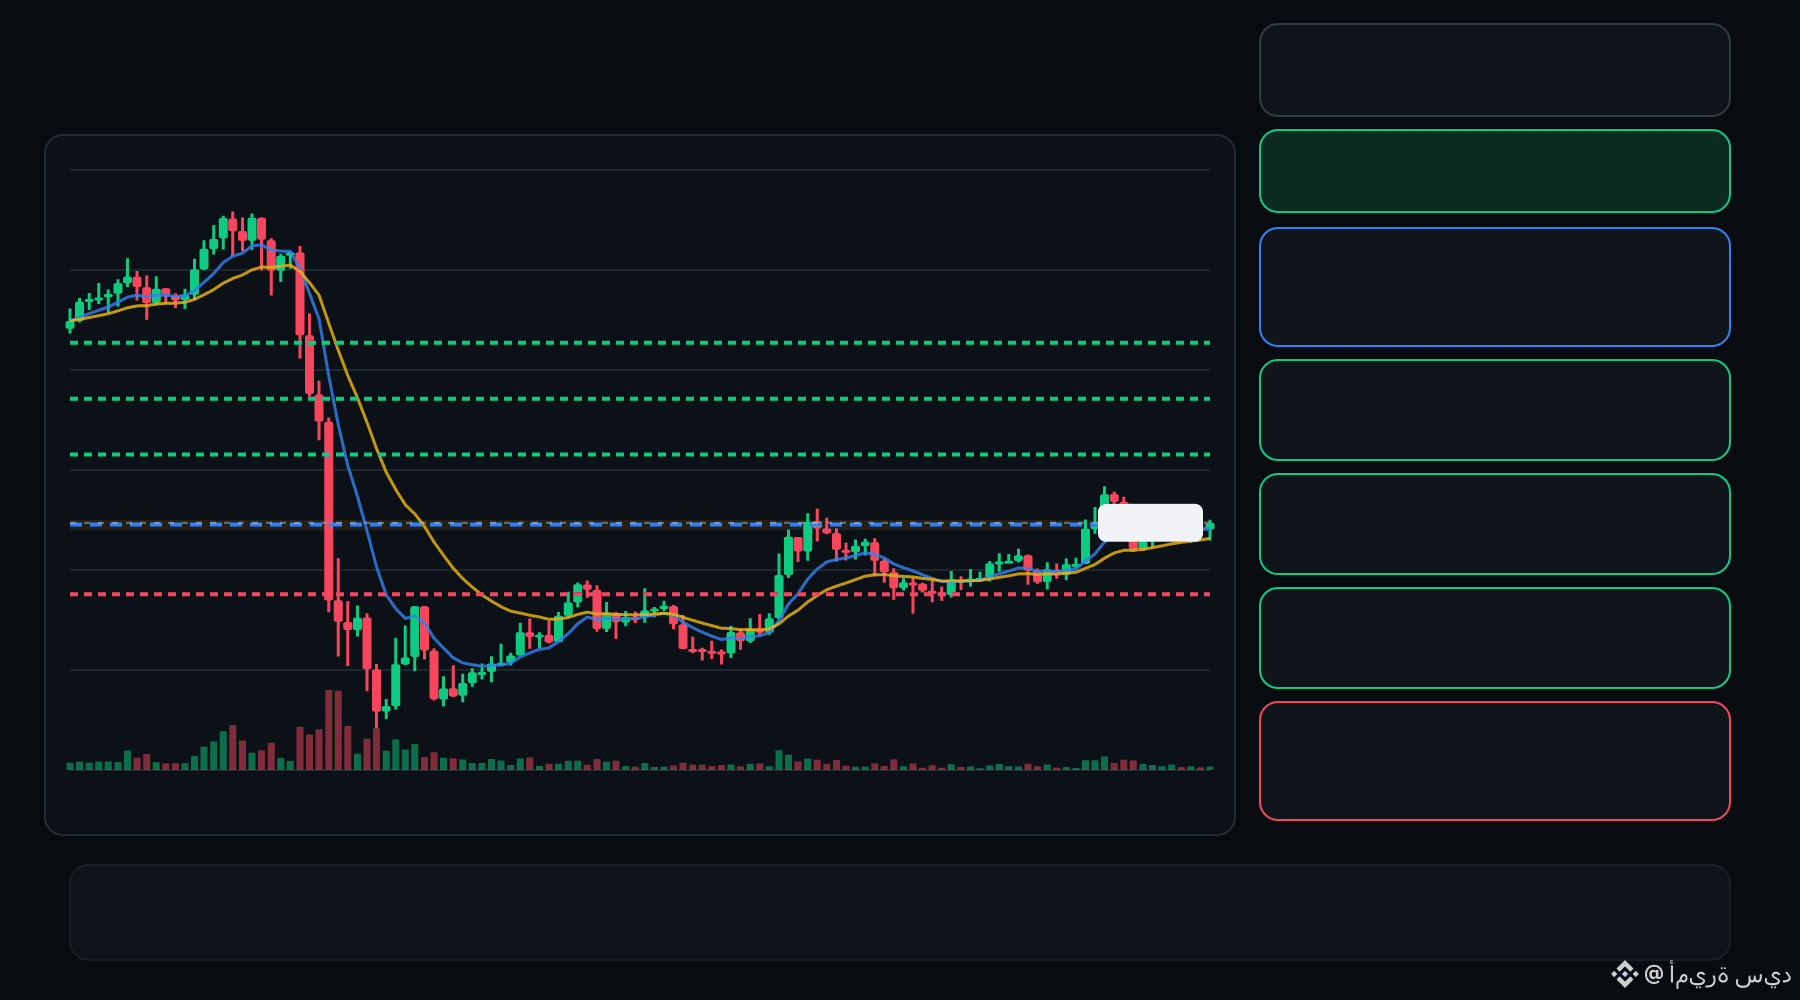
🟢 BLESS bulls are defending the pullback… is continuation setting up ⁉️
🟩 BLESS LONG
Entry: 0.01061 – 0.01070
TP1: 0.01138
TP2: 0.01197
TP3: 0.01256
Stop Loss: 0.009918
The 15M chart shows a bullish structure with momentum and volume confirmation. A controlled retest of the entry zone may give the setup a cleaner trigger.
Plan: Wait for confirmation/rejection inside the entry zone; don’t chase the move.
DYOR | Manage Risk | Avoid Over-Leverage
·
--
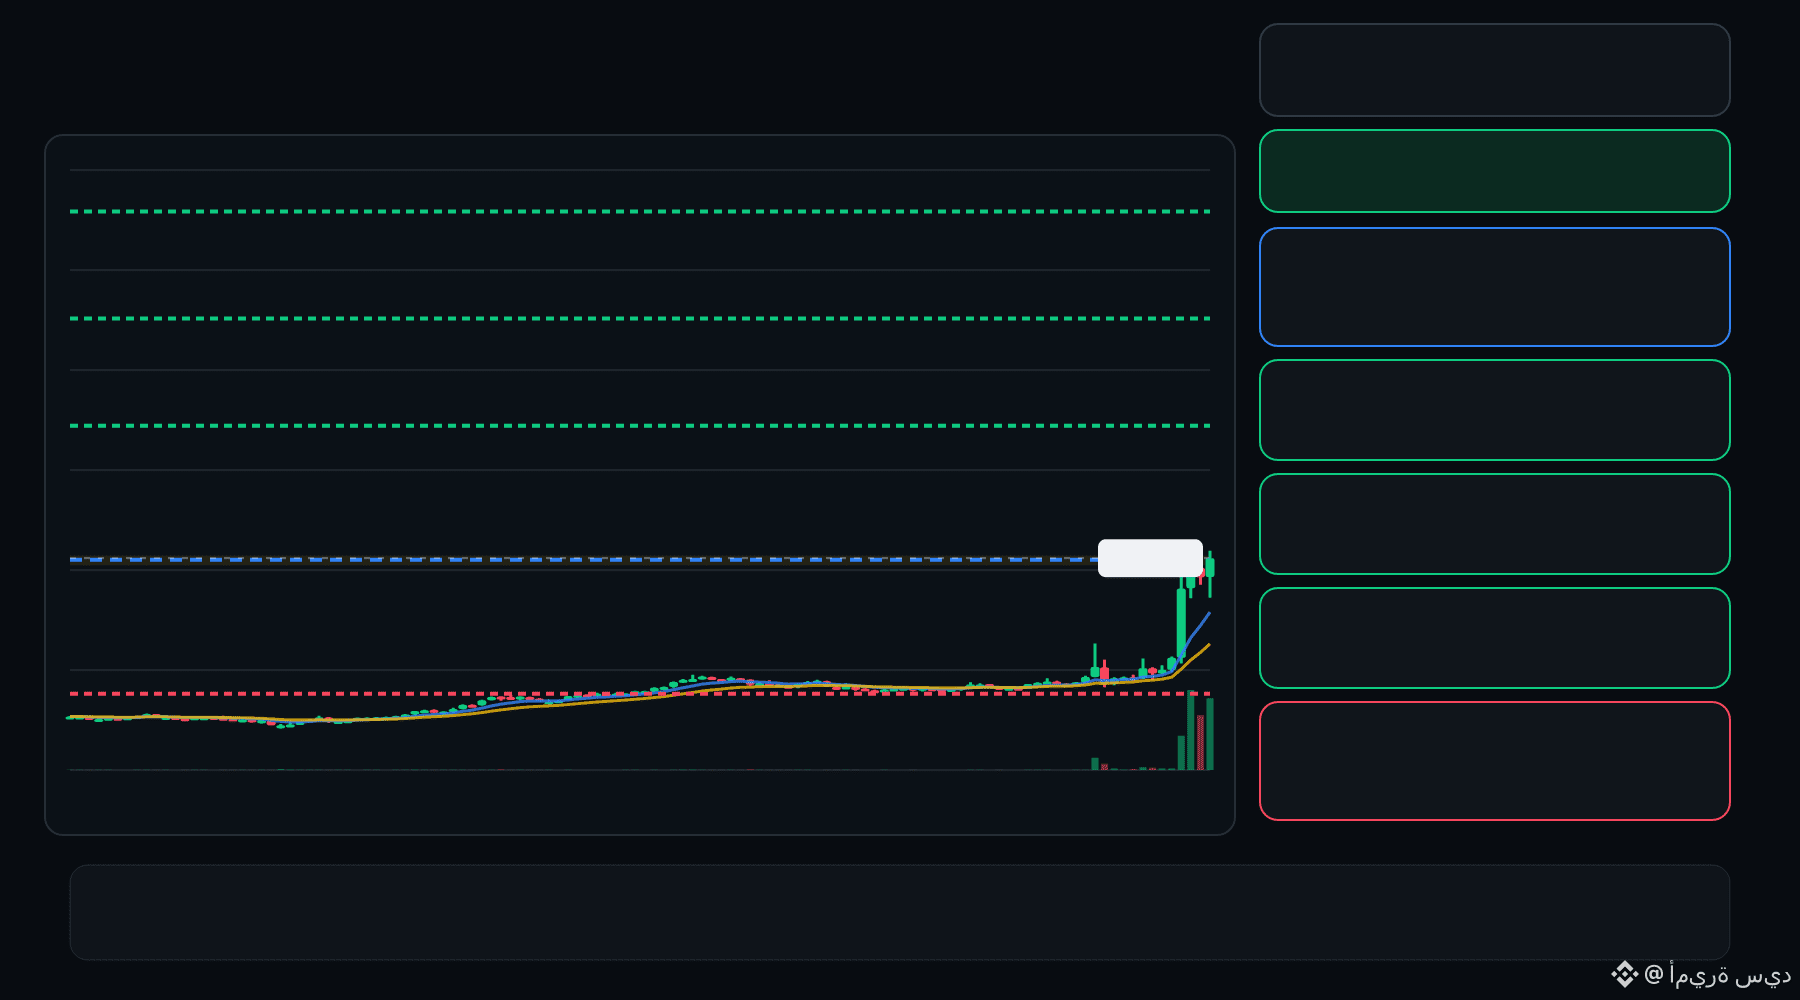
🟢 COW bulls are defending the pullback… is continuation setting up ⁉️
🟩 COW LONG
Entry: 0.1461 – 0.1481
TP1: 0.1793
TP2: 0.2050
TP3: 0.2307
Stop Loss: 0.1150
The 15M chart shows a bullish structure with momentum and volume confirmation. A controlled retest of the entry zone may give the setup a cleaner trigger.
Plan: Wait for confirmation/rejection inside the entry zone; don’t chase the move.
DYOR | Manage Risk | Avoid Over-Leverage
·
--
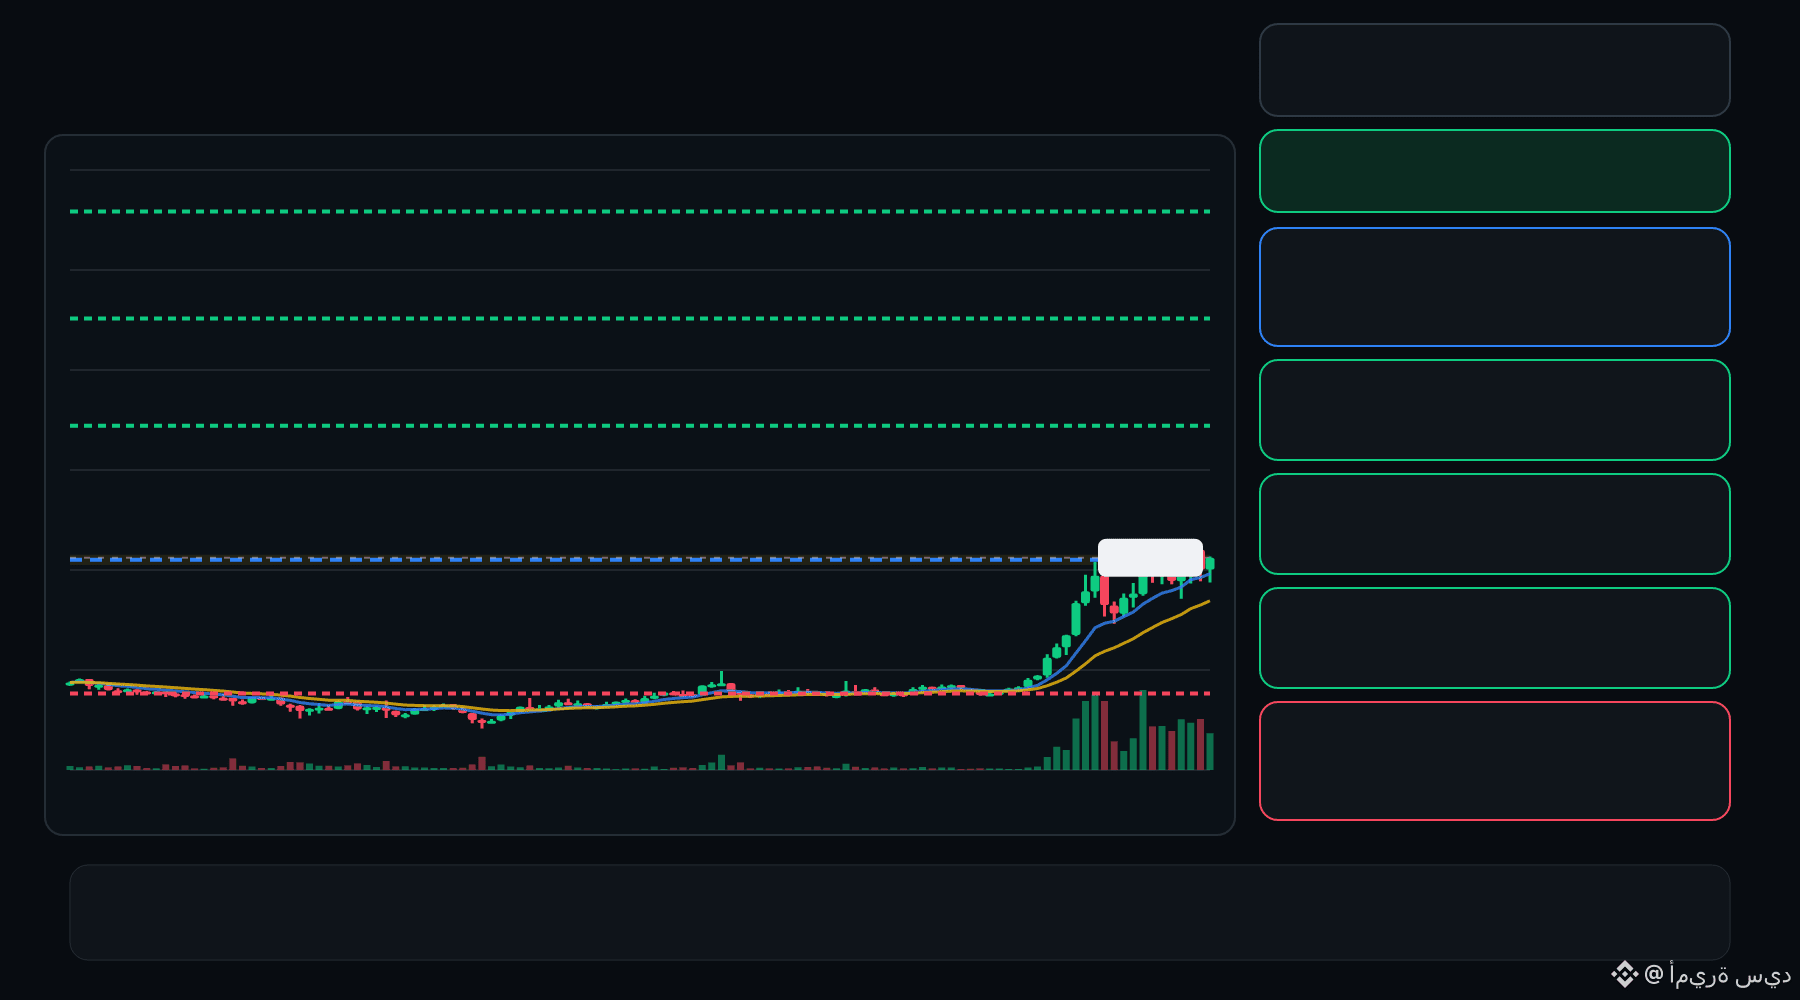
🟢 ESPORTS bulls are defending the pullback… is continuation setting up ⁉️
🟩 ESPORTS LONG
Entry: 0.008268 – 0.008355
TP1: 0.009530
TP2: 0.01051
TP3: 0.01148
Stop Loss: 0.007093
The 15M chart shows a bullish structure with momentum and volume confirmation. A controlled retest of the entry zone may give the setup a cleaner trigger.
Plan: Wait for confirmation/rejection inside the entry zone; don’t chase the move.
DYOR | Manage Risk | Avoid Over-Leverage
·
--
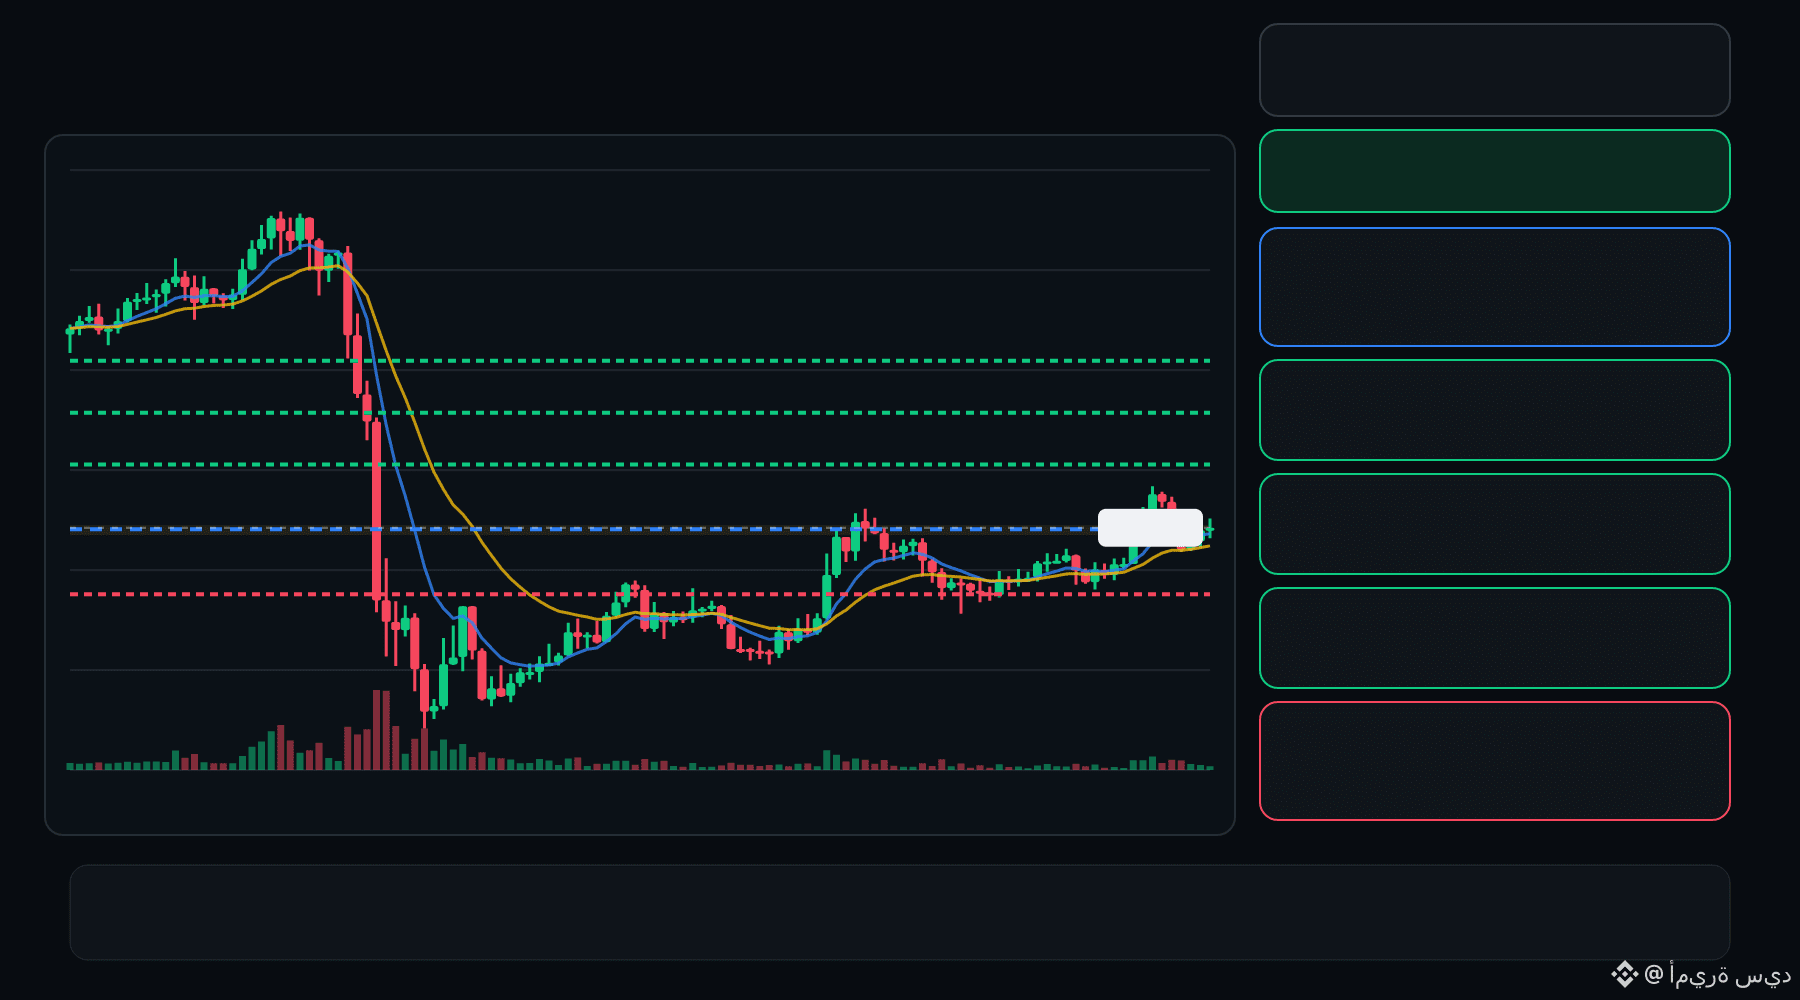
🟢 BLESS bulls are defending the pullback… is continuation setting up ⁉️
🟩 BLESS LONG
Entry: 0.01056 – 0.01064
TP1: 0.01128
TP2: 0.01182
TP3: 0.01237
Stop Loss: 0.009919
The 15M chart shows a bullish structure with momentum and volume confirmation. A controlled retest of the entry zone may give the setup a cleaner trigger.
Plan: Wait for confirmation/rejection inside the entry zone; don’t chase the move.
DYOR | Manage Risk | Avoid Over-Leverage
·
--
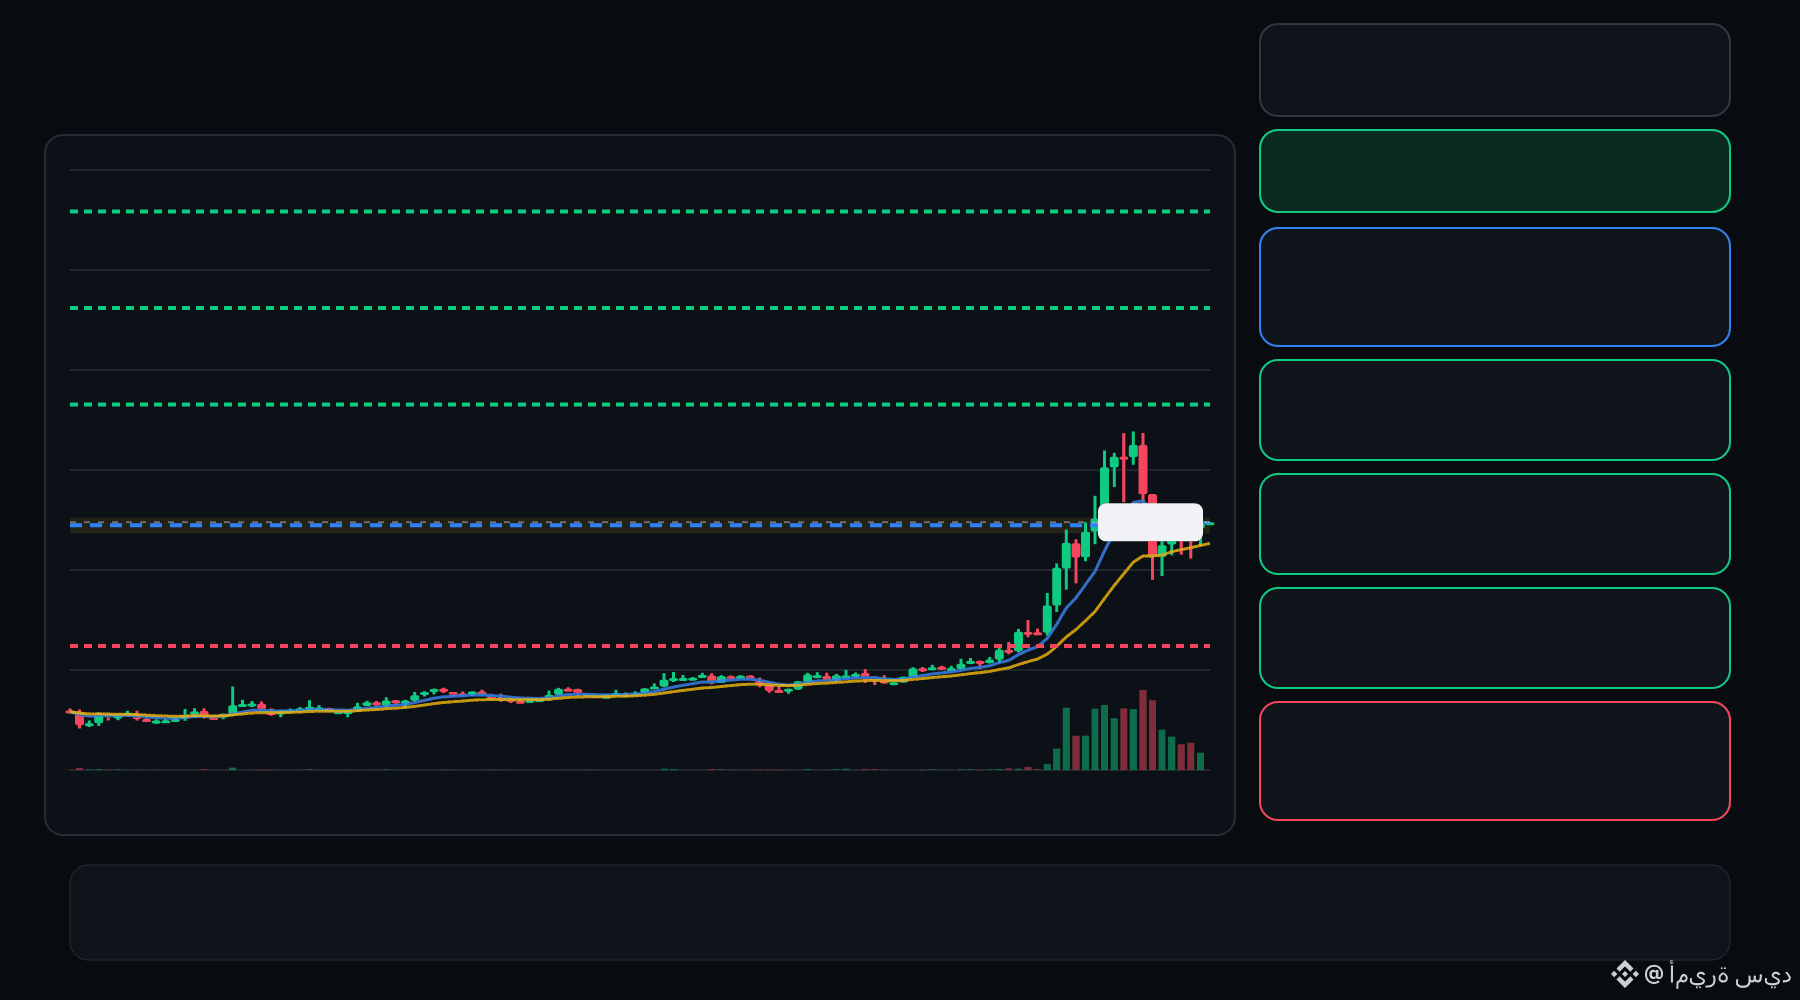
🟢 AIOT bulls are defending the pullback… is continuation setting up ⁉️
🟩 AIOT LONG
Entry: 0.08529 – 0.08669
TP1: 0.09667
TP2: 0.1052
TP3: 0.1138
Stop Loss: 0.07530
The 15M chart shows a bullish structure with momentum and volume confirmation. A controlled retest of the entry zone may give the setup a cleaner trigger.
Plan: Wait for confirmation/rejection inside the entry zone; don’t chase the move.
DYOR | Manage Risk | Avoid Over-Leverage
1
·
--
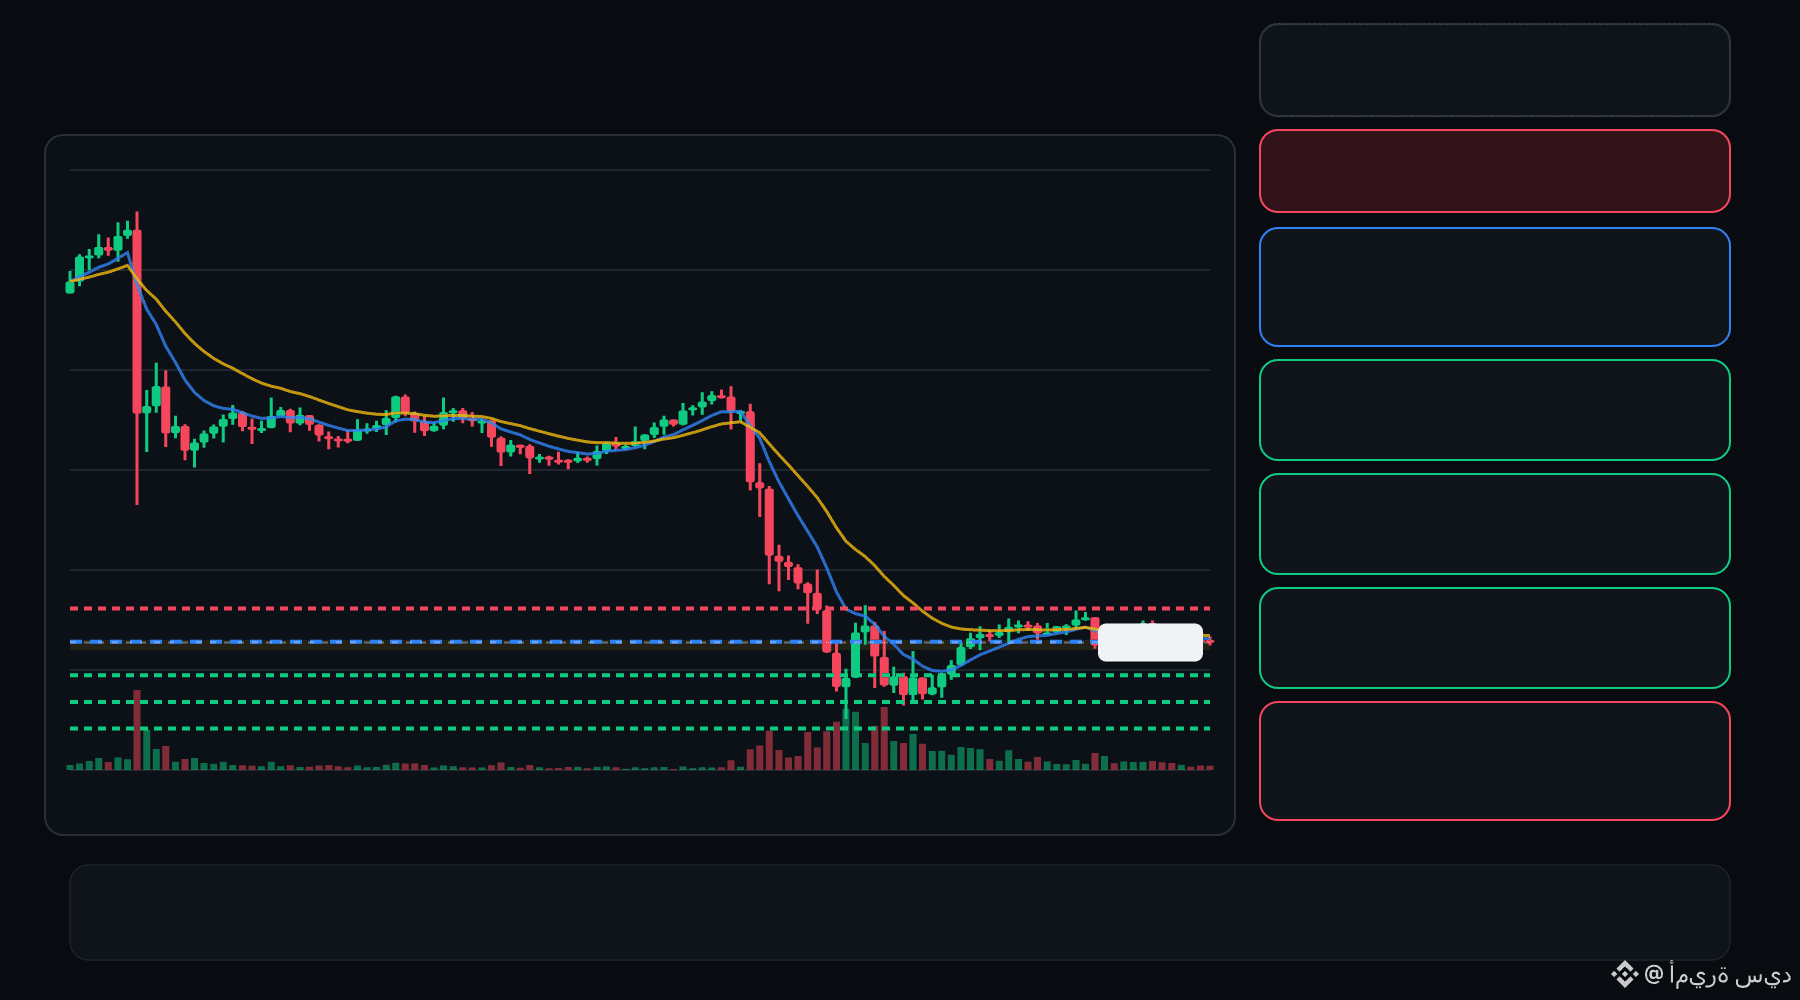
🔴 Q bears are pressing the pullback… is the rejection getting deeper ⁉️
🔴 Q SHORT
Entry: 0.03159 – 0.03185
TP1: 0.02933
TP2: 0.02742
TP3: 0.02551
Stop Loss: 0.03411
The 15M chart shows a bearish structure with momentum and volume confirmation. A controlled retest of the entry zone may give the setup a cleaner trigger.
Plan: Wait for confirmation/rejection inside the entry zone; don’t chase the move.
DYOR | Manage Risk | Avoid Over-Leverage
6
·
--
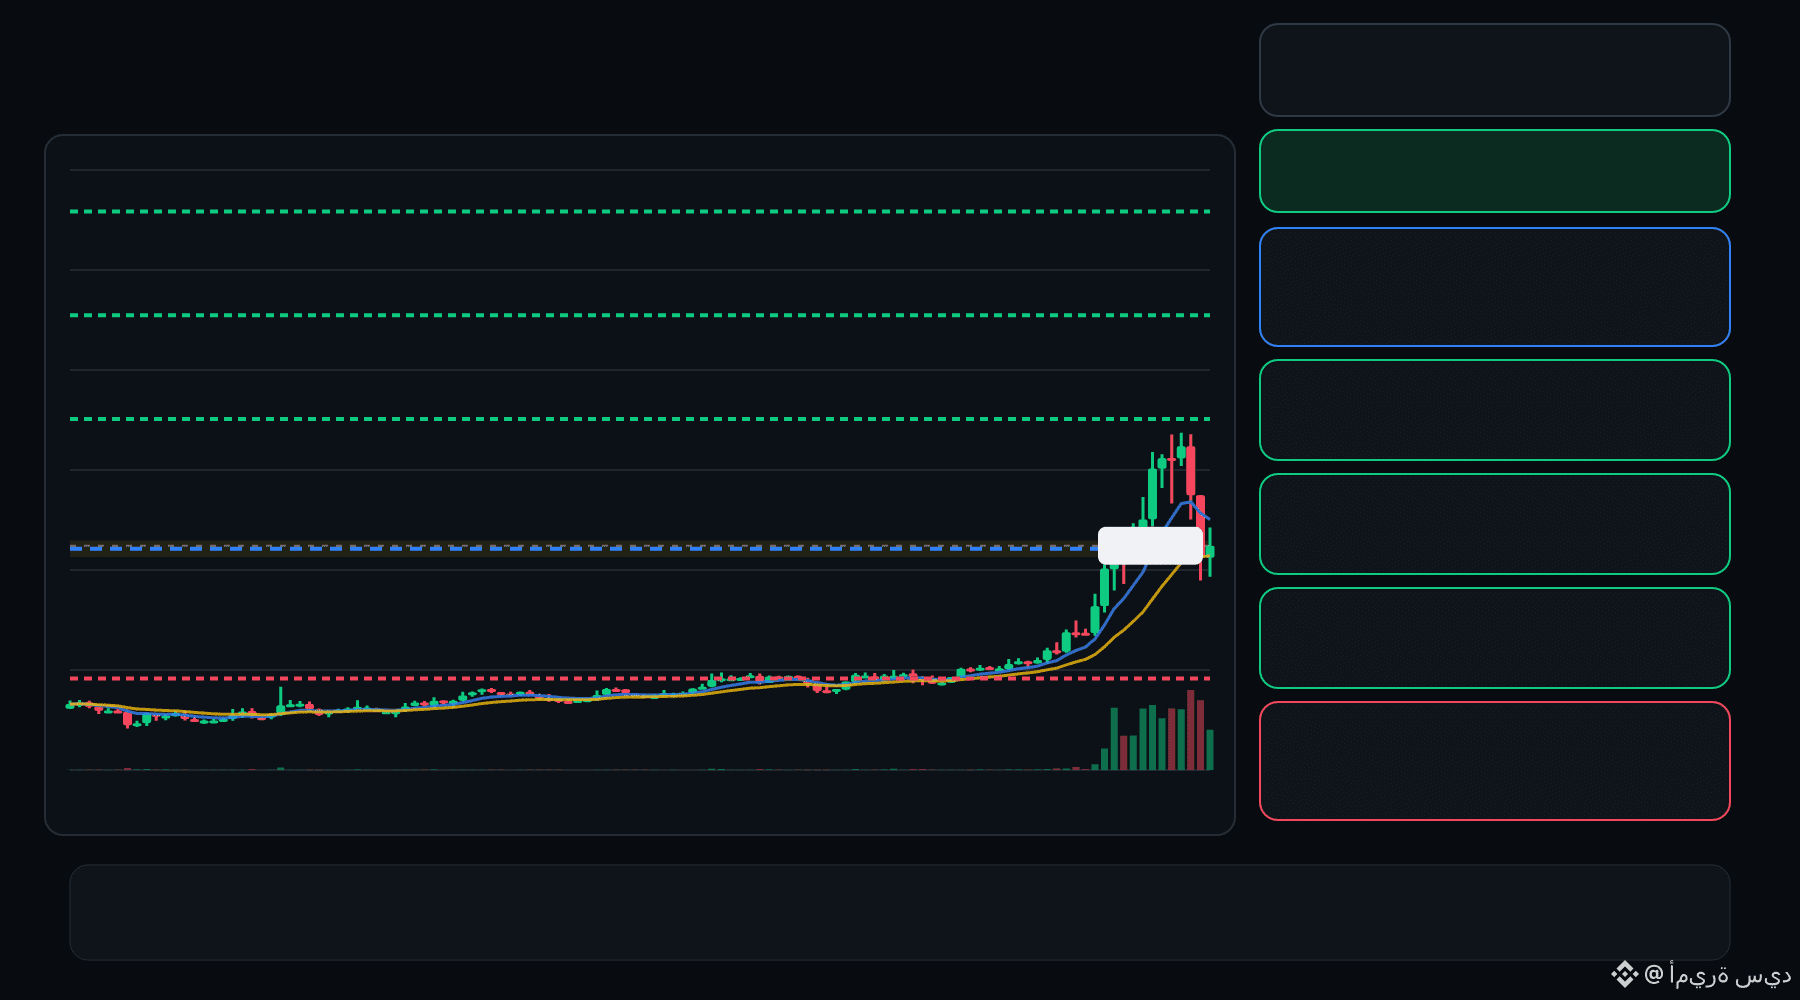
🟢 AIOT bulls are defending the pullback… is continuation setting up ⁉️
🟩 AIOT LONG
Entry: 0.08326 – 0.08472
TP1: 0.09552
TP2: 0.1048
TP3: 0.1140
Stop Loss: 0.07245
The 15M chart shows a bullish structure with momentum and volume confirmation. A controlled retest of the entry zone may give the setup a cleaner trigger.
Plan: Wait for confirmation/rejection inside the entry zone; don’t chase the move.
DYOR | Manage Risk | Avoid Over-Leverage
·
--
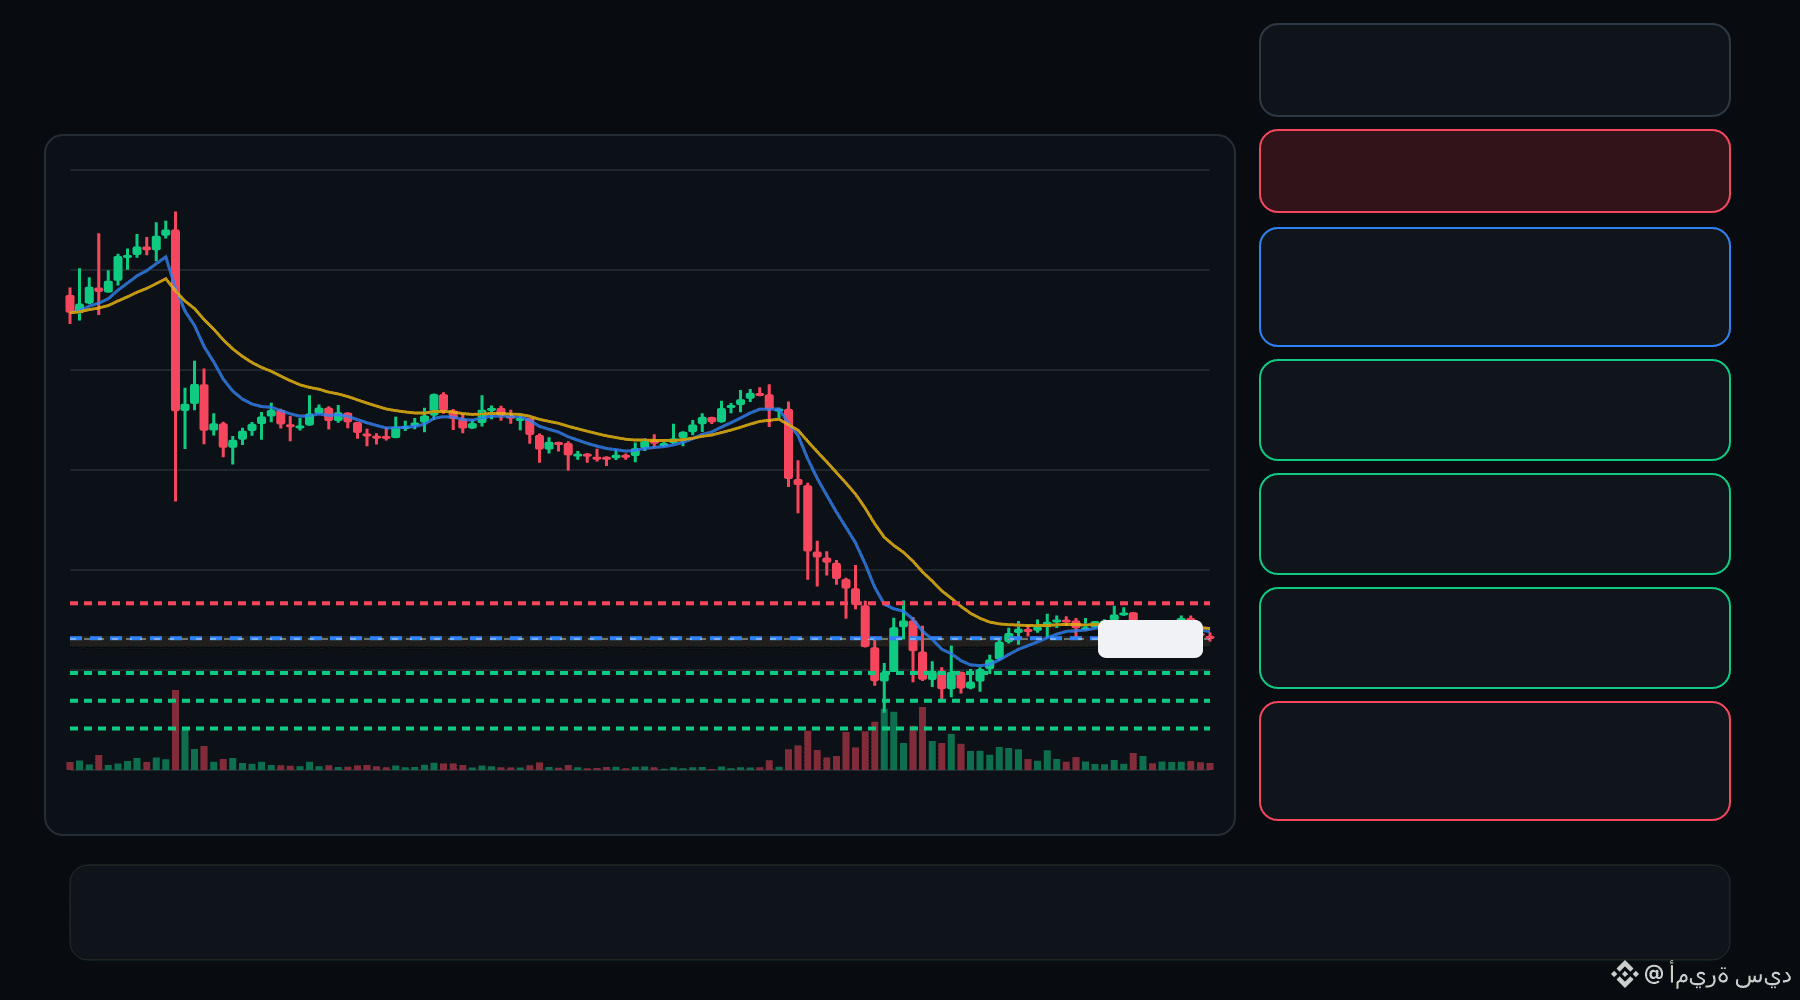
🔴 Q bears are pressing the pullback… is the rejection getting deeper ⁉️
🔴 Q SHORT
Entry: 0.03146 – 0.03175
TP1: 0.02909
TP2: 0.02707
TP3: 0.02505
Stop Loss: 0.03412
The 15M chart shows a bearish structure with momentum and volume confirmation. A controlled retest of the entry zone may give the setup a cleaner trigger.
Plan: Wait for confirmation/rejection inside the entry zone; don’t chase the move.
DYOR | Manage Risk | Avoid Over-Leverage
3
·
--
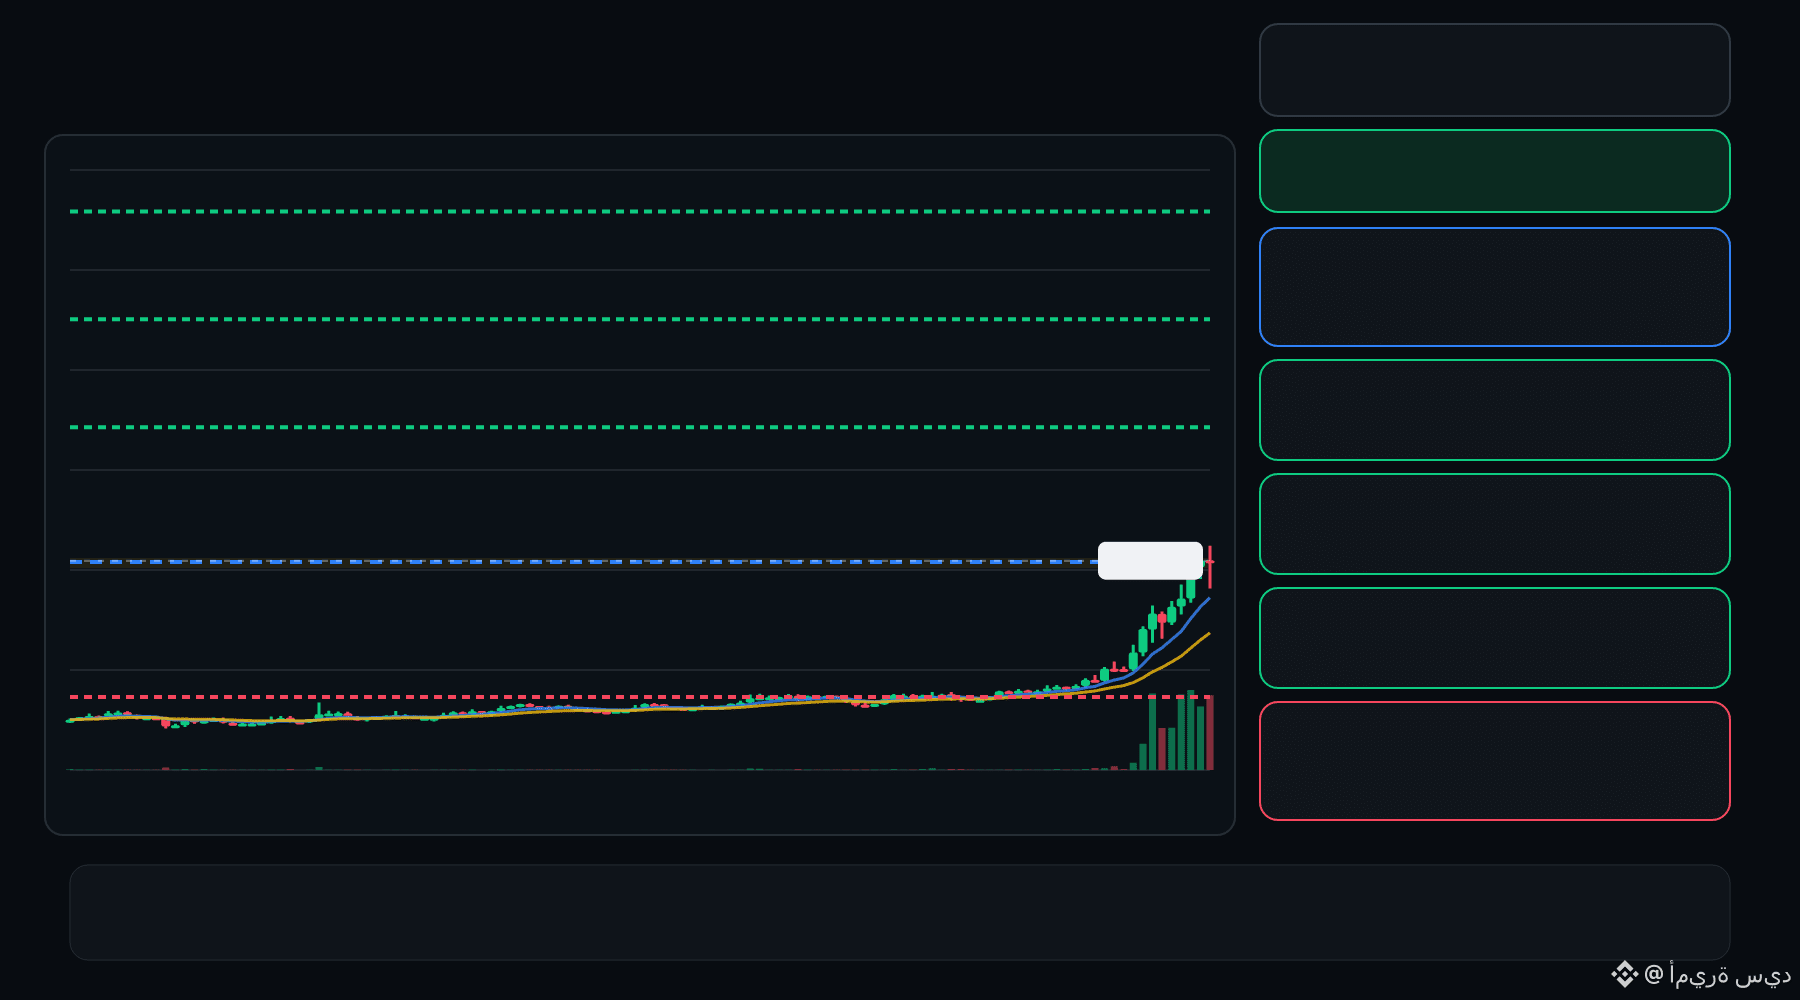
🟢 AIOT bulls are defending the pullback… is continuation setting up ⁉️
🟩 AIOT LONG
Entry: 0.09127 – 0.09235
TP1: 0.1111
TP2: 0.1265
TP3: 0.1420
Stop Loss: 0.07252
The 15M chart shows a bullish structure with momentum and volume confirmation. A controlled retest of the entry zone may give the setup a cleaner trigger.
Plan: Wait for confirmation/rejection inside the entry zone; don’t chase the move.
DYOR | Manage Risk | Avoid Over-Leverage
·
--
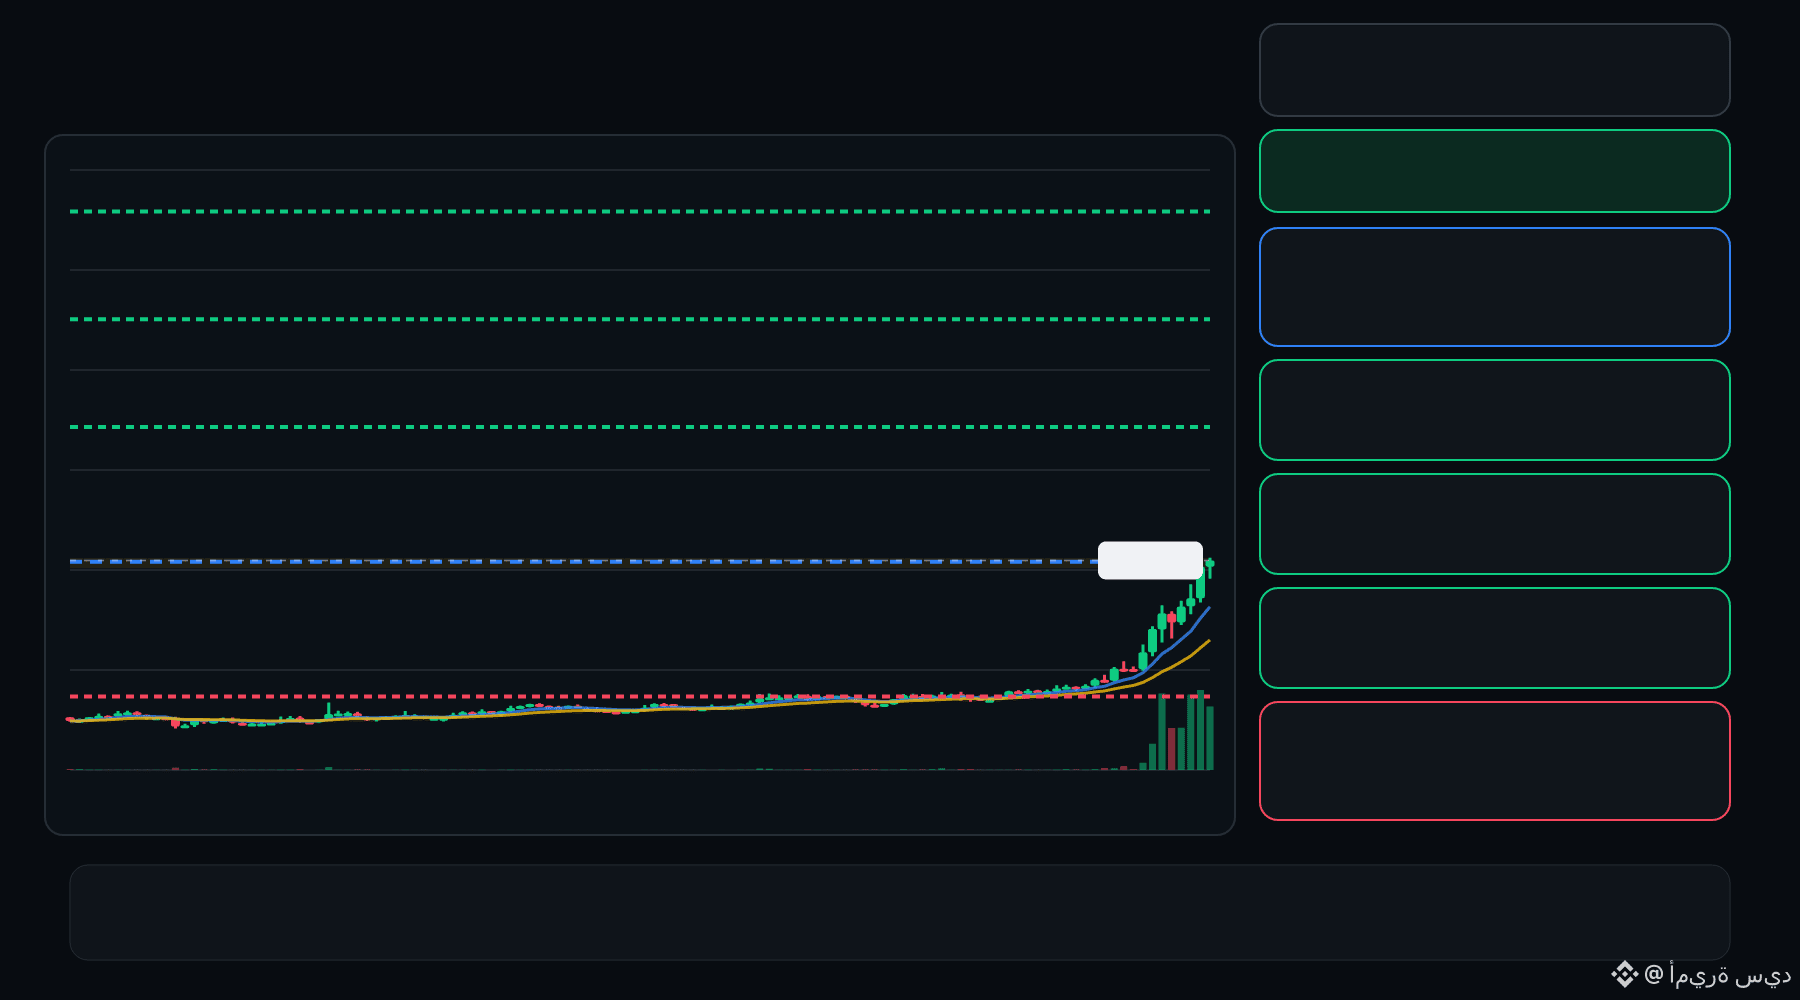
🟢 AIOT bulls are defending the pullback… is continuation setting up ⁉️
🟩 AIOT LONG
Entry: 0.09134 – 0.09230
TP1: 0.1110
TP2: 0.1264
TP3: 0.1418
Stop Loss: 0.07259
The 15M chart shows a bullish structure with momentum and volume confirmation. A controlled retest of the entry zone may give the setup a cleaner trigger.
Plan: Wait for confirmation/rejection inside the entry zone; don’t chase the move.
DYOR | Manage Risk | Avoid Over-Leverage
·
--
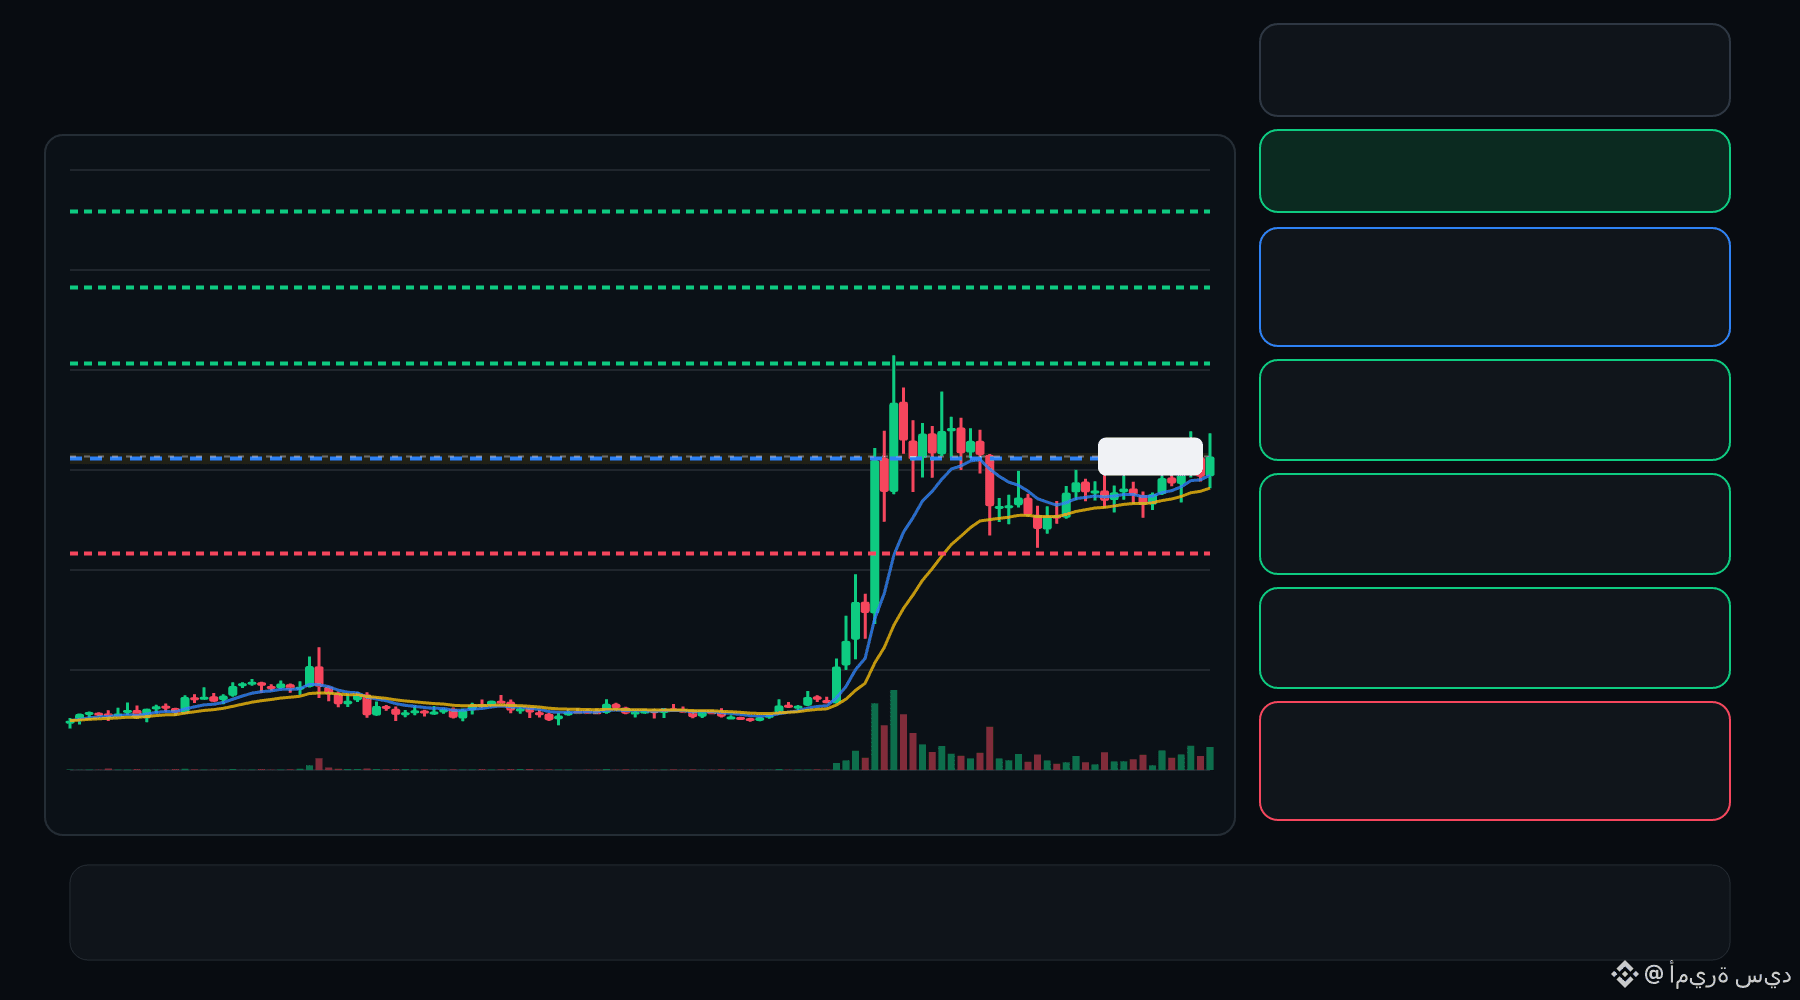
🟢 WET bulls are defending the pullback… is continuation setting up ⁉️
🟩 WET LONG
Entry: 0.06277 – 0.06322
TP1: 0.06705
TP2: 0.07030
TP3: 0.07355
Stop Loss: 0.05894
The 15M chart shows a bullish structure with momentum and volume confirmation. A controlled retest of the entry zone may give the setup a cleaner trigger.
Plan: Wait for confirmation/rejection inside the entry zone; don’t chase the move.
DYOR | Manage Risk | Avoid Over-Leverage
1
·
--
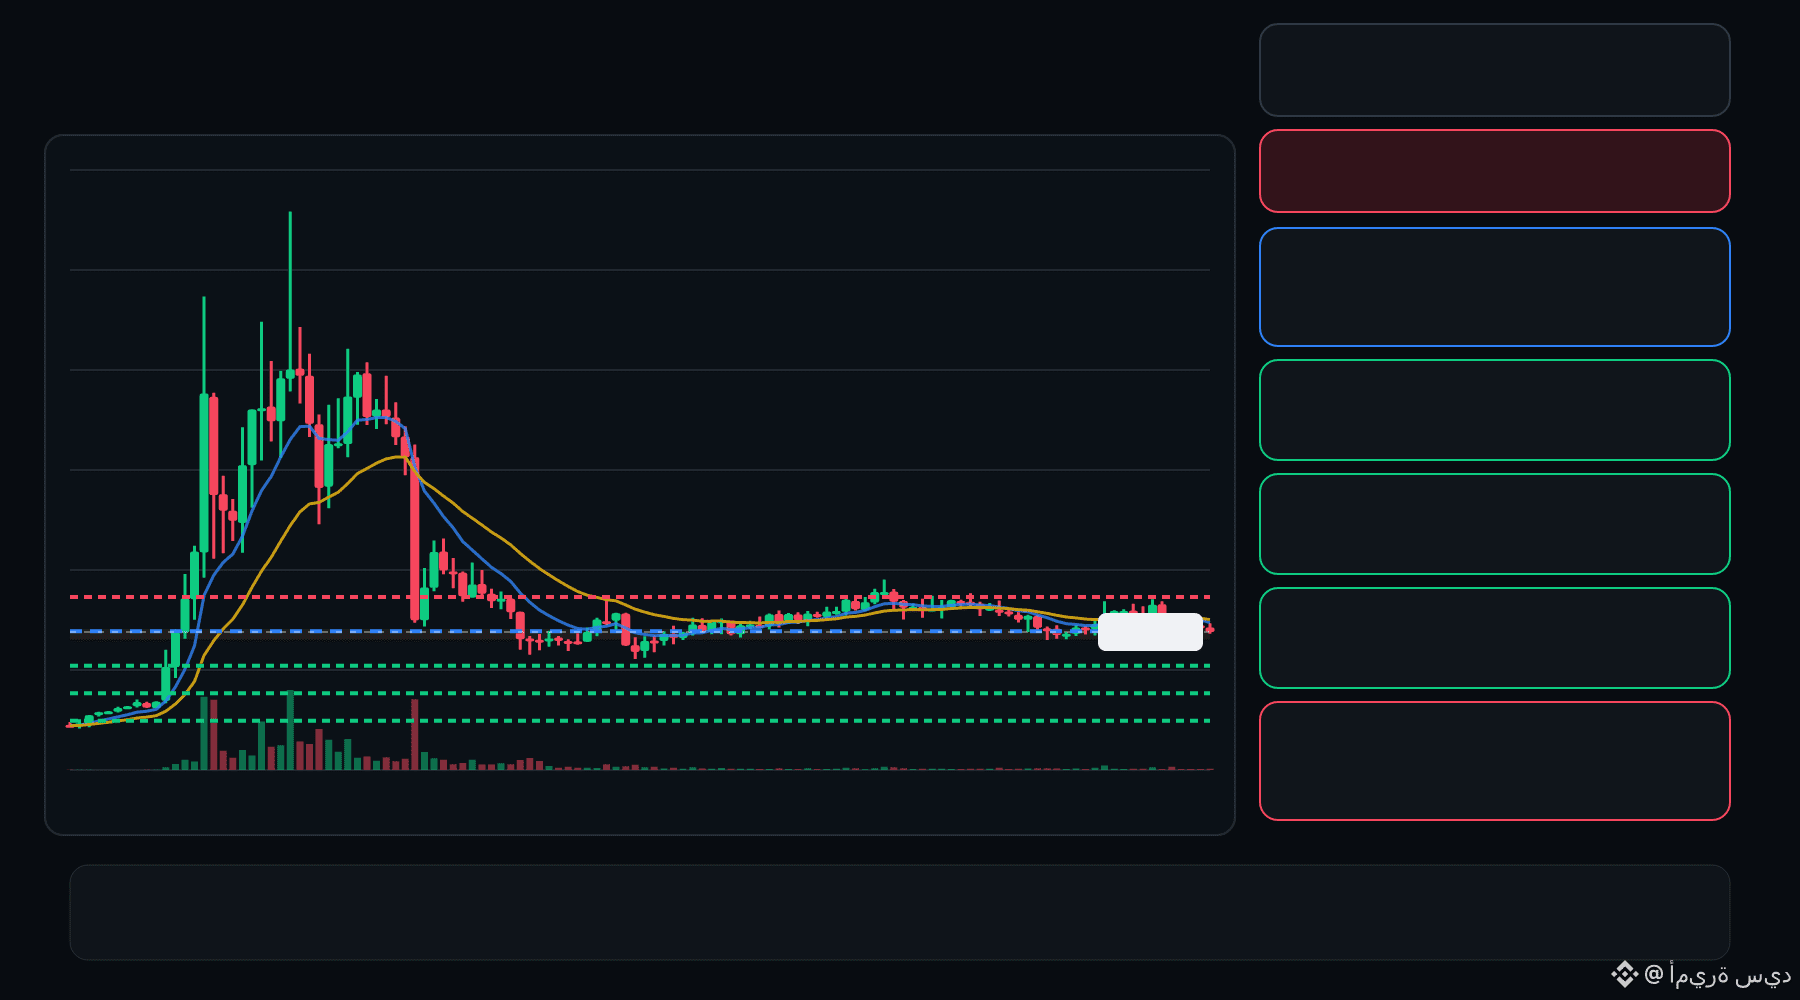
🔴 ALPINE bears are pressing the pullback… is the rejection getting deeper ⁉️
🔴 ALPINE SHORT
Entry: 0.2999 – 0.3009
TP1: 0.2922
TP2: 0.2857
TP3: 0.2792
Stop Loss: 0.3085
The 15M chart shows a bearish structure with momentum and volume confirmation. A controlled retest of the entry zone may give the setup a cleaner trigger.
Plan: Wait for confirmation/rejection inside the entry zone; don’t chase the move.
DYOR | Manage Risk | Avoid Over-Leverage
·
--
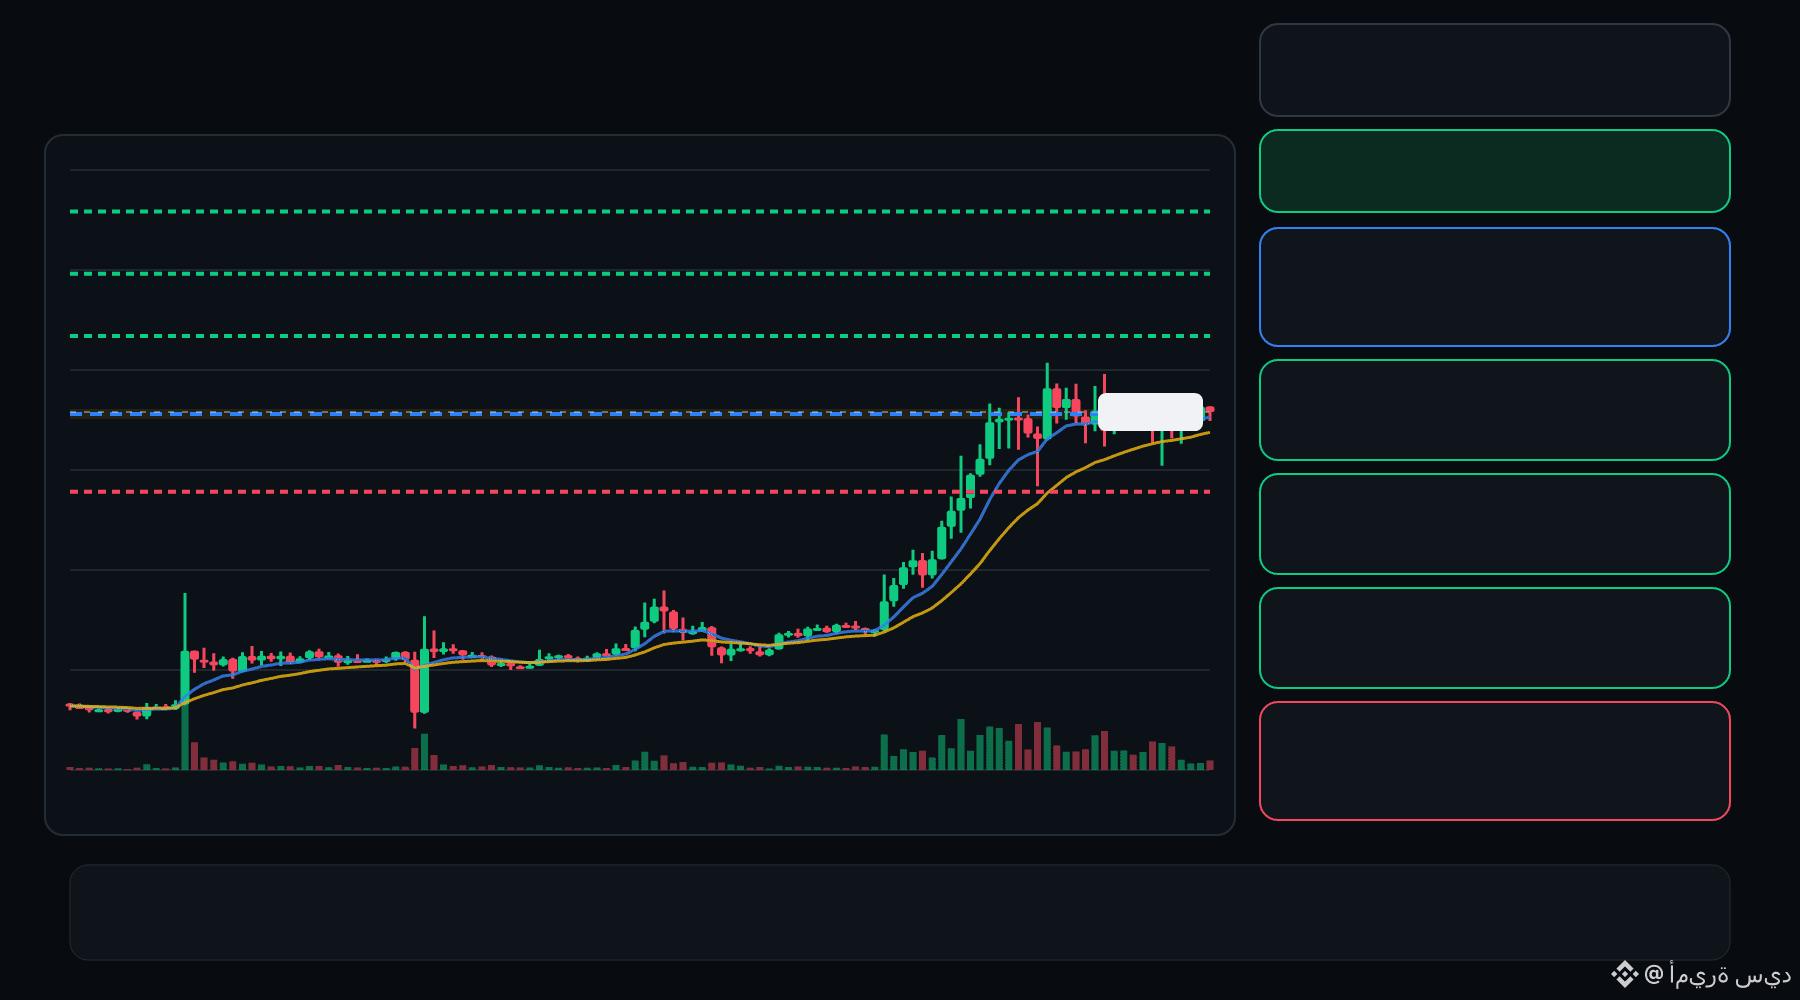
🟢 AIN bulls are defending the pullback… is continuation setting up ⁉️
🟩 AIN LONG
Entry: 0.2694 – 0.2735
TP1: 0.3038
TP2: 0.3297
TP3: 0.3556
Stop Loss: 0.2390
The 15M chart shows a bullish structure with momentum and volume confirmation. A controlled retest of the entry zone may give the setup a cleaner trigger.
Plan: Wait for confirmation/rejection inside the entry zone; don’t chase the move.
DYOR | Manage Risk | Avoid Over-Leverage
2
·
--
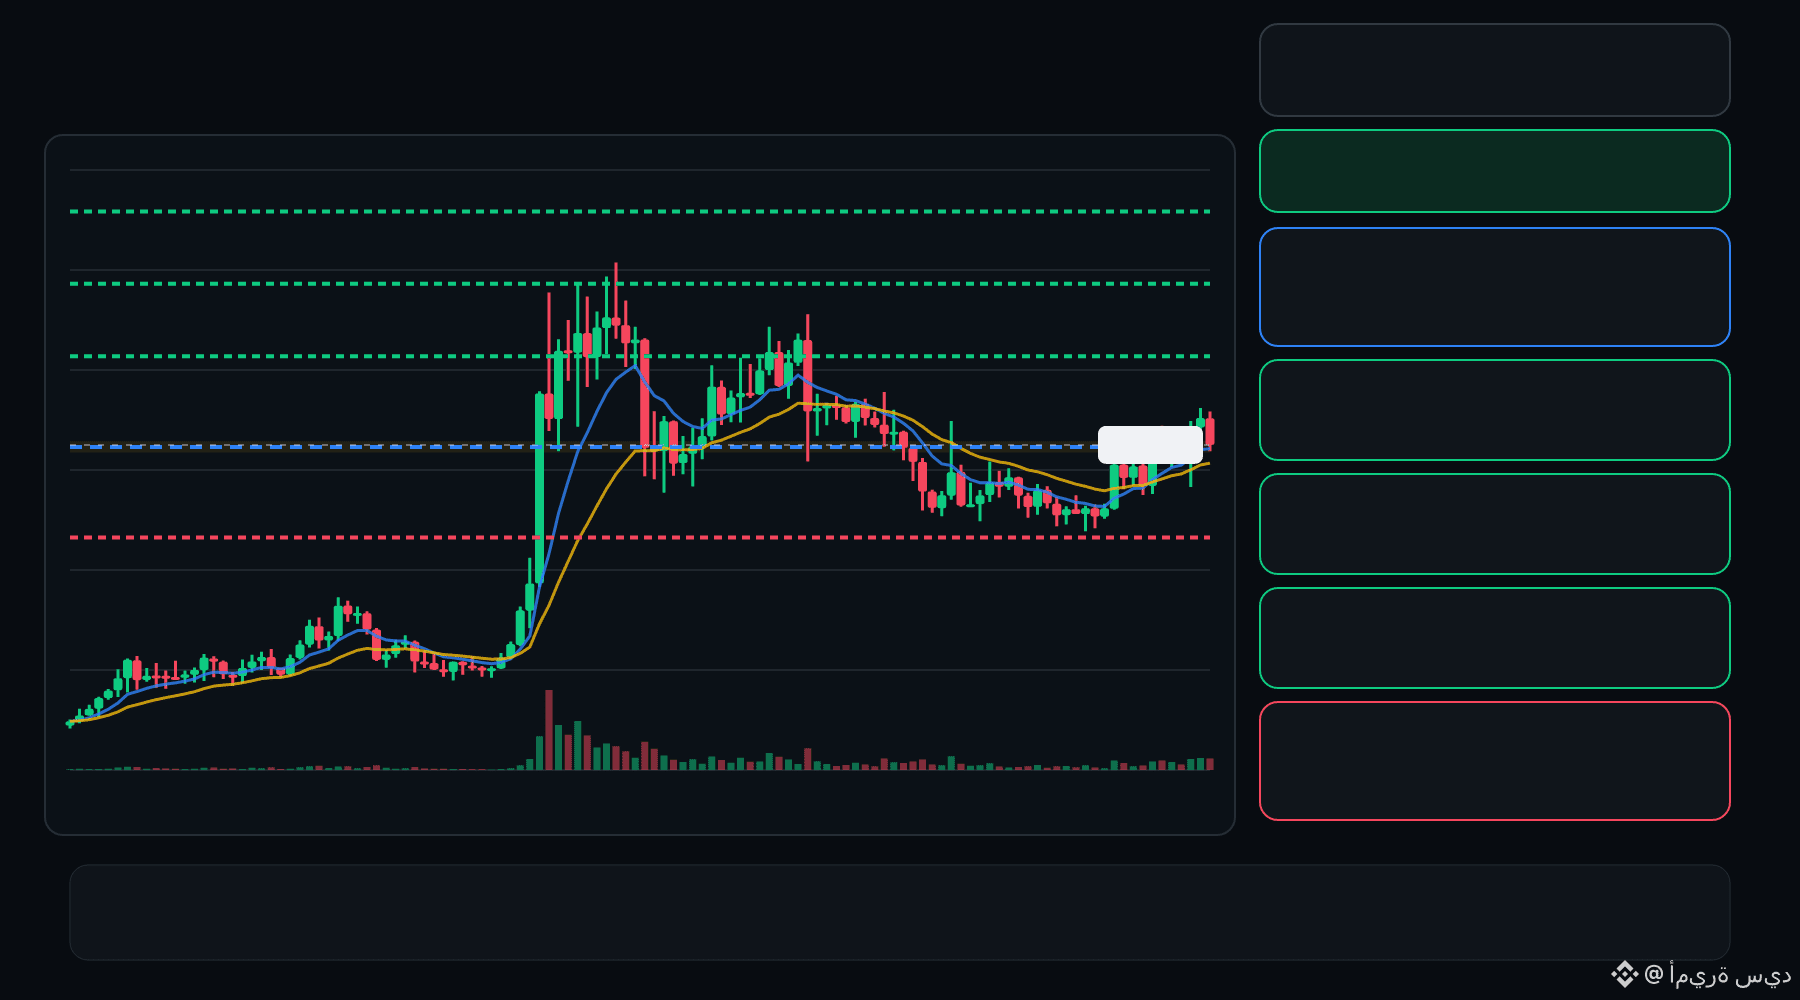
🟢 BIRB bulls are defending the pullback… is continuation setting up ⁉️
🟩 BIRB LONG
Entry: 0.09015 – 0.09098
TP1: 0.09728
TP2: 0.1026
TP3: 0.1080
Stop Loss: 0.08385
The 15M chart shows a bullish structure with momentum and volume confirmation. A controlled retest of the entry zone may give the setup a cleaner trigger.
Plan: Wait for confirmation/rejection inside the entry zone; don’t chase the move.
DYOR | Manage Risk | Avoid Over-Leverage
1
·
--
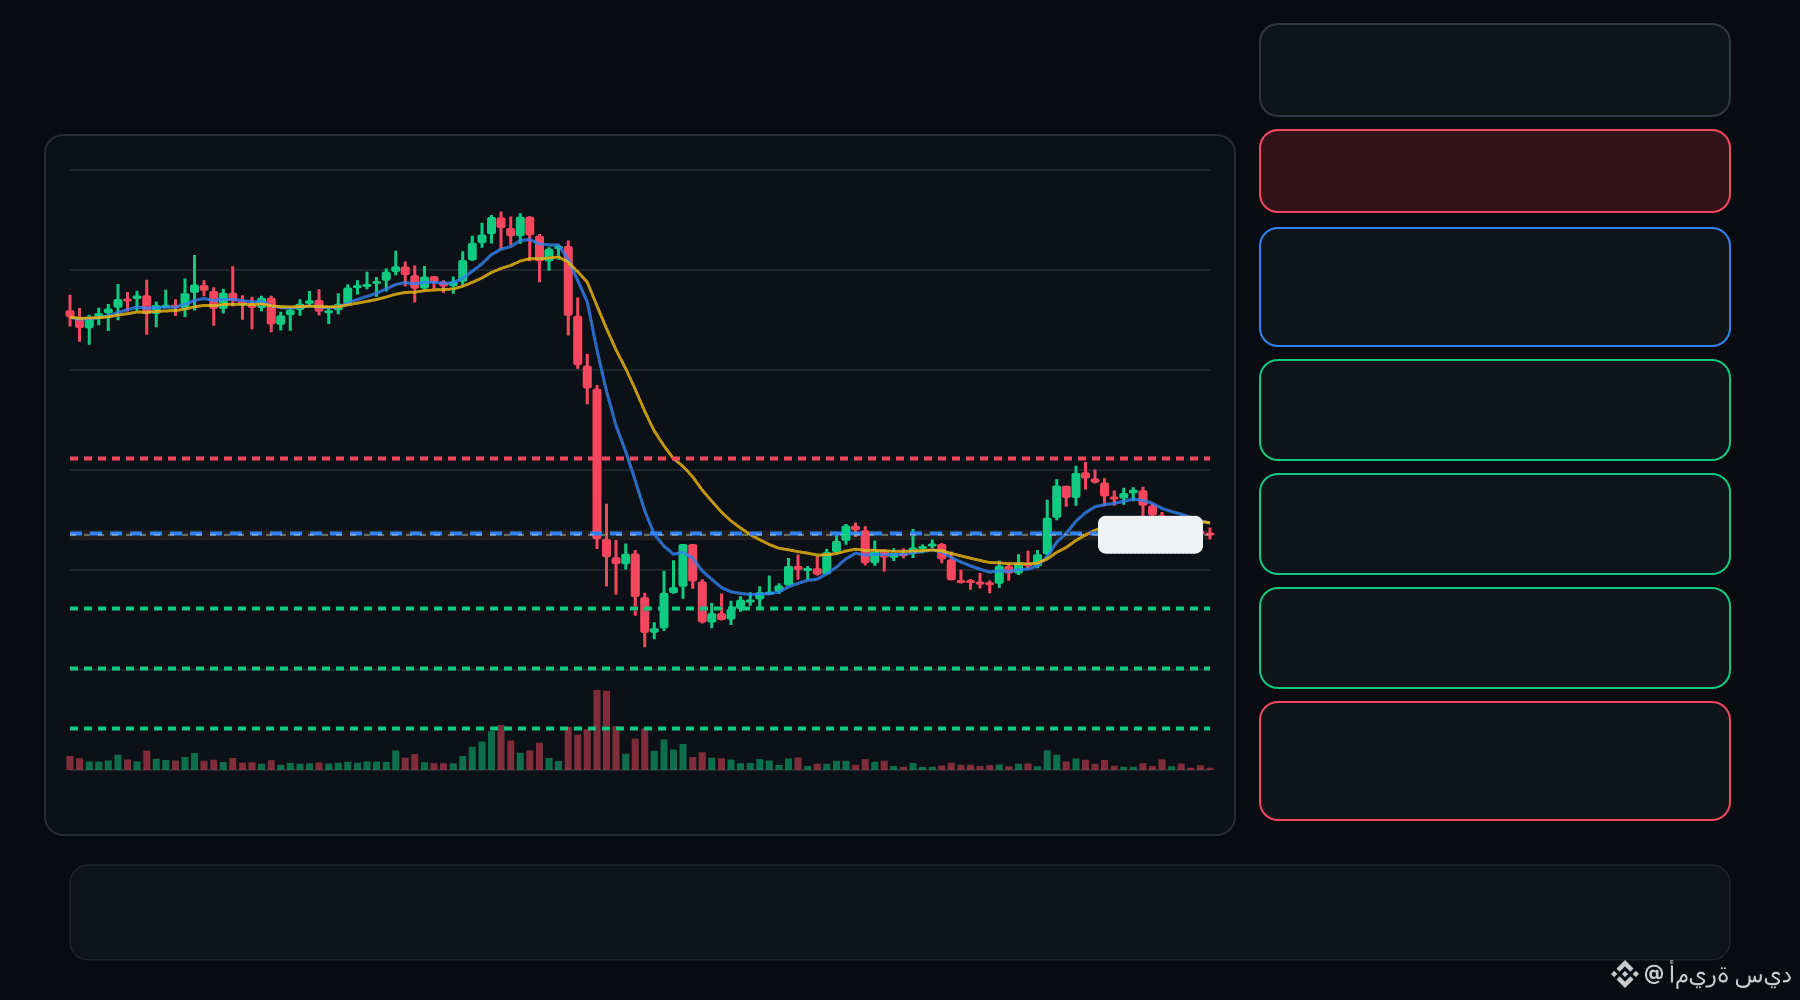
🔴 BLESS bears are pressing the pullback… is the rejection getting deeper ⁉️
🔴 BLESS SHORT
Entry: 0.009885 – 0.009963
TP1: 0.008988
TP2: 0.008240
TP3: 0.007492
Stop Loss: 0.01086
The 15M chart shows a bearish structure with momentum and volume confirmation. A controlled retest of the entry zone may give the setup a cleaner trigger.
Plan: Wait for confirmation/rejection inside the entry zone; don’t chase the move.
DYOR | Manage Risk | Avoid Over-Leverage
·
--
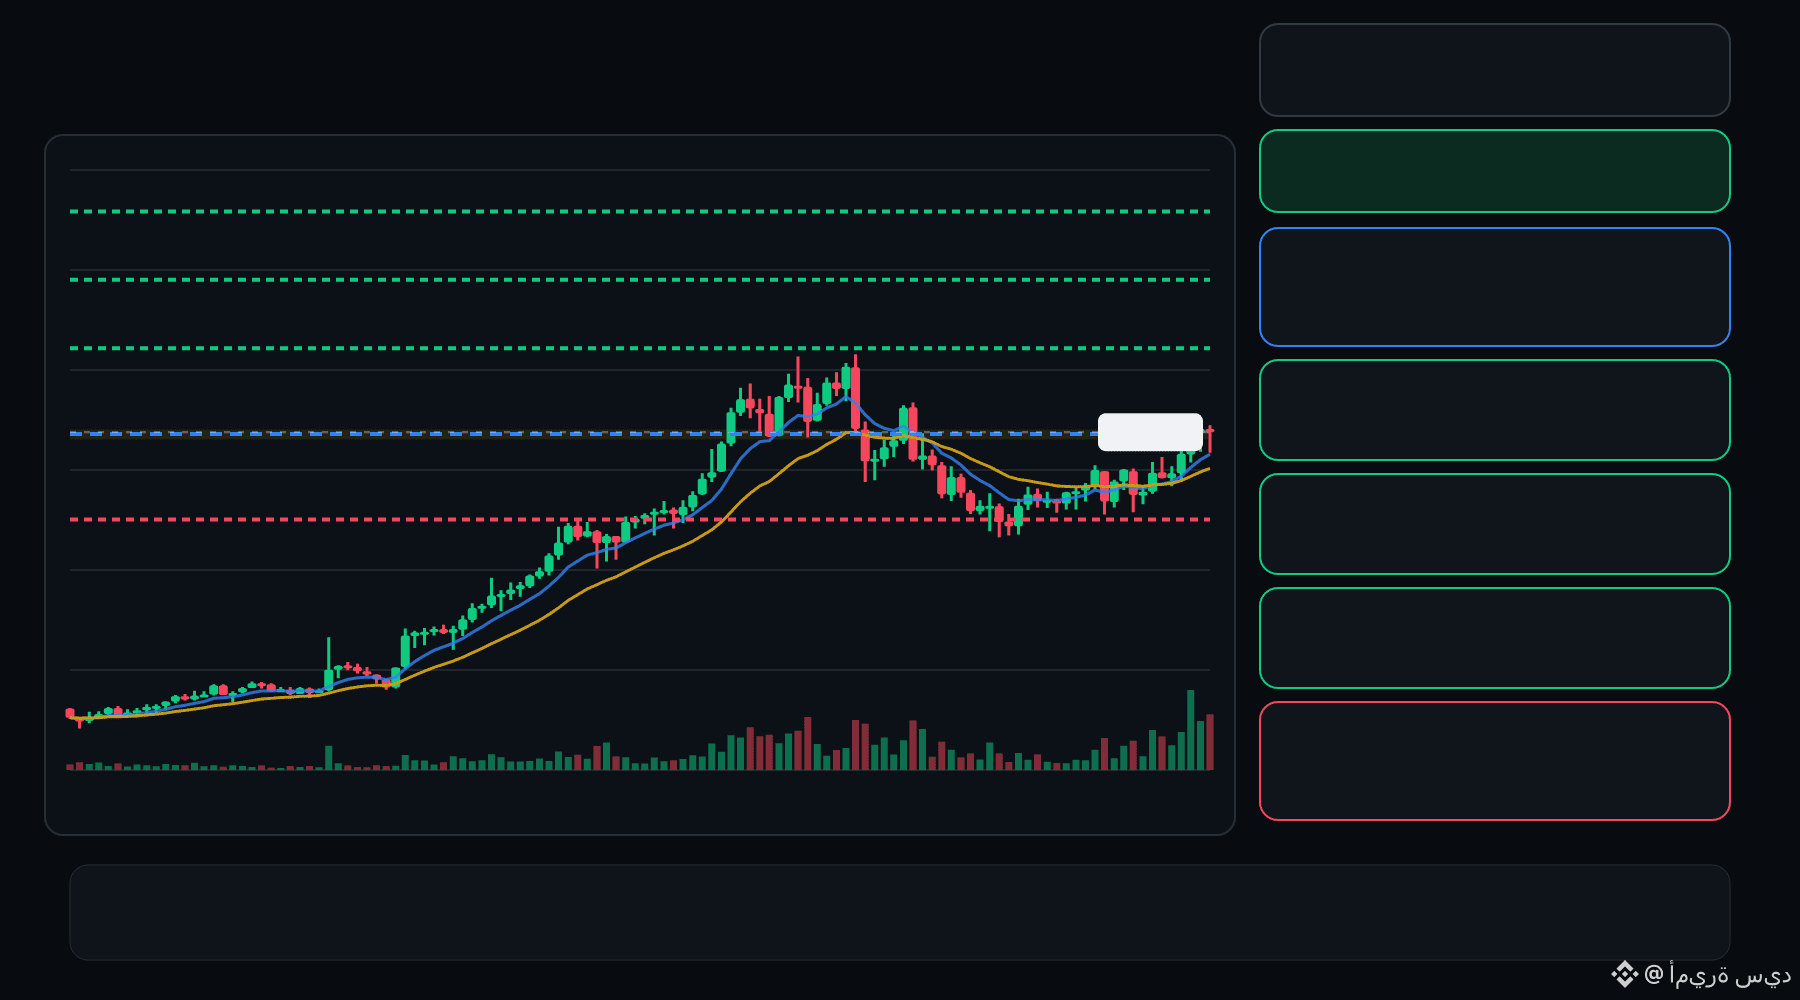
🟢 GWEI bulls are defending the pullback… is continuation setting up ⁉️
🟩 GWEI LONG
Entry: 0.02272 – 0.02288
TP1: 0.02438
TP2: 0.02565
TP3: 0.02691
Stop Loss: 0.02122
The 15M chart shows a bullish structure with momentum and volume confirmation. A controlled retest of the entry zone may give the setup a cleaner trigger.
Plan: Wait for confirmation/rejection inside the entry zone; don’t chase the move.
DYOR | Manage Risk | Avoid Over-Leverage
·
--
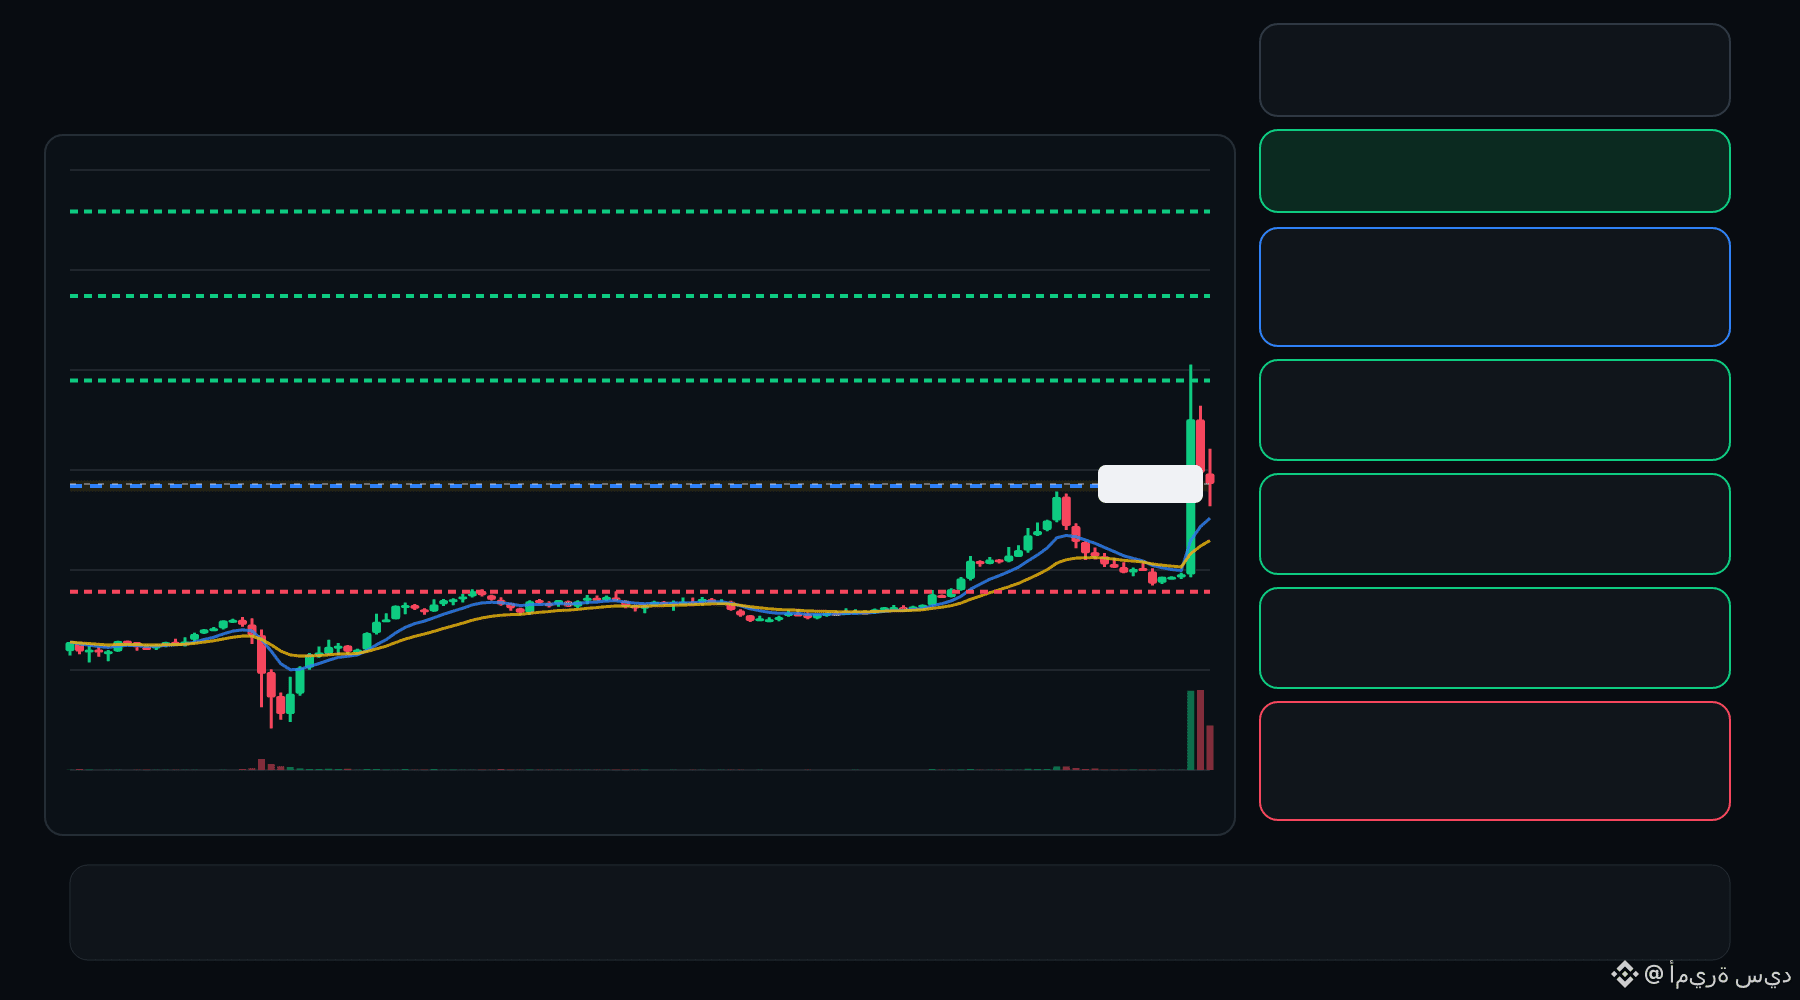
🟢 SLP bulls are defending the pullback… is continuation setting up ⁉️
🟩 SLP LONG
Entry: 0.0005468 – 0.0005516
TP1: 0.0005957
TP2: 0.0006329
TP3: 0.0006701
Stop Loss: 0.0005027
The 15M chart shows a bullish structure with momentum and volume confirmation. A controlled retest of the entry zone may give the setup a cleaner trigger.
Plan: Wait for confirmation/rejection inside the entry zone; don’t chase the move.
DYOR | Manage Risk | Avoid Over-Leverage
4
·
--
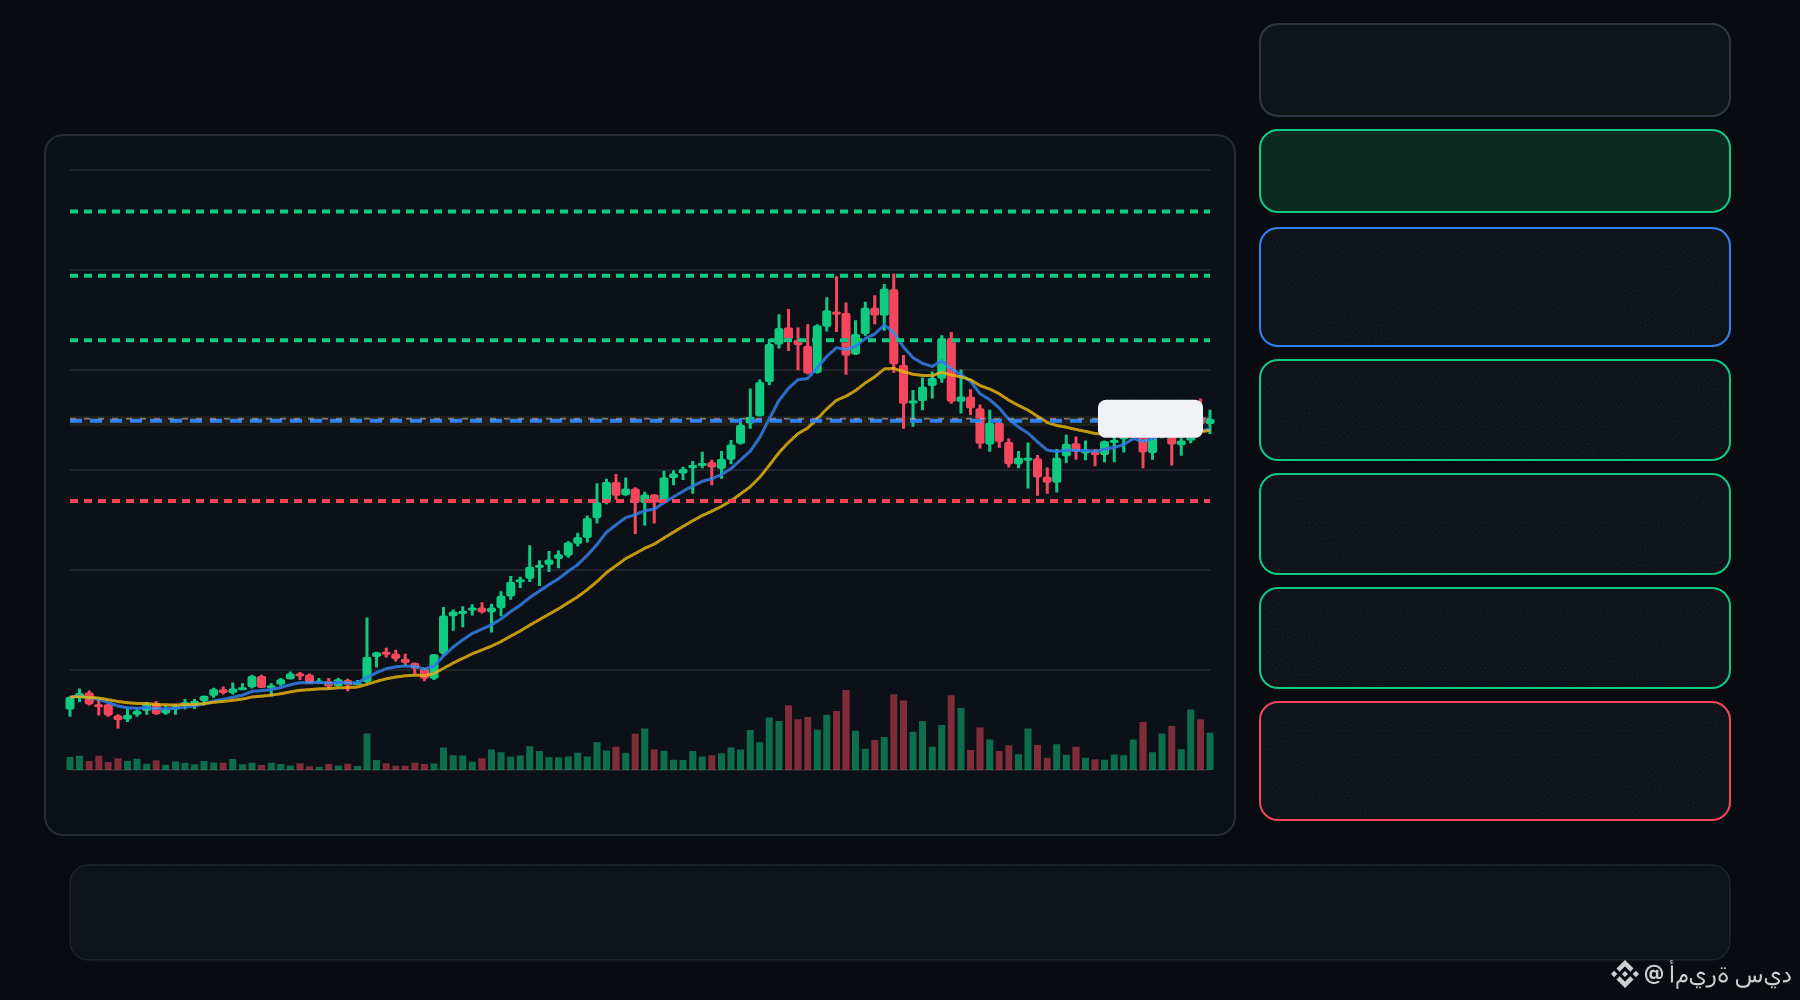
🟢 GWEI bulls are defending the pullback… is continuation setting up ⁉️
🟩 GWEI LONG
Entry: 0.02196 – 0.02210
TP1: 0.02326
TP2: 0.02424
TP3: 0.02521
Stop Loss: 0.02081
The 15M chart shows a bullish structure with momentum and volume confirmation. A controlled retest of the entry zone may give the setup a cleaner trigger.
Plan: Wait for confirmation/rejection inside the entry zone; don’t chase the move.
DYOR | Manage Risk | Avoid Over-Leverage
·
--
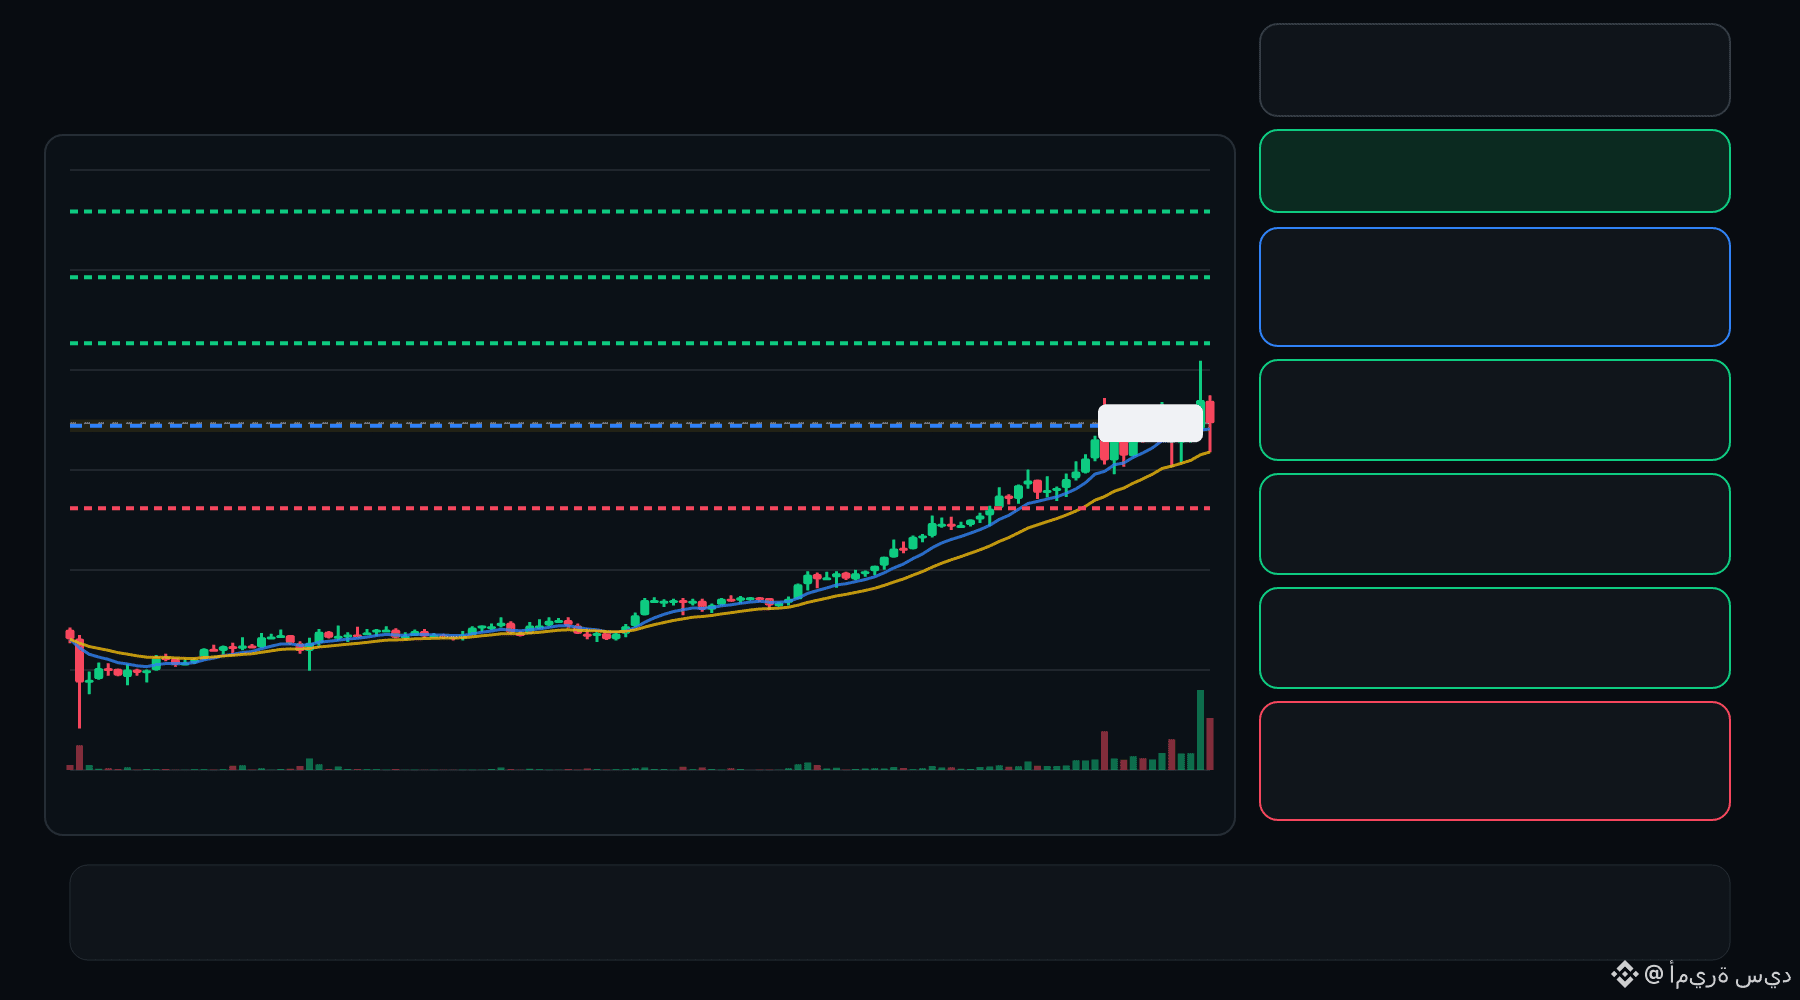
🟢 SPK bulls are defending the pullback… is continuation setting up ⁉️
🟩 SPK LONG
Entry: 0.02006 – 0.02025
TP1: 0.02135
TP2: 0.02231
TP3: 0.02327
Stop Loss: 0.01896
The 15M chart shows a bullish structure with momentum and volume confirmation. A controlled retest of the entry zone may give the setup a cleaner trigger.
Plan: Wait for confirmation/rejection inside the entry zone; don’t chase the move.
DYOR | Manage Risk | Avoid Over-Leverage
·
--
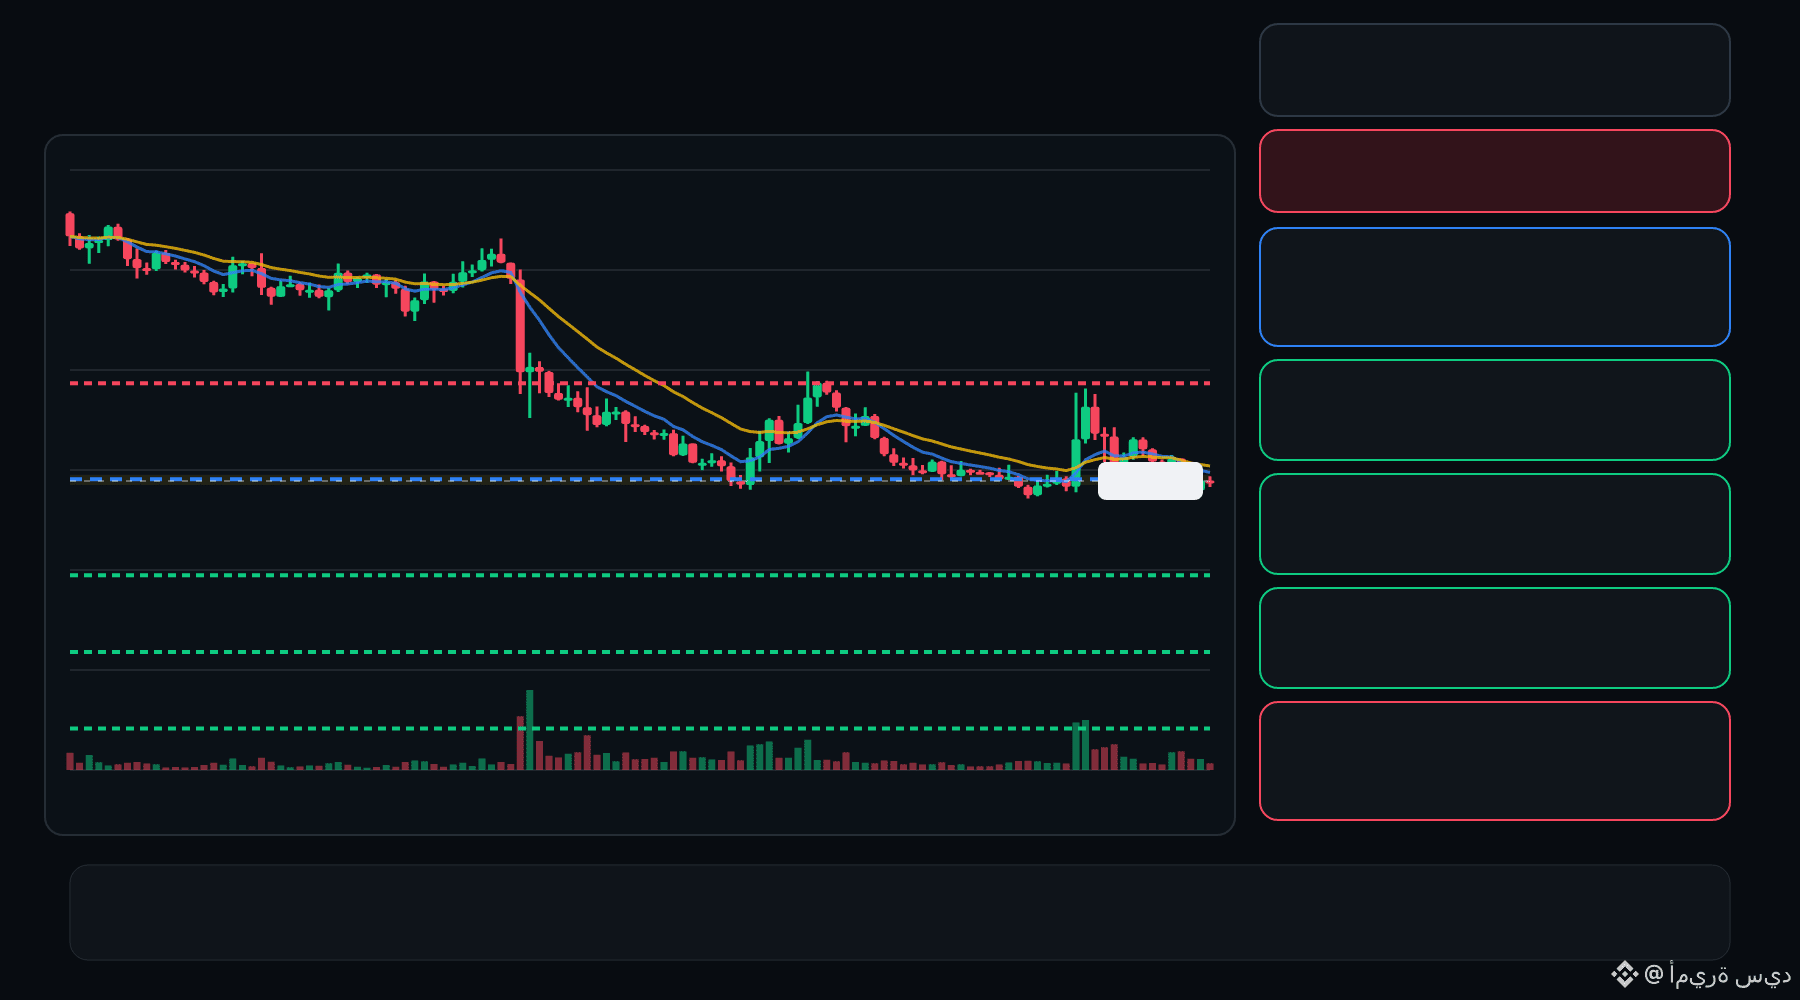
🔴 BTW bears are pressing the pullback… is the rejection getting deeper ⁉️
🔴 BTW SHORT
Entry: 1.129 – 1.145
TP1: 0.9686
TP2: 0.8338
TP3: 0.6990
Stop Loss: 1.306
The 15M chart shows a bearish structure with momentum and volume confirmation. A controlled retest of the entry zone may give the setup a cleaner trigger.
Plan: Wait for confirmation/rejection inside the entry zone; don’t chase the move.
DYOR | Manage Risk | Avoid Over-Leverage
9
Көбірек контент көру үшін кіріңіз
Binance Square платформасында әлемдік криптоқоғамдастыққа қосылыңыз
⚡️ Криптовалюта туралы ең соңғы және пайдалы ақпаратты алыңыз.
💬 Әлемдегі ең ірі криптобиржаның сеніміне ие.
👍 Расталған авторлардың нақты пікірлерін табыңыз.
Электрондық пошта/телефон нөмірі
Трендтегі тақырыптар
YiHeSaysProofOfReserves:10TokensAt100%Backing
0 рет көрілді
20 адам талқылап жатыр
🚨 BREAKING: Elon Musk just said "It would be game over for America" and the internet is split down the middle 👀
His warning: if Democrats win the House, the Senate and the presidency in 2028, they could make DC and Puerto Rico states, legalize undocumented immigrants and expand the Supreme Court. Then America becomes a "permanent one-party state" 😳
His supporters say he's pointing at real proposals. Some Democrats have openly discussed DC statehood and court expansion before 🧠
His critics say it's speculation about an election two years away, with no evidence behind it 💀
And here's the part nobody can ignore 👇
Elon has spent over $442 MILLION this election cycle backing Republicans, including $76.8M in just the last month 😱 He's not a bystander warning about the game. He's one of its biggest players.
In 2024 he said the election would be "the last election" if Trump lost. Now the same "end of democracy" warning comes from the other direction. Both sides use this language, and both can't be right 😬
Trump's approval sits around 32-33% with the midterms on November 3, so the timing isn't random 👀
Is Elon sounding a real alarm, or just buying the outcome he wants? 👇
$SPCXB
Mr Viral
·11 лайк
·26.8k рет көрілді
BinanceRecovery90% of stolen assets
0 рет көрілді
20 адам талқылап жатыр
YiHe:ProofOfReserves:10TokensAt100%Backing
0 рет көрілді
20 адам талқылап жатыр