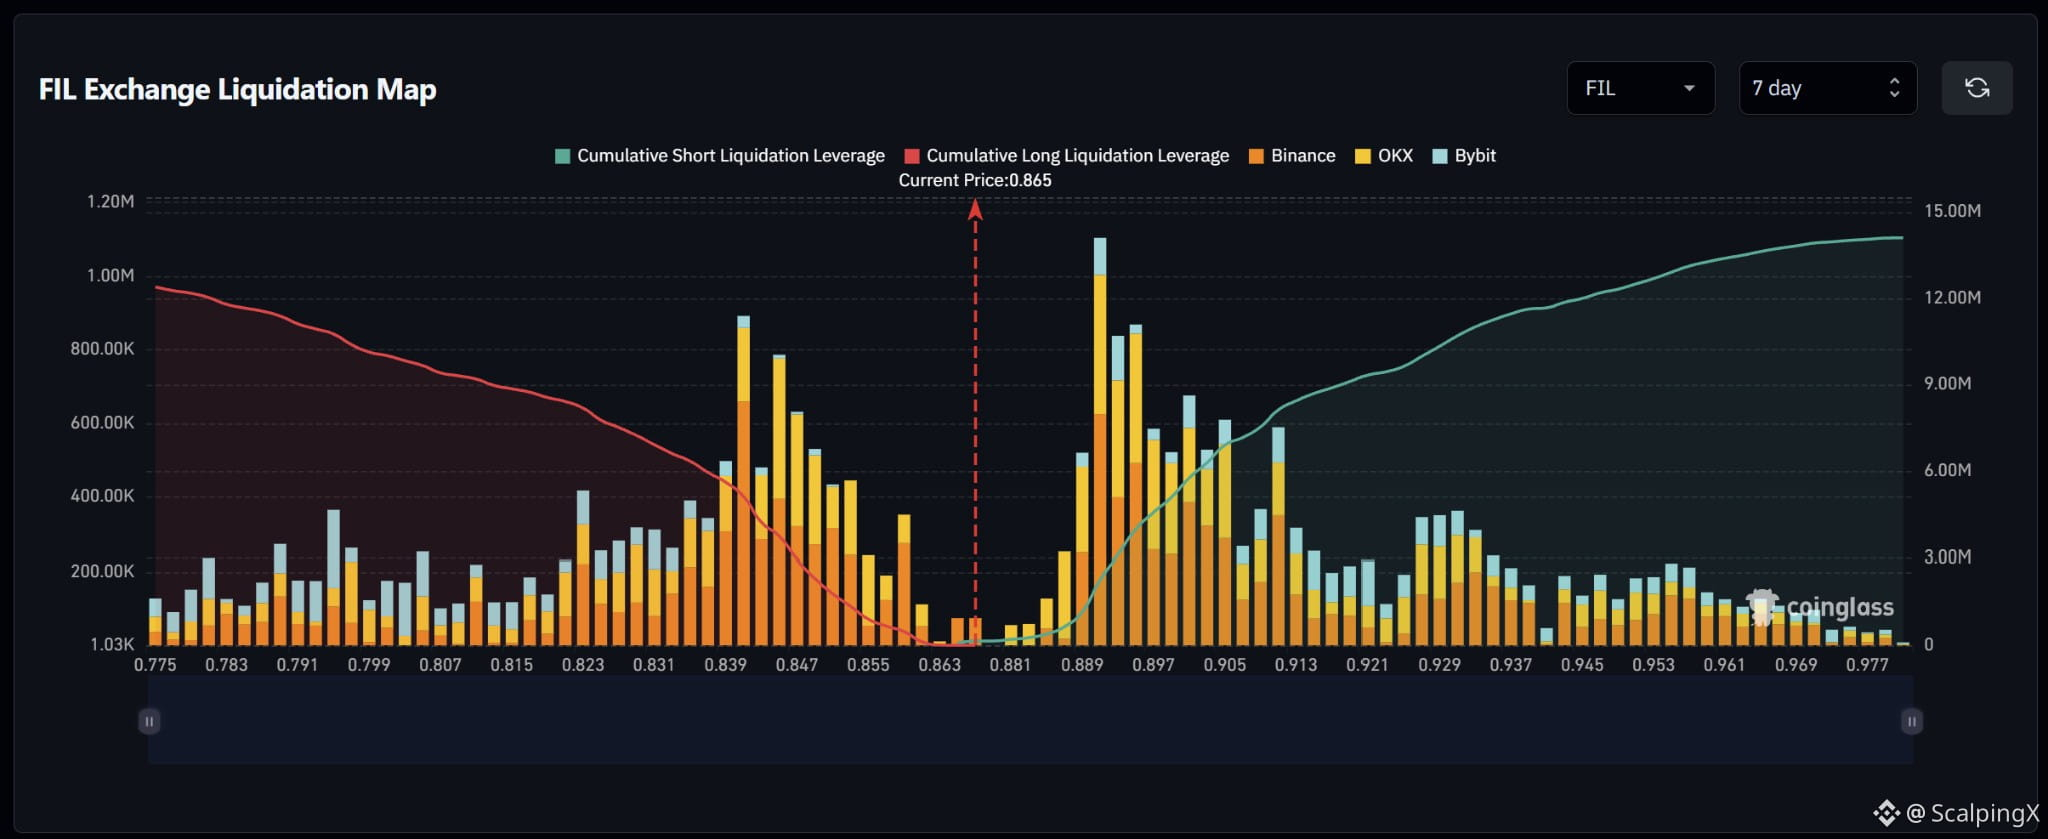
$FIL – Liquidation Map (7 days) – Index ~0.865
🧭 The preferred scenario is a downside long sweep first, focusing on 0.849–0.860. These clusters sit closer to the price shown on the map than the strong short band at 0.889–0.911. Cumulative exposure is relatively balanced, making cluster proximity and density more relevant than total size.
🔻 Losing 0.863 without a reclaim shifts attention to 0.855–0.860, then 0.849–0.855. Long liquidations there could amplify the decline; the reaction after the sweep will help assess continuation.
🎯 A further break below 0.849 brings the dense 0.839–0.847 band into focus, particularly near 0.841 and 0.845. Conversely, a downside sweep followed by a quick reclaim of 0.863 would weaken the case for further declines.
⚖️ A break and hold above 0.885 shifts priority to short clusters at 0.889–0.897, with the map’s largest bar near 0.891. Holding above 0.897 would bring 0.901–0.911 into focus, followed by 0.927–0.933 farther up. Avoid chasing a major cluster sweep that quickly reverses.
#LiquidationMap
🧭 The preferred scenario is a downside long sweep first, focusing on 0.849–0.860. These clusters sit closer to the price shown on the map than the strong short band at 0.889–0.911. Cumulative exposure is relatively balanced, making cluster proximity and density more relevant than total size.
🔻 Losing 0.863 without a reclaim shifts attention to 0.855–0.860, then 0.849–0.855. Long liquidations there could amplify the decline; the reaction after the sweep will help assess continuation.
🎯 A further break below 0.849 brings the dense 0.839–0.847 band into focus, particularly near 0.841 and 0.845. Conversely, a downside sweep followed by a quick reclaim of 0.863 would weaken the case for further declines.
⚖️ A break and hold above 0.885 shifts priority to short clusters at 0.889–0.897, with the map’s largest bar near 0.891. Holding above 0.897 would bring 0.901–0.911 into focus, followed by 0.927–0.933 farther up. Avoid chasing a major cluster sweep that quickly reverses.
#LiquidationMap