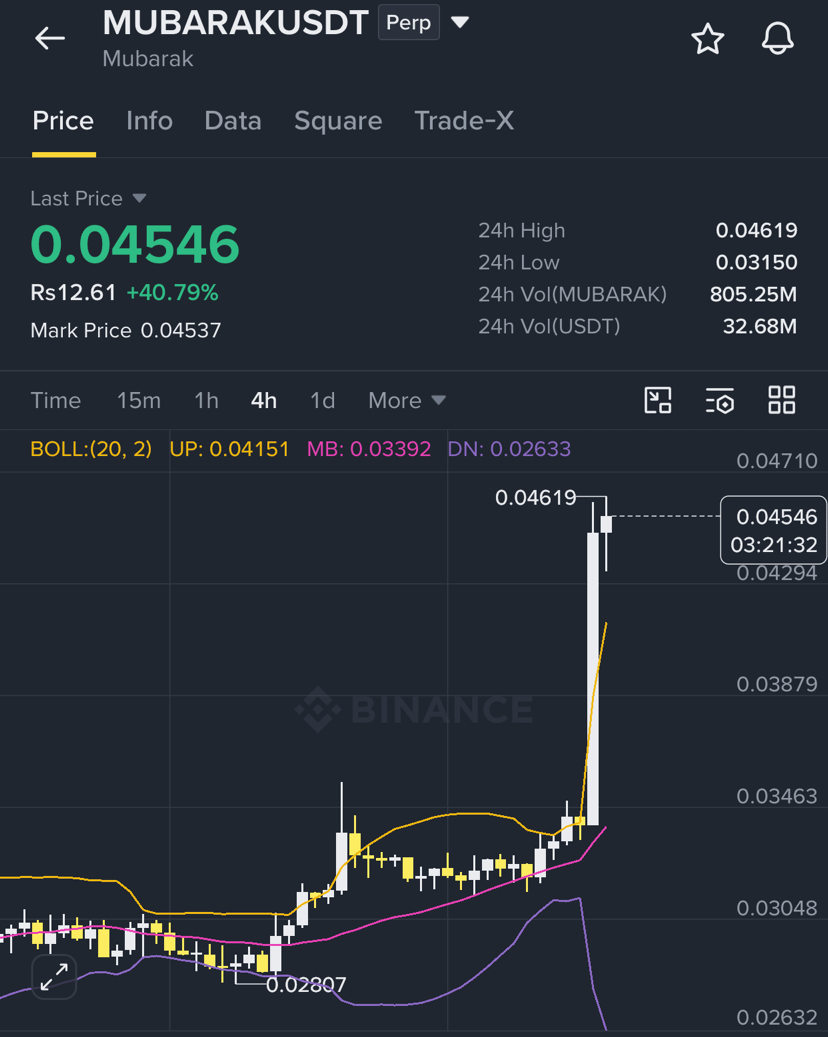
Evaluating a futures setup for $MUBARAK /USDT requires looking at structural technical patterns (such as multi-timeframe falling wedges or descending channels often tracked on higher timeframes), alongside rigorous risk management since altcoin perpetuals carry high volatility.
$MUBARAK /USDT Technical Context
Pattern Structure: Historically prone to forming compression patterns like falling wedges or descending channels on medium-to-high timeframes, which frequently act as bullish reversal or continuation structures after extended cooling periods.
Key Focus: Look for a confirmed volume-backed breakout above local resistance or trendline compression rather than entering blindly in the middle of a range.
Actionable Futures Setup Framework
If you are structuring a LONG bias based on a breakout/retest scenario, a disciplined framework looks like this:
Entry Trigger:
Option A (Breakout Entry): Enter only after a decisive 1h/4h candle close above the upper wedge/channel resistance line with expanding volume.
Option B (Pullback Entry): Wait for the breakout to happen, followed by a low-volume retest holding above the previous resistance-turned-support line.
Stop-Loss (SL):
Place structural invalidation just below the local swing low or beneath the moving average cluster (e.g., losing the local 1H/4H EMA baseline), ensuring your risk per trade stays small (typically 1–2% of total account equity).
Take-Profit (TP) Targets:
TP1: Near the first measured move or prior local high resistance level (secure partial profits here and move stop-loss to entry).
TradingView
TP2 / TP3: Extended targets mapped to higher macro resistance blocks derived from the wedge height.
Execution Checklist
[ ] Verify Live Ticker Data: Check your specific derivatives exchange (e.g., Binance Perpetual, etc.) for current funding rates and open interest to avoid getting caught in high-leverage long squeezes.
[ ] Leverage Control: Keep leverage modest (e.g., 2x–5x max) given altcoin volatility.
$MUBARAK /USDT Technical Context
Pattern Structure: Historically prone to forming compression patterns like falling wedges or descending channels on medium-to-high timeframes, which frequently act as bullish reversal or continuation structures after extended cooling periods.
Key Focus: Look for a confirmed volume-backed breakout above local resistance or trendline compression rather than entering blindly in the middle of a range.
Actionable Futures Setup Framework
If you are structuring a LONG bias based on a breakout/retest scenario, a disciplined framework looks like this:
Entry Trigger:
Option A (Breakout Entry): Enter only after a decisive 1h/4h candle close above the upper wedge/channel resistance line with expanding volume.
Option B (Pullback Entry): Wait for the breakout to happen, followed by a low-volume retest holding above the previous resistance-turned-support line.
Stop-Loss (SL):
Place structural invalidation just below the local swing low or beneath the moving average cluster (e.g., losing the local 1H/4H EMA baseline), ensuring your risk per trade stays small (typically 1–2% of total account equity).
Take-Profit (TP) Targets:
TP1: Near the first measured move or prior local high resistance level (secure partial profits here and move stop-loss to entry).
TradingView
TP2 / TP3: Extended targets mapped to higher macro resistance blocks derived from the wedge height.
Execution Checklist
[ ] Verify Live Ticker Data: Check your specific derivatives exchange (e.g., Binance Perpetual, etc.) for current funding rates and open interest to avoid getting caught in high-leverage long squeezes.
[ ] Leverage Control: Keep leverage modest (e.g., 2x–5x max) given altcoin volatility.