
$ETH
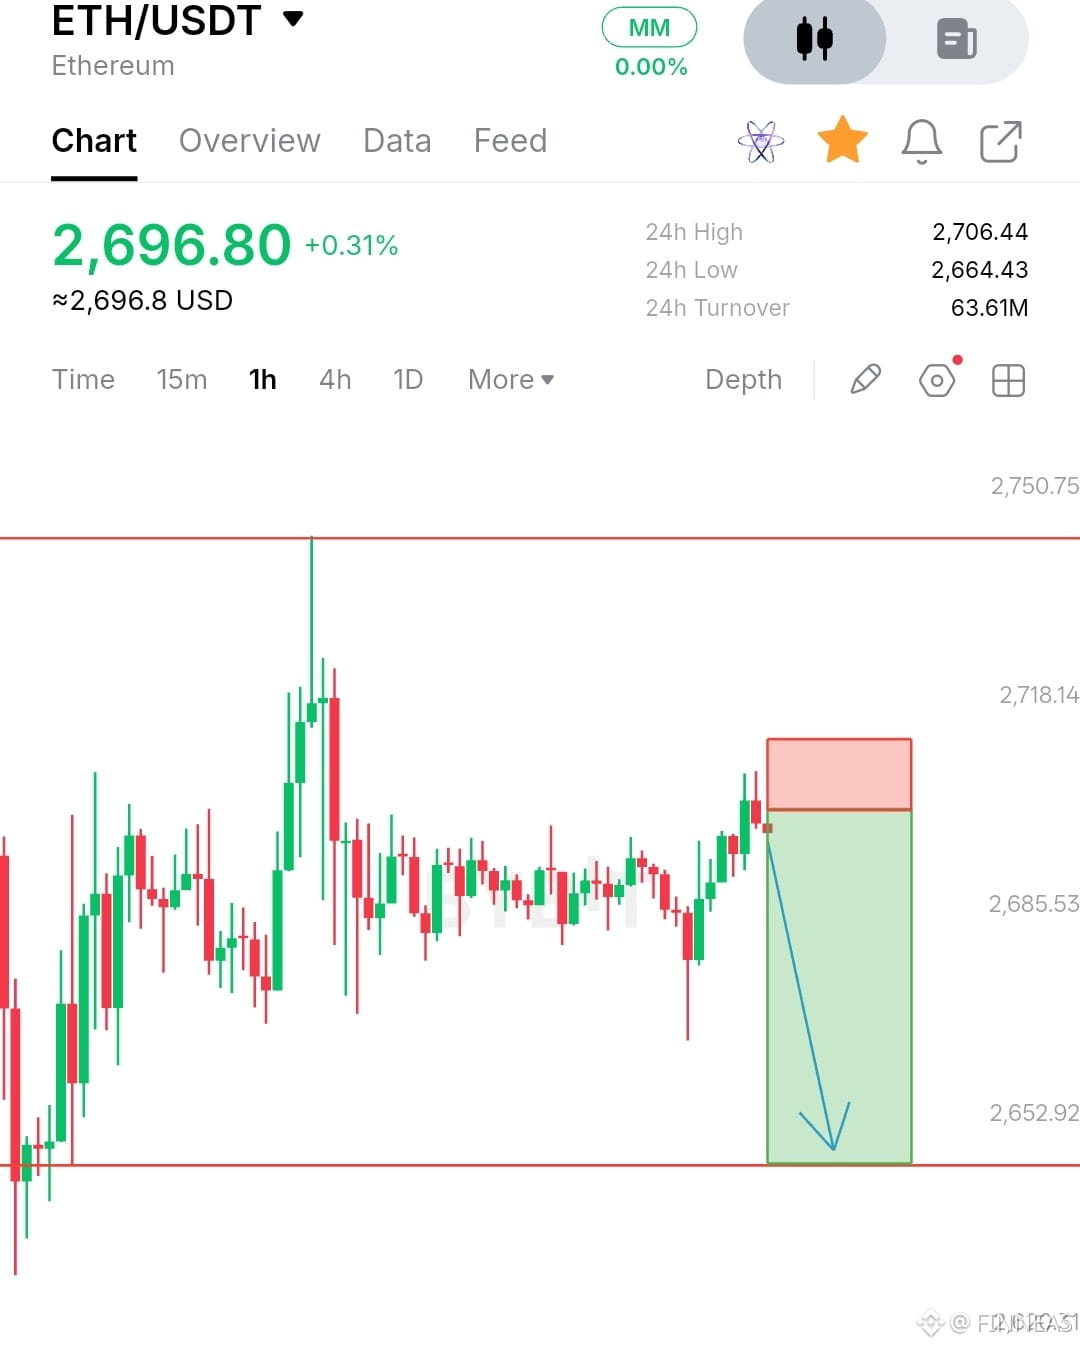
1H structure shows a clear rejection from the $2,706 to $2,718 resistance and supply zone. Price is now testing the upper part of this zone after a short recovery, making this area important for a bearish continuation setup.
The recent upside move lacks a confirmed breakout above resistance, while the broader structure remains range bound with sellers defending the upper liquidity area. A rejection here can push price back toward the lower support and liquidity zone.
EP: $2,698 to $2,706
TP1: $2,685
TP2: $2,665
TP3: $2,645
SL: $2,720
Momentum is weakening near resistance, with the $2,706 to $2,718 area acting as the key supply zone.
A sustained rejection below $2,706 keeps the short term structure bearish and opens room toward $2,685, followed by $2,665 and the major support near $2,645.
The setup is invalidated if ETH breaks and holds above $2,720, as that would indicate the resistance zone has been reclaimed.
$ETH
1H structure shows a clear rejection from the $2,706 to $2,718 resistance and supply zone. Price is now testing the upper part of this zone after a short recovery, making this area important for a bearish continuation setup.
The recent upside move lacks a confirmed breakout above resistance, while the broader structure remains range bound with sellers defending the upper liquidity area. A rejection here can push price back toward the lower support and liquidity zone.
EP: $2,698 to $2,706
TP1: $2,685
TP2: $2,665
TP3: $2,645
SL: $2,720
Momentum is weakening near resistance, with the $2,706 to $2,718 area acting as the key supply zone.
A sustained rejection below $2,706 keeps the short term structure bearish and opens room toward $2,685, followed by $2,665 and the major support near $2,645.
The setup is invalidated if ETH breaks and holds above $2,720, as that would indicate the resistance zone has been reclaimed.
$ETH