

Crypto Eagles
12.3k Publicaciones

Crypto Eagles
 Verificado Plus de Binance Square
Denunciar
Bloquear usuario
Square Content Creator | X: @CryptoProject6

Creator Awards 2024

#BinanceTurns7

Top Voices

Holder de PEPE
Trader frecuente
6.1 año(s)
142 Siguiendo
129.3K+ Seguidores
168.2K+ Me gusta
3 Insignias
Publicaciones
Todo
Citas
Videos
Live
DÍA 7 🧧
¡VOTA Y RECIBE UN SOBRE ROJO! 🎁
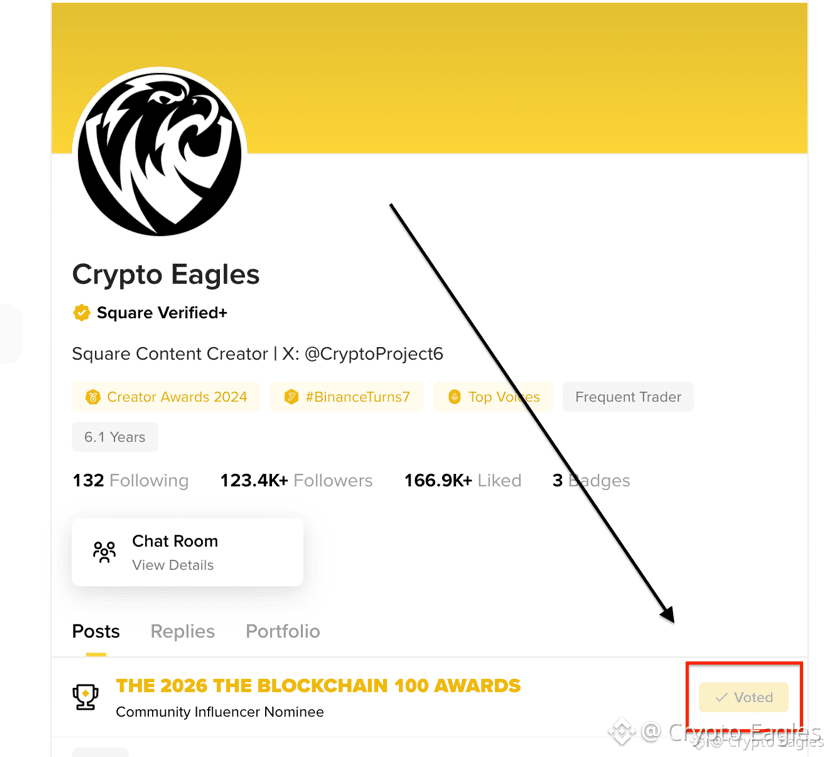
Crypto Eagles está nominado a LOS PREMIOS BLOCKCHAIN 100 DE 2026 🏆
Categoría: Influencer de la comunidad
¡Votar solo te llevará 10 segundos!
✅ Abre mi perfil
✅ Desplázate hacia abajo y pulsa VOTAR
✅ Apoya a Crypto Eagles
[https://www.binance.com/en/square/profile/crypto_eagles](https://www.binance.com/en/square/profile/crypto_eagles)
🎁 ¡Hay un sobre rojo esperándote en esta publicación!
¡Se entregará por orden de llegada!
¡Ganemos juntos, familia Eagles!
DÍA 7 🧧
¡VOTA Y RECIBE UN SOBRE ROJO! 🎁
Crypto Eagles está nominado a LOS PREMIOS BLOCKCHAIN 100 DE 2026 🏆
Categoría: Influencer de la comunidad
¡Votar solo te llevará 10 segundos!
✅ Abre mi perfil
✅ Desplázate hacia abajo y pulsa VOTAR
✅ Apoya a Crypto Eagles
https://www.binance.com/en/square/profile/crypto_eagles
🎁 ¡Hay un sobre rojo esperándote en esta publicación!
¡Se entregará por orden de llegada!
¡Ganemos juntos, familia Eagles!
¡VOTA Y RECIBE UN SOBRE ROJO! 🎁
Crypto Eagles está nominado a LOS PREMIOS BLOCKCHAIN 100 DE 2026 🏆
Categoría: Influencer de la comunidad
¡Votar solo te llevará 10 segundos!
✅ Abre mi perfil
✅ Desplázate hacia abajo y pulsa VOTAR
✅ Apoya a Crypto Eagles
https://www.binance.com/en/square/profile/crypto_eagles
🎁 ¡Hay un sobre rojo esperándote en esta publicación!
¡Se entregará por orden de llegada!
¡Ganemos juntos, familia Eagles!
2.9k
4
131
2.9k
Verificado
$NIGHT está construyendo sobre una idea sólida: la privacidad debe proteger los datos sensibles sin eliminar el cumplimiento normativo.
Midnight utiliza la divulgación selectiva y un diseño de doble libro mayor, lo que la hace relevante para la banca, la identidad, los pagos y los activos del mundo real (RWA).
El ecosistema ya incluye validadores empresariales como Google Cloud, MoneyGram, eToro y Worldpay, mientras que Monument Bank trabaja para tokenizar hasta 250 millones de libras esterlinas en depósitos de clientes.
En comparación con Zcash, Aleo, Canton y $ZAMA , el enfoque de Midnight en una privacidad programable y compatible con el cumplimiento normativo le otorga una posición diferente en el sector.
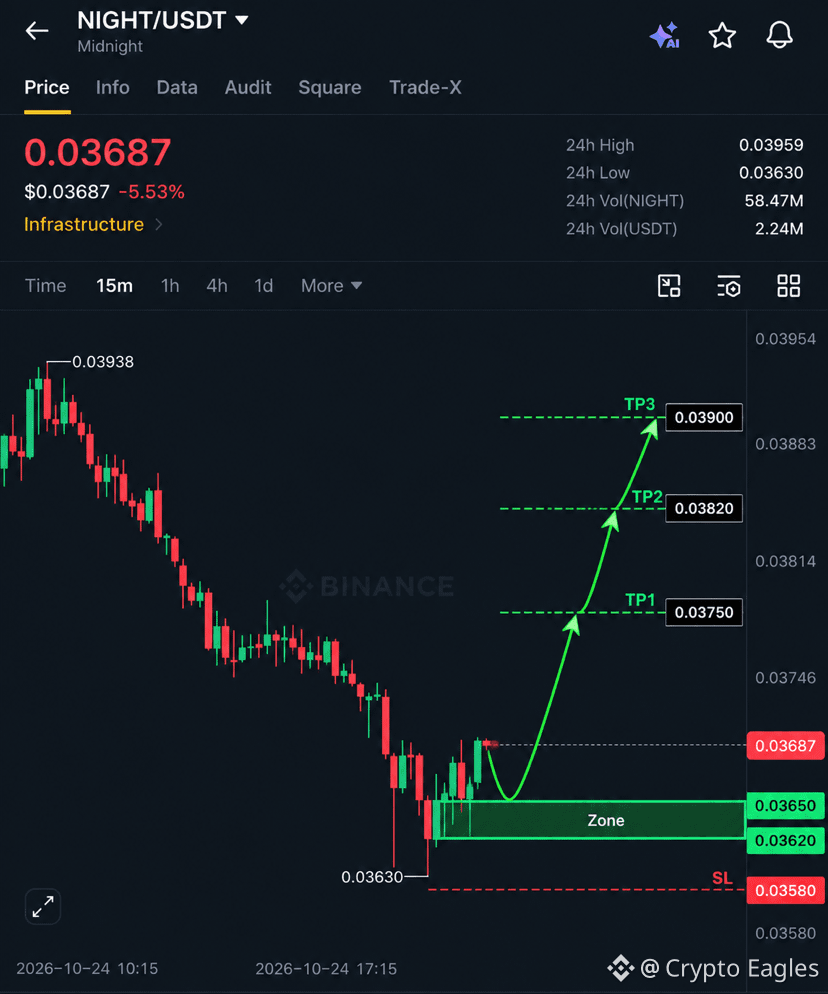
Análisis técnico: $NIGHT está reaccionando desde la zona de 0.03620–0.03650. Mantenerse en esta zona mantiene en el punto de mira los niveles de 0.03750, 0.03820 y 0.03900, mientras que una caída por debajo de 0.03580 debilitaría la configuración.
Contenido informativo únicamente. No constituye asesoramiento financiero.
$NIGHT está construyendo sobre una idea sólida: la privacidad debe proteger los datos sensibles sin eliminar el cumplimiento normativo.
Midnight utiliza la divulgación selectiva y un diseño de doble libro mayor, lo que la hace relevante para la banca, la identidad, los pagos y los activos del mundo real (RWA).
El ecosistema ya incluye validadores empresariales como Google Cloud, MoneyGram, eToro y Worldpay, mientras que Monument Bank trabaja para tokenizar hasta 250 millones de libras esterlinas en depósitos de clientes.
En comparación con Zcash, Aleo, Canton y $ZAMA , el enfoque de Midnight en una privacidad programable y compatible con el cumplimiento normativo le otorga una posición diferente en el sector.
Análisis técnico: $NIGHT está reaccionando desde la zona de 0.03620–0.03650. Mantenerse en esta zona mantiene en el punto de mira los niveles de 0.03750, 0.03820 y 0.03900, mientras que una caída por debajo de 0.03580 debilitaría la configuración.
Contenido informativo únicamente. No constituye asesoramiento financiero.
Midnight utiliza la divulgación selectiva y un diseño de doble libro mayor, lo que la hace relevante para la banca, la identidad, los pagos y los activos del mundo real (RWA).
El ecosistema ya incluye validadores empresariales como Google Cloud, MoneyGram, eToro y Worldpay, mientras que Monument Bank trabaja para tokenizar hasta 250 millones de libras esterlinas en depósitos de clientes.
En comparación con Zcash, Aleo, Canton y $ZAMA , el enfoque de Midnight en una privacidad programable y compatible con el cumplimiento normativo le otorga una posición diferente en el sector.
Análisis técnico: $NIGHT está reaccionando desde la zona de 0.03620–0.03650. Mantenerse en esta zona mantiene en el punto de mira los niveles de 0.03750, 0.03820 y 0.03900, mientras que una caída por debajo de 0.03580 debilitaría la configuración.
Contenido informativo únicamente. No constituye asesoramiento financiero.
25
34
9.5k
DÍA 6 🧧
¡VOTA Y RECIBE UN SOBRE ROJO! 🎁
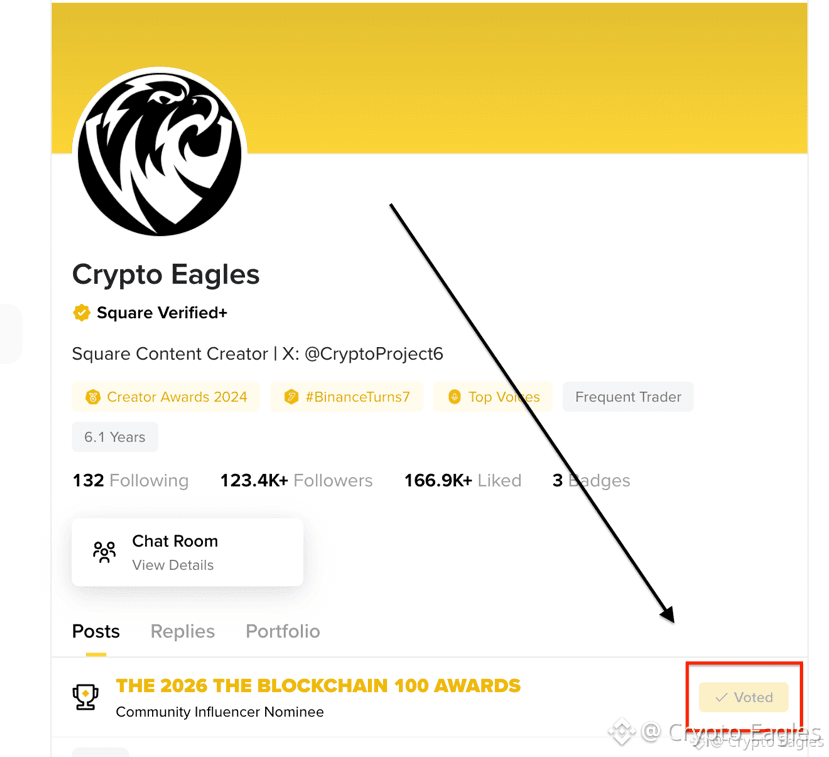
Crypto Eagles está nominado a LOS PREMIOS BLOCKCHAIN 100 DE 2026 🏆
Categoría: Influencer de la comunidad
¡Votar solo te toma 10 segundos!
✅ Abre mi perfil
✅ Desplázate hacia abajo y pulsa VOTAR
✅ Apoya a Crypto Eagles
[https://www.binance.com/en/square/profile/crypto_eagles](https://www.binance.com/en/square/profile/crypto_eagles)
🎁 ¡Hay un sobre rojo esperándote en esta publicación! ¡Por orden de llegada!
¡Ganemos juntos, familia Eagles!
DÍA 6 🧧
¡VOTA Y RECIBE UN SOBRE ROJO! 🎁
Crypto Eagles está nominado a LOS PREMIOS BLOCKCHAIN 100 DE 2026 🏆
Categoría: Influencer de la comunidad
¡Votar solo te toma 10 segundos!
✅ Abre mi perfil
✅ Desplázate hacia abajo y pulsa VOTAR
✅ Apoya a Crypto Eagles
https://www.binance.com/en/square/profile/crypto_eagles
🎁 ¡Hay un sobre rojo esperándote en esta publicación! ¡Por orden de llegada!
¡Ganemos juntos, familia Eagles!
¡VOTA Y RECIBE UN SOBRE ROJO! 🎁
Crypto Eagles está nominado a LOS PREMIOS BLOCKCHAIN 100 DE 2026 🏆
Categoría: Influencer de la comunidad
¡Votar solo te toma 10 segundos!
✅ Abre mi perfil
✅ Desplázate hacia abajo y pulsa VOTAR
✅ Apoya a Crypto Eagles
https://www.binance.com/en/square/profile/crypto_eagles
🎁 ¡Hay un sobre rojo esperándote en esta publicación! ¡Por orden de llegada!
¡Ganemos juntos, familia Eagles!
1.6k
7
102
2.3k
🎙️ ¡¡¡Feliz fin de semana a todos, charlemos un poco!!!
Finalizado
01 h 49 m 41 s
5.2k
6
1
DÍA 6 🧧
¡VOTA Y RECIBE UN SOBRE ROJO! 🎁
Crypto Eagles está nominado a los PREMIOS BLOCKCHAIN 100 DE 2026 🏆
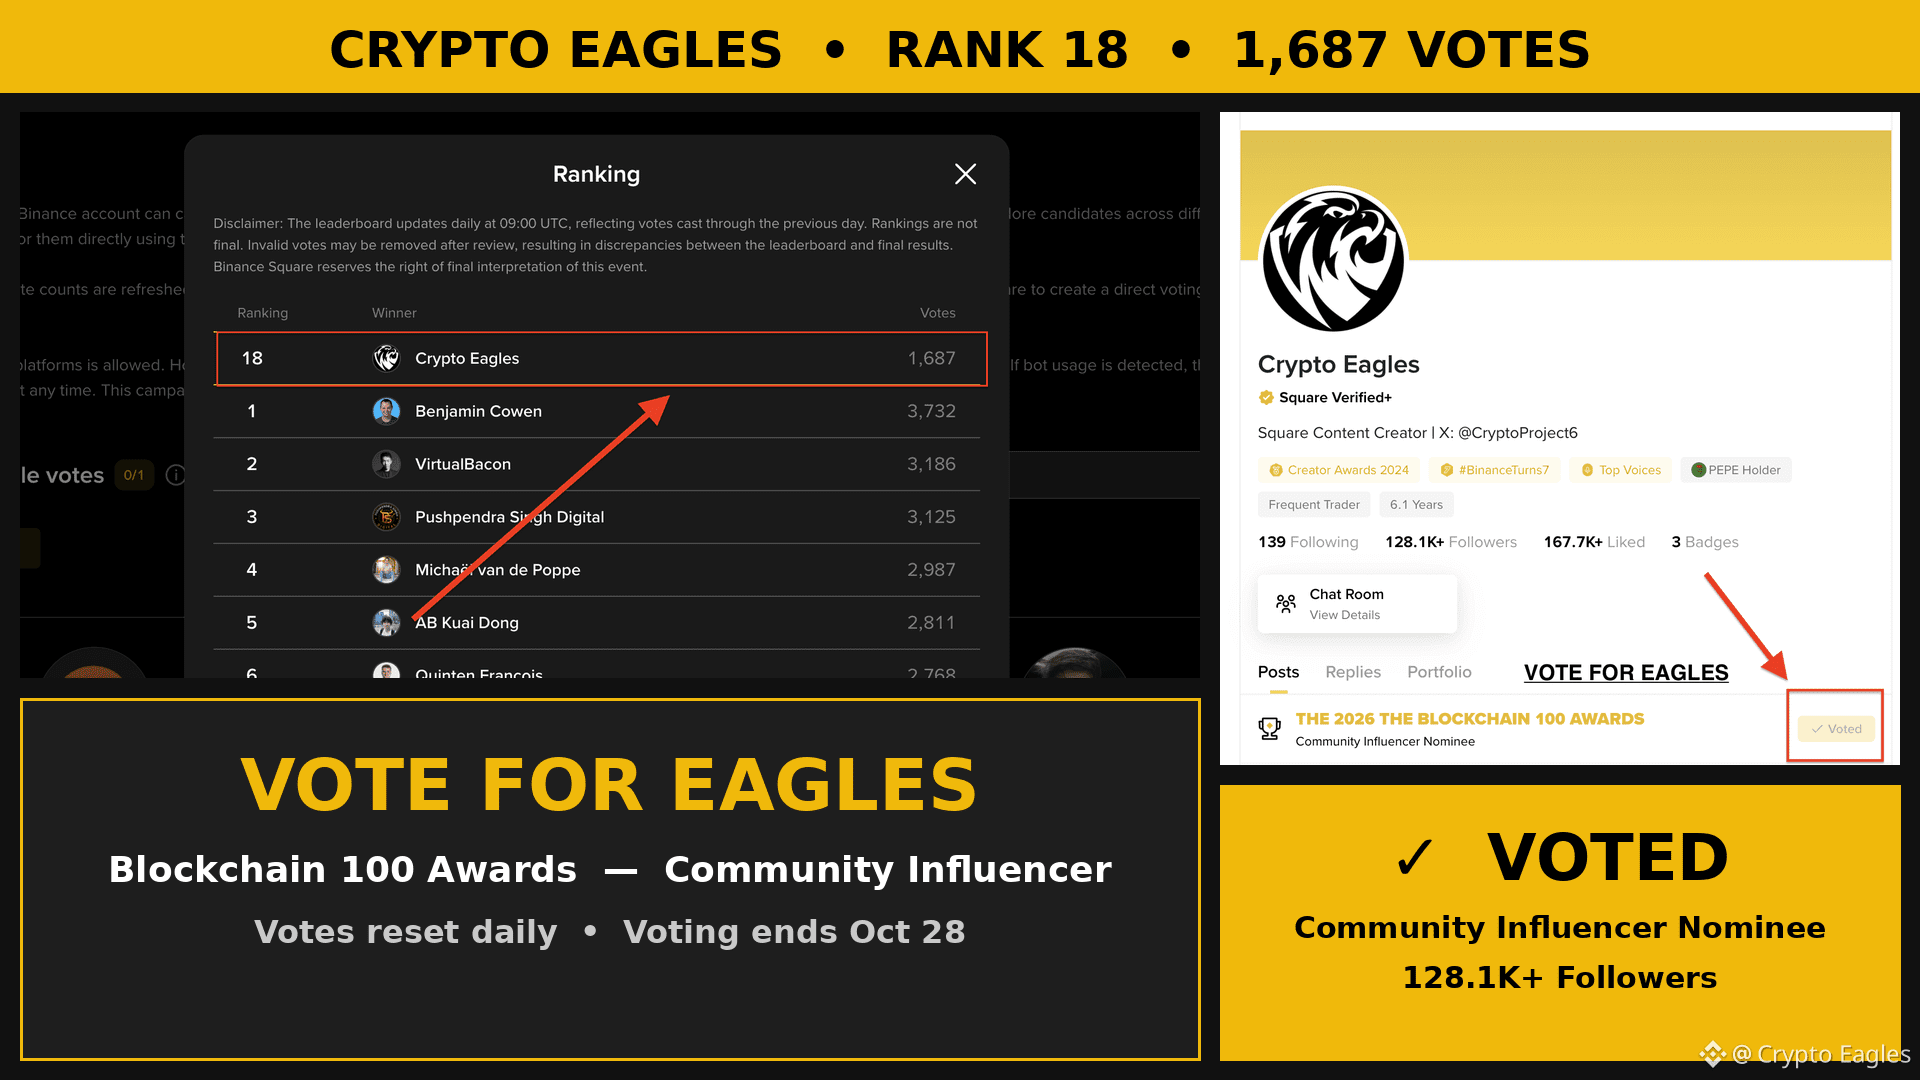
Estamos en el puesto 18 con 1,687 votos. Gracias a todos los que votaron.
Los votos se reinician cada día, así que, si votaste ayer, puedes volver a votar hoy.
Categoría: Influencer de la comunidad
¡Votar solo te llevará 10 segundos!
✅ Abre mi perfil
✅ Desplázate hacia abajo y pulsa VOTAR
✅ Apoya a Crypto Eagles
[https://www.binance.com/en/square/profile/crypto_eagles](https://www.binance.com/en/square/profile/crypto_eagles)
🎁 ¡Hay un sobre rojo esperando en esta publicación! ¡Se entregará por orden de llegada!
¡Ganemos juntos, familia Eagles!
DÍA 6 🧧
¡VOTA Y RECIBE UN SOBRE ROJO! 🎁
Crypto Eagles está nominado a los PREMIOS BLOCKCHAIN 100 DE 2026 🏆
Estamos en el puesto 18 con 1,687 votos. Gracias a todos los que votaron.
Los votos se reinician cada día, así que, si votaste ayer, puedes volver a votar hoy.
Categoría: Influencer de la comunidad
¡Votar solo te llevará 10 segundos!
✅ Abre mi perfil
✅ Desplázate hacia abajo y pulsa VOTAR
✅ Apoya a Crypto Eagles
https://www.binance.com/en/square/profile/crypto_eagles
🎁 ¡Hay un sobre rojo esperando en esta publicación! ¡Se entregará por orden de llegada!
¡Ganemos juntos, familia Eagles!
¡VOTA Y RECIBE UN SOBRE ROJO! 🎁
Crypto Eagles está nominado a los PREMIOS BLOCKCHAIN 100 DE 2026 🏆
Estamos en el puesto 18 con 1,687 votos. Gracias a todos los que votaron.
Los votos se reinician cada día, así que, si votaste ayer, puedes volver a votar hoy.
Categoría: Influencer de la comunidad
¡Votar solo te llevará 10 segundos!
✅ Abre mi perfil
✅ Desplázate hacia abajo y pulsa VOTAR
✅ Apoya a Crypto Eagles
https://www.binance.com/en/square/profile/crypto_eagles
🎁 ¡Hay un sobre rojo esperando en esta publicación! ¡Se entregará por orden de llegada!
¡Ganemos juntos, familia Eagles!
3.4k
2
158
3.4k
🎙️ Explora nuevas oportunidades en el ecosistema de Binance --Prom
Finalizado
02 h 20 m 20 s
6.8k
15
17
🎙️ Tulipanes Gemelos en vivo | Semana de Blockchain 2026 💜

Finalizado
03 h 25 m 44 s
1.7k
11
10
DÍA 5 🧧
| ¡VOTA Y RECIBE UN SOBRE ROJO! 🎁
Crypto Eagles está nominado a LOS PREMIOS BLOCKCHAIN 100 DE 2026 🏆
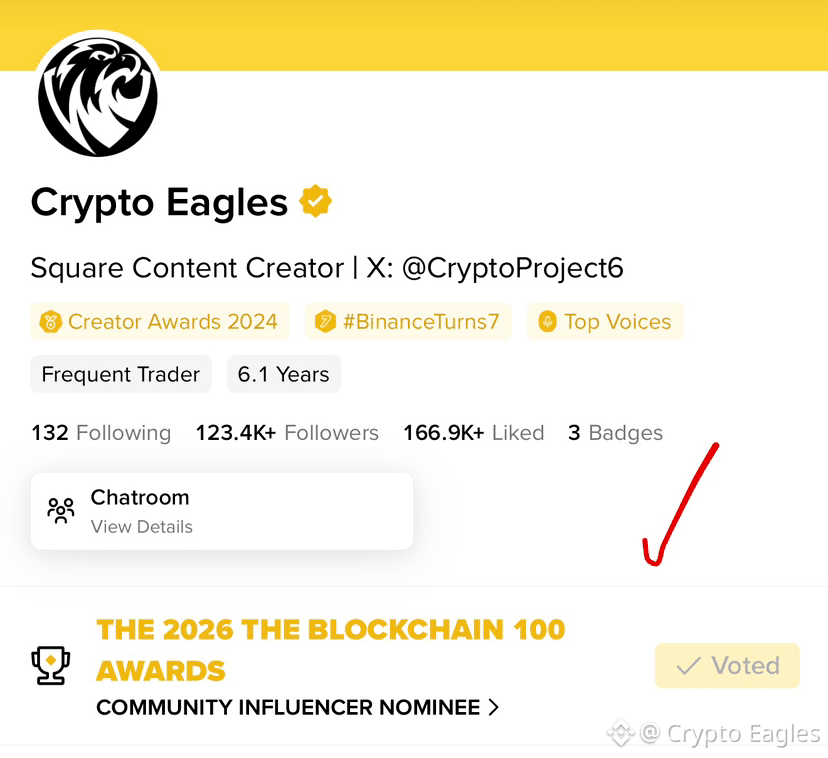
Categoría: Influencer de la comunidad
¡Votar te toma solo 10 segundos!
✅ Abre mi perfil
✅ Desplázate hacia abajo y pulsa VOTAR
✅ Apoya a Crypto Eagles
[https://www.binance.com/en/square/profile/crypto_eagles](https://www.binance.com/en/square/profile/crypto_eagles)
🎁 ¡Hay un sobre rojo esperando en esta publicación! ¡Se entrega por orden de llegada!
¡Ganemos juntos, familia de Eagles!
DÍA 5 🧧
| ¡VOTA Y RECIBE UN SOBRE ROJO! 🎁
Crypto Eagles está nominado a LOS PREMIOS BLOCKCHAIN 100 DE 2026 🏆
Categoría: Influencer de la comunidad
¡Votar te toma solo 10 segundos!
✅ Abre mi perfil
✅ Desplázate hacia abajo y pulsa VOTAR
✅ Apoya a Crypto Eagles
https://www.binance.com/en/square/profile/crypto_eagles
🎁 ¡Hay un sobre rojo esperando en esta publicación! ¡Se entrega por orden de llegada!
¡Ganemos juntos, familia de Eagles!
| ¡VOTA Y RECIBE UN SOBRE ROJO! 🎁
Crypto Eagles está nominado a LOS PREMIOS BLOCKCHAIN 100 DE 2026 🏆
Categoría: Influencer de la comunidad
¡Votar te toma solo 10 segundos!
✅ Abre mi perfil
✅ Desplázate hacia abajo y pulsa VOTAR
✅ Apoya a Crypto Eagles
https://www.binance.com/en/square/profile/crypto_eagles
🎁 ¡Hay un sobre rojo esperando en esta publicación! ¡Se entrega por orden de llegada!
¡Ganemos juntos, familia de Eagles!
2.7k
4
155
2.7k

🎙️ Construye en Binance Square y mantén BNB|Viernes: Bitcoin vuelve a los 81.000. ¿Hasta cuánto creen que llegará ahora? ¡Hablemos!~

Finalizado
04 h 37 m 49 s
10.3k
40
33
🧧 DÍA 4 | ¡VOTA Y RECIBE UN SOBRE ROJO! 🎁
Crypto Eagles está nominado a LOS PREMIOS BLOCKCHAIN 100 DE 2026 🏆
Categoría: Influencer de la comunidad
¡Votar solo te tomará 10 segundos!
✅ Abre mi perfil
✅ Desplázate hacia abajo y pulsa VOTAR
✅ Apoya a Crypto Eagles
🔗[https://www.binance.com/en/square/profile/crypto_eagles](https://www.binance.com/en/square/profile/crypto_eagles)
🎁 ¡Hay un sobre rojo esperando en esta publicación! ¡Se entrega por orden de llegada!
¡Ganemos juntos, familia Eagles!
🧧 DÍA 4 | ¡VOTA Y RECIBE UN SOBRE ROJO! 🎁
Crypto Eagles está nominado a LOS PREMIOS BLOCKCHAIN 100 DE 2026 🏆
Categoría: Influencer de la comunidad
¡Votar solo te tomará 10 segundos!
✅ Abre mi perfil
✅ Desplázate hacia abajo y pulsa VOTAR
✅ Apoya a Crypto Eagles
🔗https://www.binance.com/en/square/profile/crypto_eagles
🎁 ¡Hay un sobre rojo esperando en esta publicación! ¡Se entrega por orden de llegada!
¡Ganemos juntos, familia Eagles!
Crypto Eagles está nominado a LOS PREMIOS BLOCKCHAIN 100 DE 2026 🏆
Categoría: Influencer de la comunidad
¡Votar solo te tomará 10 segundos!
✅ Abre mi perfil
✅ Desplázate hacia abajo y pulsa VOTAR
✅ Apoya a Crypto Eagles
🔗https://www.binance.com/en/square/profile/crypto_eagles
🎁 ¡Hay un sobre rojo esperando en esta publicación! ¡Se entrega por orden de llegada!
¡Ganemos juntos, familia Eagles!
2.4k
4
114
2.4k
DÍA 4
Vota y consigue un sobre rojo 🧧👇
He puesto un sobre rojo en esta publicación para ustedes. ¡Se lo lleva quien llegue primero! 🎁
Pero antes, ¿podrían hacer algo pequeño por mí? 🙏
Crypto Eagles está nominado a los PREMIOS THE 2026 BLOCKCHAIN 100 🏆
Categoría: Influencer de la comunidad
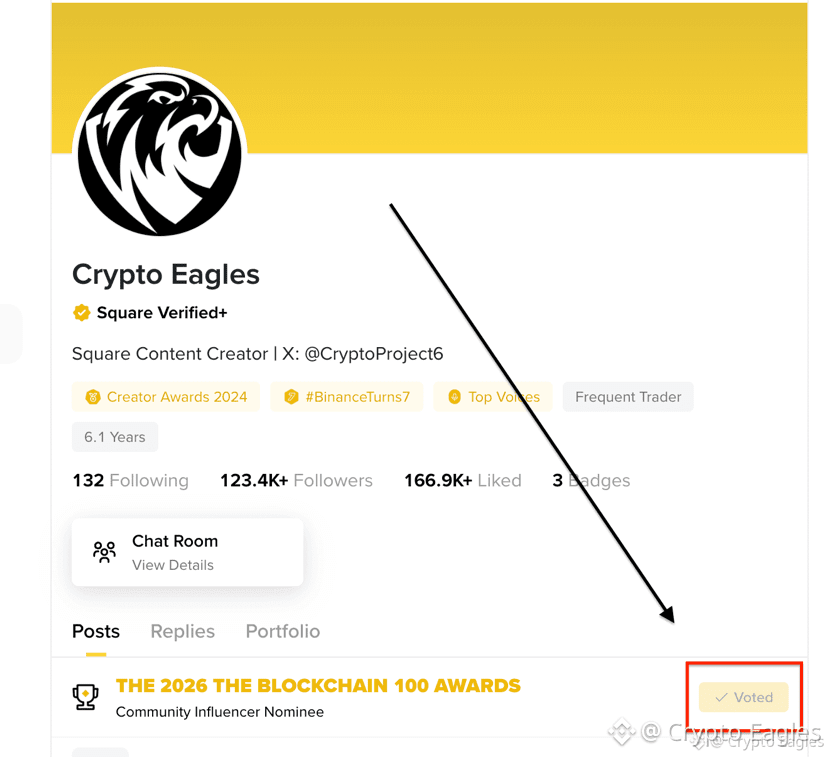
Entra en mi perfil, desplázate hacia abajo y pulsa «Votar». Solo te llevará 10 segundos.
[https://www.binance.com/en/square/profile/crypto_eagles](https://www.binance.com/en/square/profile/crypto_eagles)
DÍA 4
Vota y consigue un sobre rojo 🧧👇
He puesto un sobre rojo en esta publicación para ustedes. ¡Se lo lleva quien llegue primero! 🎁
Pero antes, ¿podrían hacer algo pequeño por mí? 🙏
Crypto Eagles está nominado a los PREMIOS THE 2026 BLOCKCHAIN 100 🏆
Categoría: Influencer de la comunidad
Entra en mi perfil, desplázate hacia abajo y pulsa «Votar». Solo te llevará 10 segundos.
https://www.binance.com/en/square/profile/crypto_eagles
Vota y consigue un sobre rojo 🧧👇
He puesto un sobre rojo en esta publicación para ustedes. ¡Se lo lleva quien llegue primero! 🎁
Pero antes, ¿podrían hacer algo pequeño por mí? 🙏
Crypto Eagles está nominado a los PREMIOS THE 2026 BLOCKCHAIN 100 🏆
Categoría: Influencer de la comunidad
Entra en mi perfil, desplázate hacia abajo y pulsa «Votar». Solo te llevará 10 segundos.
https://www.binance.com/en/square/profile/crypto_eagles
3.2k
5
163
3.2k
Vota y recibe el sobre rojo 🧧👇
He dejado un sobre rojo en esta publicación para ustedes. ¡Se entrega por orden de llegada! 🎁
Pero primero, por favor, hazme un pequeño favor 🙏
Crypto Eagles está nominado a LOS PREMIOS BLOCKCHAIN 100 DE 2026 🏆
Categoría: Influencer de comunidad
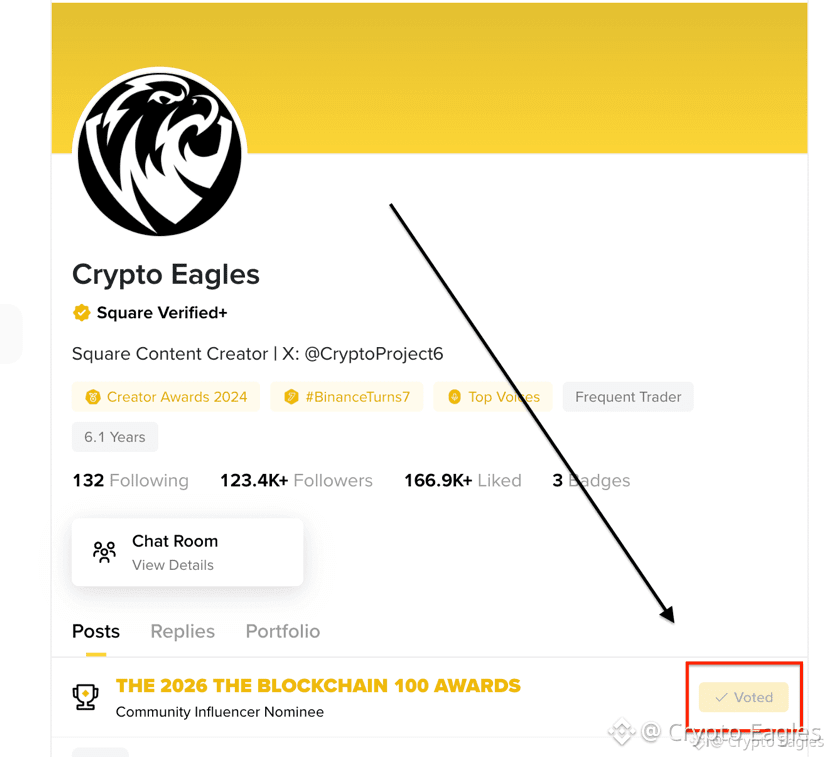
Entra en mi perfil, desplázate hacia abajo y toca «Votar». Solo te llevará 10 segundos.
[https://www.binance.com/en/square/profile/crypto_eagles](https://www.binance.com/en/square/profile/crypto_eagles)
Vota y recibe el sobre rojo 🧧👇
He dejado un sobre rojo en esta publicación para ustedes. ¡Se entrega por orden de llegada! 🎁
Pero primero, por favor, hazme un pequeño favor 🙏
Crypto Eagles está nominado a LOS PREMIOS BLOCKCHAIN 100 DE 2026 🏆
Categoría: Influencer de comunidad
Entra en mi perfil, desplázate hacia abajo y toca «Votar». Solo te llevará 10 segundos.
https://www.binance.com/en/square/profile/crypto_eagles
He dejado un sobre rojo en esta publicación para ustedes. ¡Se entrega por orden de llegada! 🎁
Pero primero, por favor, hazme un pequeño favor 🙏
Crypto Eagles está nominado a LOS PREMIOS BLOCKCHAIN 100 DE 2026 🏆
Categoría: Influencer de comunidad
Entra en mi perfil, desplázate hacia abajo y toca «Votar». Solo te llevará 10 segundos.
https://www.binance.com/en/square/profile/crypto_eagles
3k
3
156
3k

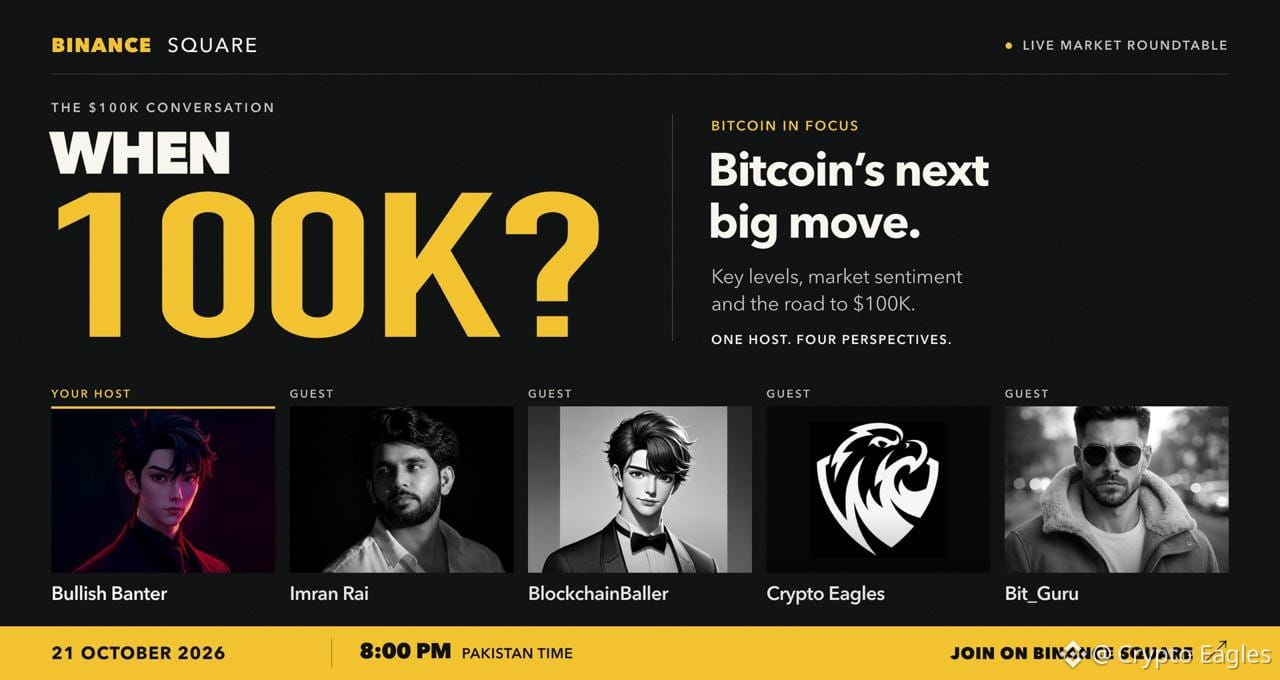
¿Cuándo llegaremos a 100K?
En directo esta noche a las 8 p. m., hora de Pakistán, en Binance Square.
Me honra recibir a @bullish_banter , @cryptonexus_btc , @Bitcoin_master y @imran_raii .
Hablaremos de Bitcoin, de los niveles que estamos observando y de lo que creemos que viene. Veamos qué opina cada uno sobre los 100K.
Pásate si andas por ahí. ¡Trae también tus preguntas!
¿Cuándo llegaremos a 100K?
En directo esta noche a las 8 p. m., hora de Pakistán, en Binance Square.
Me honra recibir a @BullishBanter , @BlockchainBaller , @Bit_Guru y @Imran Rai .
Hablaremos de Bitcoin, de los niveles que estamos observando y de lo que creemos que viene. Veamos qué opina cada uno sobre los 100K.
Pásate si andas por ahí. ¡Trae también tus preguntas!
En directo esta noche a las 8 p. m., hora de Pakistán, en Binance Square.
Me honra recibir a @BullishBanter , @BlockchainBaller , @Bit_Guru y @Imran Rai .
Hablaremos de Bitcoin, de los niveles que estamos observando y de lo que creemos que viene. Veamos qué opina cada uno sobre los 100K.
Pásate si andas por ahí. ¡Trae también tus preguntas!
16
24
1.4k
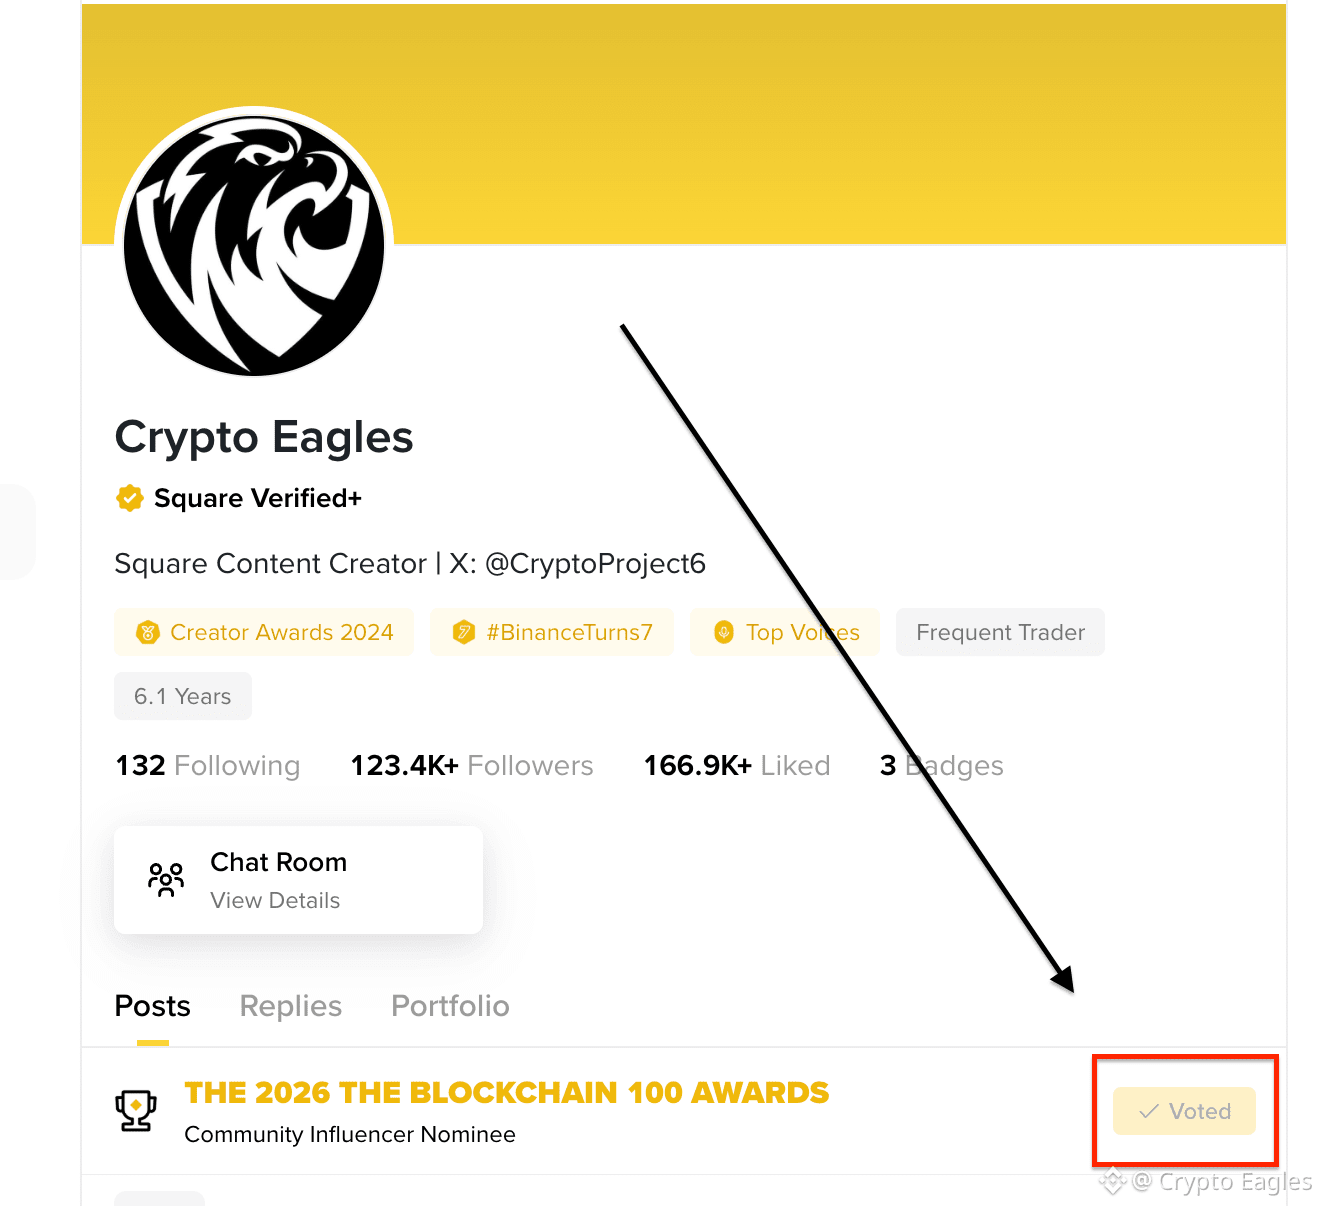
Vota y consigue el sobre rojo 🧧👇
He adjuntado un sobre rojo a esta publicación para ustedes: ¡se lo lleva quien llega primero! 🎁
Pero antes, hazme este pequeño favor 🙏
Crypto Eagles está nominado en THE 2026 BLOCKCHAIN 100 AWARDS, en la categoría de Influencer de la comunidad 🏆
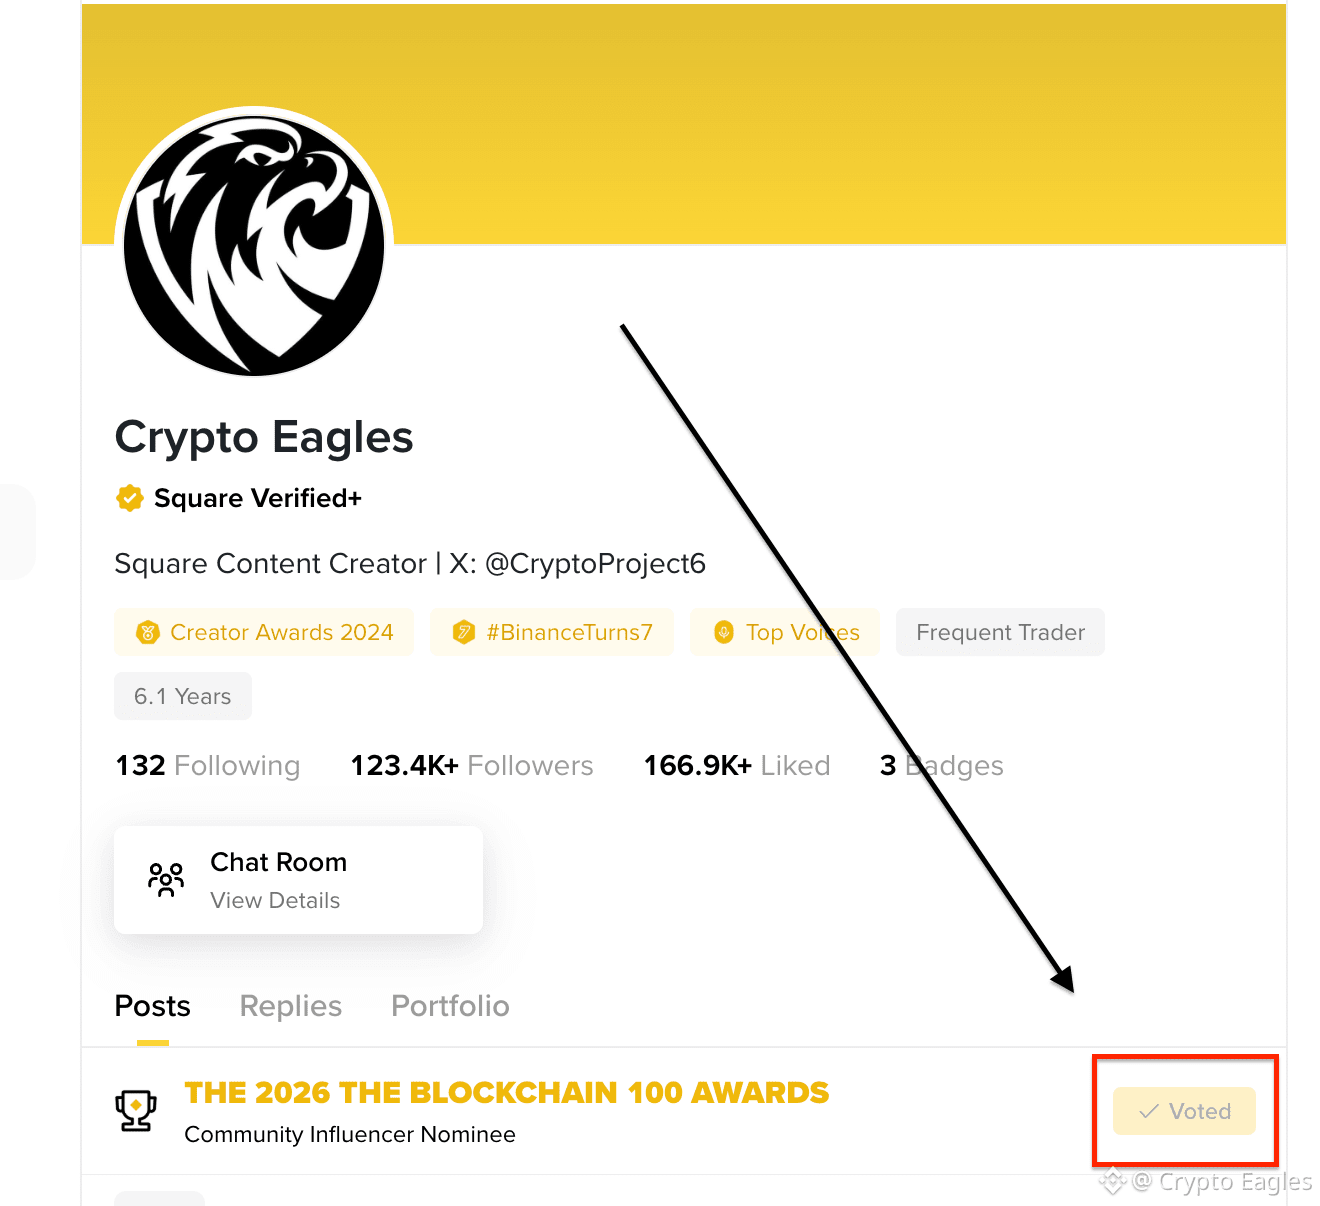
Solo tienes que abrir mi perfil, desplazarte hacia abajo y tocar «Votar». Solo te llevará 10 segundos.
[https://www.binance.com/en/square/profile/crypto_eagles](https://www.binance.com/en/square/profile/crypto_eagles)
Vota y consigue el sobre rojo 🧧👇
He adjuntado un sobre rojo a esta publicación para ustedes: ¡se lo lleva quien llega primero! 🎁
Pero antes, hazme este pequeño favor 🙏
Crypto Eagles está nominado en THE 2026 BLOCKCHAIN 100 AWARDS, en la categoría de Influencer de la comunidad 🏆
Solo tienes que abrir mi perfil, desplazarte hacia abajo y tocar «Votar». Solo te llevará 10 segundos.
https://www.binance.com/en/square/profile/crypto_eagles
He adjuntado un sobre rojo a esta publicación para ustedes: ¡se lo lleva quien llega primero! 🎁
Pero antes, hazme este pequeño favor 🙏
Crypto Eagles está nominado en THE 2026 BLOCKCHAIN 100 AWARDS, en la categoría de Influencer de la comunidad 🏆
Solo tienes que abrir mi perfil, desplazarte hacia abajo y tocar «Votar». Solo te llevará 10 segundos.
https://www.binance.com/en/square/profile/crypto_eagles
2.4k
2
108
2.4k
Artículo
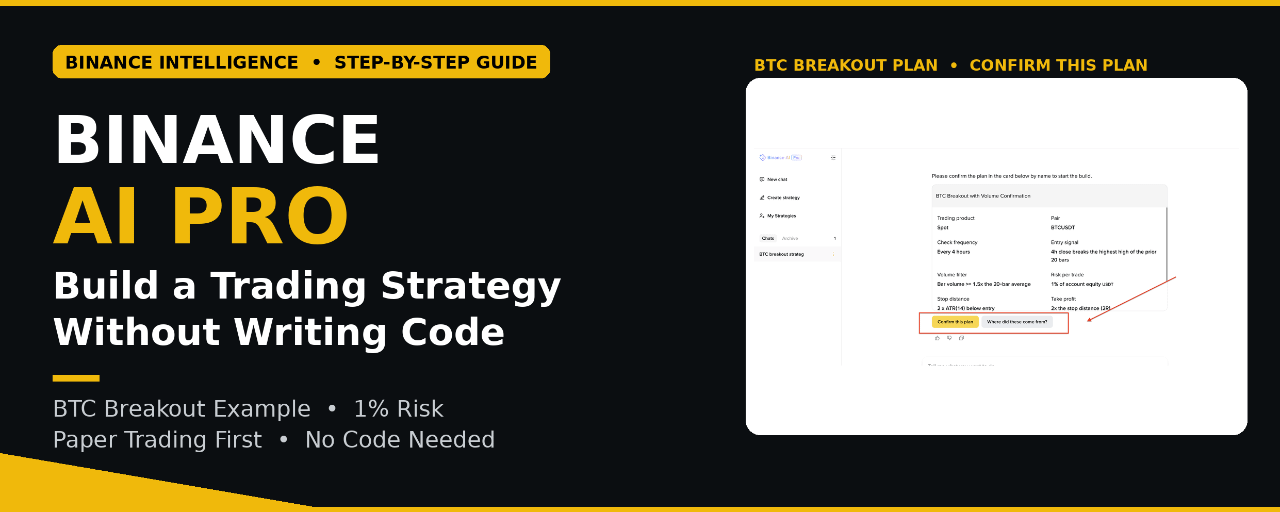
Creé una estrategia de trading de BTC sin escribir código: mi primer vistazo a Binance AI ProLa mayoría tenemos ideas de trading en la cabeza. Sabemos cuándo queremos entrar, dónde colocar el stop loss y cuánto riesgo queremos asumir. Lo difícil es convertir esa idea en una estrategia adecuada y probarla sin cometer errores.
Eso es precisamente lo que Binance AI Pro intenta resolver.
Lanzado el 19 de octubre de 2026 como parte de Binance Intelligence, Binance AI Pro convierte una idea de trading expresada con palabras sencillas en una estrategia probada y automatizada mediante una conversación normal. No hace falta programar ni descargar una aplicación aparte.
Creé una estrategia de trading de BTC sin escribir código: mi primer vistazo a Binance AI Pro
La mayoría tenemos ideas de trading en la cabeza. Sabemos cuándo queremos entrar, dónde colocar el stop loss y cuánto riesgo queremos asumir. Lo difícil es convertir esa idea en una estrategia adecuada y probarla sin cometer errores.
Eso es precisamente lo que Binance AI Pro intenta resolver.
Lanzado el 19 de octubre de 2026 como parte de Binance Intelligence, Binance AI Pro convierte una idea de trading expresada con palabras sencillas en una estrategia probada y automatizada mediante una conversación normal. No hace falta programar ni descargar una aplicación aparte.
Eso es precisamente lo que Binance AI Pro intenta resolver.
Lanzado el 19 de octubre de 2026 como parte de Binance Intelligence, Binance AI Pro convierte una idea de trading expresada con palabras sencillas en una estrategia probada y automatizada mediante una conversación normal. No hace falta programar ni descargar una aplicación aparte.
4
1
40
2.1k
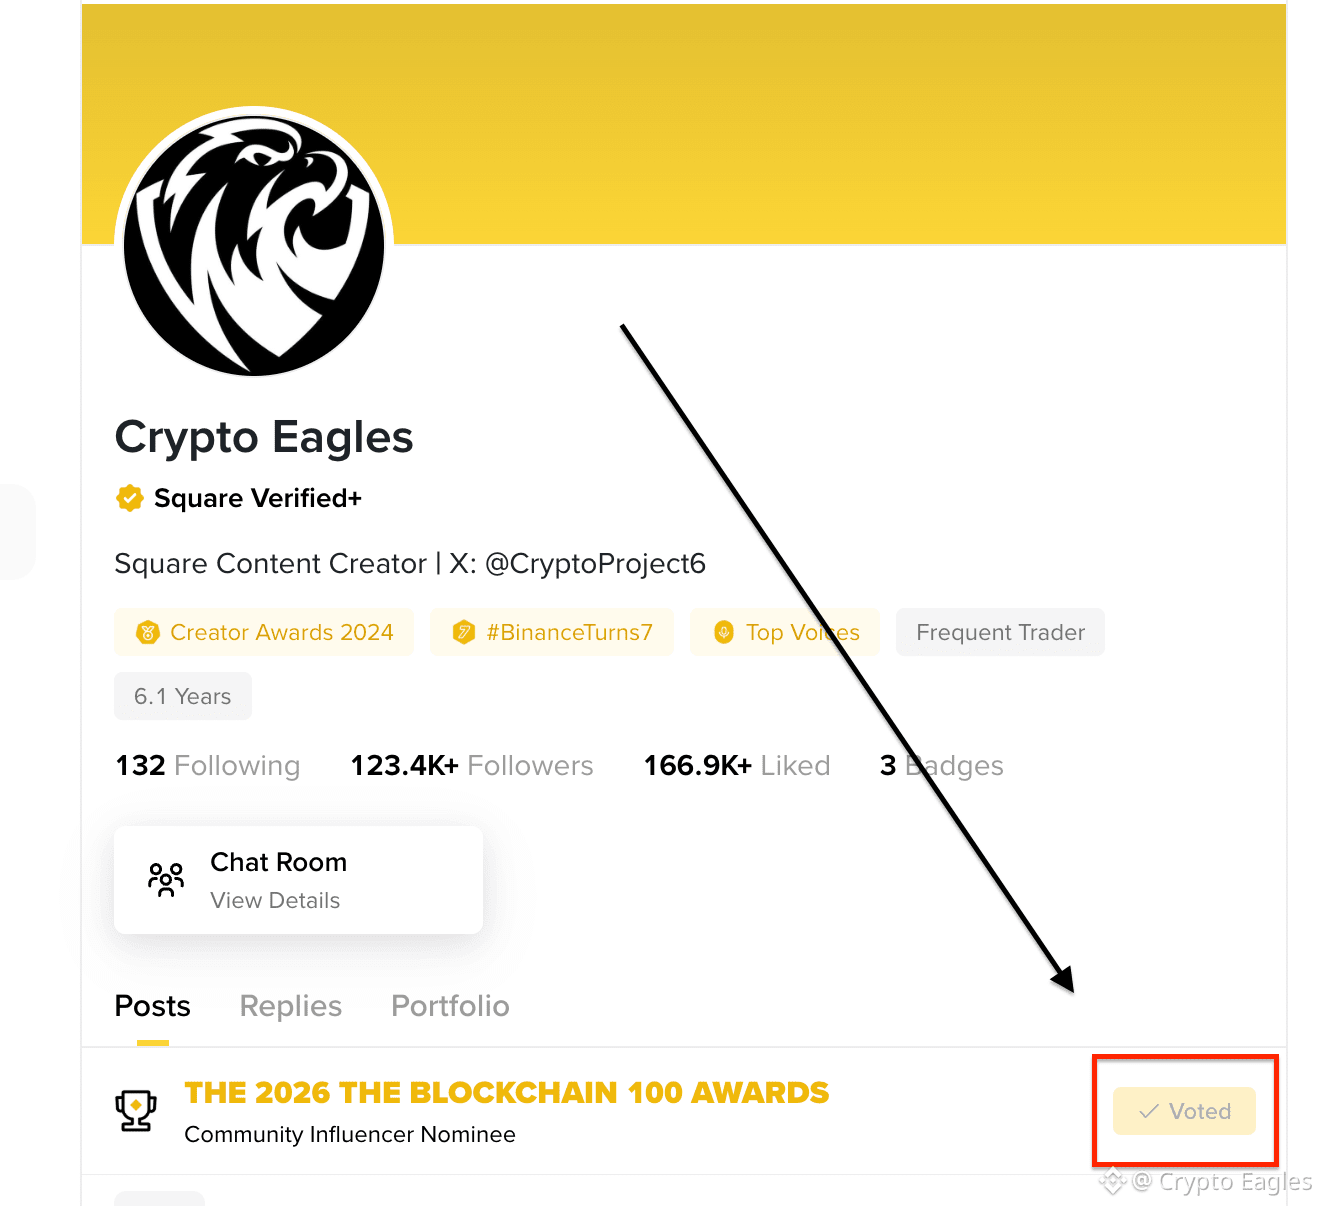
La votación ha comenzado. Necesitamos tu apoyo para llegar al puesto 100 en la blockchain.
Ve al perfil y vota. [https://www.binance.com/en/square/profile/crypto_eagles](https://www.binance.com/en/square/profile/crypto_eagles)
¡Vamos!
La votación ha comenzado. Necesitamos tu apoyo para llegar al puesto 100 en la blockchain.
Ve al perfil y vota. https://www.binance.com/en/square/profile/crypto_eagles
¡Vamos!
Ve al perfil y vota. https://www.binance.com/en/square/profile/crypto_eagles
¡Vamos!
36
2
51
4.7k
A veces, la dirección del mercado es correcta, pero la operación aun así fracasa porque la estructura no era la adecuada.
Con los contratos perpetuos, cada mecha afecta directamente a la posición. Un breve episodio de volatilidad puede activar el stop antes de que comience el movimiento principal.
Para algunas configuraciones, prefiero las opciones. El riesgo a la baja está definido antes de entrar, mientras que el potencial alcista permanece abierto si el mercado se mueve a mi favor.
@Aevoxyz Options Easy Mode ofrece a los traders una forma más sencilla de usar opciones reales sobre BTC, ETH y HYPE sin tener que navegar por una cadena de opciones complicada.
No estoy sustituyendo los contratos perpetuos. Elijo opciones cuando quiero controlar el riesgo y darle más margen a la configuración para desarrollarse.
La operación adecuada no depende solo de la dirección. También consiste en elegir la estructura correcta.
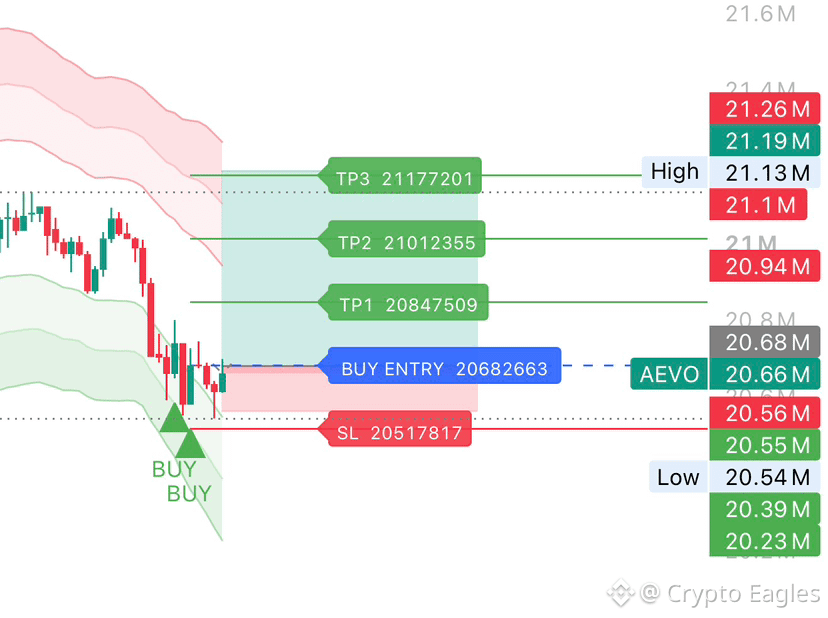
$AEVO está intentando una recuperación alcista por encima de la zona de entrada de 20.68M.
DYOR. #Aevo
A veces, la dirección del mercado es correcta, pero la operación aun así fracasa porque la estructura no era la adecuada.
Con los contratos perpetuos, cada mecha afecta directamente a la posición. Un breve episodio de volatilidad puede activar el stop antes de que comience el movimiento principal.
Para algunas configuraciones, prefiero las opciones. El riesgo a la baja está definido antes de entrar, mientras que el potencial alcista permanece abierto si el mercado se mueve a mi favor.
@Aevo Options Easy Mode ofrece a los traders una forma más sencilla de usar opciones reales sobre BTC, ETH y HYPE sin tener que navegar por una cadena de opciones complicada.
No estoy sustituyendo los contratos perpetuos. Elijo opciones cuando quiero controlar el riesgo y darle más margen a la configuración para desarrollarse.
La operación adecuada no depende solo de la dirección. También consiste en elegir la estructura correcta.
$AEVO está intentando una recuperación alcista por encima de la zona de entrada de 20.68M.
DYOR. #Aevo
Con los contratos perpetuos, cada mecha afecta directamente a la posición. Un breve episodio de volatilidad puede activar el stop antes de que comience el movimiento principal.
Para algunas configuraciones, prefiero las opciones. El riesgo a la baja está definido antes de entrar, mientras que el potencial alcista permanece abierto si el mercado se mueve a mi favor.
@Aevo Options Easy Mode ofrece a los traders una forma más sencilla de usar opciones reales sobre BTC, ETH y HYPE sin tener que navegar por una cadena de opciones complicada.
No estoy sustituyendo los contratos perpetuos. Elijo opciones cuando quiero controlar el riesgo y darle más margen a la configuración para desarrollarse.
La operación adecuada no depende solo de la dirección. También consiste en elegir la estructura correcta.
$AEVO está intentando una recuperación alcista por encima de la zona de entrada de 20.68M.
DYOR. #Aevo
29
1
42
12.5k
Inicia sesión para explorar más contenidos
Únete a usuarios globales de criptomonedas en Binance Square
⚡️ Obtén información útil y actualizada sobre criptos.
💬 Avalado por el mayor exchange de criptomonedas en el mundo.
👍 Descubre perspectivas reales de creadores verificados.
Email/número de teléfono
Temas populares
BinancePick
2.5M vistas
137,605 están debatiendo
¡Únete a #TemporadaDeResultados: predice resultados en Binance Pick y comparte tu opinión en Binance Square!
Binance Square Official
·399 me gusta
·337k vistas
EarningsSeason
4.9M vistas
23,879 están debatiendo
ElectrumWalletBugLetRogueServersStealFunds
2,066 vistas
123 están debatiendo