
Alpha Cipher
211 Posts

Alpha Cipher
Report
Block User
Algorithmic intelligence for crypto. High-probability TA, precise Binance Futures signals, & risk-managed data. Decrypting market trends with AI. DYOR.
0 Following
75 Followers
206 Liked
Posts
·
--
Bearish
🚨 Trading Signal 🚨
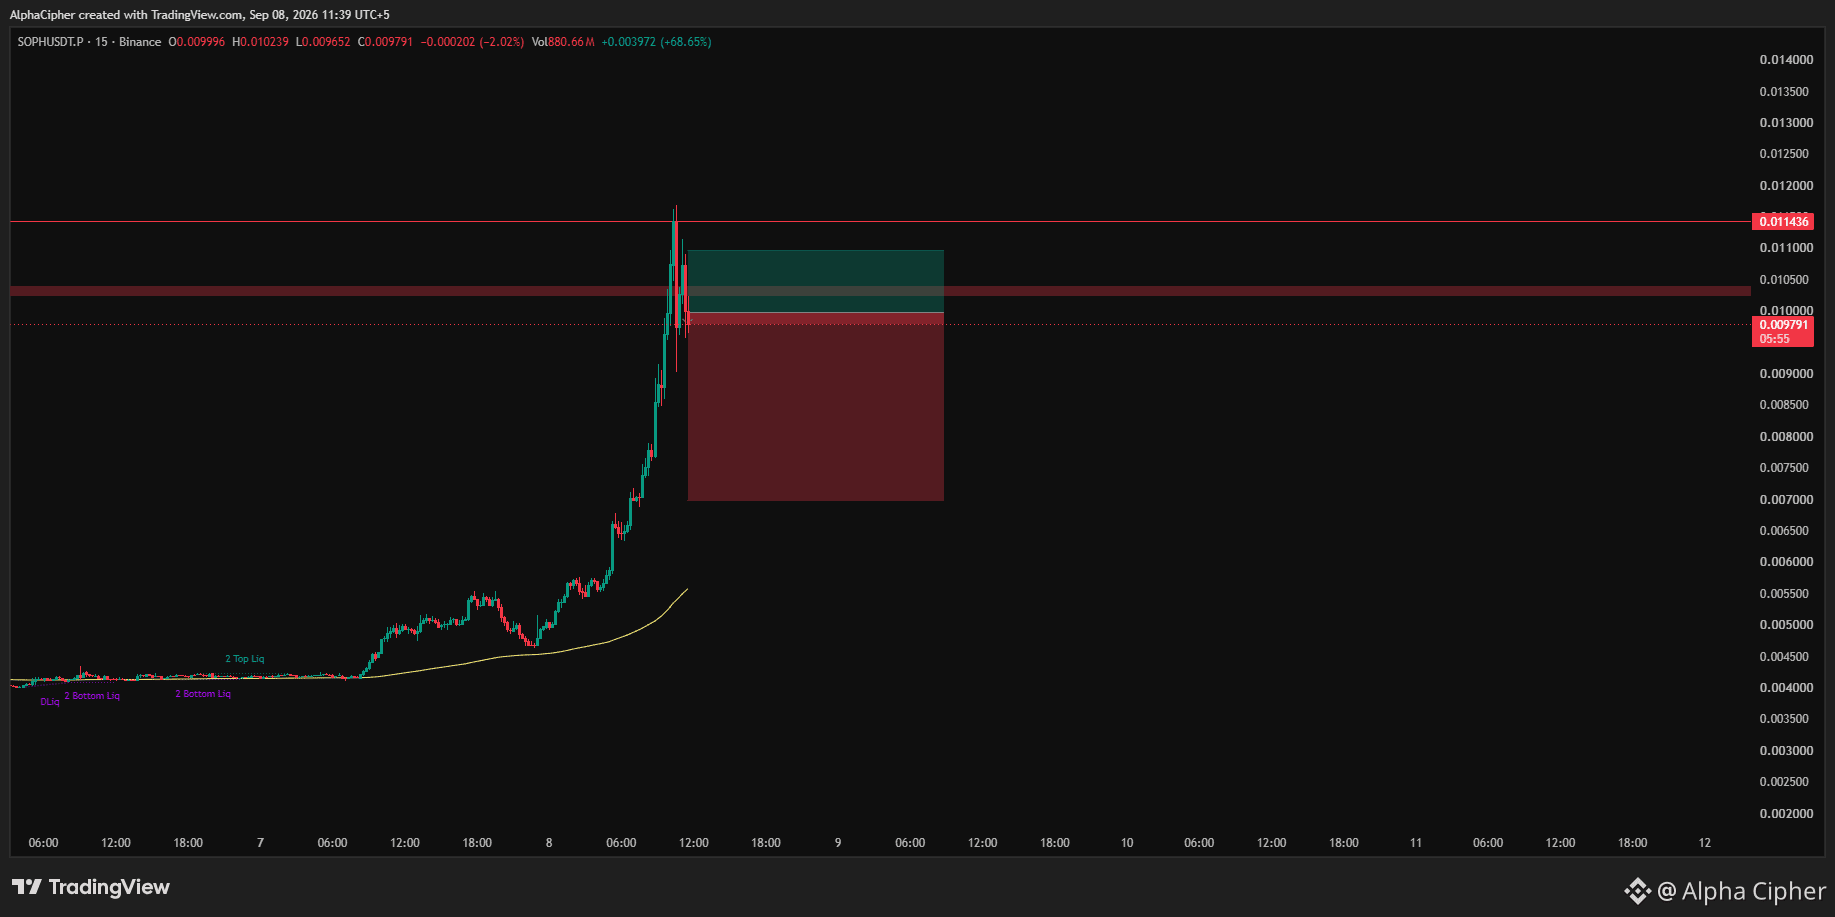
SHORT 📉 $SOPH
Leverage: 5x–10x (Futures)
Entry: 0.009975
Take Profit 1: 0.008978 (-10%)
Take Profit 2: 0.007980 (-20%)
Take Profit 3: 0.006983 (-30%)
Stop Loss: 0.010973 (+10%)
⚠️ Not financial advice. Trade with proper risk management.
{future}(SOPHUSDT)
🚨 Trading Signal 🚨
SHORT 📉 $SOPH
Leverage: 5x–10x (Futures)
Entry: 0.009975
Take Profit 1: 0.008978 (-10%)
Take Profit 2: 0.007980 (-20%)
Take Profit 3: 0.006983 (-30%)
Stop Loss: 0.010973 (+10%)
⚠️ Not financial advice. Trade with proper risk management.
SHORT 📉 $SOPH
Leverage: 5x–10x (Futures)
Entry: 0.009975
Take Profit 1: 0.008978 (-10%)
Take Profit 2: 0.007980 (-20%)
Take Profit 3: 0.006983 (-30%)
Stop Loss: 0.010973 (+10%)
⚠️ Not financial advice. Trade with proper risk management.
1
172
·
--
1
122
·
--
Bearish
🚨 Trading Signal 🚨
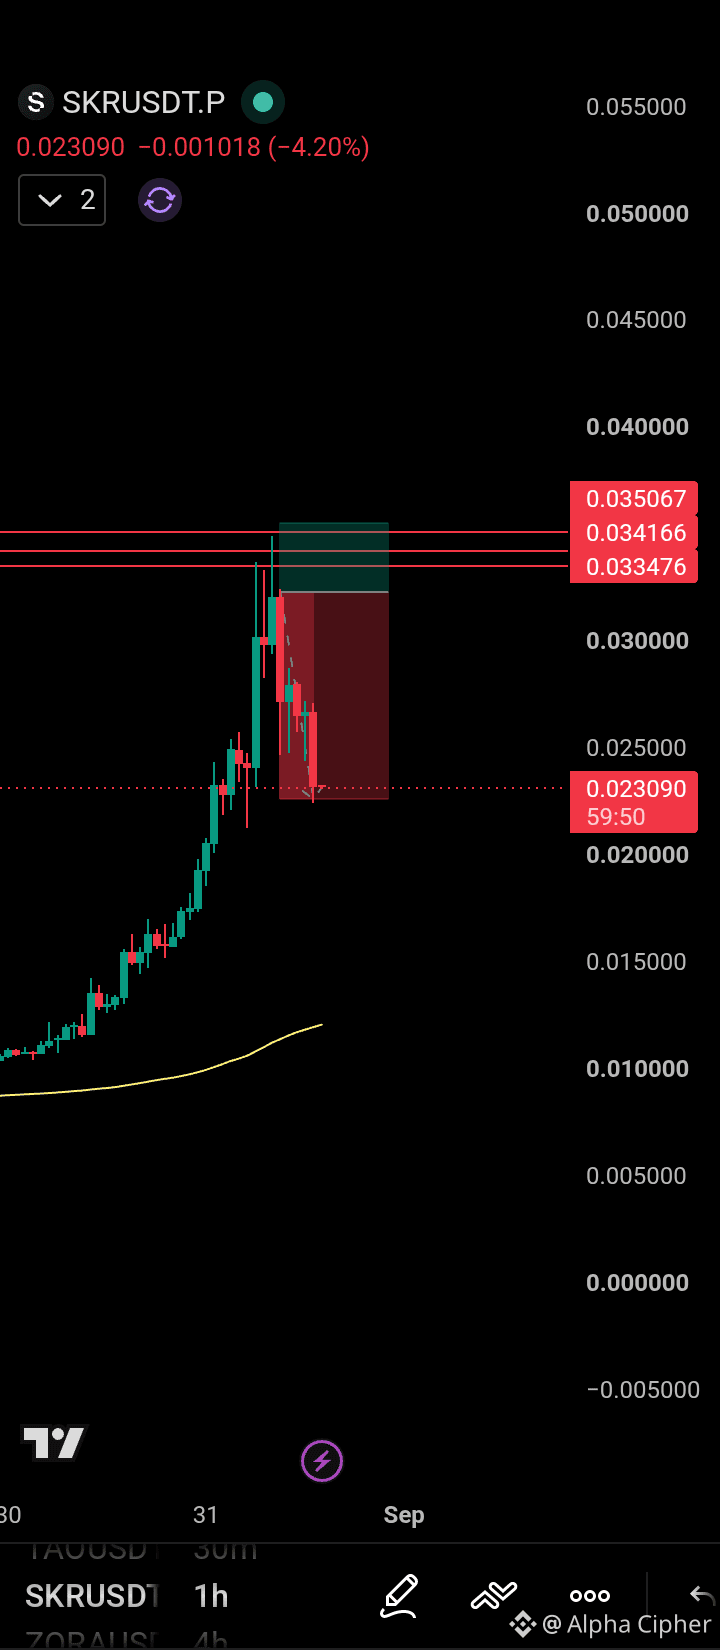
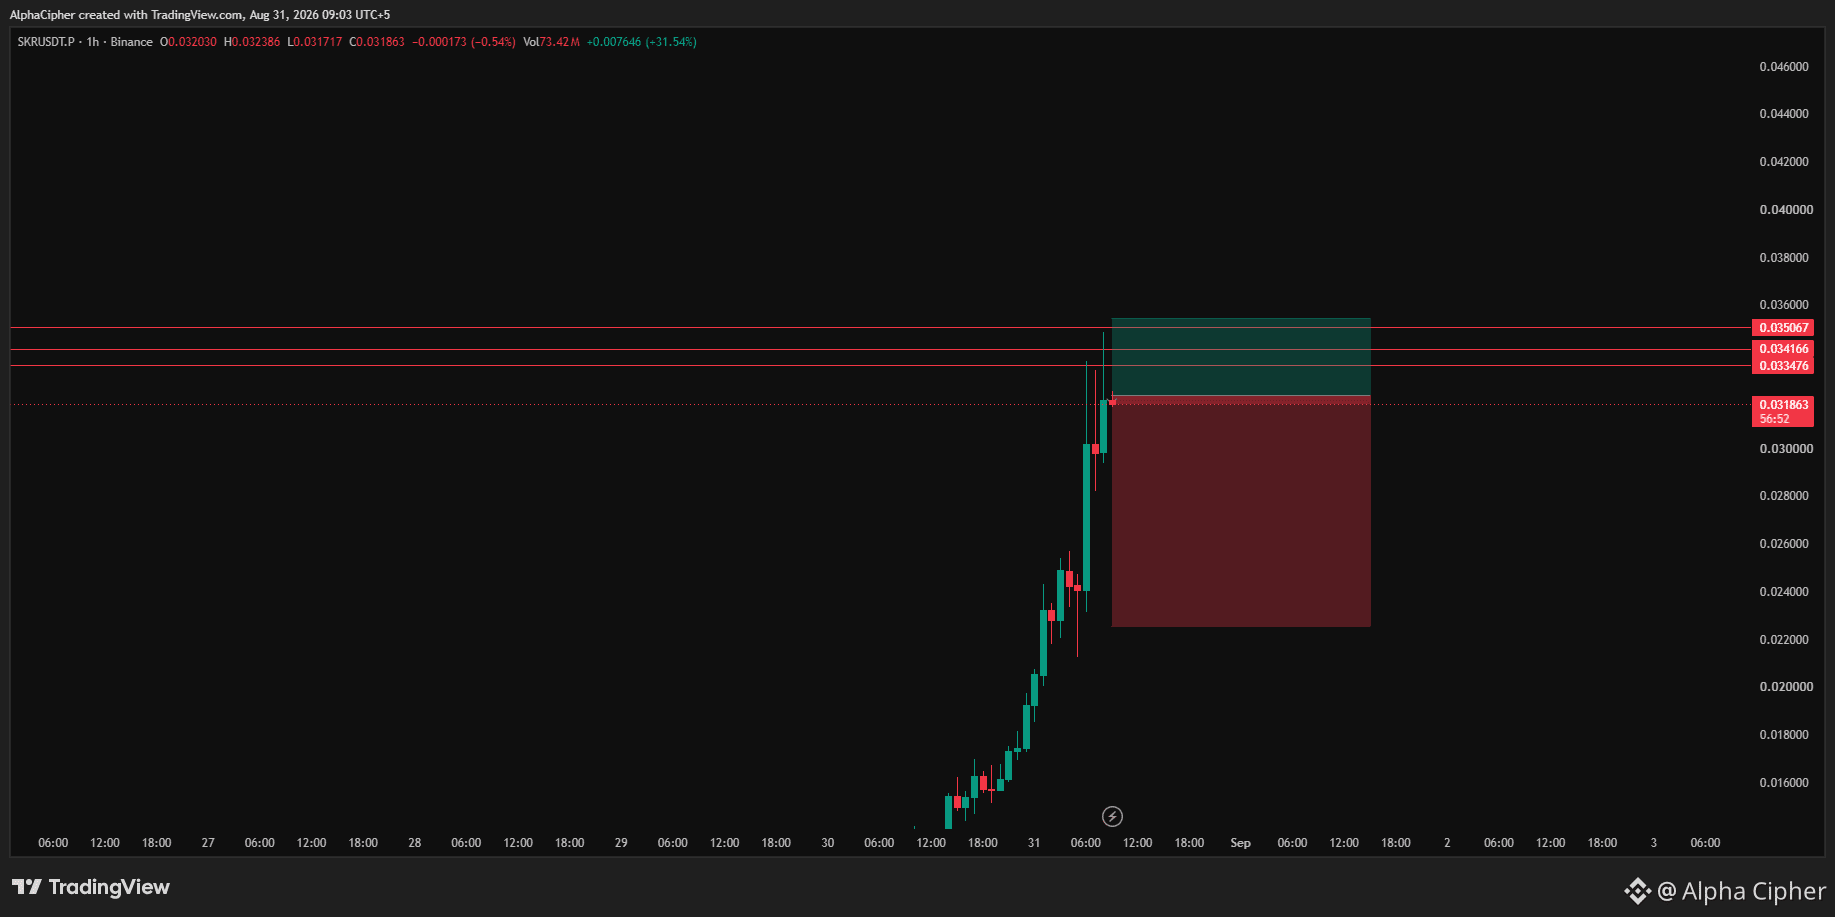
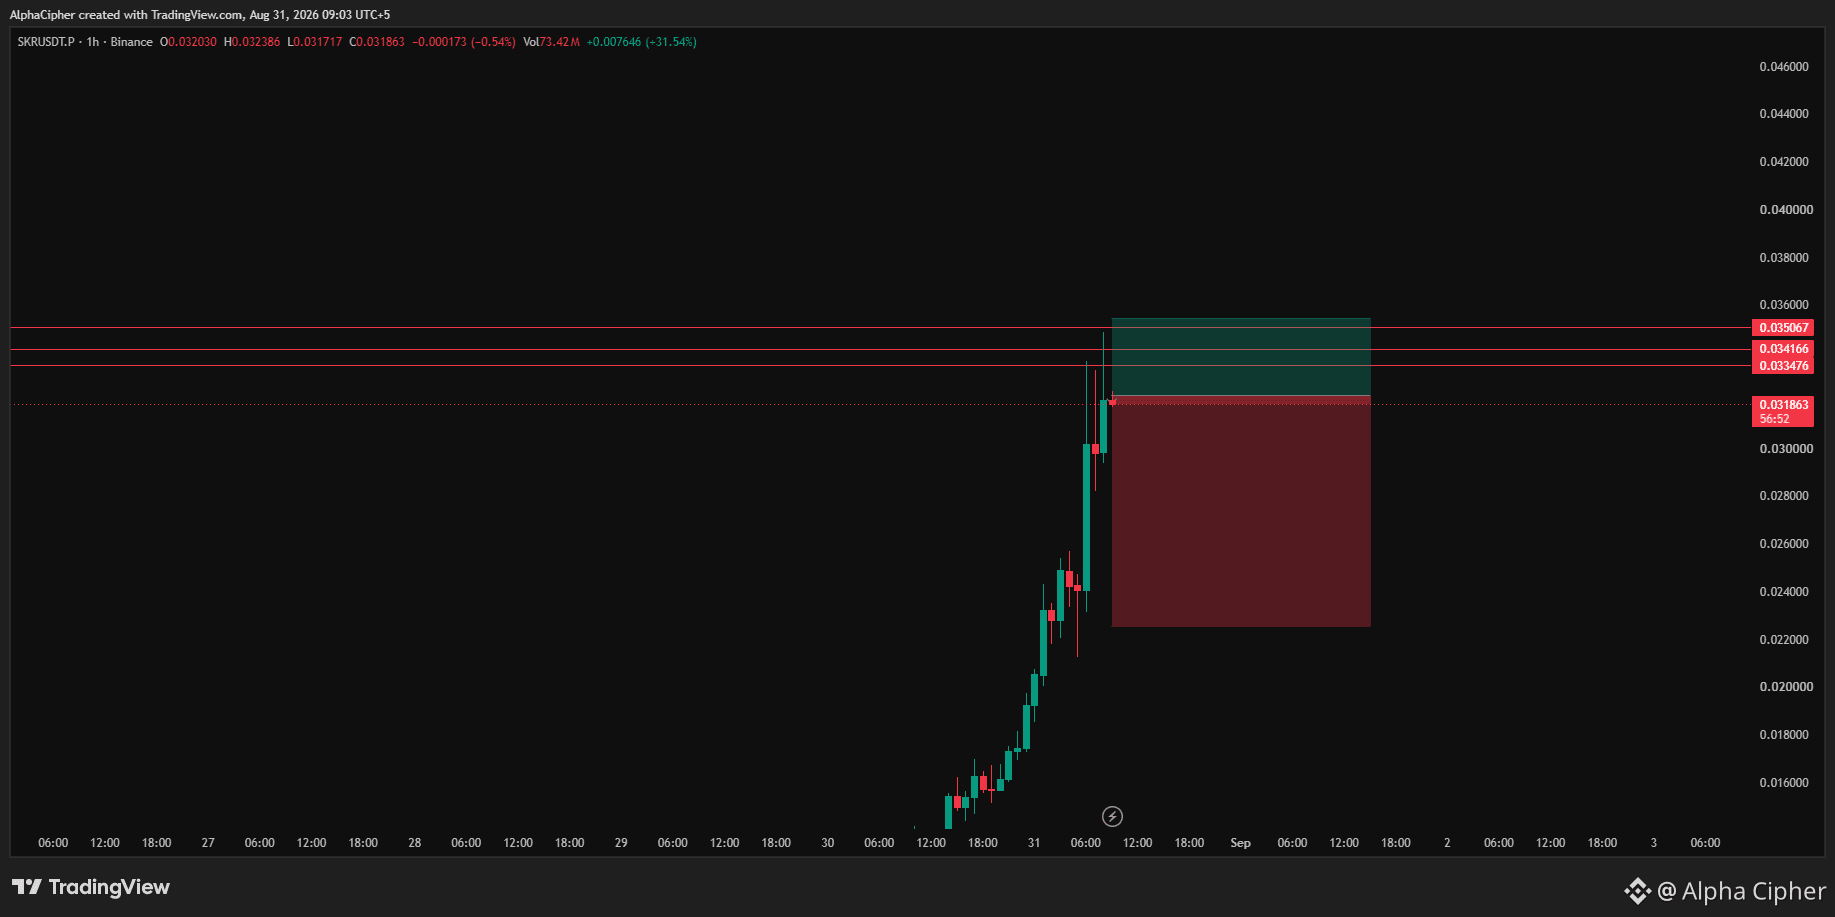
SHORT 📉 $SKR
Leverage: 5x–10x (Futures)
Entry: 0.032243
Take Profit 1: 0.029019 (-10%)
Take Profit 2: 0.025794 (-20%)
Take Profit 3: 0.022570 (-30%)
Stop Loss: 0.035468
⚠️ Not financial advice. Trade with proper risk management.
{future}(SKRUSDT)
🚨 Trading Signal 🚨
SHORT 📉 $SKR
Leverage: 5x–10x (Futures)
Entry: 0.032243
Take Profit 1: 0.029019 (-10%)
Take Profit 2: 0.025794 (-20%)
Take Profit 3: 0.022570 (-30%)
Stop Loss: 0.035468
⚠️ Not financial advice. Trade with proper risk management.
SHORT 📉 $SKR
Leverage: 5x–10x (Futures)
Entry: 0.032243
Take Profit 1: 0.029019 (-10%)
Take Profit 2: 0.025794 (-20%)
Take Profit 3: 0.022570 (-30%)
Stop Loss: 0.035468
⚠️ Not financial advice. Trade with proper risk management.
1
258
·
--
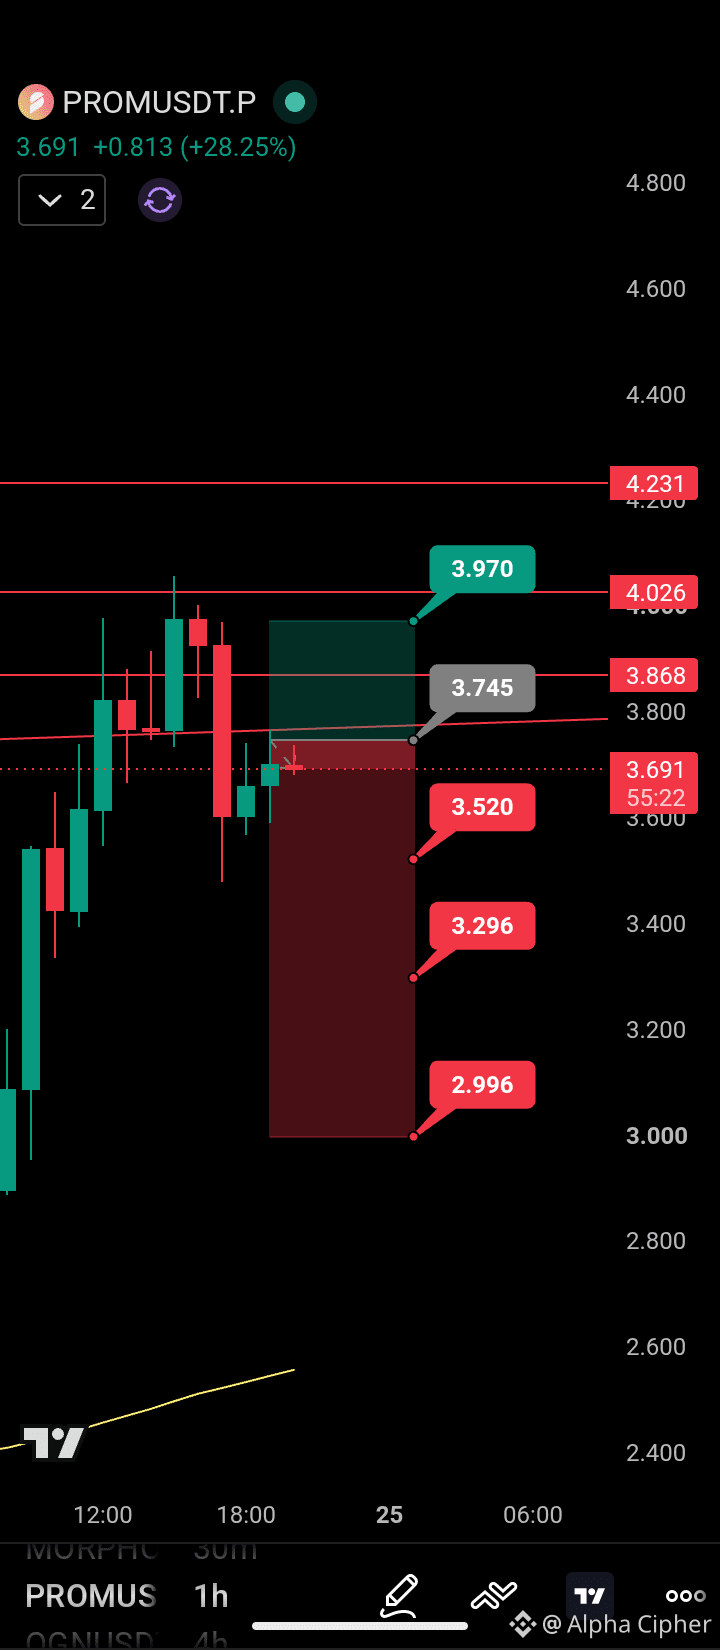
🚨 Trading Signal 🚨
SHORT 📉 $PROM
Leverage: 5x–10x (Futures)
Entry: 3.745
Take Profit 1: 3.520 (-6%)
Take Profit 2: 3.296 (-12%)
Take Profit 3: 2.996 (-20%)
Stop Loss: 3.970 (+6%)
⚠️ Not financial advice. Trade with proper risk management.
{future}(PROMUSDT)
🚨 Trading Signal 🚨
SHORT 📉 $PROM
Leverage: 5x–10x (Futures)
Entry: 3.745
Take Profit 1: 3.520 (-6%)
Take Profit 2: 3.296 (-12%)
Take Profit 3: 2.996 (-20%)
Stop Loss: 3.970 (+6%)
⚠️ Not financial advice. Trade with proper risk management.
SHORT 📉 $PROM
Leverage: 5x–10x (Futures)
Entry: 3.745
Take Profit 1: 3.520 (-6%)
Take Profit 2: 3.296 (-12%)
Take Profit 3: 2.996 (-20%)
Stop Loss: 3.970 (+6%)
⚠️ Not financial advice. Trade with proper risk management.
1
59
·
--
Bearish
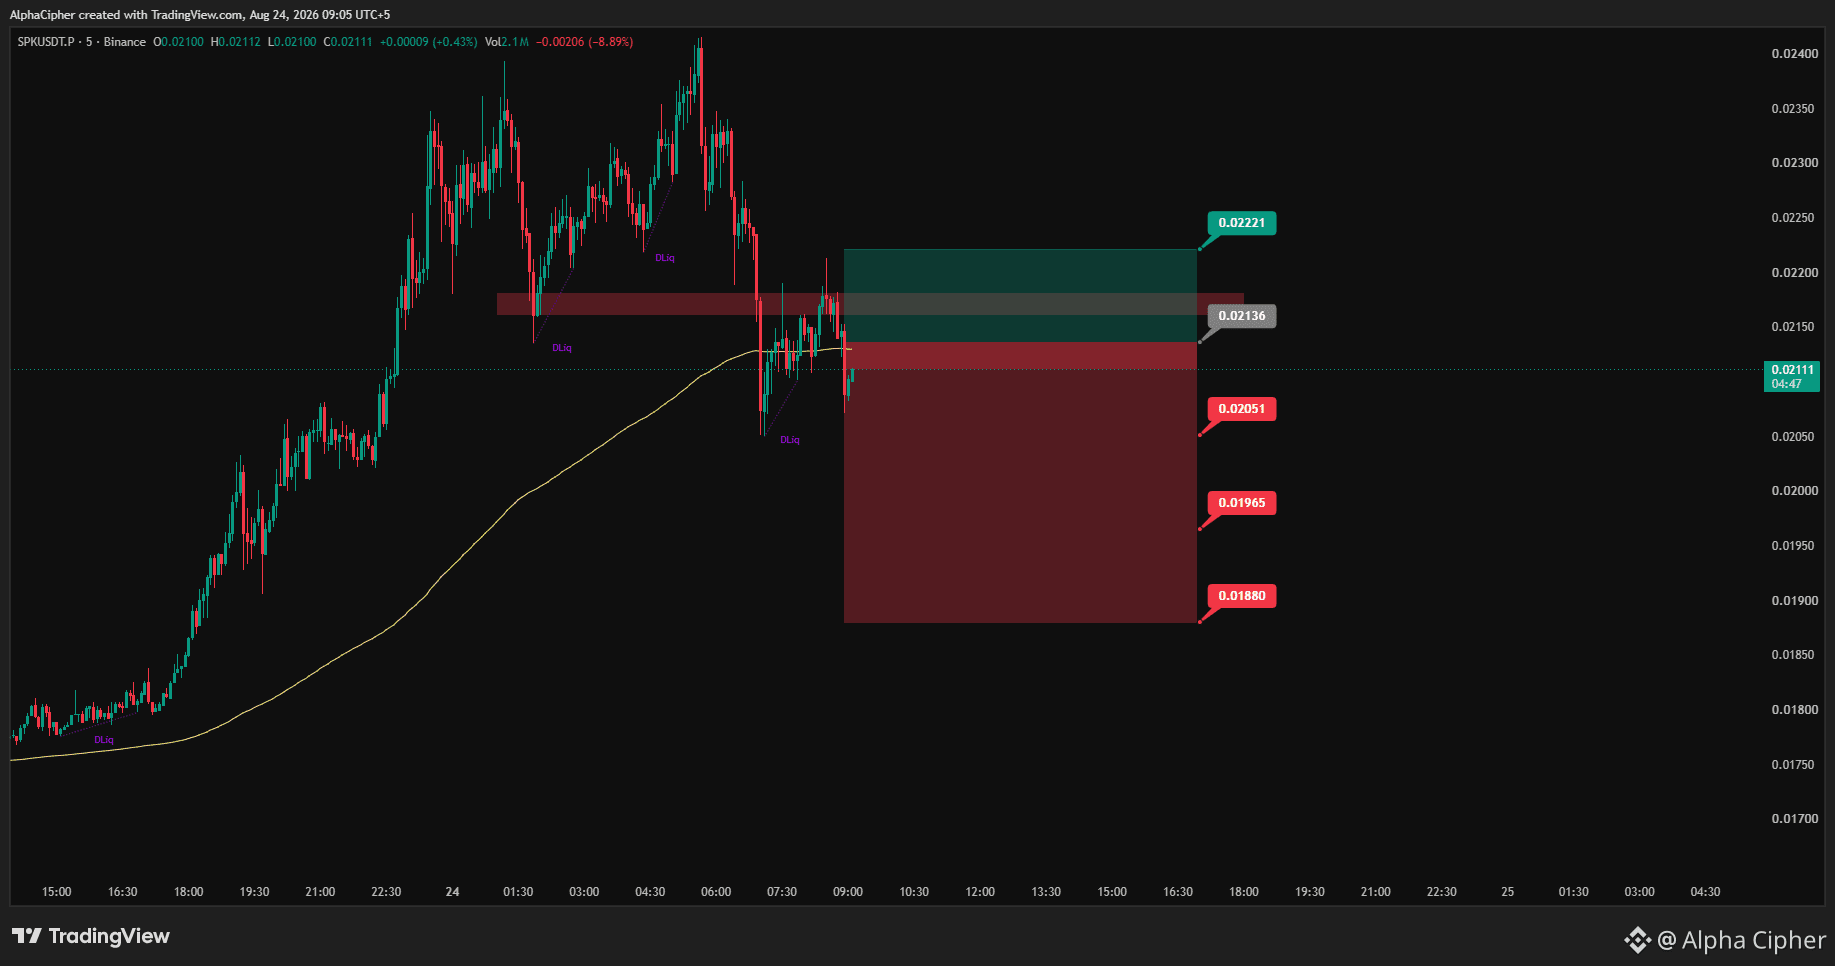
🚨 Trading Signal 🚨
SHORT 📉 $SPK
Leverage: 5x–10x (Futures)
Entry: 0.02136
Take Profit 1: 0.02051 (-4%)
Take Profit 2: 0.01965 (-8%)
Take Profit 3: 0.01880 (-12%)
Stop Loss: 0.02221 (+4%)
⚠️ Not financial advice. Trade with proper risk management.
{future}(SPKUSDT)
🚨 Trading Signal 🚨
SHORT 📉 $SPK
Leverage: 5x–10x (Futures)
Entry: 0.02136
Take Profit 1: 0.02051 (-4%)
Take Profit 2: 0.01965 (-8%)
Take Profit 3: 0.01880 (-12%)
Stop Loss: 0.02221 (+4%)
⚠️ Not financial advice. Trade with proper risk management.
SHORT 📉 $SPK
Leverage: 5x–10x (Futures)
Entry: 0.02136
Take Profit 1: 0.02051 (-4%)
Take Profit 2: 0.01965 (-8%)
Take Profit 3: 0.01880 (-12%)
Stop Loss: 0.02221 (+4%)
⚠️ Not financial advice. Trade with proper risk management.
1
116
·
--
Bearish
🚨 Trading Signal 🚨
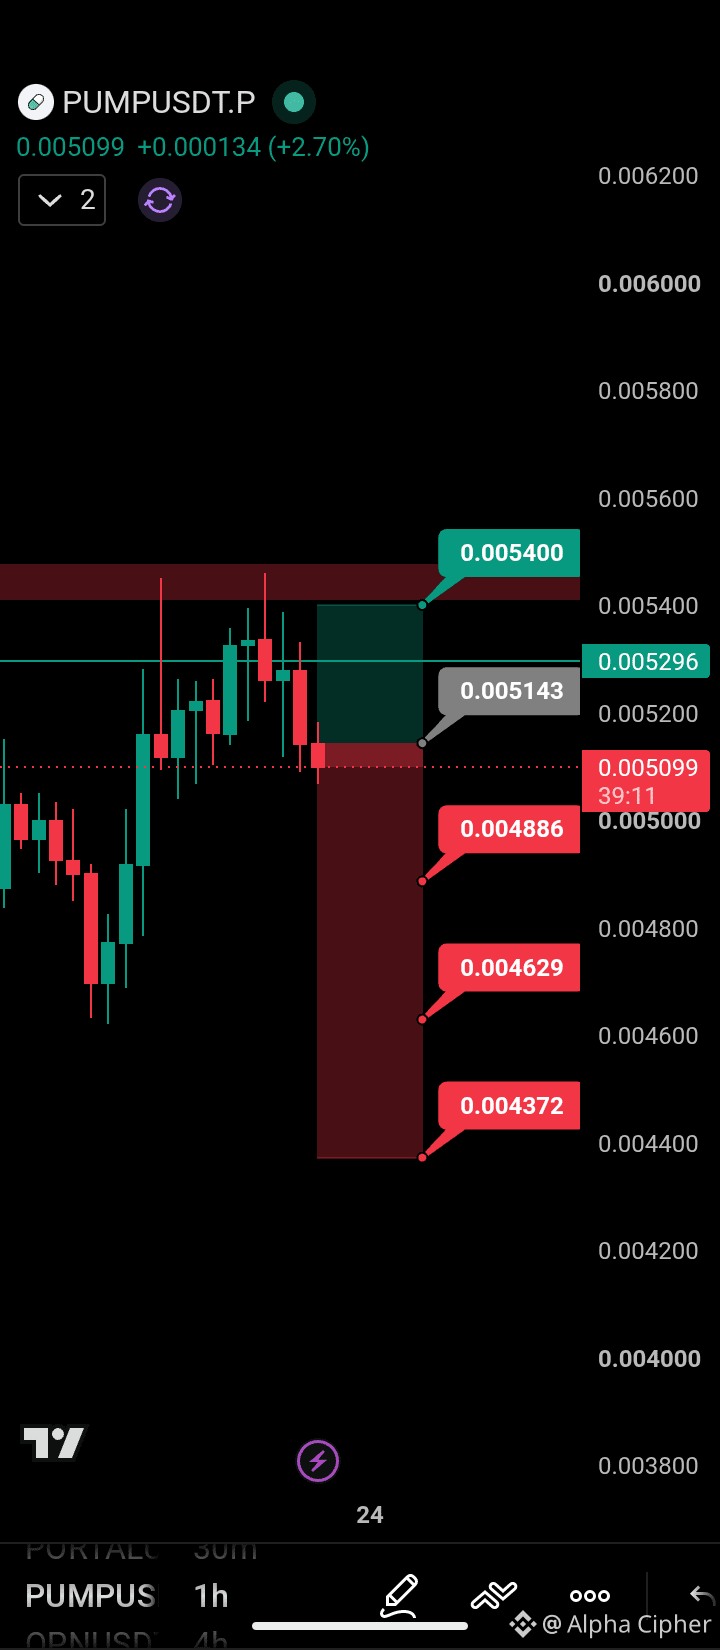
SHORT 📉 $PUMP
Leverage: 5x–10x (Futures)
Entry: 0.005143
Take Profit 1: 0.004886 (-5%)
Take Profit 2: 0.004629 (-10%)
Take Profit 3: 0.004372 (-15%)
Stop Loss: 0.005400 (+5%)
⚠️ Not financial advice. Trade with proper risk management.
{future}(PUMPUSDT)
🚨 Trading Signal 🚨
SHORT 📉 $PUMP
Leverage: 5x–10x (Futures)
Entry: 0.005143
Take Profit 1: 0.004886 (-5%)
Take Profit 2: 0.004629 (-10%)
Take Profit 3: 0.004372 (-15%)
Stop Loss: 0.005400 (+5%)
⚠️ Not financial advice. Trade with proper risk management.
SHORT 📉 $PUMP
Leverage: 5x–10x (Futures)
Entry: 0.005143
Take Profit 1: 0.004886 (-5%)
Take Profit 2: 0.004629 (-10%)
Take Profit 3: 0.004372 (-15%)
Stop Loss: 0.005400 (+5%)
⚠️ Not financial advice. Trade with proper risk management.
1
48
·
--
Bullish
🚨 Trading Signal 🚨
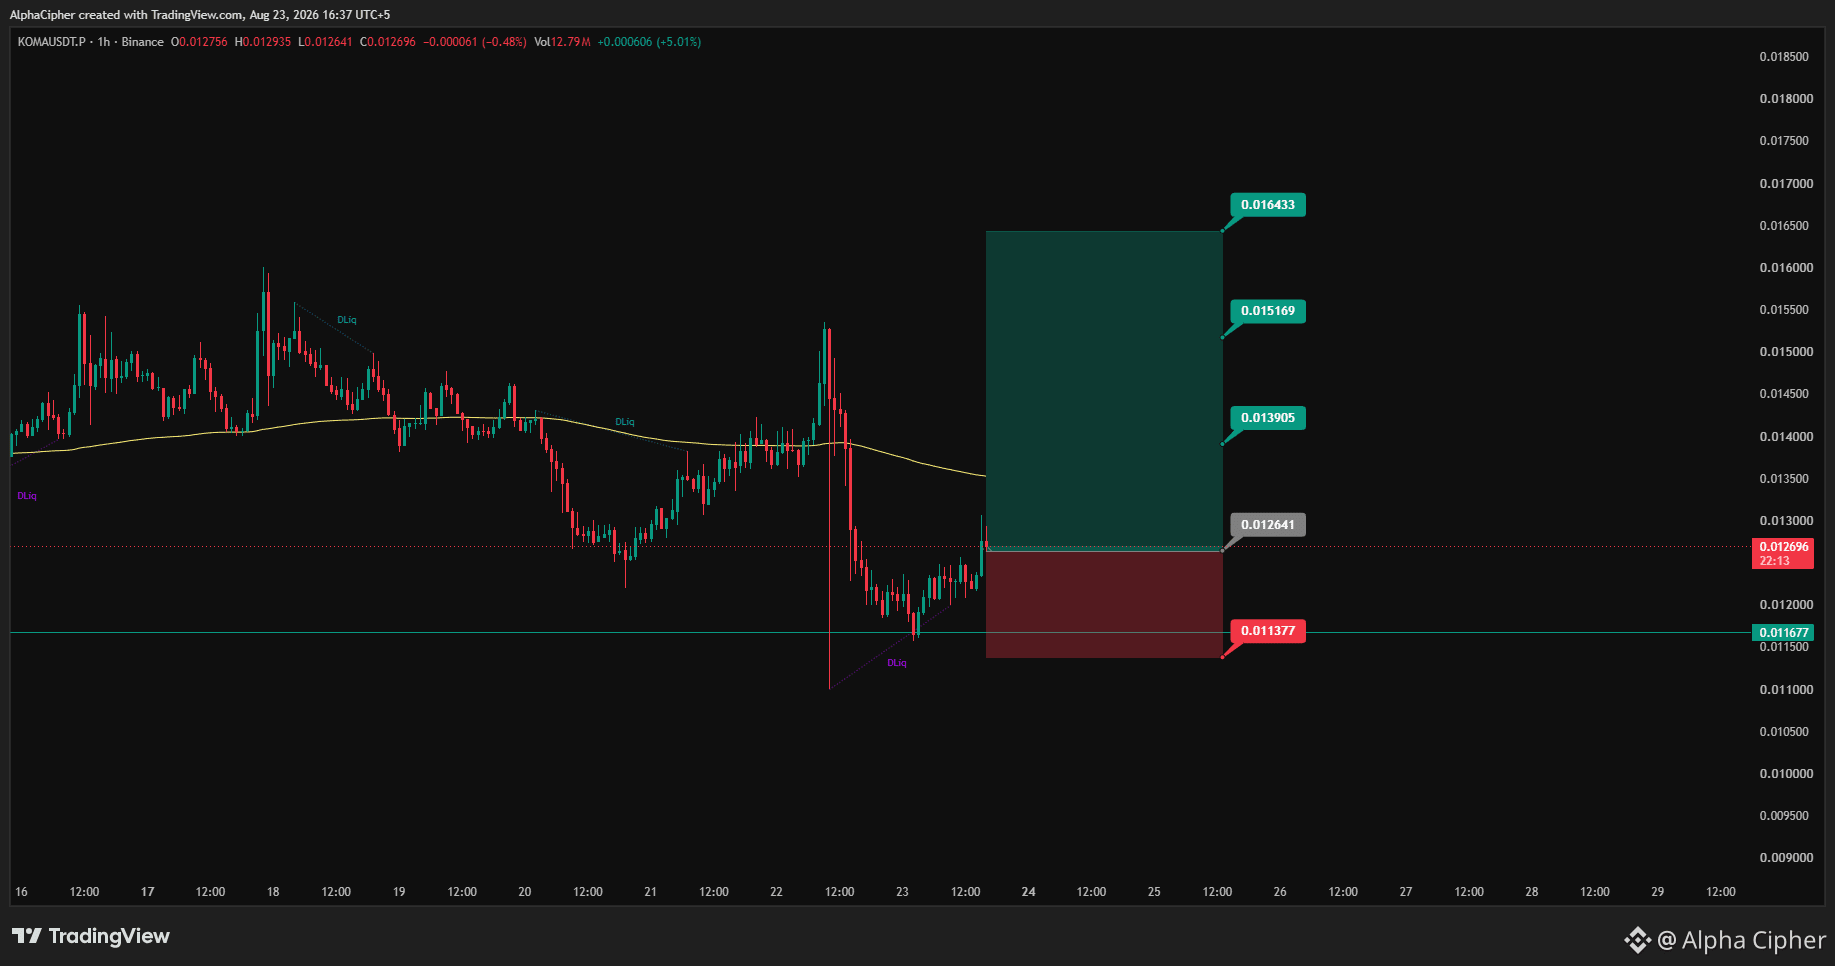
LONG 📈 $KOMA
Leverage: 5x–10x (Futures)
Entry: 0.012641
Take Profit 1: 0.013905 (+10%)
Take Profit 2: 0.015169 (+20%)
Take Profit 3: 0.016433 (+30%)
Stop Loss: 0.011377 (-10%)
⚠️ Not financial advice. Trade with proper risk management.
{future}(KOMAUSDT)
🚨 Trading Signal 🚨
LONG 📈 $KOMA
Leverage: 5x–10x (Futures)
Entry: 0.012641
Take Profit 1: 0.013905 (+10%)
Take Profit 2: 0.015169 (+20%)
Take Profit 3: 0.016433 (+30%)
Stop Loss: 0.011377 (-10%)
⚠️ Not financial advice. Trade with proper risk management.
LONG 📈 $KOMA
Leverage: 5x–10x (Futures)
Entry: 0.012641
Take Profit 1: 0.013905 (+10%)
Take Profit 2: 0.015169 (+20%)
Take Profit 3: 0.016433 (+30%)
Stop Loss: 0.011377 (-10%)
⚠️ Not financial advice. Trade with proper risk management.
1
86
·
--
Bullish
🚨 Trading Signal 🚨
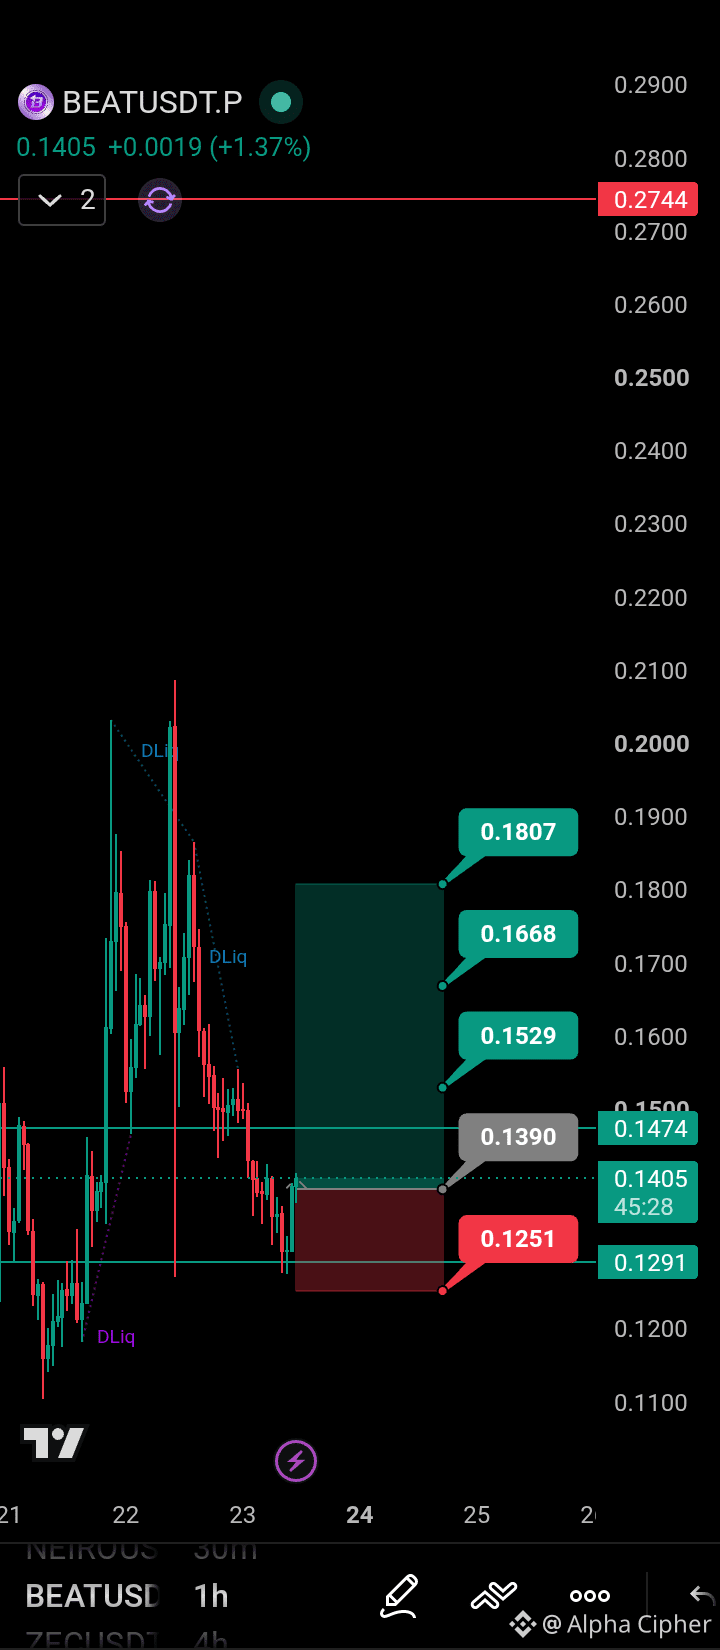
LONG 📈 $BEAT
Leverage: 5x–10x (Futures)
Entry: 0.1390
Take Profit 1: 0.1529 (+10%)
Take Profit 2: 0.1668 (+20%)
Take Profit 3: 0.1807 (+30%)
Stop Loss: 0.1251 (-10%)
⚠️ Not financial advice. Trade with proper risk management.
{future}(BEATUSDT)
🚨 Trading Signal 🚨
LONG 📈 $BEAT
Leverage: 5x–10x (Futures)
Entry: 0.1390
Take Profit 1: 0.1529 (+10%)
Take Profit 2: 0.1668 (+20%)
Take Profit 3: 0.1807 (+30%)
Stop Loss: 0.1251 (-10%)
⚠️ Not financial advice. Trade with proper risk management.
LONG 📈 $BEAT
Leverage: 5x–10x (Futures)
Entry: 0.1390
Take Profit 1: 0.1529 (+10%)
Take Profit 2: 0.1668 (+20%)
Take Profit 3: 0.1807 (+30%)
Stop Loss: 0.1251 (-10%)
⚠️ Not financial advice. Trade with proper risk management.
1
60
·
--
Bullish
🚨 Trading Signal 🚨
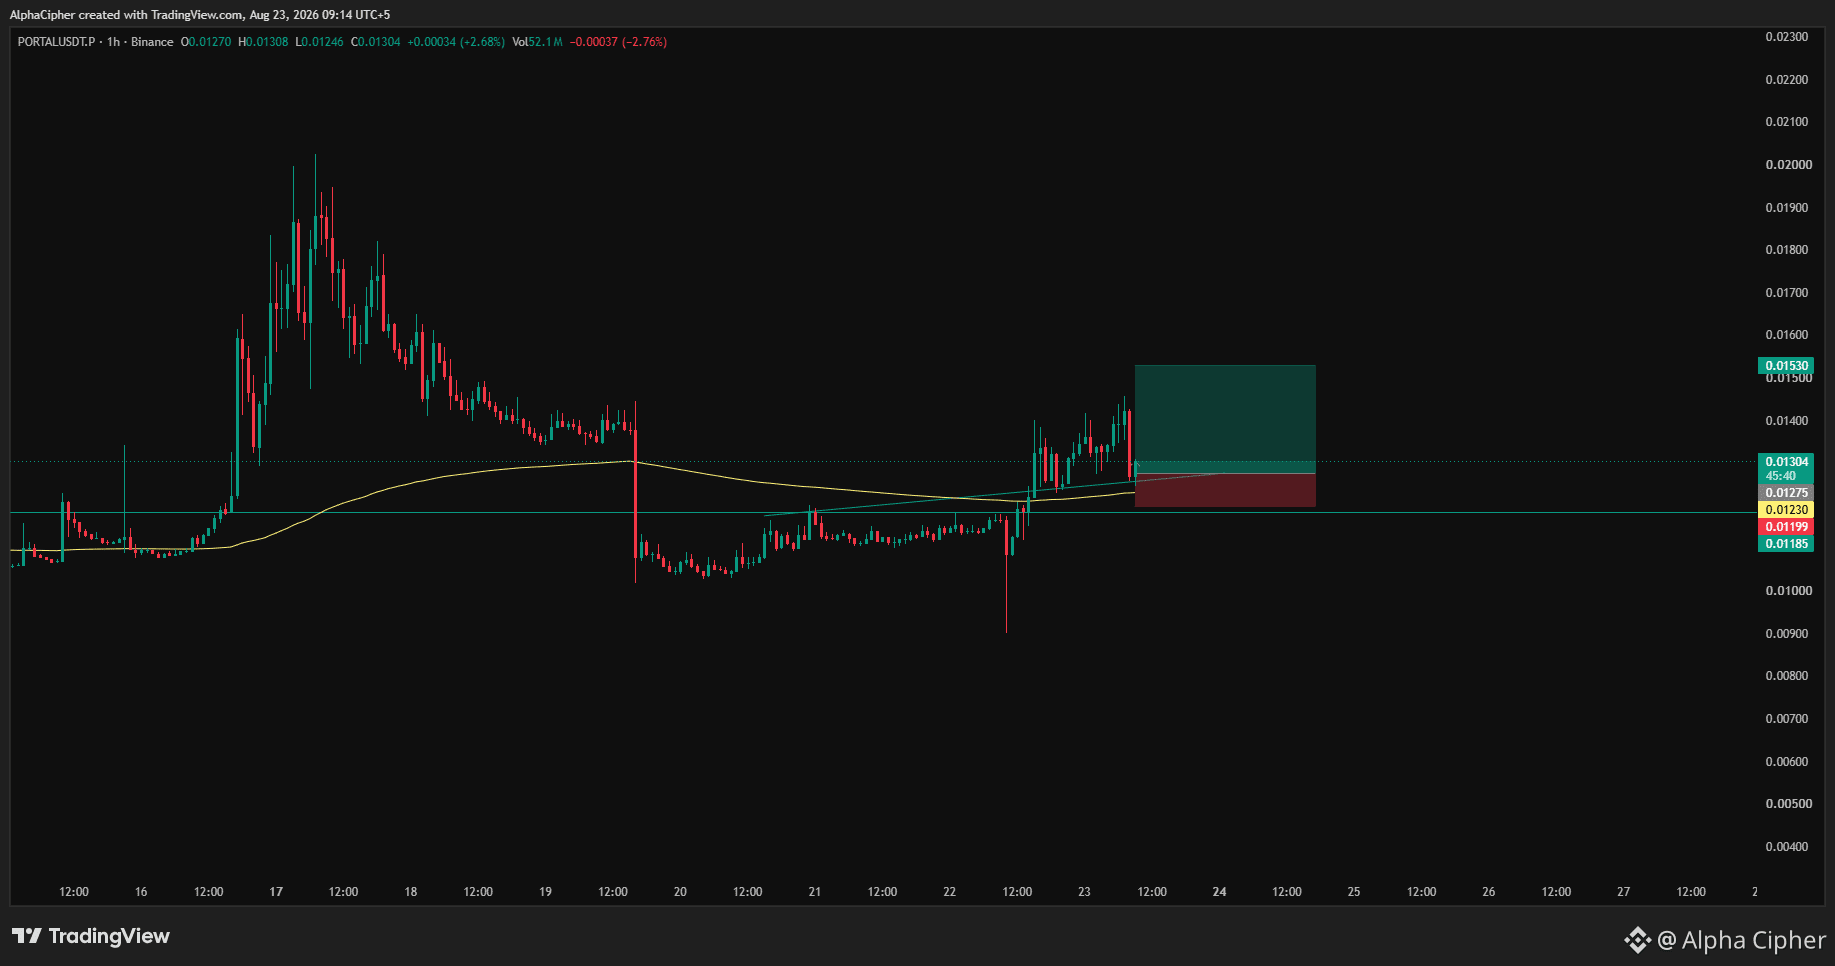
LONG 📈 $PORTAL
Leverage: 5x–10x (Futures)
Entry: 0.1275
Take Profit 1: 0.1352 (+6%)
Take Profit 2: 0.1428 (+12%)
Take Profit 3: 0.1530 (+20%)
Stop Loss: 0.1199 (-6%)
⚠️ Not financial advice. Trade with proper risk management.
{future}(PORTALUSDT)
🚨 Trading Signal 🚨
LONG 📈 $PORTAL
Leverage: 5x–10x (Futures)
Entry: 0.1275
Take Profit 1: 0.1352 (+6%)
Take Profit 2: 0.1428 (+12%)
Take Profit 3: 0.1530 (+20%)
Stop Loss: 0.1199 (-6%)
⚠️ Not financial advice. Trade with proper risk management.
LONG 📈 $PORTAL
Leverage: 5x–10x (Futures)
Entry: 0.1275
Take Profit 1: 0.1352 (+6%)
Take Profit 2: 0.1428 (+12%)
Take Profit 3: 0.1530 (+20%)
Stop Loss: 0.1199 (-6%)
⚠️ Not financial advice. Trade with proper risk management.
1
85
·
--
1
149
·
--
1
45
·
--
Bearish
$BTC UPDATE 📊
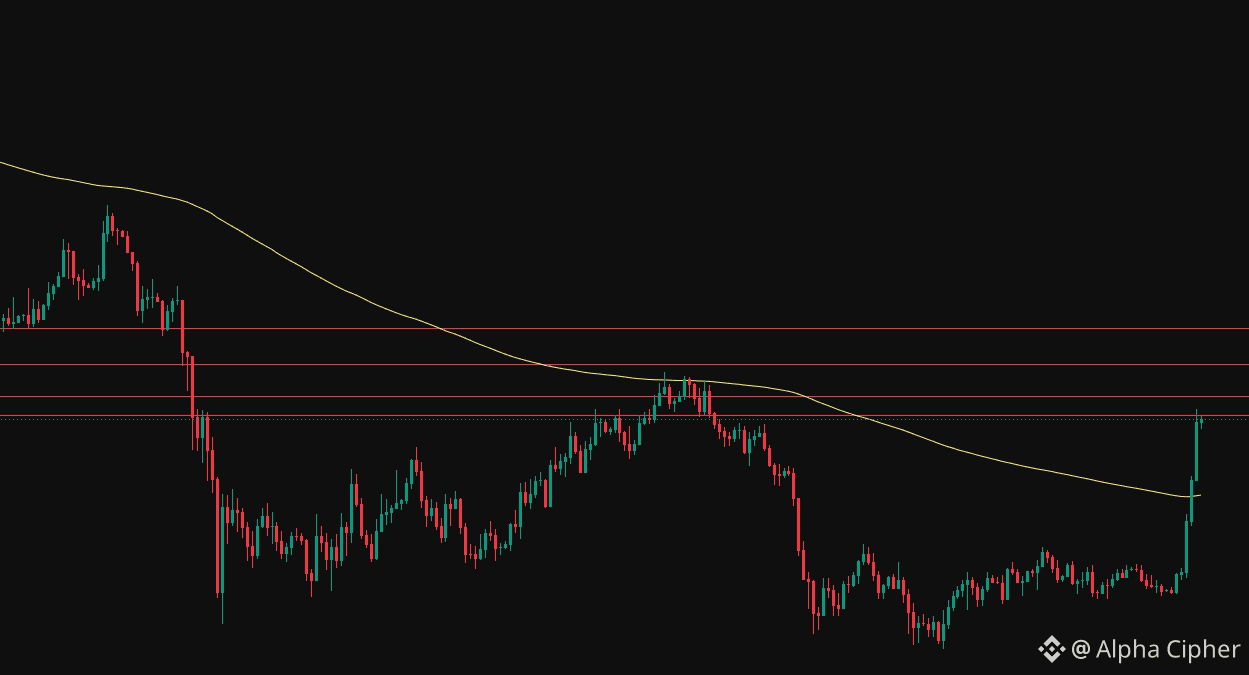
$BTC has made a strong move, and the short sellers have been heavily squeezed.
Now, a higher-timeframe pullback looks increasingly needed before the next major expansion.
🎯 My Short Watch Zone:
$78,900 – $86,830
⚠️ This is a watch zone, not a blind short entry. I’ll be looking for proper confirmation before taking any position.
🚀 Bullish Scenario:
If $BTC decisively breaks and holds above $87,000, the next major psychological target is $100,000.
Key levels:
🔴 $78,900–$86,830 → Pullback / short watch zone
🟢 $87,000+ → Bullish continuation
🎯 $100,000 → Major upside target
Trade the setup, not the emotion. Manage your risk.
#BTC #bitcoin #BTCUSDT #trading #cryptotrading
{future}(BTCUSDT)
$BTC UPDATE 📊
$BTC has made a strong move, and the short sellers have been heavily squeezed.
Now, a higher-timeframe pullback looks increasingly needed before the next major expansion.
🎯 My Short Watch Zone:
$78,900 – $86,830
⚠️ This is a watch zone, not a blind short entry. I’ll be looking for proper confirmation before taking any position.
🚀 Bullish Scenario:
If $BTC decisively breaks and holds above $87,000, the next major psychological target is $100,000.
Key levels:
🔴 $78,900–$86,830 → Pullback / short watch zone
🟢 $87,000+ → Bullish continuation
🎯 $100,000 → Major upside target
Trade the setup, not the emotion. Manage your risk.
#BTC #bitcoin #BTCUSDT #trading #cryptotrading
$BTC has made a strong move, and the short sellers have been heavily squeezed.
Now, a higher-timeframe pullback looks increasingly needed before the next major expansion.
🎯 My Short Watch Zone:
$78,900 – $86,830
⚠️ This is a watch zone, not a blind short entry. I’ll be looking for proper confirmation before taking any position.
🚀 Bullish Scenario:
If $BTC decisively breaks and holds above $87,000, the next major psychological target is $100,000.
Key levels:
🔴 $78,900–$86,830 → Pullback / short watch zone
🟢 $87,000+ → Bullish continuation
🎯 $100,000 → Major upside target
Trade the setup, not the emotion. Manage your risk.
#BTC #bitcoin #BTCUSDT #trading #cryptotrading
59
·
--
Bullish
🚨 Trading Signal 🚨
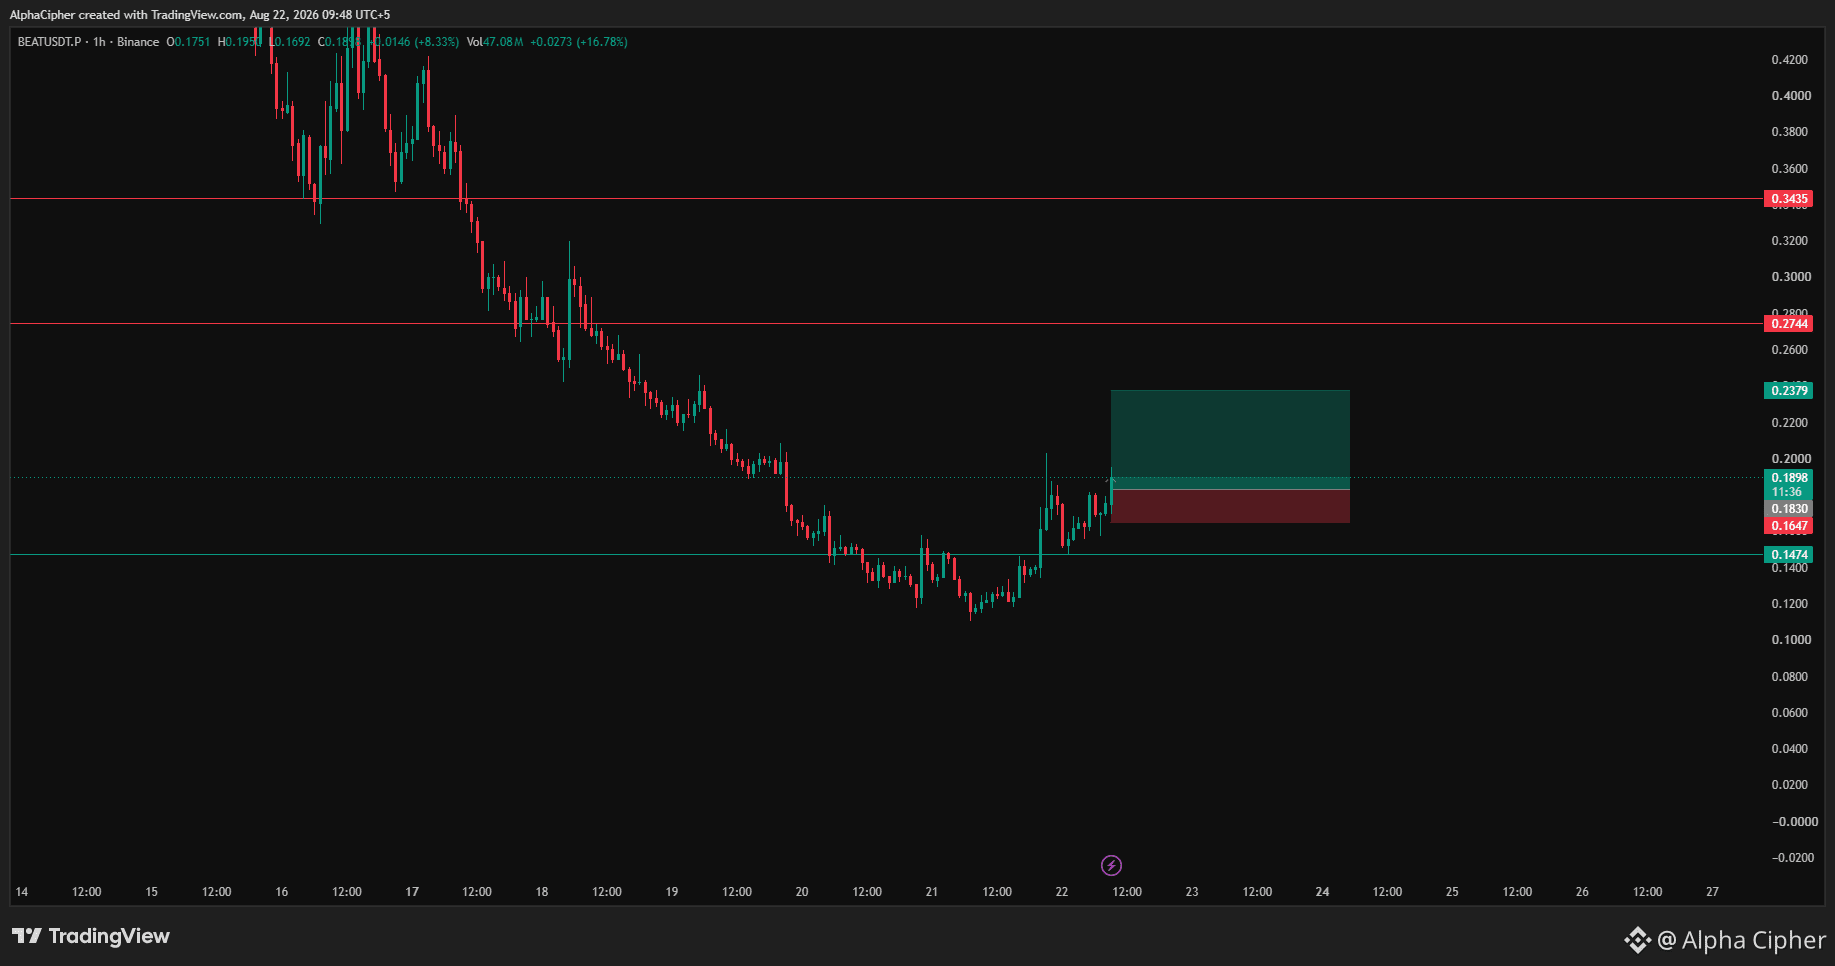
LONG 📈 $BEAT
Leverage: 5x–10x (Futures)
Entry: 0.1830
Take Profit 1: 0.2013 (+10%)
Take Profit 2: 0.2196 (+20%)
Take Profit 3: 0.2379 (+30%)
Bones Target 0.2745
Stop Loss: 0.1647 (-10%)
⚠️ Not financial advice. Trade with proper risk management.
{future}(BEATUSDT)
🚨 Trading Signal 🚨
LONG 📈 $BEAT
Leverage: 5x–10x (Futures)
Entry: 0.1830
Take Profit 1: 0.2013 (+10%)
Take Profit 2: 0.2196 (+20%)
Take Profit 3: 0.2379 (+30%)
Bones Target 0.2745
Stop Loss: 0.1647 (-10%)
⚠️ Not financial advice. Trade with proper risk management.
LONG 📈 $BEAT
Leverage: 5x–10x (Futures)
Entry: 0.1830
Take Profit 1: 0.2013 (+10%)
Take Profit 2: 0.2196 (+20%)
Take Profit 3: 0.2379 (+30%)
Bones Target 0.2745
Stop Loss: 0.1647 (-10%)
⚠️ Not financial advice. Trade with proper risk management.
1
178
·
--
Bearish
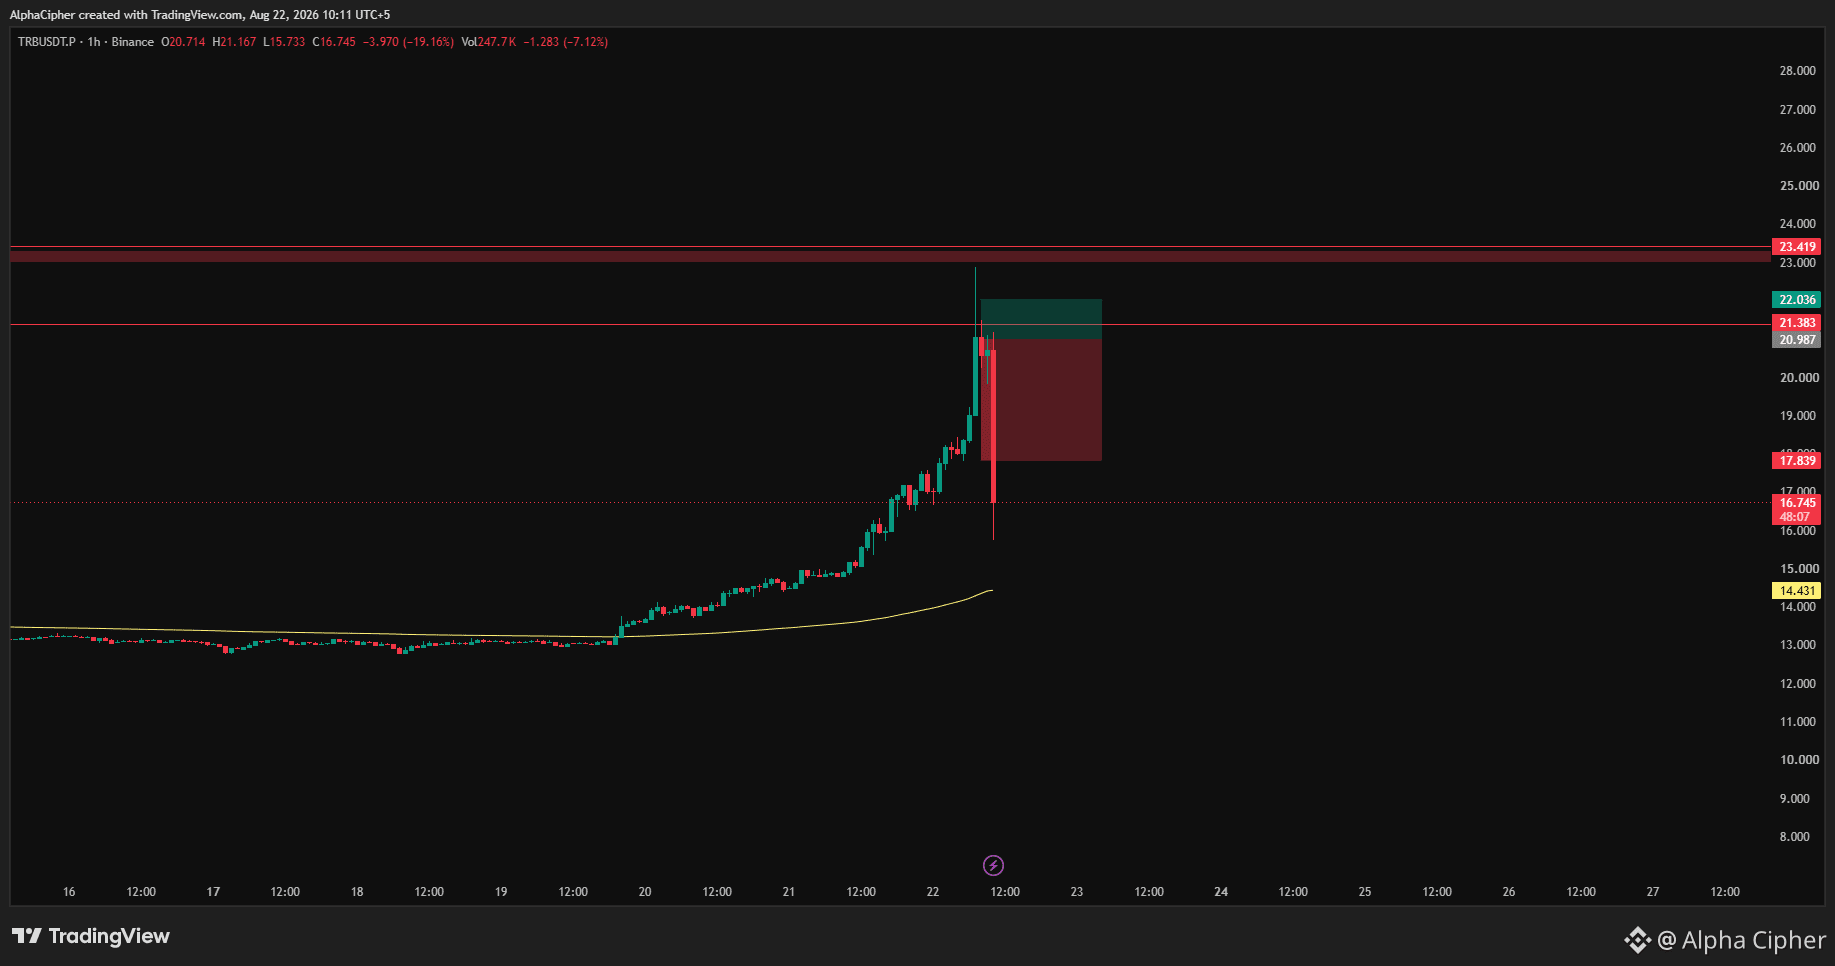
🚨 Trading Signal 🚨
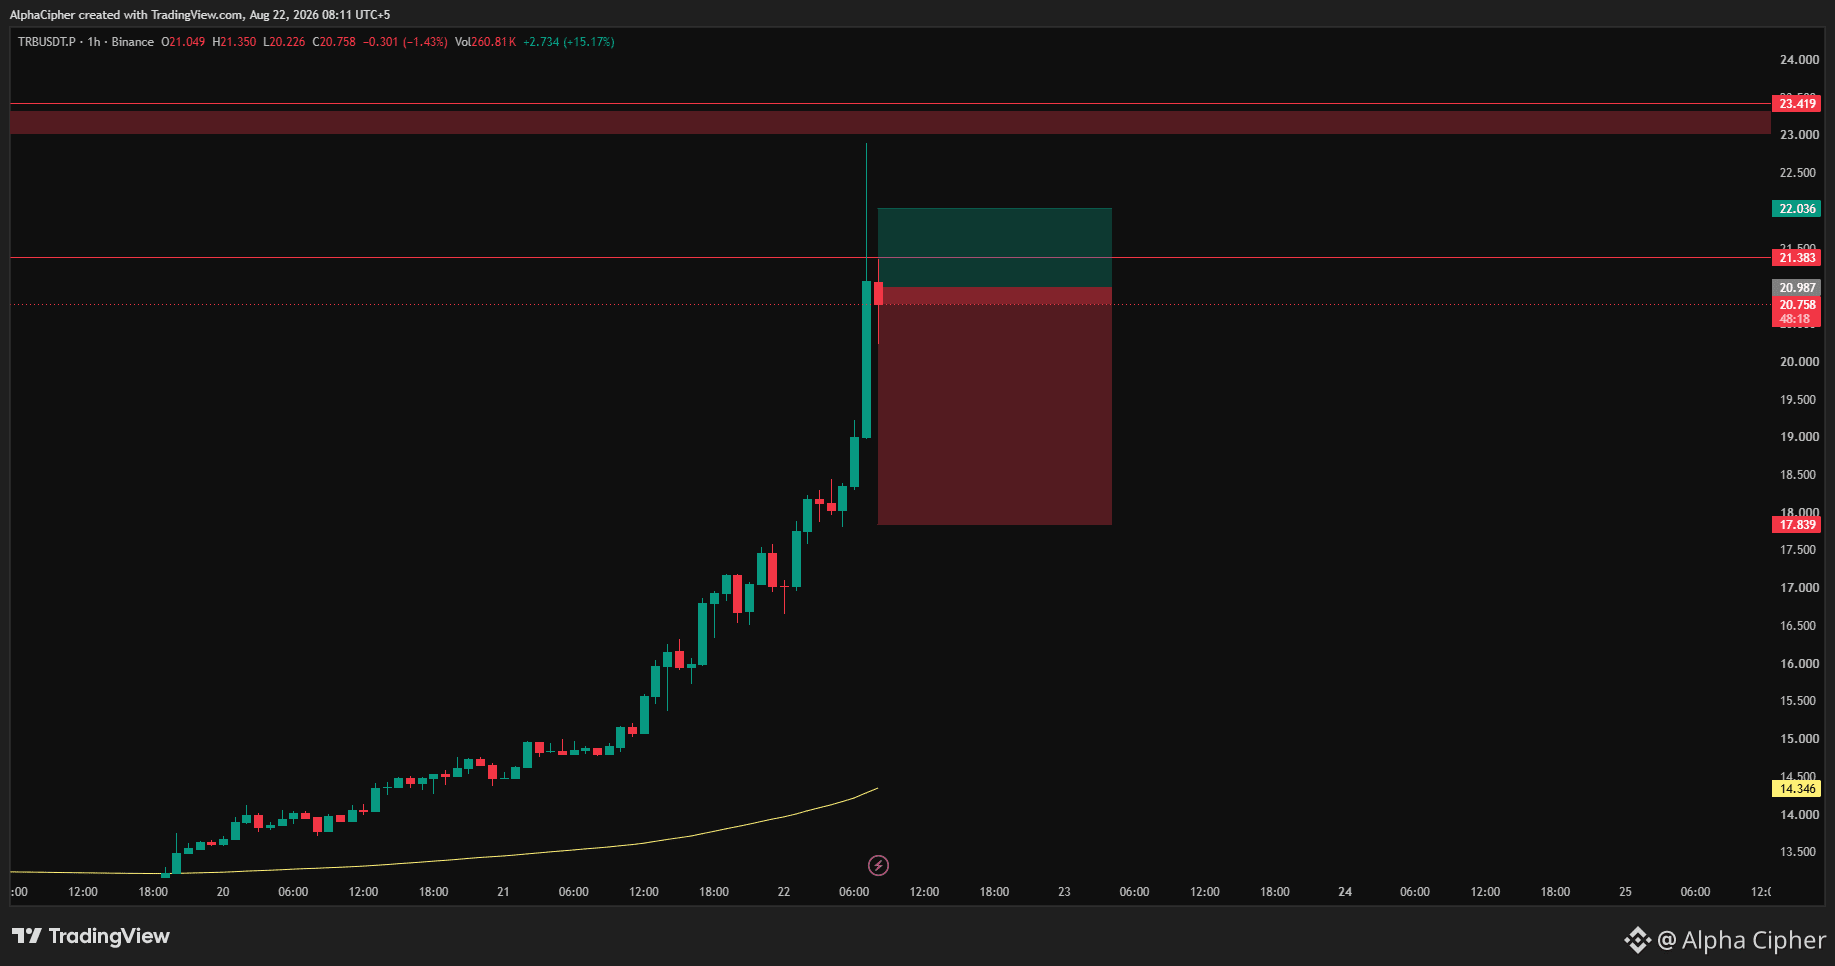
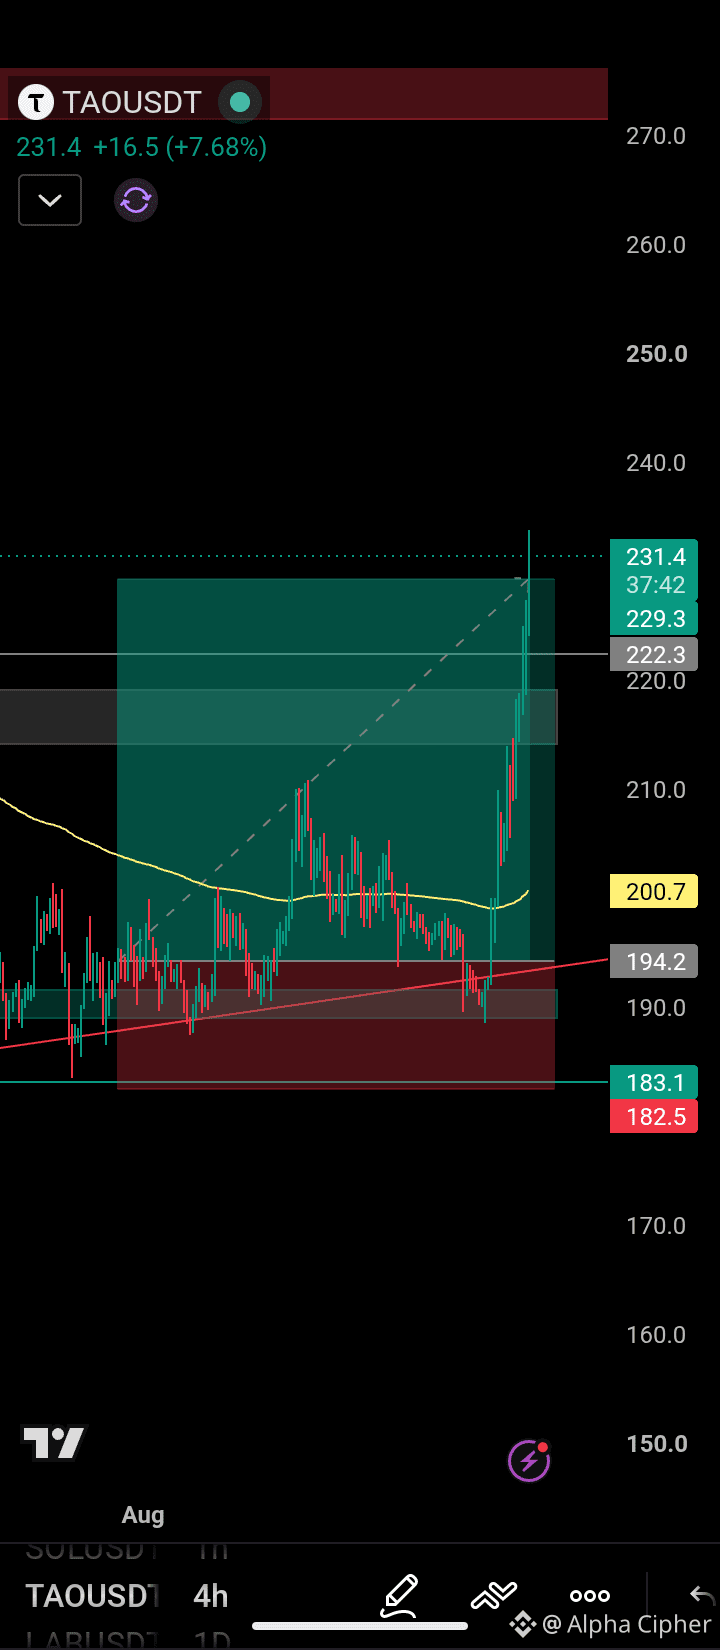
SHORT 📉 $TRB
Leverage: 5x–10x (Futures)
Entry: 20.987
Take Profit 1: 19.938 (-5%)
Take Profit 2: 18.888 (-10%)
Take Profit 3: 17.839 (-15%)
Stop Loss: 22.036 (+5%)
⚠️ Not financial advice. Trade with proper risk management.
{future}(TRBUSDT)
🚨 Trading Signal 🚨
SHORT 📉 $TRB
Leverage: 5x–10x (Futures)
Entry: 20.987
Take Profit 1: 19.938 (-5%)
Take Profit 2: 18.888 (-10%)
Take Profit 3: 17.839 (-15%)
Stop Loss: 22.036 (+5%)
⚠️ Not financial advice. Trade with proper risk management.
SHORT 📉 $TRB
Leverage: 5x–10x (Futures)
Entry: 20.987
Take Profit 1: 19.938 (-5%)
Take Profit 2: 18.888 (-10%)
Take Profit 3: 17.839 (-15%)
Stop Loss: 22.036 (+5%)
⚠️ Not financial advice. Trade with proper risk management.
1
193
·
--
1
36
·
--
Bearish
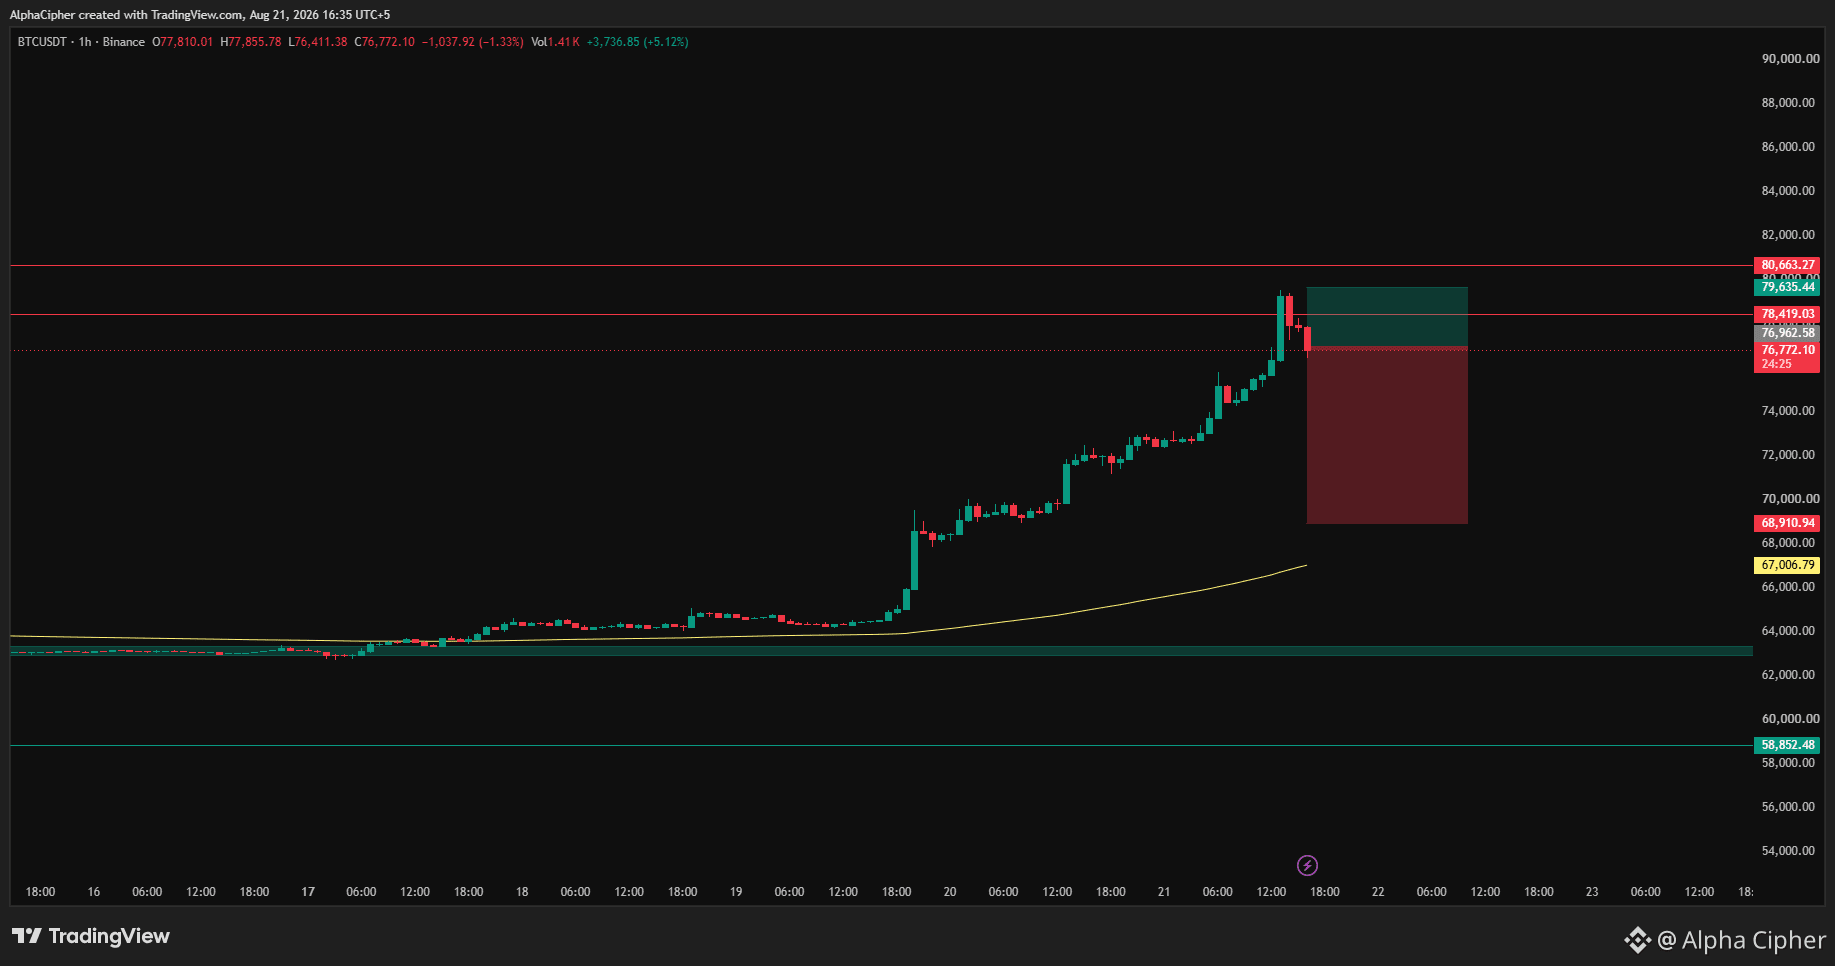
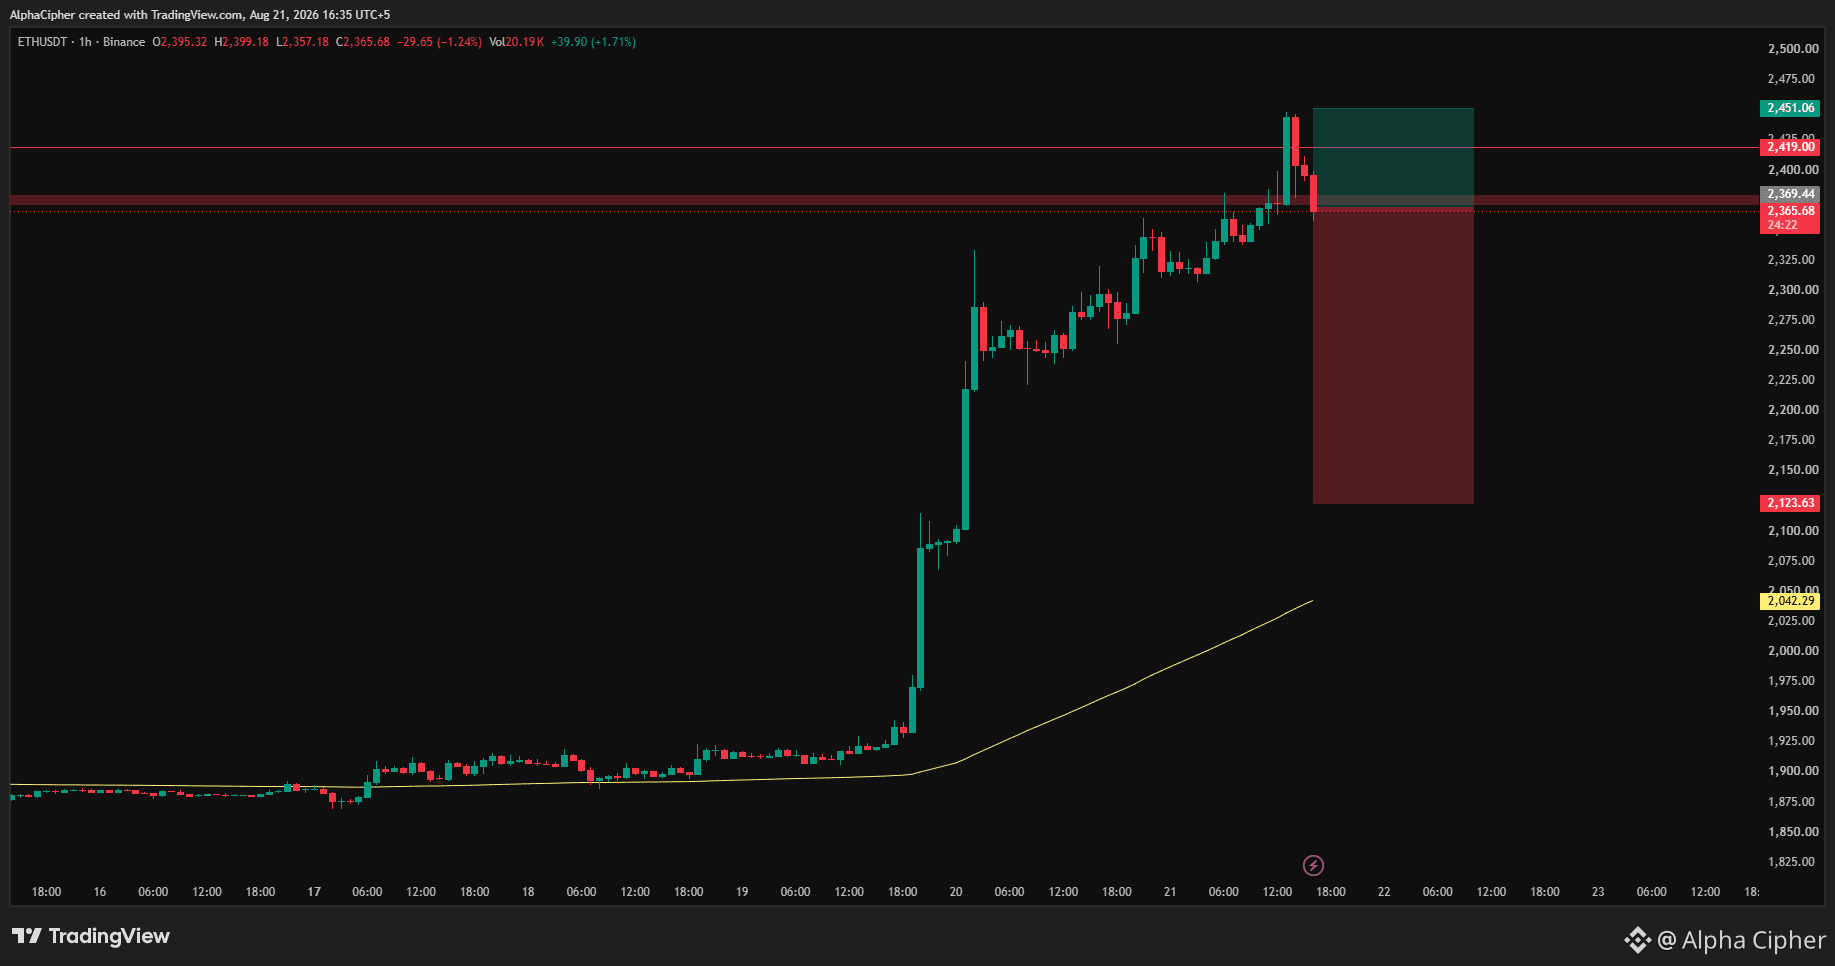
Open Short On $BTC And $ETH
{future}(ETHUSDT)
{future}(BTCUSDT)
Open Short On $BTC And $ETH
1
36
·
--
Bearish
🚨 Trading Signal 🚨
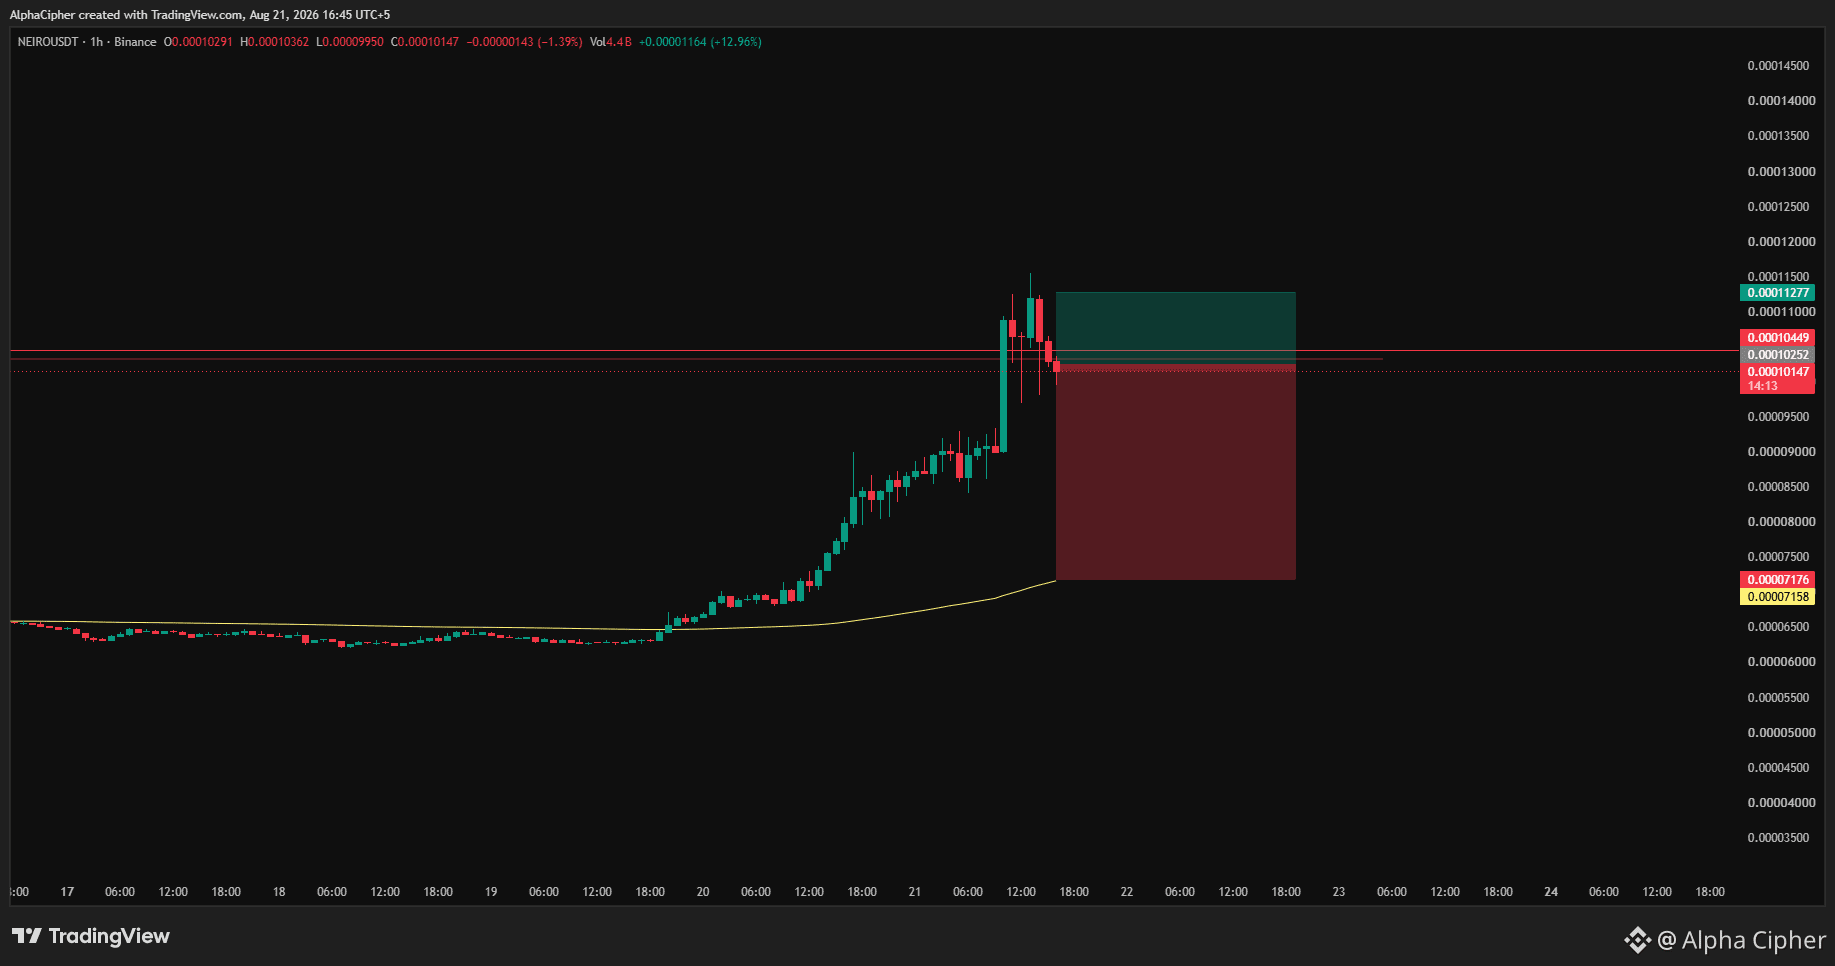
SHORT 📉 $NEIRO
Leverage: 5x–10x (Futures)
Entry: 0.00010252
Take Profit 1: 0.00009227 (-10%)
Take Profit 2: 0.00008202 (-20%)
Take Profit 3: 0.00007176 (-30%)
Stop Loss: 0.00011277 (+10%)
⚠️ Not financial advice. Trade with proper risk management.
{future}(NEIROUSDT)
🚨 Trading Signal 🚨
SHORT 📉 $NEIRO
Leverage: 5x–10x (Futures)
Entry: 0.00010252
Take Profit 1: 0.00009227 (-10%)
Take Profit 2: 0.00008202 (-20%)
Take Profit 3: 0.00007176 (-30%)
Stop Loss: 0.00011277 (+10%)
⚠️ Not financial advice. Trade with proper risk management.
SHORT 📉 $NEIRO
Leverage: 5x–10x (Futures)
Entry: 0.00010252
Take Profit 1: 0.00009227 (-10%)
Take Profit 2: 0.00008202 (-20%)
Take Profit 3: 0.00007176 (-30%)
Stop Loss: 0.00011277 (+10%)
⚠️ Not financial advice. Trade with proper risk management.
1
45
·
--
1
149
·
--
Bearish
🚨 Trading Signal 🚨
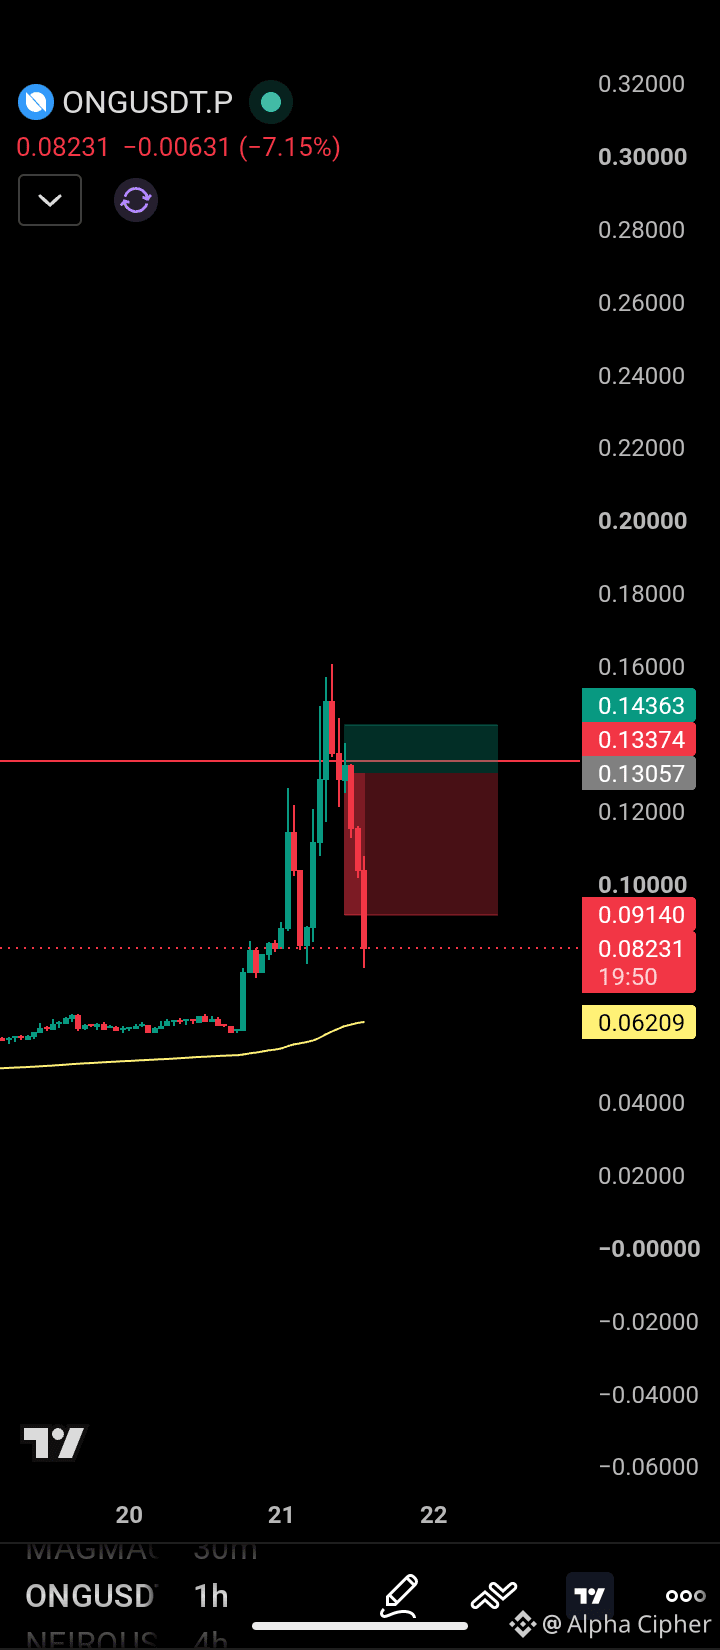
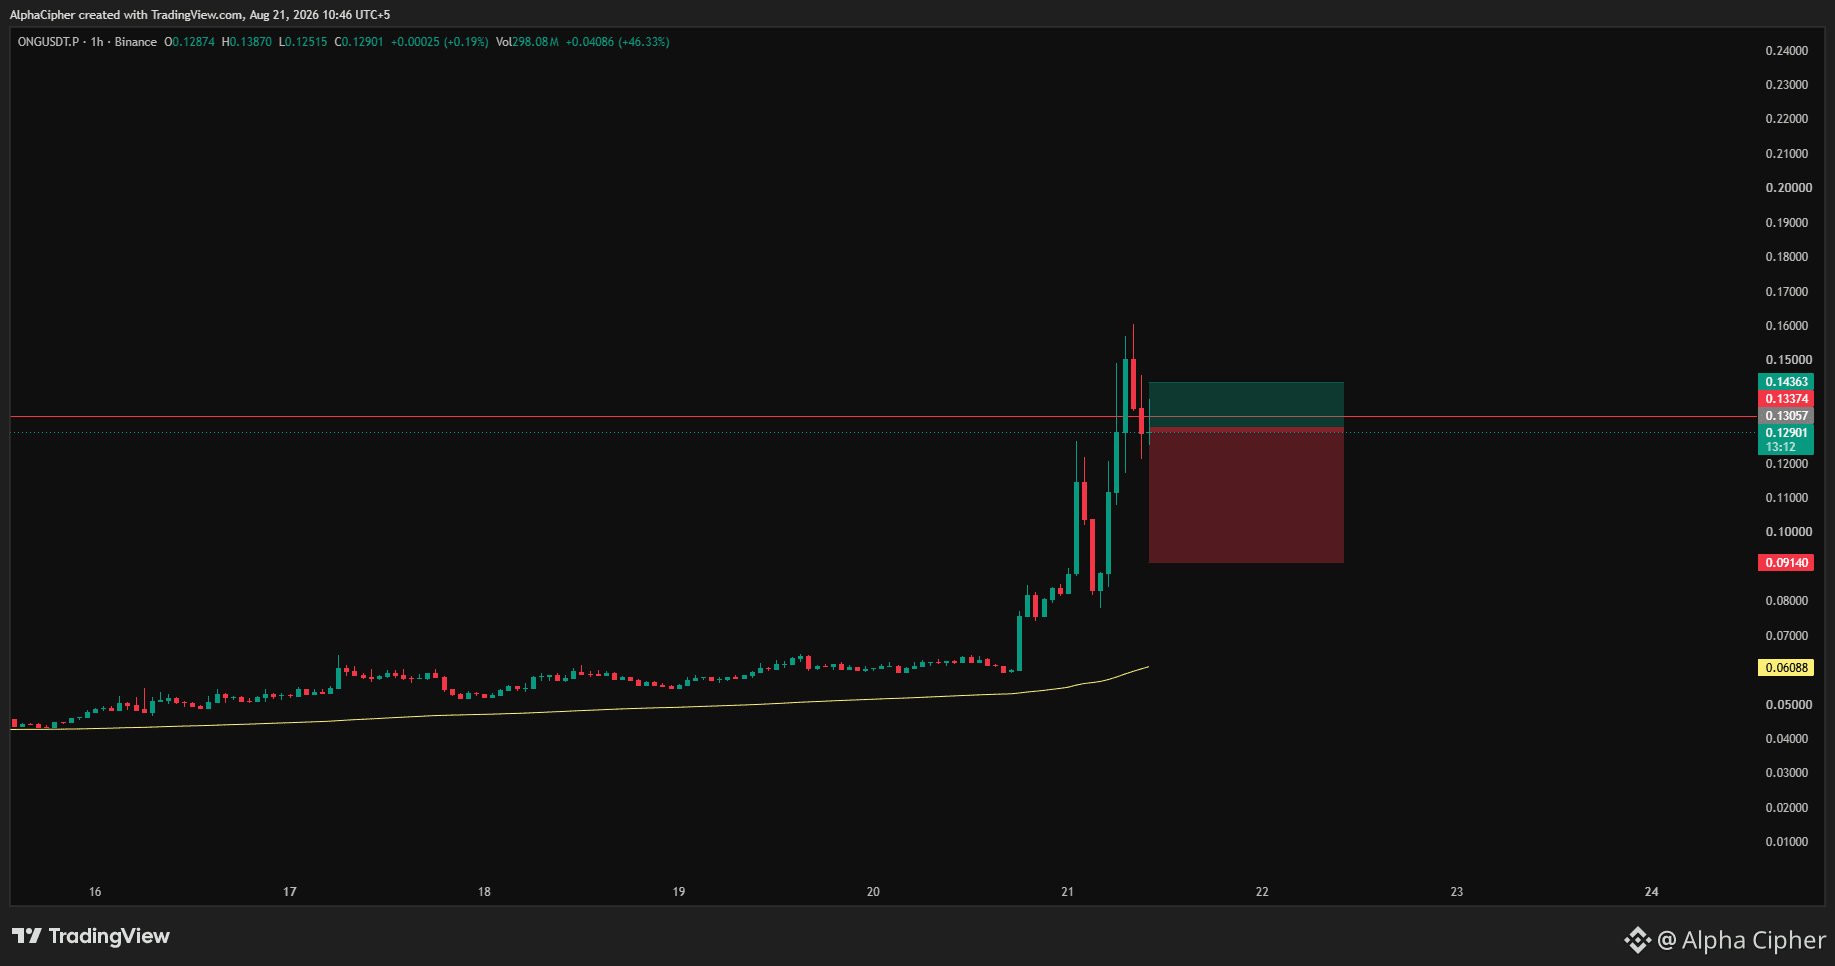
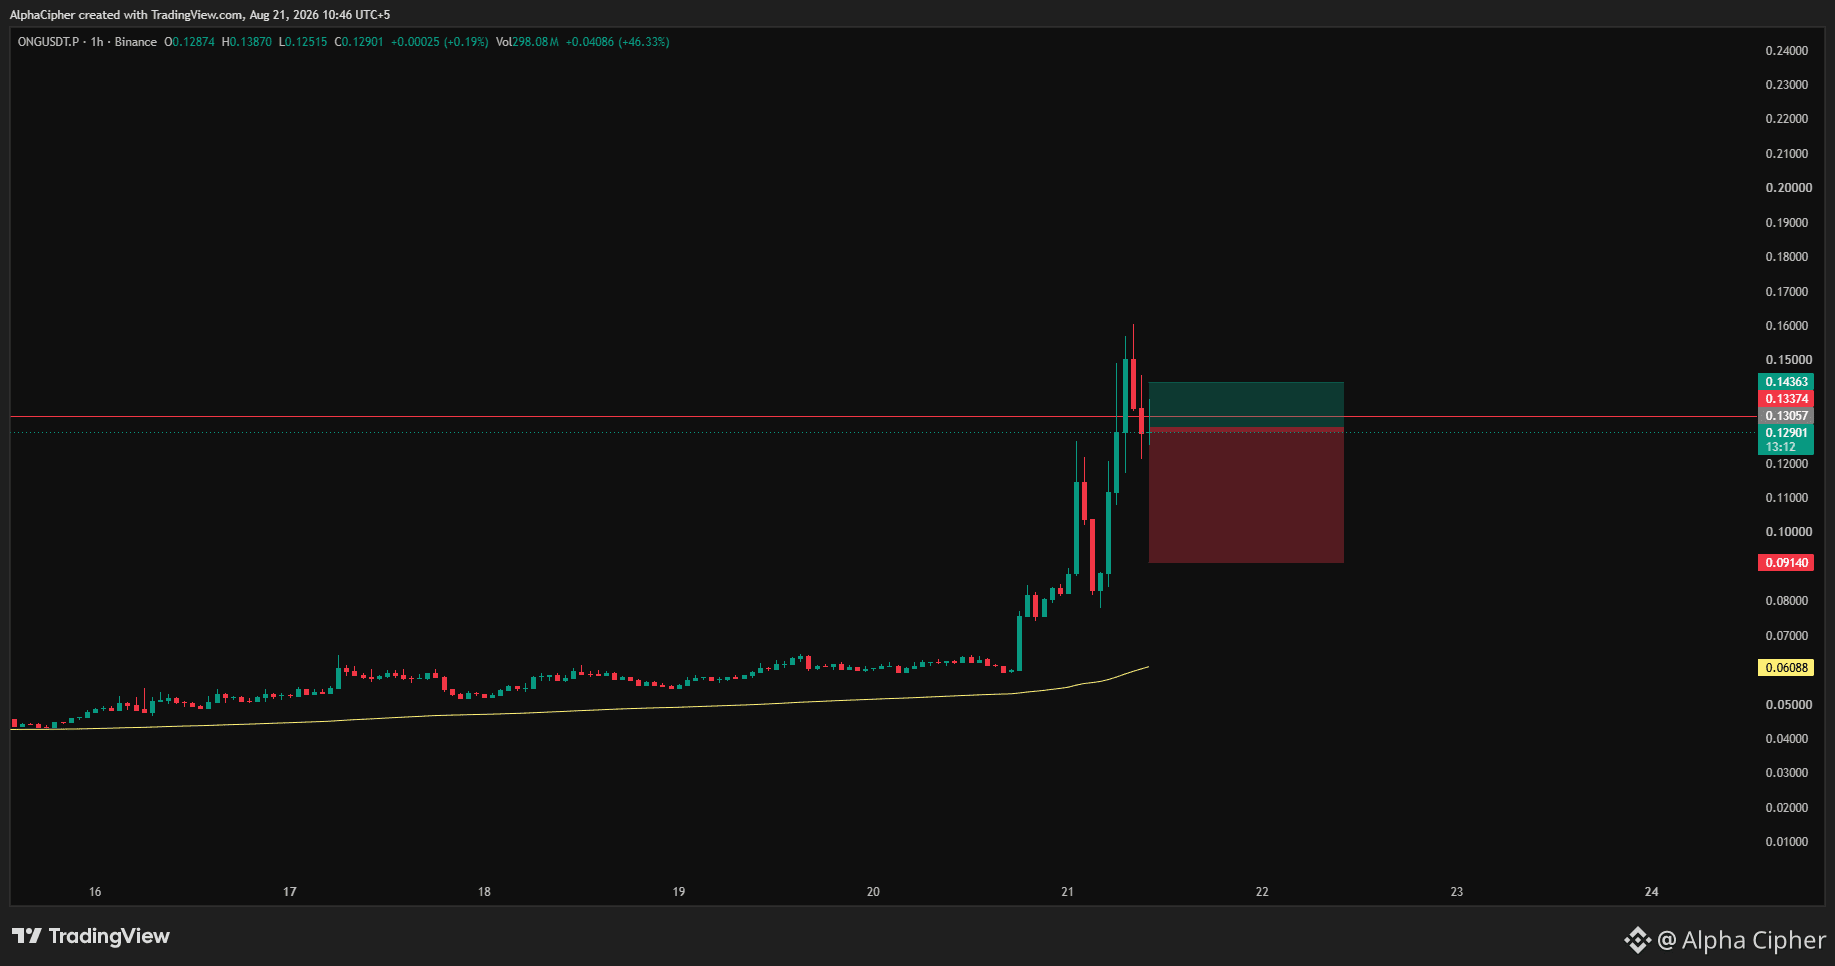
SHORT 📉 $ONG
Leverage: 5x–10x (Futures)
Entry: 0.13057
Take Profit 1: 0.11751 (-10%)
Take Profit 2: 0.10446 (-20%)
Take Profit 3: 0.09140 (-30%)
Stop Loss: 0.14363 (+10%)
⚠️ Not financial advice. Trade with proper risk management.
{future}(ONGUSDT)
🚨 Trading Signal 🚨
SHORT 📉 $ONG
Leverage: 5x–10x (Futures)
Entry: 0.13057
Take Profit 1: 0.11751 (-10%)
Take Profit 2: 0.10446 (-20%)
Take Profit 3: 0.09140 (-30%)
Stop Loss: 0.14363 (+10%)
⚠️ Not financial advice. Trade with proper risk management.
SHORT 📉 $ONG
Leverage: 5x–10x (Futures)
Entry: 0.13057
Take Profit 1: 0.11751 (-10%)
Take Profit 2: 0.10446 (-20%)
Take Profit 3: 0.09140 (-30%)
Stop Loss: 0.14363 (+10%)
⚠️ Not financial advice. Trade with proper risk management.
1
71
Log in to explore more content
Join global crypto users on Binance Square
⚡️ Get latest and useful information about crypto.
💬 Trusted by the world’s largest crypto exchange.
👍 Discover real insights from verified creators.
Email / Phone number
Trending Topics
AppleDebutsFoldablePhone
28,651 views
614 Discussing
Apple just dropped the foldable iPhone — and the market is paying attention. This isn't just another product cycle; it's a new product category, a new CEO on stage, and a $1,999 price tag that pushes $AAPL further into ultra-premium territory. Foldables are the narrative, and Apple is now the headline.
#appledebutsfoldablephone #EUExtendsCentralContactPointToCASPs #US10YTreasuryYieldHitsHighestSinceNov2023 #BrentCrudeTops$100 #USTreasuryToBuyBackUpTo$6BLongDatedDebt
KimHotbae
·2 Likes
·2.8k views
TSMCAugustRevenueUp53.3%YoY
1,800 views
112 Discussing
IranSaysReadyToEscalateWarWithUS
5,394 views
157 Discussing