

3ala2 View
1.3k Posts

3ala2 View
Report
Block User
We don't chase rockets.We wait for the kiss 🦅 Patience • Discipline • Risk Management Futures with a plan never a gamble. Im a Dentist 🦷 & UI/UX Designer
High-Frequency Trader
6 Years
17 Following
234 Followers
930 Liked
Posts
All
Quotes
Videos
·
--
Bearish
$SOL
{future}(SOLUSDT)
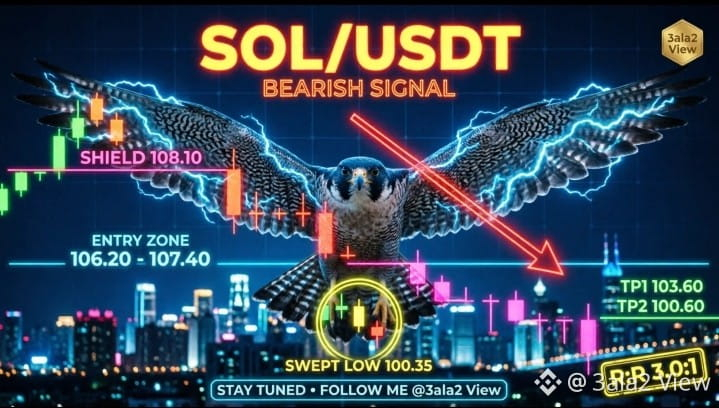
🚨 BEARISH SIGNAL 🚨
Entry Zone: $106.20 – $107.40 — the kill-zone kiss: 4H yellow EMA at 106.21, 1H red EMA at 106.23 and the 24h high at 106.22 stacked on the exact same hairline, with the October 16 ceiling at 107.50 capping the second layer
🎯 Targets:
🥇 TP1 103.60$ (60% of position — the reclaimed 1H cluster we just left)
🥈 TP2 100.60$ (40% of position — the edge of the swept pool at 100.35)
🛡️ Stop Loss: $108.10 (above the October 16 ceiling and the entire triple-layer cluster — if that hairline flips to support, the downtrend was a lie)
📊 4H Structure: A clean descending trend from 122 with lower highs intact; price trades below the 4H yellow at 106.21 and the 4H red at 109.05, and the current bounce from the 100.35 pool is relief inside a downtrend — not a reversal
🔥 Current Price: $104.28 (coiling 1.8% under the kill zone, loading the bounce)
💪 Resistance: $106.20 – $107.40 (the triple-layer kiss), deeper ceiling at $109.05
🚀 Bounce Confirmation: 1H close above $105.60 launches the relief leg straight into our short nets
$SOL swept the 100.35 pool and bounced — and every bounce inside a 4H downtrend has one job: return to kiss the broken cluster from below. Three layers sit on the same hairline at 106.2, the trend whispers down, RSI at 48 on both frames says the fuel is neutral and clean, and 1.57B of volume says this sea is institutional deep. The shield was born first at 108.10 above the whole structure, the geometry pays 3.0:1, and the swept pool whispers 100.60. If the bounce comes — we ride it down. If it never comes — a zero-dollar miss and zero regret.
THREE LAYERS, ONE HAIRLINE — THE KILL ZONE WAITS! 📉
Trade with proper risk management ✅
#Write2Earn #3ALA2 #SOL
DYOR.
══════════════════════════════
$NEAR
{future}(NEARUSDT)
$SOL
🚨 BEARISH SIGNAL 🚨
Entry Zone: $106.20 – $107.40 — the kill-zone kiss: 4H yellow EMA at 106.21, 1H red EMA at 106.23 and the 24h high at 106.22 stacked on the exact same hairline, with the October 16 ceiling at 107.50 capping the second layer
🎯 Targets:
🥇 TP1 103.60$ (60% of position — the reclaimed 1H cluster we just left)
🥈 TP2 100.60$ (40% of position — the edge of the swept pool at 100.35)
🛡️ Stop Loss: $108.10 (above the October 16 ceiling and the entire triple-layer cluster — if that hairline flips to support, the downtrend was a lie)
📊 4H Structure: A clean descending trend from 122 with lower highs intact; price trades below the 4H yellow at 106.21 and the 4H red at 109.05, and the current bounce from the 100.35 pool is relief inside a downtrend — not a reversal
🔥 Current Price: $104.28 (coiling 1.8% under the kill zone, loading the bounce)
💪 Resistance: $106.20 – $107.40 (the triple-layer kiss), deeper ceiling at $109.05
🚀 Bounce Confirmation: 1H close above $105.60 launches the relief leg straight into our short nets
$SOL swept the 100.35 pool and bounced — and every bounce inside a 4H downtrend has one job: return to kiss the broken cluster from below. Three layers sit on the same hairline at 106.2, the trend whispers down, RSI at 48 on both frames says the fuel is neutral and clean, and 1.57B of volume says this sea is institutional deep. The shield was born first at 108.10 above the whole structure, the geometry pays 3.0:1, and the swept pool whispers 100.60. If the bounce comes — we ride it down. If it never comes — a zero-dollar miss and zero regret.
THREE LAYERS, ONE HAIRLINE — THE KILL ZONE WAITS! 📉
Trade with proper risk management ✅
#Write2Earn #3ALA2 #SOL
DYOR.
══════════════════════════════
$NEAR
🚨 BEARISH SIGNAL 🚨
Entry Zone: $106.20 – $107.40 — the kill-zone kiss: 4H yellow EMA at 106.21, 1H red EMA at 106.23 and the 24h high at 106.22 stacked on the exact same hairline, with the October 16 ceiling at 107.50 capping the second layer
🎯 Targets:
🥇 TP1 103.60$ (60% of position — the reclaimed 1H cluster we just left)
🥈 TP2 100.60$ (40% of position — the edge of the swept pool at 100.35)
🛡️ Stop Loss: $108.10 (above the October 16 ceiling and the entire triple-layer cluster — if that hairline flips to support, the downtrend was a lie)
📊 4H Structure: A clean descending trend from 122 with lower highs intact; price trades below the 4H yellow at 106.21 and the 4H red at 109.05, and the current bounce from the 100.35 pool is relief inside a downtrend — not a reversal
🔥 Current Price: $104.28 (coiling 1.8% under the kill zone, loading the bounce)
💪 Resistance: $106.20 – $107.40 (the triple-layer kiss), deeper ceiling at $109.05
🚀 Bounce Confirmation: 1H close above $105.60 launches the relief leg straight into our short nets
$SOL swept the 100.35 pool and bounced — and every bounce inside a 4H downtrend has one job: return to kiss the broken cluster from below. Three layers sit on the same hairline at 106.2, the trend whispers down, RSI at 48 on both frames says the fuel is neutral and clean, and 1.57B of volume says this sea is institutional deep. The shield was born first at 108.10 above the whole structure, the geometry pays 3.0:1, and the swept pool whispers 100.60. If the bounce comes — we ride it down. If it never comes — a zero-dollar miss and zero regret.
THREE LAYERS, ONE HAIRLINE — THE KILL ZONE WAITS! 📉
Trade with proper risk management ✅
#Write2Earn #3ALA2 #SOL
DYOR.
══════════════════════════════
$NEAR
1
190
·
--
Bullish
$NEAR
{future}(NEARUSDT)
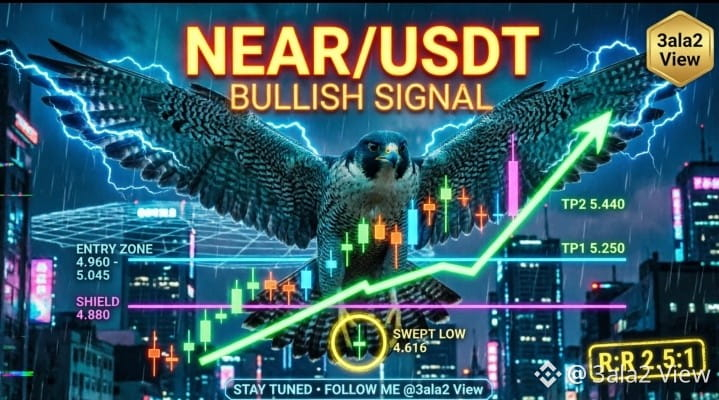
🚨 BULLISH SIGNAL 🚨
Entry Zone: $4.960 – $5.045 — the double cluster kiss: 4H yellow EMA at 5.041 and 1H red EMA at 5.044 stack as the first layer, with 4H blue EMA at 4.983 and 1H blue/yellow EMAs at 4.94–4.95 forming the deeper support platform below
🎯 Targets:
🥇 TP1 5.25$ (60% of position — the broken shelf from October 17)
🥈 TP2 5.44$ (40% of position — the V-recovery ceiling)
🛡️ Stop Loss: $4.88 (below the swept-pool double-bottom at 4.616 and the entire EMA cluster — if the floor breaks, the recovery was a lie)
📊 4H Structure: A textbook double sweep of the 4.52 and 4.616 liquidity pools, followed by a V-recovery to 5.44, a cooldown phase, and now price resting exactly on the reclaimed EMA cluster — higher lows confirmed at 4.62
🔥 Current Price: $5.049 (coiling on the cluster kiss, loading the second leg)
💪 Support: $5.04 (first layer), $4.95 (second layer), $4.62 (swept pool)
🚀 Breakout Confirmation: 1H close above $5.092 flips today's high and opens the road to 5.25
NEAR printed a double-bottom sweep at 4.616, launched a V-recovery to 5.44, and now returns to kiss the reclaimed EMA cluster — the exact spot where momentum was born. RSI at 59 on the 1H and 51 on the 4H says the fuel is clean and the tank is full. The shield was born first at 4.88 under the whole structure, the geometry pays 2.5:1, and the V-recovery whispers 5.44. If the kiss holds — the second leg loads. If the cluster breaks — a planned scratch and the sea owes us nothing.
THE POOL WAS SWEPT, THE KISS REMAINS — NEAR RELOADS! 🚀
Trade with proper risk management ✅
#Write2Earn #3ALA2 #NEAR
DYOR.
══════════════════════════════
$DOT
{future}(DOTUSDT)
$NEAR
🚨 BULLISH SIGNAL 🚨
Entry Zone: $4.960 – $5.045 — the double cluster kiss: 4H yellow EMA at 5.041 and 1H red EMA at 5.044 stack as the first layer, with 4H blue EMA at 4.983 and 1H blue/yellow EMAs at 4.94–4.95 forming the deeper support platform below
🎯 Targets:
🥇 TP1 5.25$ (60% of position — the broken shelf from October 17)
🥈 TP2 5.44$ (40% of position — the V-recovery ceiling)
🛡️ Stop Loss: $4.88 (below the swept-pool double-bottom at 4.616 and the entire EMA cluster — if the floor breaks, the recovery was a lie)
📊 4H Structure: A textbook double sweep of the 4.52 and 4.616 liquidity pools, followed by a V-recovery to 5.44, a cooldown phase, and now price resting exactly on the reclaimed EMA cluster — higher lows confirmed at 4.62
🔥 Current Price: $5.049 (coiling on the cluster kiss, loading the second leg)
💪 Support: $5.04 (first layer), $4.95 (second layer), $4.62 (swept pool)
🚀 Breakout Confirmation: 1H close above $5.092 flips today's high and opens the road to 5.25
NEAR printed a double-bottom sweep at 4.616, launched a V-recovery to 5.44, and now returns to kiss the reclaimed EMA cluster — the exact spot where momentum was born. RSI at 59 on the 1H and 51 on the 4H says the fuel is clean and the tank is full. The shield was born first at 4.88 under the whole structure, the geometry pays 2.5:1, and the V-recovery whispers 5.44. If the kiss holds — the second leg loads. If the cluster breaks — a planned scratch and the sea owes us nothing.
THE POOL WAS SWEPT, THE KISS REMAINS — NEAR RELOADS! 🚀
Trade with proper risk management ✅
#Write2Earn #3ALA2 #NEAR
DYOR.
══════════════════════════════
$DOT
🚨 BULLISH SIGNAL 🚨
Entry Zone: $4.960 – $5.045 — the double cluster kiss: 4H yellow EMA at 5.041 and 1H red EMA at 5.044 stack as the first layer, with 4H blue EMA at 4.983 and 1H blue/yellow EMAs at 4.94–4.95 forming the deeper support platform below
🎯 Targets:
🥇 TP1 5.25$ (60% of position — the broken shelf from October 17)
🥈 TP2 5.44$ (40% of position — the V-recovery ceiling)
🛡️ Stop Loss: $4.88 (below the swept-pool double-bottom at 4.616 and the entire EMA cluster — if the floor breaks, the recovery was a lie)
📊 4H Structure: A textbook double sweep of the 4.52 and 4.616 liquidity pools, followed by a V-recovery to 5.44, a cooldown phase, and now price resting exactly on the reclaimed EMA cluster — higher lows confirmed at 4.62
🔥 Current Price: $5.049 (coiling on the cluster kiss, loading the second leg)
💪 Support: $5.04 (first layer), $4.95 (second layer), $4.62 (swept pool)
🚀 Breakout Confirmation: 1H close above $5.092 flips today's high and opens the road to 5.25
NEAR printed a double-bottom sweep at 4.616, launched a V-recovery to 5.44, and now returns to kiss the reclaimed EMA cluster — the exact spot where momentum was born. RSI at 59 on the 1H and 51 on the 4H says the fuel is clean and the tank is full. The shield was born first at 4.88 under the whole structure, the geometry pays 2.5:1, and the V-recovery whispers 5.44. If the kiss holds — the second leg loads. If the cluster breaks — a planned scratch and the sea owes us nothing.
THE POOL WAS SWEPT, THE KISS REMAINS — NEAR RELOADS! 🚀
Trade with proper risk management ✅
#Write2Earn #3ALA2 #NEAR
DYOR.
══════════════════════════════
$DOT
1
236
·
--
Bearish
$HYPE
{future}(HYPEUSDT)
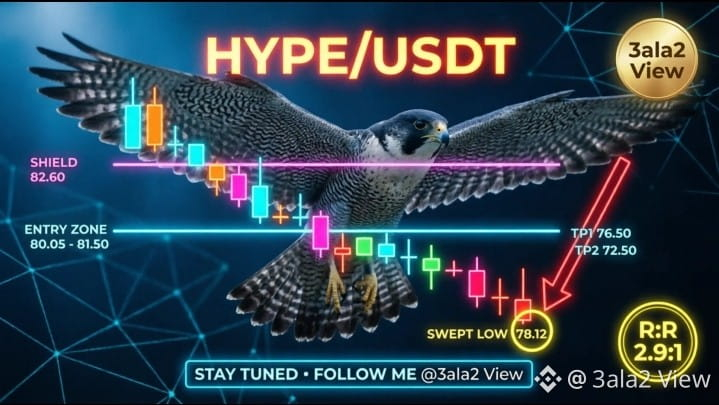
🚨 BEARISH SIGNAL 🚨
Entry Zone: $80.05 – $81.50 — the broken cluster kiss: 1H blue EMA at 80.02 and 1H yellow EMA at 80.99 stack directly over the 4H blue EMA at 81.55, turning the whole 80.0–81.5 band into a resistance ceiling after the breakdown
🎯 Targets:
🥇 TP1 76.50$ (60% of position — the psychological shelf below today's swept low)
🥈 TP2 72.50$ (40% of position — the measured-move extension of the descending ladder)
🛡️ Stop Loss: $82.60 (above today's high at 82.14 and the entire broken cluster — if the ceiling flips back to support, the breakdown was a lie)
📊 4H Structure: A clean descending ladder of lower highs — 95 → 92 → 87 → 82 — with price printing fresh lows at 78.12 and trading below every EMA on both frames: blue 81.55, yellow 83.97, red 85.39 on the 4H
🔥 Current Price: $79.00 (coiling at the rung's edge, loading the relief bounce)
💪 Resistance: $80.05 – $81.50 (the stacked cluster), deeper ceiling at $84.20 (1H red EMA)
🚀 Bounce Confirmation: 1H close above $80.00 launches the dead-cat bounce straight into our short nets
$HYPE built a textbook descending ladder for two full weeks, and every rung held as resistance on the way down. RSI at 37.9 on the 4H and 39.5 on the 1H says the fuel for continuation is loaded, while the 5% daily range and 798M volume say this sea is deep and calm — no mania wicks, no casino noise. The shield was born first at 82.60 above the whole cluster, the geometry pays 2.9:1, and the measured move whispers 72.50. If the bounce comes — we ride it down the ladder. If it never comes — a zero-dollar miss and zero regret.
LOWER HIGHS, HIGHER TRAPS — THE LADDER DESCENDS! 📉
Trade with proper risk management ✅
#Write2Earn #3ALA2 #HYPE
DYOR.
══════════════════════════════
$DOT
{future}(DOTUSDT)
$HYPE
🚨 BEARISH SIGNAL 🚨
Entry Zone: $80.05 – $81.50 — the broken cluster kiss: 1H blue EMA at 80.02 and 1H yellow EMA at 80.99 stack directly over the 4H blue EMA at 81.55, turning the whole 80.0–81.5 band into a resistance ceiling after the breakdown
🎯 Targets:
🥇 TP1 76.50$ (60% of position — the psychological shelf below today's swept low)
🥈 TP2 72.50$ (40% of position — the measured-move extension of the descending ladder)
🛡️ Stop Loss: $82.60 (above today's high at 82.14 and the entire broken cluster — if the ceiling flips back to support, the breakdown was a lie)
📊 4H Structure: A clean descending ladder of lower highs — 95 → 92 → 87 → 82 — with price printing fresh lows at 78.12 and trading below every EMA on both frames: blue 81.55, yellow 83.97, red 85.39 on the 4H
🔥 Current Price: $79.00 (coiling at the rung's edge, loading the relief bounce)
💪 Resistance: $80.05 – $81.50 (the stacked cluster), deeper ceiling at $84.20 (1H red EMA)
🚀 Bounce Confirmation: 1H close above $80.00 launches the dead-cat bounce straight into our short nets
$HYPE built a textbook descending ladder for two full weeks, and every rung held as resistance on the way down. RSI at 37.9 on the 4H and 39.5 on the 1H says the fuel for continuation is loaded, while the 5% daily range and 798M volume say this sea is deep and calm — no mania wicks, no casino noise. The shield was born first at 82.60 above the whole cluster, the geometry pays 2.9:1, and the measured move whispers 72.50. If the bounce comes — we ride it down the ladder. If it never comes — a zero-dollar miss and zero regret.
LOWER HIGHS, HIGHER TRAPS — THE LADDER DESCENDS! 📉
Trade with proper risk management ✅
#Write2Earn #3ALA2 #HYPE
DYOR.
══════════════════════════════
$DOT
🚨 BEARISH SIGNAL 🚨
Entry Zone: $80.05 – $81.50 — the broken cluster kiss: 1H blue EMA at 80.02 and 1H yellow EMA at 80.99 stack directly over the 4H blue EMA at 81.55, turning the whole 80.0–81.5 band into a resistance ceiling after the breakdown
🎯 Targets:
🥇 TP1 76.50$ (60% of position — the psychological shelf below today's swept low)
🥈 TP2 72.50$ (40% of position — the measured-move extension of the descending ladder)
🛡️ Stop Loss: $82.60 (above today's high at 82.14 and the entire broken cluster — if the ceiling flips back to support, the breakdown was a lie)
📊 4H Structure: A clean descending ladder of lower highs — 95 → 92 → 87 → 82 — with price printing fresh lows at 78.12 and trading below every EMA on both frames: blue 81.55, yellow 83.97, red 85.39 on the 4H
🔥 Current Price: $79.00 (coiling at the rung's edge, loading the relief bounce)
💪 Resistance: $80.05 – $81.50 (the stacked cluster), deeper ceiling at $84.20 (1H red EMA)
🚀 Bounce Confirmation: 1H close above $80.00 launches the dead-cat bounce straight into our short nets
$HYPE built a textbook descending ladder for two full weeks, and every rung held as resistance on the way down. RSI at 37.9 on the 4H and 39.5 on the 1H says the fuel for continuation is loaded, while the 5% daily range and 798M volume say this sea is deep and calm — no mania wicks, no casino noise. The shield was born first at 82.60 above the whole cluster, the geometry pays 2.9:1, and the measured move whispers 72.50. If the bounce comes — we ride it down the ladder. If it never comes — a zero-dollar miss and zero regret.
LOWER HIGHS, HIGHER TRAPS — THE LADDER DESCENDS! 📉
Trade with proper risk management ✅
#Write2Earn #3ALA2 #HYPE
DYOR.
══════════════════════════════
$DOT
1
311
·
--
Bearish
$NEAR
{future}(NEARUSDT)
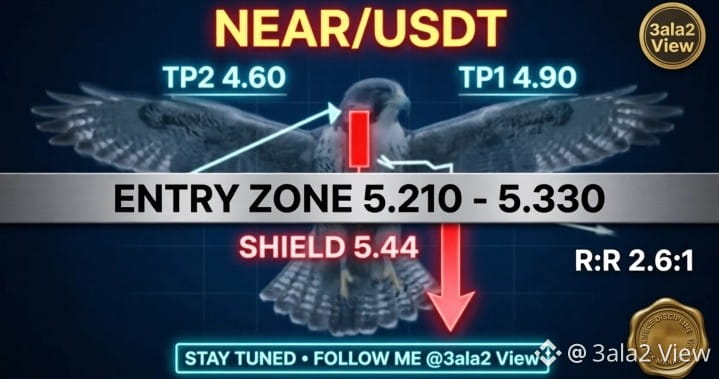
🚨 BEARISH SIGNAL 🚨
Entry Zone: $5.210 – $5.330 — the broken cluster kiss: 4H yellow EMA at 5.208 and 1H red EMA at 5.212 flipped from support to resistance after the vertical crash, with the second layer at 5.324–5.352 capping the full cluster
🎯 Targets:
🥇 TP1 4.90$ (60% of position — the swept-pool shelf)
🥈 TP2 4.60$ (40% of position — the measured-move extension below the crash leg)
🛡️ Stop Loss: $5.44 (above the 1H yellow EMA at 5.208 and the entire broken cluster — if the shelf flips back to support, the crash was a lie)
📊 4H Structure: The 6.00 ceiling broke with a vertical red column that swept the 4.887 liquidity pool, and price now returns to kiss the broken EMAs from below before the real continuation
🔥 Current Price: $5.179 (coiling under the cluster, loading the relief bounce)
💪 Resistance: $5.210 – $5.352 (the broken cluster), deeper ceiling at $5.85
🚀 Bounce Confirmation: 1H close above $5.05 launches the dead-cat bounce straight into our short nets
NEAR broke its October 8 ceiling with a vertical crash that swept the 4.887 pool, and broken clusters have one habit — price returns to kiss them from below before the real move continues. RSI at 38 on the 1H says the bounce is owed, and the cluster at 5.210–5.352 says where it dies. The shield was born first at 5.44 above the whole cluster, the geometry pays 2.6:1, and the measured move whispers 4.60. If the bounce comes — we ride it down. If it never comes — a zero-dollar miss and zero regret.
THE CEILING BROKE — THE CLUSTER IS THE TRAP! 📉
Trade with proper risk management ✅
#Write2Earn #3ALA2 #NEAR
DYOR.
══════════════════════════════
$SOL
{future}(SOLUSDT)
$NEAR
🚨 BEARISH SIGNAL 🚨
Entry Zone: $5.210 – $5.330 — the broken cluster kiss: 4H yellow EMA at 5.208 and 1H red EMA at 5.212 flipped from support to resistance after the vertical crash, with the second layer at 5.324–5.352 capping the full cluster
🎯 Targets:
🥇 TP1 4.90$ (60% of position — the swept-pool shelf)
🥈 TP2 4.60$ (40% of position — the measured-move extension below the crash leg)
🛡️ Stop Loss: $5.44 (above the 1H yellow EMA at 5.208 and the entire broken cluster — if the shelf flips back to support, the crash was a lie)
📊 4H Structure: The 6.00 ceiling broke with a vertical red column that swept the 4.887 liquidity pool, and price now returns to kiss the broken EMAs from below before the real continuation
🔥 Current Price: $5.179 (coiling under the cluster, loading the relief bounce)
💪 Resistance: $5.210 – $5.352 (the broken cluster), deeper ceiling at $5.85
🚀 Bounce Confirmation: 1H close above $5.05 launches the dead-cat bounce straight into our short nets
NEAR broke its October 8 ceiling with a vertical crash that swept the 4.887 pool, and broken clusters have one habit — price returns to kiss them from below before the real move continues. RSI at 38 on the 1H says the bounce is owed, and the cluster at 5.210–5.352 says where it dies. The shield was born first at 5.44 above the whole cluster, the geometry pays 2.6:1, and the measured move whispers 4.60. If the bounce comes — we ride it down. If it never comes — a zero-dollar miss and zero regret.
THE CEILING BROKE — THE CLUSTER IS THE TRAP! 📉
Trade with proper risk management ✅
#Write2Earn #3ALA2 #NEAR
DYOR.
══════════════════════════════
$SOL
🚨 BEARISH SIGNAL 🚨
Entry Zone: $5.210 – $5.330 — the broken cluster kiss: 4H yellow EMA at 5.208 and 1H red EMA at 5.212 flipped from support to resistance after the vertical crash, with the second layer at 5.324–5.352 capping the full cluster
🎯 Targets:
🥇 TP1 4.90$ (60% of position — the swept-pool shelf)
🥈 TP2 4.60$ (40% of position — the measured-move extension below the crash leg)
🛡️ Stop Loss: $5.44 (above the 1H yellow EMA at 5.208 and the entire broken cluster — if the shelf flips back to support, the crash was a lie)
📊 4H Structure: The 6.00 ceiling broke with a vertical red column that swept the 4.887 liquidity pool, and price now returns to kiss the broken EMAs from below before the real continuation
🔥 Current Price: $5.179 (coiling under the cluster, loading the relief bounce)
💪 Resistance: $5.210 – $5.352 (the broken cluster), deeper ceiling at $5.85
🚀 Bounce Confirmation: 1H close above $5.05 launches the dead-cat bounce straight into our short nets
NEAR broke its October 8 ceiling with a vertical crash that swept the 4.887 pool, and broken clusters have one habit — price returns to kiss them from below before the real move continues. RSI at 38 on the 1H says the bounce is owed, and the cluster at 5.210–5.352 says where it dies. The shield was born first at 5.44 above the whole cluster, the geometry pays 2.6:1, and the measured move whispers 4.60. If the bounce comes — we ride it down. If it never comes — a zero-dollar miss and zero regret.
THE CEILING BROKE — THE CLUSTER IS THE TRAP! 📉
Trade with proper risk management ✅
#Write2Earn #3ALA2 #NEAR
DYOR.
══════════════════════════════
$SOL
1
270
·
--
Bullish
$AIA
{alpha}(560x53ec33cd4fa46b9eced9ca3f6db626c5ffcd55cc)
🚨 BULLISH SIGNAL 🚨
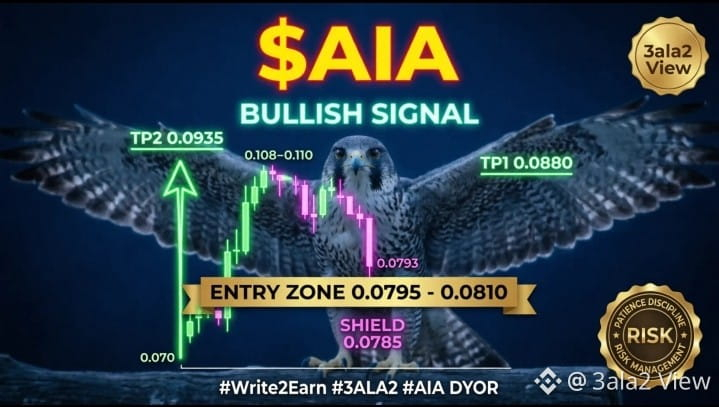
Entry Zone: $0.0795 – $0.0810 — the double kiss: the rising 4H blue EMA at 0.0810 meets the swept-pool edge at 0.0795, exactly where the crash candle printed its low and refused to continue
🎯 Targets:
🥇 TP1 0.0880$ (60% of position — the pre-spike consolidation shelf)
🥈 TP2 0.0935$ (40% of position — the 50% retracement of the crash leg)
🛡️ Stop Loss: $0.0785 (below the swept liquidity pool at 0.0793 — the hunters already fed once, and the shield sits under their table)
📊 4H Trend: Uptrend fully alive — base at 0.070–0.074 exploded to 0.108, the spike swept the tops at 0.110, and the EMAs remain stacked and rising: blue 0.0810 above yellow 0.0766 above red 0.0734
🔥 Current Price: $0.0815 (resting exactly on the 4H blue EMA kiss after the cooldown)
💪 Support: $0.0810 (the kiss), $0.0795 (pool edge), swept floor at $0.0793
🚀 Breakout Confirmation: 1H close above $0.0849 flips the 1H cluster and opens the road to 0.0880
DeAgentAI printed a fifty-percent impulse in two days, swept both tails — the 0.110 top and the 0.0793 bottom — and now cools exactly on the rising 4H blue EMA, the same line that carried the whole impulse. RSI reset to 53 on the 4H and 45 on the 1H: mania washed out, fuel reloaded. The shield was born first at 0.0785 under the swept pool, and the geometry pays 5.2:1 while the crash retracement whispers 0.0935. If the kiss holds — the second leg loads. If the pool breaks twice — a planned scratch and the sea owes us nothing.
THE SPIKE SWEPT, THE KISS REMAINS — DEAGENTAI RELOADS! 🚀
Trade with proper risk management ✅
#Write2Earn #3ALA2 #AIA
DYOR.
══════════════════════════════
$XRP
{future}(XRPUSDT)
$AIA
🚨 BULLISH SIGNAL 🚨
Entry Zone: $0.0795 – $0.0810 — the double kiss: the rising 4H blue EMA at 0.0810 meets the swept-pool edge at 0.0795, exactly where the crash candle printed its low and refused to continue
🎯 Targets:
🥇 TP1 0.0880$ (60% of position — the pre-spike consolidation shelf)
🥈 TP2 0.0935$ (40% of position — the 50% retracement of the crash leg)
🛡️ Stop Loss: $0.0785 (below the swept liquidity pool at 0.0793 — the hunters already fed once, and the shield sits under their table)
📊 4H Trend: Uptrend fully alive — base at 0.070–0.074 exploded to 0.108, the spike swept the tops at 0.110, and the EMAs remain stacked and rising: blue 0.0810 above yellow 0.0766 above red 0.0734
🔥 Current Price: $0.0815 (resting exactly on the 4H blue EMA kiss after the cooldown)
💪 Support: $0.0810 (the kiss), $0.0795 (pool edge), swept floor at $0.0793
🚀 Breakout Confirmation: 1H close above $0.0849 flips the 1H cluster and opens the road to 0.0880
DeAgentAI printed a fifty-percent impulse in two days, swept both tails — the 0.110 top and the 0.0793 bottom — and now cools exactly on the rising 4H blue EMA, the same line that carried the whole impulse. RSI reset to 53 on the 4H and 45 on the 1H: mania washed out, fuel reloaded. The shield was born first at 0.0785 under the swept pool, and the geometry pays 5.2:1 while the crash retracement whispers 0.0935. If the kiss holds — the second leg loads. If the pool breaks twice — a planned scratch and the sea owes us nothing.
THE SPIKE SWEPT, THE KISS REMAINS — DEAGENTAI RELOADS! 🚀
Trade with proper risk management ✅
#Write2Earn #3ALA2 #AIA
DYOR.
══════════════════════════════
$XRP
🚨 BULLISH SIGNAL 🚨
Entry Zone: $0.0795 – $0.0810 — the double kiss: the rising 4H blue EMA at 0.0810 meets the swept-pool edge at 0.0795, exactly where the crash candle printed its low and refused to continue
🎯 Targets:
🥇 TP1 0.0880$ (60% of position — the pre-spike consolidation shelf)
🥈 TP2 0.0935$ (40% of position — the 50% retracement of the crash leg)
🛡️ Stop Loss: $0.0785 (below the swept liquidity pool at 0.0793 — the hunters already fed once, and the shield sits under their table)
📊 4H Trend: Uptrend fully alive — base at 0.070–0.074 exploded to 0.108, the spike swept the tops at 0.110, and the EMAs remain stacked and rising: blue 0.0810 above yellow 0.0766 above red 0.0734
🔥 Current Price: $0.0815 (resting exactly on the 4H blue EMA kiss after the cooldown)
💪 Support: $0.0810 (the kiss), $0.0795 (pool edge), swept floor at $0.0793
🚀 Breakout Confirmation: 1H close above $0.0849 flips the 1H cluster and opens the road to 0.0880
DeAgentAI printed a fifty-percent impulse in two days, swept both tails — the 0.110 top and the 0.0793 bottom — and now cools exactly on the rising 4H blue EMA, the same line that carried the whole impulse. RSI reset to 53 on the 4H and 45 on the 1H: mania washed out, fuel reloaded. The shield was born first at 0.0785 under the swept pool, and the geometry pays 5.2:1 while the crash retracement whispers 0.0935. If the kiss holds — the second leg loads. If the pool breaks twice — a planned scratch and the sea owes us nothing.
THE SPIKE SWEPT, THE KISS REMAINS — DEAGENTAI RELOADS! 🚀
Trade with proper risk management ✅
#Write2Earn #3ALA2 #AIA
DYOR.
══════════════════════════════
$XRP
1
684
·
--
$SOL
{future}(SOLUSDT)
🚨 BEARISH SIGNAL 🚨
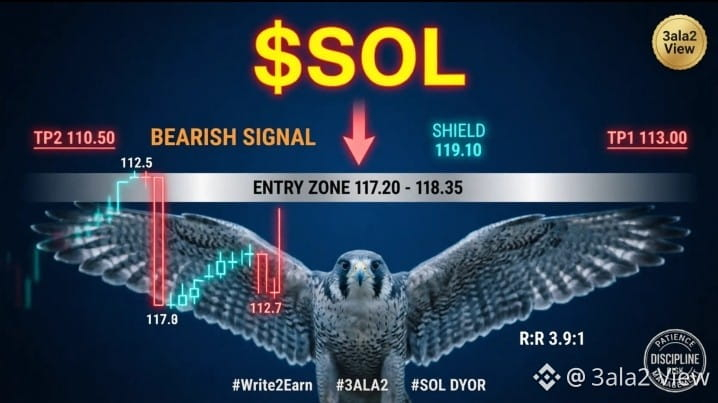
Entry Zone: $117.20 – $118.35 — the broken shelf kiss: 4H blue EMA at 117.22 and 4H yellow EMA at 118.33 flipped from support to resistance after the range breakdown, with the 1H red EMA at 118.63 capping the same cluster
🎯 Targets:
🥇 TP1 113.00$ (60% of position — the breakdown candle's origin floor)
🥈 TP2 110.50$ (40% of position — the measured-move extension below the range)
🛡️ Stop Loss: $119.10 (above the entire broken cluster — if the shelf flips back to support, the breakdown was a lie)
📊 4H Structure: The 117.50–122.00 range broke with a vertical red column, and price now hugs the 4H red EMA at 111.86 with RSI at 24 — oversold floors do not get shorted, they get waited on
🔥 Current Price: $112.70 (coiling at the range floor, loading the relief bounce)
💪 Resistance: $117.20 – $118.63 (the broken shelf cluster), deeper ceiling at $120.50
🚀 Bounce Confirmation: 1H close above $115.25 launches the dead-cat bounce straight into our short nets
$SOL broke its two-week range with conviction, and broken shelves have one habit — price returns to kiss them from below before the real move continues. RSI at 24 on both frames says the bounce is owed, and the cluster at 117.20–118.35 says where it dies. The shield was born first at 119.10 above the whole cluster, the geometry pays 3.9:1, and the measured move whispers 110.50. If the bounce comes — we ride it down. If it never comes — a zero-dollar miss and zero regret.
THE SHELF BROKE — THE BOUNCE IS THE TRAP! 📉
Trade with proper risk management ✅
#Write2Earn #3ALA2 #SOL
DYOR.
══════════════════════════════
$NEAR
{future}(NEARUSDT)
$SOL
🚨 BEARISH SIGNAL 🚨
Entry Zone: $117.20 – $118.35 — the broken shelf kiss: 4H blue EMA at 117.22 and 4H yellow EMA at 118.33 flipped from support to resistance after the range breakdown, with the 1H red EMA at 118.63 capping the same cluster
🎯 Targets:
🥇 TP1 113.00$ (60% of position — the breakdown candle's origin floor)
🥈 TP2 110.50$ (40% of position — the measured-move extension below the range)
🛡️ Stop Loss: $119.10 (above the entire broken cluster — if the shelf flips back to support, the breakdown was a lie)
📊 4H Structure: The 117.50–122.00 range broke with a vertical red column, and price now hugs the 4H red EMA at 111.86 with RSI at 24 — oversold floors do not get shorted, they get waited on
🔥 Current Price: $112.70 (coiling at the range floor, loading the relief bounce)
💪 Resistance: $117.20 – $118.63 (the broken shelf cluster), deeper ceiling at $120.50
🚀 Bounce Confirmation: 1H close above $115.25 launches the dead-cat bounce straight into our short nets
$SOL broke its two-week range with conviction, and broken shelves have one habit — price returns to kiss them from below before the real move continues. RSI at 24 on both frames says the bounce is owed, and the cluster at 117.20–118.35 says where it dies. The shield was born first at 119.10 above the whole cluster, the geometry pays 3.9:1, and the measured move whispers 110.50. If the bounce comes — we ride it down. If it never comes — a zero-dollar miss and zero regret.
THE SHELF BROKE — THE BOUNCE IS THE TRAP! 📉
Trade with proper risk management ✅
#Write2Earn #3ALA2 #SOL
DYOR.
══════════════════════════════
$NEAR
🚨 BEARISH SIGNAL 🚨
Entry Zone: $117.20 – $118.35 — the broken shelf kiss: 4H blue EMA at 117.22 and 4H yellow EMA at 118.33 flipped from support to resistance after the range breakdown, with the 1H red EMA at 118.63 capping the same cluster
🎯 Targets:
🥇 TP1 113.00$ (60% of position — the breakdown candle's origin floor)
🥈 TP2 110.50$ (40% of position — the measured-move extension below the range)
🛡️ Stop Loss: $119.10 (above the entire broken cluster — if the shelf flips back to support, the breakdown was a lie)
📊 4H Structure: The 117.50–122.00 range broke with a vertical red column, and price now hugs the 4H red EMA at 111.86 with RSI at 24 — oversold floors do not get shorted, they get waited on
🔥 Current Price: $112.70 (coiling at the range floor, loading the relief bounce)
💪 Resistance: $117.20 – $118.63 (the broken shelf cluster), deeper ceiling at $120.50
🚀 Bounce Confirmation: 1H close above $115.25 launches the dead-cat bounce straight into our short nets
$SOL broke its two-week range with conviction, and broken shelves have one habit — price returns to kiss them from below before the real move continues. RSI at 24 on both frames says the bounce is owed, and the cluster at 117.20–118.35 says where it dies. The shield was born first at 119.10 above the whole cluster, the geometry pays 3.9:1, and the measured move whispers 110.50. If the bounce comes — we ride it down. If it never comes — a zero-dollar miss and zero regret.
THE SHELF BROKE — THE BOUNCE IS THE TRAP! 📉
Trade with proper risk management ✅
#Write2Earn #3ALA2 #SOL
DYOR.
══════════════════════════════
$NEAR
1
333
·
--
Bullish
$SAND
{future}(SANDUSDT)
🚨 BULLISH SIGNAL 🚨
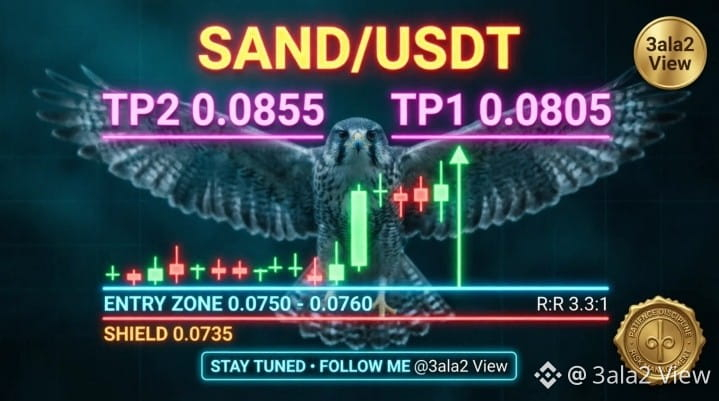
Entry Zone: $0.0750 – $0.0760 — the flag-floor kiss: the rising 1H blue EMA at 0.0753 meets a two-day flag floor that refused to break, and the nets rest exactly at the meeting point
🎯 Targets:
🥇 TP1 0.0805$ (60% of position — the flag ceiling)
🥈 TP2 0.0855$ (40% of position — the flag measured-move extension)
🛡️ Stop Loss: $0.0735 (just under the flag-floor wick — the true invalidation point of the flag, not the far liquidity pool at 0.0712)
📊 4H Structure: A multi-month base at 0.042–0.048 exploded upward on October 2 with half a billion dollars of volume, and the price now compresses in a clean bull flag at the highs
🔥 Current Price: $0.0788 (resting inside the 0.0755–0.0805 flag, waiting to kiss the floor)
💪 Support: $0.0750 – $0.0760 (flag floor + rising 1H blue EMA), deeper shelf at $0.0712
🚀 Breakout Confirmation: 1H close above $0.0805 opens the measured move toward 0.0855
$SAND slept for months between 0.042 and 0.048, then woke up with a vertical impulse on 519 million of volume — and vertical moves breathe in flags before they continue. The flag floor held twice at 0.0755 while the 1H blue EMA rises to kiss it, and our limit nets wait one tick below the meeting point. RSI sits at 61 on the 1H with room to run, the shield was born first at 0.0735 under the flag wick, and the geometry pays 3.3:1 while the measured move whispers 0.0855. If the kiss comes — we ride the launchpad. If it flies without us — a zero-dollar miss and zero regret.
THE BASE BROKE — THE FLAG IS THE LAUNCHPAD! 🚀
Trade with proper risk management ✅
#Write2Earn #3ALA2 #SAND
DYOR.
══════════════════════════════
$FIL
{future}(FILUSDT)
$SAND
🚨 BULLISH SIGNAL 🚨
Entry Zone: $0.0750 – $0.0760 — the flag-floor kiss: the rising 1H blue EMA at 0.0753 meets a two-day flag floor that refused to break, and the nets rest exactly at the meeting point
🎯 Targets:
🥇 TP1 0.0805$ (60% of position — the flag ceiling)
🥈 TP2 0.0855$ (40% of position — the flag measured-move extension)
🛡️ Stop Loss: $0.0735 (just under the flag-floor wick — the true invalidation point of the flag, not the far liquidity pool at 0.0712)
📊 4H Structure: A multi-month base at 0.042–0.048 exploded upward on October 2 with half a billion dollars of volume, and the price now compresses in a clean bull flag at the highs
🔥 Current Price: $0.0788 (resting inside the 0.0755–0.0805 flag, waiting to kiss the floor)
💪 Support: $0.0750 – $0.0760 (flag floor + rising 1H blue EMA), deeper shelf at $0.0712
🚀 Breakout Confirmation: 1H close above $0.0805 opens the measured move toward 0.0855
$SAND slept for months between 0.042 and 0.048, then woke up with a vertical impulse on 519 million of volume — and vertical moves breathe in flags before they continue. The flag floor held twice at 0.0755 while the 1H blue EMA rises to kiss it, and our limit nets wait one tick below the meeting point. RSI sits at 61 on the 1H with room to run, the shield was born first at 0.0735 under the flag wick, and the geometry pays 3.3:1 while the measured move whispers 0.0855. If the kiss comes — we ride the launchpad. If it flies without us — a zero-dollar miss and zero regret.
THE BASE BROKE — THE FLAG IS THE LAUNCHPAD! 🚀
Trade with proper risk management ✅
#Write2Earn #3ALA2 #SAND
DYOR.
══════════════════════════════
$FIL
🚨 BULLISH SIGNAL 🚨
Entry Zone: $0.0750 – $0.0760 — the flag-floor kiss: the rising 1H blue EMA at 0.0753 meets a two-day flag floor that refused to break, and the nets rest exactly at the meeting point
🎯 Targets:
🥇 TP1 0.0805$ (60% of position — the flag ceiling)
🥈 TP2 0.0855$ (40% of position — the flag measured-move extension)
🛡️ Stop Loss: $0.0735 (just under the flag-floor wick — the true invalidation point of the flag, not the far liquidity pool at 0.0712)
📊 4H Structure: A multi-month base at 0.042–0.048 exploded upward on October 2 with half a billion dollars of volume, and the price now compresses in a clean bull flag at the highs
🔥 Current Price: $0.0788 (resting inside the 0.0755–0.0805 flag, waiting to kiss the floor)
💪 Support: $0.0750 – $0.0760 (flag floor + rising 1H blue EMA), deeper shelf at $0.0712
🚀 Breakout Confirmation: 1H close above $0.0805 opens the measured move toward 0.0855
$SAND slept for months between 0.042 and 0.048, then woke up with a vertical impulse on 519 million of volume — and vertical moves breathe in flags before they continue. The flag floor held twice at 0.0755 while the 1H blue EMA rises to kiss it, and our limit nets wait one tick below the meeting point. RSI sits at 61 on the 1H with room to run, the shield was born first at 0.0735 under the flag wick, and the geometry pays 3.3:1 while the measured move whispers 0.0855. If the kiss comes — we ride the launchpad. If it flies without us — a zero-dollar miss and zero regret.
THE BASE BROKE — THE FLAG IS THE LAUNCHPAD! 🚀
Trade with proper risk management ✅
#Write2Earn #3ALA2 #SAND
DYOR.
══════════════════════════════
$FIL
1
1.1k
·
--
Bullish
$LINK
{future}(LINKUSDT)
🚨 BULLISH SIGNAL 🚨
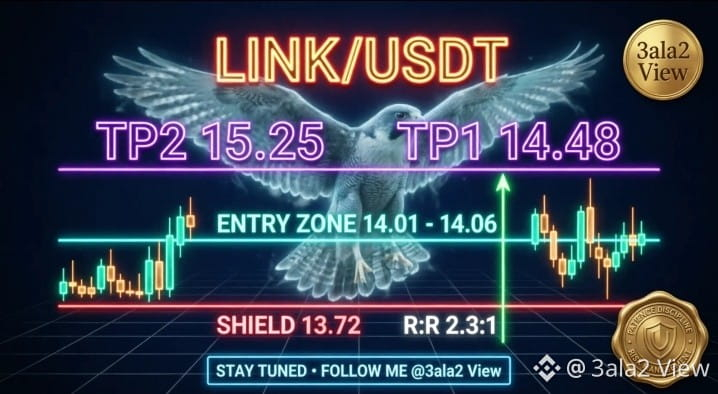
Entry Zone: $14.01 – $14.06 — the triple-EMA kiss: 1H yellow 14.063, blue 14.052 and red 14.023 glued into one point, with the 4H yellow EMA at 14.027 stacking under the same floor
🎯 Targets:
🥇 TP1 14.48$ (60% of position — the pre-drop consolidation shelf)
🥈 TP2 15.25$ (40% of position — the ceiling retest under the 15.50 top)
🛡️ Stop Loss: $13.72 (below the swept liquidity pool at 13.78–13.85 — the hunters already fed on October 3, and the shield sits under their table, never on it)
📊 4H Trend: Uptrend alive since 10.80 — EMAs stacked blue 14.105 above yellow 14.027 above red 12.755, price coiling right on the kiss
🔥 Current Price: $14.11 (twenty 1H candles compressed inside 14.00–14.20 = a loaded spring)
💪 Support: $14.02 – $14.06 (the triple kiss), swept pool floor at $13.78
🚀 Breakout Confirmation: 1H close above $14.30 unwinds the coil toward 14.48 and 15.25
$LINK climbed from 10.80 to 15.90, breathed down to 13.78 where the liquidity hunters swept their pool, and now sits compressed in a twenty-candle coil with three 1H EMAs and the 4H yellow all kissing at the same point — 14.02 to 14.06. RSI rests at 57 on the 1H and 50 on the 4H: clean fuel on both frames, zero exhaustion. The shield was born first at 13.72 under the swept pool, and the geometry pays 2.3:1 while the coil whispers its measured move. If the kiss holds — the spring unwinds. If it breaks — a planned scratch and the sea owes us nothing.
THREE EMAS, ONE KISS — THE COIL IS LOADED! 🚀
Trade with proper risk management ✅
#Write2Earn #3ALA2 #LINK
DYOR.
══════════════════════════════
$CRV
{future}(CRVUSDT)
$LINK
🚨 BULLISH SIGNAL 🚨
Entry Zone: $14.01 – $14.06 — the triple-EMA kiss: 1H yellow 14.063, blue 14.052 and red 14.023 glued into one point, with the 4H yellow EMA at 14.027 stacking under the same floor
🎯 Targets:
🥇 TP1 14.48$ (60% of position — the pre-drop consolidation shelf)
🥈 TP2 15.25$ (40% of position — the ceiling retest under the 15.50 top)
🛡️ Stop Loss: $13.72 (below the swept liquidity pool at 13.78–13.85 — the hunters already fed on October 3, and the shield sits under their table, never on it)
📊 4H Trend: Uptrend alive since 10.80 — EMAs stacked blue 14.105 above yellow 14.027 above red 12.755, price coiling right on the kiss
🔥 Current Price: $14.11 (twenty 1H candles compressed inside 14.00–14.20 = a loaded spring)
💪 Support: $14.02 – $14.06 (the triple kiss), swept pool floor at $13.78
🚀 Breakout Confirmation: 1H close above $14.30 unwinds the coil toward 14.48 and 15.25
$LINK climbed from 10.80 to 15.90, breathed down to 13.78 where the liquidity hunters swept their pool, and now sits compressed in a twenty-candle coil with three 1H EMAs and the 4H yellow all kissing at the same point — 14.02 to 14.06. RSI rests at 57 on the 1H and 50 on the 4H: clean fuel on both frames, zero exhaustion. The shield was born first at 13.72 under the swept pool, and the geometry pays 2.3:1 while the coil whispers its measured move. If the kiss holds — the spring unwinds. If it breaks — a planned scratch and the sea owes us nothing.
THREE EMAS, ONE KISS — THE COIL IS LOADED! 🚀
Trade with proper risk management ✅
#Write2Earn #3ALA2 #LINK
DYOR.
══════════════════════════════
$CRV
🚨 BULLISH SIGNAL 🚨
Entry Zone: $14.01 – $14.06 — the triple-EMA kiss: 1H yellow 14.063, blue 14.052 and red 14.023 glued into one point, with the 4H yellow EMA at 14.027 stacking under the same floor
🎯 Targets:
🥇 TP1 14.48$ (60% of position — the pre-drop consolidation shelf)
🥈 TP2 15.25$ (40% of position — the ceiling retest under the 15.50 top)
🛡️ Stop Loss: $13.72 (below the swept liquidity pool at 13.78–13.85 — the hunters already fed on October 3, and the shield sits under their table, never on it)
📊 4H Trend: Uptrend alive since 10.80 — EMAs stacked blue 14.105 above yellow 14.027 above red 12.755, price coiling right on the kiss
🔥 Current Price: $14.11 (twenty 1H candles compressed inside 14.00–14.20 = a loaded spring)
💪 Support: $14.02 – $14.06 (the triple kiss), swept pool floor at $13.78
🚀 Breakout Confirmation: 1H close above $14.30 unwinds the coil toward 14.48 and 15.25
$LINK climbed from 10.80 to 15.90, breathed down to 13.78 where the liquidity hunters swept their pool, and now sits compressed in a twenty-candle coil with three 1H EMAs and the 4H yellow all kissing at the same point — 14.02 to 14.06. RSI rests at 57 on the 1H and 50 on the 4H: clean fuel on both frames, zero exhaustion. The shield was born first at 13.72 under the swept pool, and the geometry pays 2.3:1 while the coil whispers its measured move. If the kiss holds — the spring unwinds. If it breaks — a planned scratch and the sea owes us nothing.
THREE EMAS, ONE KISS — THE COIL IS LOADED! 🚀
Trade with proper risk management ✅
#Write2Earn #3ALA2 #LINK
DYOR.
══════════════════════════════
$CRV
74
·
--
Bearish
$NEAR
{future}(NEARUSDT)
🚨 BEARISH SIGNAL 🚨
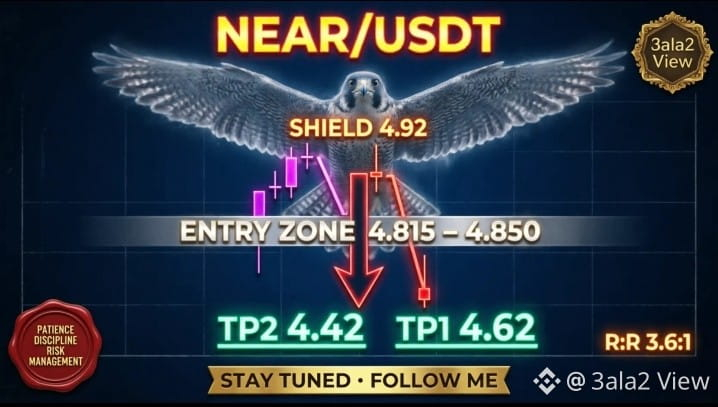
Entry Zone: $4.815 – $4.850 — the broken EMA cluster kiss: 1H red EMA at 4.816 and yellow EMA at 4.853 now form resistance above us after the breakdown from the double-top ceiling
🎯 Targets:
🥇 TP1 4.62$ (60% of position — the October 1 swing low shelf)
🥈 TP2 4.42$ (40% of position — the range measured-move extension)
🛡️ Stop Loss: $4.92 (above the 4H yellow EMA at 4.814 and 1H yellow EMA at 4.853 — if the broken cluster flips back above us, the breakdown was a lie)
📊 4H Structure: Double top printed at 5.50-5.55, then a clean breakdown below the 4H yellow EMA — the uptrend is dead and the bears took control
🔥 Current Price: $4.75 (retesting the broken EMA cluster from below)
💪 Resistance: $4.815 – $4.850 (the flipped shelf), deeper ceiling at $4.95
🚀 Breakdown Confirmation: 1H close below $4.62 opens the floor to 4.42 and beyond
$NEAR printed two tops at 5.50 and 5.55, then broke the yellow EMA with a red candle of conviction — and now walks back to kiss the broken cluster from below, exactly where our short nets wait. The shield was born first at 4.92 above the cluster, RSI sits at 41 on the 4H with clean bearish fuel, and the geometry pays 3.6:1 while the double-top measured-move whispers 4.42. If the cluster holds as resistance — we ride the breakdown. If it flips — a planned scratch and the sea gives us another hunt.
THE CEILING BROKE — THE CLUSTER IS THE ROOF! 📉
Trade with proper risk management ✅
#Write2Earn #3ALA2 #NEAR
DYOR.
══════════════════════════════
$SOL
{future}(SOLUSDT)
$NEAR
🚨 BEARISH SIGNAL 🚨
Entry Zone: $4.815 – $4.850 — the broken EMA cluster kiss: 1H red EMA at 4.816 and yellow EMA at 4.853 now form resistance above us after the breakdown from the double-top ceiling
🎯 Targets:
🥇 TP1 4.62$ (60% of position — the October 1 swing low shelf)
🥈 TP2 4.42$ (40% of position — the range measured-move extension)
🛡️ Stop Loss: $4.92 (above the 4H yellow EMA at 4.814 and 1H yellow EMA at 4.853 — if the broken cluster flips back above us, the breakdown was a lie)
📊 4H Structure: Double top printed at 5.50-5.55, then a clean breakdown below the 4H yellow EMA — the uptrend is dead and the bears took control
🔥 Current Price: $4.75 (retesting the broken EMA cluster from below)
💪 Resistance: $4.815 – $4.850 (the flipped shelf), deeper ceiling at $4.95
🚀 Breakdown Confirmation: 1H close below $4.62 opens the floor to 4.42 and beyond
$NEAR printed two tops at 5.50 and 5.55, then broke the yellow EMA with a red candle of conviction — and now walks back to kiss the broken cluster from below, exactly where our short nets wait. The shield was born first at 4.92 above the cluster, RSI sits at 41 on the 4H with clean bearish fuel, and the geometry pays 3.6:1 while the double-top measured-move whispers 4.42. If the cluster holds as resistance — we ride the breakdown. If it flips — a planned scratch and the sea gives us another hunt.
THE CEILING BROKE — THE CLUSTER IS THE ROOF! 📉
Trade with proper risk management ✅
#Write2Earn #3ALA2 #NEAR
DYOR.
══════════════════════════════
$SOL
🚨 BEARISH SIGNAL 🚨
Entry Zone: $4.815 – $4.850 — the broken EMA cluster kiss: 1H red EMA at 4.816 and yellow EMA at 4.853 now form resistance above us after the breakdown from the double-top ceiling
🎯 Targets:
🥇 TP1 4.62$ (60% of position — the October 1 swing low shelf)
🥈 TP2 4.42$ (40% of position — the range measured-move extension)
🛡️ Stop Loss: $4.92 (above the 4H yellow EMA at 4.814 and 1H yellow EMA at 4.853 — if the broken cluster flips back above us, the breakdown was a lie)
📊 4H Structure: Double top printed at 5.50-5.55, then a clean breakdown below the 4H yellow EMA — the uptrend is dead and the bears took control
🔥 Current Price: $4.75 (retesting the broken EMA cluster from below)
💪 Resistance: $4.815 – $4.850 (the flipped shelf), deeper ceiling at $4.95
🚀 Breakdown Confirmation: 1H close below $4.62 opens the floor to 4.42 and beyond
$NEAR printed two tops at 5.50 and 5.55, then broke the yellow EMA with a red candle of conviction — and now walks back to kiss the broken cluster from below, exactly where our short nets wait. The shield was born first at 4.92 above the cluster, RSI sits at 41 on the 4H with clean bearish fuel, and the geometry pays 3.6:1 while the double-top measured-move whispers 4.42. If the cluster holds as resistance — we ride the breakdown. If it flips — a planned scratch and the sea gives us another hunt.
THE CEILING BROKE — THE CLUSTER IS THE ROOF! 📉
Trade with proper risk management ✅
#Write2Earn #3ALA2 #NEAR
DYOR.
══════════════════════════════
$SOL
1
197
·
--
Bullish
$SOL
{future}(SOLUSDT)
🚨 BULLISH SIGNAL 🚨
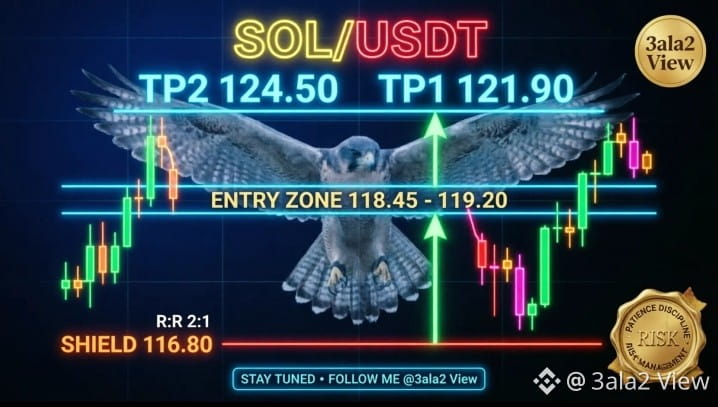
Entry Zone: $118.45 – $119.20 — the double-shelf kiss: 1H blue and yellow EMAs glued at 119.35, with the 4H yellow and 1H red EMA stacking a second shelf at 118.40
🎯 Targets:
🥇 TP1 121.90$ (60% of position — the pre-crash consolidation shelf)
🥈 TP2 124.50$ (40% of position — the range ceiling test)
🛡️ Stop Loss: $116.80 (below the double-wick liquidity pool at 117.05/117.20 — the shield sits under the hunt zone, never above it)
📊 4H Structure: Range 117–125 with price at its kissing floor — two wicks printed the same bottom twice, and the EMAs now stack under the price like a loaded spring
🔥 Current Price: $119.55 (resting right on the kiss after the V-recovery)
💪 Support: $118.40 – $119.40 (the double shelf), deeper floor at $117.05
🚀 Breakout Confirmation: 1H close above $121.00 opens the road to 121.90 and 123.40
$SOL trades the deepest sea we have ever fished — 2.07 billion dollars of daily volume — and deep seas move with respect. The price swept 117 twice, refused twice, and now hugs the double-EMA kiss at 118.4–119.4 with RSI at 51 on both frames: clean fuel, zero exhaustion. The shield was born first at 116.80, under the liquidity pool where the hunters feed, and the geometry pays a honest 2:1. If the kiss holds — we ride the range from floor to ceiling. If the pool breaks — a planned scratch and the sea owes us nothing.
TWO WICKS, ONE FLOOR — THE KISS IS LOADED! 🚀
Trade with proper risk management ✅
#Write2Earn #3ALA2 #SOL
DYOR.
══════════════════════════════
$TRX
{future}(TRXUSDT)
$SOL
🚨 BULLISH SIGNAL 🚨
Entry Zone: $118.45 – $119.20 — the double-shelf kiss: 1H blue and yellow EMAs glued at 119.35, with the 4H yellow and 1H red EMA stacking a second shelf at 118.40
🎯 Targets:
🥇 TP1 121.90$ (60% of position — the pre-crash consolidation shelf)
🥈 TP2 124.50$ (40% of position — the range ceiling test)
🛡️ Stop Loss: $116.80 (below the double-wick liquidity pool at 117.05/117.20 — the shield sits under the hunt zone, never above it)
📊 4H Structure: Range 117–125 with price at its kissing floor — two wicks printed the same bottom twice, and the EMAs now stack under the price like a loaded spring
🔥 Current Price: $119.55 (resting right on the kiss after the V-recovery)
💪 Support: $118.40 – $119.40 (the double shelf), deeper floor at $117.05
🚀 Breakout Confirmation: 1H close above $121.00 opens the road to 121.90 and 123.40
$SOL trades the deepest sea we have ever fished — 2.07 billion dollars of daily volume — and deep seas move with respect. The price swept 117 twice, refused twice, and now hugs the double-EMA kiss at 118.4–119.4 with RSI at 51 on both frames: clean fuel, zero exhaustion. The shield was born first at 116.80, under the liquidity pool where the hunters feed, and the geometry pays a honest 2:1. If the kiss holds — we ride the range from floor to ceiling. If the pool breaks — a planned scratch and the sea owes us nothing.
TWO WICKS, ONE FLOOR — THE KISS IS LOADED! 🚀
Trade with proper risk management ✅
#Write2Earn #3ALA2 #SOL
DYOR.
══════════════════════════════
$TRX
🚨 BULLISH SIGNAL 🚨
Entry Zone: $118.45 – $119.20 — the double-shelf kiss: 1H blue and yellow EMAs glued at 119.35, with the 4H yellow and 1H red EMA stacking a second shelf at 118.40
🎯 Targets:
🥇 TP1 121.90$ (60% of position — the pre-crash consolidation shelf)
🥈 TP2 124.50$ (40% of position — the range ceiling test)
🛡️ Stop Loss: $116.80 (below the double-wick liquidity pool at 117.05/117.20 — the shield sits under the hunt zone, never above it)
📊 4H Structure: Range 117–125 with price at its kissing floor — two wicks printed the same bottom twice, and the EMAs now stack under the price like a loaded spring
🔥 Current Price: $119.55 (resting right on the kiss after the V-recovery)
💪 Support: $118.40 – $119.40 (the double shelf), deeper floor at $117.05
🚀 Breakout Confirmation: 1H close above $121.00 opens the road to 121.90 and 123.40
$SOL trades the deepest sea we have ever fished — 2.07 billion dollars of daily volume — and deep seas move with respect. The price swept 117 twice, refused twice, and now hugs the double-EMA kiss at 118.4–119.4 with RSI at 51 on both frames: clean fuel, zero exhaustion. The shield was born first at 116.80, under the liquidity pool where the hunters feed, and the geometry pays a honest 2:1. If the kiss holds — we ride the range from floor to ceiling. If the pool breaks — a planned scratch and the sea owes us nothing.
TWO WICKS, ONE FLOOR — THE KISS IS LOADED! 🚀
Trade with proper risk management ✅
#Write2Earn #3ALA2 #SOL
DYOR.
══════════════════════════════
$TRX
1
149
·
--
Bullish
$ADA
{future}(ADAUSDT)
🚨 BULLISH SIGNAL 🚨
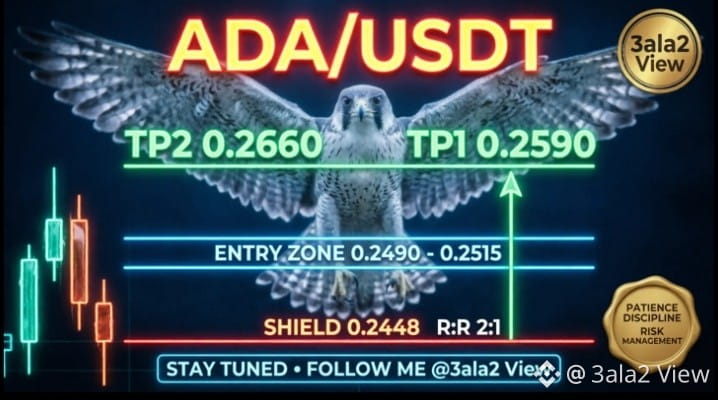
Entry Zone: $0.2490 – $0.2515 — the breakout shelf retest: a 10-day range (0.245–0.255) broke upward on volume, and the nets rest where the shelf should kiss back
🎯 Targets:
🥇 TP1 0.2590$ (60% of position — just under the 0.2600 range ceiling)
🥈 TP2 0.2660$ (40% of position — the range measured-move extension)
🛡️ Stop Loss: $0.2448 (below the 1H EMA cluster at 0.2461–0.2492 — if the shelf flips back under us, the breakout was a lie)
📊 4H Trend: Uptrend alive — EMAs stacked blue 0.2482 above yellow 0.2462 above red 0.2269, price riding above all three
🔥 Current Price: $0.2538 (kissing the breakout shelf from above after the volume candle)
💪 Support: $0.2490 – $0.2515 (the flipped shelf), deeper floor at $0.2460
🚀 Breakout Confirmation: 1H close above $0.2573 opens the ceiling toward 0.2600 and beyond
$ADA printed ten days of sideways compression between 0.245 and 0.255, then broke the lid with a real volume candle — and broke it cleanly. The price now walks back to kiss the shelf it stood on, exactly where our limit nets wait: 0.2490 to 0.2515. The shield was born first at 0.2448, RSI sits at 57 on the 4H with clean fuel, and the geometry pays 2:1 while the range measured-move whispers 0.2660. If the shelf holds — we ride the compression release. If it flips — a one-dollar scratch and the sea gives us another hunt.
THE RANGE BROKE — THE SHELF IS THE FLOOR! 🚀
Trade with proper risk management ✅
#Write2Earn #3ALA2 #ADA
DYOR.
══════════════════════════════
$AVAX
{future}(AVAXUSDT)
$ADA
🚨 BULLISH SIGNAL 🚨
Entry Zone: $0.2490 – $0.2515 — the breakout shelf retest: a 10-day range (0.245–0.255) broke upward on volume, and the nets rest where the shelf should kiss back
🎯 Targets:
🥇 TP1 0.2590$ (60% of position — just under the 0.2600 range ceiling)
🥈 TP2 0.2660$ (40% of position — the range measured-move extension)
🛡️ Stop Loss: $0.2448 (below the 1H EMA cluster at 0.2461–0.2492 — if the shelf flips back under us, the breakout was a lie)
📊 4H Trend: Uptrend alive — EMAs stacked blue 0.2482 above yellow 0.2462 above red 0.2269, price riding above all three
🔥 Current Price: $0.2538 (kissing the breakout shelf from above after the volume candle)
💪 Support: $0.2490 – $0.2515 (the flipped shelf), deeper floor at $0.2460
🚀 Breakout Confirmation: 1H close above $0.2573 opens the ceiling toward 0.2600 and beyond
$ADA printed ten days of sideways compression between 0.245 and 0.255, then broke the lid with a real volume candle — and broke it cleanly. The price now walks back to kiss the shelf it stood on, exactly where our limit nets wait: 0.2490 to 0.2515. The shield was born first at 0.2448, RSI sits at 57 on the 4H with clean fuel, and the geometry pays 2:1 while the range measured-move whispers 0.2660. If the shelf holds — we ride the compression release. If it flips — a one-dollar scratch and the sea gives us another hunt.
THE RANGE BROKE — THE SHELF IS THE FLOOR! 🚀
Trade with proper risk management ✅
#Write2Earn #3ALA2 #ADA
DYOR.
══════════════════════════════
$AVAX
🚨 BULLISH SIGNAL 🚨
Entry Zone: $0.2490 – $0.2515 — the breakout shelf retest: a 10-day range (0.245–0.255) broke upward on volume, and the nets rest where the shelf should kiss back
🎯 Targets:
🥇 TP1 0.2590$ (60% of position — just under the 0.2600 range ceiling)
🥈 TP2 0.2660$ (40% of position — the range measured-move extension)
🛡️ Stop Loss: $0.2448 (below the 1H EMA cluster at 0.2461–0.2492 — if the shelf flips back under us, the breakout was a lie)
📊 4H Trend: Uptrend alive — EMAs stacked blue 0.2482 above yellow 0.2462 above red 0.2269, price riding above all three
🔥 Current Price: $0.2538 (kissing the breakout shelf from above after the volume candle)
💪 Support: $0.2490 – $0.2515 (the flipped shelf), deeper floor at $0.2460
🚀 Breakout Confirmation: 1H close above $0.2573 opens the ceiling toward 0.2600 and beyond
$ADA printed ten days of sideways compression between 0.245 and 0.255, then broke the lid with a real volume candle — and broke it cleanly. The price now walks back to kiss the shelf it stood on, exactly where our limit nets wait: 0.2490 to 0.2515. The shield was born first at 0.2448, RSI sits at 57 on the 4H with clean fuel, and the geometry pays 2:1 while the range measured-move whispers 0.2660. If the shelf holds — we ride the compression release. If it flips — a one-dollar scratch and the sea gives us another hunt.
THE RANGE BROKE — THE SHELF IS THE FLOOR! 🚀
Trade with proper risk management ✅
#Write2Earn #3ALA2 #ADA
DYOR.
══════════════════════════════
$AVAX
1
1
334
·
--
Bullish
$AVAX
{future}(AVAXUSDT)
🚨 BULLISH SIGNAL 🚨
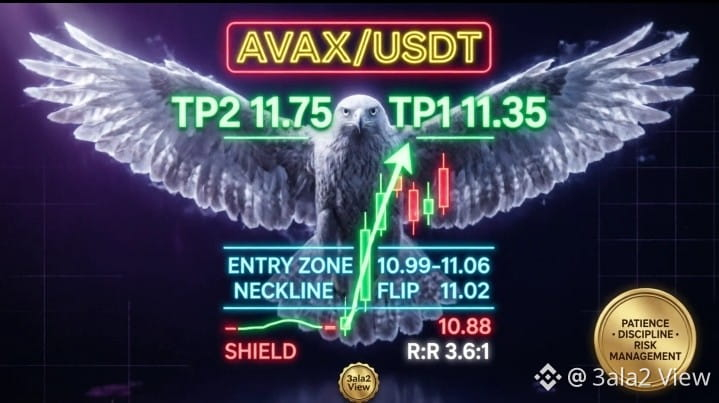
Entry Zone: $10.99 – $11.06 — the neckline retest: yesterday's resistance is today's floor, and the nets rest exactly at the kiss
🎯 Targets:
🥇 TP1 11.35$ (60% — the Oct 1 swing high retest)
🥈 TP2 11.75$ (40% — the shelf under the 11.78 ceiling)
🛡️ Stop Loss: $10.88 (below the breakout shelf — if the neckline flip fails, the setup was a lie)
📊 4H Trend: Uptrend intact — EMAs stacked blue 10.997 above yellow 10.757 above red 9.230, price riding above all
🔥 Current Price: $11.06 (sitting on the flipped neckline after the clean breakout to 11.20)
💪 Support: $10.99 – $11.06 (the flipped neck), deeper shelf at $10.95
🚀 Breakout Confirmation: 1H close above $11.20 opens the road to 11.35 and beyond
$AVAX broke the 11.02 neckline with volume, then walked back to kiss it from above — the classic role flip. The first net filled live at 11.054, the second rests at 10.99 for a deeper kiss, and the shield was born first at 10.88 for both. RSI at 53.6 on the 4H means clean fuel, and a 3.6:1 geometry does the rest. If the neck holds — we ride. If it breaks — a small planned scratch and the next hunt.
RESISTANCE DIED — SUPPORT WAS BORN! 🚀
Trade with proper risk management ✅
#Write2Earn #3ALA2 #AVAX
DYOR.
══════════════════════════════
$SOL
{future}(SOLUSDT)
$AVAX
🚨 BULLISH SIGNAL 🚨
Entry Zone: $10.99 – $11.06 — the neckline retest: yesterday's resistance is today's floor, and the nets rest exactly at the kiss
🎯 Targets:
🥇 TP1 11.35$ (60% — the Oct 1 swing high retest)
🥈 TP2 11.75$ (40% — the shelf under the 11.78 ceiling)
🛡️ Stop Loss: $10.88 (below the breakout shelf — if the neckline flip fails, the setup was a lie)
📊 4H Trend: Uptrend intact — EMAs stacked blue 10.997 above yellow 10.757 above red 9.230, price riding above all
🔥 Current Price: $11.06 (sitting on the flipped neckline after the clean breakout to 11.20)
💪 Support: $10.99 – $11.06 (the flipped neck), deeper shelf at $10.95
🚀 Breakout Confirmation: 1H close above $11.20 opens the road to 11.35 and beyond
$AVAX broke the 11.02 neckline with volume, then walked back to kiss it from above — the classic role flip. The first net filled live at 11.054, the second rests at 10.99 for a deeper kiss, and the shield was born first at 10.88 for both. RSI at 53.6 on the 4H means clean fuel, and a 3.6:1 geometry does the rest. If the neck holds — we ride. If it breaks — a small planned scratch and the next hunt.
RESISTANCE DIED — SUPPORT WAS BORN! 🚀
Trade with proper risk management ✅
#Write2Earn #3ALA2 #AVAX
DYOR.
══════════════════════════════
$SOL
🚨 BULLISH SIGNAL 🚨
Entry Zone: $10.99 – $11.06 — the neckline retest: yesterday's resistance is today's floor, and the nets rest exactly at the kiss
🎯 Targets:
🥇 TP1 11.35$ (60% — the Oct 1 swing high retest)
🥈 TP2 11.75$ (40% — the shelf under the 11.78 ceiling)
🛡️ Stop Loss: $10.88 (below the breakout shelf — if the neckline flip fails, the setup was a lie)
📊 4H Trend: Uptrend intact — EMAs stacked blue 10.997 above yellow 10.757 above red 9.230, price riding above all
🔥 Current Price: $11.06 (sitting on the flipped neckline after the clean breakout to 11.20)
💪 Support: $10.99 – $11.06 (the flipped neck), deeper shelf at $10.95
🚀 Breakout Confirmation: 1H close above $11.20 opens the road to 11.35 and beyond
$AVAX broke the 11.02 neckline with volume, then walked back to kiss it from above — the classic role flip. The first net filled live at 11.054, the second rests at 10.99 for a deeper kiss, and the shield was born first at 10.88 for both. RSI at 53.6 on the 4H means clean fuel, and a 3.6:1 geometry does the rest. If the neck holds — we ride. If it breaks — a small planned scratch and the next hunt.
RESISTANCE DIED — SUPPORT WAS BORN! 🚀
Trade with proper risk management ✅
#Write2Earn #3ALA2 #AVAX
DYOR.
══════════════════════════════
$SOL
1
1
258
·
--
Bullish
$AVAX
{future}(AVAXUSDT)
🚨 BULLISH SIGNAL 🚨
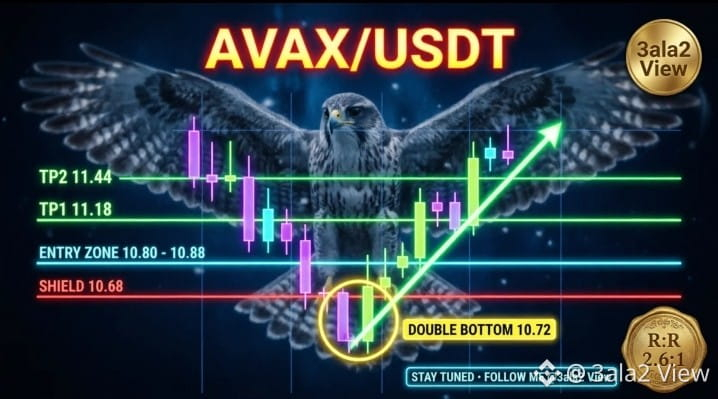
Entry Zone: $10.80 – $10.88 — limit nets cast at the double-bottom retest, we let the price come to us
🎯 Targets:
🥇 TP1 11.18$ (60% of position — the neckline cluster)
🥈 TP2 11.44$ (40% of position — the shelf before the 11.78 high)
🛡️ Stop Loss: $10.68 (below the double-bottom floor at 10.72 — if that breaks, the setup was a lie)
📊 4H Structure: Double bottom printed twice at 10.72 and rejected hard both times = solid ground
🔥 Current Price: $10.95 (bounce candle in progress, neckline at 11.02 is the trigger)
💪 Support: $10.80 – $10.88 (the retest zone), deeper floor at $10.72
🚀 Breakout Confirmation: 1H close above $11.02 flips the plan from retest to momentum
$AVAX defended the same floor twice in four days — 10.72 is not a coincidence, it is a wall. The limit nets rest exactly where the retest should kiss: 10.80 to 10.88, with the shield born first at 10.68. If the bounce runs without us — a $0 miss and zero FOMO. If the retest comes — we ride a 2.6:1 setup with the double-bottom wall under our feet.
THE WALL HELD TWICE — THE NETS ARE CAST! 🚀
Trade with proper risk management ✅
#Write2Earn #3ALA2 #AVAX
DYOR.
══════════════════════════════
$BNB
{future}(BNBUSDT)
$AVAX
🚨 BULLISH SIGNAL 🚨
Entry Zone: $10.80 – $10.88 — limit nets cast at the double-bottom retest, we let the price come to us
🎯 Targets:
🥇 TP1 11.18$ (60% of position — the neckline cluster)
🥈 TP2 11.44$ (40% of position — the shelf before the 11.78 high)
🛡️ Stop Loss: $10.68 (below the double-bottom floor at 10.72 — if that breaks, the setup was a lie)
📊 4H Structure: Double bottom printed twice at 10.72 and rejected hard both times = solid ground
🔥 Current Price: $10.95 (bounce candle in progress, neckline at 11.02 is the trigger)
💪 Support: $10.80 – $10.88 (the retest zone), deeper floor at $10.72
🚀 Breakout Confirmation: 1H close above $11.02 flips the plan from retest to momentum
$AVAX defended the same floor twice in four days — 10.72 is not a coincidence, it is a wall. The limit nets rest exactly where the retest should kiss: 10.80 to 10.88, with the shield born first at 10.68. If the bounce runs without us — a $0 miss and zero FOMO. If the retest comes — we ride a 2.6:1 setup with the double-bottom wall under our feet.
THE WALL HELD TWICE — THE NETS ARE CAST! 🚀
Trade with proper risk management ✅
#Write2Earn #3ALA2 #AVAX
DYOR.
══════════════════════════════
$BNB
🚨 BULLISH SIGNAL 🚨
Entry Zone: $10.80 – $10.88 — limit nets cast at the double-bottom retest, we let the price come to us
🎯 Targets:
🥇 TP1 11.18$ (60% of position — the neckline cluster)
🥈 TP2 11.44$ (40% of position — the shelf before the 11.78 high)
🛡️ Stop Loss: $10.68 (below the double-bottom floor at 10.72 — if that breaks, the setup was a lie)
📊 4H Structure: Double bottom printed twice at 10.72 and rejected hard both times = solid ground
🔥 Current Price: $10.95 (bounce candle in progress, neckline at 11.02 is the trigger)
💪 Support: $10.80 – $10.88 (the retest zone), deeper floor at $10.72
🚀 Breakout Confirmation: 1H close above $11.02 flips the plan from retest to momentum
$AVAX defended the same floor twice in four days — 10.72 is not a coincidence, it is a wall. The limit nets rest exactly where the retest should kiss: 10.80 to 10.88, with the shield born first at 10.68. If the bounce runs without us — a $0 miss and zero FOMO. If the retest comes — we ride a 2.6:1 setup with the double-bottom wall under our feet.
THE WALL HELD TWICE — THE NETS ARE CAST! 🚀
Trade with proper risk management ✅
#Write2Earn #3ALA2 #AVAX
DYOR.
══════════════════════════════
$BNB
1
157
·
--
$AVAX
{future}(AVAXUSDT)
🚨 BULLISH SIGNAL 🚨
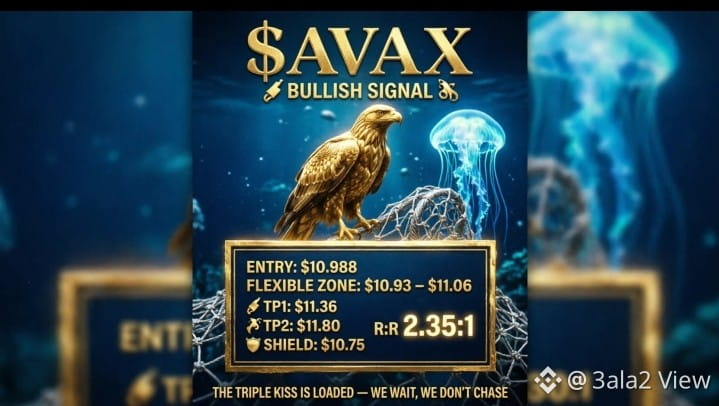
Entry: $10.988 — the limit net is cast at the triple-EMA kiss zone (1H blue 11.056 + yellow 10.948 + red 10.932 stacked in one floor)
📍 FLEXIBLE ENTRY ZONE: $10.93 – $11.06
🎯 Targets:
🥇 TP1 11.36$ (60% of position — the 24h high)
🥈 TP2 11.80$ (40% of position — the shelf before the 12.0 top)
🛡️ Stop Loss: $10.75 (below the 24h low at 10.786)
📊 4H Trend: Uptrend intact — price riding above the big yellow EMA at 10.648, correction within a healthy climb
🔥 Current Price: $10.957 (kissing the triple-EMA floor)
💪 Support: $10.93 – $11.06 (the triple kiss), deeper floor at $10.786
🚀 Breakout Confirmation: 1H close above $11.36 with strong volume
$AVAX printed a calm -2.35% day with $235M volume — a deep quiet sea with a real uptrend current underneath. The price landed exactly where three EMAs kiss on the 1H chart: blue above yellow above red, all stacked in one zone. RSI at 38 on the hour means buyers are cooling and ready to reload, while the 4H RSI at 53 confirms clean fuel with zero exhaustion. The shield was born before the entry at 10.75, and once price touches 11.18 the stop moves to entry — the trade becomes free from that moment.
THE TRIPLE KISS IS LOADED — WE WAIT, WE DON'T CHASE! 🚀
Trade with proper risk management ✅
#Write2Earn #3ALA2 #AVAX
DYOR.
══════════════════════════════
$LINK
{future}(LINKUSDT)
$AVAX
🚨 BULLISH SIGNAL 🚨
Entry: $10.988 — the limit net is cast at the triple-EMA kiss zone (1H blue 11.056 + yellow 10.948 + red 10.932 stacked in one floor)
📍 FLEXIBLE ENTRY ZONE: $10.93 – $11.06
🎯 Targets:
🥇 TP1 11.36$ (60% of position — the 24h high)
🥈 TP2 11.80$ (40% of position — the shelf before the 12.0 top)
🛡️ Stop Loss: $10.75 (below the 24h low at 10.786)
📊 4H Trend: Uptrend intact — price riding above the big yellow EMA at 10.648, correction within a healthy climb
🔥 Current Price: $10.957 (kissing the triple-EMA floor)
💪 Support: $10.93 – $11.06 (the triple kiss), deeper floor at $10.786
🚀 Breakout Confirmation: 1H close above $11.36 with strong volume
$AVAX printed a calm -2.35% day with $235M volume — a deep quiet sea with a real uptrend current underneath. The price landed exactly where three EMAs kiss on the 1H chart: blue above yellow above red, all stacked in one zone. RSI at 38 on the hour means buyers are cooling and ready to reload, while the 4H RSI at 53 confirms clean fuel with zero exhaustion. The shield was born before the entry at 10.75, and once price touches 11.18 the stop moves to entry — the trade becomes free from that moment.
THE TRIPLE KISS IS LOADED — WE WAIT, WE DON'T CHASE! 🚀
Trade with proper risk management ✅
#Write2Earn #3ALA2 #AVAX
DYOR.
══════════════════════════════
$LINK
🚨 BULLISH SIGNAL 🚨
Entry: $10.988 — the limit net is cast at the triple-EMA kiss zone (1H blue 11.056 + yellow 10.948 + red 10.932 stacked in one floor)
📍 FLEXIBLE ENTRY ZONE: $10.93 – $11.06
🎯 Targets:
🥇 TP1 11.36$ (60% of position — the 24h high)
🥈 TP2 11.80$ (40% of position — the shelf before the 12.0 top)
🛡️ Stop Loss: $10.75 (below the 24h low at 10.786)
📊 4H Trend: Uptrend intact — price riding above the big yellow EMA at 10.648, correction within a healthy climb
🔥 Current Price: $10.957 (kissing the triple-EMA floor)
💪 Support: $10.93 – $11.06 (the triple kiss), deeper floor at $10.786
🚀 Breakout Confirmation: 1H close above $11.36 with strong volume
$AVAX printed a calm -2.35% day with $235M volume — a deep quiet sea with a real uptrend current underneath. The price landed exactly where three EMAs kiss on the 1H chart: blue above yellow above red, all stacked in one zone. RSI at 38 on the hour means buyers are cooling and ready to reload, while the 4H RSI at 53 confirms clean fuel with zero exhaustion. The shield was born before the entry at 10.75, and once price touches 11.18 the stop moves to entry — the trade becomes free from that moment.
THE TRIPLE KISS IS LOADED — WE WAIT, WE DON'T CHASE! 🚀
Trade with proper risk management ✅
#Write2Earn #3ALA2 #AVAX
DYOR.
══════════════════════════════
$LINK
1
76
·
--
Bullish
$FIL
{future}(FILUSDT)
🚨 BULLISH SIGNAL 🚨
Entry: $1.0660 — the limit net is cast at the double-EMA kiss (4H EMA20 at 1.0711 + 1H EMA50 at 1.0706 stacked in one zone)
📍 FLEXIBLE ENTRY ZONE: $1.060 – $1.073
🎯 Targets:
🥇 TP1 1.1000$ (above the 24h high at 1.0909)
🥈 TP2 1.1280$ (retest of the 1.13 top)
🛡️ Stop Loss: $1.0430 (below the 1H EMA20 and the Sep 29 correction shelf)
📊 4H Trend: Clean uptrend — EMAs fully stacked blue above yellow above red, price riding above them
🔥 Current Price: $1.073 (kissing the EMA cluster from above after a healthy dip to 1.03)
💪 Support: $1.060 – $1.073 (the kiss zone), deeper floor at $1.036
🚀 Breakout Confirmation: 1H close above $1.091 with strong volume
$FIL printed a calm +1.89% day with $129M volume — a quiet sea with a real current. The price already paid its respect to the big yellow EMA at 1.03 two days ago and climbed back above the cluster: the correction is done and the buyers are returning. RSI at 51 on the 4H means clean fuel with zero overbought stress. The shield was born before the entry at 1.0430, and once price touches 1.0820 both stops move to entry — the trade becomes free from that moment.
THE CORRECTION IS OVER — THE KISS IS LOADED! 🚀
Trade with proper risk management ✅
#Write2Earn #3ALA2 #FIL
DYOR.
══════════════════════════════
$LINK
{future}(LINKUSDT)
🕸️
$FIL
🚨 BULLISH SIGNAL 🚨
Entry: $1.0660 — the limit net is cast at the double-EMA kiss (4H EMA20 at 1.0711 + 1H EMA50 at 1.0706 stacked in one zone)
📍 FLEXIBLE ENTRY ZONE: $1.060 – $1.073
🎯 Targets:
🥇 TP1 1.1000$ (above the 24h high at 1.0909)
🥈 TP2 1.1280$ (retest of the 1.13 top)
🛡️ Stop Loss: $1.0430 (below the 1H EMA20 and the Sep 29 correction shelf)
📊 4H Trend: Clean uptrend — EMAs fully stacked blue above yellow above red, price riding above them
🔥 Current Price: $1.073 (kissing the EMA cluster from above after a healthy dip to 1.03)
💪 Support: $1.060 – $1.073 (the kiss zone), deeper floor at $1.036
🚀 Breakout Confirmation: 1H close above $1.091 with strong volume
$FIL printed a calm +1.89% day with $129M volume — a quiet sea with a real current. The price already paid its respect to the big yellow EMA at 1.03 two days ago and climbed back above the cluster: the correction is done and the buyers are returning. RSI at 51 on the 4H means clean fuel with zero overbought stress. The shield was born before the entry at 1.0430, and once price touches 1.0820 both stops move to entry — the trade becomes free from that moment.
THE CORRECTION IS OVER — THE KISS IS LOADED! 🚀
Trade with proper risk management ✅
#Write2Earn #3ALA2 #FIL
DYOR.
══════════════════════════════
$LINK
🕸️
🚨 BULLISH SIGNAL 🚨
Entry: $1.0660 — the limit net is cast at the double-EMA kiss (4H EMA20 at 1.0711 + 1H EMA50 at 1.0706 stacked in one zone)
📍 FLEXIBLE ENTRY ZONE: $1.060 – $1.073
🎯 Targets:
🥇 TP1 1.1000$ (above the 24h high at 1.0909)
🥈 TP2 1.1280$ (retest of the 1.13 top)
🛡️ Stop Loss: $1.0430 (below the 1H EMA20 and the Sep 29 correction shelf)
📊 4H Trend: Clean uptrend — EMAs fully stacked blue above yellow above red, price riding above them
🔥 Current Price: $1.073 (kissing the EMA cluster from above after a healthy dip to 1.03)
💪 Support: $1.060 – $1.073 (the kiss zone), deeper floor at $1.036
🚀 Breakout Confirmation: 1H close above $1.091 with strong volume
$FIL printed a calm +1.89% day with $129M volume — a quiet sea with a real current. The price already paid its respect to the big yellow EMA at 1.03 two days ago and climbed back above the cluster: the correction is done and the buyers are returning. RSI at 51 on the 4H means clean fuel with zero overbought stress. The shield was born before the entry at 1.0430, and once price touches 1.0820 both stops move to entry — the trade becomes free from that moment.
THE CORRECTION IS OVER — THE KISS IS LOADED! 🚀
Trade with proper risk management ✅
#Write2Earn #3ALA2 #FIL
DYOR.
══════════════════════════════
$LINK
🕸️

1
186
·
--
Bullish
$LINK
{future}(LINKUSDT)
🚨 BULLISH SIGNAL 🚨
Entry: $14.98 — the limit net is cast below the market, waiting for the kiss (never chase an extended price)
📍 FLEXIBLE ENTRY ZONE: $14.90 – $15.10 (1H EMA20 kiss + the Sep 29 correction shelf)
🎯 Targets:
🥇 TP1 15.55$
🥈 TP2 15.90$ (extension beyond the 15.77 top)
🛡️ Stop Loss: $14.62 (below the 1H EMA50 at 14.698 and the Sep 28 swing low)
📊 4H Trend: Clean uptrend — EMAs fully stacked blue above yellow above red, price above all of them
🔥 Current Price: $15.39 (extended above the 1H EMA20 = we wait, we don't chase)
💪 Support: $14.90 – $15.10 (the kiss zone), deeper floor at $14.70
🚀 Breakout Confirmation: 1H close above $15.77 with strong volume
$LINK prints a +4.84% day inside a textbook two-timeframe uptrend with $668M volume — a deep sea with a real current. But the price is stretched above its 1H EMA20, and snipers don't buy fatigue. The net rests at 14.98 where the EMAs kiss; if the pullback comes, we ride with the trend. If the price flies to 16 without us — a $0 miss and zero FOMO. The shield was born before the entry at 14.62, and once price touches 15.20 both stops move to entry — the trade becomes free from that moment.
PATIENCE CATCHES WHAT CHASING LOSES — WAIT FOR THE KISS! 🚀
Trade with proper risk management ✅
#Write2Earn #3ALA2 #LINK
DYOR.
══════════════════════════════
$AVAX
{future}(AVAXUSDT)
$LINK
🚨 BULLISH SIGNAL 🚨
Entry: $14.98 — the limit net is cast below the market, waiting for the kiss (never chase an extended price)
📍 FLEXIBLE ENTRY ZONE: $14.90 – $15.10 (1H EMA20 kiss + the Sep 29 correction shelf)
🎯 Targets:
🥇 TP1 15.55$
🥈 TP2 15.90$ (extension beyond the 15.77 top)
🛡️ Stop Loss: $14.62 (below the 1H EMA50 at 14.698 and the Sep 28 swing low)
📊 4H Trend: Clean uptrend — EMAs fully stacked blue above yellow above red, price above all of them
🔥 Current Price: $15.39 (extended above the 1H EMA20 = we wait, we don't chase)
💪 Support: $14.90 – $15.10 (the kiss zone), deeper floor at $14.70
🚀 Breakout Confirmation: 1H close above $15.77 with strong volume
$LINK prints a +4.84% day inside a textbook two-timeframe uptrend with $668M volume — a deep sea with a real current. But the price is stretched above its 1H EMA20, and snipers don't buy fatigue. The net rests at 14.98 where the EMAs kiss; if the pullback comes, we ride with the trend. If the price flies to 16 without us — a $0 miss and zero FOMO. The shield was born before the entry at 14.62, and once price touches 15.20 both stops move to entry — the trade becomes free from that moment.
PATIENCE CATCHES WHAT CHASING LOSES — WAIT FOR THE KISS! 🚀
Trade with proper risk management ✅
#Write2Earn #3ALA2 #LINK
DYOR.
══════════════════════════════
$AVAX
🚨 BULLISH SIGNAL 🚨
Entry: $14.98 — the limit net is cast below the market, waiting for the kiss (never chase an extended price)
📍 FLEXIBLE ENTRY ZONE: $14.90 – $15.10 (1H EMA20 kiss + the Sep 29 correction shelf)
🎯 Targets:
🥇 TP1 15.55$
🥈 TP2 15.90$ (extension beyond the 15.77 top)
🛡️ Stop Loss: $14.62 (below the 1H EMA50 at 14.698 and the Sep 28 swing low)
📊 4H Trend: Clean uptrend — EMAs fully stacked blue above yellow above red, price above all of them
🔥 Current Price: $15.39 (extended above the 1H EMA20 = we wait, we don't chase)
💪 Support: $14.90 – $15.10 (the kiss zone), deeper floor at $14.70
🚀 Breakout Confirmation: 1H close above $15.77 with strong volume
$LINK prints a +4.84% day inside a textbook two-timeframe uptrend with $668M volume — a deep sea with a real current. But the price is stretched above its 1H EMA20, and snipers don't buy fatigue. The net rests at 14.98 where the EMAs kiss; if the pullback comes, we ride with the trend. If the price flies to 16 without us — a $0 miss and zero FOMO. The shield was born before the entry at 14.62, and once price touches 15.20 both stops move to entry — the trade becomes free from that moment.
PATIENCE CATCHES WHAT CHASING LOSES — WAIT FOR THE KISS! 🚀
Trade with proper risk management ✅
#Write2Earn #3ALA2 #LINK
DYOR.
══════════════════════════════
$AVAX

1
1
229
·
--
$AVAX
{future}(AVAXUSDT)
🚨 BULLISH SIGNAL 🚨
Entry: $10.35 — the limit net is already cast at the kiss zone (4H EMA50 + 1H EMA200 stacked at 10.35)
📍 FLEXIBLE ENTRY ZONE: $10.30 – $10.42
🎯 Target:
🥇 TP 10.70$ (the 1H EMA50 shelf)
🛡️ Stop Loss: $10.12 (below the 24h low at 10.142)
📊 4H Trend: Uptrend intact — price above the EMA50 and far above the EMA200; this dip is a correction, not a reversal
🔥 Current Price: $10.42
💪 Support: $10.30 – $10.42 (double-EMA kiss + previous consolidation floor)
🚀 Breakout Confirmation: 1H close above $10.70 with strong volume
$AVAX printed a -4.4% pullback inside a healthy 4H uptrend and landed exactly where the two EMAs kiss at 10.35. This is not knife-catching against a downtrend — this is buying a correction with the higher-timeframe trend as our ally. $254M in 24h volume means a deep sea, and RSI at 41 leaves plenty of fuel for the bounce. The shield was born before the entry at 10.12, and once price touches 10.52 the stop moves to entry — the trade becomes free from that moment.
BUYERS ARE RELOADING AT THE KISS — WAIT FOR THE FILL! 🚀
Trade with proper risk management ✅
#Write2Earn #3ALA2 #AVAX
DYOR.
══════════════════════════════
$TRX
{future}(TRXUSDT)
$AVAX
🚨 BULLISH SIGNAL 🚨
Entry: $10.35 — the limit net is already cast at the kiss zone (4H EMA50 + 1H EMA200 stacked at 10.35)
📍 FLEXIBLE ENTRY ZONE: $10.30 – $10.42
🎯 Target:
🥇 TP 10.70$ (the 1H EMA50 shelf)
🛡️ Stop Loss: $10.12 (below the 24h low at 10.142)
📊 4H Trend: Uptrend intact — price above the EMA50 and far above the EMA200; this dip is a correction, not a reversal
🔥 Current Price: $10.42
💪 Support: $10.30 – $10.42 (double-EMA kiss + previous consolidation floor)
🚀 Breakout Confirmation: 1H close above $10.70 with strong volume
$AVAX printed a -4.4% pullback inside a healthy 4H uptrend and landed exactly where the two EMAs kiss at 10.35. This is not knife-catching against a downtrend — this is buying a correction with the higher-timeframe trend as our ally. $254M in 24h volume means a deep sea, and RSI at 41 leaves plenty of fuel for the bounce. The shield was born before the entry at 10.12, and once price touches 10.52 the stop moves to entry — the trade becomes free from that moment.
BUYERS ARE RELOADING AT THE KISS — WAIT FOR THE FILL! 🚀
Trade with proper risk management ✅
#Write2Earn #3ALA2 #AVAX
DYOR.
══════════════════════════════
$TRX
🚨 BULLISH SIGNAL 🚨
Entry: $10.35 — the limit net is already cast at the kiss zone (4H EMA50 + 1H EMA200 stacked at 10.35)
📍 FLEXIBLE ENTRY ZONE: $10.30 – $10.42
🎯 Target:
🥇 TP 10.70$ (the 1H EMA50 shelf)
🛡️ Stop Loss: $10.12 (below the 24h low at 10.142)
📊 4H Trend: Uptrend intact — price above the EMA50 and far above the EMA200; this dip is a correction, not a reversal
🔥 Current Price: $10.42
💪 Support: $10.30 – $10.42 (double-EMA kiss + previous consolidation floor)
🚀 Breakout Confirmation: 1H close above $10.70 with strong volume
$AVAX printed a -4.4% pullback inside a healthy 4H uptrend and landed exactly where the two EMAs kiss at 10.35. This is not knife-catching against a downtrend — this is buying a correction with the higher-timeframe trend as our ally. $254M in 24h volume means a deep sea, and RSI at 41 leaves plenty of fuel for the bounce. The shield was born before the entry at 10.12, and once price touches 10.52 the stop moves to entry — the trade becomes free from that moment.
BUYERS ARE RELOADING AT THE KISS — WAIT FOR THE FILL! 🚀
Trade with proper risk management ✅
#Write2Earn #3ALA2 #AVAX
DYOR.
══════════════════════════════
$TRX
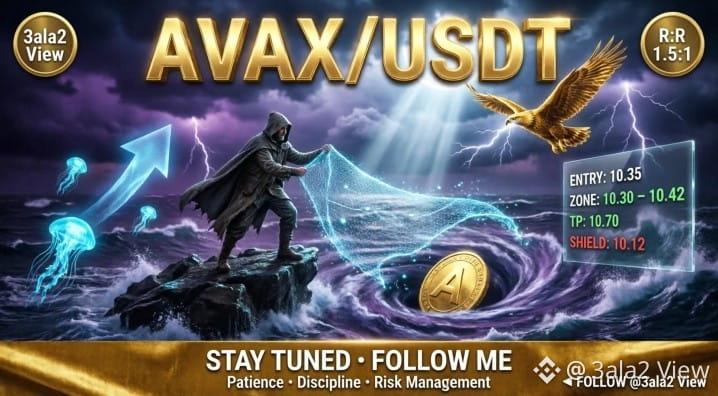
1
1
186
·
--
Bullish
$CRV
{future}(CRVUSDT)
🚨 BULLISH SIGNAL 🚨
Entry: $0.3255 — the net is already filled at the triple-support kiss zone
📍 FLEXIBLE ENTRY ZONE: $0.3240 – $0.3265 (4H EMA200 + 24h low + previous swing low — three floors in one zone)
🎯 Targets:
🥇 TP1 0.3320$
🥈 TP2 0.3400$
🛡️ Stop Loss: $0.3180 (below all three floors)
📊 1H Trend: Fresh waterfall landing on major support, RSI cooling at 35 while MACD downside momentum is fading
🔥 Current Price: $0.3233
💪 Support: $0.3200 – $0.3240 (the triple floor)
🚀 Breakout Confirmation: 1H close above $0.3320 with strong volume
$CRV printed a -5.4% waterfall and landed exactly on the strongest floor of the month: the 4H EMA200, the 24h low, and the previous swing low — three supports stacked in one zone. We don't buy fear in the air; we buy it where the floor is proven. The shield was born before the entry at 0.3180, and once price touches 0.3290 the stop moves to entry — the trade becomes free from that moment.
BUYERS ARE WAITING AT THE FLOOR — THE KISS IS LOADED! 🚀
Trade with proper risk management ✅
#Write2Earn #3ALA2 #CRV/USDT
DYOR.
══════════════════════════════
$TRX
{future}(TRXUSDT)
$CRV
🚨 BULLISH SIGNAL 🚨
Entry: $0.3255 — the net is already filled at the triple-support kiss zone
📍 FLEXIBLE ENTRY ZONE: $0.3240 – $0.3265 (4H EMA200 + 24h low + previous swing low — three floors in one zone)
🎯 Targets:
🥇 TP1 0.3320$
🥈 TP2 0.3400$
🛡️ Stop Loss: $0.3180 (below all three floors)
📊 1H Trend: Fresh waterfall landing on major support, RSI cooling at 35 while MACD downside momentum is fading
🔥 Current Price: $0.3233
💪 Support: $0.3200 – $0.3240 (the triple floor)
🚀 Breakout Confirmation: 1H close above $0.3320 with strong volume
$CRV printed a -5.4% waterfall and landed exactly on the strongest floor of the month: the 4H EMA200, the 24h low, and the previous swing low — three supports stacked in one zone. We don't buy fear in the air; we buy it where the floor is proven. The shield was born before the entry at 0.3180, and once price touches 0.3290 the stop moves to entry — the trade becomes free from that moment.
BUYERS ARE WAITING AT THE FLOOR — THE KISS IS LOADED! 🚀
Trade with proper risk management ✅
#Write2Earn #3ALA2 #CRV/USDT
DYOR.
══════════════════════════════
$TRX
🚨 BULLISH SIGNAL 🚨
Entry: $0.3255 — the net is already filled at the triple-support kiss zone
📍 FLEXIBLE ENTRY ZONE: $0.3240 – $0.3265 (4H EMA200 + 24h low + previous swing low — three floors in one zone)
🎯 Targets:
🥇 TP1 0.3320$
🥈 TP2 0.3400$
🛡️ Stop Loss: $0.3180 (below all three floors)
📊 1H Trend: Fresh waterfall landing on major support, RSI cooling at 35 while MACD downside momentum is fading
🔥 Current Price: $0.3233
💪 Support: $0.3200 – $0.3240 (the triple floor)
🚀 Breakout Confirmation: 1H close above $0.3320 with strong volume
$CRV printed a -5.4% waterfall and landed exactly on the strongest floor of the month: the 4H EMA200, the 24h low, and the previous swing low — three supports stacked in one zone. We don't buy fear in the air; we buy it where the floor is proven. The shield was born before the entry at 0.3180, and once price touches 0.3290 the stop moves to entry — the trade becomes free from that moment.
BUYERS ARE WAITING AT THE FLOOR — THE KISS IS LOADED! 🚀
Trade with proper risk management ✅
#Write2Earn #3ALA2 #CRV/USDT
DYOR.
══════════════════════════════
$TRX
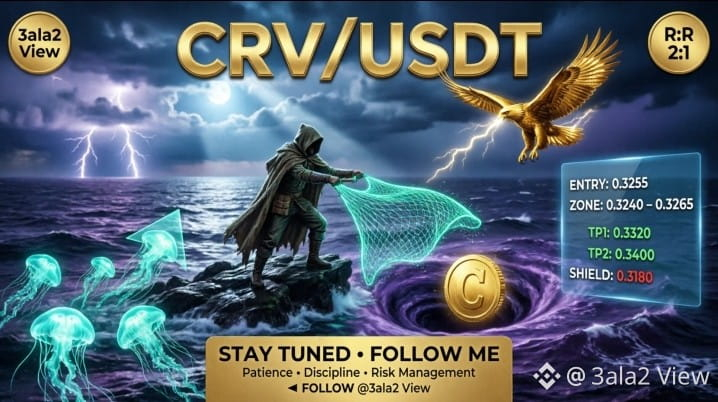
2
494
·
--
Bullish
$SOL
{future}(SOLUSDT)
━━━━━━━━━━━━━━━━━━
SOL printed a strong +5.6% day and is now cooling from 122 resistance. The 1H RSI hit 68.5 (overbought) while the 4H trend still holds above the EMA stack. No chasing here — the net waits at the retest zone, 4% below the current price, where the last impulse was born.
📍 ENTRY ┃ 117.00 (3-tranche kiss net)
🎯 TP1 121.90 ┃ TP2 124.00 ┃ TP3 126.40
🛑 SL ┃ 115.40
━━━━━━━━━━━━━━━━━━
📊 CHART ANALYSIS
SOL is the deepest sea on my board with 2.79B in 24h volume, and the 4H trend still holds above the full EMA stack. After the vertical push to 122, the 1H RSI cooled from overbought — that is not weakness, that is an invitation. I do not chase green candles; my limit net sits at 117.00, the retest zone where the last consolidation happened. The stop at 115.40 sits below the 4H support; if it triggers, my read was simply wrong. If the 1H closes below 116.00 first, I cut manually before the shield ever works. Once price touches 121.90, the stop moves to entry — the trade becomes risk-free from that moment. First partial closes at 121.90, second at 124.00, third at 126.40.
⚙️ TRADE DETAILS
• Split ┃ 50% / 30% / 20% of your position size
• Risk ┃ ≤3% of your equity
• Leverage ┃ ≤5x Isolated
• R:R ┃ 1:4
• Breakeven ┃ mark 121.90 → SL 117.00
• Status ┃ 🟡 PENDING — the net is cast 4% below the knife
━━━━━━━━━━━━━━━━━━
Follow @3ala2 View for more trade setups 🕸️
#Write2Earn #3ALA2 #SOL
DYOR.
══════════════════════════════
$BNB
{future}(BNBUSDT)
$SOL
━━━━━━━━━━━━━━━━━━
SOL printed a strong +5.6% day and is now cooling from 122 resistance. The 1H RSI hit 68.5 (overbought) while the 4H trend still holds above the EMA stack. No chasing here — the net waits at the retest zone, 4% below the current price, where the last impulse was born.
📍 ENTRY ┃ 117.00 (3-tranche kiss net)
🎯 TP1 121.90 ┃ TP2 124.00 ┃ TP3 126.40
🛑 SL ┃ 115.40
━━━━━━━━━━━━━━━━━━
📊 CHART ANALYSIS
SOL is the deepest sea on my board with 2.79B in 24h volume, and the 4H trend still holds above the full EMA stack. After the vertical push to 122, the 1H RSI cooled from overbought — that is not weakness, that is an invitation. I do not chase green candles; my limit net sits at 117.00, the retest zone where the last consolidation happened. The stop at 115.40 sits below the 4H support; if it triggers, my read was simply wrong. If the 1H closes below 116.00 first, I cut manually before the shield ever works. Once price touches 121.90, the stop moves to entry — the trade becomes risk-free from that moment. First partial closes at 121.90, second at 124.00, third at 126.40.
⚙️ TRADE DETAILS
• Split ┃ 50% / 30% / 20% of your position size
• Risk ┃ ≤3% of your equity
• Leverage ┃ ≤5x Isolated
• R:R ┃ 1:4
• Breakeven ┃ mark 121.90 → SL 117.00
• Status ┃ 🟡 PENDING — the net is cast 4% below the knife
━━━━━━━━━━━━━━━━━━
Follow @3ala2 View for more trade setups 🕸️
#Write2Earn #3ALA2 #SOL
DYOR.
══════════════════════════════
$BNB
━━━━━━━━━━━━━━━━━━
SOL printed a strong +5.6% day and is now cooling from 122 resistance. The 1H RSI hit 68.5 (overbought) while the 4H trend still holds above the EMA stack. No chasing here — the net waits at the retest zone, 4% below the current price, where the last impulse was born.
📍 ENTRY ┃ 117.00 (3-tranche kiss net)
🎯 TP1 121.90 ┃ TP2 124.00 ┃ TP3 126.40
🛑 SL ┃ 115.40
━━━━━━━━━━━━━━━━━━
📊 CHART ANALYSIS
SOL is the deepest sea on my board with 2.79B in 24h volume, and the 4H trend still holds above the full EMA stack. After the vertical push to 122, the 1H RSI cooled from overbought — that is not weakness, that is an invitation. I do not chase green candles; my limit net sits at 117.00, the retest zone where the last consolidation happened. The stop at 115.40 sits below the 4H support; if it triggers, my read was simply wrong. If the 1H closes below 116.00 first, I cut manually before the shield ever works. Once price touches 121.90, the stop moves to entry — the trade becomes risk-free from that moment. First partial closes at 121.90, second at 124.00, third at 126.40.
⚙️ TRADE DETAILS
• Split ┃ 50% / 30% / 20% of your position size
• Risk ┃ ≤3% of your equity
• Leverage ┃ ≤5x Isolated
• R:R ┃ 1:4
• Breakeven ┃ mark 121.90 → SL 117.00
• Status ┃ 🟡 PENDING — the net is cast 4% below the knife
━━━━━━━━━━━━━━━━━━
Follow @3ala2 View for more trade setups 🕸️
#Write2Earn #3ALA2 #SOL
DYOR.
══════════════════════════════
$BNB
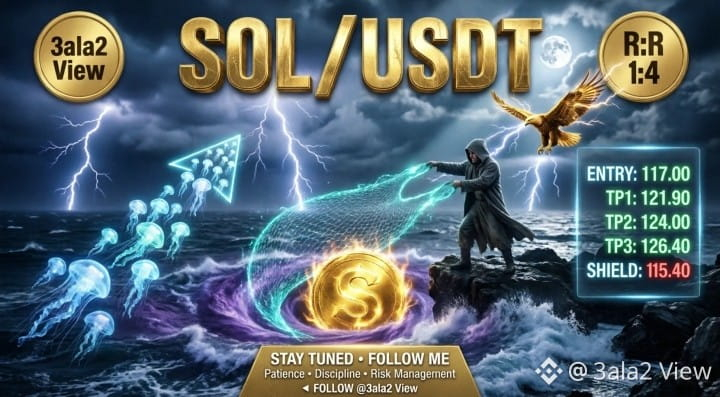
1
151
·
--
Bullish
$TRX
{future}(TRXUSDT)
━━━━━━━━━━━━━━━━━━
TRX got rejected from 0.3490 and fell straight into the only line that matters on the 4H chart — the 200 EMA. The 1H prints deep oversold while the knife is still falling, so we do not catch it at market. The net is cast 1% below, at the old shelf, and waits.
📍 ENTRY ┃ 0.3350 (3-tranche kiss net)
🎯 TP1 0.3422 ┃ TP2 0.3465 ┃ TP3 0.3490
🛑 SL ┃ 0.3300
━━━━━━━━━━━━━━━━━━
📊 CHART ANALYSIS
TRX was rejected near 0.3490 and corrected hard into the 4H 200 EMA around 0.3370, the last structural support before the September lows. On the 1H, RSI sits at 26.5, deeply oversold, and volume expanded on the last red candles — selling is stretched, but a stretched knife is still a knife, so zero market buys here. My three-tranche limit net waits at 0.3350, just under the EMA200 kiss and above the old consolidation shelf. The stop at 0.3300 sits below the September 15 wick low; if a 1H candle closes under 0.3325 first, I exit manually before the shield ever works. Targets are the EMA cluster at 0.3422, then 0.3465, then the swing high at 0.3490. Once TP1 fills, the remaining stops move to entry and the trade cannot lose.
⚙️ TRADE DETAILS
• Split ┃ 50% / 30% / 20% of your position size
• Risk ┃ ≤3% of your equity
• Leverage ┃ ≤5x Isolated
• R:R ┃ 1:2
• Breakeven ┃ mark 0.3422 → SL 0.3350
• Status ┃ 🟡 PENDING — the net is cast 1% below the knife
━━━━━━━━━━━━━━━━━━
Follow @dr3ala2 for more trade setups 🕸️
#Write2Earn #3ALA2 #TRX/USDT❤️
DYOR.
══════════════════════════════
$BNB
$TRX
━━━━━━━━━━━━━━━━━━
TRX got rejected from 0.3490 and fell straight into the only line that matters on the 4H chart — the 200 EMA. The 1H prints deep oversold while the knife is still falling, so we do not catch it at market. The net is cast 1% below, at the old shelf, and waits.
📍 ENTRY ┃ 0.3350 (3-tranche kiss net)
🎯 TP1 0.3422 ┃ TP2 0.3465 ┃ TP3 0.3490
🛑 SL ┃ 0.3300
━━━━━━━━━━━━━━━━━━
📊 CHART ANALYSIS
TRX was rejected near 0.3490 and corrected hard into the 4H 200 EMA around 0.3370, the last structural support before the September lows. On the 1H, RSI sits at 26.5, deeply oversold, and volume expanded on the last red candles — selling is stretched, but a stretched knife is still a knife, so zero market buys here. My three-tranche limit net waits at 0.3350, just under the EMA200 kiss and above the old consolidation shelf. The stop at 0.3300 sits below the September 15 wick low; if a 1H candle closes under 0.3325 first, I exit manually before the shield ever works. Targets are the EMA cluster at 0.3422, then 0.3465, then the swing high at 0.3490. Once TP1 fills, the remaining stops move to entry and the trade cannot lose.
⚙️ TRADE DETAILS
• Split ┃ 50% / 30% / 20% of your position size
• Risk ┃ ≤3% of your equity
• Leverage ┃ ≤5x Isolated
• R:R ┃ 1:2
• Breakeven ┃ mark 0.3422 → SL 0.3350
• Status ┃ 🟡 PENDING — the net is cast 1% below the knife
━━━━━━━━━━━━━━━━━━
Follow @3ala2 View for more trade setups 🕸️
#Write2Earn #3ALA2 #TRX/USDT❤️
DYOR.
══════════════════════════════
$BNB
━━━━━━━━━━━━━━━━━━
TRX got rejected from 0.3490 and fell straight into the only line that matters on the 4H chart — the 200 EMA. The 1H prints deep oversold while the knife is still falling, so we do not catch it at market. The net is cast 1% below, at the old shelf, and waits.
📍 ENTRY ┃ 0.3350 (3-tranche kiss net)
🎯 TP1 0.3422 ┃ TP2 0.3465 ┃ TP3 0.3490
🛑 SL ┃ 0.3300
━━━━━━━━━━━━━━━━━━
📊 CHART ANALYSIS
TRX was rejected near 0.3490 and corrected hard into the 4H 200 EMA around 0.3370, the last structural support before the September lows. On the 1H, RSI sits at 26.5, deeply oversold, and volume expanded on the last red candles — selling is stretched, but a stretched knife is still a knife, so zero market buys here. My three-tranche limit net waits at 0.3350, just under the EMA200 kiss and above the old consolidation shelf. The stop at 0.3300 sits below the September 15 wick low; if a 1H candle closes under 0.3325 first, I exit manually before the shield ever works. Targets are the EMA cluster at 0.3422, then 0.3465, then the swing high at 0.3490. Once TP1 fills, the remaining stops move to entry and the trade cannot lose.
⚙️ TRADE DETAILS
• Split ┃ 50% / 30% / 20% of your position size
• Risk ┃ ≤3% of your equity
• Leverage ┃ ≤5x Isolated
• R:R ┃ 1:2
• Breakeven ┃ mark 0.3422 → SL 0.3350
• Status ┃ 🟡 PENDING — the net is cast 1% below the knife
━━━━━━━━━━━━━━━━━━
Follow @3ala2 View for more trade setups 🕸️
#Write2Earn #3ALA2 #TRX/USDT❤️
DYOR.
══════════════════════════════
$BNB
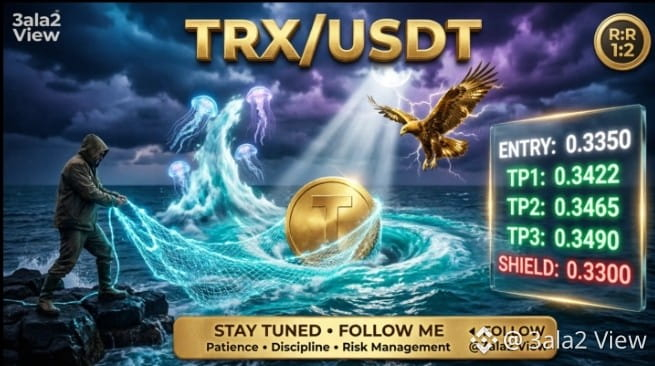
1
88
Log in to explore more content
Join global crypto users on Binance Square
⚡️ Get latest and useful information about crypto.
💬 Trusted by the world’s largest crypto exchange.
👍 Discover real insights from verified creators.
Email / Phone number