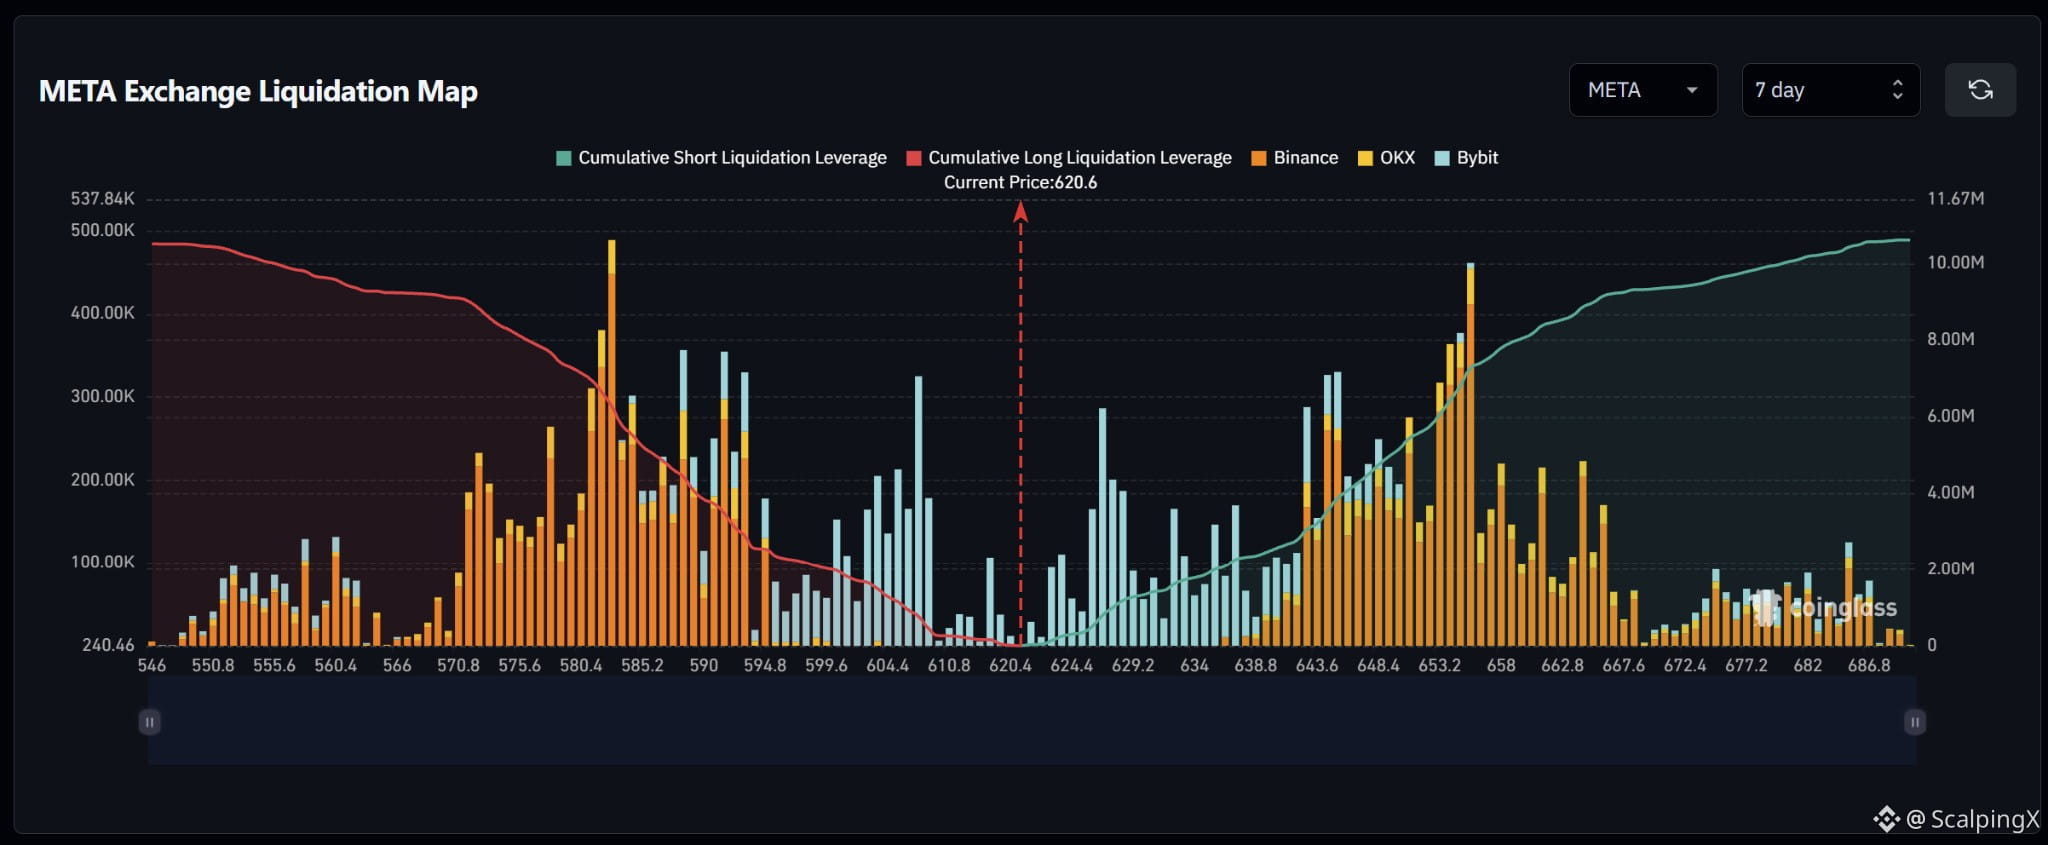
$META – Liquidation Map (7 days) – Index ~620.6
🧭 The preferred scenario is a nearby upside short sweep, starting at 623–625, then 626–629. Cumulative liquidation exposure is broadly balanced across the displayed range, making nearby cluster placement more relevant than the difference in totals.
🔺 A break and hold above 625 shifts attention to 626–629, particularly near 627. Short liquidations there could amplify the advance; the reaction after the sweep will help assess continuation.
🎯 Holding above 629 would bring scattered bars at 632–637 into focus next. Farther up, a dense band sits at 642–649, followed by 653–656 with a large bar near 655.5. These are separate clusters, requiring momentum to be reassessed after each sweep.
⚖️ Losing 618 without a reclaim would weaken the upside scenario and shift attention to 614–616, then the stronger long cluster at 603–608. Farther down lies 590–594. Avoid chasing a sweep of 626–629 that quickly reverses below 625.
#LiquidationMap
🧭 The preferred scenario is a nearby upside short sweep, starting at 623–625, then 626–629. Cumulative liquidation exposure is broadly balanced across the displayed range, making nearby cluster placement more relevant than the difference in totals.
🔺 A break and hold above 625 shifts attention to 626–629, particularly near 627. Short liquidations there could amplify the advance; the reaction after the sweep will help assess continuation.
🎯 Holding above 629 would bring scattered bars at 632–637 into focus next. Farther up, a dense band sits at 642–649, followed by 653–656 with a large bar near 655.5. These are separate clusters, requiring momentum to be reassessed after each sweep.
⚖️ Losing 618 without a reclaim would weaken the upside scenario and shift attention to 614–616, then the stronger long cluster at 603–608. Farther down lies 590–594. Avoid chasing a sweep of 626–629 that quickly reverses below 625.
#LiquidationMap