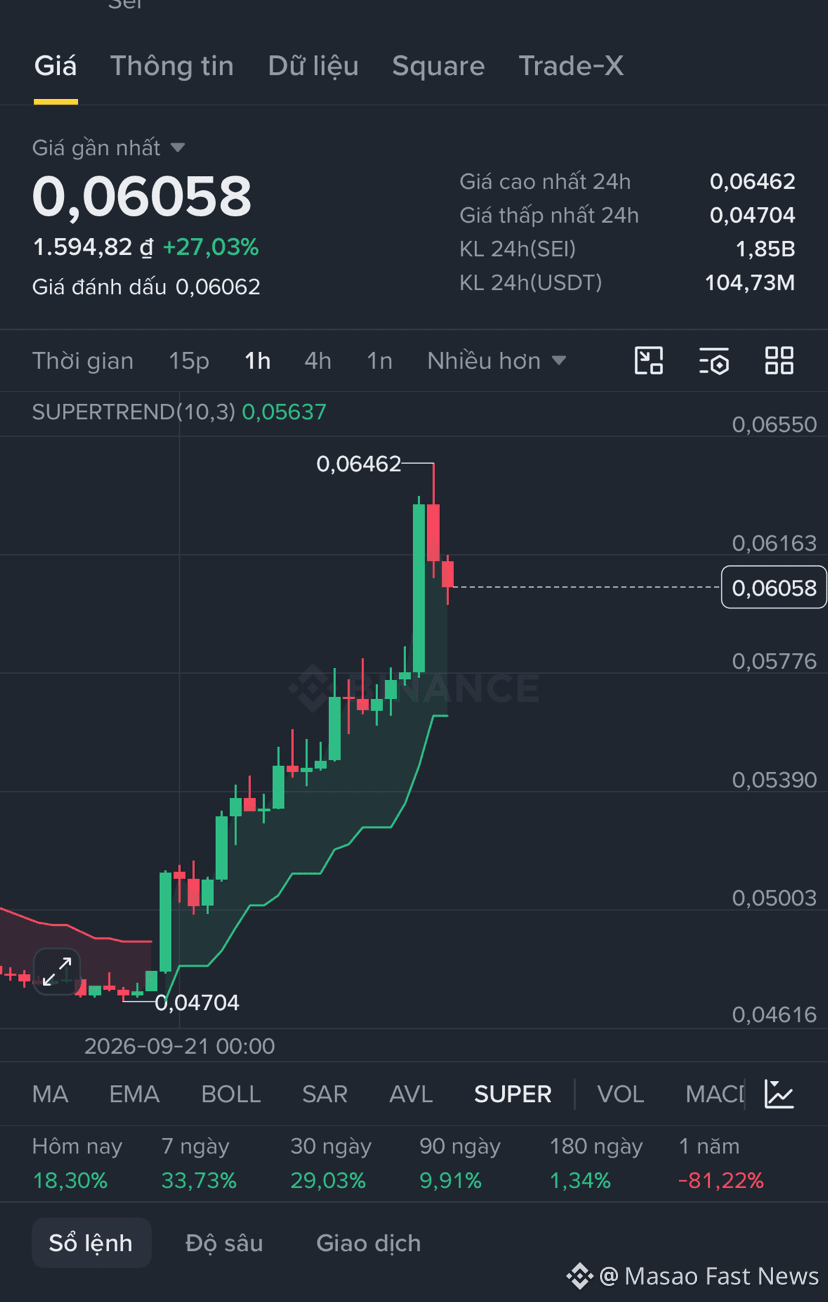
$SEI DONE PLAN — LONG FULL TP 🎯
LONG PLAN 🟢 | $SEI
Entry: 0.0535–0.0542
SL: 0.0525
TP1: 0.0555 ✅
TP2: 0.0570 ✅
TP3: 0.0590 ✅
Result: SEI completed all 3 targets, and the LONG trade ran exactly according to the original plan.
Reasons the trade ran correctly:
SEI maintained the HH–HL structure on the H1 timeframe after breaking out the 0.0500–0.0510 zone with strong volume.
After retesting the Entry area, buying pressure continued to hold, and price successively broke above TP1 and TP2 before strongly expanding above TP3. H1 later recorded a top at 0.06462.
Personal viewpoint:
This setup shows that waiting for a retest after the breakout helps reduce FOMO and provides a more合理 entry point.
The trade hit FULL TP, so there’s no need to chase price after the strong upswing. Prefer to wait for a new structure and the next setup.
PLAN: DONE — FULL TP 🎯
No FOMO. Wait for the next setup.
LONG PLAN 🟢 | $SEI
Entry: 0.0535–0.0542
SL: 0.0525
TP1: 0.0555 ✅
TP2: 0.0570 ✅
TP3: 0.0590 ✅
Result: SEI completed all 3 targets, and the LONG trade ran exactly according to the original plan.
Reasons the trade ran correctly:
SEI maintained the HH–HL structure on the H1 timeframe after breaking out the 0.0500–0.0510 zone with strong volume.
After retesting the Entry area, buying pressure continued to hold, and price successively broke above TP1 and TP2 before strongly expanding above TP3. H1 later recorded a top at 0.06462.
Personal viewpoint:
This setup shows that waiting for a retest after the breakout helps reduce FOMO and provides a more合理 entry point.
The trade hit FULL TP, so there’s no need to chase price after the strong upswing. Prefer to wait for a new structure and the next setup.
PLAN: DONE — FULL TP 🎯
No FOMO. Wait for the next setup.