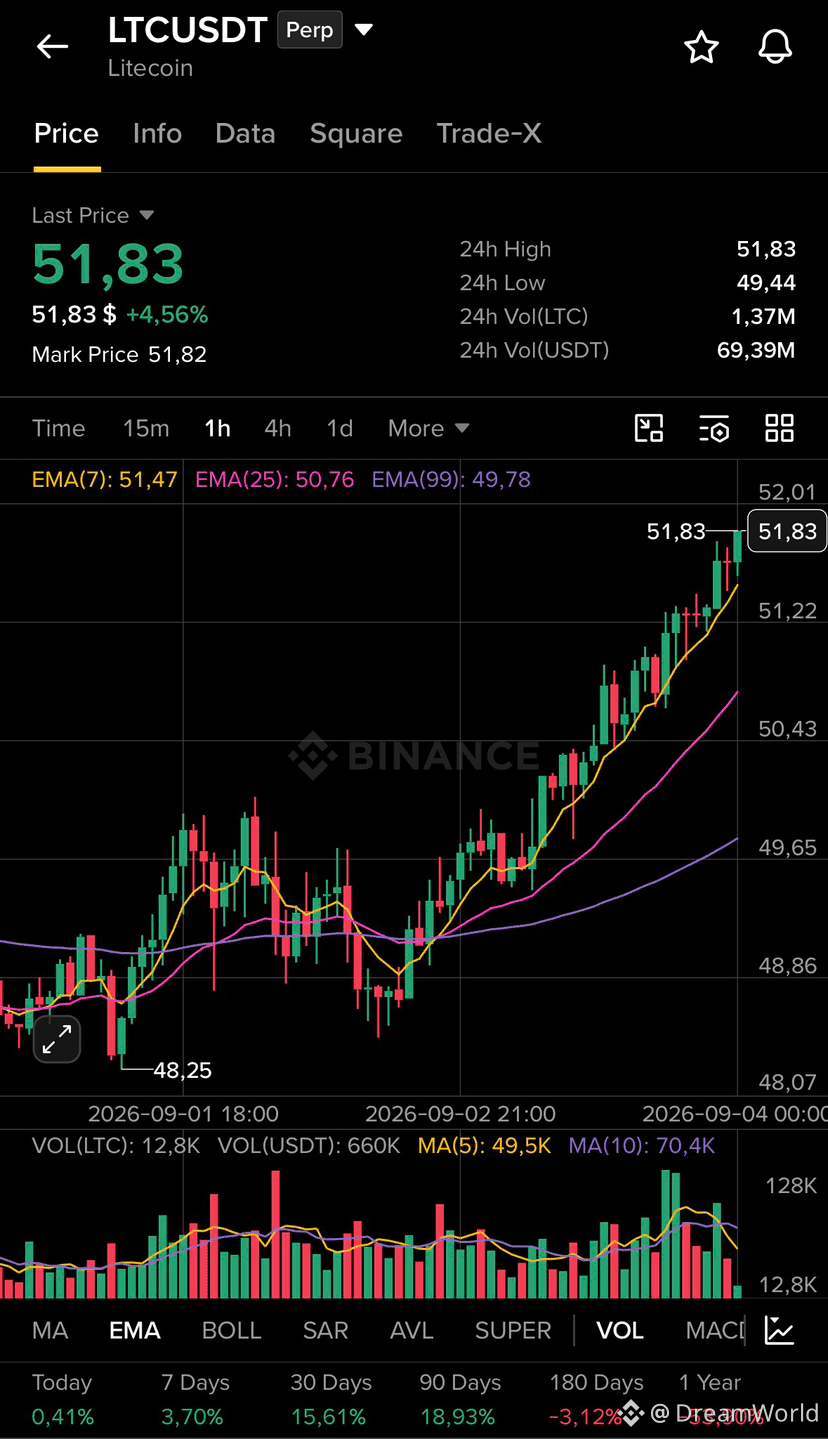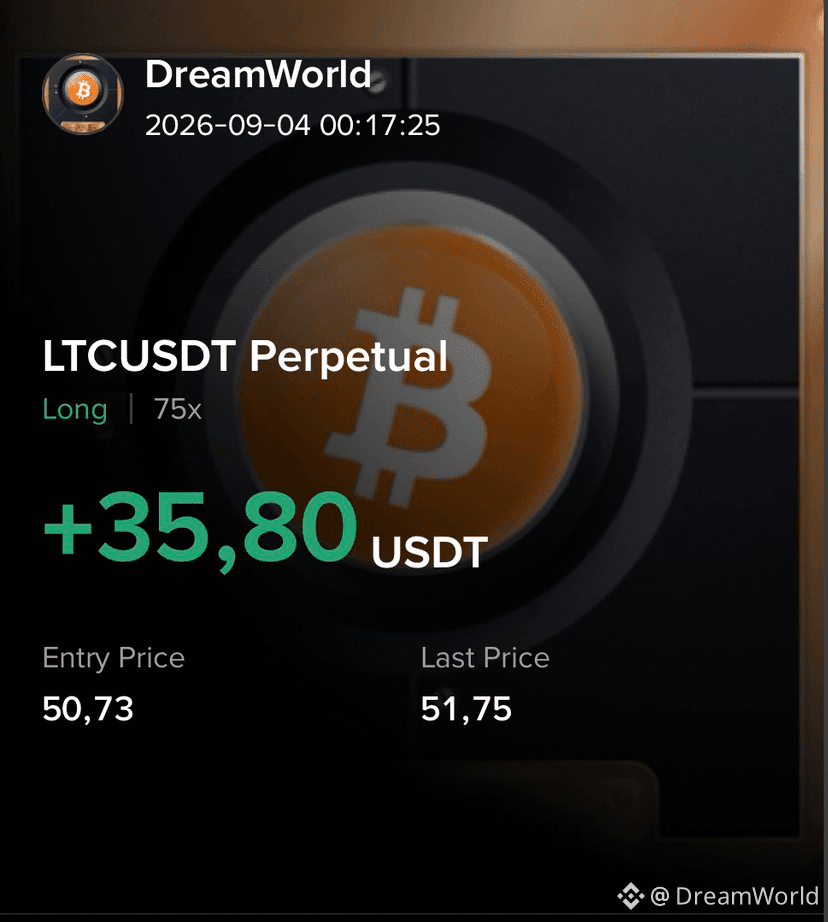

$LTC demonstrates a stable upward impulse — will the price be able to break the local resistance at $52.01 and move toward testing high liquidation levels?
$LTC - 🟢 LONG · Conf 85%
Trading plan:
• Entry zone: 51.20 – 51.85
• SL: 50.40
• TP1: 53.20
• TP2: 54.50
• TP3: 56.00
Why this specific setup?
• Bullish alignment and a divergent spread of the EMA (7: 51.47, 25: 50.76, 99: 49.78) on the 1h chart, with confident price consolidation above the moving averages.
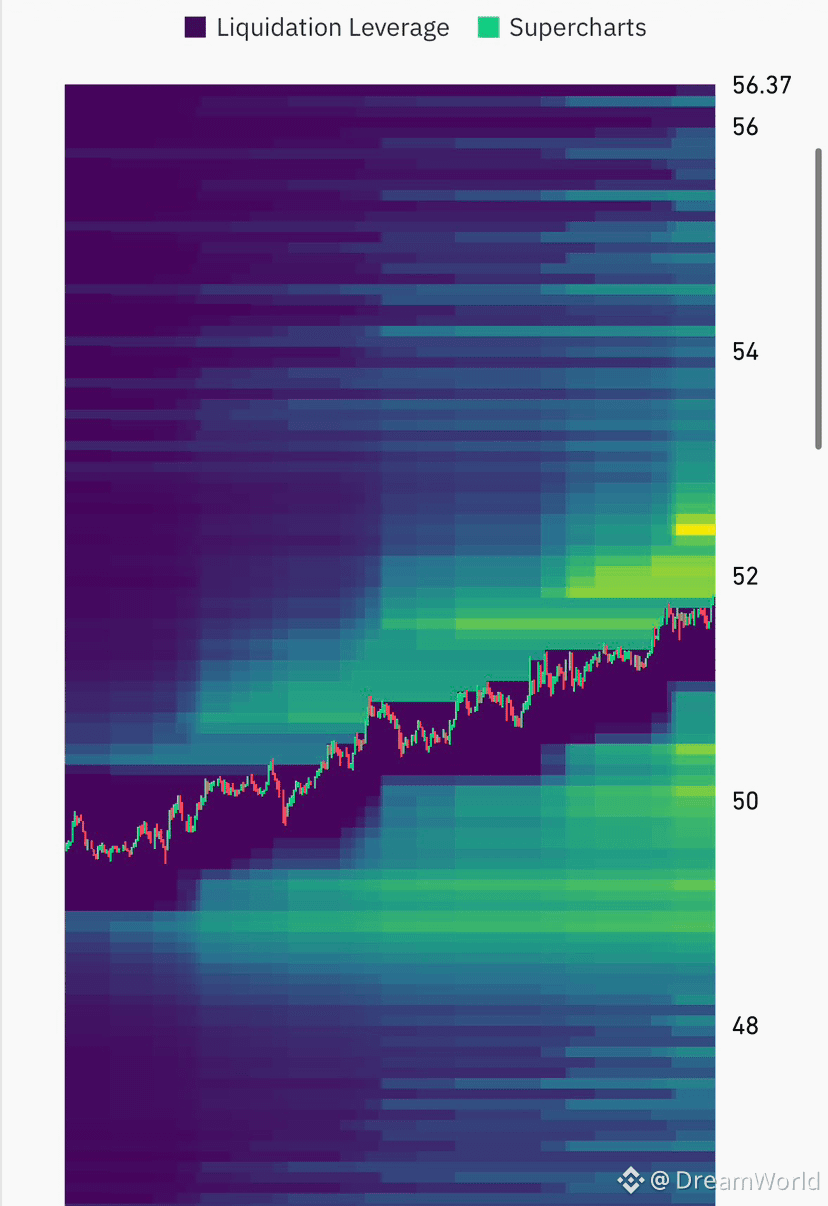
• A powerful liquidation zone for shorts on the heatmap in the range $53.00–56.00, acting as a magnet for the next impulse.
• A confident buyback from the local low of $48.25, with steadily rising minimums.
• A well-calculated risk-to-reward ratio, with a protective stop based on trend support from EMA25 and EMA99.
Will buyers have enough strength for an impulsive breakout above $52.00 and a move toward the $55.00 limit?
⚠️ Analysis is for informational purposes only. NFA — manage your risk and DYOR.
$LTC - 🟢 LONG · Conf 85%
Trading plan:
• Entry zone: 51.20 – 51.85
• SL: 50.40
• TP1: 53.20
• TP2: 54.50
• TP3: 56.00
Why this specific setup?
• Bullish alignment and a divergent spread of the EMA (7: 51.47, 25: 50.76, 99: 49.78) on the 1h chart, with confident price consolidation above the moving averages.
• A powerful liquidation zone for shorts on the heatmap in the range $53.00–56.00, acting as a magnet for the next impulse.
• A confident buyback from the local low of $48.25, with steadily rising minimums.
• A well-calculated risk-to-reward ratio, with a protective stop based on trend support from EMA25 and EMA99.
Will buyers have enough strength for an impulsive breakout above $52.00 and a move toward the $55.00 limit?
⚠️ Analysis is for informational purposes only. NFA — manage your risk and DYOR.