

Content
How to open a Binance Futures account
How to fund your Binance Futures account
Binance Futures interface guide
How to adjust your leverage
What is the difference between Mark Price and Final Price?
What order types are available and how to use them?
How to use the Binance Futures calculator
How to use Hedge Mode
What is Funding Rate and how to check it?
Apa itu Post-Only, Time in Force, dan Reduce-Only?
When is your position at risk of liquidation?
What is auto-deleveraging, and how does it affect it?
Closing
How to open a Binance Futures account
Before opening a Binance Futures account, you need a regular Binance account. If you don't have one, you can go to Binance, then click Register in the top right corner of the screen. Follow these steps:
2. Masukkan alamat email Anda, lalu pilih kata sandi yang aman. Jika Anda memiliki ID referral, tempelkan ke kotak ID referral. Jika tidak memilikinya, Anda dapat menggunakan tautan referral kami untuk mendapatkan diskon 10% terhadap biaya perdagangan spot/margin.

When you're ready, click on Create an account.
You will immediately receive a verification email. Follow the instructions in the email to complete your registration.
Next, log in to your Binance account, hover your mouse over the bar at the top of the page, then click USD(S)-M Futures.

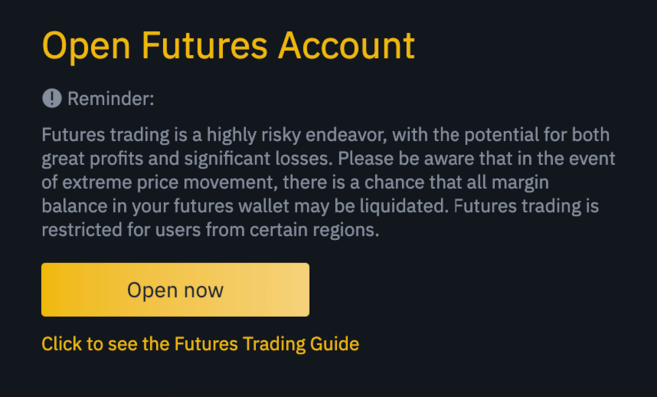
Click on the Open now button to activate your Binance Futures account. Just that! now you are ready to trade!
If you don't understand futures contract trading, we recommend reading the article What are Forward and Futures Contracts? and What is a Perpetual Futures Contract? before starting.
You can also read the Binance Futures FAQ for a summary of the contract specifications.
If you want to test the platform without risking real funds, you can try the Binance Futures testnet.
How to fund your Binance Futures account
Anda dapat mentransfer dana bolak-balik di antara Dompet Bursa (dompet yang digunakan di Binance) dan Dompet Futures (dompet yang digunakan di Binance Futures).
Jika Anda tidak memiliki dana yang disetor ke Binance, kami menyarankan untuk membaca Cara Menyetor di Binance.
To transfer funds to the Futures Wallet, click Transfer on the right side of the Binance Futures page.

Set the amount you want to transfer, then click Confirm transfer. You will immediately see the balance added to the Futures Wallet. You can change the transfer direction using the two arrow icons as below.

This is not the only way to fund a Futures Wallet. You can also use funds in your Exchange Wallet as collateral and borrow USDT for futures trading from the Futures Wallet Balance page. This way, you don't have to transfer funds directly to the Futures Wallet. Of course, you have to pay back the borrowed USDT.

Panduan antarmuka Binance Futures

1. In this area, you can find links to other Binance pages, such as COIN-M Futures (quarterly contracts), API Access, Spot, and Activity. In the [Information] tab, you can find links to Futures FAQs, funding rates, index prices and other market data.
The right side of the top bar is where you can find access to your Binance account, including the Dashboard. You can check your wallet balance and orders across the Binance ecosystem easily.
2. This is an area for:
Selects a contract from the available contract names (default: BTCUSDT).
Check the Mark Price (it is very important to observe this, because liquidation depends on the Mark Price).
Check the Funding Rate and when the next funding will be.
View the current diagram. You can switch between Native or integrated TradingView charts. You will get a real-time view of the current order book depth by clicking [Depth].

View order book data directly. You can adjust the order book accuracy in the dropdown menu in the top right corner of this area (0.01 by default).
View a live list of previously executed trades on the platform.

Whenever you see an arrow in the bottom right corner of a module, it means you can move and resize that element. This way, you can easily create your own custom interface layout!

3. This is the area to monitor your trading activity. You can switch between tabs to check the current status of open and recently executed positions and orders. You can also get a complete history of trades and transactions over a certain period.
This is also a place for you to monitor positions in the auto deleveraging queue within ADL (important to note during times of high volatility).
4. This is the area to check available assets, deposit and buy more crypto. This is also the place to view information relating to your current contract and position. Make sure to pay attention to the Margin Ratio to prevent liquidation.
By clicking Transfer, you can transfer funds from Futures Wallet to other Binance ecosystems.
5. This is the order entry field. Read our detailed explanation of the available order types further in this article. This is also the place to switch between Cross Margin and Isolated Margin. Adjust your leverage by clicking on the current leverage amount (20x by default).
How to adjust your leverage
Binance Futures allows you to manually adjust leverage within each contract. To select a contract, hover over the top left of the page and select the current contract (default: BTCUSDT).
To adjust leverage, open the order entry field, then click on your current leverage amount (20x by default). Determine the leverage amount by adjusting the slider or by typing it, then click [Confirm].
It should be noted that the larger the position size, the smaller the amount of leverage you can use. Vice versa, the smaller the position size, the greater the leverage that can be used.
Please note that using high leverage carries a greater risk of liquidation. Beginner traders should be careful in determining the level of leverage.
What is the difference between Mark Price and Final Price?
To avoid unnecessary spikes and liquidations during periods of high volatility, Binance Futures uses Last Price and Mark Price.
Last Price is easy to understand. This means the last price of the contract traded. In other words, the last trade in the trading history determines the Last Price. Used to calculate your realized PnL (Profit and Loss).
Mark prices are designed to prevent price manipulation. Calculated using a combination of funding data and a number of price data from various spot exchanges. Your liquidation and unrealized PnL prices are calculated using the Mark Price.
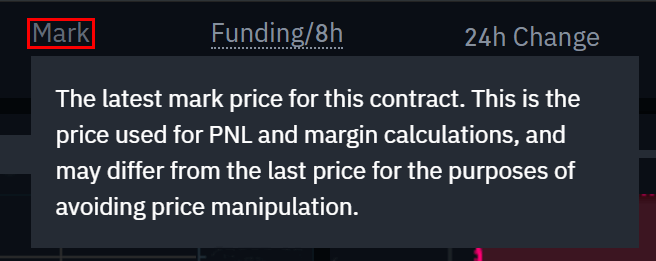
Please note that the Mark Price and Final Price may differ.
When setting an order type that uses a stop price as a trigger, you can select the price you want to use as a trigger, namely the Last Price or Mark Price. To do this, select the price you want to use in the Trigger dropdown menu at the bottom of the order entry field.
What order types are available and how to use them?
There are many order types that can be used on Binance Futures:
Limit Order
Limit orders are orders placed in the order book with a certain limit price. When placing a limit order, the trade will only be executed if the market price reaches your limit price (or better). Therefore, you can use limit orders to buy at a lower price or to sell at a higher price than the current market price.
Market Order
A market order is an order to buy or sell at the best price currently available. This order is executed against the limit order previously placed in the order book. When placing a market order, you will pay a fee as a market taker.
Stop Limit Order
The easiest way to understand stop-limit orders is to break them down into a stop price and a limit price. The stop price is the price that triggers the limit order, while the limit price is the price of the limit order that is triggered. This means that once the stop price is reached, your limit order will be immediately placed in the order book.
Although the stop price and limit price can be the same, however, this is not recommended. In fact, it will be safer for you to set the stop price (trigger price) slightly higher than the limit price for sell orders, or slightly lower than the limit price for buy orders. This increases the chances of your limit order being filled after the stop price is triggered.
Stop-Market Order
Similar to a stop-limit order, a stop market order uses a stop price as a trigger. However, when the stop price is reached, the market order will actually be triggered.
Take Profit Limit Order
If you understand stop-limit orders, you will understand take-profit limit orders easily. Similar to a stop-limit order, this order includes a trigger price, which is the price that triggers the order, and a limit price, which is the price of the limit order which is then added to the order book. The main difference between a stop-limit order and a take profit limit order is that a take profit limit order can only be used to reduce an open position.
Take profit limit orders can be a powerful tool in managing risk and locking in profits at certain price levels. These orders can also be used in conjunction with other types of orders, such as stop-limit orders, allowing you to have greater control over your position.
Harap diperhatikan bahwa ini bukanlah OCO order. Misalnya, jika stop-limit order terisi sementara Anda juga memiliki take profit limit order yang aktif, maka take profit limit order akan tetap aktif hingga Anda membatalkannya secara manual.
Anda dapat mengatur take profit limit order dalam pilihan Stop Limit di bidang entri order.
Take Profit Market Order
Serupa dengan take-profit limit order, take-profit market order menggunakan harga stop sebagai pemicu. Namun, ketika harga stop tercapai, market order justru akan dipicu.
Anda dapat mengatur take-profit market order dalam pilihan Stop Market di bidang entri order.
Trailing Stop Order
Trailing stop orders help you lock in profits while limiting potential losses on open positions. For long positions, this means that the trailing stop will move up with the price if the price increases. However, if the price falls, the trailing stop stops moving. If the price moves a certain percentage (called the Callback Level) in the other direction, then a sell order will be issued. The same thing applies to short positions, but in the opposite way. The trailing stop moves down with the market, but stops moving if the market starts to rise. If the price moves a certain percentage in the other direction, then a buy order will be issued.
Activation Price is the price that triggers the trailing stop order. If you do not specify an Activation Price, then the price will default to the Last Price or current Mark Price. You can set the price to be used as a trigger at the bottom of the order entry field.
The Callback Level determines the amount of percentage the trailing stop will “follow” the price. So, if you set the Callback Level to 1%, then the trailing stop will continue to follow the price by a distance of 1% if the trade moves in your direction. If the price moves more than 1% in the opposite direction to your trade, then a buy or sell order will be issued (depending on the direction of your trade).
How to use the Binance Futures calculator
Video tutorial is available here.
You can find a calculator at the top where you enter your order. Makes it easier for you to calculate values before entering a long or short position. You can move the leverage slider to use it as a basis for your calculations.
The calculator has three menus:
PNL – Use this tab to calculate Initial Margin, Profit and Loss (PnL), and Return on Equity (ROE) based on intended entry and exit prices, as well as position size.
Target Price – Use this tab to calculate the price required to exit your position to achieve the desired return percentage.
Liquidation Price – Use this tab to calculate an estimated liquidation price based on wallet balance, intended entry price, and position size.
How to use Hedge Mode
In Hedging Mode, you can have both long and short positions simultaneously for one contract. Why do this? Imagine that you are optimistic about the price of Bitcoin in the long term, so you open a long position. At the same time, you may want to take a short short position for a shorter period of time. Hedging Mode allows you to do so. In this case, your short short position will not affect your long position.
By default, the position mode is One Way Mode. This means you cannot open long and short positions simultaneously on one contract. If you try to do so, the positions will cancel each other out. So, if you want to use Hedge Mode, you have to activate it manually. Here's how:
1. Navigate to the top right corner of the screen, then select [Preferences].
2. Buka tab [Position Mode] (Mode Posisi), lalu pilih [Hedge Mode] (Mode Hedging).
Please note that if you have an open order or position, you will not be able to adjust the position mode.
What is Funding Rate and how to check it?
The Funding Rate ensures that the price of perpetual futures contracts remains as close as possible to the price (spot) of the underlying asset. In essence, traders pay each other depending on their open positions. Which party will be paid, is determined by the difference between the futures price and the spot price.
If the Funding Rate is positive, longs pay shorts. If the Funding Rate is negative, shorts pay longs.
If you want to read more about how this process works, read What is a Perpetual Futures Contract?.
So what does this mean for you? Well, you will pay or receive funding, depending on your open positions and Funding Rate. At Binance Futures, this funding is paid every 8 hours. You can check the time and estimated Funding Rate for the next period at the top of the page, next to the Mark Price.
If you want to check previous Funding Rates for each contract, hover over [Information], then select [Funding Rate History].
Apa itu Post-Only, Time in Force, dan Reduce-Only?

Saat menggunakan limit order, Anda dapat mengatur instruksi tambahan beserta dengan order. Di Binance Futures, instruksi ini dapat berupa Post-Only (Posting Saja) atau Time in Force (TIF/Masa Berlaku) dan instruksi ini menentukan sifat tambahan dari limit order Anda. Anda dapat mengaksesnya di bagian bawah bidang entri order.
Post-Only berarti bahwa order Anda akan selalu ditambahkan ke buku order terlebih dahulu dan tidak akan pernah dieksekusi terhadap order yang ada dalam buku order. Hal ini berguna jika Anda hanya ingin membayar biaya maker.
TIF instructions allow you to customize how long your order remains active before executing or expiring. You can choose one of several TIF instruction options:
GTC (Good Till Cancel): Order will remain active until filled or cancelled.
IOC (Immediate Or Cancel): Order will be executed immediately (fully or partially). If only partially executed, the unfilled portion of the order will be cancelled.
FOK (Fill Or Kill): Orders must be filled immediately. Otherwise, the order will not be executed at all.
When you are in One-Way Mode, checking the Reduce-Only box will ensure that any new orders you place will only reduce, and will not increase, your current open position.
When is your position at risk of liquidation?
Liquidation occurs when the Margin Balance falls below the required Minimum Margin. Margin Balance is your Binance Futures account balance, including Unrealized PnL (Profit and Loss). So, your profits and losses will cause the Margin Balance value to change. If you use Cross Margin mode, this balance will be shared across your positions. If you use Isolated Margin mode, this balance can be allocated to individual positions.
Minimum Margin is the minimum value required to keep a position open. The value varies depending on the size of your position. Larger positions require a higher Minimum Margin.
You can check the current Margin Ratio in the bottom right corner. If the Margin Ratio reaches 100%, your position will be liquidated.
If liquidation occurs, all your open orders will be cancelled. Ideally, you should monitor positions to avoid auto-liquidation (which if happens, will cost you extra). If your position is close to being liquidated, it may be best to close the position manually rather than waiting for auto-liquidation.
What is auto-deleveraging and what is its effect?
When the user's account size falls below 0, the Insurance Fund will be used to cover losses. However, in some highly volatile market environments, the Insurance Fund may not be able to handle the losses and open positions will have to be reduced to cover them. This means that your open positions are also at risk of being reduced in circumstances like this.
The order in which positions are reduced is determined by a queue. The most profitable and highest leveraged traders are at the front of the queue. You can check the current position of the queue by navigating to [ADL] in the [Position tab].

Closing
Futures contracts are derivatives that obligate traders to buy or sell an asset in the future. However, unlike traditional futures contracts, perpetual futures contracts do not have a settlement date. However, derivatives can be quite confusing for inexperienced traders. So, it's important to understand how the contract works before taking on the financial risk. As mentioned, you can access the Binance Futures testnet to test the platform without risking real funds.