You can now store frequently used addresses and its associating beneficiary information in the address book. Upon withdrawal, you can choose to select the address from the address book and the majority of the information can be pre-filled. This includes all of the information in the withdrawal questionnaire.
Please note that you are still required to click through all the questionnaires and ensure all information is accurate before the transaction can be triggered. It is your responsibility to ensure the information provided is accurate and up to date.
If the beneficiary address is an unhosted wallet, a satoshi test is required to “verify” the address. If it belongs to another VASP, you would have to go through the verification process by completing the withdrawal questionnaire to change the status into “Declared” or “Verified”.
Once you complete the verification process and the questionnaire for a stored address, the questionnaire will be pre-filled with your inputs whenever you withdraw to this address from the address book.
A Satoshi Test verifies control of a self-hosted wallet address by requiring the user to transfer a small amount of cryptocurrency to Binance within a specified timeframe. Successful completion proves control of the address, and the funds will be credited to your Binance account after the deposit questionnaire is filled out. If the transaction fails, the test can be retried again.
It informs Binance Japan that you are the owner of the beneficiary address. It is not a strict requirement for you to perform the test and verify your address, but it does provide us with additional information for regulatory and compliance purposes.
The verification process is still on-going, please wait for the status to be updated, meanwhile withdrawals made to this address will still have to complete the questionnaire process but the information will be pre-filled.
1. Go to Address Management page, click on [Add], Add address

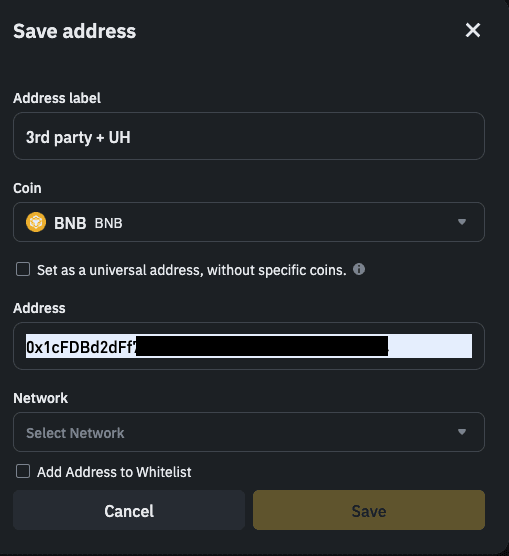
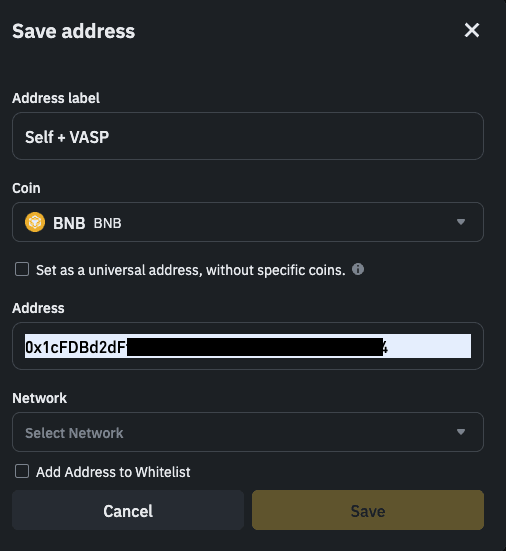
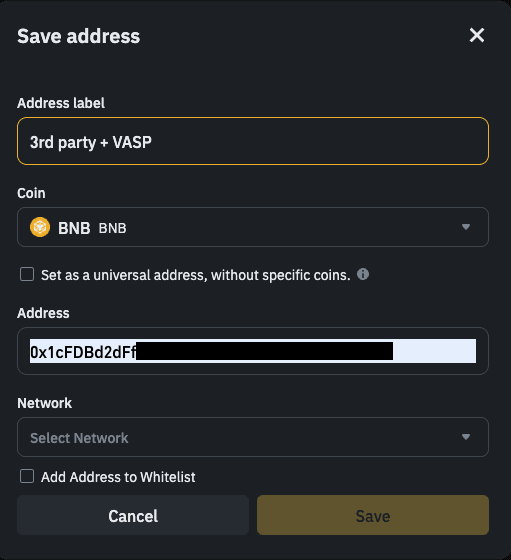
2. In the Save address pop-up, input the relevant details for your self-hosted address, click [Save]
3. Verification Reminder prompt will pop out, click [Verify Now] to proceed

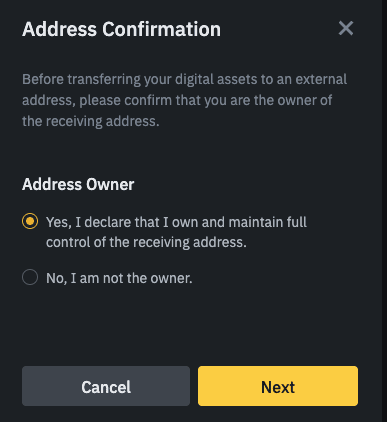
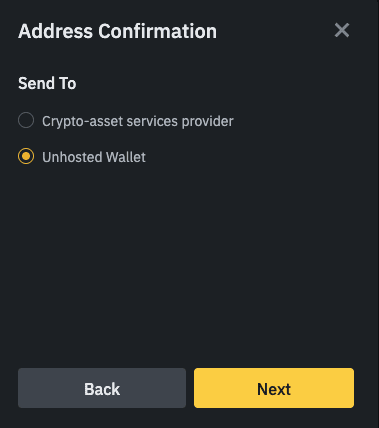
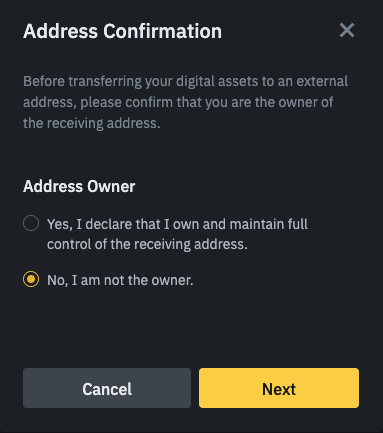
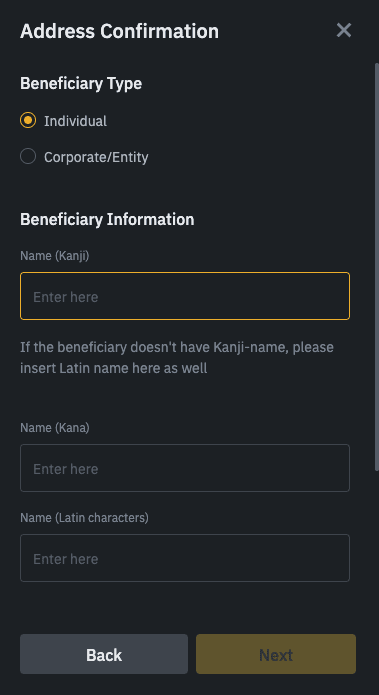
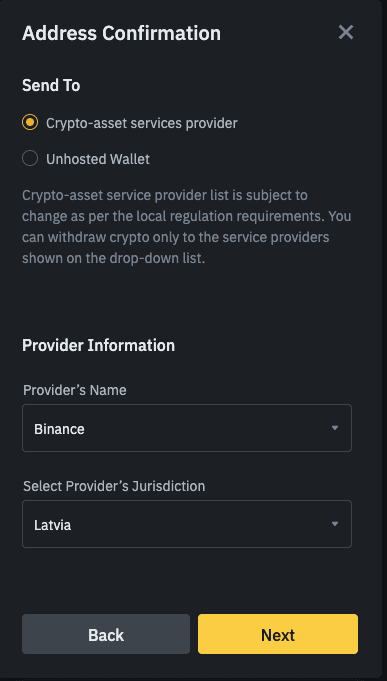
4. Answer the corresponding question regarding the address confirmation
 |  |
5. Select Verification Method and Deposit Token for the Satoshi Test, click on [Submit].
Note: Even if the satoshi test is not completed, your withdrawal questionnaire will still be pre-filled with your stored information.

6. A pop-up will appear to let user deposit the pre-set amount of the chosen token-network to the deposit address
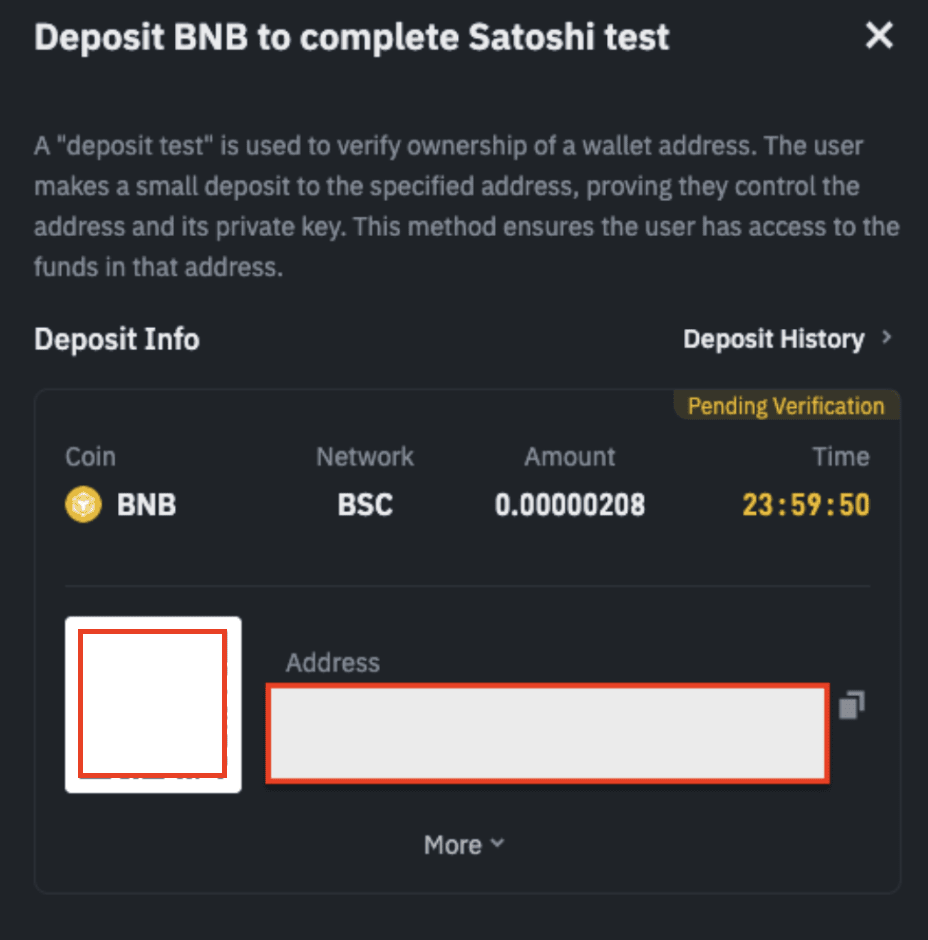
7. After depositing, while pending for results, address status will be displayed as “Pending”

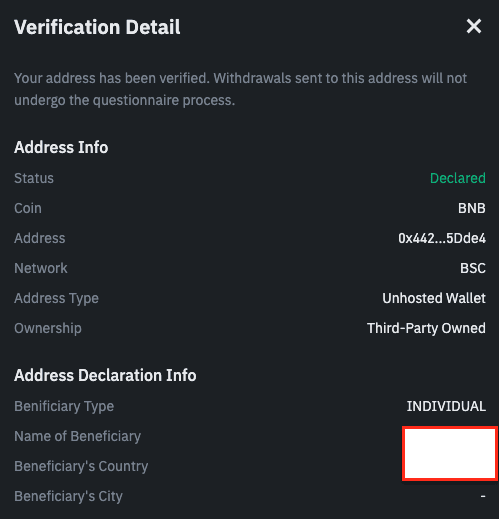
8. Once the deposit has been credited, address status will be updated to “Verified”, click on [Verified] to check the Verification Detail


1. Go to Address Management page, click on [Add], Add address
2. In the Save address pop-up, input the relevant details for your self-hosted address, click on [Save]
3. Verification Reminder prompt will pop out, click [Verify Now] to proceed
4. Answer the corresponding question regarding the address confirmation
5. Once submitted, click on Check Verification Status, address status will be updated to “Declared”, click on [Declared] to check the Verification Detail
1. Go to Address Management page, click on [Add], Add address
2. In the Save address pop-up, input the relevant details for your self-hosted address, click on [Save]
3. Verification Reminder prompt will pop out, click on [Verify Now] to proceed
4. Answer the corresponding question regarding the address confirmation (user will have different questions depending on the entity)
5. Once submitted, click on Check Verification Status,

If VASP is in GTR, address status will be updated to “Verified”, click on [Verified] to check the Verification Detail
1. Go to Address Management page, click on [Add], Add address
2. In the Save address pop-up, input the relevant details for your self-hosted address, click save
3. Verification Reminder prompt will pop out, click on [Verify Now] to proceed
4. Answer the corresponding question regarding the address confirmation (user will have different questions depending on the entity)

5. Once submitted, click on Check Verification Status,
a. If VASP is not in GTR, address status will be updated to “Declared”, click on [Declared] to check the Verification Detail

b. If VASP is in GTR, address status will be updated to “Verified”, click on [Verified] to check the Verification Detail

