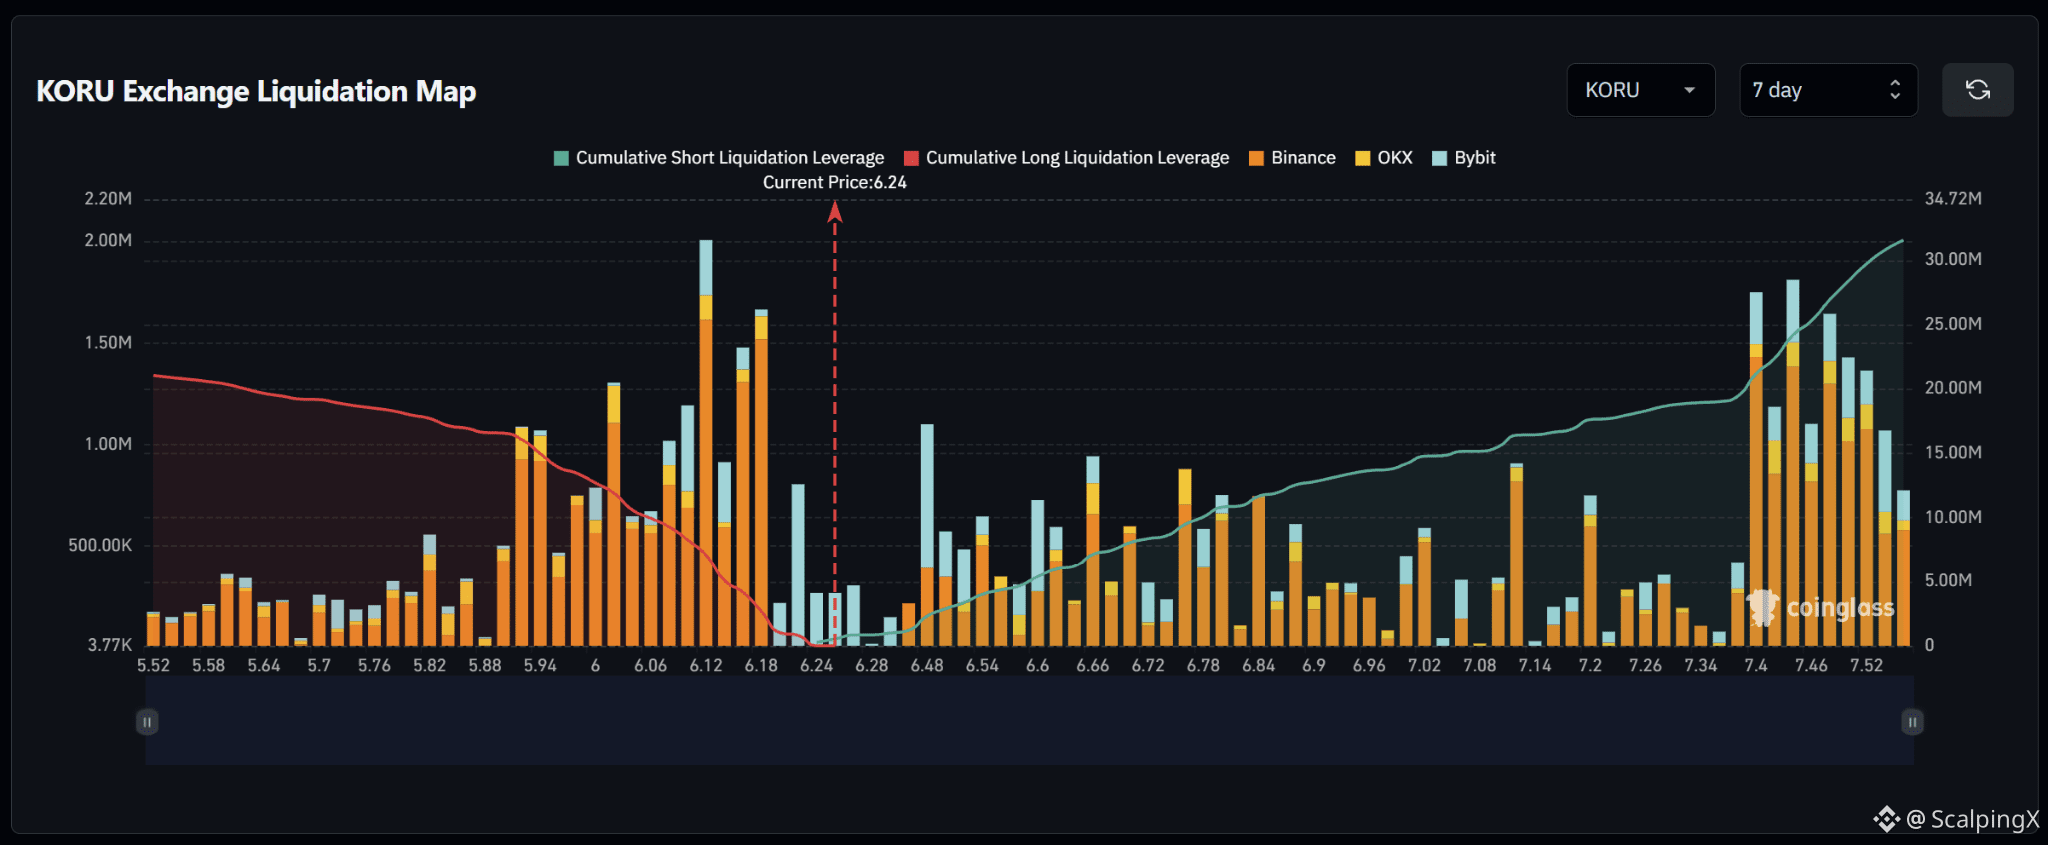
$KORU – Liquidation Map (7 days) – Index ~6.24
🧭 Favor a long-liquidation sweep at 6.18–6.22. Large downside bars sit closer to price than the main short zone at 6.48–6.66, with further long concentrations at 6.10–6.16.
🔻 Losing 6.18 without reclaiming it would shift focus to 6.10–6.16, particularly around 6.12, which contains the largest bar on the map. Holding below 6.10 would bring 6.00–6.08, then 5.92–5.96 into view.
🎯 A long sweep followed by a quick reclaim of 6.24 would weaken downside continuation. Above price, bars are relatively sparse before the large short cluster around 6.48, followed by successive clusters through 6.66.
⚖️ Breaking and holding above 6.48 would shift preference toward short-liquidation sweeps at 6.52–6.66. Holding above 6.66 would put 6.76–6.86 in focus. Further up, 7.40–7.52 contains another concentration of large bars; a short sweep followed by a loss of 6.48 would weaken further upside.
#LiquidationMap
🧭 Favor a long-liquidation sweep at 6.18–6.22. Large downside bars sit closer to price than the main short zone at 6.48–6.66, with further long concentrations at 6.10–6.16.
🔻 Losing 6.18 without reclaiming it would shift focus to 6.10–6.16, particularly around 6.12, which contains the largest bar on the map. Holding below 6.10 would bring 6.00–6.08, then 5.92–5.96 into view.
🎯 A long sweep followed by a quick reclaim of 6.24 would weaken downside continuation. Above price, bars are relatively sparse before the large short cluster around 6.48, followed by successive clusters through 6.66.
⚖️ Breaking and holding above 6.48 would shift preference toward short-liquidation sweeps at 6.52–6.66. Holding above 6.66 would put 6.76–6.86 in focus. Further up, 7.40–7.52 contains another concentration of large bars; a short sweep followed by a loss of 6.48 would weaken further upside.
#LiquidationMap