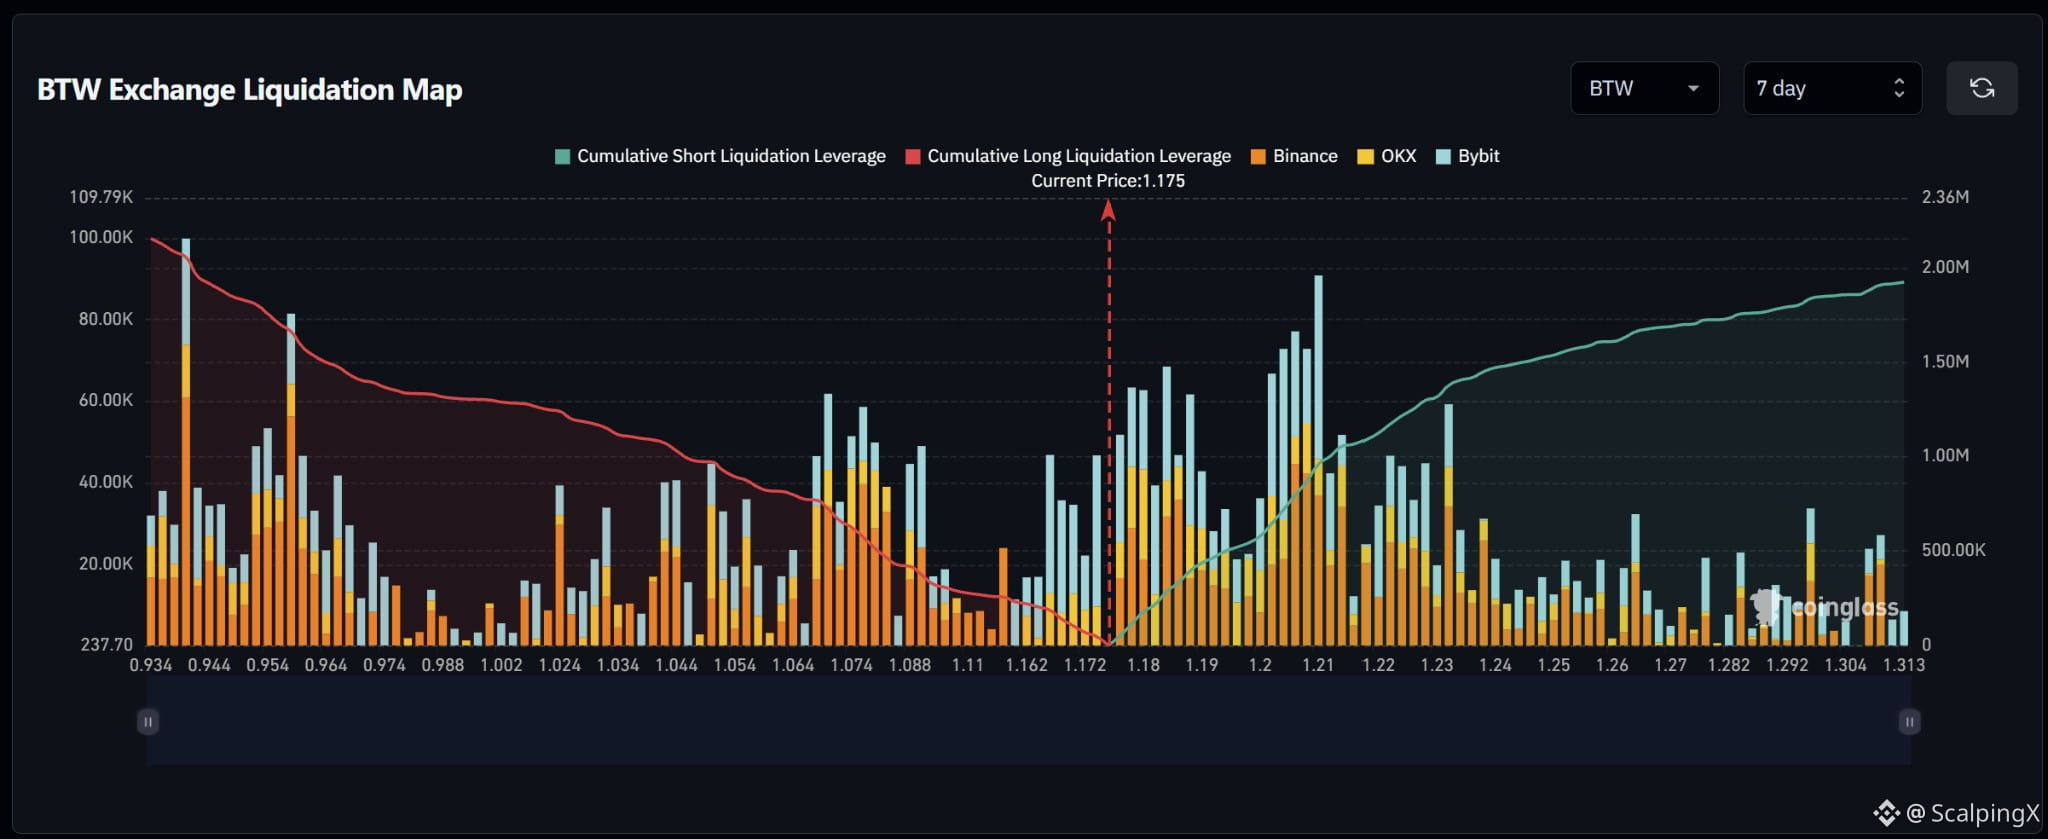
$BTW – Liquidation Map (7 days) – Index ~1.175
🧭 The preferred scenario is an upside short-liquidation sweep at 1.177–1.191, where bars cluster densely just above price. Estimated cumulative exposure is relatively balanced within the displayed range.
🔺 Clearing and holding above 1.191 shifts attention to 1.202–1.211. Bars around 1.194–1.200 are smaller, while the next range contains several consecutive large spikes, particularly near 1.210. Short liquidations here could amplify volatility.
🎯 Holding above 1.211 after the sweep brings 1.220–1.233 into focus. Beyond 1.240, bars generally become smaller and more scattered, with cumulative exposure rising more slowly.
⚖️ Losing 1.172 without reclaiming it weakens the upside scenario, shifting attention to long clusters at 1.165–1.170, then 1.158–1.163. A sweep of 1.180–1.191 followed by a quick drop below 1.180 would increase the risk of a failed upside move.
#LiquidationMap
🧭 The preferred scenario is an upside short-liquidation sweep at 1.177–1.191, where bars cluster densely just above price. Estimated cumulative exposure is relatively balanced within the displayed range.
🔺 Clearing and holding above 1.191 shifts attention to 1.202–1.211. Bars around 1.194–1.200 are smaller, while the next range contains several consecutive large spikes, particularly near 1.210. Short liquidations here could amplify volatility.
🎯 Holding above 1.211 after the sweep brings 1.220–1.233 into focus. Beyond 1.240, bars generally become smaller and more scattered, with cumulative exposure rising more slowly.
⚖️ Losing 1.172 without reclaiming it weakens the upside scenario, shifting attention to long clusters at 1.165–1.170, then 1.158–1.163. A sweep of 1.180–1.191 followed by a quick drop below 1.180 would increase the risk of a failed upside move.
#LiquidationMap