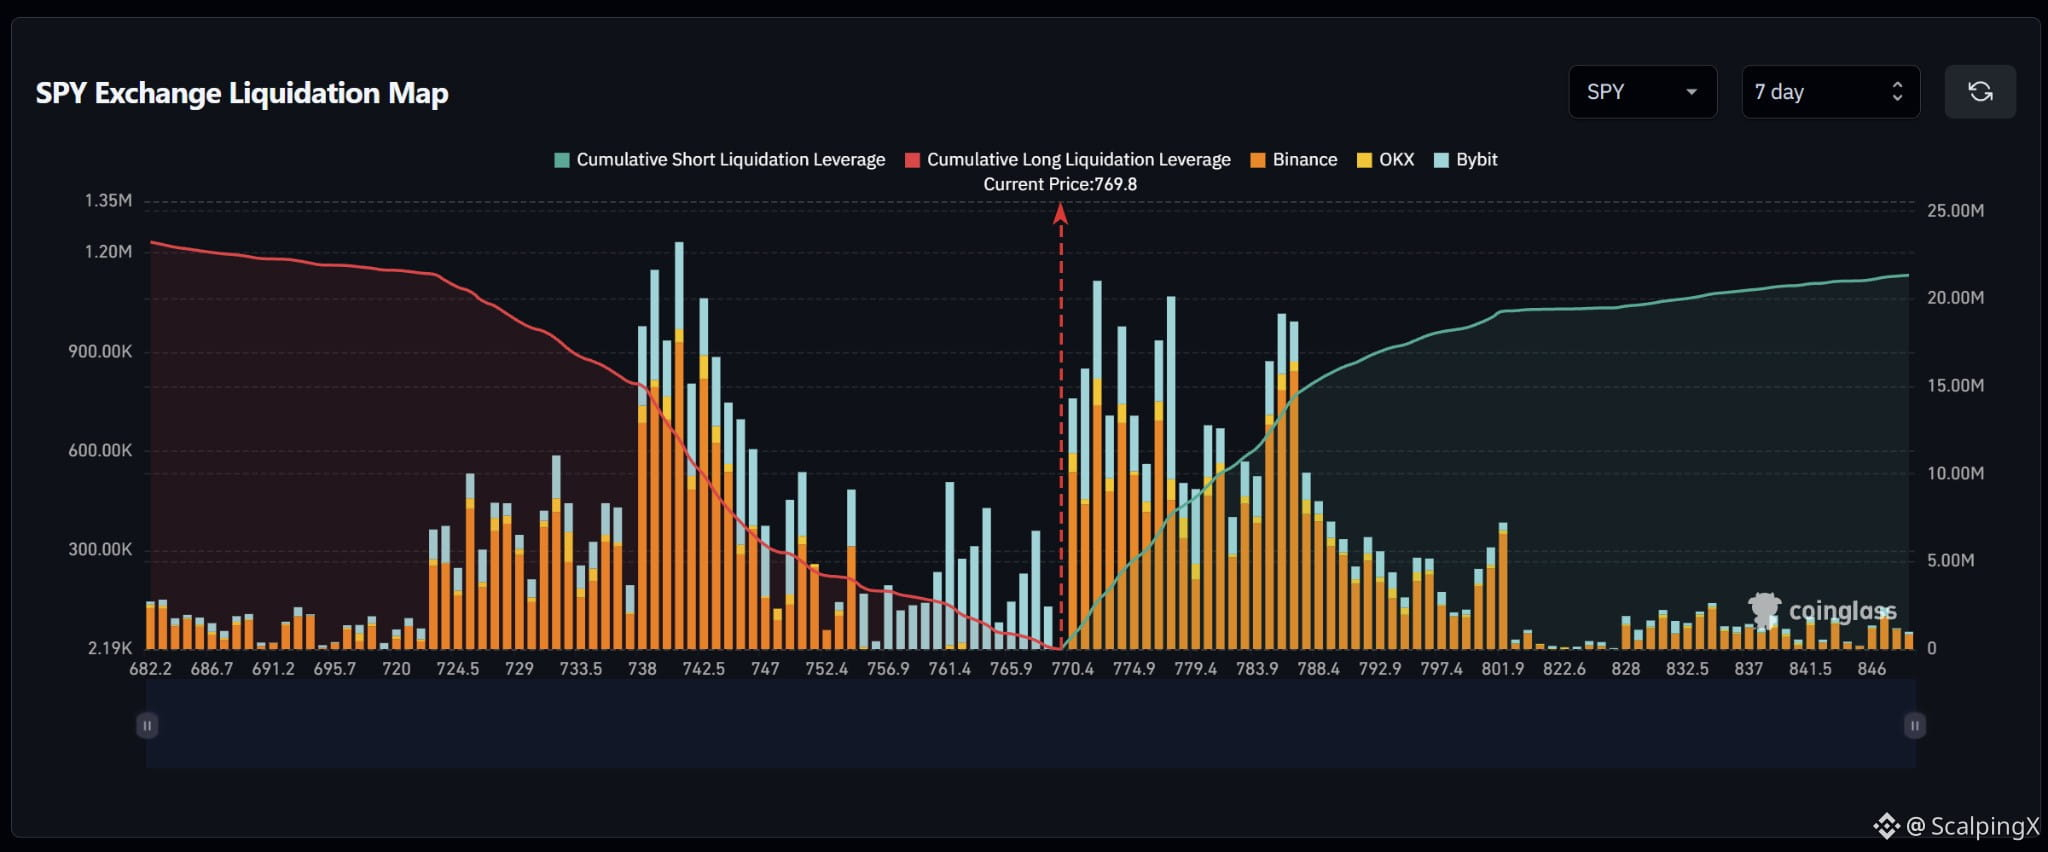
$SPY – Liquidation Map (7 days) – Index ~769.8
🧭 The preferred scenario is a nearby upside short sweep. Several large bars cluster immediately above price at 770–780, while the strongest long band lies farther below at 738–747. Cumulative liquidation exposure is broadly balanced across the displayed range.
🔺 A break and hold above 774 after the initial sweep shifts attention to 775–780. Prominent bars near 772 and 778 could amplify an advance as shorts are liquidated; the reaction after the sweep will help assess continuation.
🎯 Holding above 780 brings 783–788 into focus, particularly near 786–787. Farther up, smaller clusters sit at 790–802. Beyond 802, bars diminish noticeably, making momentum worth reassessing after the main bands are swept.
⚖️ Losing 767 without a reclaim would weaken the upside scenario and shift attention to 761–765, then 752–757. A denser long cluster sits at 738–747, particularly near 742. Avoid chasing a sweep of 775–780 that quickly reverses below 774.
#LiquidationMap
🧭 The preferred scenario is a nearby upside short sweep. Several large bars cluster immediately above price at 770–780, while the strongest long band lies farther below at 738–747. Cumulative liquidation exposure is broadly balanced across the displayed range.
🔺 A break and hold above 774 after the initial sweep shifts attention to 775–780. Prominent bars near 772 and 778 could amplify an advance as shorts are liquidated; the reaction after the sweep will help assess continuation.
🎯 Holding above 780 brings 783–788 into focus, particularly near 786–787. Farther up, smaller clusters sit at 790–802. Beyond 802, bars diminish noticeably, making momentum worth reassessing after the main bands are swept.
⚖️ Losing 767 without a reclaim would weaken the upside scenario and shift attention to 761–765, then 752–757. A denser long cluster sits at 738–747, particularly near 742. Avoid chasing a sweep of 775–780 that quickly reverses below 774.
#LiquidationMap