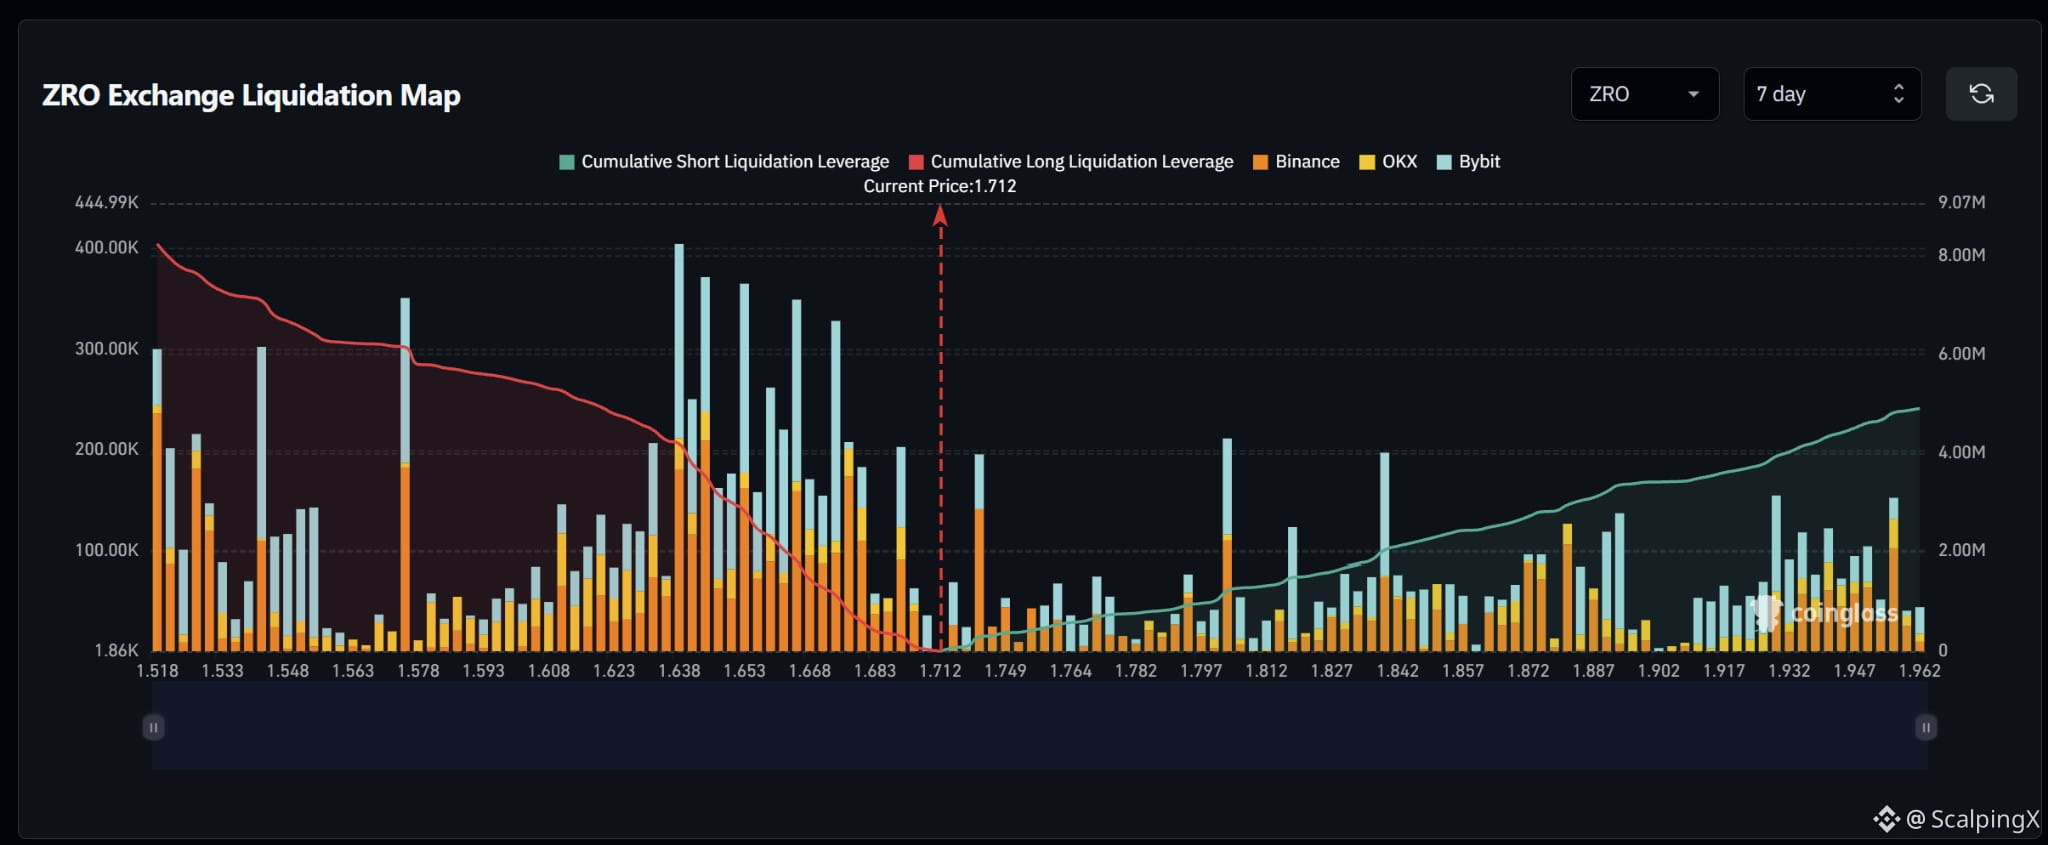
$ZRO – Liquidation Map (7 days) – Index ~1.712
🧭 The preferred scenario is a downside long sweep. Long clusters are denser across 1.638–1.705, while short exposure above price consists mainly of scattered bars. Estimated cumulative long liquidation exposure is roughly $8 million across the displayed range, versus nearly $5 million on the short side.
🔻 Losing 1.700 without a reclaim shifts attention to 1.680–1.690. Long liquidations there could amplify the decline; the reaction after the sweep will help assess continuation.
🎯 A further break below 1.680 brings the dense 1.638–1.675 band into focus, particularly around 1.650–1.665. Conversely, a downside sweep followed by a quick reclaim of 1.700 would weaken the case for further declines.
⚖️ A break and hold above the short cluster near 1.730 would weaken the downside bias. Exposure farther up is relatively sparse until the prominent cluster at 1.800–1.805, followed by 1.838–1.845. Avoid chasing a sweep of 1.730 that quickly reverses below 1.712.
#LiquidationMap
🧭 The preferred scenario is a downside long sweep. Long clusters are denser across 1.638–1.705, while short exposure above price consists mainly of scattered bars. Estimated cumulative long liquidation exposure is roughly $8 million across the displayed range, versus nearly $5 million on the short side.
🔻 Losing 1.700 without a reclaim shifts attention to 1.680–1.690. Long liquidations there could amplify the decline; the reaction after the sweep will help assess continuation.
🎯 A further break below 1.680 brings the dense 1.638–1.675 band into focus, particularly around 1.650–1.665. Conversely, a downside sweep followed by a quick reclaim of 1.700 would weaken the case for further declines.
⚖️ A break and hold above the short cluster near 1.730 would weaken the downside bias. Exposure farther up is relatively sparse until the prominent cluster at 1.800–1.805, followed by 1.838–1.845. Avoid chasing a sweep of 1.730 that quickly reverses below 1.712.
#LiquidationMap