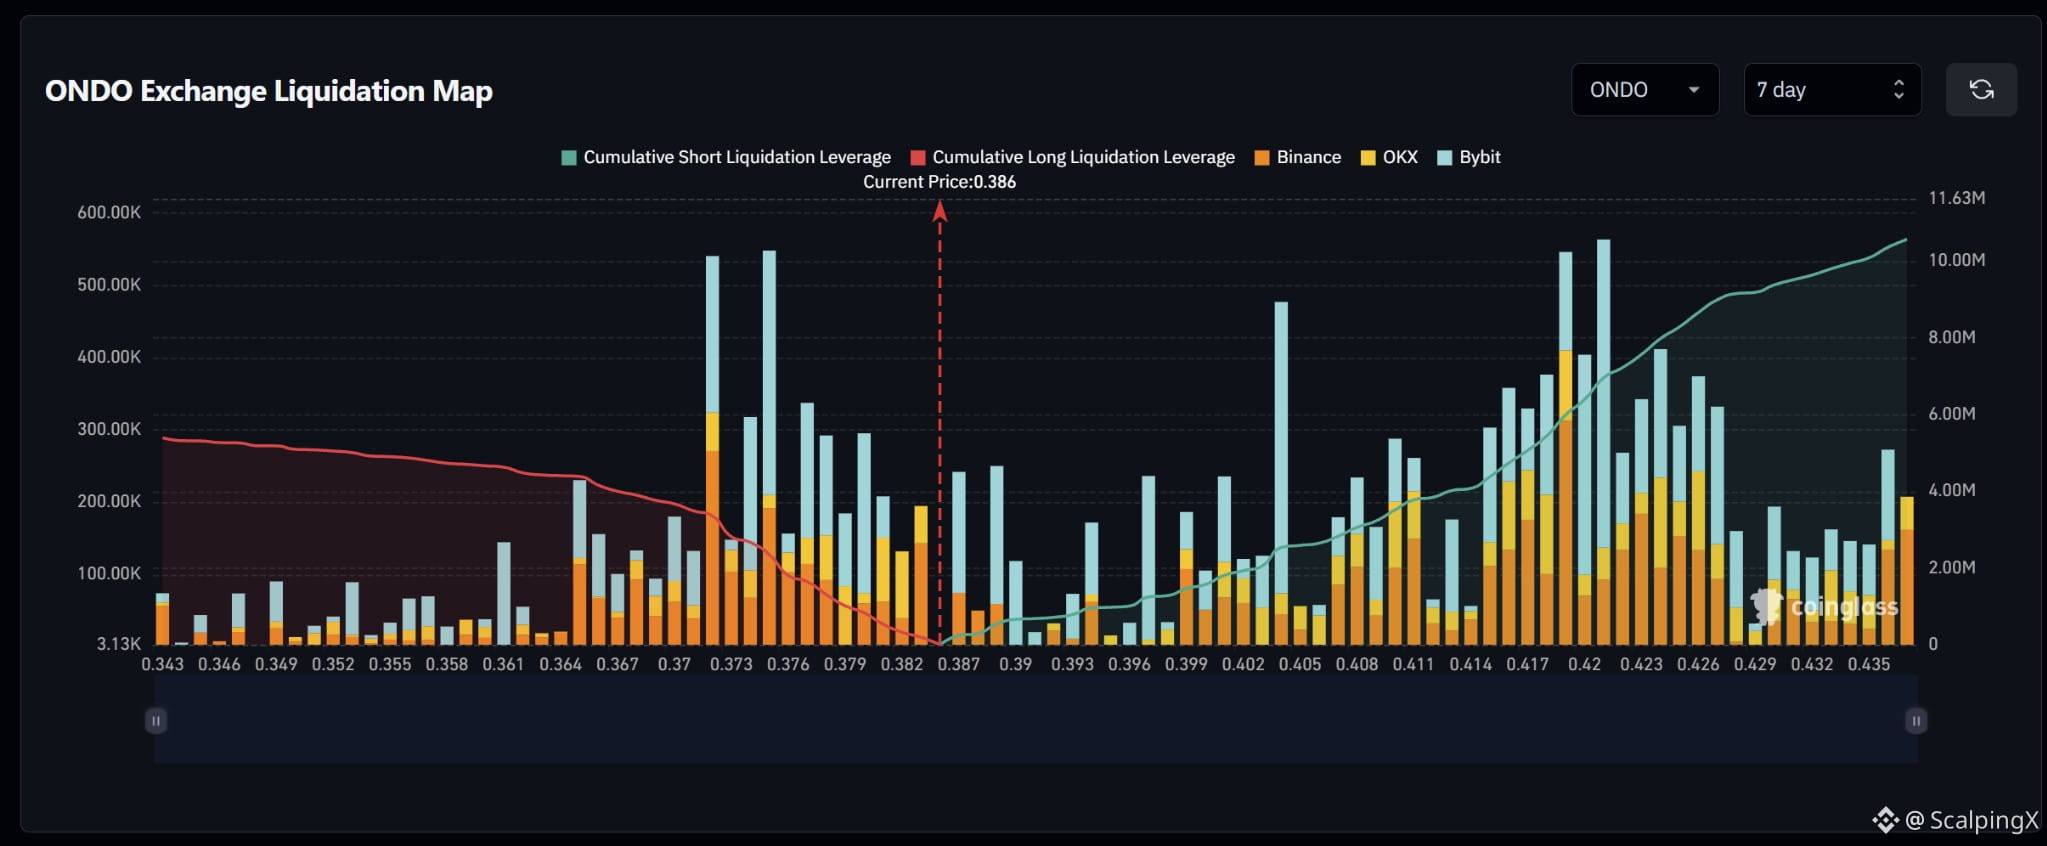
$ONDO – Liquidation Map (7 days) – Index ~0.386
🧭 The preferred scenario is a nearby upside short sweep first, focusing on 0.387–0.390. Estimated cumulative short liquidation exposure is roughly $10.5 million across the displayed range, nearly twice the long side, although much of it lies farther away at 0.415–0.427.
🔺 A break and hold above 0.390 after the initial sweep shifts attention to 0.398–0.404, particularly near 0.404. Liquidation bars between 0.391 and 0.397 are relatively sparse and scattered, making sustained upward momentum important.
🎯 Holding above 0.404 would bring clusters at 0.408–0.411 into focus next. Farther up, the dense 0.415–0.427 band contains large bars near 0.419 and 0.421, where short liquidations could amplify volatility.
⚖️ Losing 0.384 without a reclaim would weaken the upside scenario and shift attention to long clusters at 0.378–0.382, then 0.371–0.376. Bars near 0.372 and 0.375 stand out below price. Avoid chasing a sweep of 0.387–0.390 that quickly reverses below 0.386.
#LiquidationMap
🧭 The preferred scenario is a nearby upside short sweep first, focusing on 0.387–0.390. Estimated cumulative short liquidation exposure is roughly $10.5 million across the displayed range, nearly twice the long side, although much of it lies farther away at 0.415–0.427.
🔺 A break and hold above 0.390 after the initial sweep shifts attention to 0.398–0.404, particularly near 0.404. Liquidation bars between 0.391 and 0.397 are relatively sparse and scattered, making sustained upward momentum important.
🎯 Holding above 0.404 would bring clusters at 0.408–0.411 into focus next. Farther up, the dense 0.415–0.427 band contains large bars near 0.419 and 0.421, where short liquidations could amplify volatility.
⚖️ Losing 0.384 without a reclaim would weaken the upside scenario and shift attention to long clusters at 0.378–0.382, then 0.371–0.376. Bars near 0.372 and 0.375 stand out below price. Avoid chasing a sweep of 0.387–0.390 that quickly reverses below 0.386.
#LiquidationMap