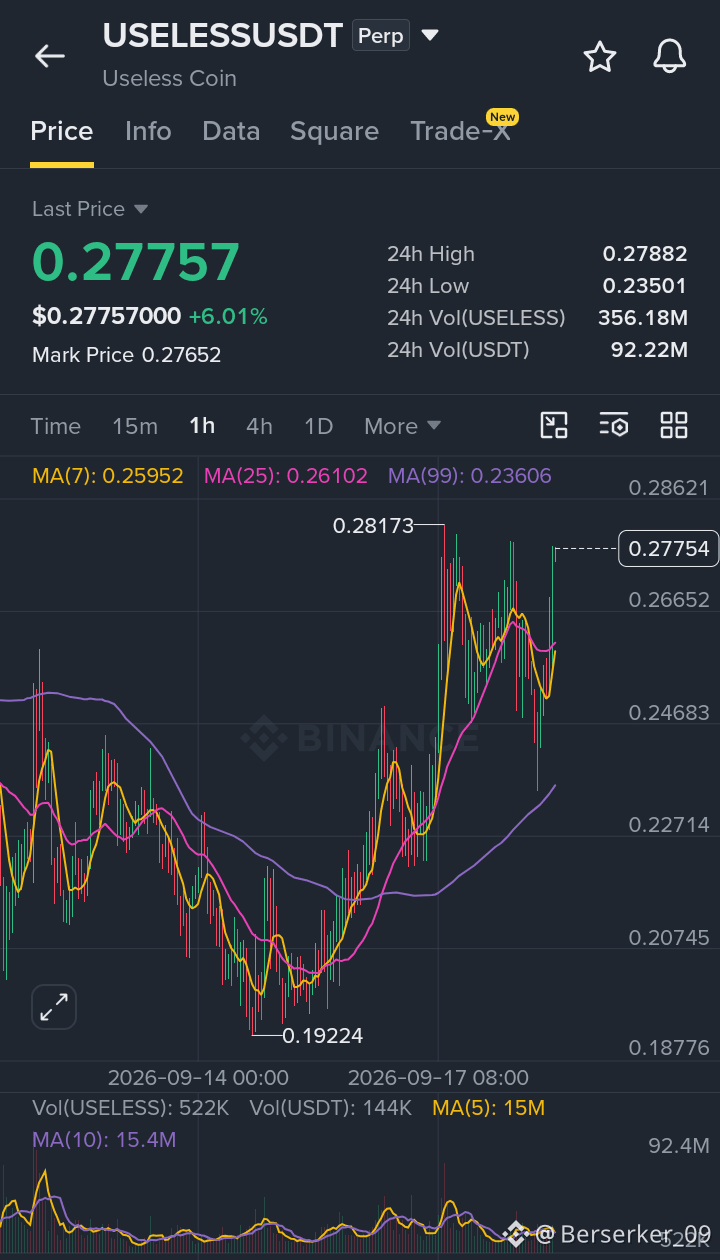
📈 $USELESS — Bullish Resistance Breakout Setup
LONG $USELESS
Entry: $0.2690 – $0.2740
SL: $0.2630
🎯 Take Profit:
TP1: $0.2770
TP2: $0.2820
TP3: $0.2870
The 1H chart is showing a strong recovery from the $0.235–$0.245 support region, with buyers stepping in aggressively and forming a sequence of higher lows alongside strong bullish candles.
Price is now approaching the previous $0.2780–$0.2800 resistance zone. A clean breakout followed by a sustained hold above this area would provide stronger confirmation for continued upside momentum toward the listed targets.
🔑 Key Level: $0.2780–$0.2800 — a confirmed breakout and hold above this resistance zone could strengthen the bullish continuation setup.
⚠️ Risk Note: A sustained move below $0.2630 invalidates the setup. Wait for confirmation around resistance and keep position sizing controlled.
Bullish bias while the recovery structure remains intact. 📈
Buy and Trade $USELESS here 👇
DYOR
LONG $USELESS
Entry: $0.2690 – $0.2740
SL: $0.2630
🎯 Take Profit:
TP1: $0.2770
TP2: $0.2820
TP3: $0.2870
The 1H chart is showing a strong recovery from the $0.235–$0.245 support region, with buyers stepping in aggressively and forming a sequence of higher lows alongside strong bullish candles.
Price is now approaching the previous $0.2780–$0.2800 resistance zone. A clean breakout followed by a sustained hold above this area would provide stronger confirmation for continued upside momentum toward the listed targets.
🔑 Key Level: $0.2780–$0.2800 — a confirmed breakout and hold above this resistance zone could strengthen the bullish continuation setup.
⚠️ Risk Note: A sustained move below $0.2630 invalidates the setup. Wait for confirmation around resistance and keep position sizing controlled.
Bullish bias while the recovery structure remains intact. 📈
Buy and Trade $USELESS here 👇
DYOR