Adding a custom network means manually adding a blockchain network to your crypto wallet that isn't supported by default.
This allows you to access different tokens, interact with new decentralized applications (dApps), and use services on less common or new blockchains. You can typically do this by entering specific network details, such as the RPC URL, chain ID, and currency symbols, into your wallet's settings.
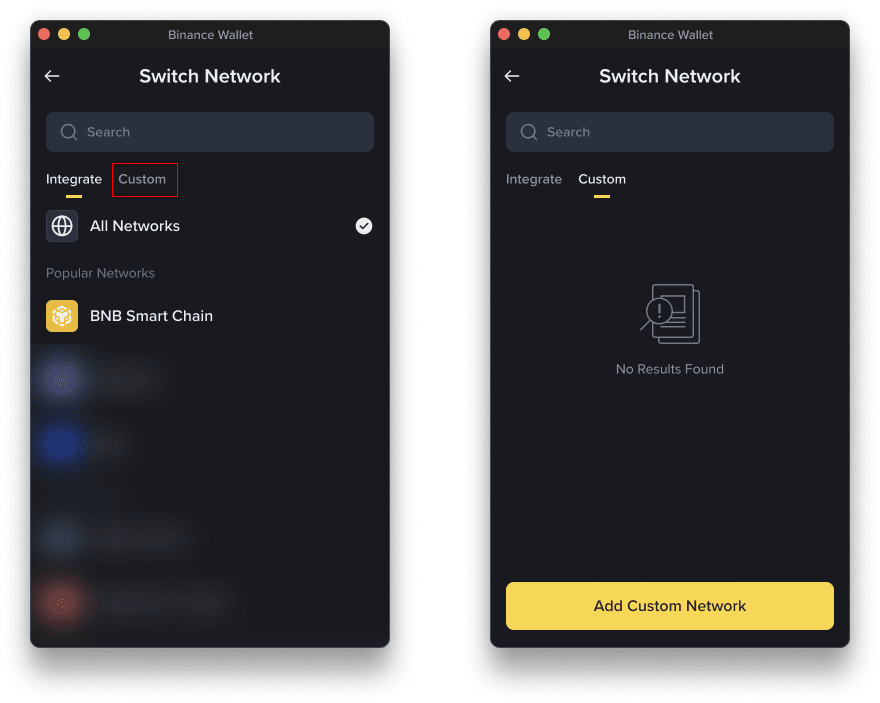
1. Click the network selector in the top-right corner (usually showing the current network, e.g., Ethereum Mainnet), and you open the [Switch Network] page.

2. Go to the [Custom] tab to switch to the custom network page, then click [Add Custom Network].
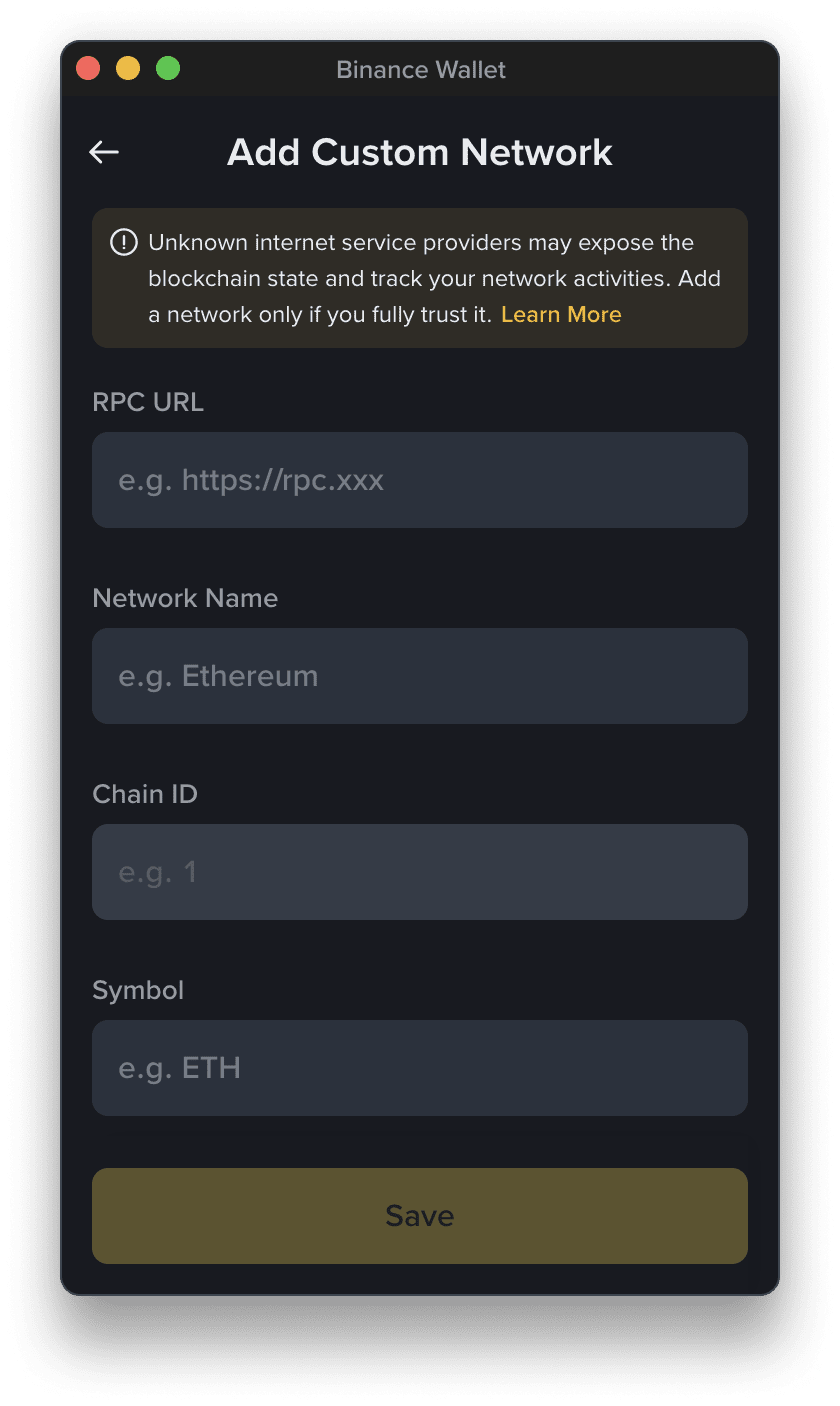
3. Enter the network info. You can get the node info from the official documentation of the target network. Below are some examples:
Risk Warning: Do your due diligence before adding and using the custom network to keep your assets as safe as possible. Malicious nodes may be used to commit fraud by providing a false blockchain state. Please independently verify the security through a trusted third party before adding it.
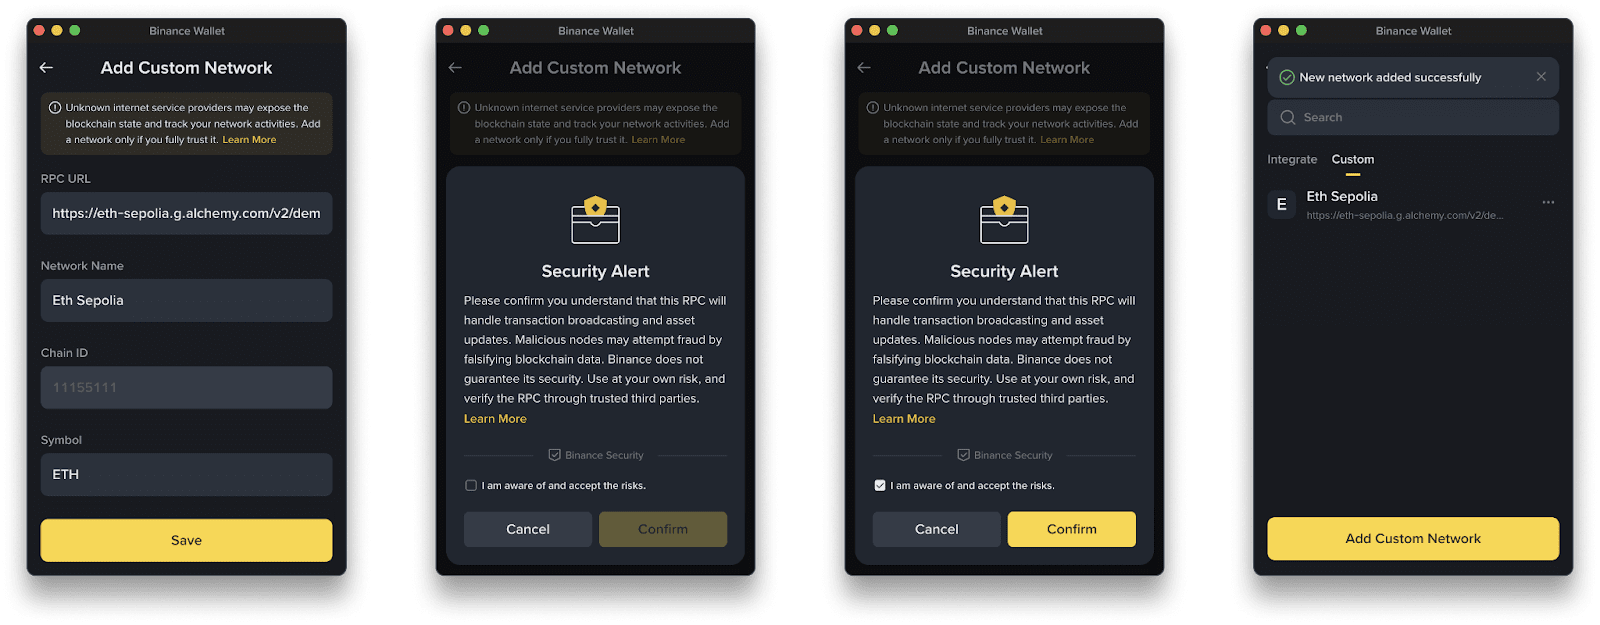
4. Click [Save] and confirm the risk warnings to add the network. You can then choose it from the network list.
Please note:
If you find the RPC node of a custom network unstable or wish to use a different RPC node, you can edit the RPC URL for that custom network. Please note that the Chain ID cannot be modified.
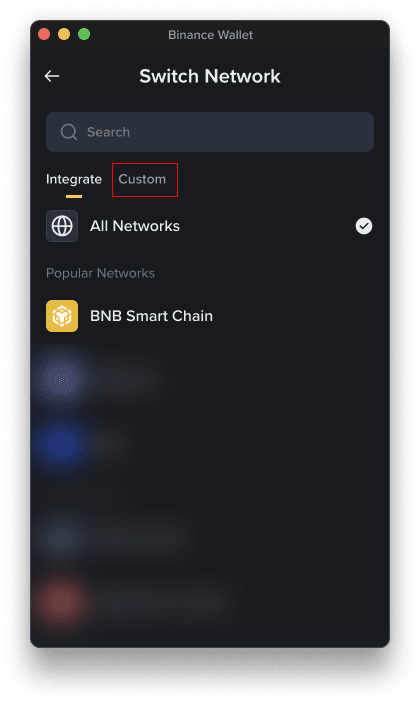
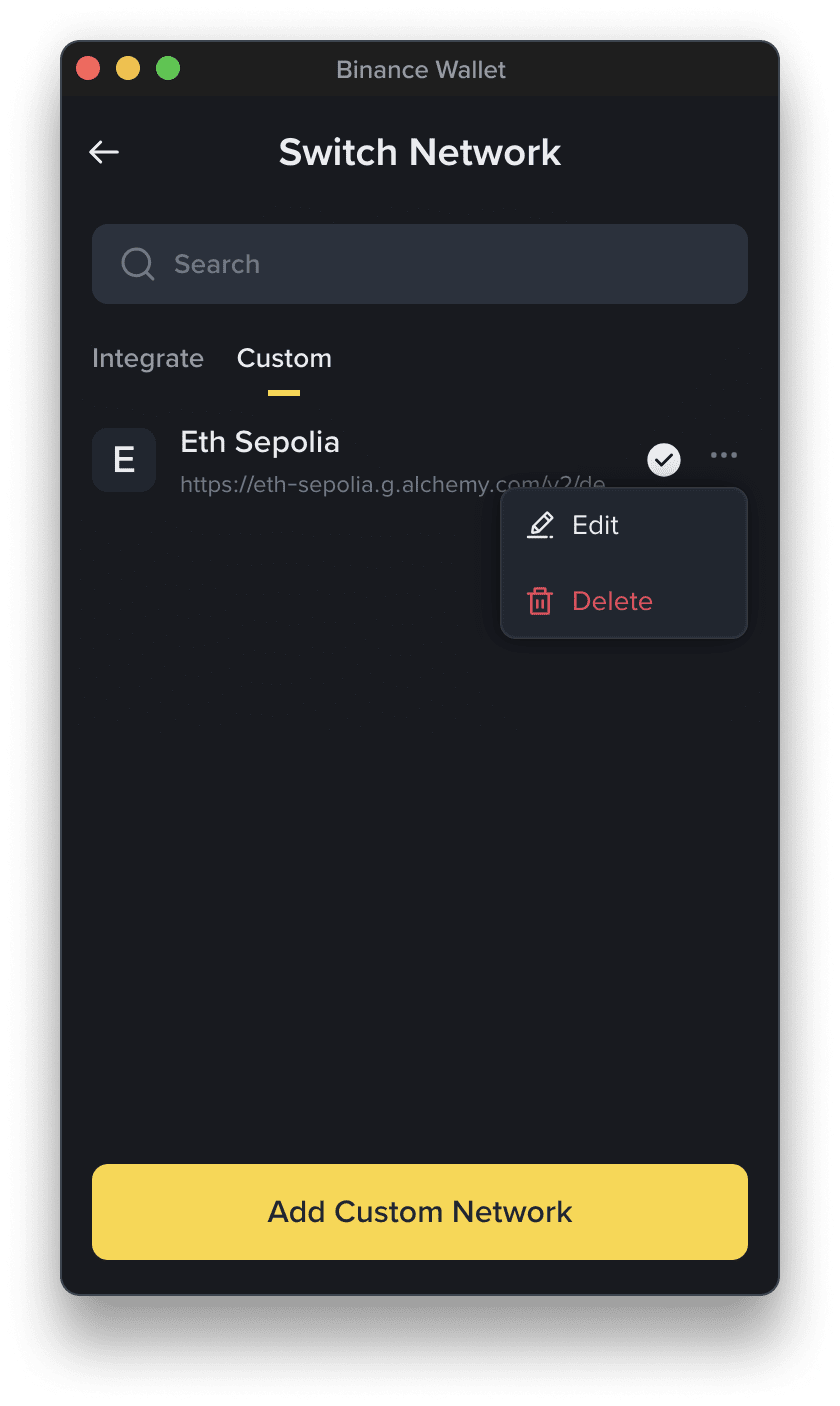
1. Go to [Switch Network] - [Custom].
2. Choose the network you want to edit by clicking the [...] next to it, and click [Edit].
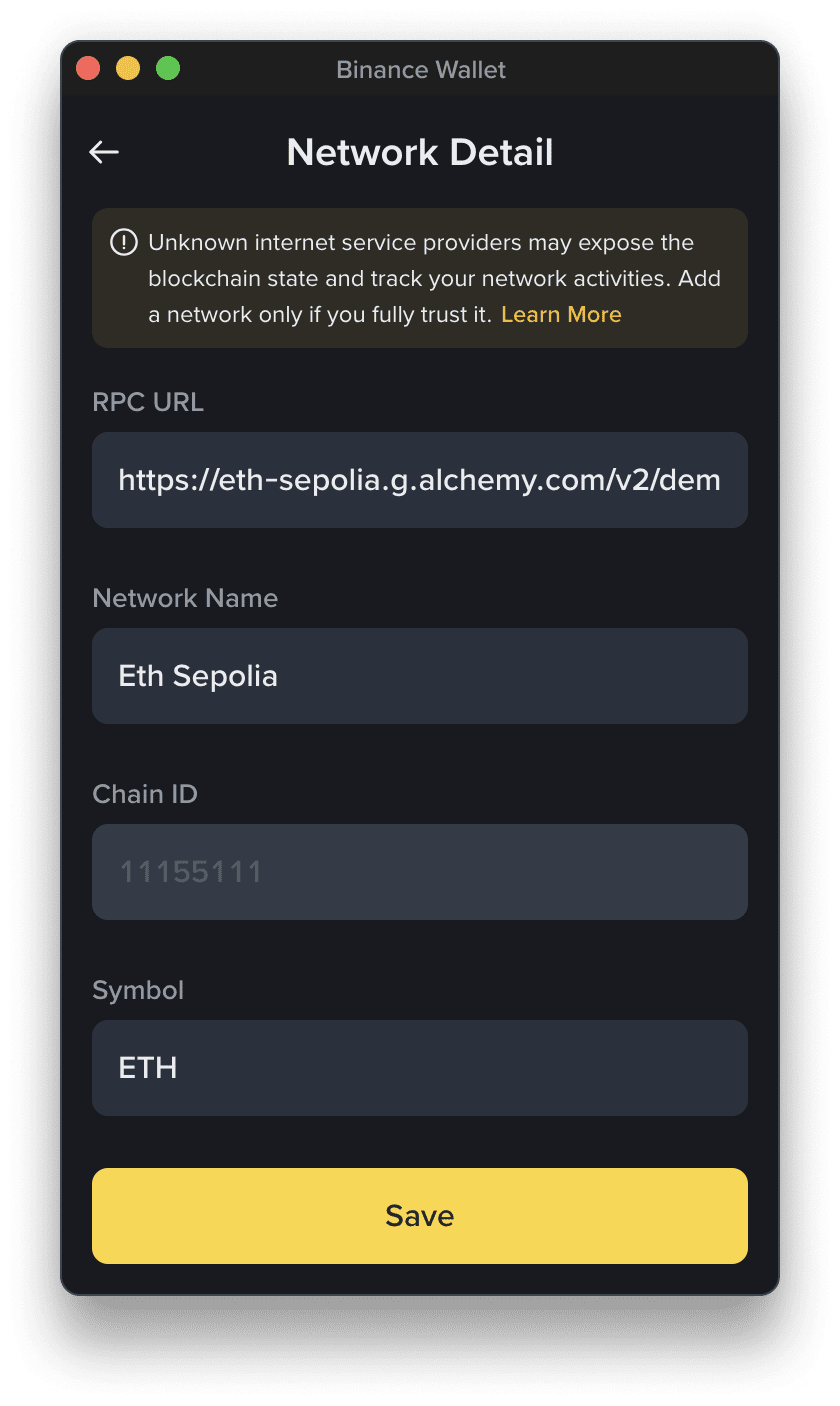
3. On the “Network Detail” page, you can modify the network information based on the current Chain ID. After editing, click [Save] to save your preferences. Please note that you’d need to confirm the risk warnings again.
If the current custom network is in use, you won’t be able to delete it. Please disconnect any dApp connections, or switch to a different network first.
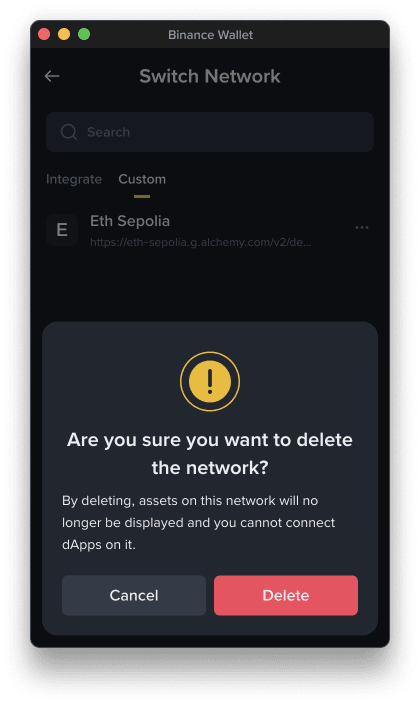
1. Go to [Switch Network] - [Custom].
2. Choose the network you want to remove by clicking [...] - [Delete].
3. Confirm by clicking [Delete].
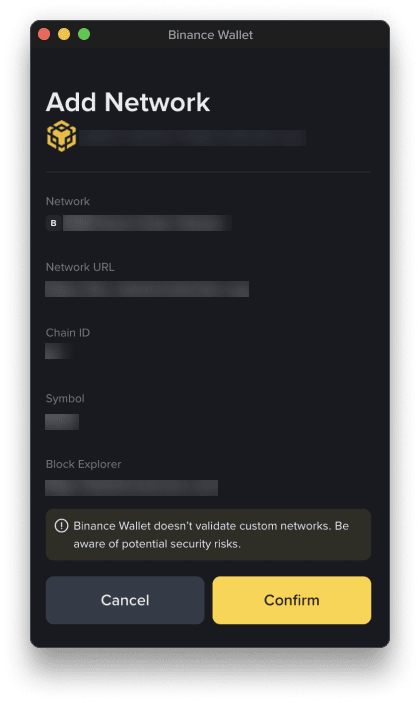
You can initiate the addition of a custom network directly from a dApp.
1. You’ll see a “Add Network” signature request page in the extension.
2. Review the relevant information and click [Confirm] to add.
Risk Warning:
To operate on the custom network, go to [Switch Network] - [Custom].
Binance Extension Wallet primarily supports EVM-compatible networks (e.g., BNB Chain, Ethereum, Polygon, Optimism, etc.). Non-EVM chains (such as Solana) are not currently supported for direct addition. Please use a different wallet that is compatible.
The custom network feature is supported in the version V1.5.0 or above. Please follow the instructions in How to Update My Binance Wallet Extension to update your wallet extension.
You need to use the ‘Add custom token’ feature to add the token first. Only the native token is supported after adding a custom network.
The asset balance of a custom network may experience a delay of a few minutes in updating.
Click the refresh button next to the total assets on the homepage to manually refresh the page.
Types of error and possible fixes:
Yes, this is supported. Please note that you cannot add new nodes to the integrated networks or existing custom networks.
We aim to provide general guidance for users handling custom networks, but the tips here are not exhaustive and may not cover all of the nuances of every custom network instance. Please make sure you conduct your own research before using any custom network.
Custom networks often trade security and reliability for lower fees and faster transactions and not all networks are safe. Before transferring assets, you must fully understand the risks. Trust your RPC provider—malicious nodes can falsify state, withhold transactions, or log your IP. Always verify information from official sources.
Adding custom networks does not expose private keys, but malicious RPCs can leak your activities, so be sure to verify everything and only use trusted network providers.
When a site prompts to add a network, you should cross-check the RPC URL and Chain ID with official documentation first. Avoid unverified sources or unknown custom networks.
Binance Wallet is a tool to connect and use dApps and networks, but that does not mean it offers technical support for all of those products, protocols, or networks. If you are interacting with a non-Consensys, non-integrated third party, seek technical assistance from them first unless you are sure that what you're experiencing is a problem with the Binance Wallet Extension.
Disclaimer: By using the Binance Wallet Extension, you acknowledge and accept that this product involves risks including, but not limited to: the irreversible nature of blockchain transactions, potential loss or theft of private keys or recovery credentials, and exposure to volatile digital asset markets. You may also gain access to third-party services or protocols such as decentralized applications (“dApps”) through the Binance Wallet Extension. Binance does not control, endorse, or guarantee any third-party services, dApps or tokens accessible through the Binance Wallet, and you bear full responsibility for conducting your own due diligence and making your own decisions. You are solely responsible for keeping your private keys safe, and Binance is not able to unilaterally help you regain access to your Extension Wallet if you lose access to your private keys (this applies in the unfortunate event where users pass away as well). Network congestion, transaction fees, slippage, and technical failures may also adversely affect your experience and result in losses. You are solely responsible for your investment decisions and Binance is not liable for any losses you may incur. For more information, see our Terms of Use and Risk Warning.
There may be discrepancies in the translated version of this original article in English. Please reference this original version for the latest or most accurate information.
