


Today, we will learn how to view your recharge address on the Binance platform and select the correct network—this is a basic operation that new users must master.
When you first try to recharge to Binance, the most confusing part may be how to find the recharge address.
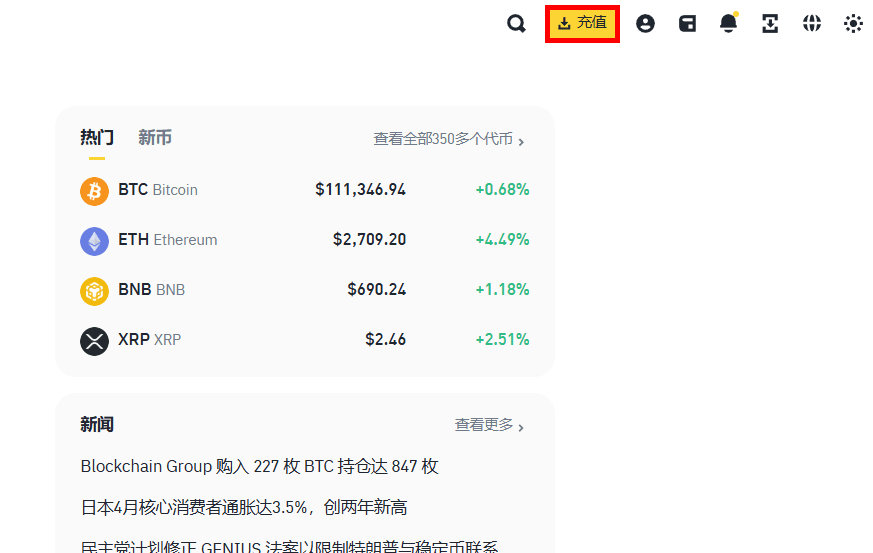
To find your recharge address, log in to Binance, go to the [Wallet] menu, click [Recharge], and then select the currency you want to recharge.
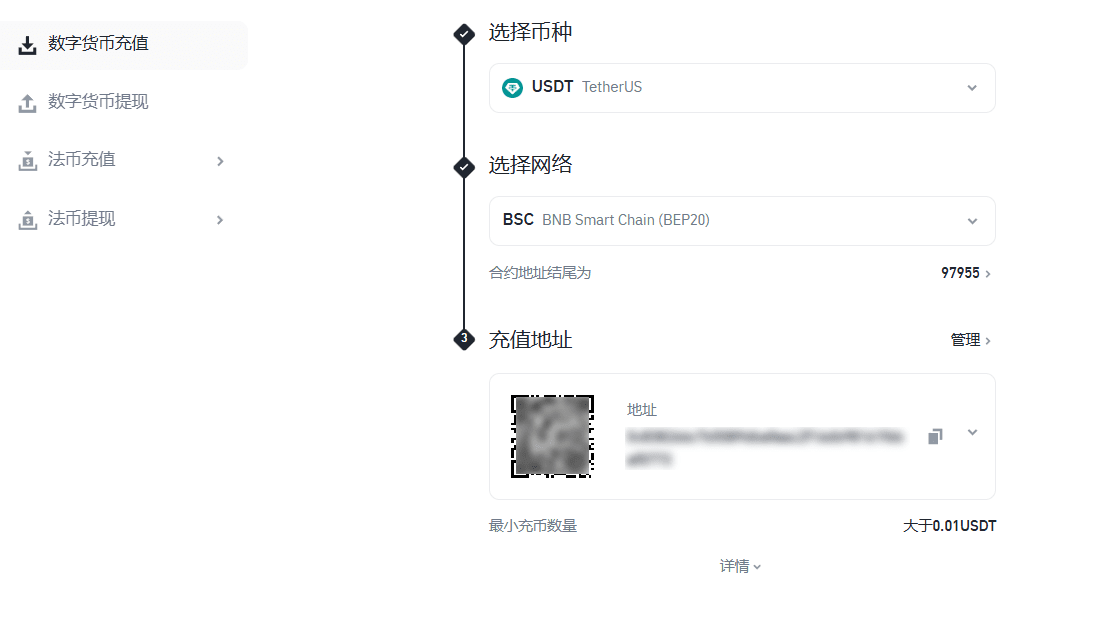
After selecting the currency, the corresponding recharge address will be displayed, and you just need to click to copy it.
However, when pasting the address, be sure to double-check for any errors or missing characters.
Otherwise, your assets may be lost.
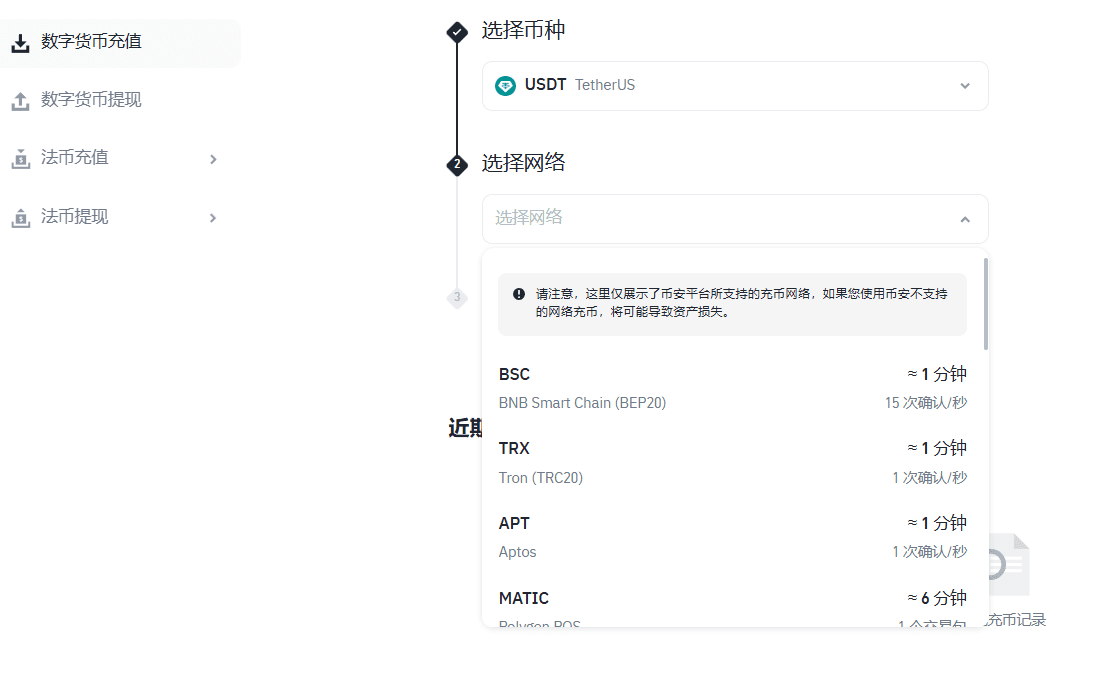
In addition to the recharge address, selecting the correct network is equally important.
For example, USDT has multiple networks to choose from: ERC-20, TRC-20, and BEP-20.
You must choose a network that matches the sender's wallet or exchange to ensure safe arrival.
If you choose the wrong network, your coins may be lost.
Therefore, be sure to check the network type displayed next to the address provided by Binance.
If you are worried about making mistakes, it is recommended to test a small transfer first.
After a successful test transfer, send the full amount.
This small habit can help you effectively avoid mistakes in large transfers.
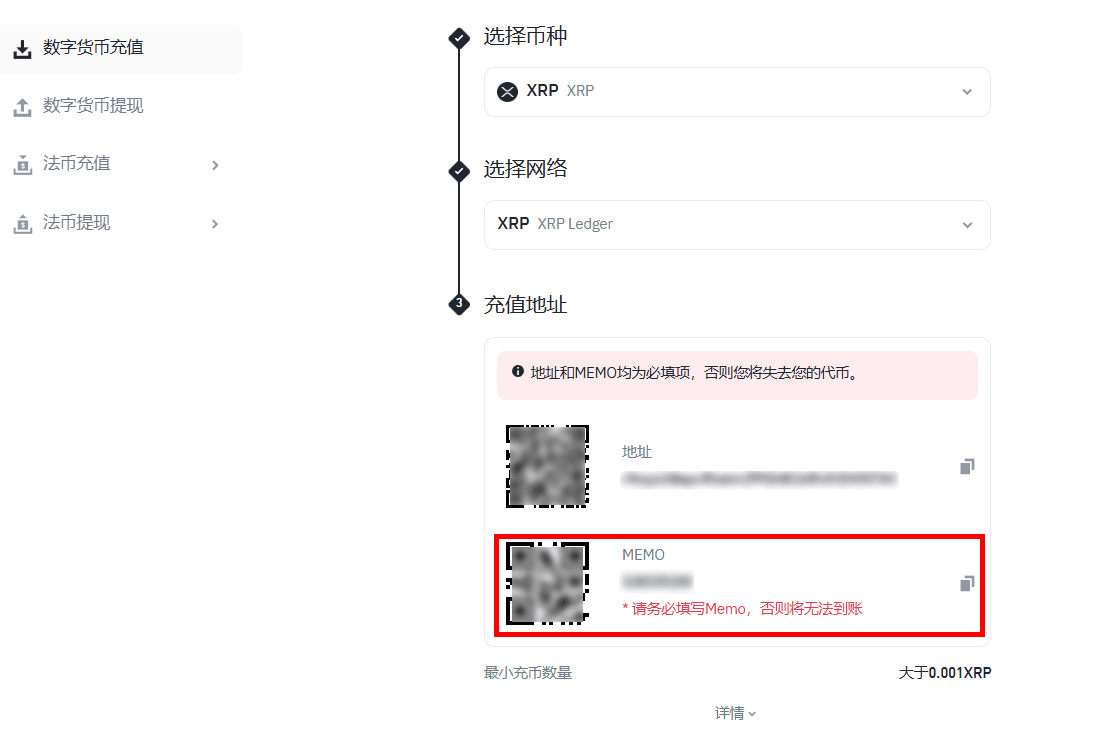
For certain currencies, such as XRP (Ripple) or XLM (Stellar), you need to fill in the Memo or Tag in addition to the address.
In this case, simply filling in the address is not enough; the Memo must also be filled in accurately.
If you miss the Memo, the recharge will not be recognized, and you will have to contact customer service for assistance.
When copying the Binance recharge address, also pay attention to security issues.
After completing the recharge, it is recommended that you save the hash value (TXID) of this transaction.
If you encounter any issues later, you must provide the TXID when contacting customer service.
You can easily find the TXID in your wallet history, so be sure to keep it safe.
Here's a little advice: don't rush to make a recharge operation.
The more anxious you are, the more likely you are to make mistakes, which increases the risk of asset loss.
Please be patient, and carefully verify the address, network, and Memo before confirming the transaction.
Additionally, please confirm the minimum recharge amount for that currency.
If the recharge amount is too small, it may not be worth it due to high fees.
Before recharging, please check the minimum recharge limit set by Binance for that currency.
Let's briefly understand the characteristics of various networks:
ERC-20: The most widely used but with higher fees.
TRC-20: Fast speed and low fees, but not all exchanges support it.
BEP-20: Based on the Binance Smart Chain, low fees, but some Korean exchanges may not support direct connections.
Understanding the differences between these networks can help you make more informed choices.
Before making a recharge, checking the network congestion is also a useful step.
For example, the Ethereum network can sometimes be very congested.
If you are in a hurry, consider transferring through the TRC-20 network.
Just a final note, even if the recharge page shows 'Completed', Binance may still take some time to confirm the number of blockchain confirmations, especially during busy network times.
So, please don't panic. Just track your TXID and patiently wait for your assets to arrive.
In summary, confirming the Binance recharge address and selecting the correct network is the most basic but also the most crucial habit to protect your crypto assets.
Although it may seem troublesome at first, you will become proficient with practice, allowing you to manage your digital assets more safely.
If you have not registered for a Binance account, you can register through the link below to enjoy a 20% trading fee discount.
This offer is only available for first-time registration, easy to operate, and not to be missed!
📌 Click here to register on Binance and enjoy a 20% fee discount