



Today, we will learn how to check the coin deposit address and network settings for Binance beginners.
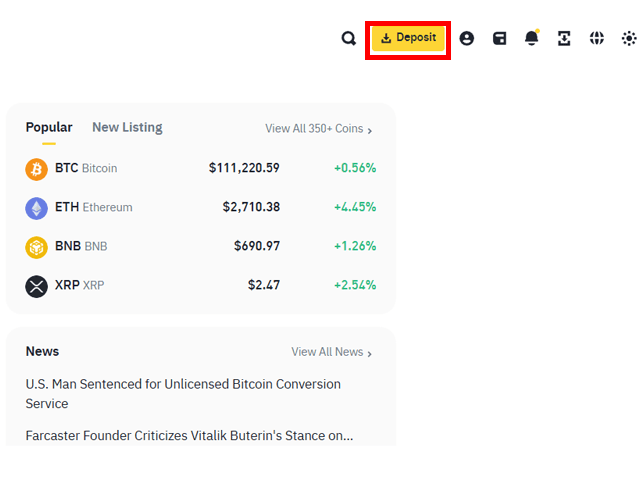
When I first tried to deposit to Binance, the most daunting part was finding the Binance deposit address. To check the deposit address, log in to Binance, go to the [Wallet] menu, and select [Deposit], then choose the coin.
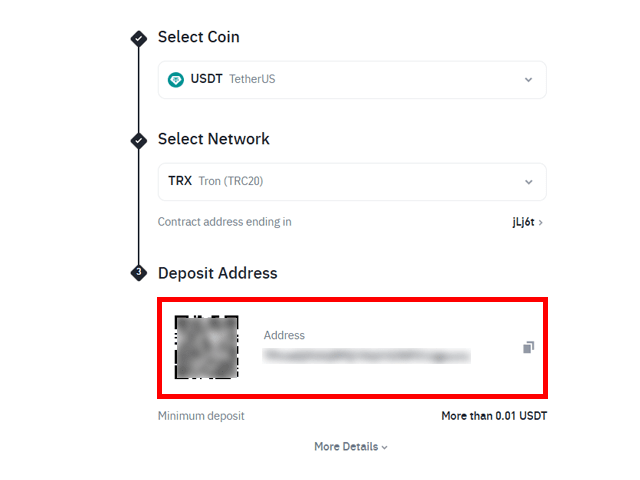
After that, when you select the coin you want to deposit, the corresponding address will appear, and you can copy it. At this point, it is essential to develop the habit of double-checking for any typos or omissions when pasting. If you don't do this, you could lose your coins.
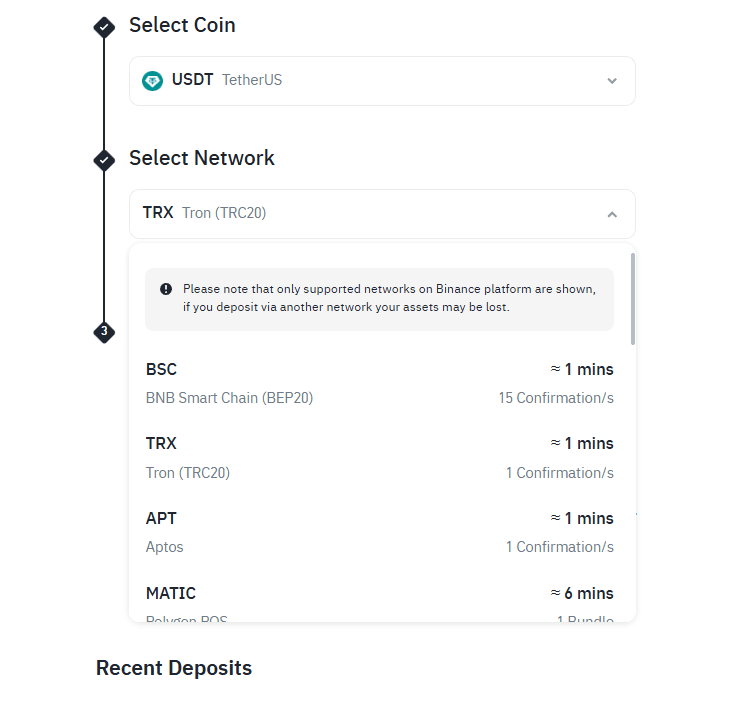
Next, as important as finding the Binance deposit address is choosing the correct network. For USDT alone, you can choose between ERC-20, TRC-20, and BEP-20. You must select the one that matches the exchange you want to send to for a safe deposit.
If you do not set the network correctly, your coins may disappear. Always carefully check the network displayed next to the address provided by Binance.
If you're worried about making a mistake, making a small test transfer is a good method. If the test transfer is successful, you can then proceed with the actual transfer. This small habit can prevent deposit accidents.
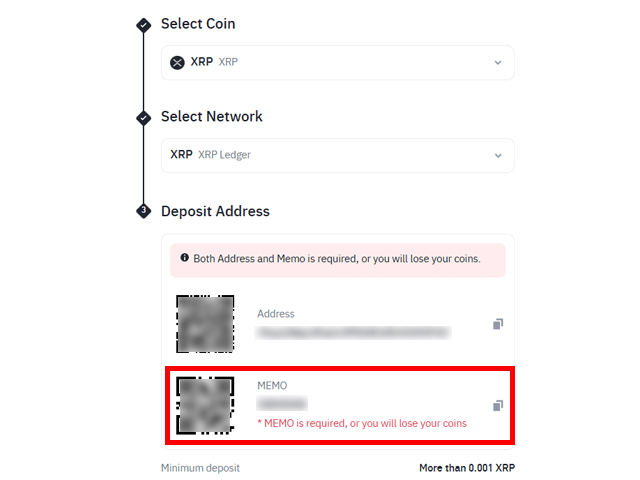
There are also coins that require a memo or tag to be entered. Cases like Ripple (XRP) and Stellar (XLM) are examples. In this case, you cannot just enter the Binance deposit address; you also need to enter the memo accurately. If you forget the memo, the deposit may be missed, and you will have to contact customer support.
When copying the Binance deposit address, it's also important to pay attention to security. After the deposit is completed, it is recommended to save the transaction hash (TXID). If any issues arise, you will need it when contacting customer support, so remember that you can easily check the TXID in your wallet history.
Also, it's important not to rush when making a deposit. If you're hasty, mistakes are likely to happen, which increases the chance of loss. Please slowly check the Binance deposit address, network, and memo.
You should also check the minimum deposit amount. Sending too small an amount may result in higher fees. Please make sure to check the minimum amount conditions set by Binance before depositing.

Additionally, let's learn a bit more about the characteristics of each network. ERC-20 is common but has high fees, TRC-20 is cheap and fast, but some exchanges may not support it. BEP-20 is based on the Binance Smart Chain, so fees are low, but it may not be directly connected to domestic exchanges. Understanding and choosing these characteristics is important.
Checking the network congestion when making deposits to Binance can also be helpful. Sometimes the Ethereum network gets congested, so when you're in a hurry, there is also the option of sending via TRC-20.
Additionally, Binance sometimes takes time to confirm the number of blocks even after the deposit is completed. Especially during network congestion, the reflection of the deposit may be delayed, so it is recommended not to rush and to track the TXID while waiting.
To wrap up, developing the habit of checking the Binance deposit address and network settings is the most basic and important action to protect your assets. Initially, it may feel cumbersome, but after doing it a few times, it will naturally become second nature, allowing you to manage your cryptocurrency safely.
If you haven't signed up for Binance yet, you can sign up through the link below to receive a 20% discount on fees. This is only available during the initial registration, and you can receive the benefit without a complicated process, so I highly recommend taking advantage of it.