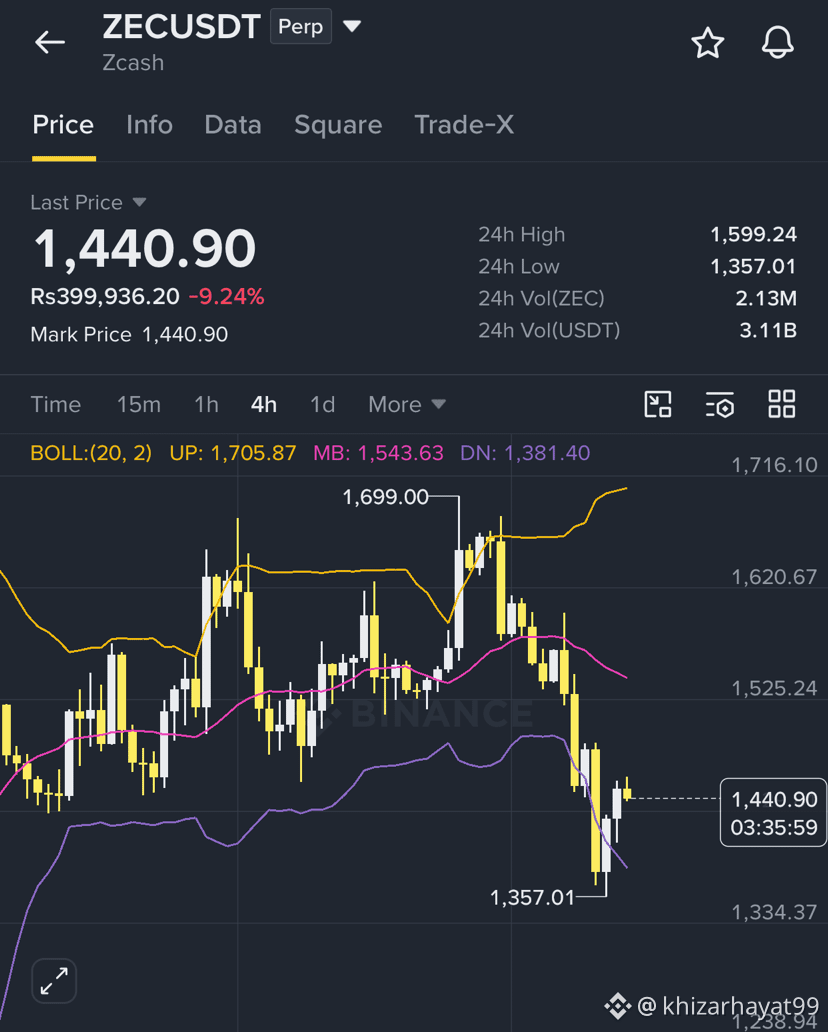
Here is a 4-hour market structure bearish short trade setup for $ZEC /USDT targeting a breakdown around the $1,440 key resistance and high-timeframe liquidity zone.
On the 4-hour timeframe, $1,440 represents an overhead structural resistance and supply block. If price shows exhaustion near this level, a rejection setup offers a favorable risk-to-reward ratio. Conversely, a clean 4H breakout above $1,440 invalidates the bearish structure and flips the bias to long.
Bearish Rejection (Short Setup)
Triggered if price tests $1,440 and prints clear exhaustion on the 4H chart (e.g., long upper wicks, bearish engulfing candle, or declining buy volume near resistance).
Entry Zone: $1,420 – $1,445
Stop Loss (SL): $1,515 (Above local high-wick rejection / ~5.2% risk)
Take Profit Targets:
TP1: $1,320 (Local 4H support / 20 EMA area)
TP2: $1,230 (Mid-range consolidation level)
TP3: $1,120 (Lower demand block / key swing low)
On the 4-hour timeframe, $1,440 represents an overhead structural resistance and supply block. If price shows exhaustion near this level, a rejection setup offers a favorable risk-to-reward ratio. Conversely, a clean 4H breakout above $1,440 invalidates the bearish structure and flips the bias to long.
Bearish Rejection (Short Setup)
Triggered if price tests $1,440 and prints clear exhaustion on the 4H chart (e.g., long upper wicks, bearish engulfing candle, or declining buy volume near resistance).
Entry Zone: $1,420 – $1,445
Stop Loss (SL): $1,515 (Above local high-wick rejection / ~5.2% risk)
Take Profit Targets:
TP1: $1,320 (Local 4H support / 20 EMA area)
TP2: $1,230 (Mid-range consolidation level)
TP3: $1,120 (Lower demand block / key swing low)