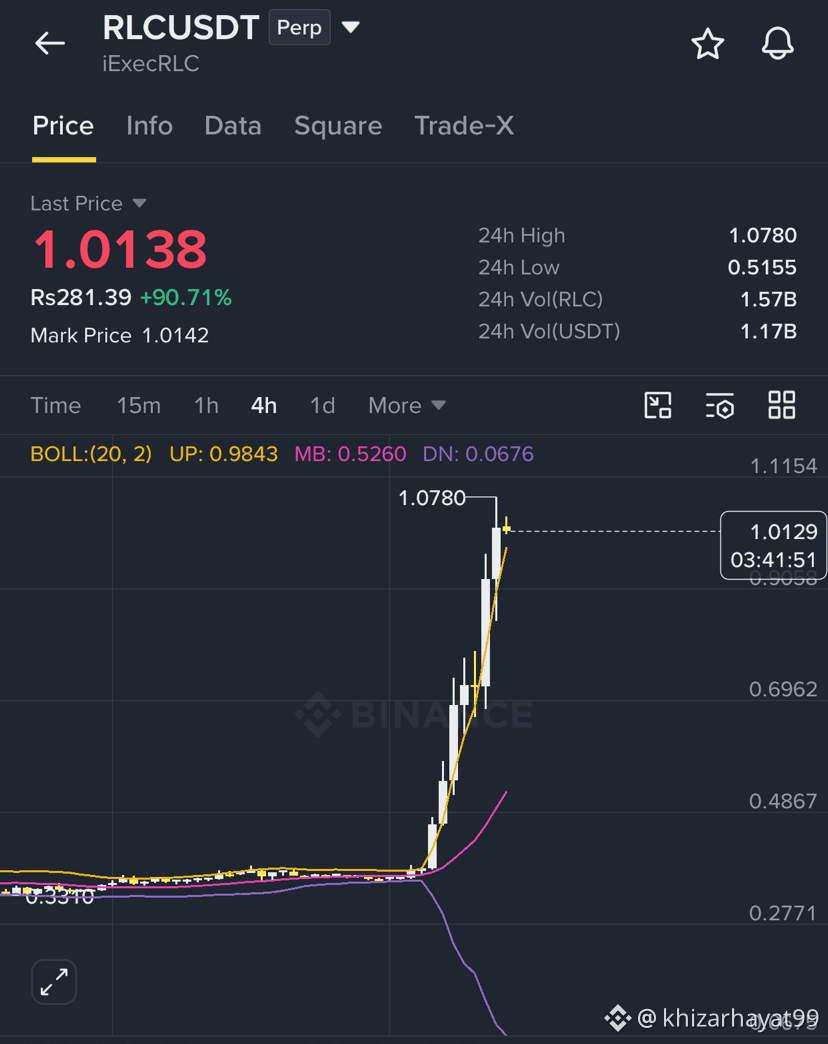
Here is a counter-trend 15-minute pullback (short) trade setup for $RLC /USDT around $1.0144, aligned with taking profit into the primary 4-hour bullish demand zone:
Trade Parameters
Pair: RLC / USDT (Futures)
Timeframe: 15-Minute (15M) — Counter-trend Scalp / Retracement
Direction: SHORT 🔴
Entry Zone: $1.0100 – $1.0250 (15M Supply Zone / Liquidity Grab Area)
Stop Loss (SL): $1.0520 (Invalidation above key 15M swing high / expansion high)
Take-Profit Targets
TP1: $0.9450 (First local 15M demand / support)
TP2: $0.8800 (Mid-retracement target / fair value gap fill)
TP3: $0.8100 (4H Bullish Demand / Ideal re-entry zone for longs)
Risk-to-Reward Ratio (R:R)
Risk: ~$0.0376 (~3.7%)
Reward to TP1: ~$0.0694 (~6.8%) — 1:1.8
Reward to TP2: ~$0.1344 (~13.2%) — 1:3.6
Reward to TP3: ~$0.2044 (~20.1%) — 1:5.4
Trade Execution & Risk Warnings
Counter-Trend Warning: The higher timeframe (4H) trend is Bullish. Counter-trend scalps carry higher risk—keep position sizing strictly reduced (0.5% – 1% max risk).
Take Profit Rule: Do not hold past TP3 ($0.8100) as the overall 4H bullish structure is expected to react strongly from lower demand levels.
Stop-Loss Management: Shift SL to Breakeven ($1.0144) immediately upon securing TP1 ($0.9450).
Trade Parameters
Pair: RLC / USDT (Futures)
Timeframe: 15-Minute (15M) — Counter-trend Scalp / Retracement
Direction: SHORT 🔴
Entry Zone: $1.0100 – $1.0250 (15M Supply Zone / Liquidity Grab Area)
Stop Loss (SL): $1.0520 (Invalidation above key 15M swing high / expansion high)
Take-Profit Targets
TP1: $0.9450 (First local 15M demand / support)
TP2: $0.8800 (Mid-retracement target / fair value gap fill)
TP3: $0.8100 (4H Bullish Demand / Ideal re-entry zone for longs)
Risk-to-Reward Ratio (R:R)
Risk: ~$0.0376 (~3.7%)
Reward to TP1: ~$0.0694 (~6.8%) — 1:1.8
Reward to TP2: ~$0.1344 (~13.2%) — 1:3.6
Reward to TP3: ~$0.2044 (~20.1%) — 1:5.4
Trade Execution & Risk Warnings
Counter-Trend Warning: The higher timeframe (4H) trend is Bullish. Counter-trend scalps carry higher risk—keep position sizing strictly reduced (0.5% – 1% max risk).
Take Profit Rule: Do not hold past TP3 ($0.8100) as the overall 4H bullish structure is expected to react strongly from lower demand levels.
Stop-Loss Management: Shift SL to Breakeven ($1.0144) immediately upon securing TP1 ($0.9450).