Lesson#3
$AGT
Multi-Timeframe Support and Resistance
Four timeframes are used: 1W, 1D, 4H and 1H.
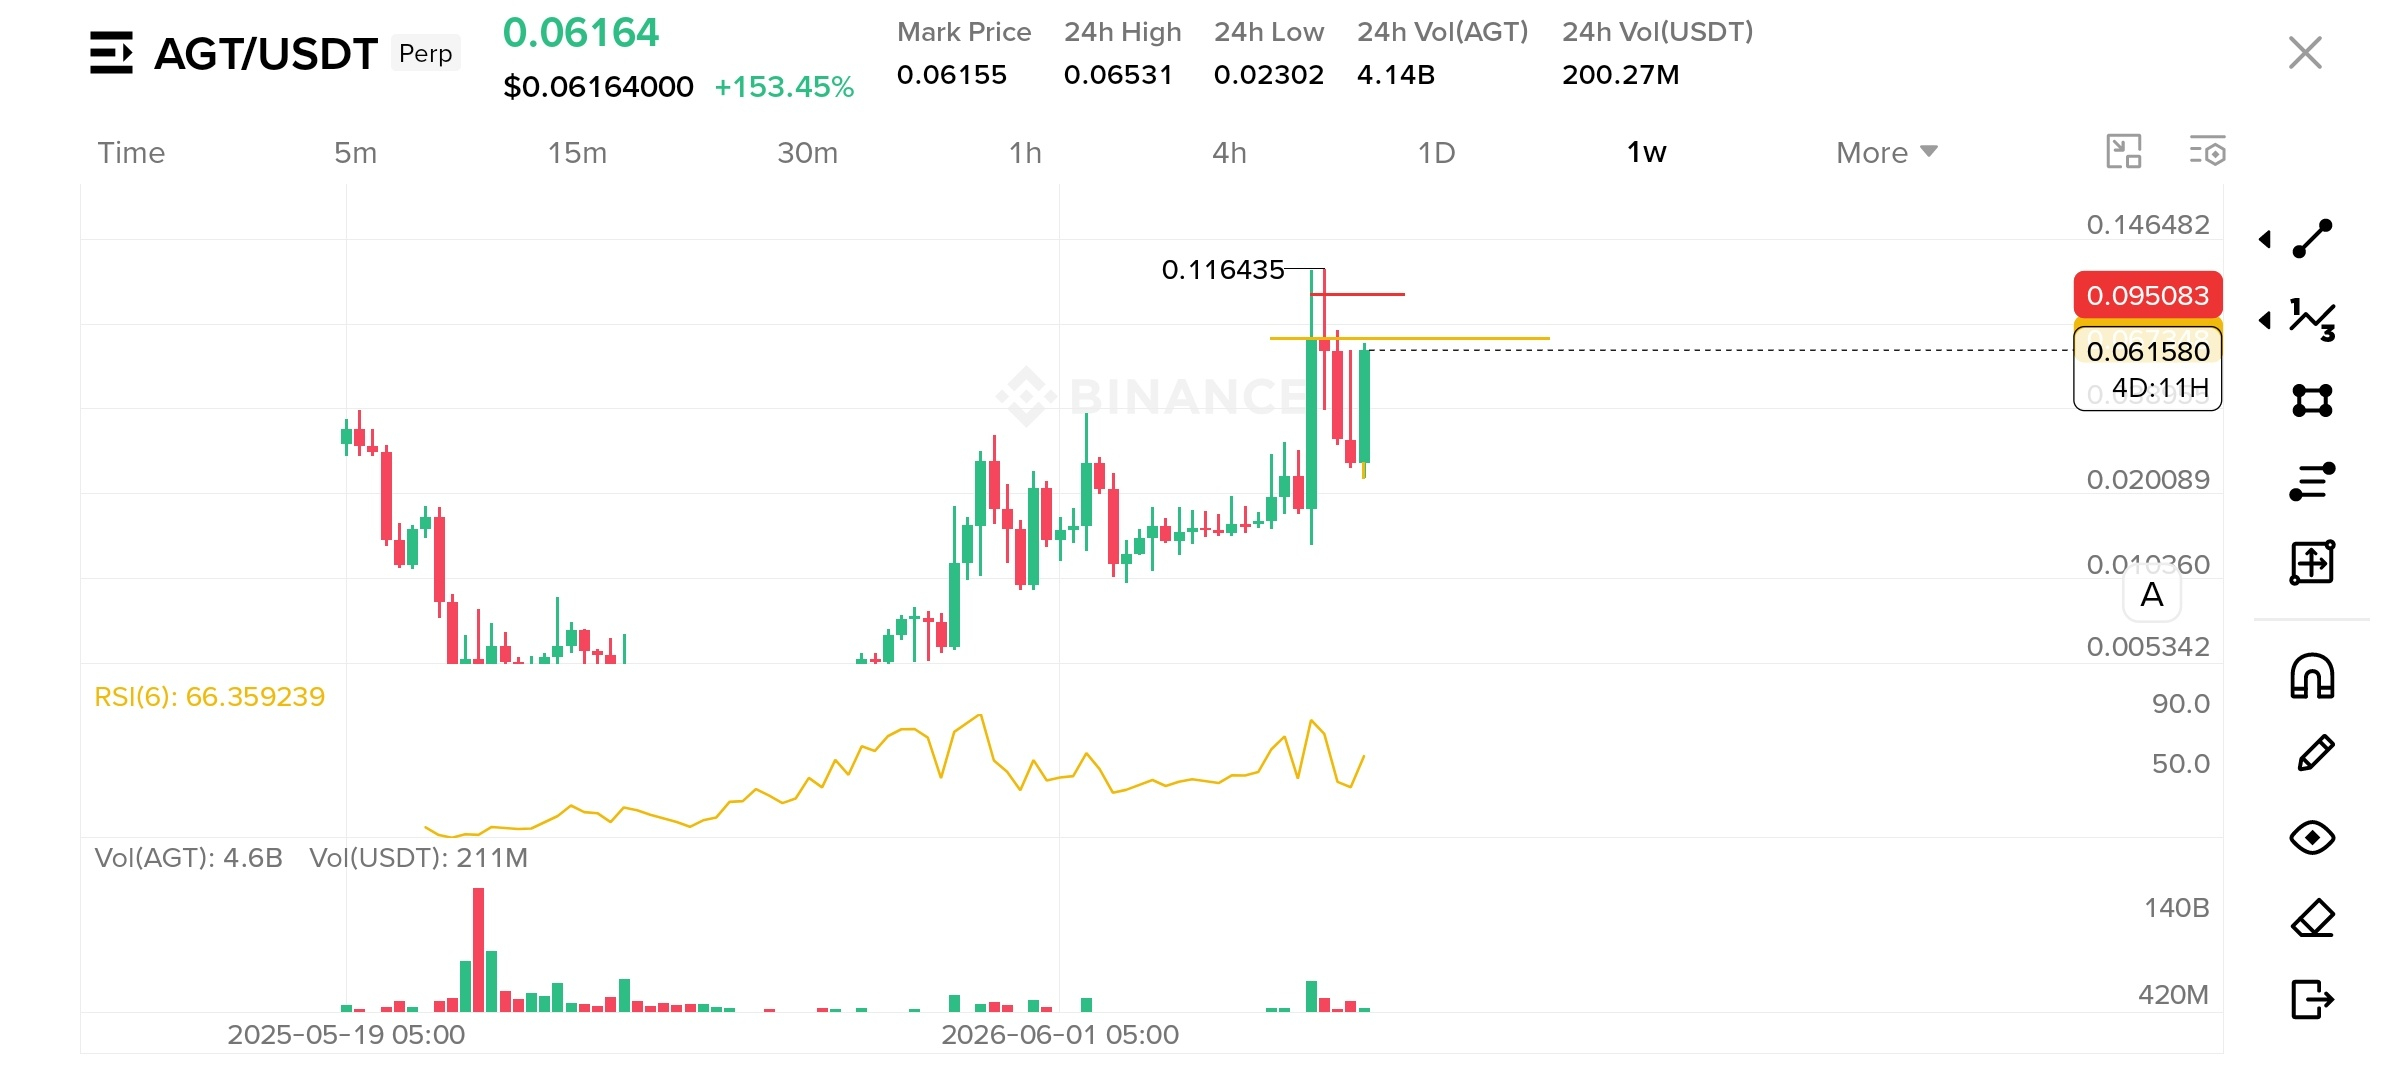
1W: Mark support and resistance first. The 1M timeframe is skipped because it has too few candles.
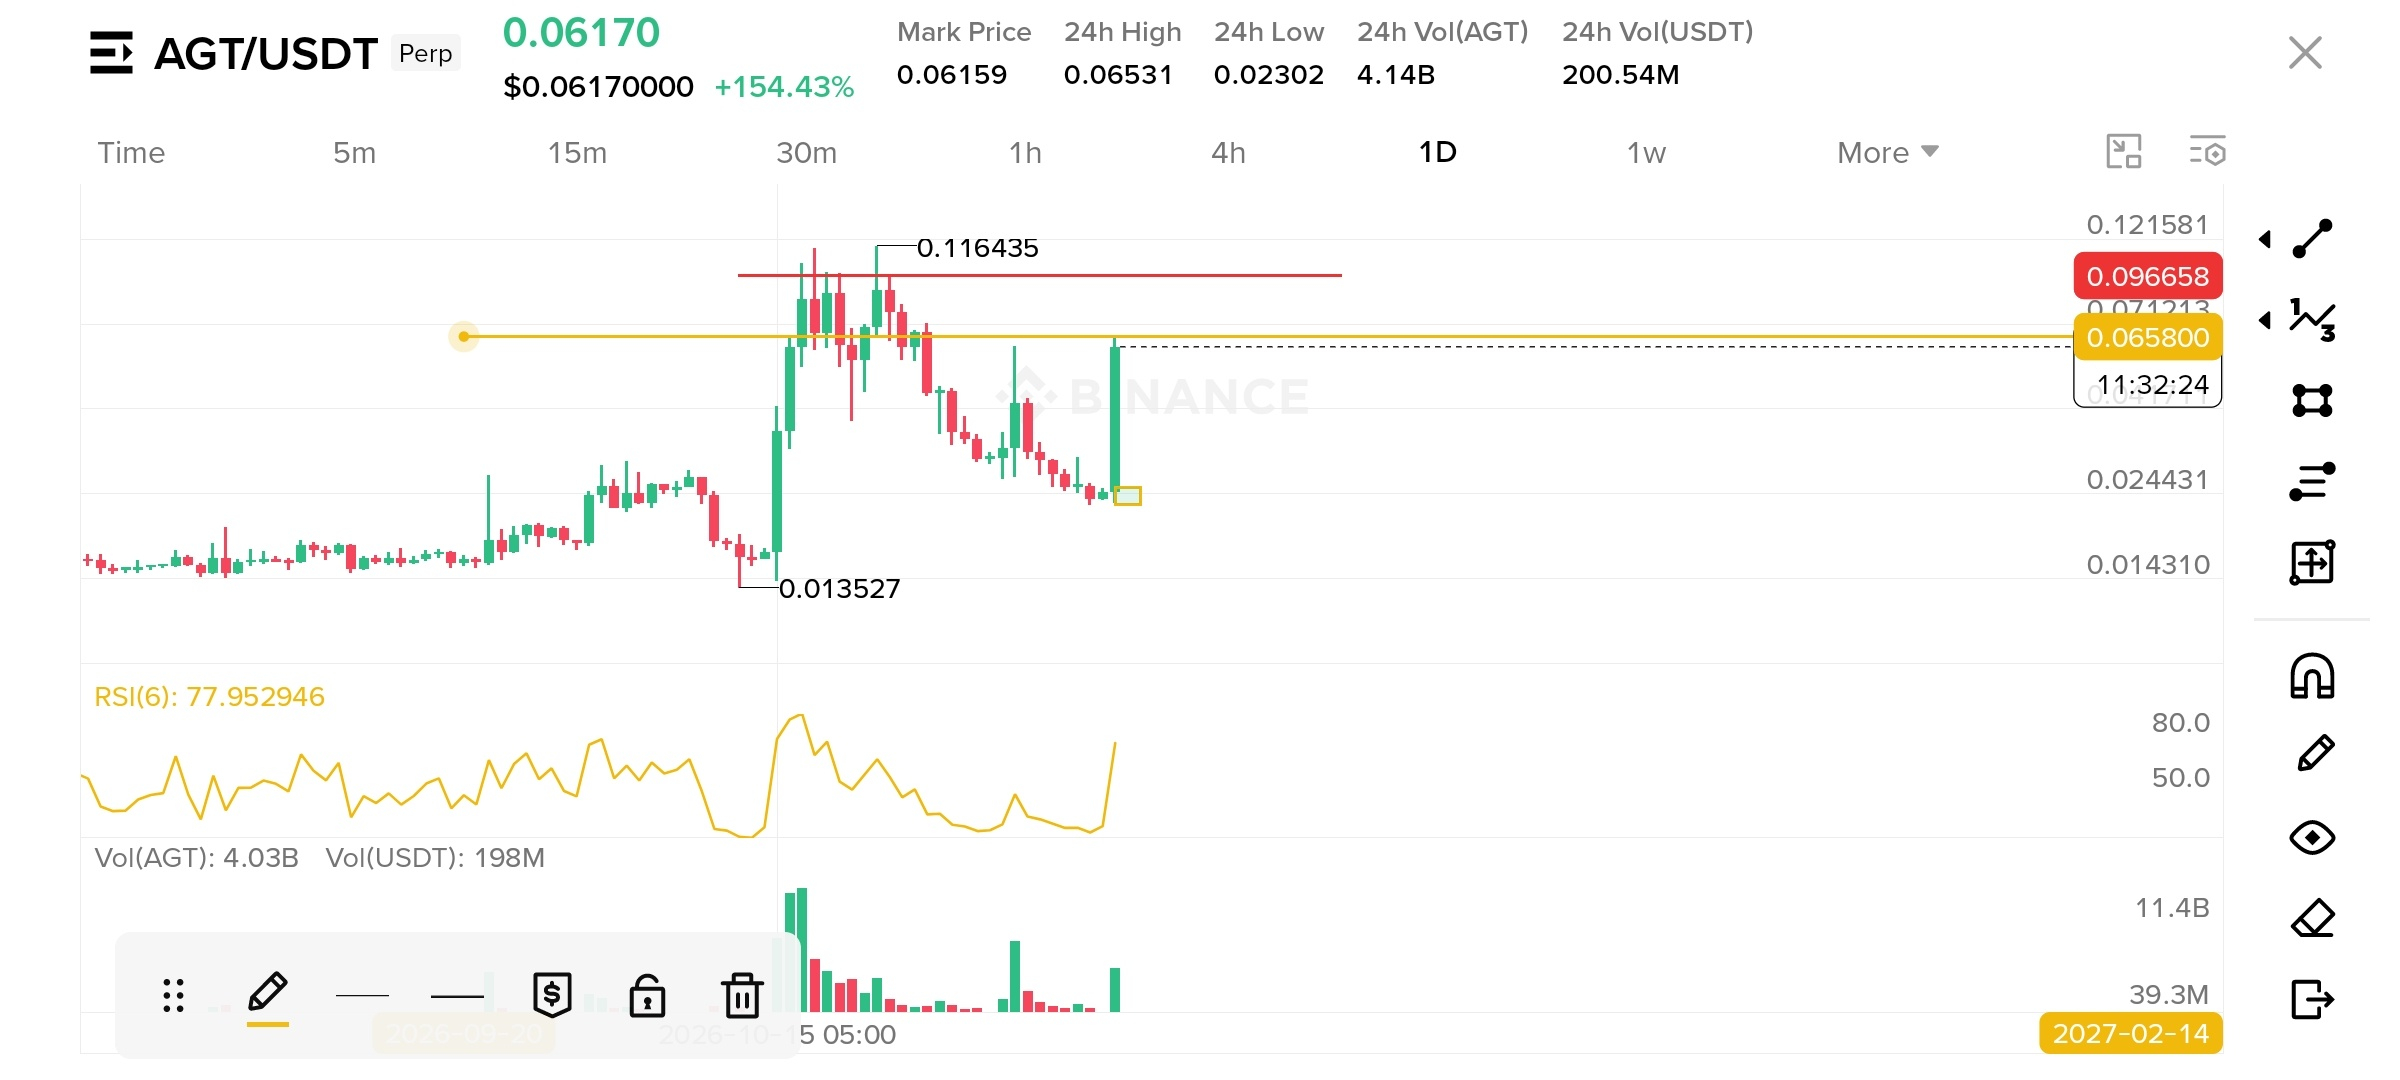
1D: Mark support and resistance again and check whether the levels align with the weekly ones.
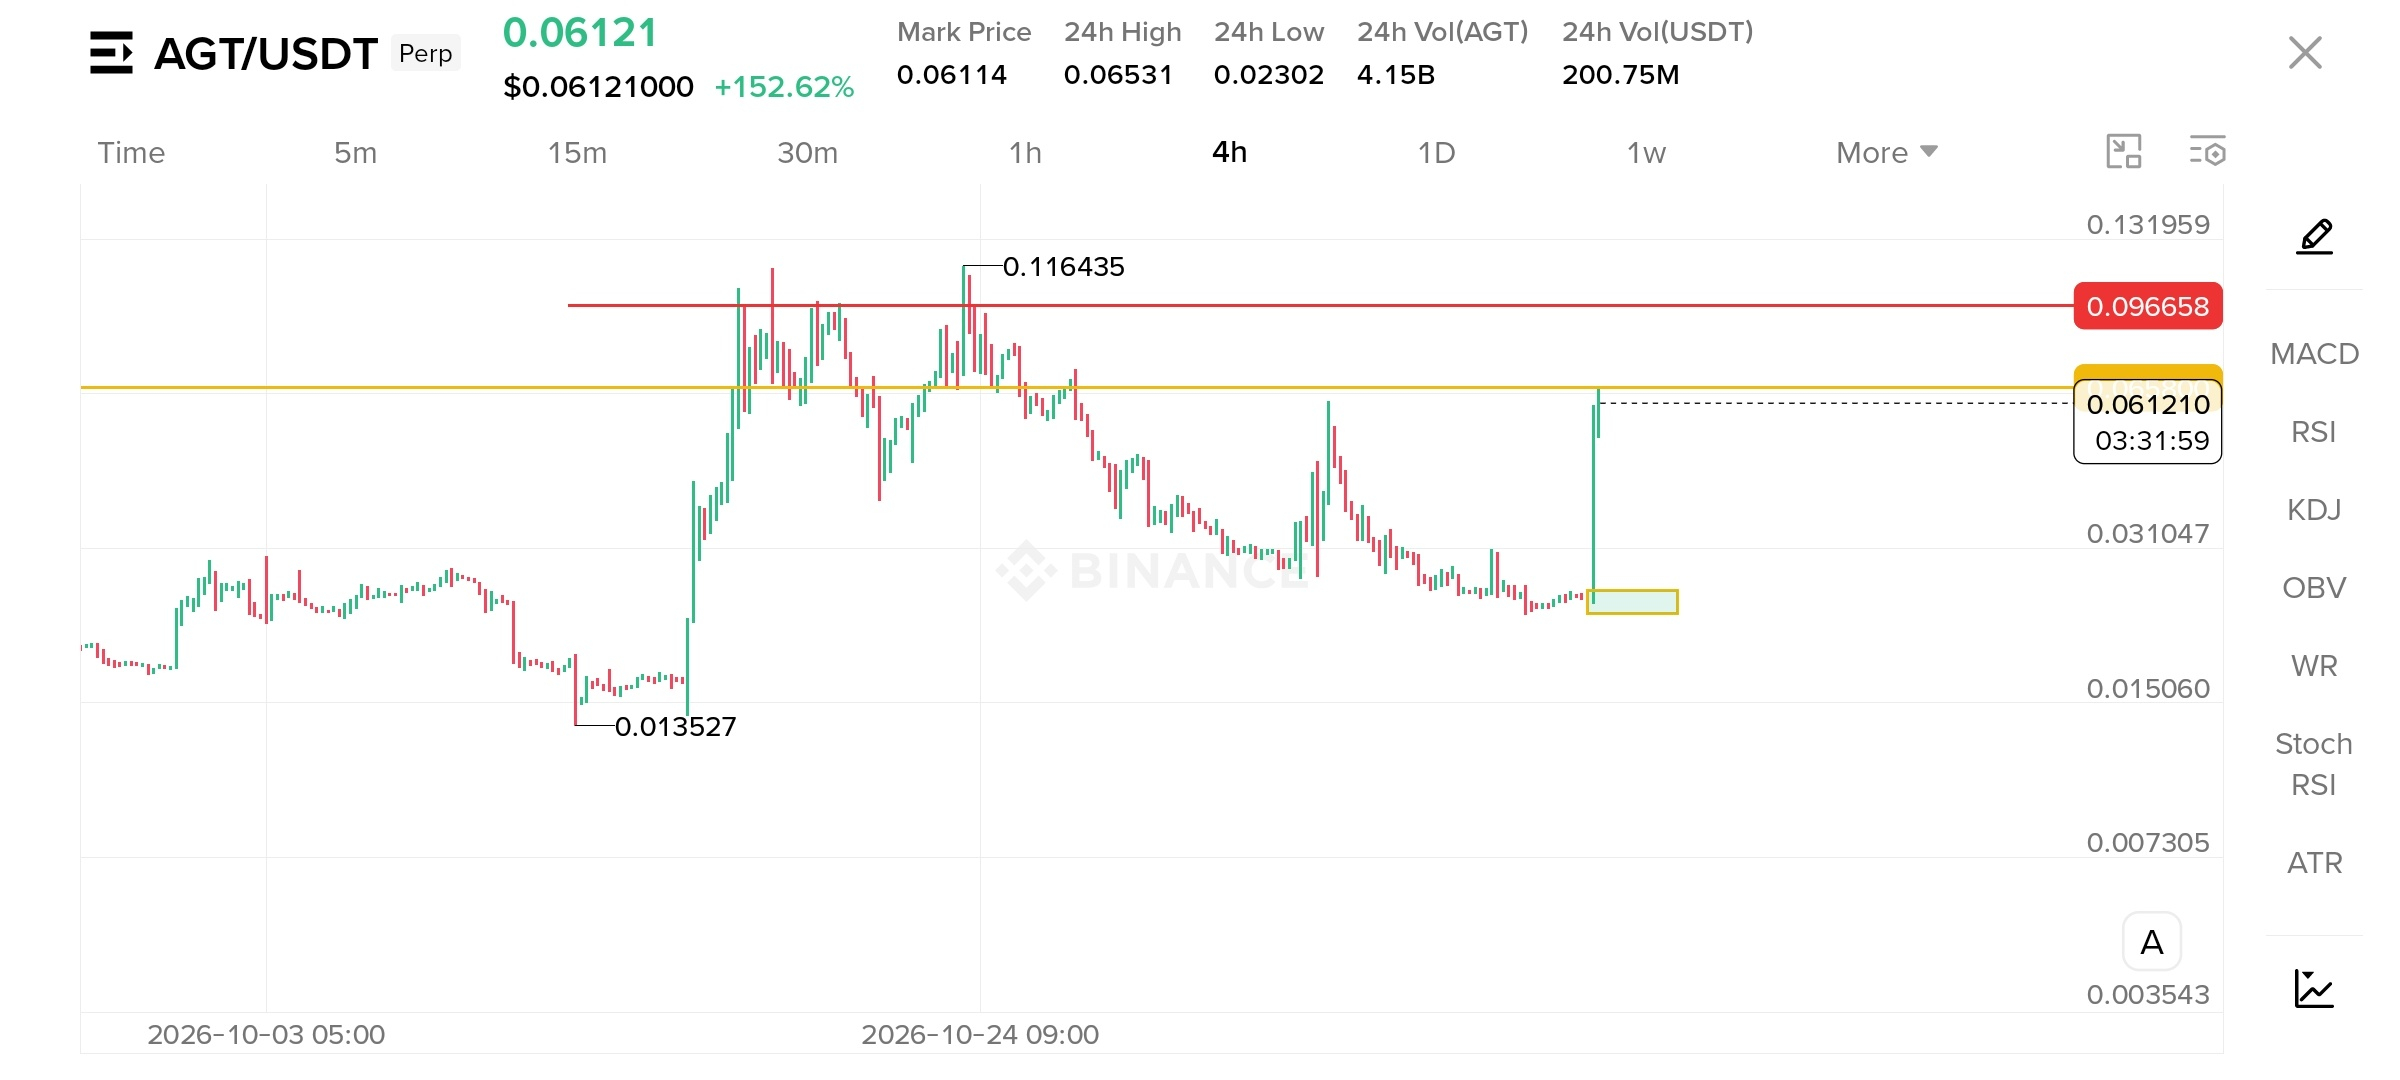
4H: Repeat the same process and check the alignment again.
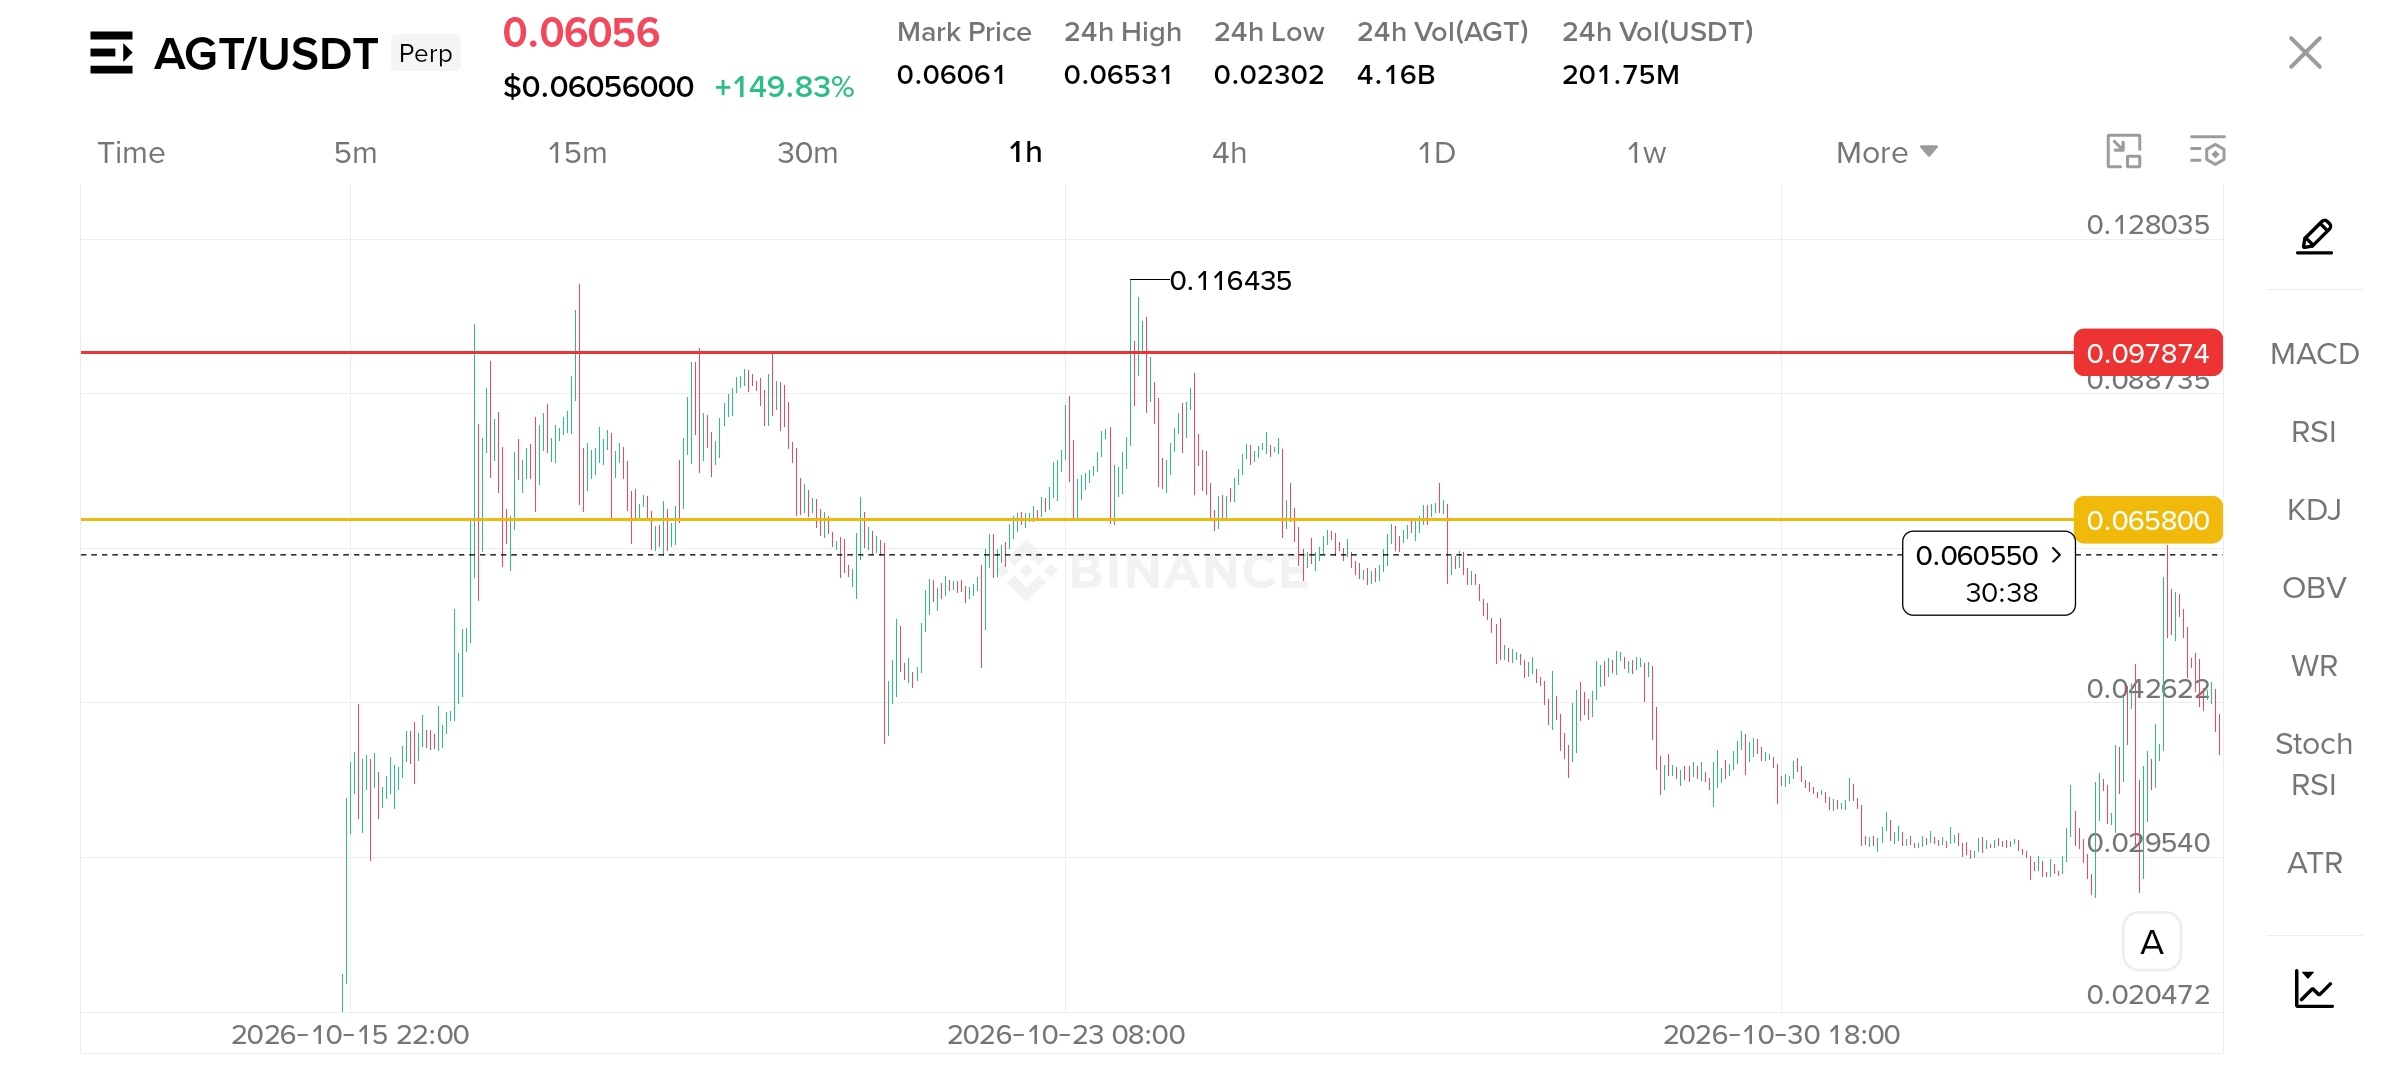
1H: Finally, observe the levels here. The yellow support line is strong on all timeframes, with only a few points of gap between them.
When a level lines up across all timeframes, it becomes a much stronger zone.
For entry, the 5-minute and 1-minute timeframes are used. That will be explained in a later post. 📚
Shorter version:
"Step 1: Mark support and resistance on 1W (1M is skipped because it has too few candles).
Step 2: Check if the 1D levels align.
Step 3: Repeat on 4H.
Step 4: Confirm on 1H. The yellow line is strong on every timeframe, with only a few points of gap.
Entry is on the 5m and 1m, to be covered next. 🔥"
$AGT
Multi-Timeframe Support and Resistance
Four timeframes are used: 1W, 1D, 4H and 1H.
1W: Mark support and resistance first. The 1M timeframe is skipped because it has too few candles.
1D: Mark support and resistance again and check whether the levels align with the weekly ones.
4H: Repeat the same process and check the alignment again.
1H: Finally, observe the levels here. The yellow support line is strong on all timeframes, with only a few points of gap between them.
When a level lines up across all timeframes, it becomes a much stronger zone.
For entry, the 5-minute and 1-minute timeframes are used. That will be explained in a later post. 📚
Shorter version:
"Step 1: Mark support and resistance on 1W (1M is skipped because it has too few candles).
Step 2: Check if the 1D levels align.
Step 3: Repeat on 4H.
Step 4: Confirm on 1H. The yellow line is strong on every timeframe, with only a few points of gap.
Entry is on the 5m and 1m, to be covered next. 🔥"