📈 $XAU — Bullish Recovery Setup
LONG $XAU
Entry: $4,155–$4,175
SL: $4,110
🎯 Take Profit:
TP1: $4,200
TP2: $4,225
TP3: $4,250
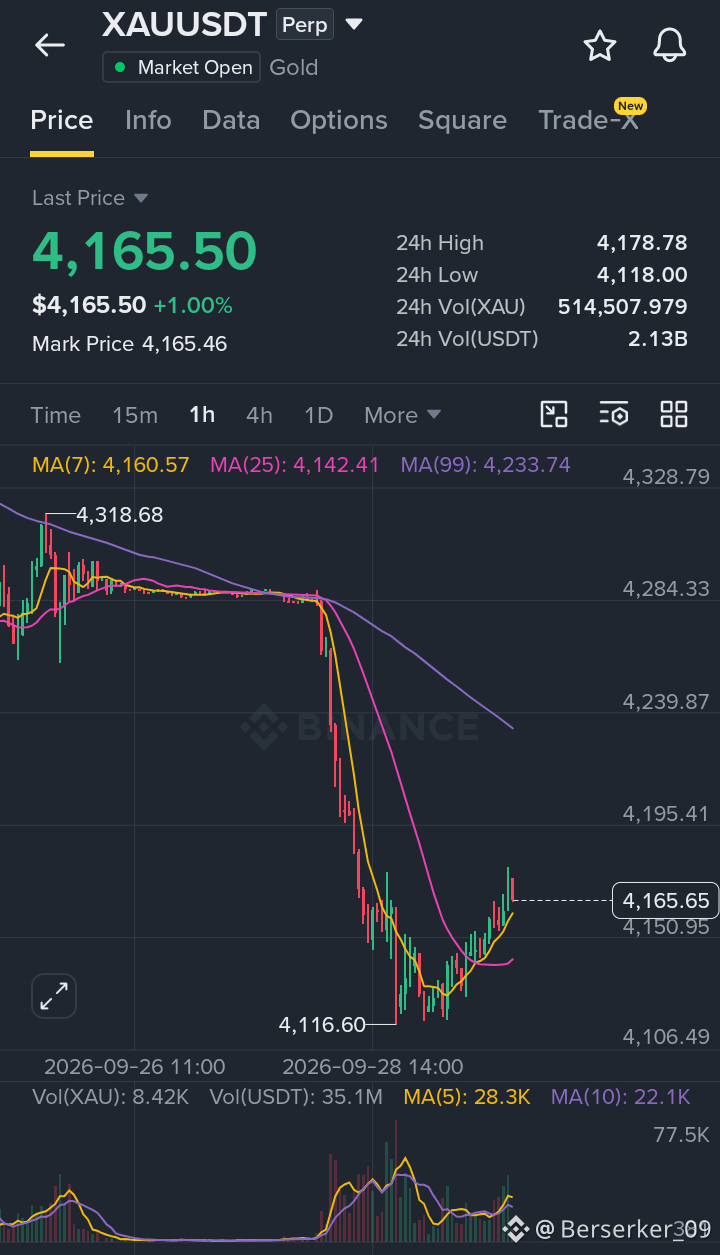
The 1H structure is showing a bullish recovery, with price bouncing from the $4,090–$4,110 support zone and reclaiming $4,170. Holding above this area could keep the recovery structure active and provide room for further upside toward the listed targets.
🔑 Key Level:
$4,170 — Holding above this reclaimed level could support continued bullish momentum and keep buyers in control.
⚠️ Risk Note:
A move below $4,110 would weaken and invalidate the bullish setup. Wait for confirmation around the entry zone and use controlled position sizing with proper risk management.
Bullish bias while support holds. 📈
Buy and Trade $XAU here 👇
DYOR
LONG $XAU
Entry: $4,155–$4,175
SL: $4,110
🎯 Take Profit:
TP1: $4,200
TP2: $4,225
TP3: $4,250
The 1H structure is showing a bullish recovery, with price bouncing from the $4,090–$4,110 support zone and reclaiming $4,170. Holding above this area could keep the recovery structure active and provide room for further upside toward the listed targets.
🔑 Key Level:
$4,170 — Holding above this reclaimed level could support continued bullish momentum and keep buyers in control.
⚠️ Risk Note:
A move below $4,110 would weaken and invalidate the bullish setup. Wait for confirmation around the entry zone and use controlled position sizing with proper risk management.
Bullish bias while support holds. 📈
Buy and Trade $XAU here 👇
DYOR