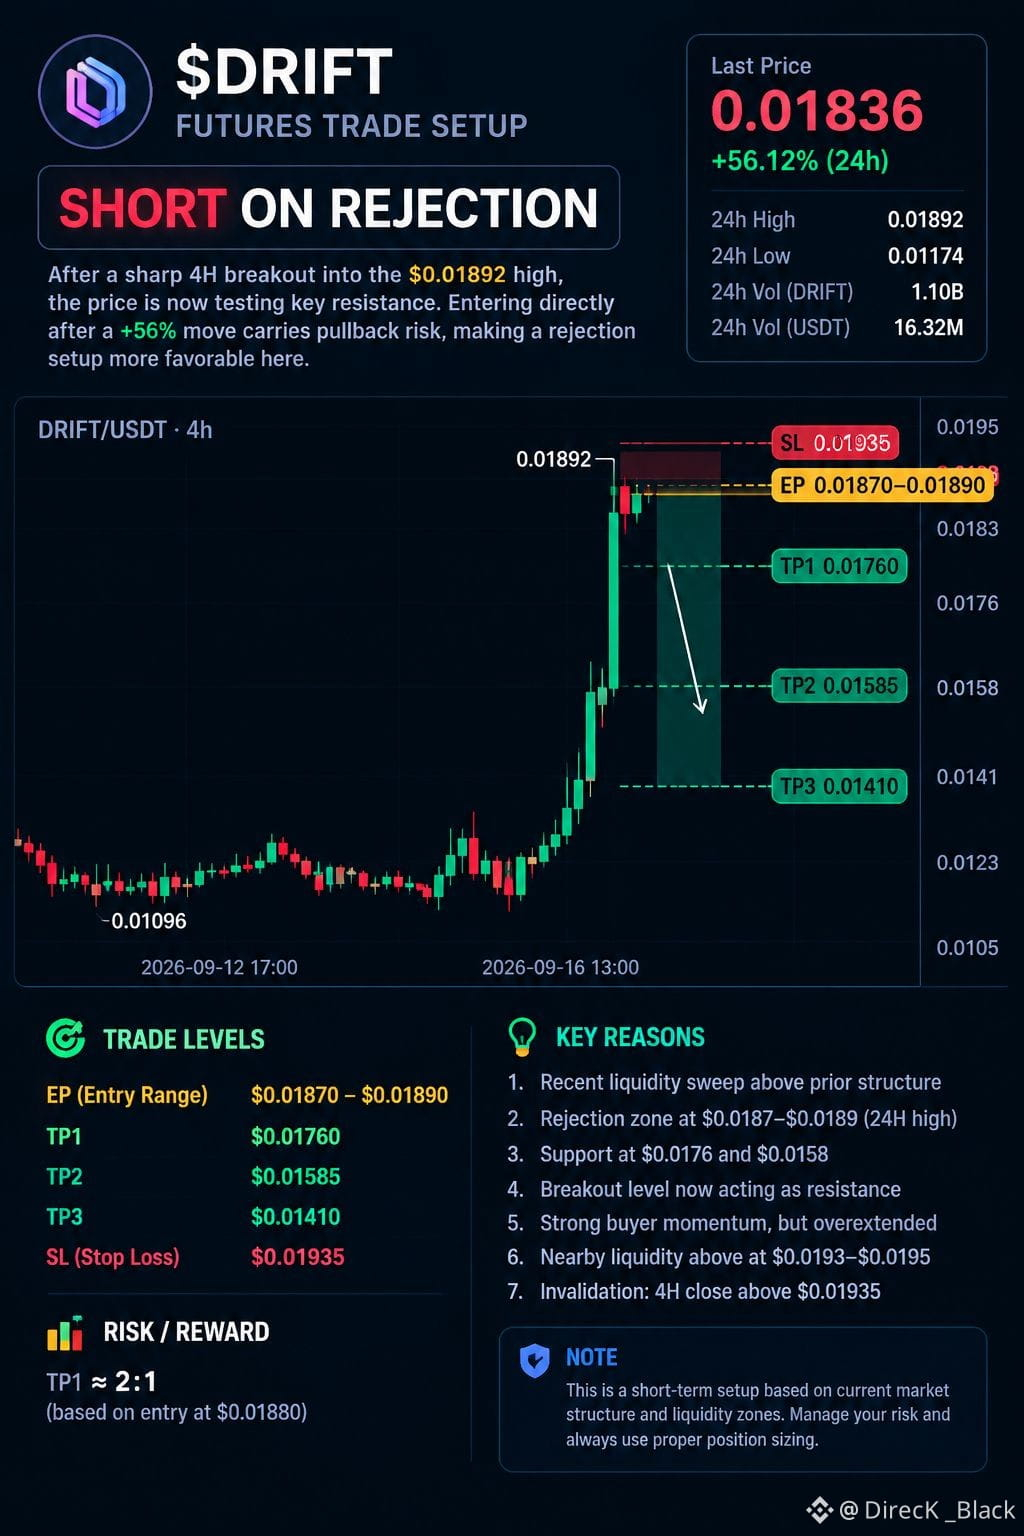
$DRIFT is showing a short-on-rejection setup after a sharp 4H breakout into the $0.01892 high. Buyers remain aggressive, but entering directly after a +56% move carries elevated pullback risk; the key area is $0.0187–$0.0189, where rejection can trigger a retracement.
EP: $0.01870–$0.01890
TP1: $0.01760
TP2: $0.01585
TP3: $0.01410
SL: $0.01935
The recent move swept liquidity above the prior structure and reached the 24H high at $0.01892, making that zone important resistance. A rejection below $0.0189 with a 4H close back under $0.0183 supports the short structure; a sustained breakout above $0.01935 invalidates it. Based on the screenshot, TP1 offers roughly 2:1 risk/reward, with deeper targets available only if selling pressure expands.
Would you prefer a LONG pullback setup or this SHORT rejection setup?
$CROSS
$COTI
EP: $0.01870–$0.01890
TP1: $0.01760
TP2: $0.01585
TP3: $0.01410
SL: $0.01935
The recent move swept liquidity above the prior structure and reached the 24H high at $0.01892, making that zone important resistance. A rejection below $0.0189 with a 4H close back under $0.0183 supports the short structure; a sustained breakout above $0.01935 invalidates it. Based on the screenshot, TP1 offers roughly 2:1 risk/reward, with deeper targets available only if selling pressure expands.
Would you prefer a LONG pullback setup or this SHORT rejection setup?
$CROSS
$COTI