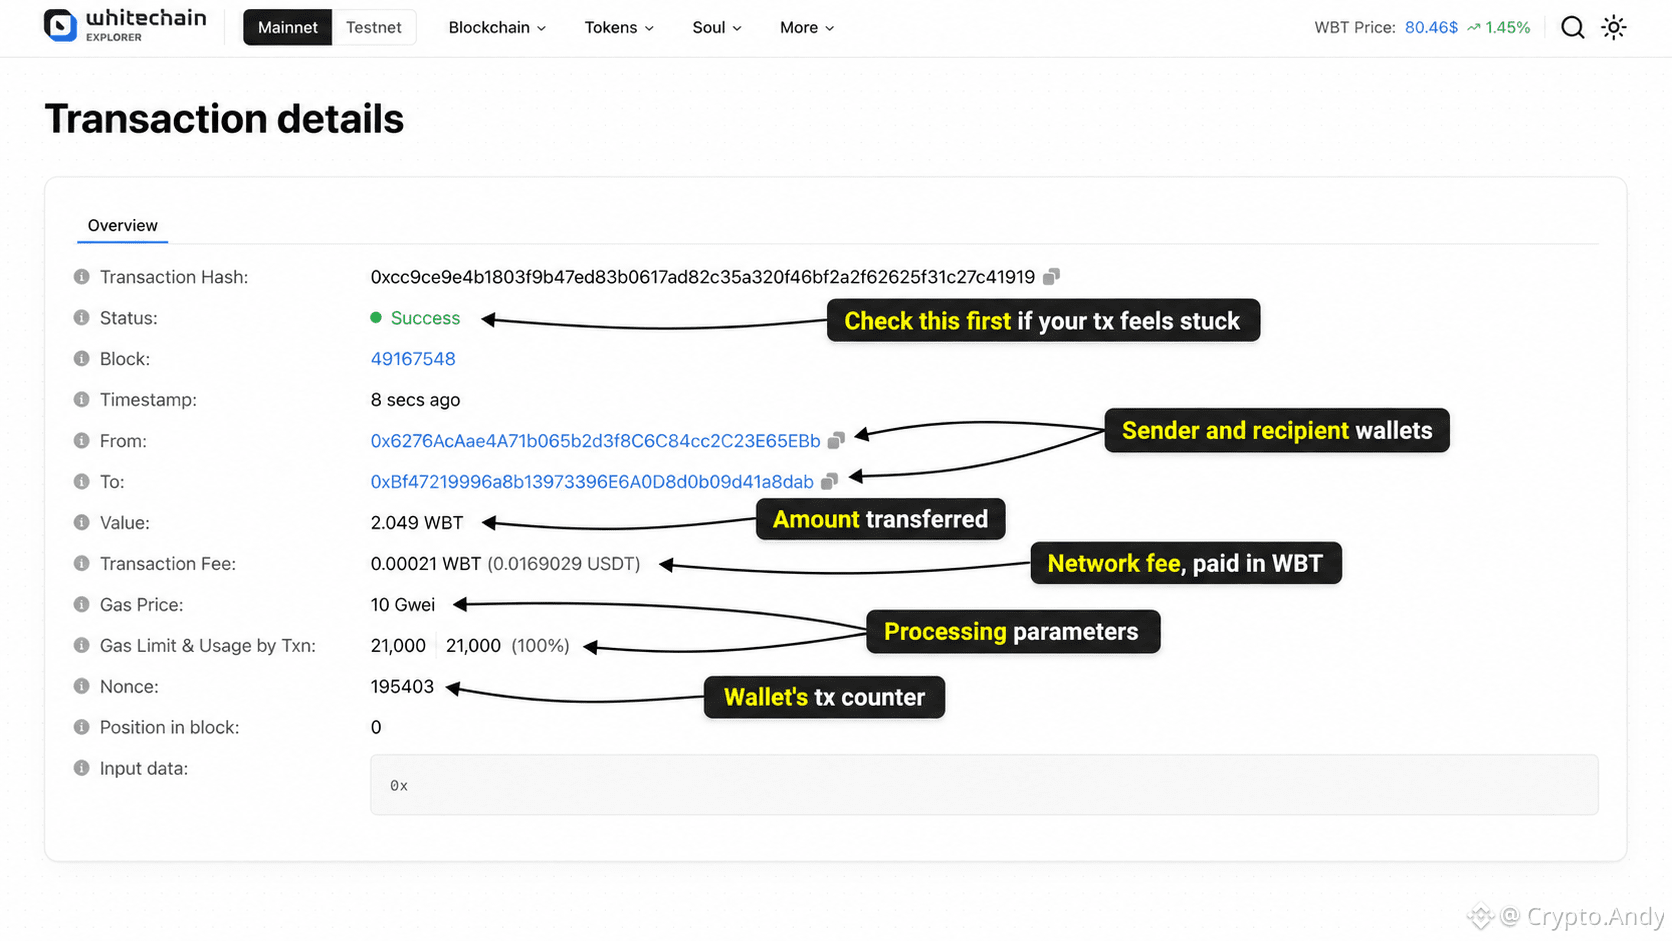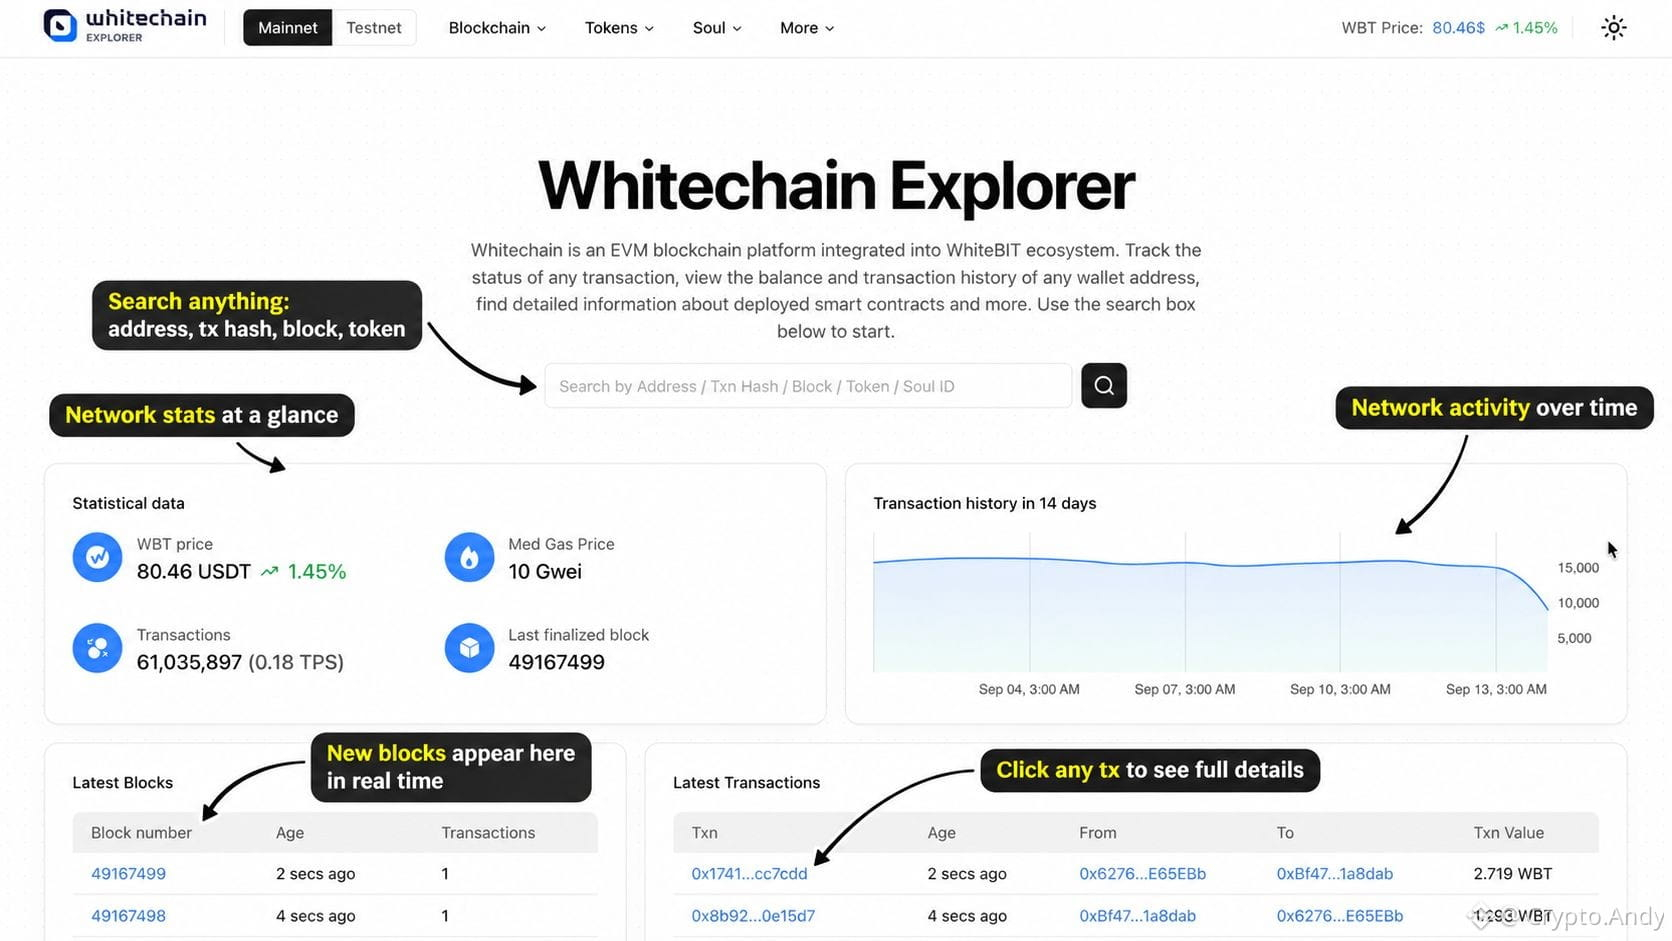
🧩 Reading a Blockchain Explorer, Step by Step Ever sent $BTC crypto and then just... stared at your screen wondering if it actually went through? That's what a block explorer is for. It's basically the blockchain's search engine. And here's the thing worth knowing upfront: every network has its own explorer. Ethereum has Etherscan, Tron has Tronscan, Solana has Solscan, WhiteBIT Coin has Whitechain etc. Different chain, same idea. No matter which one you use, the logic is the exact same - so let’s take a closer look at one of the examples mentioned above: Whitechain Explorer. Step 1. Land on the homepage Right away you get the vibe check on the whole network: WBT price, average gas (which is paid in WBT, of course), total transactions, latest block. Scroll down and you've got live feeds of blocks and transactions rolling in real time. Need to find something specific? Drop an address, tx hash, block number, token, or Soul ID into the search bar. Step 2. Open a transaction Click into any tx and here's your cheat sheet: • Transaction Hash - its fingerprint, totally unique • Status - the one you actually care about (Success ✅ or Failed ❌) • From / To - who sent, who received • Value - how much moved (2.049 WBT here) • Transaction Fee - what the network charged, paid in WBT (0.00021 WBT, pretty cheap) • Gas Price & Gas Limit - the technical knobs behind processing • Nonce - the wallet's transaction counter Real talk, some quick tips: → Transfer went missing? Search the hash first. → Transaction stuck or you're panicking? Check the Status field before you panic more. → Fee looks off? Compare it against the Med Gas Price on the homepage. Moral of the story: before you spiral, just check the explorer. It already knows. #BTC Price Analysis# #Macro Insights#

投稿
コントラクトアドレスを含みます。慎重に取引してください。