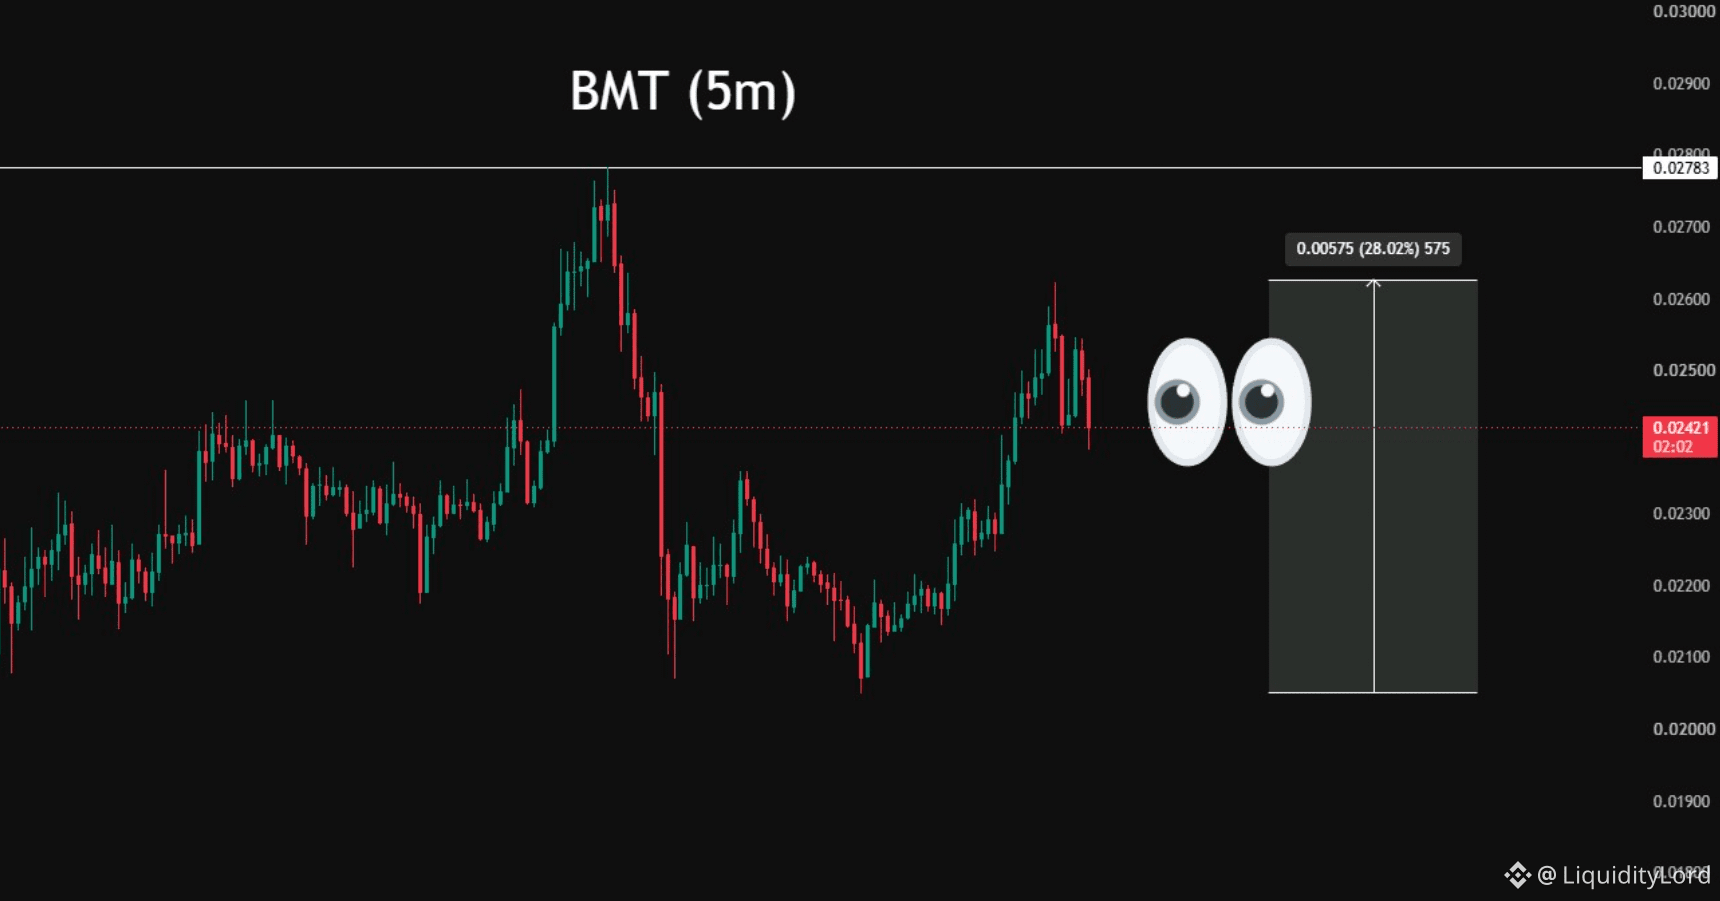
👀 BMT IS WATCHING THE BREAKOUT
BMT trades around 0.02421 on the 5m chart after recovering from 0.0210. Price pushed toward 0.0260 before pulling back, while 0.02783 remains major resistance.
📊 STRUCTURE CHECK
The key confirmation is a break above 0.0260 followed by acceptance. Until then, BMT remains inside a short-term range.
🎯 TARGET MAP
TP1: 0.0263
TP2: 0.02783
TP3: 0.0300
Stop Loss: 0.0210
TP1 is the first continuation checkpoint. TP2 is major resistance, while TP3 represents broader expansion.
⚠ INVALIDATION
The bullish setup weakens if BMT loses 0.0230 and fails to reclaim it. A move below 0.0210 would invalidate the recovery structure.
🧩 EXECUTION DYNAMICS
ST0N is relevant to execution, not the BMT thesis. During a fast 5m move, liquidity can change as traders adjust orders around breakout levels. RFQ routing lets competing resolvers search fragmented liquidity for efficient quotes when spreads and depth shift.
BMT's chart determines whether the breakout is valid. Execution concerns how efficiently orders can be filled. ST0N does not create the setup or determine direction; it operates at the execution layer.
TON remains the broader ecosystem reference, while BMT needs independent price confirmation.
🔎 MY PLAN
I would not chase BMT into 0.0260. My preferred scenario is a pullback toward 0.0230-0.0240 that holds, followed by another attempt through 0.0260.
If buyers reclaim 0.0260, 0.0263 becomes the first checkpoint. A break above it could open 0.02783, with 0.0300 as the broader target.
If BMT rejects resistance and loses 0.0230, I would step aside. A break below 0.0210 would invalidate the continuation idea.
The setup is interesting because price is approaching resistance after a strong recovery. But the breakout still needs confirmation. Buyers need to prove that 0.0260 can become support before the next expansion.
NFA - DYOR for now
$BMT
BMT trades around 0.02421 on the 5m chart after recovering from 0.0210. Price pushed toward 0.0260 before pulling back, while 0.02783 remains major resistance.
📊 STRUCTURE CHECK
The key confirmation is a break above 0.0260 followed by acceptance. Until then, BMT remains inside a short-term range.
🎯 TARGET MAP
TP1: 0.0263
TP2: 0.02783
TP3: 0.0300
Stop Loss: 0.0210
TP1 is the first continuation checkpoint. TP2 is major resistance, while TP3 represents broader expansion.
⚠ INVALIDATION
The bullish setup weakens if BMT loses 0.0230 and fails to reclaim it. A move below 0.0210 would invalidate the recovery structure.
🧩 EXECUTION DYNAMICS
ST0N is relevant to execution, not the BMT thesis. During a fast 5m move, liquidity can change as traders adjust orders around breakout levels. RFQ routing lets competing resolvers search fragmented liquidity for efficient quotes when spreads and depth shift.
BMT's chart determines whether the breakout is valid. Execution concerns how efficiently orders can be filled. ST0N does not create the setup or determine direction; it operates at the execution layer.
TON remains the broader ecosystem reference, while BMT needs independent price confirmation.
🔎 MY PLAN
I would not chase BMT into 0.0260. My preferred scenario is a pullback toward 0.0230-0.0240 that holds, followed by another attempt through 0.0260.
If buyers reclaim 0.0260, 0.0263 becomes the first checkpoint. A break above it could open 0.02783, with 0.0300 as the broader target.
If BMT rejects resistance and loses 0.0230, I would step aside. A break below 0.0210 would invalidate the continuation idea.
The setup is interesting because price is approaching resistance after a strong recovery. But the breakout still needs confirmation. Buyers need to prove that 0.0260 can become support before the next expansion.
NFA - DYOR for now
$BMT