The first step to gaining access to Ethereum’s rich ecosystem of dApps is to download the MetaMask extension from the official website. You will see support for all three major operating systems — Windows, iOS, and Android. Correspondingly, depending on your platform, MetaMask can either be desktop or mobile.

Once you have installed MetaMask into your favorite browser, click on the “get started” prompt in order to “Create a Wallet.”

This is the critical part of the installation, in which you will create a private key to access your funds. After all, crypto wallets are not fund holders, just containers for private keys which grant access to blockchains. Then, each time you access them with private keys, your transaction is recorded on the digital ledger.
Seed phrase as your wallet restoration point
After clicking on the “Create a Wallet,” you will be asked to create a password for the MetaMask app itself. The most important part comes after when you are asked to create a backup phrase. Also called seed phrase, this 12-word safety guard allows you to recover your wallet even if your device is lost.
As you can see, you have two options — Import wallet and Create a Wallet. If you had already lost your device and all data on it, you would then recover your crypto assets by selecting the “Import wallet” with your seed phrase.
Accordingly, try to keep the 12-word seed phrase as a separate item, safely stored on a piece of paper or a hardware password manager. If you are new to the crypto world, read up on these top 10 cryptocurrency security tips first!
You will see this screen on token swapping after you safely store your seed phrase.

As mentioned previously, MetaMask wallet allows you to exchange between ETH and dozens of DeFi tokens. You can see ETH as the master cryptocurrency for the whole DeFi ecosystem. Protocols like Uniswap or 1inch are mini-ecosystems, each one having a token for governance and network fees.
How to add funds to your MetaMask wallet
However, before you can start token swapping or anything else with MetaMask wallet, you have to have funds. This means that you must convert fiat currency to ETH first. MetaMask wallet gives you two options — Wyre payment processor or transfer using a blockchain address.
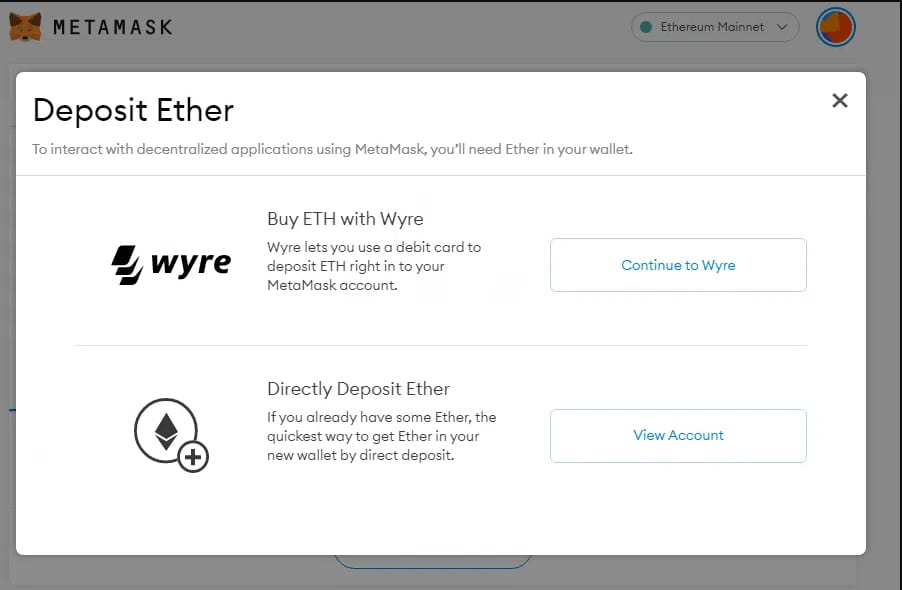
Not many people have Wyre, and most buy cryptocurrencies from exchanges, so the second option is the most convenient. Of course, this means that you would have to have an account on a crypto exchange to buy some ETH. Coinbase, Binance, StormGain are just some of the most popular crypto exchanges from which you can easily buy cryptocurrencies once you complete your KYC (Know-Your-Customer) procedure.
If you already have an account with some ETH, deposit it into MetaMask in the Send/Receive section. You will see the section when you click on Wallet:
Copy the receive address of your MetaMask wallet
Paste this receive address into your exchange’s send textbox
Execute the transfer of ETH from your crypto exchange (send) to the MetaMask wallet (receive)
Keep in mind that your crypto exchange account is also a wallet, but you don’t own your private key. Therefore, such a wallet is custodial. In contrast, MetaMask is a non-custodial wallet, with which you own your private key. You can, at any time, access and export your private key if you click on “Account details.”
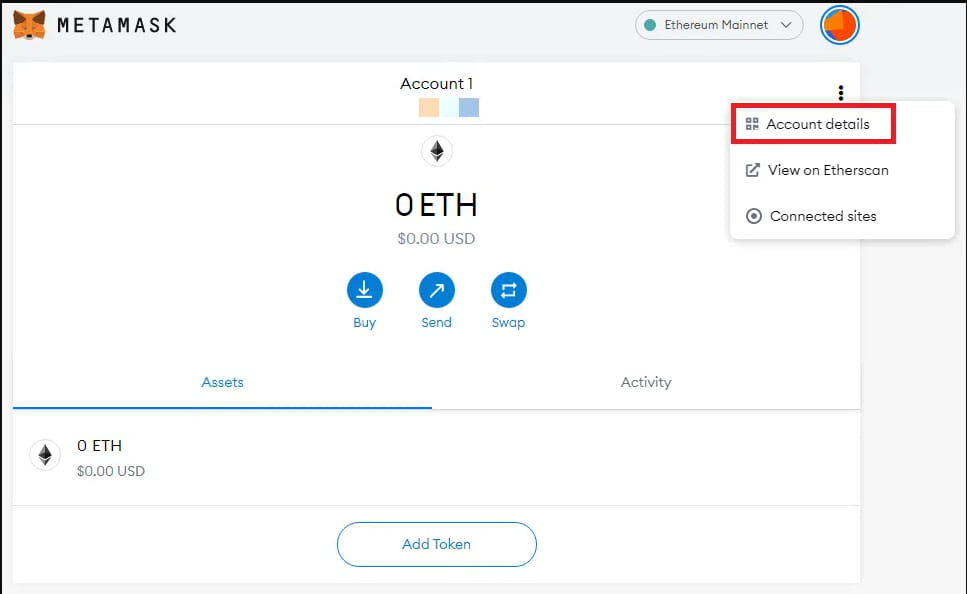
Keep your private key safe
You will then see the “Export Private Key” option, to both view it on Etherscan or export it. Of course, if someone gains access to your private key, they would also gain access to all of your crypto assets. This is what crypto exchange hacks are all about.
For the convenience of using an exchange, it safeguards your private key, but if hackers pilfer them, they also steal all the exchange’s funds. This is why you should always use a non-custodial wallet, preferably a hardware one.
Fortunately, MetaMask supports the most popular hardware wallets — Trezor and Ledger.
With the ETH funds in your wallet, the next step is using it to access dApps.
How to connect your MetaMask wallet to dApps
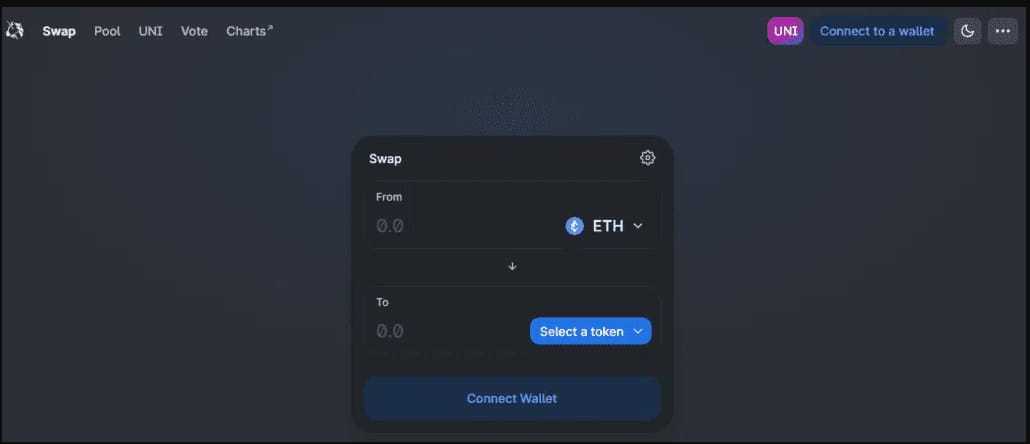
Remember, dApps themselves are smart contracts running on Ethereum (others like BSC, Cardano, or Solana have their own dApps). The surface level of dApps is their web interface. This is what you see when you connect to Uniswap — one of the most popular decentralized exchanges used for yield farming.
When you go to Uniswap, you will see “Connect to a wallet” in the top-right corner.
With MetaMask installed, a confirmation notification will appear asking to connect your account and the corresponding dApp.
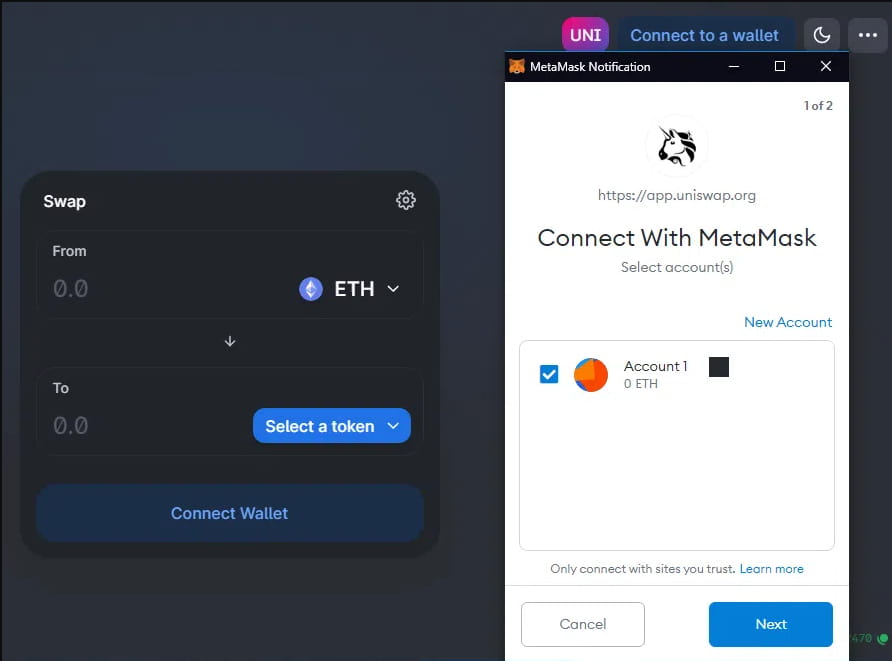
Once you click on “Next,” the dApp will have access to your wallet’s funds. You can then use them for staking in a liquidity pool for token pairs. When traders use that pool to exchange tokens, you get a cut. This is called yield farming. In Uniswap, it will be the upper left option, just next to Swap.
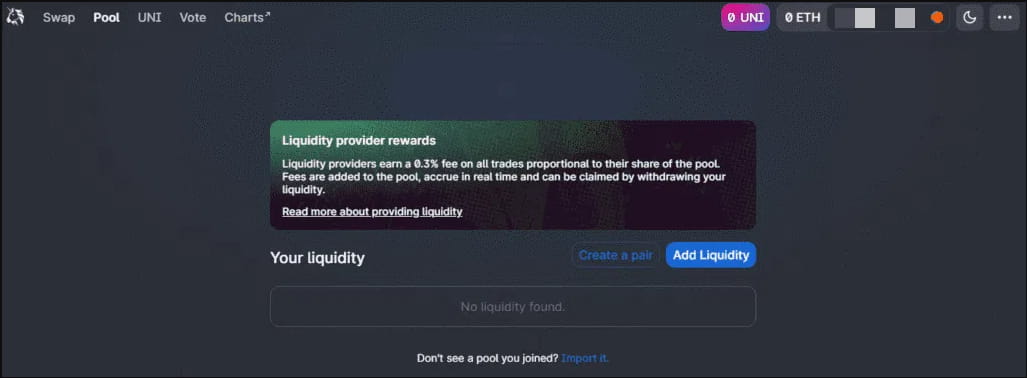
To get the most advantage of yield farming and maximize your returns, it would be best to read this yield-farming guide first. In the same manner, as you connect to Uniswap, you will also be able to connect to NFT marketplaces and blockchain games, effectively all dApps running on Ethereum.
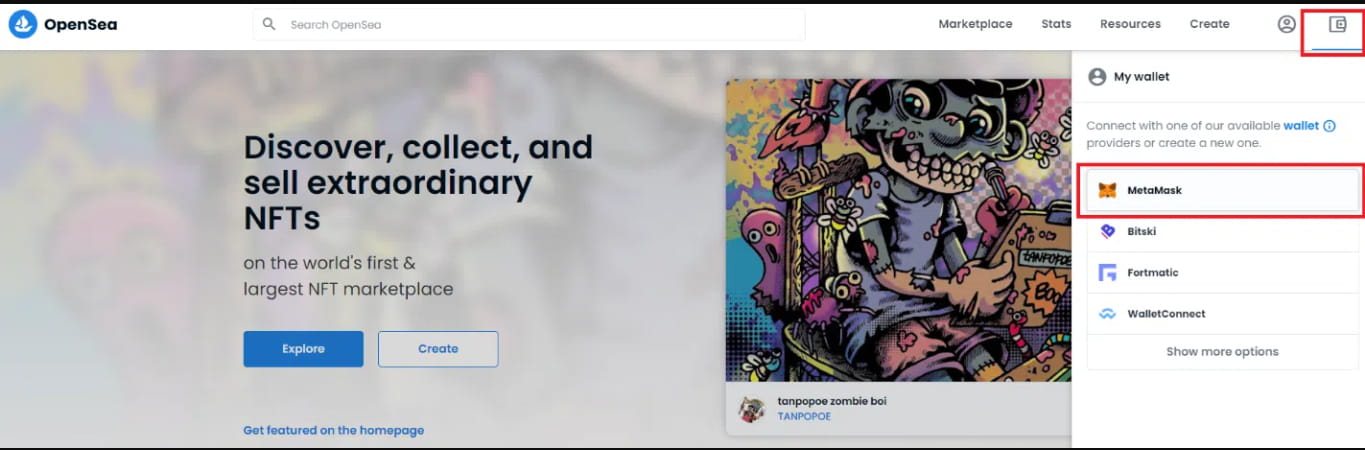
The matter is quite straightforward, even if it is your first time with MetaMask. After clicking the wallet icon in the top-right, you’ll see a list of wallets with direct download links. For example, this is how OpenSea, the top NFT marketplace, offers its web wallet connection.
Likewise, Rarible.com, the second-largest NFT marketplace, will have it in the same upper-right corner.

If you find this guide helpful, would you please give me follow, like, comment, and share? This inspires me to create more helpful content for you.
Thank you