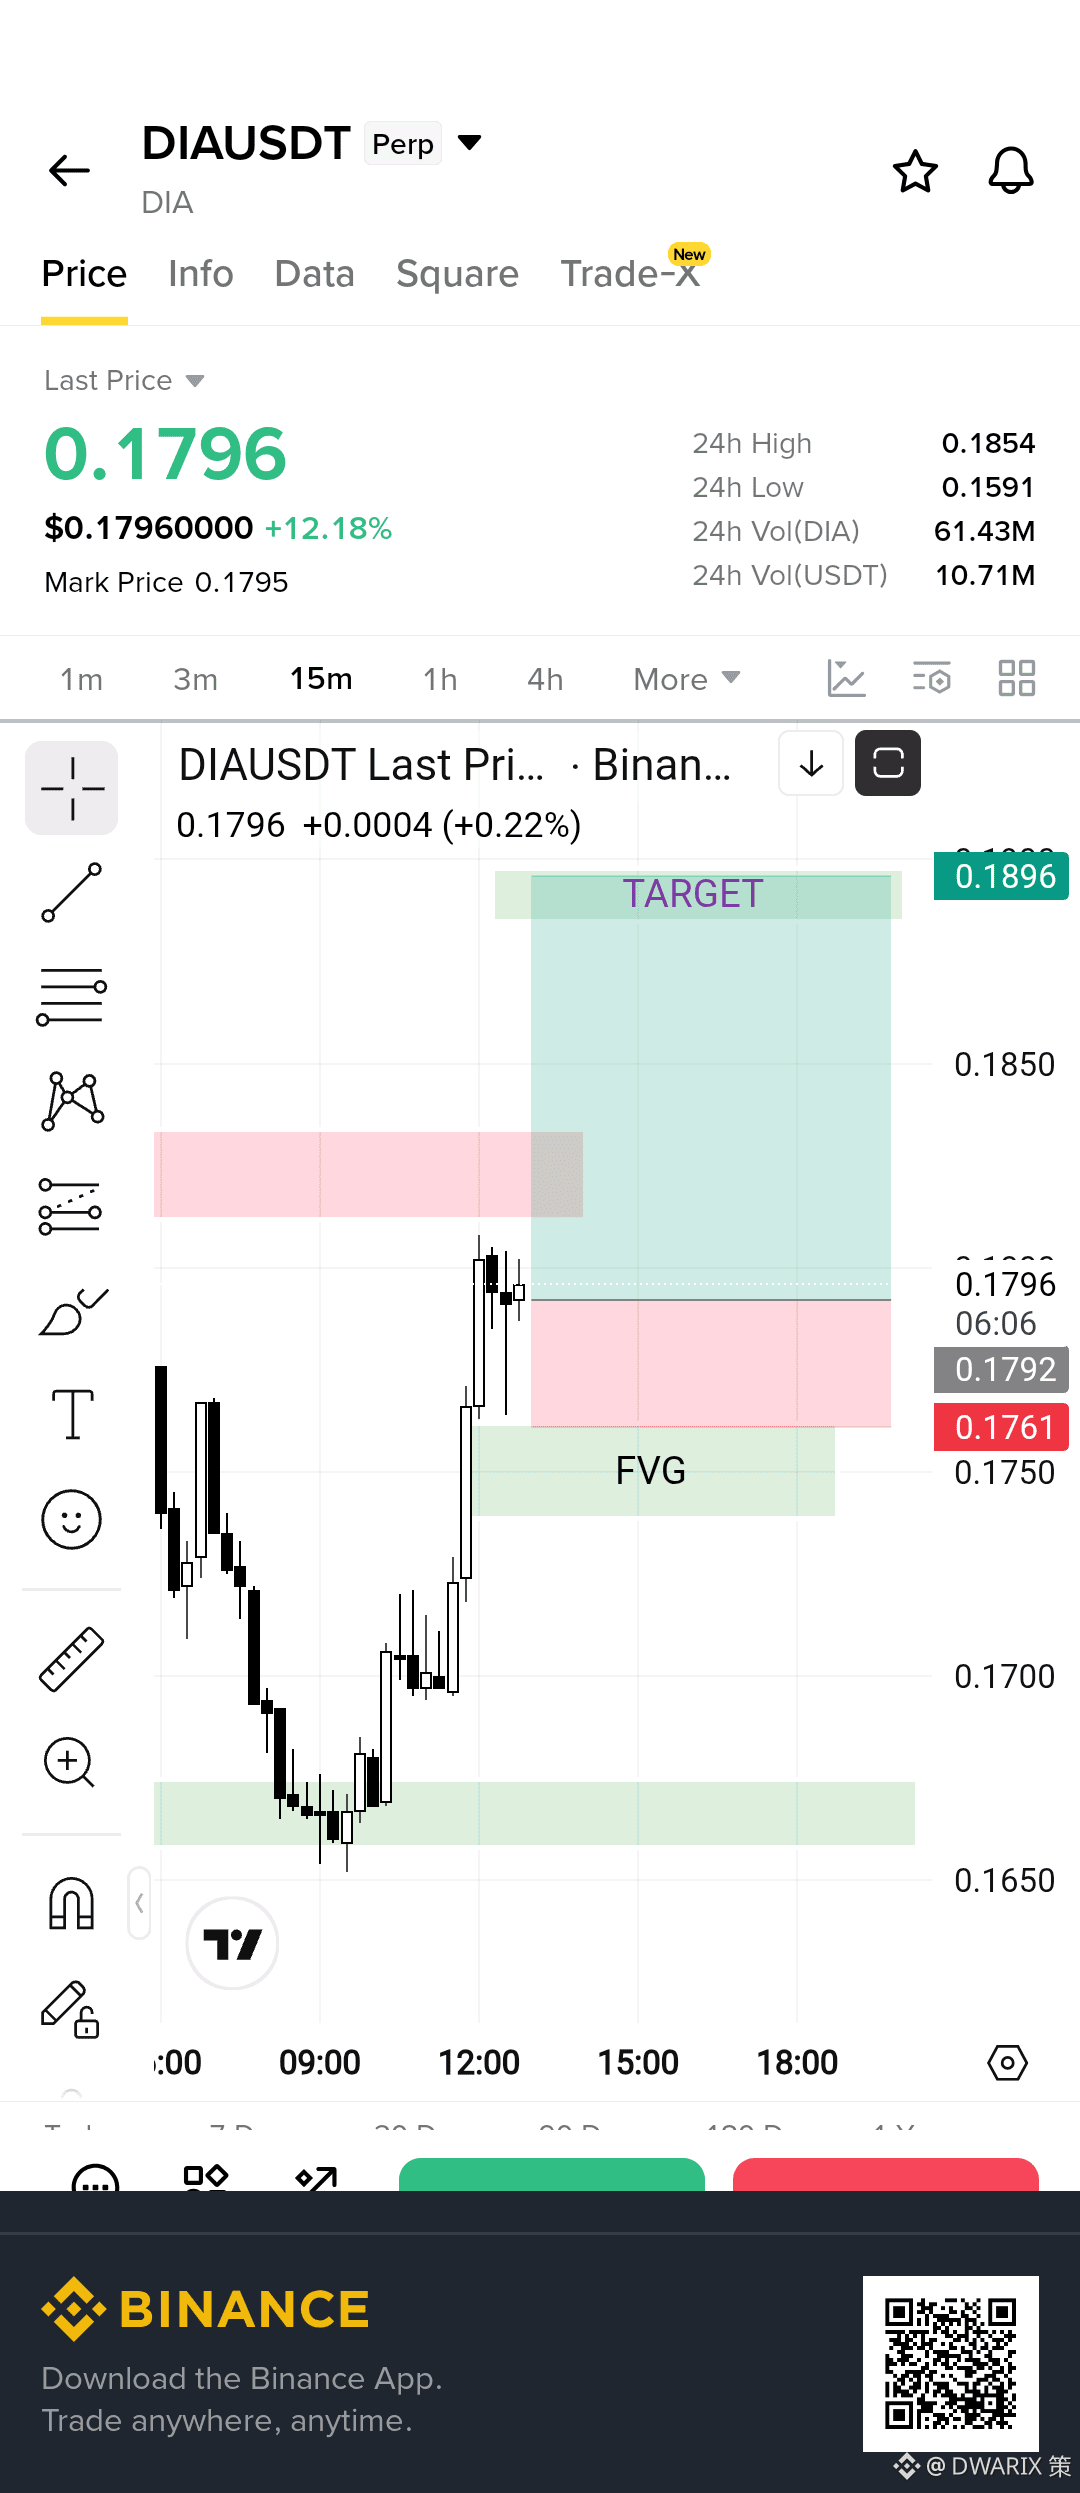
🟢 $DIA USDT — LONG SETUP | FVG RECLAIM
DIA is showing a strong intraday recovery on the 15M chart, with price pushing sharply from the 0.166–0.168 demand zone and now holding above the nearby FVG.
The idea is simple: let the pullback come to us instead of chasing the pump.
📌 Trade Plan
Entry Zone: 0.1761 – 0.1792
Stop Loss: 0.1745
TP1: 0.1835
TP2: 0.1860
Final Target: 0.1896
🔎 Why this setup?
• Strong bullish displacement from the lower demand area
• 15M structure has shifted upward
• FVG around 0.175–0.176 provides a potential retracement zone
• Holding above 0.1761 keeps the bullish continuation thesis valid
• 0.1896 sits near the projected liquidity/target zone
Best approach: If DIA retraces into the FVG, watch for a bullish reaction before adding. If price loses the setup's invalidation area, don't force the trade.
🎯 Target: 0.1896
Risk first. Position size accordingly. DYOR — not financial advice.
DIA is showing a strong intraday recovery on the 15M chart, with price pushing sharply from the 0.166–0.168 demand zone and now holding above the nearby FVG.
The idea is simple: let the pullback come to us instead of chasing the pump.
📌 Trade Plan
Entry Zone: 0.1761 – 0.1792
Stop Loss: 0.1745
TP1: 0.1835
TP2: 0.1860
Final Target: 0.1896
🔎 Why this setup?
• Strong bullish displacement from the lower demand area
• 15M structure has shifted upward
• FVG around 0.175–0.176 provides a potential retracement zone
• Holding above 0.1761 keeps the bullish continuation thesis valid
• 0.1896 sits near the projected liquidity/target zone
Best approach: If DIA retraces into the FVG, watch for a bullish reaction before adding. If price loses the setup's invalidation area, don't force the trade.
🎯 Target: 0.1896
Risk first. Position size accordingly. DYOR — not financial advice.