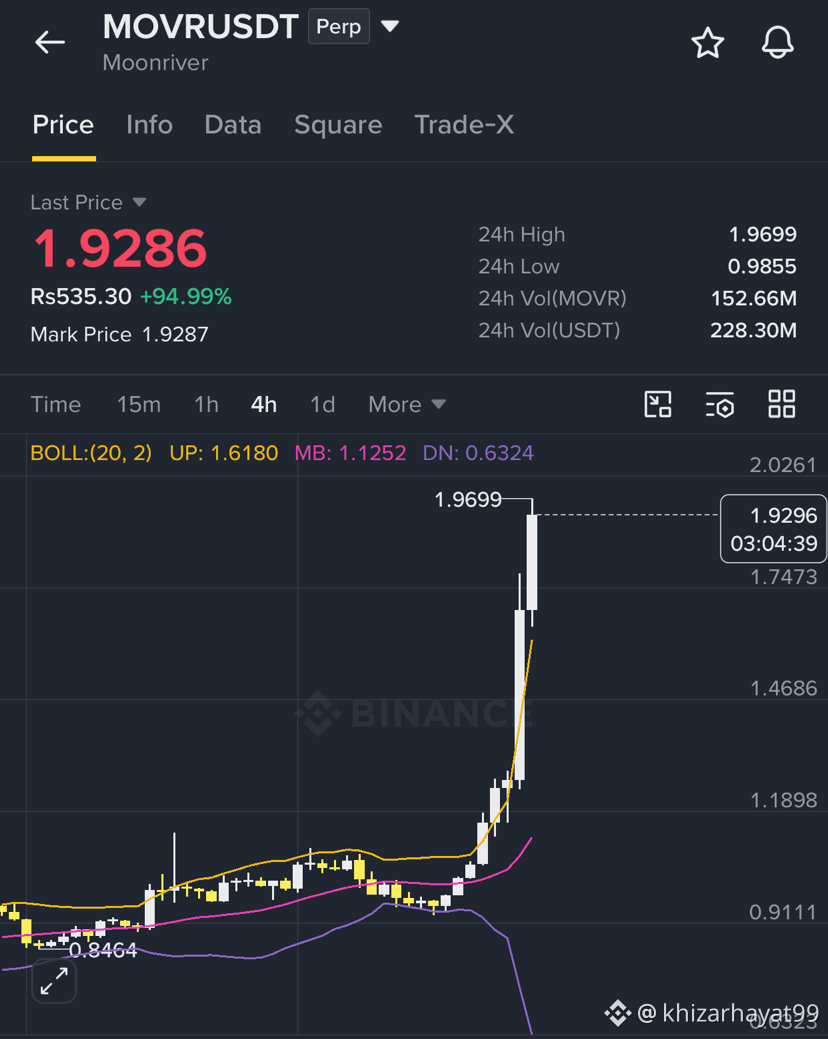
$MOVR /USDT — 4-Hour Bullish Structure Long Setup
Trade Parameters
Bias: Bullish Continuation / Reclaim
Timeframe: 4-Hour (4H)
Entry Zone: $1.9000 – $1.9250 (accumulation / support retest zone)
Stop Loss (SL): $1.8350 (below recent 4H swing low / structural invalidation)
Risk/Reward Ratio: ~1:3+ (depending on execution)
Take Profit Targets
TP1: $2.0800 (First major 4H horizontal supply / local resistance)
TP2: $2.2800 (Liquidity pool above recent high)
TP3: $2.5200 (Extended target for macro breakout continuation)
Execution & Confluence Checklist
Structure Shift: Look for a 4H candle body close solidifying above $1.9200 to confirm support conversion.
Volume Profile: Confirm volume expansion on bullish candles compared to declining volume during the pullback to $1.9200.
Lower Timeframe Trigger (15m / 1H): Look for a change of character (CHoCH) or a Higher High/Higher Low formation on the 15m/1H charts before committing full size.
Momentum: RSI resetting near/above 45–50 level on the 4H, indicating room for the next leg up without being overbought.
Risk Management Rules
Keep total risk strictly capped at 1–2% of account equity.
Move Stop Loss to Breakeven (BE) once TP1 is secured.
Take partial profits at TP1 (e.g., 30–50% of position) to de-risk the trade.
Trade Parameters
Bias: Bullish Continuation / Reclaim
Timeframe: 4-Hour (4H)
Entry Zone: $1.9000 – $1.9250 (accumulation / support retest zone)
Stop Loss (SL): $1.8350 (below recent 4H swing low / structural invalidation)
Risk/Reward Ratio: ~1:3+ (depending on execution)
Take Profit Targets
TP1: $2.0800 (First major 4H horizontal supply / local resistance)
TP2: $2.2800 (Liquidity pool above recent high)
TP3: $2.5200 (Extended target for macro breakout continuation)
Execution & Confluence Checklist
Structure Shift: Look for a 4H candle body close solidifying above $1.9200 to confirm support conversion.
Volume Profile: Confirm volume expansion on bullish candles compared to declining volume during the pullback to $1.9200.
Lower Timeframe Trigger (15m / 1H): Look for a change of character (CHoCH) or a Higher High/Higher Low formation on the 15m/1H charts before committing full size.
Momentum: RSI resetting near/above 45–50 level on the 4H, indicating room for the next leg up without being overbought.
Risk Management Rules
Keep total risk strictly capped at 1–2% of account equity.
Move Stop Loss to Breakeven (BE) once TP1 is secured.
Take partial profits at TP1 (e.g., 30–50% of position) to de-risk the trade.