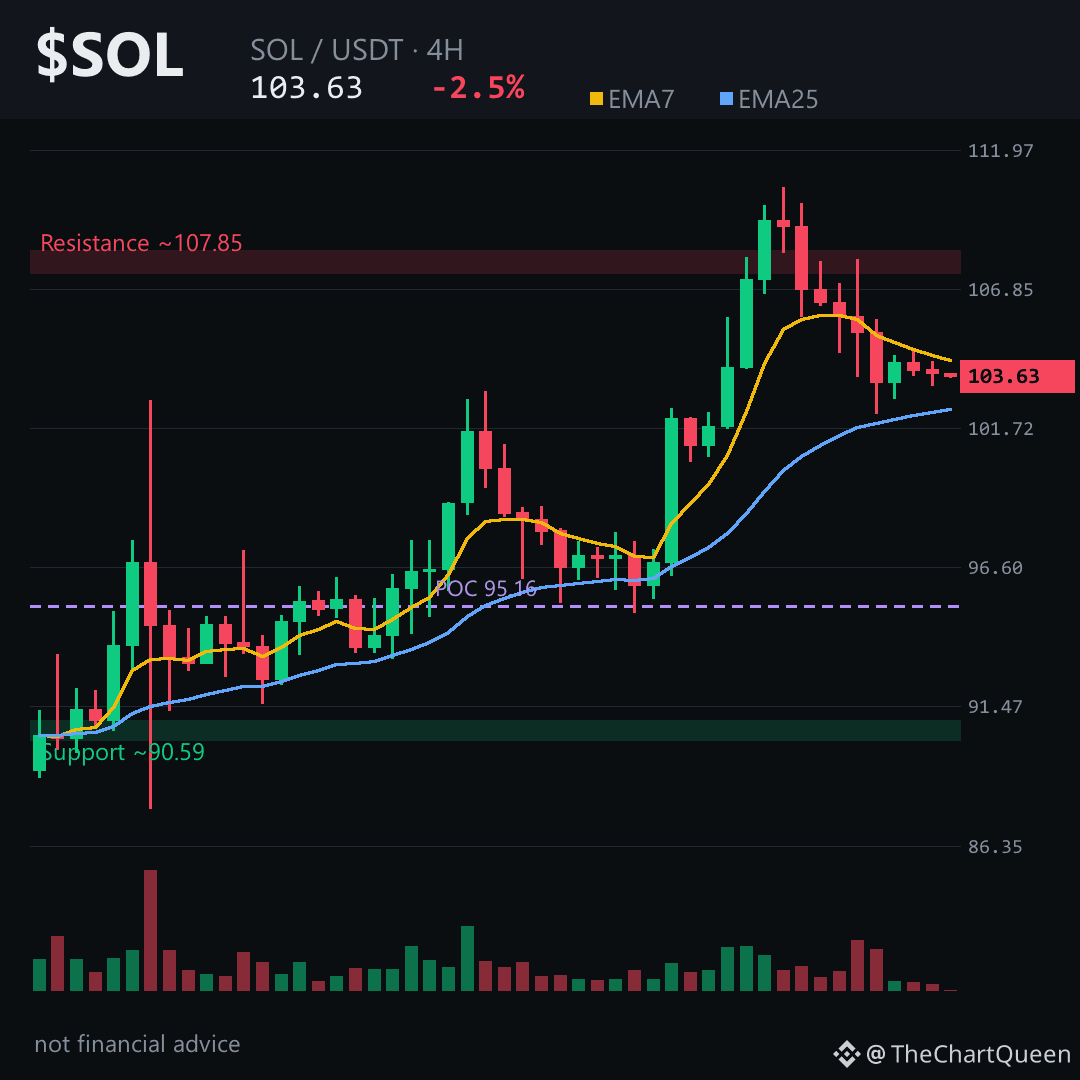
The 4‑hour candles are drenched in red, yet the weekly chart is humming a different tune. 👀
Price is tucked under the weekly EMA crossover, and the long‑term profile still shows a clear sell‑off bias, even as short‑term buyers cling to the 103‑zone.
On the weekly picture, $SOL is holding just below the ~119 zone. Lose the ~119 area on a 1W close and the bearish case evaporates; the next danger line sits around ~140. If sellers stay firm, the chart eyes the ~65 zone as the next destination.
My read: the weekly structure leans toward a slide toward the mid‑60s unless a decisive break above the 119 level flips the story.
Follow me for the next update when $SOL finally tests that 65 target – you won’t want to miss the shift.
What level do you think will decide $SOL’s next move – the 119 pivot or the 65 zone? 👇
⚠️ Not financial advice. DYOR.
#SOL #Solana #Crypto #BinanceSquare
Price is tucked under the weekly EMA crossover, and the long‑term profile still shows a clear sell‑off bias, even as short‑term buyers cling to the 103‑zone.
On the weekly picture, $SOL is holding just below the ~119 zone. Lose the ~119 area on a 1W close and the bearish case evaporates; the next danger line sits around ~140. If sellers stay firm, the chart eyes the ~65 zone as the next destination.
My read: the weekly structure leans toward a slide toward the mid‑60s unless a decisive break above the 119 level flips the story.
Follow me for the next update when $SOL finally tests that 65 target – you won’t want to miss the shift.
What level do you think will decide $SOL’s next move – the 119 pivot or the 65 zone? 👇
⚠️ Not financial advice. DYOR.
#SOL #Solana #Crypto #BinanceSquare