
The FTX claim website suddenly opened in the early morning of July 12 for users to submit information. Although the website continued to be inaccessible, it has now stabilized and FTX disaster-affected households can submit claim applications. If there are assets still on the FTX exchange , you can refer to the step-by-step instructions in this article. Please note that the content that needs to be filled in for a claim is a bit lengthy, and everyone must be mentally prepared to spend a certain amount of time.
Enter the FTX claims website
FTX's claims website is now online. If you have an FTX account, you can visit claims.ftx.com/. The default website is English. If you need to change the language, you can switch the language in the upper right corner of the website. On the platform selection side, select the platform you have used. Hong Kong and Taiwan users generally select "FTX .com". If you use a Blockfolio wallet, select "Blockfolio - FTX .com", and then click "Start" to continue.

On the platform selection side, select the platform you have used. Hong Kong and Taiwan users usually select "FTX .com" and then click "Start" to continue.
STEP 1: Start account holder authentication
Log in to your FTX account in Step 1. You can log in directly with your old FTX account password. If you have set up two-factor authentication (2FA) before, you also need to prepare a Google or Authy authenticator.
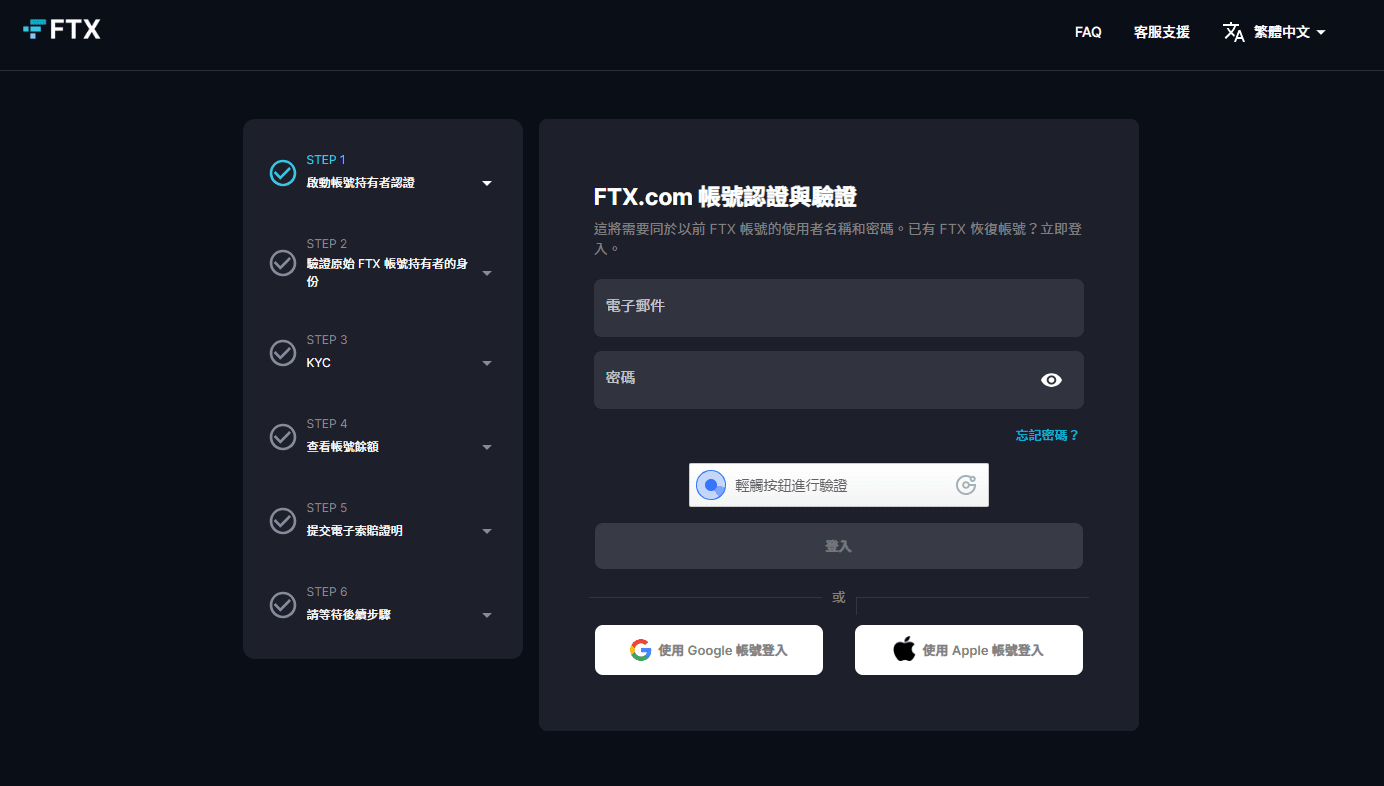
Log in to your FTX account in Step 1. You can log in directly with your old FTX account password. If you have set up two-factor authentication (2FA) before, you also need to be ready.
STEP 2: Verify the identity of the original FTX account holder
Here you will confirm whether your email is valid. Click "Confirm Email" and then check your corresponding email. Normally you will receive an email sent by "support@ftx. com". Click "Confirm your email" in the email. email" button to continue.

Here you will confirm whether your email is valid. Click "Confirm Email" and then check your corresponding email. Normally you will receive an email sent by "support@ftx. com". Click "Confirm your email" in the email. email" button to continue.
STEP 3:KYC
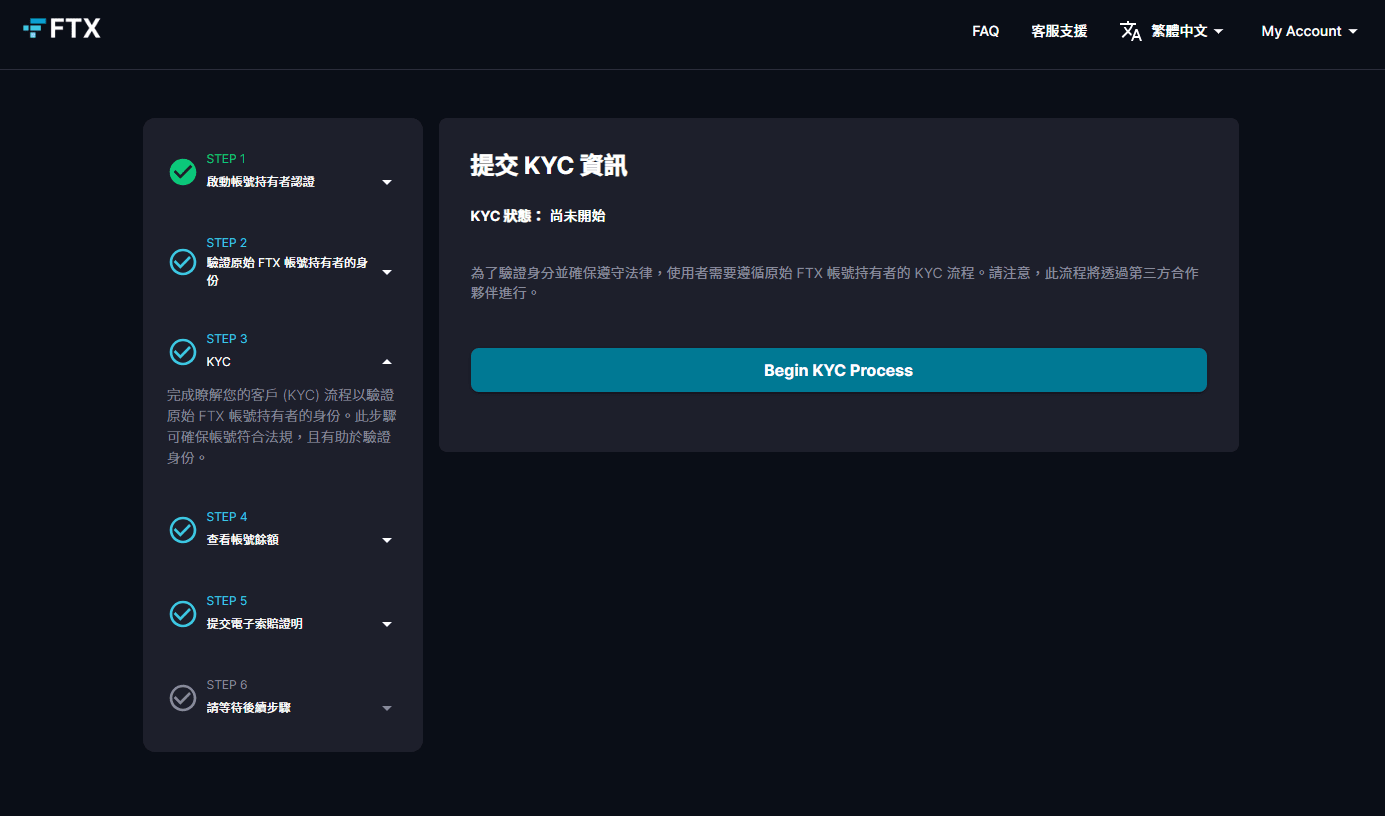
This step requires the user to perform identity verification. Clicking "Begin KYC Process" will jump to the third-party verification website. Almost all of them are in English, and they all require you to enter personal information related to you.
This step requires the user to perform identity verification. If you click "Begin KYC Process" directly, you will jump to the third-party verification website. Almost all the information here is in English, and you need to enter personal information related to you. The process is as follows:
Agree and accept the terms of collection of personal information
Select your nationality under "Nationality" under "Application"
Select the current occupation category in "Industry" under "Questionaire"
Select the issuing country of the document in "Select Issuing country" under "Identify document", and select "Passport" or "ID card" in "Choose your document type" below. It is best to choose the one you originally registered with FTX Use the same ID for identity verification, and then upload a photo of the ID. If you open the website on a computer, you can also select "Continue on phone" to continue the verification steps on your phone so that you can take photos with your phone.
Follow the instructions for face verification. This requires opening the front camera of your computer or mobile phone. The first step will ask you to fix the head image in a square frame, and then a round frame will appear. You need to turn your head left, right, up and down. Let the program verify the authenticity.
Finally, you will be asked to upload proof of address. It is best to upload a bank statement or water/electricity bill. It is recommended to upload a bill with an English address.
After completing all KYC steps, you need to wait for about 20 minutes. At this time, the third-party verification page can be closed directly and returned to the original FTX claim website.
STEP 4: Check account balance
While waiting for KYC, you can click "STEP 4: View Account Balance" on the claim website, which will display what assets you have in FTX for reference later.

While waiting for KYC, you can click "STEP 4: View Account Balance" on the claim website, which will display what assets you have in FTX for reference later.
STEP 5: Submit electronic proof of claim

The last step now is to formally submit the electronic version of the claim certificate. In Step 5, click "Submit Claim Certificate" directly and you will be directed to the website of the claim agency Kroll.
Fill out the Kroll claim form
The last step now is to formally submit the electronic version of the claim certificate. In Step 5, click "Submit Claim Certificate" directly and you will jump to the website of the claim agency Kroll. If no proof of claim has been submitted, the form on this page will only display "No form data was found". Click "View Scheduled Claim" here to view your claim form.

If no proof of claim has been submitted, the form on this page will only display "No form data was found". Click "View Scheduled Claim" here to view your claim form.
「FTX Details」
In the first step, you will see the "FTX Details" form of your FTX account information. Normally when you jump to it from the claim website, it will be pre-filled for you. If there is no big problem, you can click "Next" to continue.

In the first step, you will see the information of your FTX account. Normally when you jump to the claim website, it will be filled in for you. If there is no big problem, you can press "Next" to continue.
「Scheduled Claim Information」
The subsequent "Scheduled Claim Information" form must be carefully checked and filled in. First, you must select the claimant. Hong Kong and Taiwan users generally choose "FTX Trading Ltd. (d/b/a "FTX") (Case No. 22-11068)" can.

The "Scheduled Claim Information" form must be carefully checked and filled out. First, you must select the claimant. Hong Kong and Taiwan users generally select "FTX Trading Ltd. (d/b/a "FTX") (Case No. 22-11068)" .
Then there will be 5 detailed forms that need to be checked and filled in. Here you can refer to the information on the claim website "STEP 4: Check Account Balance" to check with the forms here, including:
Fiat (fiat assets)
Loaned Fiat (lent legal currency assets)
Asserted Crypto (valid cryptocurrency)
Loaned Crypto
NFTs
Carefully check each detailed form to see if there are any errors or omissions. If there are no problems, just like the "Do you agree with the Scheduled Quantity?" option in the picture, select Yes to agree to the pre-filled asset quantity. If you disagree, you can select No and change it yourself. As for the previous figures, it is recommended that if the difference is not large, just agree directly so that the process can be expedited. The Yes/No option below is if the form does not list the assets you should hold, you can select Yes and then fill in the missing assets and quantities in the pop-up form.

There are many users who encounter problems in "Asserted Crypto". Many people report that some cryptocurrencies are not included.
There are many users who encounter problems in "Asserted Crypto" in this section. Many people report that some cryptocurrencies are not included. If this happens, you can directly select Yes in "Do you want to add any coin not previously listed?" Then fill in the name and quantity of the coin below. It is recommended to directly copy and paste the name and quantity in "STEP 4: View Account Balance". The form here can currently only add 4 new assets. If the difference is really large, you may have to wait for an update from Koll, but there is no official statement yet. If you don't mind, just fill in the 4 types with the largest amount.

The last option on the form asks you if you are conducting any other claim procedures for FTX. Usually, you just select No. After all is completed, you can press Next.
The last option on the form asks you whether you are conducting any other claim procedures for FTX. Usually you just select No. After all is completed, you can press Next.
「File a Proof of Claim」

The form will ask you to fill in your full English name and email address
「EPOC Agreement」、「Instructions」和「Claim Information」
The form will then ask you to fill in your full English name and email address for subsequent procedures. Pressing Next will pop up the "EPOC Agreement". After reading the terms, select "I Agree" at the bottom and press Next. After reading the following "Instructions", you can also press Next directly.

The key point is the "Claim Information" form. You need to fill in your personal information. If you have a personal account in the first option, select "Yes", and then fill in your personal information and contact address in English. Legal currency compensation is estimated to be Send it by cashier's check to the address you fill in here.
Please pay attention to the following questions when filling out this form:
"Is the creditor address outside of the US?" - Is the address you filled in outside the US? Generally, select Yes here, and then fill in your country.
"Should payments go to a different address?" - Should the compensation be sent to a different address? Normally choose No
"Would you like to add any additional addresses for receiving notices about this proof of claim?" — Would you like to add any additional addresses for receiving notices about this proof of claim? Normally choose No
"4. Does this claim amend one already filed?" - Has this compensation been submitted? Normally choose No
"5. Do you know if anyone else has filed a proof of claim for this claim?" - Has this compensation been submitted by anyone else? Normally choose No
「Additional Information」

The "Additional Information" section asks you whether you have participated in the Earn program of the Blockfolio wallet, and whether you are undergoing any other claim procedures for FTX. If not, select No and continue.
「E-Sign」

The "E-Sign" section requires electronic signature for the entire form. If you are claiming for your own personal account, remember to select "I am the creditor." for the first option, and then "First Name/Middle Name/Last" Name" fill in your full English name. Remember to fill in the format of "First Name" first and "Last Name" last. Then select "I agree", fill in the address again, and preferably enter the contact number (including country code) and email.
「Attachments」

Finally, select whether there are other supporting documents that need to be uploaded. If not, just select "I do not have supporting documentation". If there are other supporting documents that need to be uploaded, only PDF format documents are supported here.

After everything is completed, just click "Submit" in the last step. At this time, you can close this page. Kroll will then send you a confirmation email, and then continue to wait for the latest news.
This article, The Ultimate Lazy Pack | An article that teaches you how to apply for an FTX claim, first appeared on Blockchain.