
Author: Milko Trajcevski Compiler: Cointime.com 237
This article will guide you through the process of setting up and running a Tron full node. Whether you are a developer or a blockchain enthusiast, running a Tron full node allows you to actively participate in the Tron network, contribute to its decentralization, and access the Tron node API for a variety of purposes. We will explore two methods: using the NOWNodes Tron node provider for a hassle-free experience, and running a Tron full node yourself.
1. Access Tron full node using NOWNodes
NOWNodes, as a Tron node provider, provides easy and convenient access to Tron full nodes without requiring extensive technical knowledge or infrastructure management, and without the need to set up and run a Tron full node yourself. NOWNodes provides reliable and secure node hosting services, allowing you to focus on developing DApps or exploring the capabilities of the Tron network.
To get started with NOWNodes, follow these simple steps:
1) Register an account on the NOWNodes website.
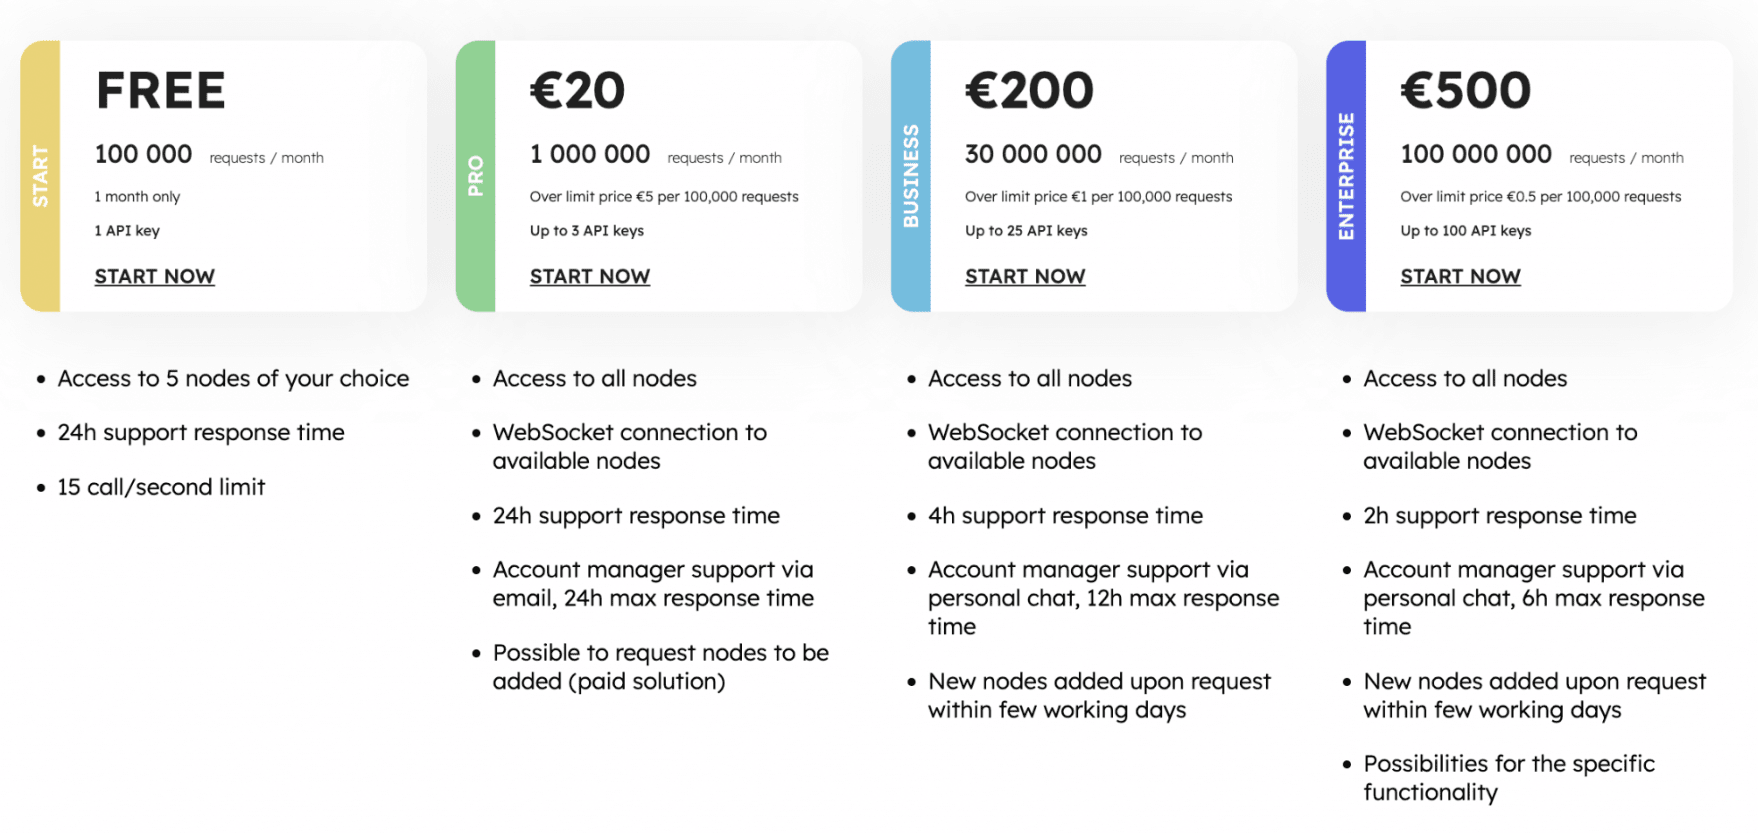
2) Select your tariff plan from the 5 available options. You can simply use the free plan or choose any paid plan based on your needs.
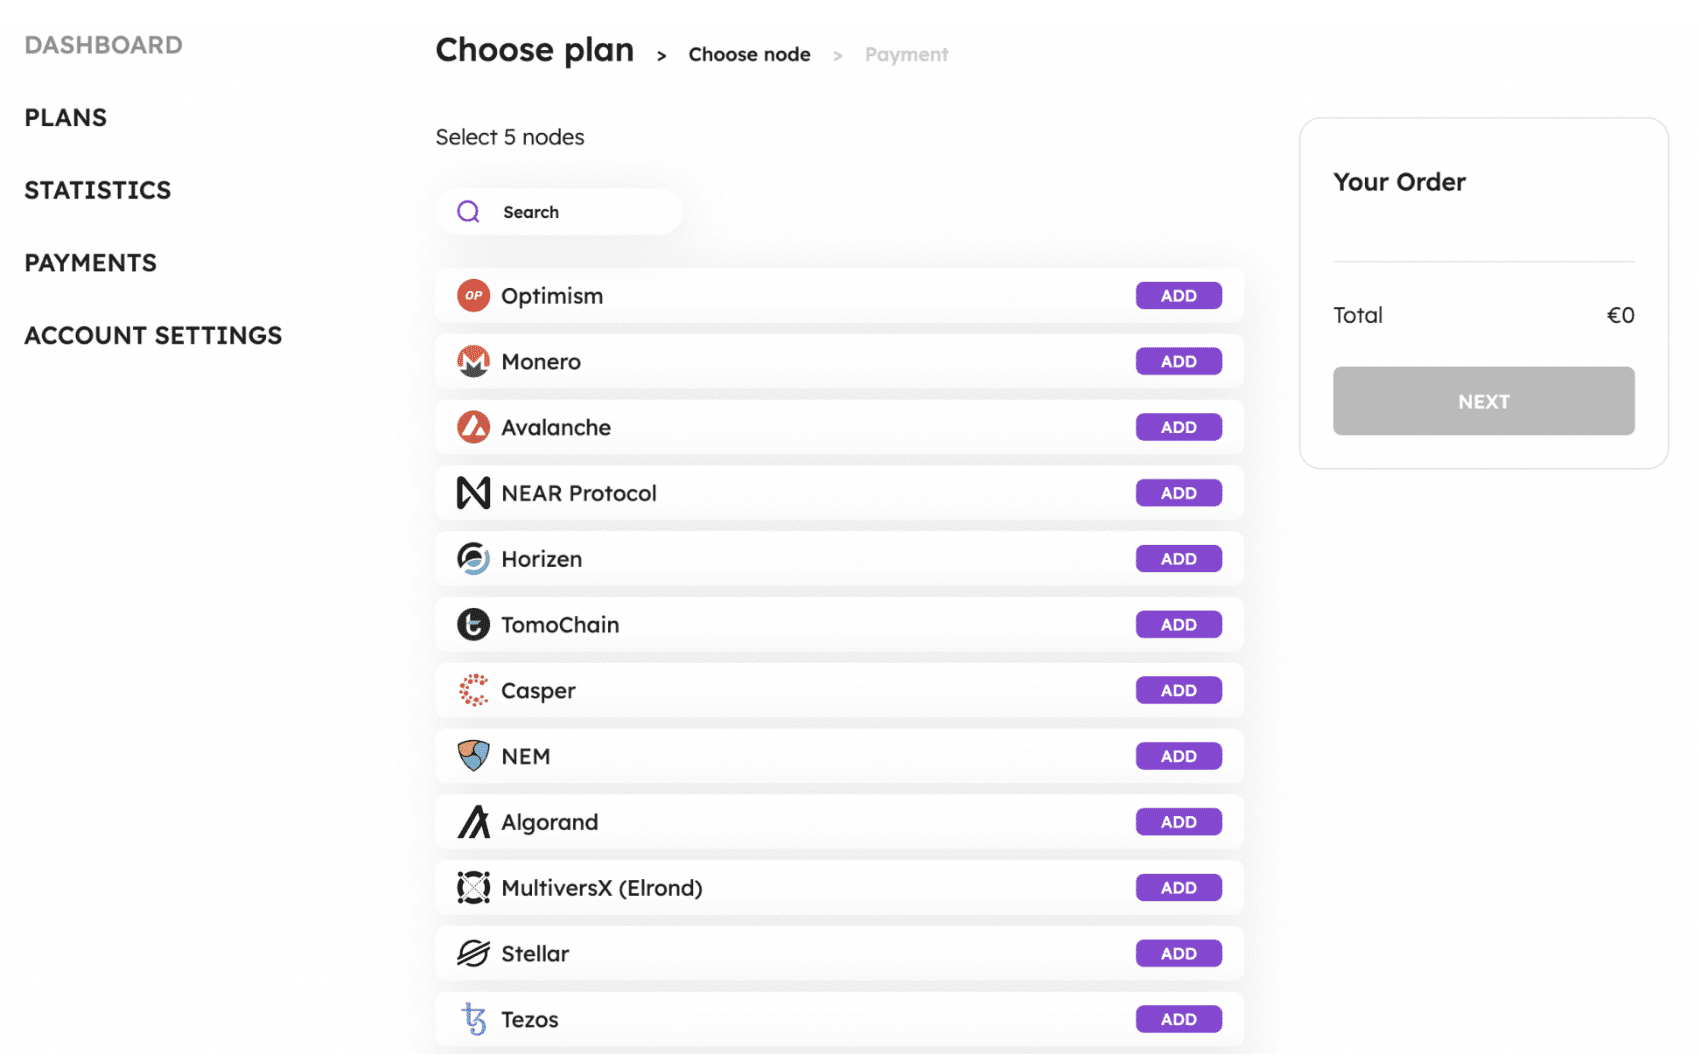
3) If you plan to use the free plan, next you will be asked to select 5 blockchains from the 77 available at the date of writing this article. Scroll down to find the TRON RPC node in this list. Press the "ADD" button in front of the TRON code as the blockchain network you want to connect to.
4) Then you need to navigate to the "Dashboard" in your account and scroll down the page. There you will see the "Add New Key" button. Just press the button and your API key will be automatically added. This API key can be used as a Tron node API or for any other blockchain in the selected list.

5) Open NOWNodes postman to check all available Tron methods.
6) Use the provided API documentation and endpoints to interact with your platform.
NOWNodes takes care of all technical aspects, ensuring that Tron full nodes are always up and running, synced with the network, and accessible through a user-friendly API.
2. How to run a Tron full node by yourself?
If you want full control over your Tron full node or have specific hardware and software requirements, you can choose to set up and run a Tron full node yourself. You can do this by:
1) Hardware requirements
In order to run a Tron full node efficiently, the following hardware configuration is recommended:
A. CPU: A normal full node must have at least 16 cores, and a full node participating in block production must have at least 32 cores.
B. RAM: At least 32GB, but 64GB is recommended for block-producing nodes.
C. SSD: Storage capacity of 2.5TB or more, used to accommodate blockchain data.
D. Bandwidth: A stable Internet connection with download and upload speeds of at least 100Mbps.
These hardware specifications ensure smooth node operation and optimal performance.
2) Software Dependency
Before setting up a Tron full node, make sure you have the following software dependencies installed:
A. Oracle JDK 8u211 and later: Make sure that you have Java Development Kit 8 or later installed on your system.
B. Git: Install Git to clone the Tron source code repository and compile it as needed.
3) Get FullNode.jar
To get the FullNode.jar file, you have two options: compile the source code or download a pre-built version from the official Tron GitHub repository.
A. Compile source code
If you choose to compile from source, follow these steps:
A) Clone the java-tron source code repository using Git:
$ git clone https://github.com/tronprotocol/java-tron.git
$ git checkout -t origin/master
B) Change the working directory to the java-tron repository and compile the code:
$ cd java-tron
$ ./gradlew clean build -x test
B. Download pre-built version
If you prefer a faster approach, you can download a pre-built FullNode.jar file directly from the Tron GitHub releases page. Select the version that suits your needs and download the corresponding JAR file.
4) Start the node
Once you have the FullNode.jar file, you can start a Tron full node. The process is the same whether you are running a regular full node or a block-producing full node.
A. Get the Tron coin mainnet configuration file main_net_config.conf from the official Tron deployment repository on GitHub.
B. Open a terminal or command prompt and navigate to the directory where the FullNode.jar file is located.
C. Start the full node using the appropriate command. For a regular full node, use the following command:
$ java -Xmx24g -XX:+UseConcMarkSweepGC -jar FullNode.jar -c main_net_config.conf
D. The -Xmx flag specifies the maximum heap size for the Java Virtual Machine (JVM). It is recommended to set it to 80% of available physical memory.
E. The -XX:+UseConcMarkSweepGC flag enables parallel garbage collection, thereby improving performance.
F. If you want to run a full node that also produces blocks, add the --witness parameter to the command:
$ java -Xmx24g -XX:+UseConcMarkSweepGC -jar FullNode.jar --witness -c main_net_config.conf
G. To participate in block production, please make sure you have a super representative account and get enough votes to enter the top 27 representatives.
H. If you choose to run a full-node for block production, you need to fill in the private key of the super representative address in the list in the main_net_config.conf file. Here is an example:
localwitness = [
650950B193DDDDB35B6E48912DD28F7AB0E7140C1BFDEFD493348F02295BD812
]
I. Start the node with the updated configuration:
$ java -Xmx24g -XX:+UseConcMarkSweepGC -jar FullNode.jar --witness -c main_net_config.conf
Note: For a running full node, you can use the command kill -15 process id to shut it down normally.
3. Other tips and precautions
1) How long does it take to synchronize a Tron full node?
When starting a new Tron full node, especially for the mainnet or Nile testnet, it may take a lot of time to synchronize the entire blockchain. To speed up the synchronization process, you can use data snapshots. Follow these steps:
A. Download the latest data snapshot from Tron official documentation or community resources.
B. Extract the snapshot files to the output-directory of your Tron project.
C. Start the node as usual. It will sync according to the data snapshot, greatly reducing the sync time.
2) Use tcmalloc to optimize memory allocation
To improve memory allocation performance in the java-tron code base, you can use tcmalloc. Here is how to optimize memory allocation using tcmalloc:
A. Install tcmalloc on your system. The installation process varies depending on your Linux distribution.
B. Ubuntu 20.04 LTS / Ubuntu 18.04 LTS / Debian Stable:
$ sudo apt install libgoogle-perftools4
C、Ubuntu 16.04 LTS:
$ sudo apt install libgoogle-perftools4
D、CentOS 7:
$ sudo yum install gperftools-libs
E. Add the following line to the startup script, modifying the path to tcmalloc according to your Linux distribution:
#!/bin/bash
export LD_PRELOAD="/usr/lib/libtcmalloc.so.4"
export TCMALLOC_RELEASE_RATE=10
# Original start command
java -jar .....
This optimization technique can improve the memory allocation efficiency of Tron full nodes.
4 Conclusion
Running a Tron full node opens up countless possibilities for developers and blockchain enthusiasts. Whether you choose to set up and manage your own node or use NOWNodes' Tron node API, you can actively participate in the Tron network and contribute to its decentralization. Follow the steps mentioned in this guide to get started and become an integral part of the Tron ecosystem.
Take advantage of the resources available today and start your journey into a Tron full node with NOWNodes.