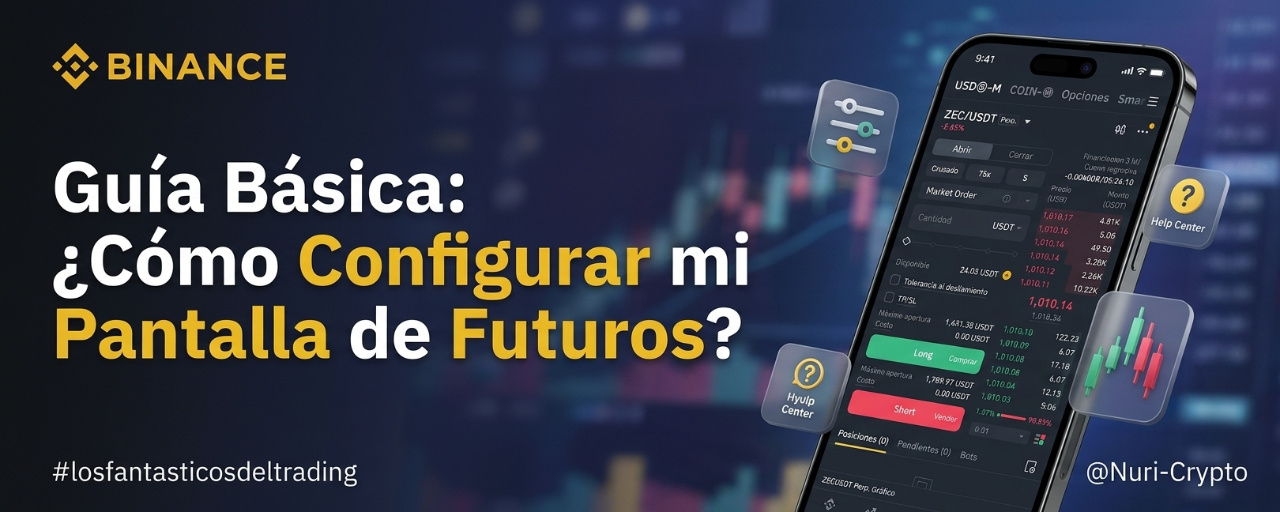

Attention, traders! 🚀 Are you about to get started with Binance Perpetual Futures and feel like the screen looks like an airplane cockpit? ✈️ Don’t blow your account with one bad click. Here’s a step-by-step guide based on the official setup and backed by key concepts from Binance Academy, designed to help you configure your dashboard like a pro and avoid headaches.
Save this post, share it, and leave me a comment if you found it helpful! 🔥👇
Step 1: The starting point (Accessing Preferences)
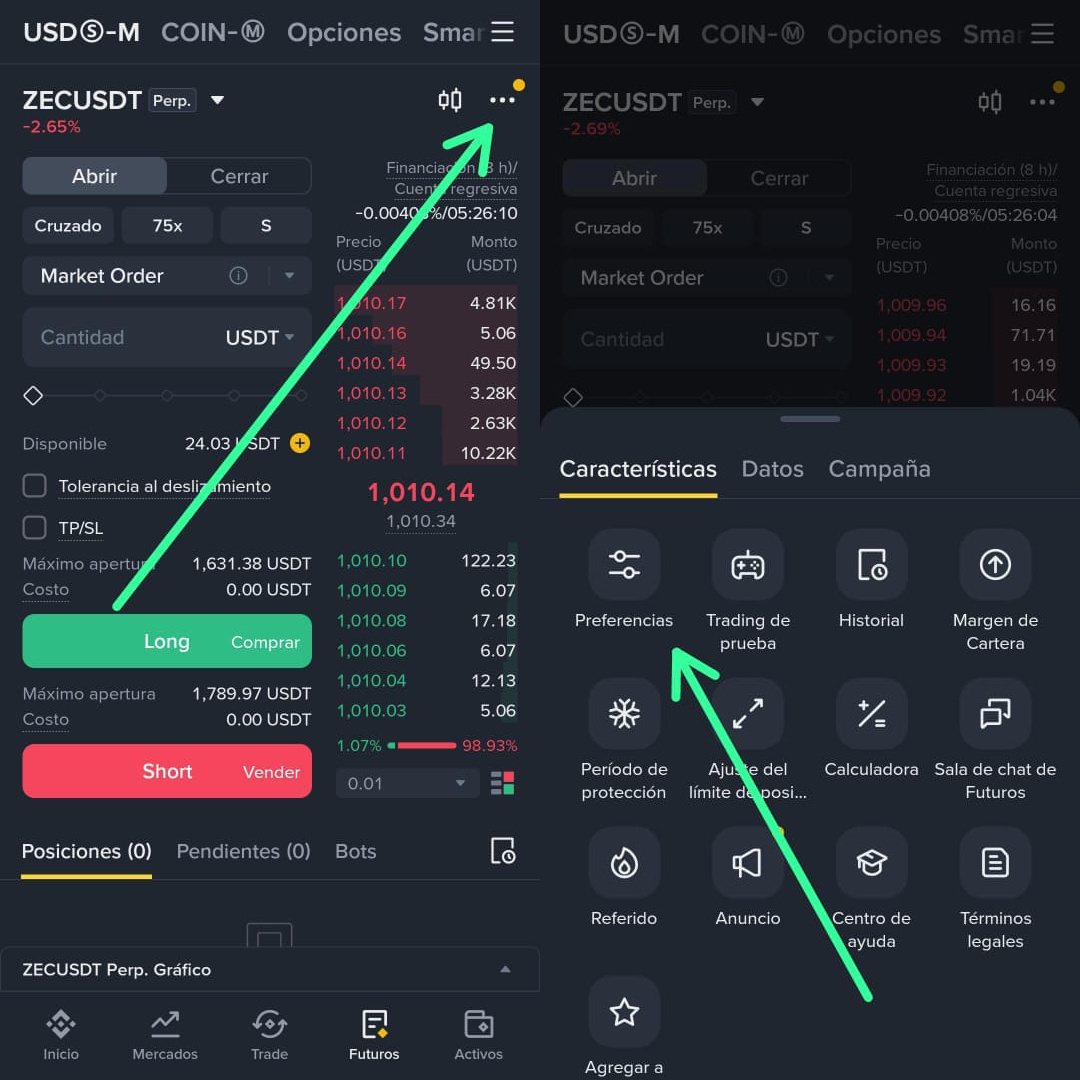
To customize your interface, first go to the main futures panel.
Tap the three dots (...) in the top-right corner of the trading screen.
A floating menu with several options (Features, Data, Campaign) will appear. Select Preferences (the slider icon).
Step 2: Choose Your Futures and Account Mode
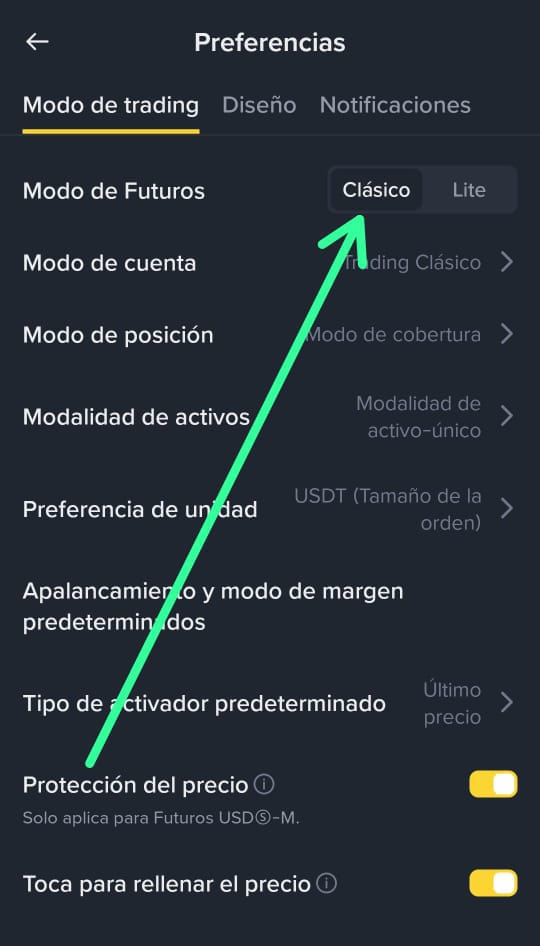
In the Preferences menu, the Trading Mode tab lets you customize the platform to suit your experience level:
Futures Mode (Classic vs. Lite): To make the most of the professional tools, make sure Classic mode is selected instead of the simplified Lite version.
Account Mode (Classic Trading): This option clearly separates your Spot, Futures, and Margin accounts. According to Binance Academy, this helps you isolate risk: an isolated product limits risk to a single account, and unrealized PnL (profits and losses) from different products are not offset against each other, protecting the rest of your capital. Ideal for keeping risk under strict control!
Step 3: One-Way Position vs. Hedge Mode
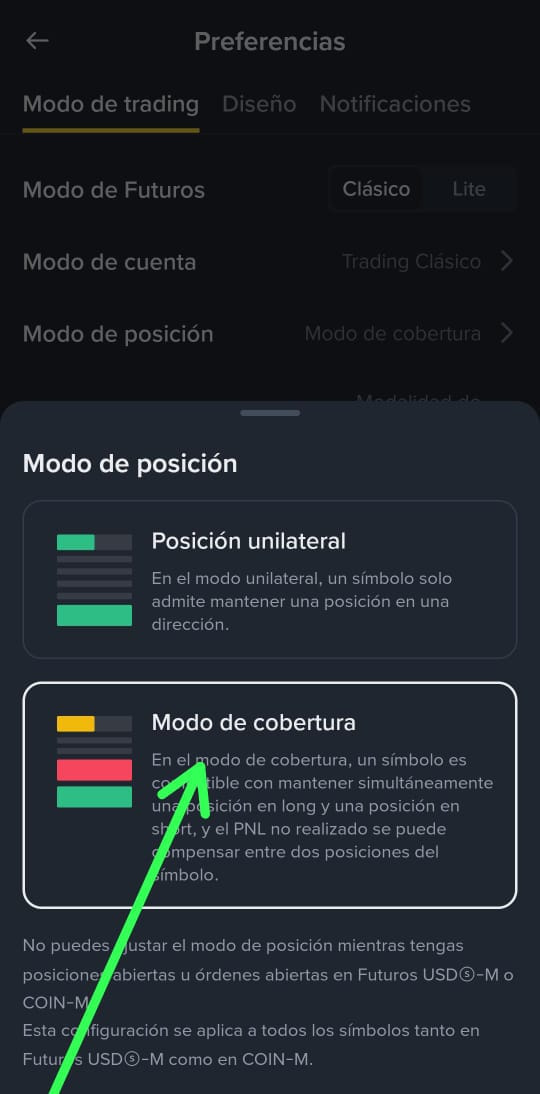
How do you want to trade? This is where you define your order strategy:
One-Way Position: Allows you to hold only one position in one direction per symbol at a time (either buy Long or sell Short).
Hedge Mode: A favorite among advanced traders! It lets you hold both a Long and a Short position for the same symbol simultaneously. This is extremely useful for hedging against unexpected market movements.
⚠️ Note: You can't change this mode if you have open orders or positions.
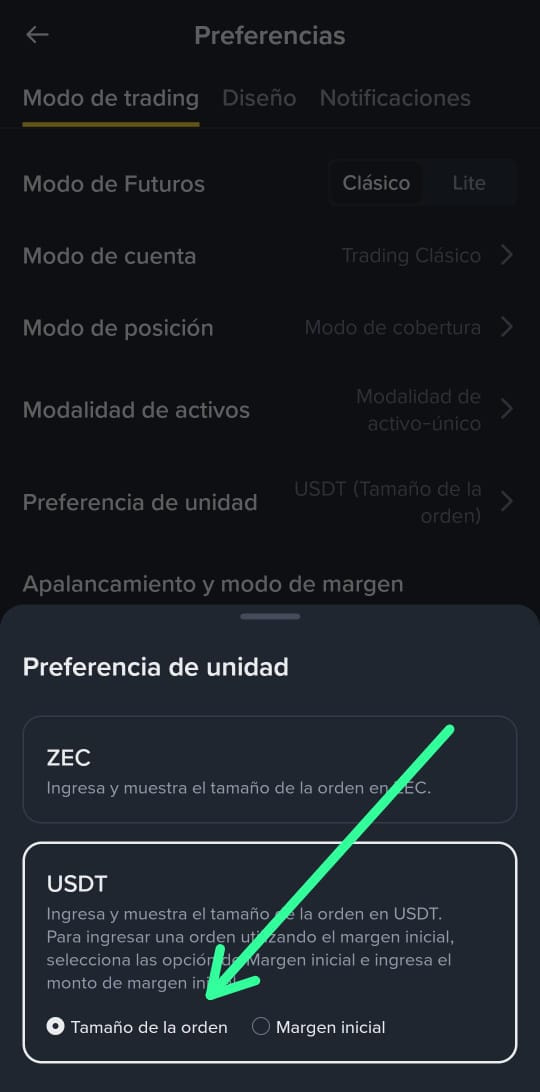
Step 4: Unit Preference (How do you view your numbers?)
Avoid mathematical confusion when placing an order:
You can choose to view and trade in the cryptocurrency of the pair (for example, ZEC) or in USDT.
Set it to USDT Order Size to quickly and visually calculate exactly how much capital you're risking in digital dollars, without having to do mental conversions when you're in a hurry.
Step 5: Asset Mode (Single-Asset vs. Multi-Assets)
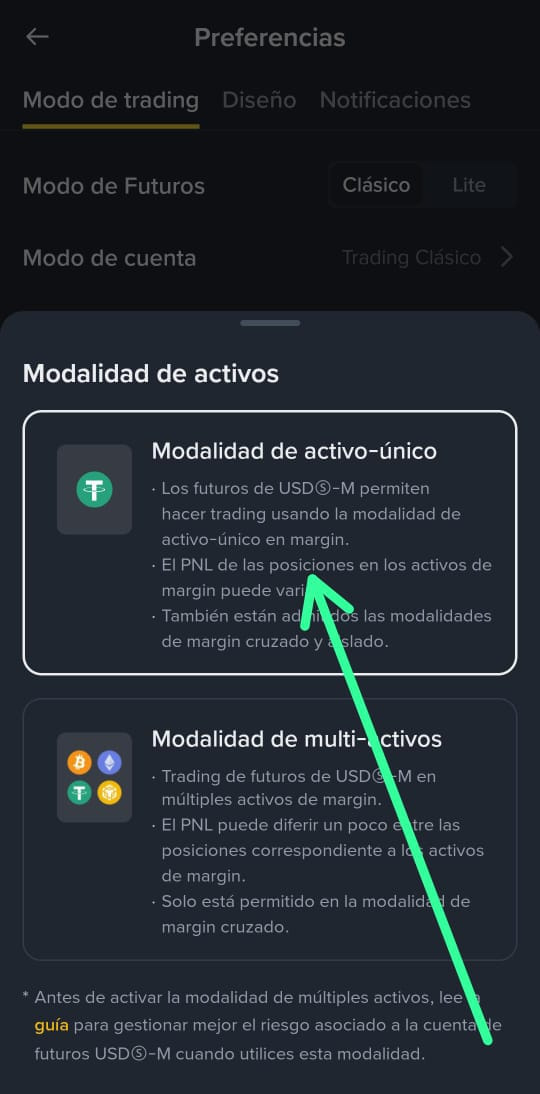
Binance gives you flexibility in choosing what to use as collateral:
Single-Asset Mode: Uses the specific asset's margin (for example, USDT for USDⓈ-M futures).
Multi-Assets Mode: Lets you trade using multiple margin assets together under cross margin. Binance Academy tip: If you're a beginner, stick with Single-Asset Mode to simplify risk management until you've fully mastered leverage.
Step 6: Customize Your Visual Layout
A comfortable screen makes you more efficient and reduces fatal errors caused by eye strain:
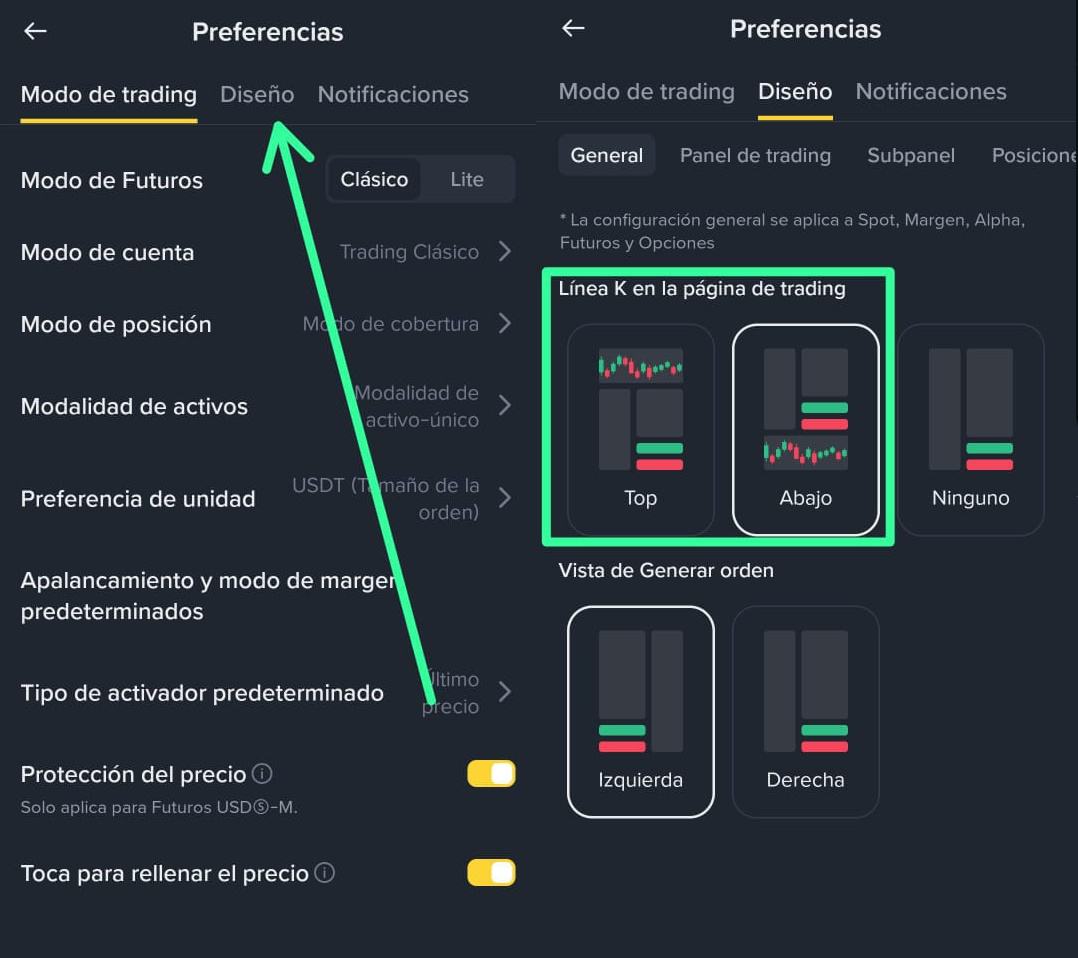
Go to the Layout tab under Preferences.
In the K-Line section on the trading page, you can choose where to place the charts and order book panels (Top, Bottom, or None).
Adjust it in whatever way feels most natural and intuitive, so you can clearly see price movements while placing your orders.
"Leverage amplifies both your gains and your losses."
Setting up your screen properly is just the first step; the real secret to success in futures is risk management: always use Stop Loss orders (TP/SL) and don't over-leverage. Protecting your capital is the only thing that will keep you in the game for the long term.
🔥 Join our public groups:
The Fantastic Traders Classroom 📚
Nexus Crypto Lab: The Fantastic Traders
Did you enjoy this tutorial?
👍 Like this post if you learned something new today.
💬 Comment: What settings do you use, or which pair would you like us to analyze in the next post?
Follow me so you don't miss the upcoming study guides. See you at the top! 🚀📈
#BinanceSquareFamily #losfantasticosdeltrading #nuricrypto