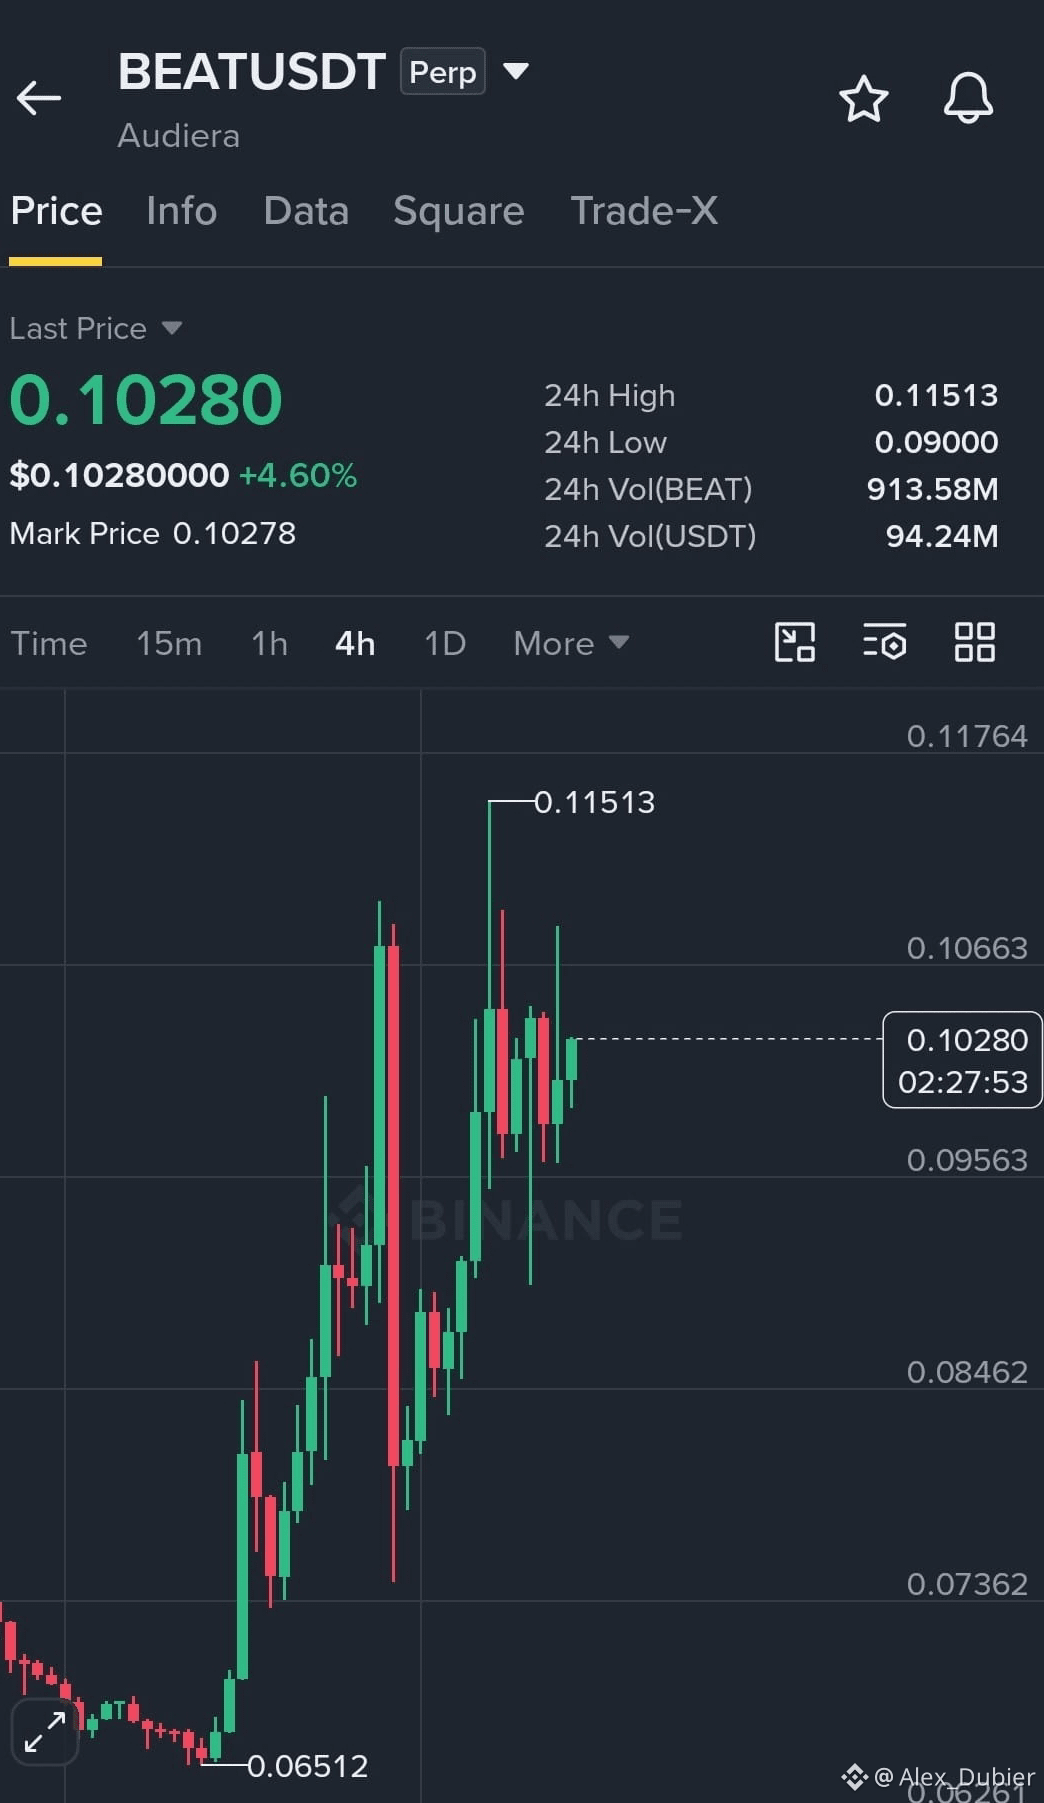
📊 $BEAT — LONG SETUP 🐂
The bullish structure is clear, and the price is looking to continue upward. Here’s the complete plan, organized and including risk management:
📍 Entry zone: 0.1020 – 0.1030
🎯 Targets:
• TP1 → 0.1050
• TP2 → 0.1120
• TP3 → 0.1180
• Final target → 0.1200
🛑 Stop Loss: 0.0980
⚙️ Parameters:
• Leverage: 10x – 20x
• Use only 1% – 3% of your total capital
💡 Strategy: When TP1 is reached, secure part of your profits and move your Stop Loss to your entry price. This protects your capital and lets the rest run risk-free. ✅
🎯 My advice: Don’t enter all at once. Accumulate patiently, respect your levels, and manage your risk. A good entry with discipline always beats a perfect entry without control. Buy safely, trade with a plan—patience pays. 🚀💎
👉 Ready to execute? Here’s your opportunity to take a position before the next move. Don’t chase—enter in the zone and let the market work for you. 👇