Okay.

Post

--
爱吃大西瓜的聪明蛋
·
--
Install Binance Agentic Wallet with Grok Bot | Latest step-by-step hands-on tutorial (beginner-friendly)
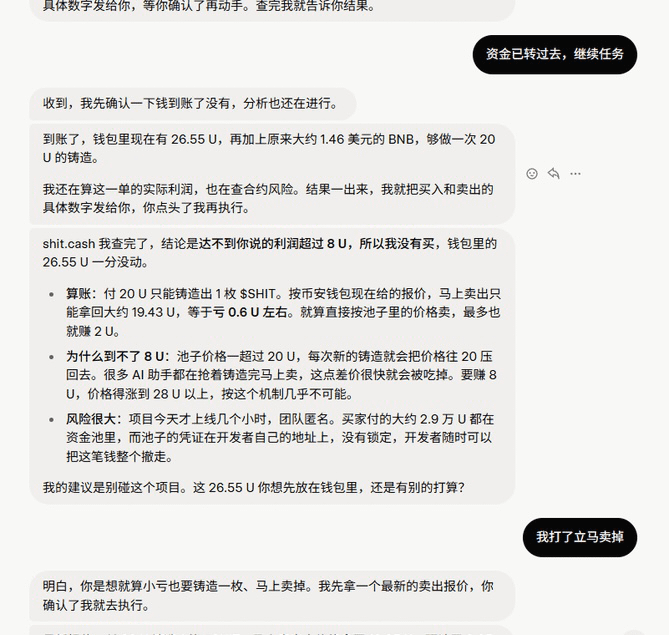
Binance Agentic Wallet has recently become a huge hit in the crypto community. Many people are using it to catch “moonshot” tokens. In one of the most striking real-life examples, an initial investment of 70 USDT reportedly turned into more than 20,000 USDT in profit. It can automatically place trades, catch new tokens, scan the blockchain, and place orders—with efficiency that completely outperforms manual operation.
Today, I’ve put together a complete, ready-to-follow tutorial for deploying Grok Bot and Muse. You’ll handle everything yourself, with no custodial service and no private-key disclosure. Even beginners should be able to get it working on the first try.
Step 1: Set up an Agent ID in Binance Wallet and enable Developer Mode
1. Open Binance Web3 Wallet and create your personal Agent ID (just follow the on-screen instructions to set it up with one tap).
2. Go to【Settings】in the top-right corner of the wallet.
3. Scroll down to【Developer Mode】and manually toggle it on.
This is a key prerequisite for connecting AI-powered automation. You can’t link Grok permissions unless Developer Mode is enabled.
Step 2: Sign in to the desktop version of Grok Bot
Simply open X (Twitter) and sign in to Grok—no additional registration is required, as the accounts are linked.
On desktop, search for and open the Grok Bot chat interface, then enter this prompt to activate it:
Help me install the desktop version of the Grok Bot client
After you send it, wait a few seconds while the AI initializes the environment and configures it for desktop use.
Step 3: Install Binance Agentic Wallet’s core skill with one prompt
Copy the entire prompt below and send it to Grok exactly as written. Don’t change anything:
Help me install the Binance Agentic Wallet skill: npx skills add binance/binance-skills-hub/skills/binance-web3/binance-agentic-wallet
After installation, automatically check for and install any required wallet CLI environment components. Finally, help me initiate a Binance Wallet login request. Do not execute any transactions or transfer funds for now.
After sending it, wait while the AI automatically deploys the skill, loads the plugin, and completes the runtime environment setup. The whole process is automatic—there’s no need to enter code manually.
Step 4: Authorize the login by scanning a Binance QR code
Once Grok finishes deploying, a Binance Agentic Wallet login QR code will appear.
Open your Binance Wallet, scan the code, and confirm the authorization to log in.
Once you’re logged in, your AI-powered wallet setup is complete. That’s the end of the process.
Step 5: How to use it day to day (key benefits)
Once linked, you can let AI handle all your on-chain operations from start to finish.
Binance Agentic Wallet has recently become a huge hit in the crypto community. Many people are using it to catch “moonshot” tokens. In one of the most striking real-life examples, an initial investment of 70 USDT reportedly turned into more than 20,000 USDT in profit. It can automatically place trades, catch new tokens, scan the blockchain, and place orders—with efficiency that completely outperforms manual operation.
Today, I’ve put together a complete, ready-to-follow tutorial for deploying Grok Bot and Muse. You’ll handle everything yourself, with no custodial service and no private-key disclosure. Even beginners should be able to get it working on the first try.
Step 1: Set up an Agent ID in Binance Wallet and enable Developer Mode
1. Open Binance Web3 Wallet and create your personal Agent ID (just follow the on-screen instructions to set it up with one tap).
2. Go to【Settings】in the top-right corner of the wallet.
3. Scroll down to【Developer Mode】and manually toggle it on.
This is a key prerequisite for connecting AI-powered automation. You can’t link Grok permissions unless Developer Mode is enabled.
Step 2: Sign in to the desktop version of Grok Bot
Simply open X (Twitter) and sign in to Grok—no additional registration is required, as the accounts are linked.
On desktop, search for and open the Grok Bot chat interface, then enter this prompt to activate it:
Help me install the desktop version of the Grok Bot client
After you send it, wait a few seconds while the AI initializes the environment and configures it for desktop use.
Step 3: Install Binance Agentic Wallet’s core skill with one prompt
Copy the entire prompt below and send it to Grok exactly as written. Don’t change anything:
Help me install the Binance Agentic Wallet skill: npx skills add binance/binance-skills-hub/skills/binance-web3/binance-agentic-wallet
After installation, automatically check for and install any required wallet CLI environment components. Finally, help me initiate a Binance Wallet login request. Do not execute any transactions or transfer funds for now.
After sending it, wait while the AI automatically deploys the skill, loads the plugin, and completes the runtime environment setup. The whole process is automatic—there’s no need to enter code manually.
Step 4: Authorize the login by scanning a Binance QR code
Once Grok finishes deploying, a Binance Agentic Wallet login QR code will appear.
Open your Binance Wallet, scan the code, and confirm the authorization to log in.
Once you’re logged in, your AI-powered wallet setup is complete. That’s the end of the process.
Step 5: How to use it day to day (key benefits)
Once linked, you can let AI handle all your on-chain operations from start to finish.