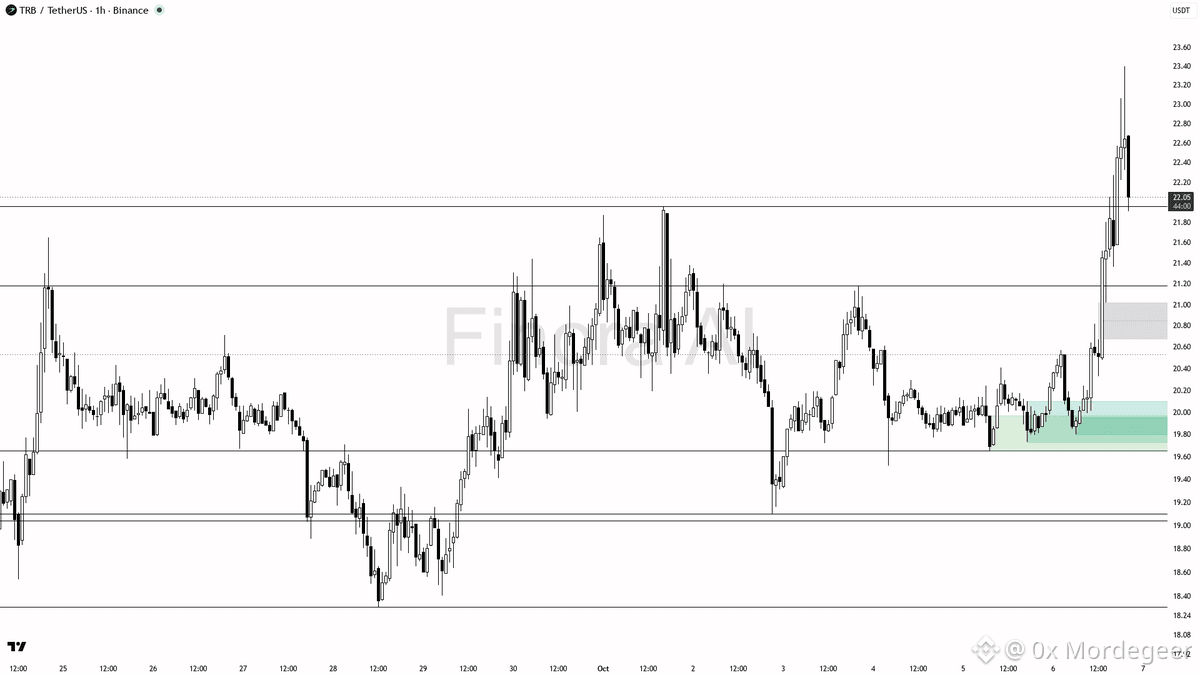
📊 $TRB Technical Analysis & Setup
$TRB volume just spiked 2.4x alongside a sharp -3% dip, but higher timeframes remain strongly bullish with price holding above the EMA20 and EMA200. This heavy volume drop looks like a liquidity sweep of recent swing highs, keeping the primary trend intact until proven otherwise.
• Key Support / Demand: 21.96-21.18 zone, with deeper demand at 20.41-19.80.
• Resistance / Supply Targets: 22.32, 22.84, and the 23.68 liquidity pool.
• Trigger / Confirmation: Look for a bullish lower wick rejection or engulfing candle on 5m/15m charts within the demand zones before entering.
• Risk / Invalidation: Bullish bias fails and flips bearish only upon a 1h close below 19.80.
• Market Execution: Manage risk tightly against invalidation levels during high-volume volatility.
DYOR — Educational setup, not financial advice.
#BinanceSquare #Trading #TRB #Crypto
$TRB volume just spiked 2.4x alongside a sharp -3% dip, but higher timeframes remain strongly bullish with price holding above the EMA20 and EMA200. This heavy volume drop looks like a liquidity sweep of recent swing highs, keeping the primary trend intact until proven otherwise.
• Key Support / Demand: 21.96-21.18 zone, with deeper demand at 20.41-19.80.
• Resistance / Supply Targets: 22.32, 22.84, and the 23.68 liquidity pool.
• Trigger / Confirmation: Look for a bullish lower wick rejection or engulfing candle on 5m/15m charts within the demand zones before entering.
• Risk / Invalidation: Bullish bias fails and flips bearish only upon a 1h close below 19.80.
• Market Execution: Manage risk tightly against invalidation levels during high-volume volatility.
DYOR — Educational setup, not financial advice.
#BinanceSquare #Trading #TRB #Crypto