🚀 $NEAR Healthy Cool-Down: Prime LONG Setup in Progress
After reaching a local peak at $5.370, $NEAR is executing a textbook pullback and healthily consolidating right above key dynamic support levels.
🔍 Technical Breakdown:
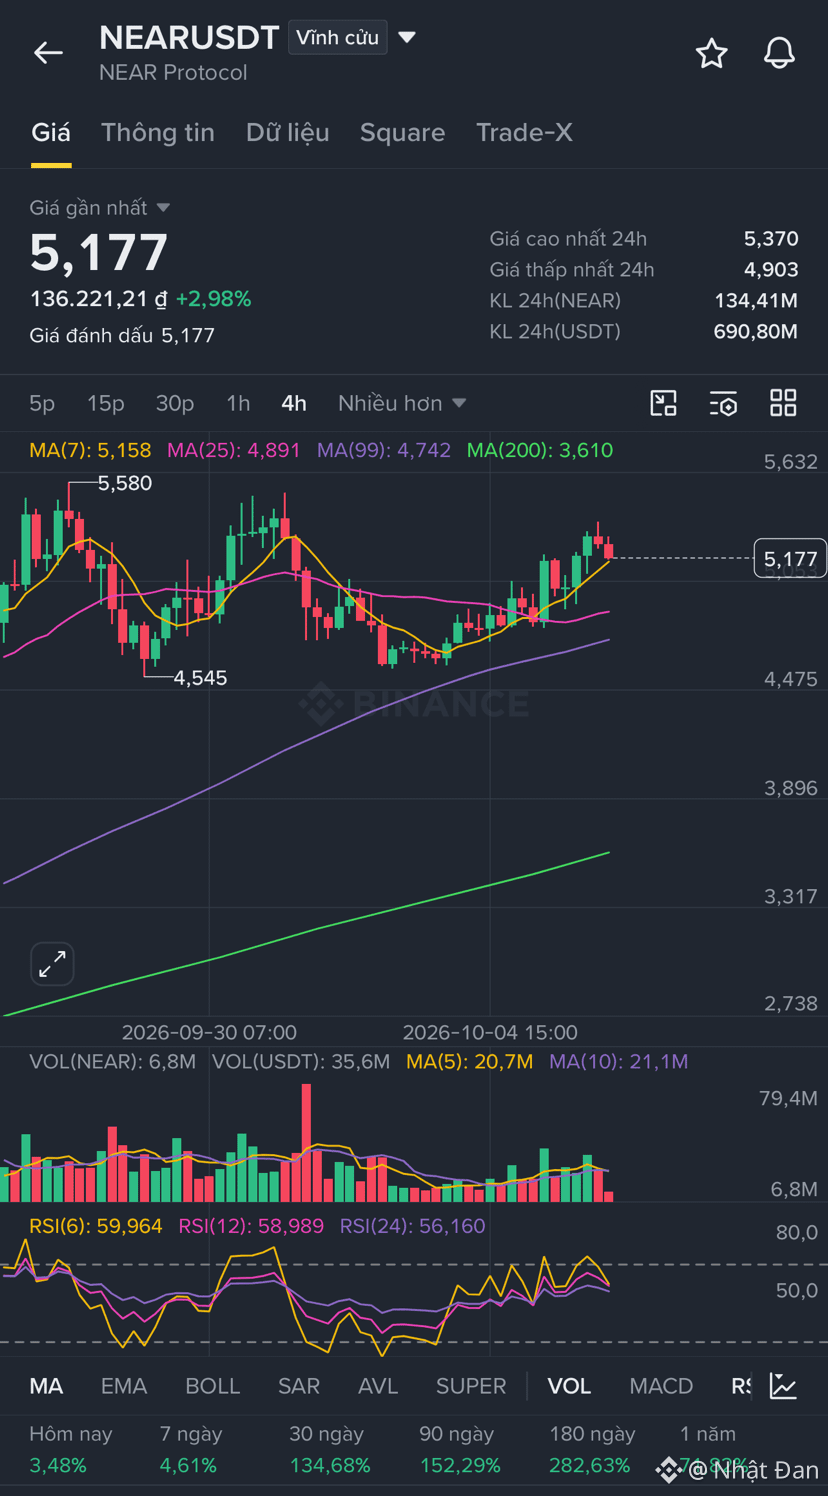
• 4H Timeframe: The macro trend remains strongly bullish, holding comfortably above MA(7) at $5.158 and MA(25) at $4.891. RSI(6) sits at 59.9, leaving plenty of momentum for another leg up.
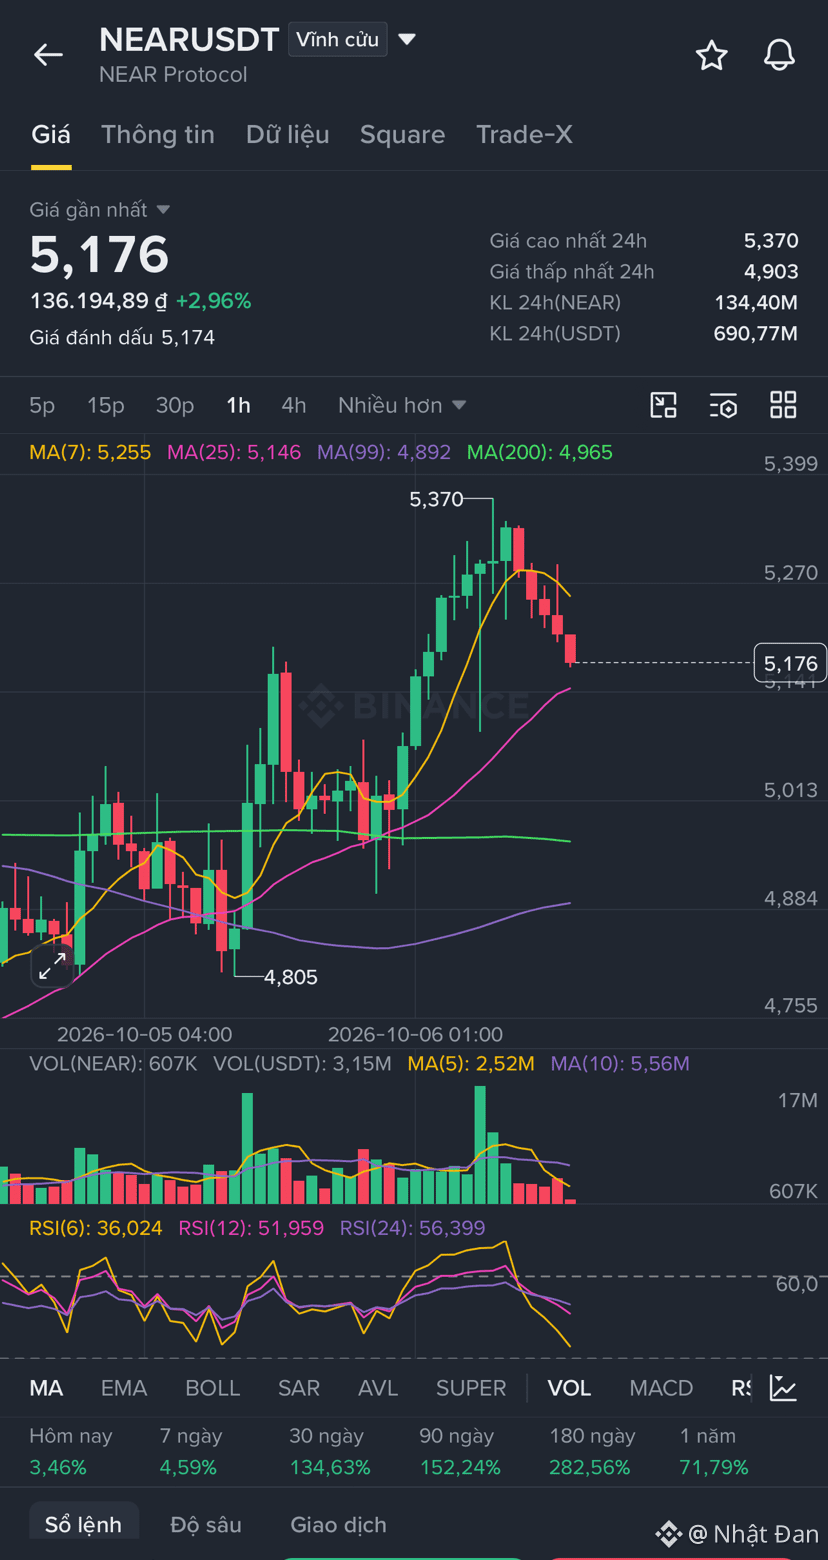
• 1H Timeframe: Price found clean buyers right at the 1H MA(25) ($5.146). Notice how the 1H RSI(6) reset all the way down to 36.0 (oversold area)—a classic setup for momentum buyers to step back in.
📊 LONG Setup:
• Entry Zone: $5.140 – $5.175 (Around 1H MA25)
• Stop Loss (SL): $4.960 (Strict invalidation below 1H MA200 & $5.00 psychological support)
• Take Profit 1 (TP1): $5.370 (Retest recent high)
• Take Profit 2 (TP2): $5.580 (Major 4H resistance target)
• Risk/Reward: ~1:2.2+
Always manage your risk with strict SL! 📈📉
$NEAR
After reaching a local peak at $5.370, $NEAR is executing a textbook pullback and healthily consolidating right above key dynamic support levels.
🔍 Technical Breakdown:
• 4H Timeframe: The macro trend remains strongly bullish, holding comfortably above MA(7) at $5.158 and MA(25) at $4.891. RSI(6) sits at 59.9, leaving plenty of momentum for another leg up.
• 1H Timeframe: Price found clean buyers right at the 1H MA(25) ($5.146). Notice how the 1H RSI(6) reset all the way down to 36.0 (oversold area)—a classic setup for momentum buyers to step back in.
📊 LONG Setup:
• Entry Zone: $5.140 – $5.175 (Around 1H MA25)
• Stop Loss (SL): $4.960 (Strict invalidation below 1H MA200 & $5.00 psychological support)
• Take Profit 1 (TP1): $5.370 (Retest recent high)
• Take Profit 2 (TP2): $5.580 (Major 4H resistance target)
• Risk/Reward: ~1:2.2+
Always manage your risk with strict SL! 📈📉
$NEAR