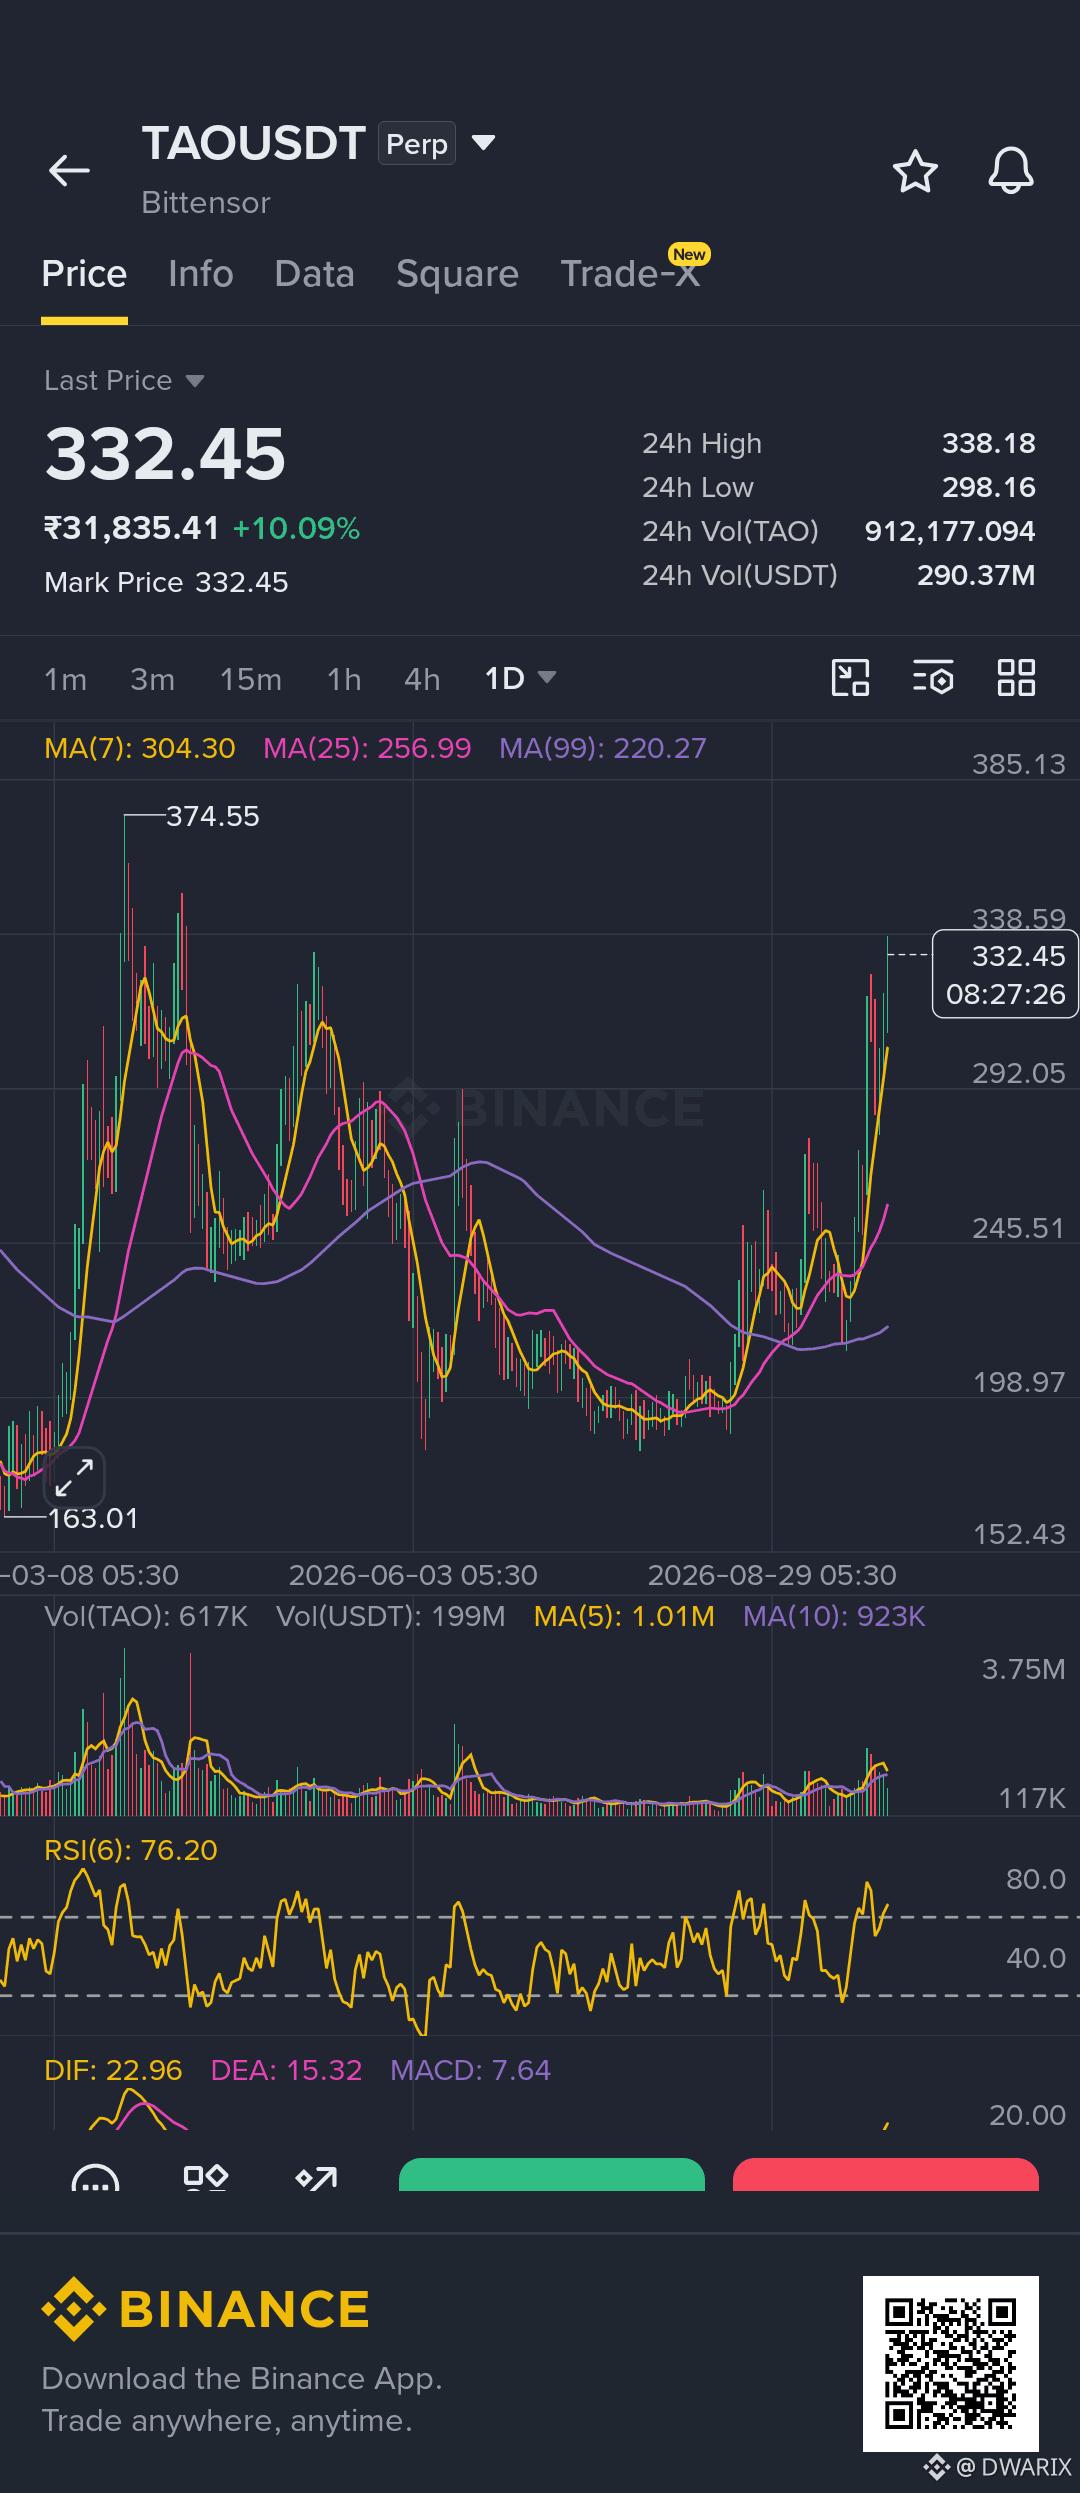
🚨 $TAO IS SHOWING BULLISH CONTINUATION POTENTIAL
📊 TAO/USDT — LONG SETUP
🟢 Entry Zone: $320 – $326
🎯 TP1: $338
🎯 TP2: $350
🎯 TP3: $365 – $375
🛑 Invalidation: Below $312
$TAO just pushed into the $338 area, with strong momentum and volume behind the move. The 15M chart is still holding above the key moving averages, while the daily structure remains strongly bullish.
Why I'm watching this setup: • 15M structure remains bullish
• Price holding above MA25/MA99
• Strong volume expansion during the breakout
• Daily trend has reclaimed major levels
• $338 is the immediate breakout/resistance area
⚠️ Important: RSI is already elevated, so chasing the candle at $332+ carries higher pullback risk. A controlled retest around the entry zone would offer a cleaner setup.
If $338 breaks and holds → continuation becomes much stronger.
If $320 fails → step back and wait for a new structure.
DYOR. Manage risk. No blind entries.
#TAO #Bittensor
📊 TAO/USDT — LONG SETUP
🟢 Entry Zone: $320 – $326
🎯 TP1: $338
🎯 TP2: $350
🎯 TP3: $365 – $375
🛑 Invalidation: Below $312
$TAO just pushed into the $338 area, with strong momentum and volume behind the move. The 15M chart is still holding above the key moving averages, while the daily structure remains strongly bullish.
Why I'm watching this setup: • 15M structure remains bullish
• Price holding above MA25/MA99
• Strong volume expansion during the breakout
• Daily trend has reclaimed major levels
• $338 is the immediate breakout/resistance area
⚠️ Important: RSI is already elevated, so chasing the candle at $332+ carries higher pullback risk. A controlled retest around the entry zone would offer a cleaner setup.
If $338 breaks and holds → continuation becomes much stronger.
If $320 fails → step back and wait for a new structure.
DYOR. Manage risk. No blind entries.
#TAO #Bittensor