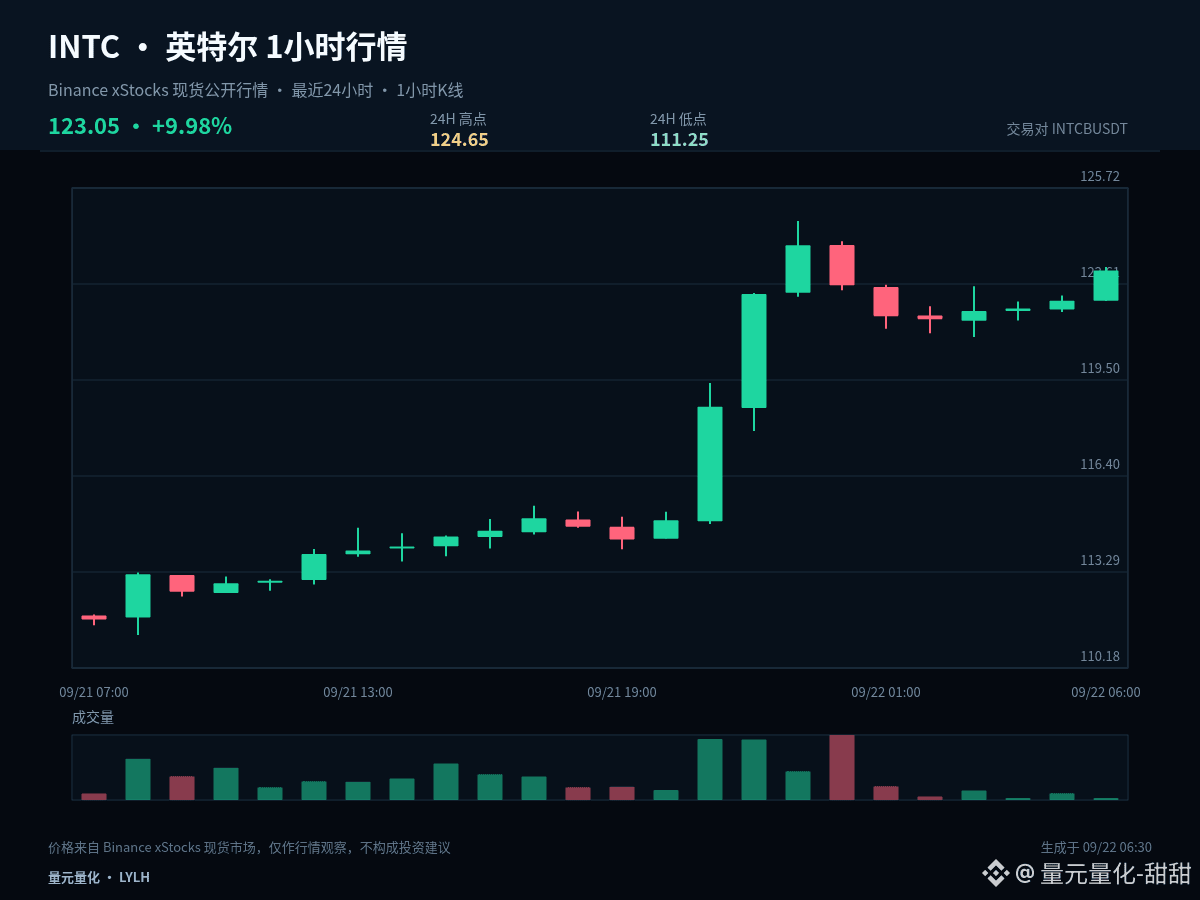
$INTCB #INTC From a layout perspective, the focus is not on chasing already-occurring fluctuations, but on deciding in advance where you are willing to wait. Current price: 123.05, 1-hour +0.80%, 24-hour +10.2%.
The current price is near the upper end of the past 24-hour trading range: 1-hour +0.80%, 24-hour +10.2%. The most important thing at the highs is to confirm market acceptance after a breakout: if the price can stay above the upper band, it means the market recognizes a higher range; if it only briefly pierces and then quickly snaps back, you need to guard against a false breakout.
The first observation zone is 117.95, used to judge whether a normal pullback has ended; the second observation zone is 111.25, used to judge whether a deeper retracement can form follow-through support. On the upside, watch 124.65; after a breakout, you should look for a pullback confirmation to avoid mistaking a temporary pierce for the trend already being open.
Position management should distinguish between mid-term and short-term trades. For existing mid-term positions, first assess whether the structure is broken; don’t be repeatedly swayed by single 1-hour candlesticks. For short-term positions, execute based on support, resistance, and closing confirmation. If you are in cash, you don’t need to chase prices in the middle of the range—waiting for a clearer spot often has an advantage.
The purpose of scaling in is not to keep lowering your average cost, but to control the pace while the structure remains valid. Once a key support fails, you should stop the original layout plan and wait for a new price range to form.
A trading plan must include invalidation conditions. If your judgment is correct, you can realize profits in stages; if your judgment is wrong, you must also allow yourself to exit. You cannot use adding to positions to cover the fact that the original logic has changed. The market will update, and your view should adjust with price evidence.
#ZetaChainVotesToMigrateZETAToSolana
The current price is near the upper end of the past 24-hour trading range: 1-hour +0.80%, 24-hour +10.2%. The most important thing at the highs is to confirm market acceptance after a breakout: if the price can stay above the upper band, it means the market recognizes a higher range; if it only briefly pierces and then quickly snaps back, you need to guard against a false breakout.
The first observation zone is 117.95, used to judge whether a normal pullback has ended; the second observation zone is 111.25, used to judge whether a deeper retracement can form follow-through support. On the upside, watch 124.65; after a breakout, you should look for a pullback confirmation to avoid mistaking a temporary pierce for the trend already being open.
Position management should distinguish between mid-term and short-term trades. For existing mid-term positions, first assess whether the structure is broken; don’t be repeatedly swayed by single 1-hour candlesticks. For short-term positions, execute based on support, resistance, and closing confirmation. If you are in cash, you don’t need to chase prices in the middle of the range—waiting for a clearer spot often has an advantage.
The purpose of scaling in is not to keep lowering your average cost, but to control the pace while the structure remains valid. Once a key support fails, you should stop the original layout plan and wait for a new price range to form.
A trading plan must include invalidation conditions. If your judgment is correct, you can realize profits in stages; if your judgment is wrong, you must also allow yourself to exit. You cannot use adding to positions to cover the fact that the original logic has changed. The market will update, and your view should adjust with price evidence.
#ZetaChainVotesToMigrateZETAToSolana