
Scroll recently successfully raised $50 million from well-known VCs such as Polychain Capital and Sequoia Capital. Overall, Scroll managed to raise $83 million.
Scroll is now valued at $ 1,8 B
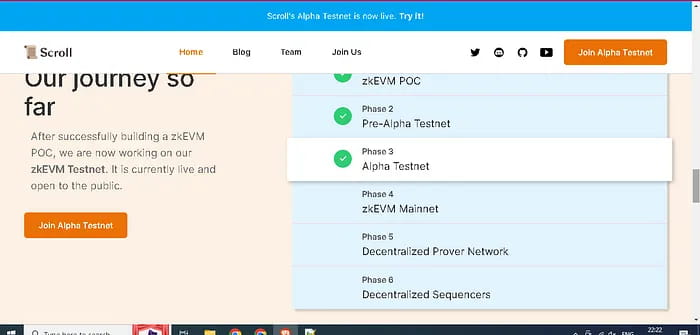
Scroll is zkRollup based on zkEVM on Ethereum, providing native compatibility with existing Ethereum applications and tools. Simply put, it is a new layer 2 network for Ethereum.
Currently, the alpha testnet phase is underway, and during the pre-alpha version, 1 million unique addresses and 16 million transactions were achieved
https://medium.com/@jiamigou/Cryptodog Compilation Airdrop Chapter 47 - Participating in the project invested by the founder of Ethereum - 33 million US dollars - scroll test network tutorial - a0416c04d3a4
https://medium.com/@jiamigou/Cryptodog Compilation Airdrop Chapter 140 - The Most Complete Guide to the Scroll Test Network - e54619ad49a7
https://medium.com/@jiamigou/Cryptodog Compilation Airdrop Chapter 147 - Don’t miss it - Dog Brother Summary - Top 10 high-probability airdrops in March - 6cf0bb27508d
Remember, each testnet requires at least 100 transactions
Today we are going to do some bridging tests, create our own contracts, tokens and conduct more than 100 transactions, and increase the account weight to prepare for later airdrops. Specific steps are as follows:
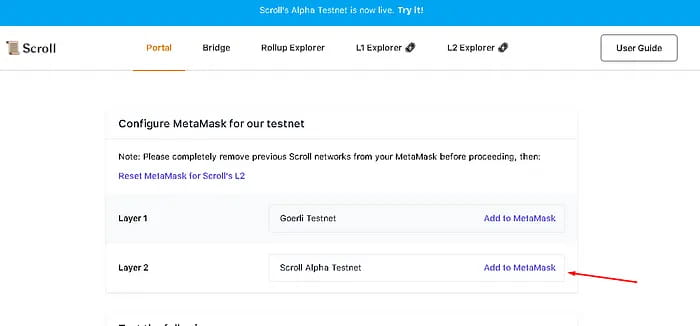
Step 1. Obtain testnet tokens
First we need to use scroll bridge in order to obtain scroll goerli ETH.
Log in to https://scroll.io/alpha and add the Scroll Alpha Testnet network in metamask
Go to https://scroll.io/alpha/bridge and bridge some goerli ETH to Scroll Goerli ETH.
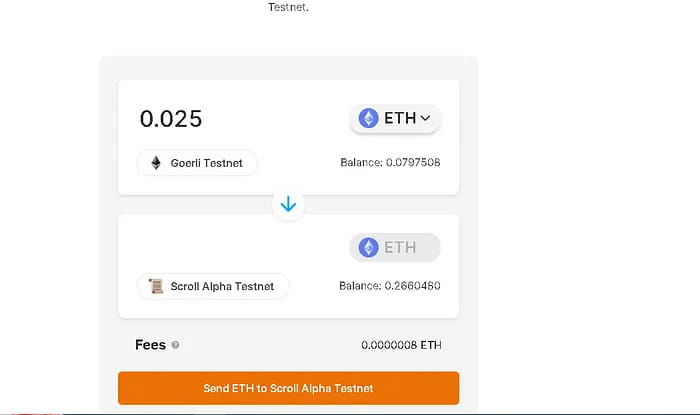
Start bridging
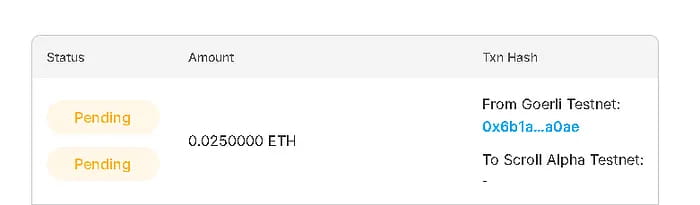
This process requires waiting from 30 minutes to more than an hour.
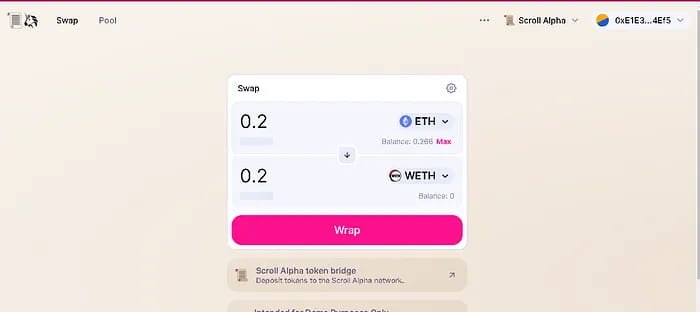
Step 2. Obtain wETH
After obtaining scroll ETH, we use scroll-uniswap to exchange some wETH;
Go to https://uniswap-v3.scroll.io/#/swap to exchange ETH for wETH;
I recommend getting as many goerli taps and bridges as possible.
We have only done 50% of this tutorial so far, we still have to do the following things:
Create our own contract and verify its code
Create tokens and provide liquidity to them
Swap on Uniswap
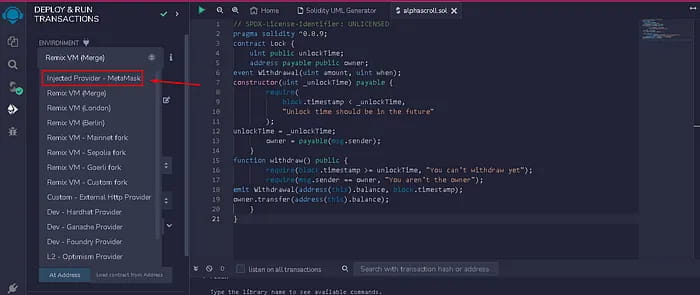
Step 3. Create our contract
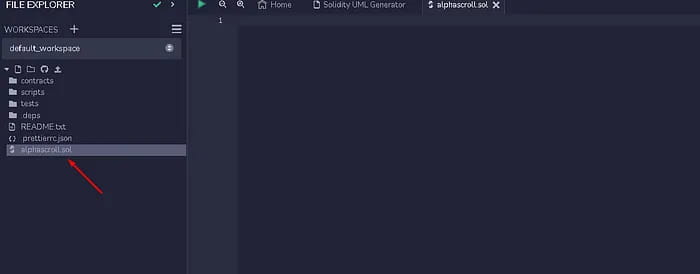
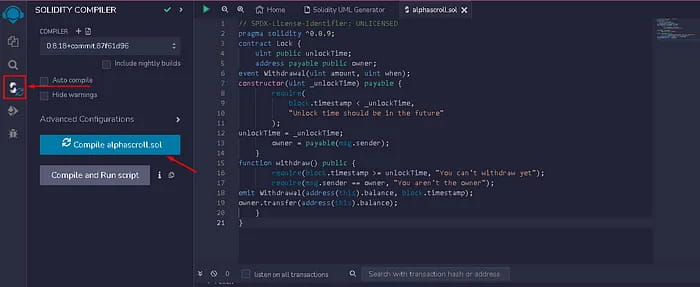
Go to remix.ethereum.org and click create new file. Give the file a name. Remember to add .sol after the name.

The file name for this tutorial is alphascroll.sol
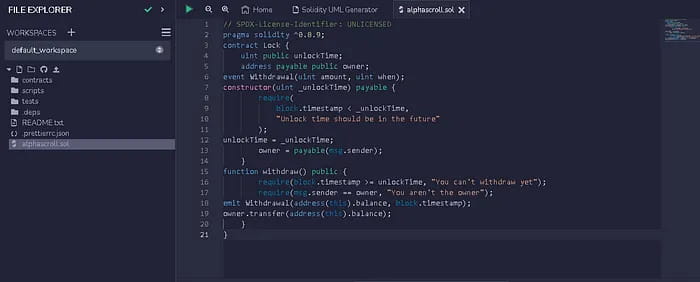
Place the following code on the right side of the screen
// SPDX-License-Identifier: UNLICENSED pragma solidity ^0.8.9; contract Lock { uint public unlockTime; address payable public owner;event Withdrawal(uint amount, uint when); constructor(uint _unlockTime) payable { require( block.timestamp < _unlockTime, "Unlock time should be in the future" ); unlockTime = _unlockTime; owner = payable(msg.sender); }function withdraw() public { require(block.timestamp >= unlockTime, "You can't withdraw yet"); require(msg.sender == owner, "You aren't the owner");emit Withdrawal(address(this).balance, block.timestamp); owner.transfer(address(this).balance); }
We go to soliditycompiler and click compile
(Optional) You can also compile with the command:
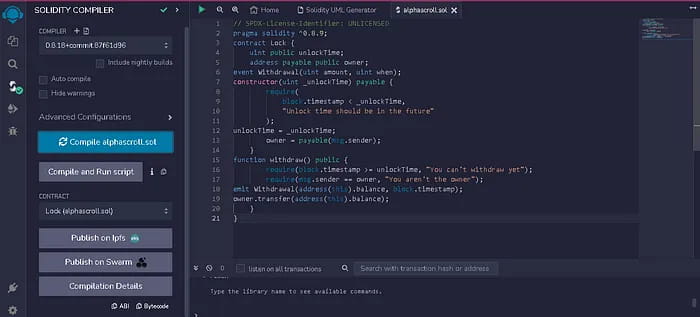
Go to the Solidity Compiler from the left-panel -> click on 'Compile cryptomarketblog.sol' -> If there is no error you'll see a green tick on solidity compiler button
After compilation we see a picture like this
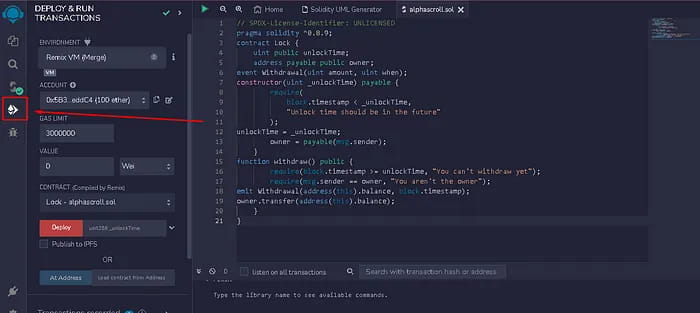
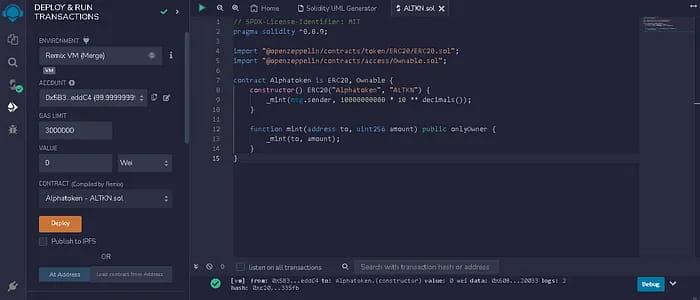
Now we click on the deploy and run transaction icon on the left
(Optional) You can also deploy using the command:
Go to the Deploy & Run Transactions sidebar from the left-panel -> Select environment
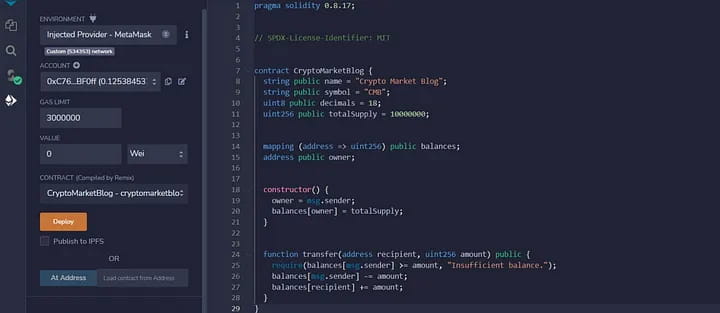
Select "Injected Provider Metamask" as the environment
A MetaMask window will pop up here, approve it.
Now you can see your wallet address just below the environment.
Enter 1 in the “VALUE” field; switch from Wei to Gwei; enter 1696118400 in the “unit256_unlock time” field;
Check the image below
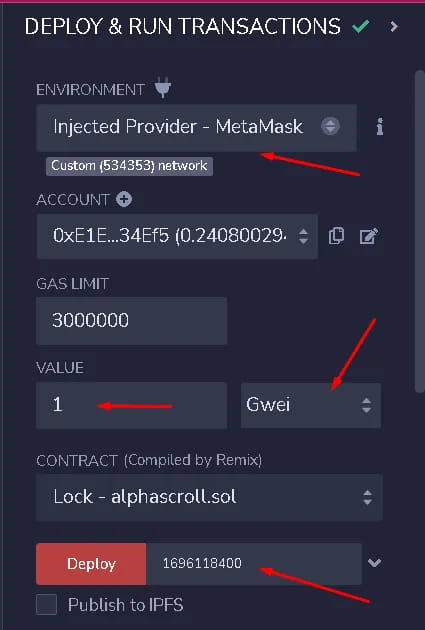
Now after filling everything in, click on deploy icon and confirm on metamask (make sure you are on ETH Goerli network)
After a few minutes you will see results like this:
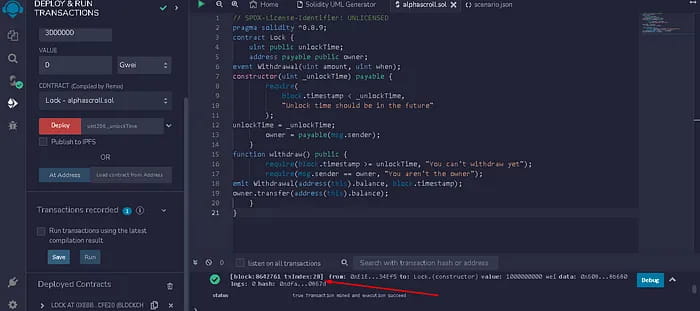
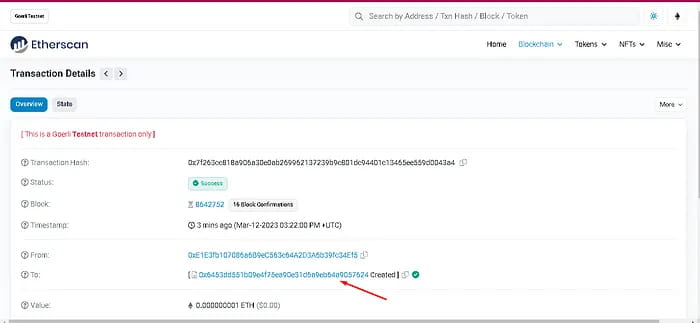
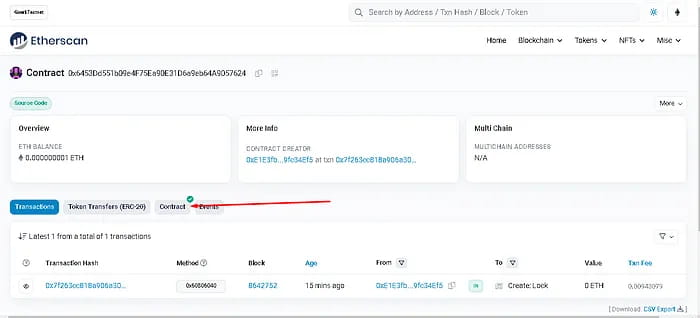
Now we open the last transaction in ETH explorer and open the contract.
As shown below:
Now we go to the TAB contract and verify the contract;
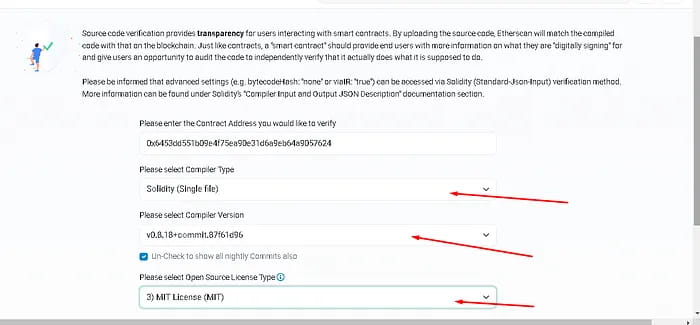
Click to continue
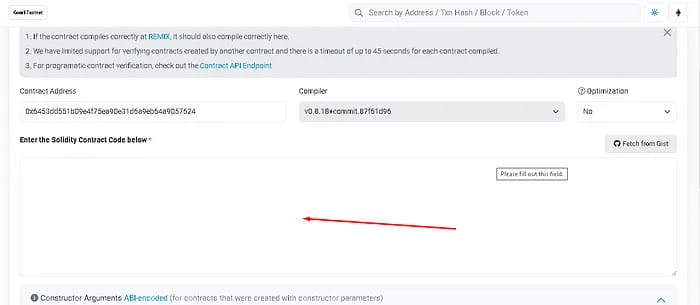
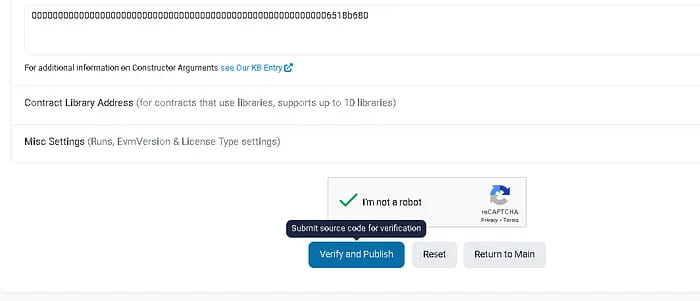
Now you see there's a big empty box here. Go back to remix, copy the code, click Verify and Publish.
If you did everything correctly, you'll get something like this:
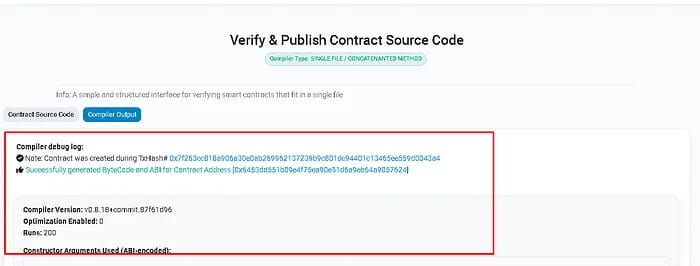
Now we check the contract again to see if it is verified.
Step 4. Create your own token
Login: https://docs.openzeppelin.com/contracts/4.x/wizard
Set the values as shown below, leaving all other fields as is.
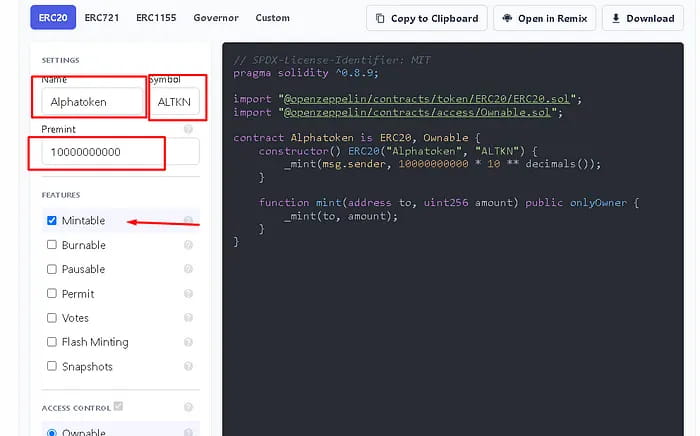
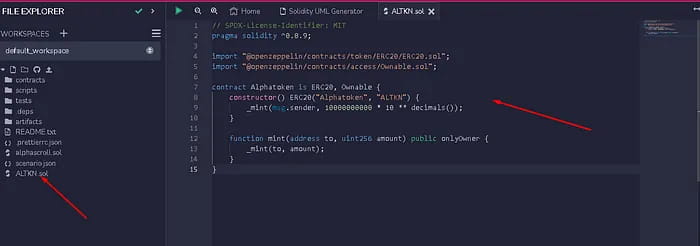
Copy all the code from the right side of the screen and visit the Remix website again in a new window. Again create a new file called ALTKN.sol (in my case) and paste it there.
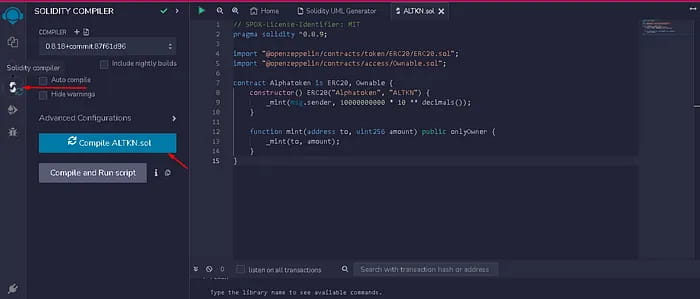
Go to solidity compiler and compile
Go to DEPLOY & RUN TRANSACTIONS and deploy.
Copy the contract address and import the tokens in MetaMask;
Step 5. Test the fluency of token operation
Now we are ready to test our token in uniswap-scroll
Log in to https://uniswap-v3.scroll.io/#/pool and use the scroll alpha network connection.
Add our tokens here
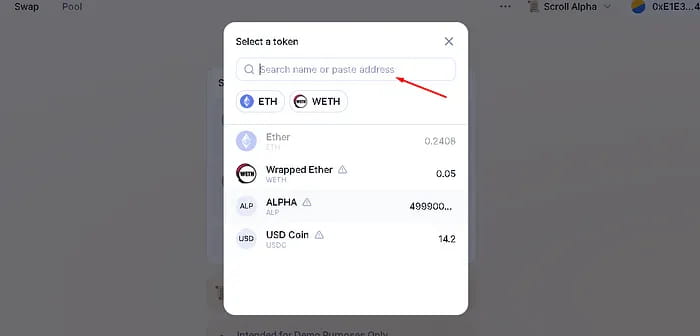
Below you can see our ALPHA custom token.
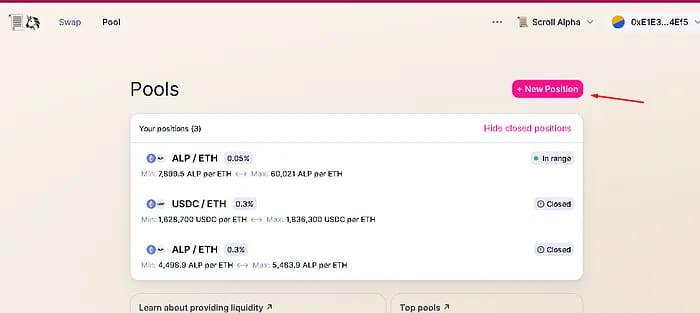
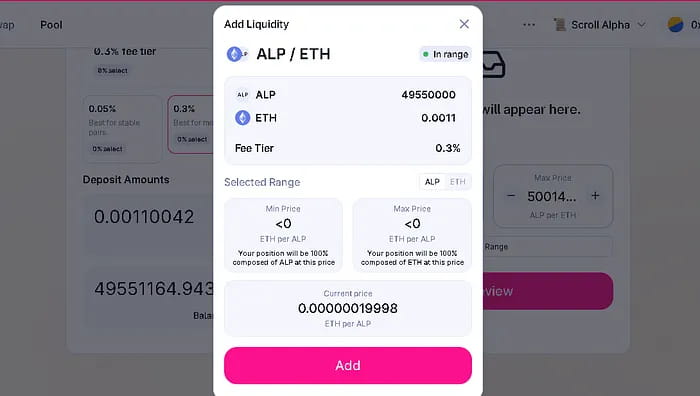
Step 6. Add liquidity
Go to the POOL option and click new position;
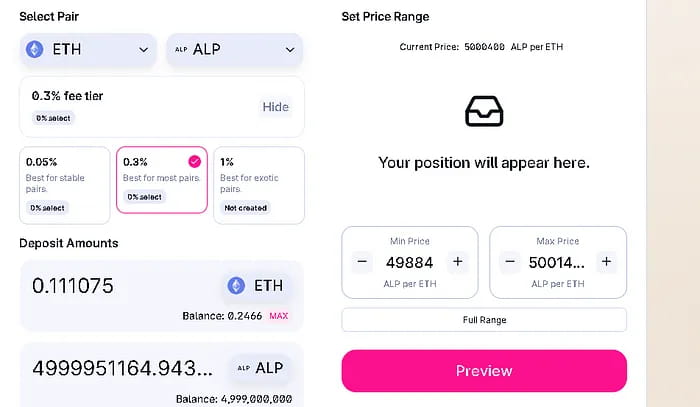
When setting it up for the first time, you'll fill in some values to create the initial price and liquidity. Afterwards you will get something like the picture below:
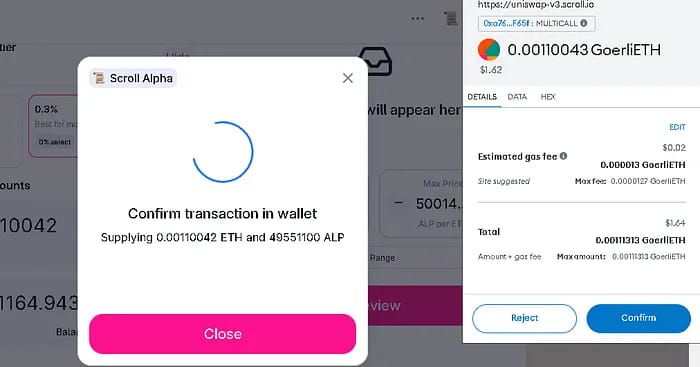
At this step, it means that your deployment has been completed and you can perform 100 token exchanges by yourself.
That’s all for this article